
Basic Sourdough Bread: A Recipe for Everyday Baking

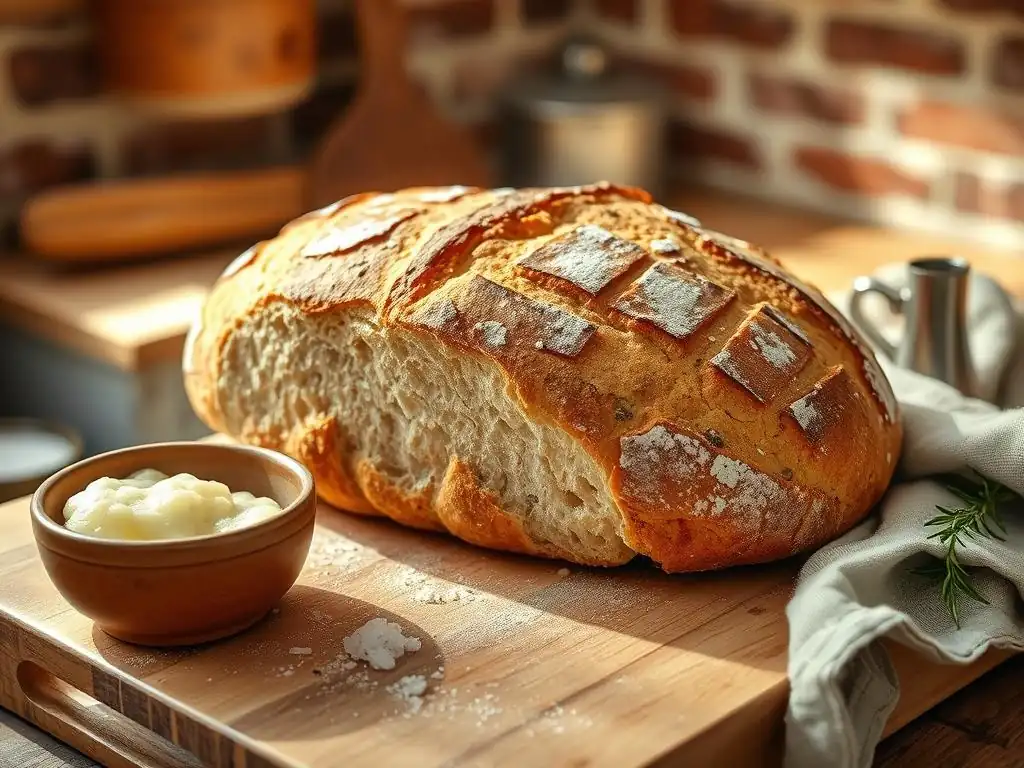
Welcome to BakeWithEase, where the joy of baking is made accessible to everyone! Ever dreamt of crafting your own crusty, flavorful sourdough but felt intimidated? Our "Basic Sourdough Bread: A Recipe for Everyday Baking" unveils a surprisingly easy beginner sourdough bread recipe that demystifies the process. While categorized under intermediate baking, we've broken down each step, making it achievable even if you're just starting your sourdough journey. Curious to discover the secret to that perfect rise and tangy flavor? Keep reading to unlock the secrets of homemade sourdough!
- Rustic Country Sourdough Bread: A Beginner's Guide
- Essential Ingredients: Starter, Flour, Water, Salt
- Step-by-Step Instructions: Baking Your Sourdough
- Troubleshooting Common Sourdough Issues
- Exploring Sourdough Variations
- Storing Your Sourdough Bread
- Conclusion: Your Sourdough Baking Journey Begins!
-
Frequently Asked Questions
- What makes this sourdough bread recipe "easy" for beginners?
- How long does it take to make this basic sourdough bread?
- What if I don't have a Dutch oven? Can I still bake this sourdough bread?
- What is a "levain," and why is it important for sourdough bread?
- What should I do if my sourdough starter isn't active enough?
- Final Reflection: The Humble Loaf, A Gateway to Baking Joy
- Unleash Your Inner Baker: Start Baking Sourdough Today!
Rustic Country Sourdough Bread: A Beginner's Guide
Embracing Sourdough: Your First Loaf
Welcome to the rewarding world of sourdough baking! Taking the leap to bake your first sourdough loaf can feel a bit daunting, but it's an incredibly satisfying journey. Unlike commercial yeast, a sourdough starter is a living culture of wild yeast and bacteria, which gives the bread its unique tangy flavor, chewy texture, and beautiful crust.
Think of your starter as a pet that needs regular feeding and care, and in return, it will give you the magic ingredient for your bread. This guide focuses on an easy beginner sourdough bread recipe designed to demystify the process and set you up for success.
Embarking on this baking adventure requires patience and observation. Your first few loaves might not be perfect – maybe the crust is a little pale, or the crumb isn't as open as you hoped. That's completely normal! Each bake is a learning experience. This guide will walk you through the fundamental steps, from understanding your starter to shaping and baking, making the process accessible. We've simplified the steps to minimize potential pitfalls, ensuring that even newcomers can achieve a delicious and rustic loaf right from their home kitchen.
Why This Rustic Recipe is Perfect for Beginners
This specific rustic country sourdough recipe is tailored with the beginner in mind, focusing on simplicity and manageability. It utilizes a straightforward process with clear timing suggestions, reducing the complexity often associated with sourdough. Instead of complicated schedules or advanced techniques, we break down each stage into easy-to-follow steps. This approach helps build confidence and understanding of the core principles of sourdough baking, making it an ideal easy beginner sourdough bread recipe to start with.
The recipe emphasizes observation and feel over strict adherence to precise measurements (beyond the initial ingredients), encouraging bakers to learn how the dough should look and feel at each stage. We use a common flour blend and a relatively standard hydration level that is forgiving for new hands. By focusing on a rustic loaf, we embrace the natural variations that occur with sourdough, removing the pressure to achieve a perfectly uniform loaf right away. This makes it a truly accessible and enjoyable way to bake your first easy beginner sourdough bread recipe.
Essential Ingredients: Starter, Flour, Water, Salt
Understanding Your Sourdough Starter
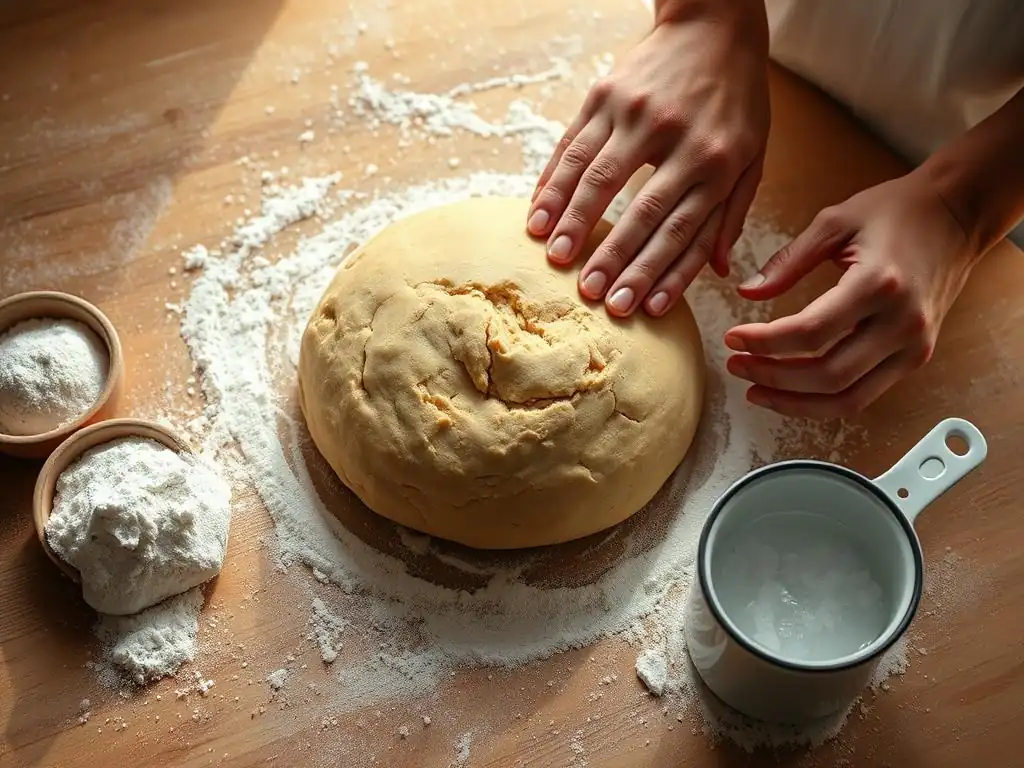
Your sourdough starter is the heart and soul of your bread. It's a fermented mixture of flour and water that contains a thriving community of wild yeasts and lactic acid bacteria. These microorganisms work together to leaven the bread and create its characteristic flavor profile.
A healthy, active starter is crucial for a successful bake. You can create your own starter from scratch (which takes about a week or two) or obtain one from a friend or online community. A mature starter will typically double or triple in size a few hours after feeding and have a pleasant, slightly tangy aroma.
Recognizing when your starter is active and ready to bake is key. A common indicator is its peak activity, which usually occurs several hours after feeding when it's most bubbly and expanded. Many bakers look for the "float test": taking a small spoonful of starter and gently dropping it into a glass of water.
If it floats, it's generally ready to use for baking because it's full of gas produced by the active yeasts. If it sinks, it may need more time or another feeding. Using an active starter is fundamental to getting good oven spring and a light crumb in your easy beginner sourdough bread recipe.
Feeding and Maintaining a Healthy Starter
Feeding your sourdough starter regularly is essential to keep the microorganisms happy and active. The standard feeding ratio is often 1:1:1 by weight (1 part starter, 1 part water, 1 part flour). For example, you might discard all but 50 grams of your existing starter, then feed it with 50 grams of water and 50 grams of flour.
This provides fresh food for the yeasts and bacteria and helps maintain a consistent population. Feeding frequency depends on how you store your starter; starters kept at room temperature typically need daily feeding, while those in the refrigerator can be fed less often, perhaps once a week.
Consistency in feeding time and temperature helps your starter develop a predictable cycle. Using filtered water is often recommended to avoid chlorine, which can harm the microbial community. The type of flour used for feeding can also influence the starter's activity and the bread's flavor. Many bakers use a mix of all-purpose and whole wheat flour for feeding, as whole wheat provides more nutrients for the microbes. Observing how your starter reacts to different feeding schedules and flours will help you understand its behavior, leading to more consistent results with your easy beginner sourdough bread recipe.
Choosing the Right Flour
The type of flour you use significantly impacts the texture and structure of your sourdough bread. For most rustic loaves, a high-protein bread flour is ideal. Bread flour typically contains 12-14% protein, which helps develop strong gluten networks. Gluten is what gives bread its structure and elasticity, allowing it to trap the gases produced by the starter and create that desirable open crumb. While all-purpose flour (around 10-12% protein) can work, bread flour generally yields a better result with sourdough's long fermentation times.
Beyond protein content, the quality of the flour matters. Look for unbleached flours, as the bleaching process can weaken the gluten. Organic flours are also preferred by many sourdough bakers. For this easy beginner sourdough bread recipe, we recommend a blend, but starting with a good quality bread flour for the majority of the mix is a solid foundation. Experimenting with different brands and types of flour over time will help you discover your preferences and how they affect your specific starter and baking environment.
Bread Flour and Whole Wheat Flour: A Blend for Flavor
This rustic country sourdough recipe often benefits from a blend of bread flour and a smaller percentage of whole wheat flour. Bread flour provides the necessary structure for a good rise and open crumb. Whole wheat flour, while lower in gluten-forming proteins, adds depth of flavor, nutrients, and a more rustic texture to the loaf. A common blend for beginners might be 80% bread flour and 20% whole wheat flour. This ratio provides enough structural support from the bread flour while incorporating the benefits of whole wheat without making the dough too difficult to handle.
Incorporating whole wheat also provides more food for the starter during fermentation, potentially boosting activity and flavor development. The bran and germ in whole wheat can affect gluten development, sometimes requiring slightly different hydration levels or fermentation times compared to 100% white bread. However, in a smaller percentage like 20%, its impact is manageable for beginners and adds a lovely complexity to the final easy beginner sourdough bread recipe. As you gain experience, you can experiment with increasing the whole wheat percentage or trying other flours like rye or spelt.
The Importance of Water and Salt
Water is the other critical component that interacts with flour to form gluten and hydrates the starter. The amount of water used, relative to the flour weight (known as hydration), greatly affects the dough's consistency and the final bread's texture. Higher hydration doughs (those with more water) are typically stickier and harder to handle but can result in a more open, airy crumb.
This easy beginner sourdough bread recipe uses a moderate hydration level, aiming for a dough that is hydrated enough for a good crumb but still relatively easy for a beginner to manage during mixing and shaping. Using filtered or non-chlorinated tap water is best to avoid inhibiting your starter's activity.
Salt is not just for flavor; it plays several vital roles in sourdough baking. It strengthens the gluten network, which helps the dough hold its shape and trap gases. Salt also controls the fermentation rate, slowing down the activity of the yeast and bacteria, which allows for longer fermentation times and more complex flavor development.
Without salt, the dough can ferment too quickly and become slack and difficult to handle. Typically, salt is added after the autolyse phase (when flour and water are mixed) to ensure it doesn't interfere with initial gluten development. A common salt percentage is around 2% of the total flour weight.
Step-by-Step Instructions: Baking Your Sourdough
Step 1: Building the Levain
Building a levain (or leaven) is the process of taking a small amount of your active sourdough starter and feeding it a specific ratio of flour and water to create the amount needed for your recipe. This step ensures you're using a highly active and predictable portion of your starter for baking, rather than using the entire bulk of your maintained starter. It's like creating a dedicated "starter boost" for your bake. For this easy beginner sourdough bread recipe, building a levain helps consolidate the necessary active culture.
The levain is typically built several hours before you plan to mix your main dough, allowing it time to become ripe and active. The specific ratio and amount depend on the recipe, but a common approach is using a small amount of starter (e.g., 20 grams) fed with equal parts flour and water (e.g., 50 grams flour, 50 grams water) to yield 120 grams of levain. You'll use a portion of this ripe levain in your dough.
Mixing the Levain: A Simple Ratio
A simple and effective ratio for building your levain for this easy beginner sourdough bread recipe is 1:2:2 (starter:water:flour). For example, you could take 20 grams of your active sourdough starter and mix it with 40 grams of water and 40 grams of flour (using the same flour blend you plan to use for the bread, or just bread flour). This yields 100 grams of levain, which is often sufficient for one or two loaves. Mix these ingredients thoroughly in a clean jar or container.
Once mixed, cover the container loosely and let the levain sit at room temperature. The time it takes to become ripe will depend on the ambient temperature. In a warm kitchen (around 75-80°F or 24-27°C), it might be ready in 4-6 hours. In a cooler kitchen, it could take 8-12 hours. You're looking for it to significantly increase in volume (ideally double or triple), become very bubbly, and develop a dome shape before starting to fall slightly.
Observing Leaven Activity: Float Test
The float test is a simple visual check to gauge if your levain is ready to be used in your dough. Once your levain appears bubbly and has peaked in volume (or is just starting to recede), gently scoop a very small amount (about a teaspoon) from the surface using a spoon. Don't stir the levain first, as this will degas it.
Carefully drop this small spoonful of levain into a glass of room temperature water. If the levain is sufficiently active and full of gas, it will float on the surface of the water. If it sinks to the bottom, it likely needs more time to ferment and develop more gas. While not foolproof, the float test is a widely used indicator for beginners making an easy beginner sourdough bread recipe to help judge levain readiness.
Step 2: Autolyse - Hydrating for Texture
Autolyse is a simple technique where you mix the flour and water for your dough and let them rest before adding the starter and salt. For this easy beginner sourdough bread recipe, you would typically mix the specified amount of flour and water together until no dry bits remain, then cover the bowl and let it sit. The resting period can range from 30 minutes to several hours, depending on the recipe and flour used.
The primary benefit of autolyse is allowing the flour to fully hydrate. This gives the gluten-forming proteins time to start linking up and developing without the interference of salt or starter. This initial hydration and resting period makes the dough easier to mix and handle later, reduces the overall kneading time required, and can lead to a smoother, more extensible dough.
Benefits of Autolyse: Gluten Development
The resting period during autolyse allows enzymes naturally present in the flour (protease) to start breaking down some of the protein, while others (amylase) convert starch into sugars, which will later feed the starter. More significantly for structure, the water allows the glutenin and gliadin proteins in the flour to begin forming gluten bonds simply through hydration and time, without mechanical mixing.
This passive gluten development makes the dough more extensible and less sticky, which is a big help for beginners learning to handle sourdough. When you later add the starter and salt and begin mixing or folding, the gluten network develops much more quickly and efficiently because it's already partially formed. This leads to a stronger dough that can hold its shape better and achieve better oven spring, contributing to a beautiful loaf from your easy beginner sourdough bread recipe.
Step 3: Mixing the Dough
Once your levain is ripe and the autolyse is complete, it's time to mix the dough. First, add the ripe levain to the bowl with your autolysed flour and water mixture. Gently incorporate the levain into the dough. This can be done by hand, squeezing the dough through your fingers until the levain is evenly distributed, or using a stand mixer on a low speed. This initial mixing step can be a little messy as you combine the sticky elements.
After the levain is mixed in, you'll add the salt. Some bakers hold back a small amount of water to help dissolve the salt and mix it in more easily. Once the salt is added, continue mixing or gently folding the dough until all ingredients are thoroughly combined and the dough starts to show some initial signs of structure. The dough will likely still be quite shaggy at this point, which is perfectly normal for an easy beginner sourdough bread recipe.
Gentle Mixing: Avoiding Over-Mixing
Unlike yeasted bread doughs that sometimes require vigorous kneading, sourdough often benefits from gentler mixing followed by a series of folds during bulk fermentation. For this beginner recipe, after incorporating the starter and salt, a few minutes of gentle mixing (either by hand or machine) is usually sufficient to bring the dough together. The goal is just to ensure everything is evenly distributed and the dough has a basic structure.
Over-mixing can be detrimental, especially with higher hydration sourdoughs, as it can tear the developing gluten network. Instead of continuous kneading, we rely on time and periodic "coil folds" or "stretch and folds" during the bulk fermentation phase to build strength. This hands-off approach is less labor-intensive and often more effective for developing the desired open crumb structure in an easy beginner sourdough bread recipe.
Step 4: Bulk Fermentation: The First Rise
Bulk fermentation is the critical first rise of the dough, occurring after all ingredients are mixed but before shaping. During this phase, the sourdough starter is hard at work, fermenting the sugars in the flour, producing carbon dioxide gas (which makes the dough rise), and developing complex flavors. The length of bulk fermentation is one of the most variable aspects of sourdough baking and depends heavily on the temperature of your kitchen and the activity of your starter. For a beginner, this phase requires patience and observation.
A typical bulk fermentation might last anywhere from 4 to 8 hours at room temperature (around 70-75°F or 21-24°C). You are looking for the dough to increase significantly in volume (often 50-80%), become visibly gassy and bubbly, and feel lighter and more airy. The dough's surface should also become smoother and more supple. Learning to read the dough and recognize these signs is key to a successful easy beginner sourdough bread recipe.
Bulk Fermentation: Time and Temperature Guidelines
Temperature is the most significant factor influencing the speed of bulk fermentation. Warmer temperatures accelerate fermentation, while cooler temperatures slow it down. As a general guideline for this easy beginner sourdough bread recipe, aim for a dough temperature around 75-78°F (24-26°C) if possible. You can achieve this by using slightly warmer water when mixing or placing the dough in a warm spot in your kitchen (like near a sunny window or inside a turned-off oven with the light on).
If your kitchen is cooler (below 70°F), bulk fermentation will take longer, potentially 8-12 hours or even more. It's more important to watch the dough's progress (volume increase, texture, bubbles) than to stick rigidly to a time. A dough that has doubled in volume before shaping is likely over-fermented, while one that has barely risen is under-fermented. Aiming for around a 50-75% increase is a good target for beginners.
Coil Folds: Strengthening the Dough
During the first 2-3 hours of bulk fermentation, you will perform a series of "coil folds" or "stretch and folds" to help develop the dough's strength and structure. These gentle manipulations build tension in the dough without the need for traditional kneading. Typically, you perform 3-4 sets of folds, spaced 30-45 minutes apart.
To perform a coil fold, wet your hands slightly to prevent sticking. Gently slide your hands under the center of the dough in the bowl. Lift the dough, allowing the ends to stretch down, then fold the dough under itself. Rotate the bowl and repeat 2-3 more times until the dough forms a neat package.
For stretch and folds, grab a portion of the dough, gently stretch it upwards, and fold it back over the rest of the dough. Repeat 4-5 times around the bowl. These folds are crucial for developing the strong gluten network needed for a good rise in your easy beginner sourdough bread recipe.
Step 5: Shaping the Dough
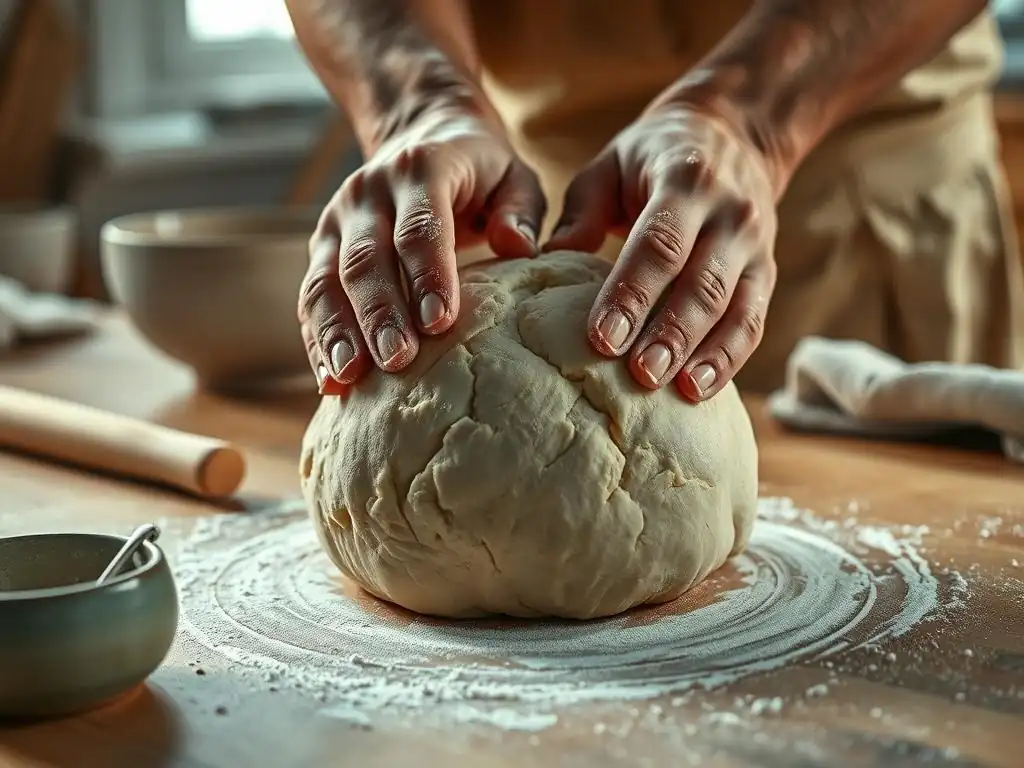
After bulk fermentation is complete, it's time to shape your dough. First, gently turn the dough out onto a lightly floured surface. You want to handle the dough carefully to avoid degassing it too much. The goal of shaping is to create tension on the surface of the dough, which helps it hold its shape during proofing and baking and contributes to good oven spring.
For a boule (round loaf), you'll gently pre-shape the dough into a rough ball and let it rest for 15-20 minutes. Then, perform the final shaping by creating significant surface tension. For a batard (oval loaf), the process is slightly different. The key is to be firm but gentle, using just enough flour to prevent sticking.
Pre-Shaping: Creating Tension
Pre-shaping is a brief resting period after bulk fermentation that helps relax the gluten and makes the final shaping easier. Gently gather the dough into a rough ball or log shape depending on your desired final loaf shape. Don't worry about making it perfect at this stage. The aim is just to create some initial tension and prepare the dough for the final shape.
Cover the pre-shaped dough and let it rest on the counter for about 15-20 minutes. This allows the gluten you developed during bulk fermentation and the folds to relax, preventing the dough from tearing when you attempt the final, tighter shape. This simple step is important for achieving a smooth, taut surface on your loaf in this easy beginner sourdough bread recipe.
Final Shaping: A Boule or Batard
For a boule (round loaf), gently flatten the rested pre-shape into a rough circle. Take the edges and fold them into the center like an envelope. Then, flip the dough over and use your hands to gently cup and pull the dough towards you, rotating it slightly as you go, to create a tight, smooth ball with tension on the surface. For a batard (oval loaf), flatten the dough into a rectangle, fold the top third down, the bottom third up, then fold the dough in half lengthwise and seal the seam while creating tension.
Once shaped, the dough is placed seam-side up into a floured banneton (a proofing basket) or a bowl lined with a floured tea towel. The banneton supports the dough and helps it hold its shape during proofing. Flour the banneton or cloth generously with rice flour (which is less likely to stick) or a mix of rice and bread flour. This final shaping is crucial for giving your easy beginner sourdough bread recipe its structure and appearance.
Step 6: Proofing the Dough: The Second Rise
Proofing, also known as the second rise, is the final fermentation stage after shaping and before baking. During proofing, the shaped dough continues to ferment slowly, developing more gas and flavor. Unlike the initial bulk fermentation, the goal here is not to double the dough in size, but rather to allow it to become light and airy while holding its shape.
The most common method for proofing sourdough is cold proofing in the refrigerator. This significantly slows down fermentation, allowing for a longer, more controlled rise and the development of deeper, more complex flavors. Cold proofing also makes the dough easier to handle and score before baking.
Cold Proofing: Developing Flavor
Cold proofing involves placing the shaped dough in its banneton or lined bowl into the refrigerator (at around 38-40°F or 3-4°C) for an extended period. This can range from 8 hours to 24 hours, or even longer depending on your schedule and desired flavor development. A longer cold proof generally results in a tangier loaf.
The cold temperature dramatically slows yeast activity, but the lactic acid bacteria continue to work, producing more organic acids that contribute to the classic sourdough tang. Cold dough is also firmer and easier to score cleanly just before baking. Cold proofing is highly recommended for this easy beginner sourdough bread recipe as it adds flavor and simplifies the handling process.
Assessing Readiness: The Finger Dent Test
Determining when your cold-proofed dough is ready to bake is important. A common method is the "finger dent test." Gently but firmly press your finger into the side of the dough. If the indentation springs back immediately, the dough is likely under-proofed and needs more time. If the indentation remains completely without springing back, the dough is likely over-proofed (though this is less common with a long cold proof).
Ideally, for a perfectly proofed loaf from your easy beginner sourdough bread recipe, the indentation should spring back slowly, leaving a small indent. This indicates the dough has enough strength to hold its shape but is sufficiently fermented and filled with gas. Practice with this test on your first few loaves to get a feel for it.
Step 7: Baking Your Sourdough
Baking sourdough requires high heat and steam in the initial phase to achieve maximum oven spring and a beautiful crust. The best way to replicate a professional bakery environment at home is often by using a Dutch oven or a lidded baking vessel. Preheat your oven to a very high temperature, typically between 450°F and 500°F (230°C - 260°C).
Place your Dutch oven (with the lid on) in the oven while it preheats, usually for at least 30-60 minutes, to ensure it's scorching hot. This hot environment provides the initial burst of heat needed for oven spring. Baking in a closed vessel traps the moisture released from the dough, creating a steamy environment similar to a professional deck oven. This steam keeps the crust pliable during the initial rise, allowing the dough to expand fully before the crust sets.
Oven Temperature and Dutch Oven Baking
For this easy beginner sourdough bread recipe, preheat your oven to 475°F (245°C) with your empty Dutch oven inside. Carefully remove the hot Dutch oven from the oven using thick oven mitts. Gently turn your cold-proofed dough out of the banneton directly into the hot Dutch oven. Score the top of the dough quickly (see below) and immediately place the lid back on the Dutch oven.
Carefully place the lidded Dutch oven back into the hot oven. Bake with the lid on for the first 20 minutes. This trapped steam is crucial for maximizing oven spring. After 20 minutes, carefully remove the lid. The dough should have significantly risen and the crust will have started to set. Reduce the oven temperature to 450°F (230°C) and continue baking uncovered for another 20-30 minutes, or until the crust is a deep golden brown and the internal temperature of the loaf reaches around 205-210°F (96-99°C).
Scoring: Achieving Oven Spring
Scoring the dough just before baking is essential. It involves making cuts on the surface of the loaf with a sharp blade (like a razor blade or a sharp knife). These cuts act as vents, directing the expansion of the dough during oven spring. Without scoring, the dough might burst unpredictably in weaker spots.
For a simple rustic loaf from your easy beginner sourdough bread recipe, a single deep cut down the center is common and effective. You can also do a simple cross or multiple parallel cuts. Angle the blade at about 30-45 degrees to the surface of the dough for a cleaner cut and better "ear" development (the flap of crust that lifts along the score). Score quickly and confidently to avoid dragging the dough.
Step 8: Cooling and Enjoying
Once your sourdough bread is baked to a beautiful golden-brown color with a firm crust, carefully remove it from the Dutch oven and place it on a wire rack to cool completely. This step is just as important as the baking itself and requires patience!
Allowing the bread to cool fully is crucial for the texture and quality of the crumb. As the bread cools, the internal structure sets, and residual moisture redistributes throughout the loaf. Cutting into a hot loaf will result in a gummy, dense texture because the starches haven't had time to fully set.
Cooling Completely: Preventing a Gummy Crumb
Resist the urge to slice into your beautiful easy beginner sourdough bread recipe as soon as it comes out of the oven. A standard-sized loaf needs at least 2-3 hours to cool completely at room temperature. Larger loaves may require even longer.
During this cooling period, the steam trapped inside dissipates, and the internal temperature drops. This process allows the crumb to firm up and develop its final structure. Cutting too early interrupts this process, leading to a gummy, sometimes sticky interior, even if the crust is perfect. Patience here is truly a virtue!
Troubleshooting Common Sourdough Issues
Addressing Common Problems
Even with an easy beginner sourdough bread recipe, you might encounter issues. Sourdough baking is a dynamic process influenced by many factors: your starter's health, ambient temperature, flour type, and technique. Don't get discouraged by less-than-perfect results. Each bake is a learning opportunity to understand how these variables interact.
Common problems include a dense crumb, lack of oven spring, or an overly sour taste. By understanding the potential causes behind these issues, you can adjust your process for future bakes. Keep a simple baking journal noting temperatures, timing, and observations – this will be invaluable for troubleshooting and improving your easy beginner sourdough bread recipe results over time.
Dense Bread: Under-Proofing or Weak Starter
A dense, heavy crumb is one of the most common issues for beginners. The primary culprits are usually an under-active starter or insufficient fermentation (either bulk fermentation or proofing). If your starter isn't active enough, it won't produce sufficient gas to leaven the dough. Ensure your starter passes the float test and is visibly bubbly and active before building your levain.
Under-proofing means the dough hasn't had enough time for the yeast to produce sufficient gas to create an open structure. If your bulk fermentation didn't result in a significant volume increase (less than 50%), or if your cold-proofed dough didn't pass the finger dent test appropriately, it likely needed more time. Reviewing the signs of proper fermentation (volume increase, texture, bubbles) is key to avoiding a dense loaf from your easy beginner sourdough bread recipe.
Overly Sour Taste: Fermentation Control
While a slight tang is characteristic of sourdough, an overwhelmingly sour taste can indicate over-fermentation. This often happens when fermentation times are too long or temperatures are too high, allowing the lactic acid bacteria to produce excessive amounts of acid. Using a very mature or unfed starter can also contribute to excessive sourness.
To control sourness, try using your levain when it's younger (closer to its peak, not long after it's peaked and started to fall). Shorten your bulk fermentation time, especially in warmer conditions, aiming for the target volume increase rather than a fixed time. Cold proofing helps develop flavor but at a slower rate; ensure your bulk fermentation isn't already overdone before putting the dough in the fridge. Adjusting these variables will help you find the right balance of tang in your easy beginner sourdough bread recipe.
Lack of Oven Spring: Scoring and Dough Strength
Lack of oven spring – when the loaf doesn't expand much in the oven – can be frustrating. Several factors contribute to this. A weak starter or under-proofed dough won't have enough gas production or strength to rise properly. Ensure your starter is active and your bulk fermentation reaches the target volume increase.
Insufficient dough strength (from inadequate gluten development during folds or improper handling) means the dough can't hold the gas produced. Make sure you are performing enough effective coil folds or stretch and folds during bulk fermentation. Finally, improper scoring can hinder oven spring; if the cuts aren't deep or well-placed, the dough can't expand through the intended vents. Practice your scoring technique on your next easy beginner sourdough bread recipe.
Exploring Sourdough Variations
Adding Flavor and Texture
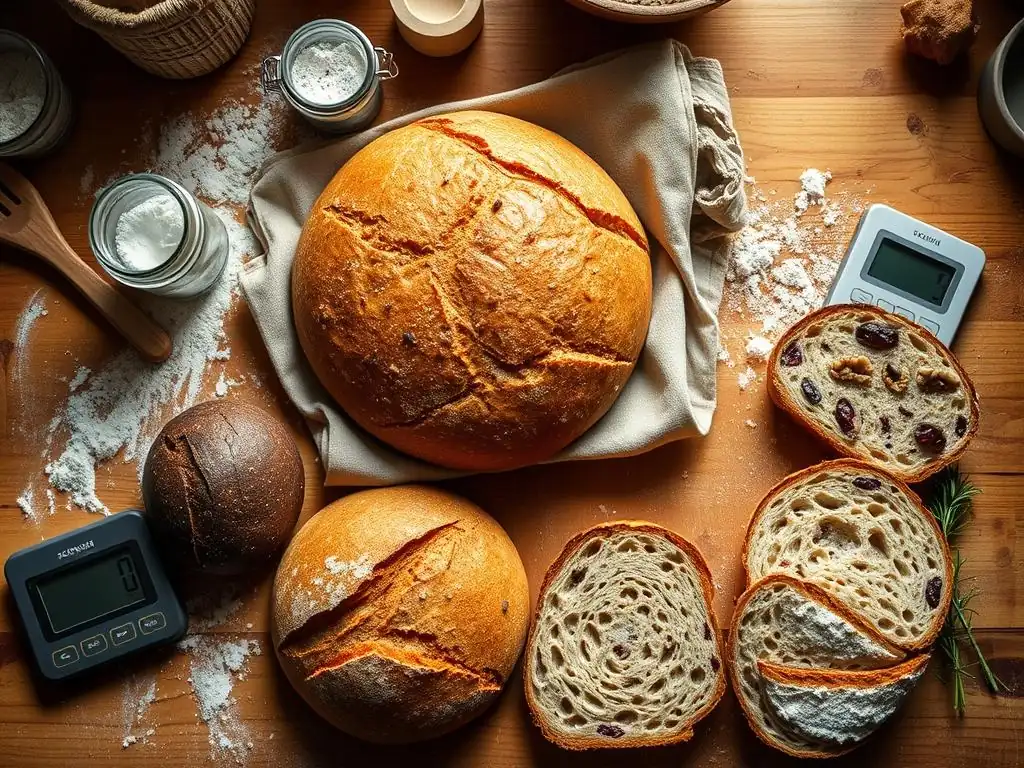
Once you've successfully baked your basic rustic loaf using this easy beginner sourdough bread recipe, you can start experimenting with adding flavor and texture enhancers. These additions can turn a simple loaf into something truly special. Common mix-ins include seeds, nuts, dried fruits, olives, herbs, or roasted garlic.
When adding inclusions, it's best to incorporate them towards the end of the mixing phase or during the first set of folds during bulk fermentation. This ensures they are evenly distributed without tearing the gluten network too much. The amount of inclusion should generally not exceed 10-20% of the total flour weight to avoid weighing down the dough and inhibiting the rise.
Olive and Rosemary Sourdough
A popular and delicious variation is adding olives and fresh rosemary. For a standard loaf using this easy beginner sourdough bread recipe as a base, you could add about 100-150 grams of chopped olives (like Kalamata or Castelvetrano) and 1-2 tablespoons of finely chopped fresh rosemary. Ensure the olives are pitted and drained well to avoid adding excess moisture to the dough.
Mix the olives and rosemary into the dough during the first or second set of coil folds. The flavors infuse throughout the bread during the long fermentation, resulting in a savory and aromatic loaf perfect for pairing with cheese or enjoying on its own. This variation demonstrates how easily you can adapt your easy beginner sourdough bread recipe skills.
Whole Wheat Sourdough
While this beginner recipe includes some whole wheat, you can explore baking loaves with higher percentages or even 100% whole wheat flour. Whole wheat flour absorbs more water than white bread flour, so you'll likely need to increase the hydration slightly. Dough made with higher percentages of whole wheat can also be less extensible and require gentler handling.
Baking 100% whole wheat sourdough often results in a denser loaf compared to a white or blended loaf, but it offers a robust, nutty flavor and increased nutritional value. Fermentation times might be slightly different due to the flour type. Experimenting with a 50% whole wheat blend after mastering the basic easy beginner sourdough bread recipe is a great next step before attempting 100%.
Experimenting with Different Flours
The world of flour extends far beyond white and whole wheat. As you become more comfortable with sourdough, you can experiment with ancient grains and alternative flours, such as spelt, rye, einkorn, or kamut. Each flour brings its own unique flavor profile, nutritional benefits, and handling characteristics.
Rye flour, for instance, has very different gluten-forming properties than wheat and is often used in smaller percentages in wheat-based sourdoughs or in specific rye sourdough recipes. Spelt is an ancient grain that offers a slightly nutty flavor and is often easier to digest for some people. Experimenting with these flours will broaden your baking horizons beyond the initial easy beginner sourdough bread recipe and allow you to discover new favorite loaf types.
Storing Your Sourdough Bread
Maintaining Freshness
Properly storing your sourdough bread is key to keeping that delicious crust and chewy interior fresh for as long as possible. Once the loaf has cooled completely (this is critical! ), avoid storing it in an airtight plastic bag on the counter, as this will soften the crust and can encourage mold.
The best way to store sourdough for the first day or two is cut-side down on a cutting board or in a paper bag. This allows the crust to remain crisp while protecting the exposed interior. For longer storage, a bread box or a linen bread bag works well, allowing some air circulation while preventing the bread from drying out too quickly. Your easy beginner sourdough bread recipe deserves to be enjoyed at its best!
Freezing for Later Use
Sourdough bread freezes exceptionally well, allowing you to bake ahead or store leftovers. To freeze, ensure the loaf is completely cooled. You can freeze it whole or sliced. If freezing sliced, place parchment paper between slices so they don't stick together.
Wrap the bread tightly in plastic wrap, followed by a layer of aluminum foil or place it in a freezer-safe bag. This double layer helps prevent freezer burn. Frozen sourdough can be stored for up to 3-4 months. To thaw, simply unwrap the bread and let it sit at room temperature. For best results, refresh a whole loaf by spritzing it with water and warming it in a 350°F (175°C) oven for 10-15 minutes. This brings back that lovely crust you achieved with your easy beginner sourdough bread recipe.
Conclusion: Your Sourdough Baking Journey Begins!
The Rewards of Sourdough Baking
Congratulations on taking the first steps in your sourdough baking journey! Mastering this easy beginner sourdough bread recipe is a significant accomplishment. The rewards of baking sourdough go far beyond just the delicious taste and texture of the bread. There's a deep satisfaction in creating something so fundamental and nourishing from just flour, water, salt, and your active starter.
The process itself can be meditative and engaging, requiring patience and observation. Each loaf you bake will teach you something new about your starter, your environment, and your technique. It's a continuous learning process that yields tangible, edible results. Enjoy the journey and the wonderful bread you create!
One of the greatest joys of baking, especially something as special as sourdough, is sharing it with others. There's something truly heartwarming about offering a slice of your homemade loaf to friends and family. The unique flavor and texture of sourdough make it a perfect accompaniment to meals, a base for delicious sandwiches, or simply wonderful with butter.
Don't hesitate to share your successes (and even your learning loaves!) from this easy beginner sourdough bread recipe. It's a wonderful way to connect with people and spread the joy of real, homemade bread. Happy baking!
Frequently Asked Questions
What makes this sourdough bread recipe "easy" for beginners?
This recipe focuses on simple ingredients and a straightforward process, minimizing complex techniques. We've also included detailed instructions to guide you every step of the way.
How long does it take to make this basic sourdough bread?
The entire process, including the levain build, mixing, bulk fermentation, shaping, and baking, takes approximately 24-36 hours, but most of that time is hands-off. The active time is relatively short.
What if I don't have a Dutch oven? Can I still bake this sourdough bread?
Yes, you can! While a Dutch oven helps create oven spring and a crispy crust, you can use a baking stone or baking sheet with a tray of water for steam.
What is a "levain," and why is it important for sourdough bread?
A levain is a starter culture made from flour and water that ferments naturally. It provides the leavening power and distinct tangy flavor characteristic of sourdough bread.
What should I do if my sourdough starter isn't active enough?
Feed your starter regularly (once or twice a day) with equal parts flour and water until it doubles in size within 4-8 hours after feeding. An active starter is crucial for a good rise.
Final Reflection: The Humble Loaf, A Gateway to Baking Joy
The enduring appeal of sourdough bread lies not just in its tangy flavor, but in the simple act of creation itself. This seemingly complex process, demystified throughout this article, offers a surprisingly accessible entry point into the world of baking, proving that crafting delicious, homemade bread is within everyone's reach. The ease of this recipe, combined with the rewarding results, makes it a perfect starting point for aspiring bakers of all skill levels.
The journey of making sourdough, from nurturing the starter to the satisfying thud of the loaf hitting the cooling rack, is a deeply rewarding experience. It's a connection to a long tradition of baking, a tangible link to the past. Bread is the staff of life,
a simple phrase, yet it encapsulates the profound significance of this staple food, and the satisfaction of making it yourself. This recipe, I hope, has helped to bridge the gap between the perceived difficulty of sourdough and the genuine pleasure of its creation, fostering a deeper appreciation for the process and the final product.
Now, I invite you to roll up your sleeves, gather your ingredients, and embark on your own sourdough journey. Don't be intimidated by the seemingly complex process; embrace the simplicity of the steps outlined in this article. The rewards – the aroma of freshly baked bread filling your kitchen, the satisfying chew of the crust, the comforting warmth of sharing your creation – are well worth the effort. Remember, every loaf, even the imperfect ones, is a step closer to mastering this ancient art and discovering the joy of baking your own bread.
Unleash Your Inner Baker: Start Baking Sourdough Today!
Thanks for joining us on this sourdough journey! We hope you now feel confident and excited to tackle this rewarding baking adventure. Ready to transform your kitchen into a fragrant haven?
- Bake your first loaf: Grab your ingredients and follow the recipe again – experiment with different flours or hydration levels! This time, you'll be a sourdough pro.
- Share your baking success: Post a picture of your masterpiece on social media and tag us – we'd love to see it! Let's inspire each other.
- Explore other sourdough recipes: Discover the magic of sourdough beyond basic bread. Think pretzels, pizza, or even pancakes!
What unique twist will you add to your next sourdough creation? Let's discuss in the comments below!