
Bake Basic Sourdough with Confidence: An Easy Recipe

Welcome to BakeWithEase, your companion in the delightful world of baking!
Ever dreamt of crafting that perfect loaf of sourdough, but felt intimidated by the process? You're not alone! This time, we're diving into the heart of sourdough success with our easy sourdough starter recipe, demystifying the process so you can bake with confidence. Curious how simple it can be to cultivate that tangy, bubbly magic? Let's get started and unlock the secrets to delicious, homemade sourdough bread!
- Introduction to Easy Sourdough Baking with BakeWithEase
- Mastering the Easy Sourdough Starter: Your Foundation for Delicious Bread
- Easy Sourdough Bread Recipe: The Ingredients You'll Need
-
Step-by-Step Guide: Baking Your First Easy Sourdough Loaf
- Step 1: Mixing the Dough - Achieving the Right Consistency
- Step 2: Bulk Fermentation - The Key to Sourdough Flavor Development
- Step 3: Shaping Your Sourdough Loaf - Creating a Beautiful Boule or Batard
- Step 4: Proofing - Preparing Your Dough for Baking
- Step 5: Baking - Achieving a Crispy Crust and Open Crumb
- Step 6: Cooling and Slicing - The Final Touches
- Tips for Baking the Perfect Easy Sourdough Bread
- Storing Your Homemade Sourdough Bread
- Conclusion: Enjoy Your Homemade Easy Sourdough!
-
Frequently Asked Questions
- What exactly is a sourdough starter, and why is it important for baking sourdough bread?
- How long does it typically take to create a sourdough starter from scratch using an easy sourdough starter recipe?
- What are some common problems people encounter when making a sourdough starter, and how can I troubleshoot them based on this easy sourdough starter recipe?
- Can I use different types of flour when feeding my sourdough starter with this easy sourdough starter recipe?
- How often should I feed my sourdough starter once it's active and ready to be used for baking delicious sourdough bread?
- Final Reflection: The Unexpected Joys of Sourdough Simplicity
- Unlock Your Inner Baker: Start Your Sourdough Journey Today!
Introduction to Easy Sourdough Baking with BakeWithEase
Welcome to the World of Homemade Sourdough Bread
Embarking on the journey of baking sourdough bread at home can feel daunting, but it's an incredibly rewarding experience. The magic lies in the wild yeast and bacteria that live in your sourdough starter, creating a loaf with unparalleled flavor, texture, and aroma. Unlike commercial yeast, which provides a quick rise, a sourdough starter works slowly, developing complex flavors through fermentation. This process not only makes the bread delicious but also potentially easier to digest for some people. Mastering an easy sourdough starter recipe is the first step towards unlocking this ancient craft right in your own kitchen.
Our goal at BakeWithEase is to demystify sourdough baking, making it accessible and enjoyable for everyone. We believe that with a clear, step-by-step guide and a little patience, anyone can bake a beautiful and delicious loaf. Forget the intimidating tales; this approach is designed to build your confidence with each successful bake. From understanding your easy sourdough starter to shaping your dough, we'll walk you through the entire process, proving that authentic, homemade sourdough is well within your reach.
Why This Easy Sourdough Recipe is Perfect for Beginners
This particular easy sourdough recipe is specifically designed with the novice baker in mind. We've streamlined the process, focusing on fundamental techniques that yield great results without requiring specialized equipment or advanced skills from the outset. The ingredient list is minimal, and the steps are broken down into manageable stages, allowing you to learn the rhythm of sourdough baking at a comfortable pace. Many beginner recipes can be overly complex, leading to frustration, but our method prioritizes simplicity and success.
Furthermore, this recipe emphasizes understanding why each step is important, not just how to do it. We'll explain the role of fermentation, the purpose of stretching and folding, and how to tell when your dough is ready. This foundational knowledge is key to building intuition and confidently tackling future sourdough projects. By starting with this easy sourdough starter recipe and accompanying bread method, you'll gain the confidence and skills needed to explore the vast and wonderful world of sourdough baking.
Mastering the Easy Sourdough Starter: Your Foundation for Delicious Bread
Creating Your Own Sourdough Starter: A Step-by-Step Guide
Creating an easy sourdough starter recipe from scratch requires just two simple ingredients: flour and water. The process involves mixing equal parts flour and water and letting it sit at room temperature, allowing wild yeast and bacteria from the environment and flour to colonize the mixture. Over several days, typically 7 to 14, you'll discard most of the starter and feed it fresh flour and water daily.
This regular feeding strengthens the microbial colony, making it active and ready to leaven bread. A common feeding ratio is 1:1:1 by weight – 1 part starter, 1 part water, 1 part flour. For example, you might start with 50g flour and 50g water on day one, and then on subsequent days, keep 50g of the mixture and feed it 50g fresh flour and 50g fresh water.
As your starter develops, you'll begin to see signs of life: small bubbles forming on the surface and throughout the mixture, a pleasant tangy aroma developing, and the starter increasing in volume after feeding before slowly falling back down. This rise and fall is a key indicator of activity. Consistency is crucial during this initial phase.
Keeping your starter in a warm spot, ideally between 70°F and 80°F (21°C to 27°C), will encourage faster development. Patience is also a virtue; don't be discouraged if it takes a week or two for your starter to become consistently active and ready to bake with.
Feeding and Maintaining Your Active Sourdough Starter for Best Results
Once your easy sourdough starter recipe is consistently doubling or tripling in size within 4-12 hours after feeding, it's considered active and ready for baking. To maintain its vigor, regular feeding is essential. If you plan to bake frequently (a few times a week), keeping your starter at room temperature and feeding it daily is ideal.
The standard feeding ratio of 1:1:1 (starter:water:flour by weight) works well for daily maintenance. For instance, if you keep 100g of starter, you'd feed it 100g water and 100g flour. Using filtered water can be beneficial, as chlorine in tap water can sometimes inhibit microbial activity.
If you don't bake often, storing your active sourdough starter in the refrigerator is a great option. Refrigeration slows down the fermentation process significantly, meaning you only need to feed it about once a week. When you want to bake, take the starter out, let it come to room temperature for an hour or two, and then feed it as usual.
You'll need to do one or two feedings at room temperature, waiting for it to become active and bubbly again (typically 4-12 hours after the final feeding), before using it in your easy sourdough bread recipe. This "revival" step ensures your starter has the necessary leavening power.
Troubleshooting Common Sourdough Starter Problems
Even with an easy sourdough starter recipe, you might encounter a few bumps along the road. One common issue is a starter that doesn't seem to become active or rise consistently. This could be due to temperature (it might be too cold), irregular feeding, or using chlorinated water. Try moving the starter to a warmer location, establishing a consistent daily feeding schedule, and switching to filtered or bottled water.
Another issue is liquid separating on top of the starter, often called "hooch." This clear or dark liquid is a sign that your starter is hungry and needs to be fed more frequently or with a higher ratio of flour. Simply stir it in or pour it off before feeding.
Mold is a less common but more serious problem. If you see fuzzy, colored mold (not just a thin layer of hooch), unfortunately, you'll need to discard the starter and begin again. This usually happens if the starter isn't fed regularly or is kept in conditions that promote mold growth. A healthy, active starter is quite resilient due to its acidic environment.
Foul smells, beyond the typical tangy or yeasty aroma, can also indicate a problem. Ensure you're using fresh flour and clean containers. Patience and consistent care are your best tools for overcoming most easy sourdough starter recipe challenges.
Easy Sourdough Bread Recipe: The Ingredients You'll Need
Essential Ingredients for a Perfect Sourdough Loaf
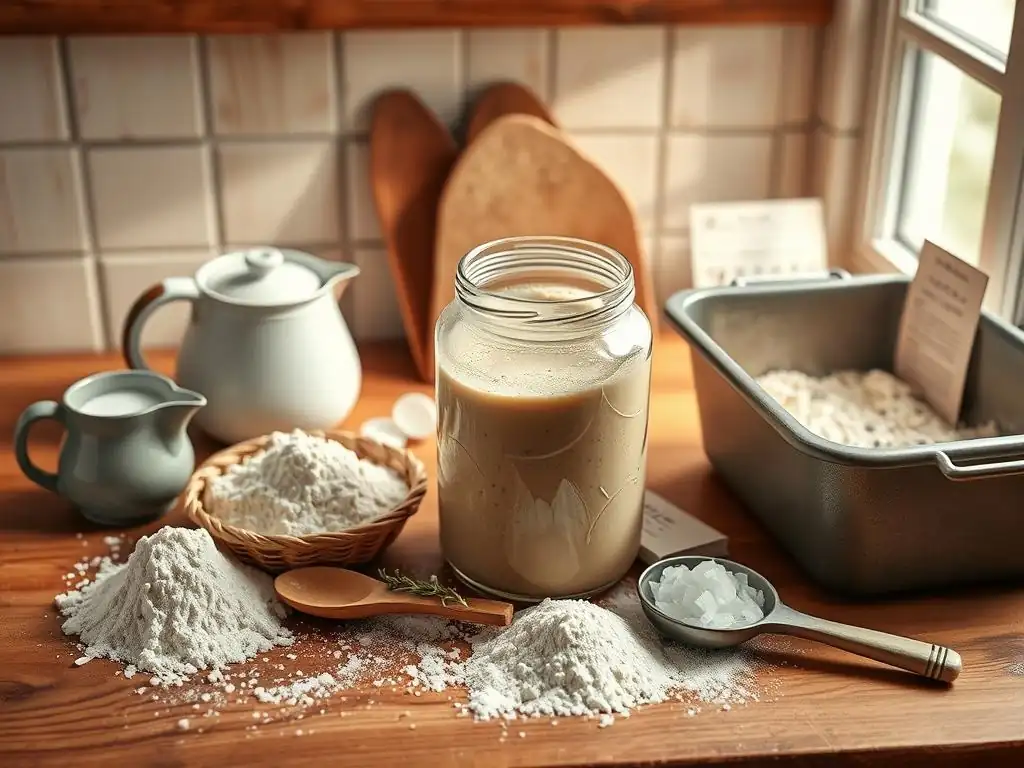
Baking a delicious easy sourdough loaf requires just a few fundamental ingredients. The star, of course, is your active sourdough starter, which provides both leavening and flavor. You'll need about 100-200 grams of vigorous starter, depending on the recipe's size and desired fermentation time. Next is flour.
While many types can be used, a strong bread flour with a protein content of 12-14% is highly recommended for beginners, as its higher gluten content provides structure to the dough. All-purpose flour can work, but might result in a slightly flatter loaf. Approximately 400-500 grams of bread flour is a good starting point for a standard loaf.
Water is the third essential ingredient. The amount of water relative to the flour is known as hydration, and it significantly impacts the dough's texture and handling. For an easy sourdough recipe, a hydration level between 70% and 75% (water weight divided by flour weight) is manageable for beginners. This means for 500g of flour, you'd use 350-375g of water.
Finally, salt is crucial for flavor, controlling fermentation speed, and strengthening the gluten network. About 9-10 grams of fine sea salt or kosher salt is typical for this amount of flour. Avoid iodized table salt, which can sometimes interfere with fermentation.
Understanding the Role of Each Ingredient in Sourdough Baking
Each ingredient in this easy sourdough bread recipe plays a vital role in the final product. The active sourdough starter is the leavening agent; the wild yeast consumes sugars in the flour and produces carbon dioxide gas, which makes the dough rise. The bacteria in the starter produce lactic and acetic acids, contributing to the characteristic tangy flavor and improving the bread's keeping quality. A healthy, active starter is paramount for a good rise and flavor development.
Flour provides the structure (through gluten development) and the food source (starches and sugars) for the starter's microbes. The type of flour affects the dough's hydration needs and the final crumb texture. Bread flour's high protein content allows for robust gluten development, trapping the gases produced by the starter and creating that desirable open crumb. Water hydrates the flour, enabling gluten formation and allowing the yeast and bacteria in your easy sourdough starter recipe to become active and ferment.
The hydration level impacts how sticky the dough is and the potential for an open crumb. Salt, while seemingly small in quantity, is mighty in impact. It enhances flavor, tightens the gluten structure making the dough easier to handle, and slows down the fermentation process, allowing for longer flavor development without the dough becoming over-proofed too quickly.
Step-by-Step Guide: Baking Your First Easy Sourdough Loaf
Step 1: Mixing the Dough - Achieving the Right Consistency
The first step in this easy sourdough bread recipe is mixing your active sourdough starter, water, and flour. This initial mix is often called the autolyse, though for simplicity in a beginner recipe, we might add the salt later or include it upfront. Combine the measured amount of warm water (around 80-85°F or 27-29°C) with your active starter in a large mixing bowl. Stir gently to disperse the starter.
Then, add the flour and salt (if adding now). Mix everything together by hand or with a spatula until no dry flour remains. The mixture will be shaggy and sticky – this is perfectly normal.
Once mixed, cover the bowl and let the dough rest for 30 minutes to an hour. This resting period, sometimes called the "autolyse" (even with salt included), allows the flour to fully hydrate and the gluten development process to begin naturally without much effort from you. You'll notice the dough becomes slightly smoother and more pliable after this rest. This step is crucial in an easy sourdough recipe as it makes the subsequent handling much easier and promotes better gluten development, which is key for a good crumb structure.
Step 2: Bulk Fermentation - The Key to Sourdough Flavor Development
Bulk fermentation is the longest stage of the process where the main rise occurs, and the sourdough's characteristic flavor develops. After the initial rest, the dough needs several hours at room temperature to ferment. The ideal temperature for bulk fermentation is typically between 75°F and 80°F (24°C to 27°C). At this temperature, fermentation might take 4 to 6 hours. If your kitchen is cooler, it could take significantly longer, perhaps 8-12 hours or even more. During this time, the dough should increase in volume by about 30-50% and become visibly bubbly and airy.
Monitoring the dough, rather than strictly following a clock, is key during bulk fermentation. You can gently poke the dough with a wet finger; if the indentation slowly springs back only partially, it's likely ready. If it springs back completely, it needs more time. If it stays indented completely, it might be over-fermented (though less likely in an easy sourdough recipe unless the starter is extremely vigorous or the temperature very high). This stage is also where you'll perform a series of "folds" to build dough strength.
Performing Folds During Bulk Fermentation for Dough Strength
During the bulk fermentation stage, performing a series of stretches and folds at regular intervals (usually every 30-60 minutes for the first 2-3 hours) helps to develop the gluten structure in your easy sourdough dough. This technique strengthens the dough, allowing it to hold its shape better and trap the gases produced by your easy sourdough starter recipe, leading to a better rise and crumb. To perform a fold, wet your hand slightly to prevent sticking.
Grab one side of the dough, gently stretch it upwards, and fold it over the center. Rotate the bowl a quarter turn and repeat the stretch and fold. Do this 4 times to complete one set of folds.
Aim for 3 to 4 sets of folds during the first half of the bulk fermentation period. For example, if your bulk fermentation is expected to take 5 hours, you might do sets of folds at 30, 60, 120, and 180 minutes from the start of bulk fermentation. As you perform the folds, you'll notice the dough becoming smoother, more elastic, and easier to handle. After the final set of folds, let the dough rest undisturbed for the remainder of the bulk fermentation time to allow the yeast to work and the flavor to deepen.
Step 3: Shaping Your Sourdough Loaf - Creating a Beautiful Boule or Batard
Once bulk fermentation is complete, it's time to shape your easy sourdough dough. Gently turn the dough out onto a lightly floured surface. Avoid using too much flour, as this can create dry spots in the dough.
The goal of shaping is to create tension on the surface of the dough, which helps it hold its shape during proofing and baking and encourages a good oven spring. For a round loaf (boule), gently pre-shape the dough into a rough ball by pulling the edges underneath. Let it rest for 15-20 minutes uncovered; this allows the gluten to relax, making the final shaping easier.
For the final shaping of a boule, gently flatten the dough into a circle. Take the bottom edge and fold it up past the center. Take the top edge and fold it down, overlapping the bottom edge. Then, fold in the sides like an envelope.
Finally, flip the dough over and use your hands to gently cup and rotate the dough, pulling it towards you to create surface tension and form a tight ball. For an oval loaf (batard), after the pre-shape rest, gently flatten the dough into an oval. Fold the top edge down past the center, press gently, then fold the bottom edge up and over the top fold. Seal the seam, then gently roll the loaf back and forth to lengthen it into an oval shape, maintaining tension.
Step 4: Proofing - Preparing Your Dough for Baking
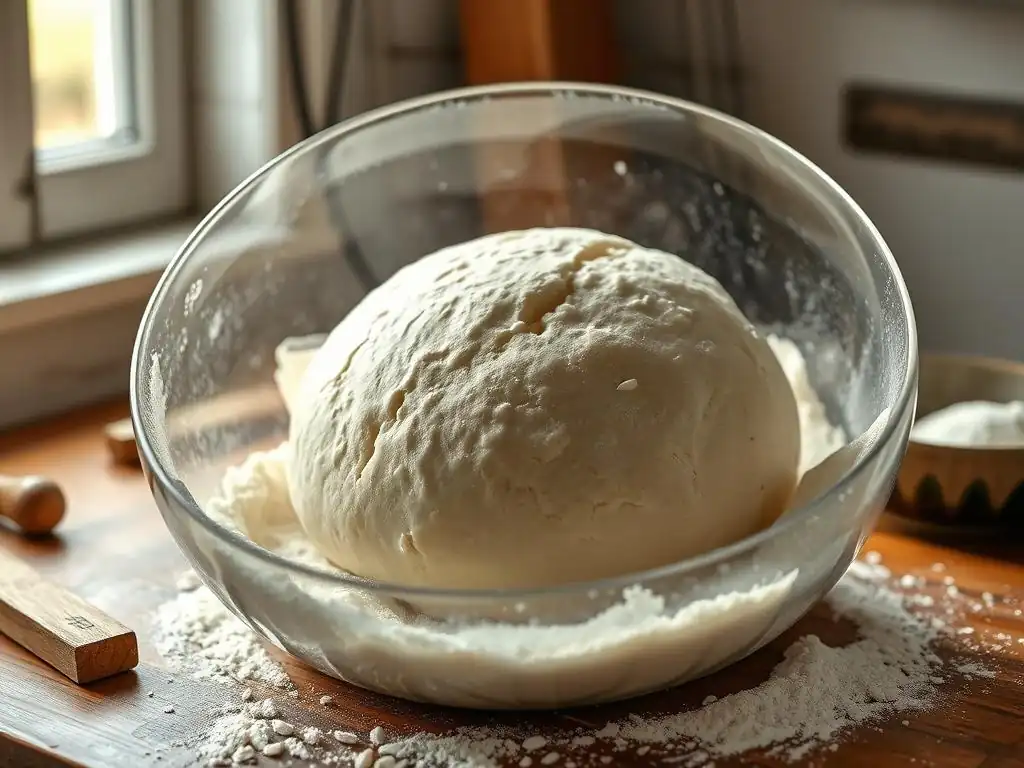
After shaping, your easy sourdough loaf needs a final rise, known as proofing. This is where the dough gets its final lift before baking. The shaped dough is typically placed seam-side up in a proofing basket (banneton) that has been well-floured (rice flour works best to prevent sticking). If you don't have a banneton, a bowl lined with a floured kitchen towel works just as well. Cover the dough loosely with plastic wrap or a damp towel to prevent it from drying out.
The proofing time and location depend on whether you choose a cold proof or a room temperature proof. Room temperature proofing is faster, typically taking 1-4 hours depending on your kitchen temperature and dough activity. Cold proofing in the refrigerator is much slower, usually 8-12 hours or even up to 24 hours. Cold proofing is highly recommended for an easy sourdough recipe as it slows down fermentation, making the dough easier to handle, deepening the flavor, and allowing you more flexibility in your baking schedule.
Cold Proofing vs. Room Temperature Proofing: Which is Best?
For beginners using an easy sourdough starter recipe, cold proofing in the refrigerator is generally considered best. It offers several significant advantages. Firstly, the cold temperature slows down the yeast activity considerably, making it much harder to over-proof your dough.
This provides a wider window of time for baking, allowing you to fit the bake into your schedule rather than being dictated by the dough's rapid rise at room temperature. A cold-proofed dough is also firmer and much easier to score (cut designs into the surface) just before baking, which contributes to a better oven spring and a more beautiful loaf.
Secondly, the longer, slower fermentation that occurs during cold proofing allows for more complex flavors to develop in your easy sourdough. The acids produced by the bacteria in the starter have more time to work, resulting in a tangier, more nuanced taste. While room temperature proofing can work and is faster, it requires careful monitoring to avoid over-proofing, which can lead to a flat loaf. For reliability, ease of handling, and superior flavor development in your first easy sourdough loaves, the cold proof method is the way to go.
Step 5: Baking - Achieving a Crispy Crust and Open Crumb
Baking is the culmination of all your hard work. For the best results with an easy sourdough recipe, baking in a Dutch oven is highly recommended. A Dutch oven creates a steamy environment around the loaf for the first part of the bake.
This steam keeps the surface of the dough moist, allowing it to expand fully before the crust sets. This expansion is called "oven spring" and is crucial for achieving a good volume and an open crumb structure. Preheat your oven with the Dutch oven inside to a high temperature, typically 450-500°F (230-260°C), for at least 30-60 minutes.
Carefully remove the hot Dutch oven from the oven. Gently turn your cold-proofed dough out of the banneton into the Dutch oven (you can place it on parchment paper first for easier transfer). Score the top of the loaf with a sharp knife or razor blade. Quickly place the lid on the Dutch oven and return it to the hot oven. Bake with the lid on for 20-25 minutes. Then, remove the lid and continue baking for another 20-25 minutes, or until the crust is deeply golden brown and the internal temperature reaches around 205-210°F (96-99°C).
Baking with a Dutch Oven for Optimal Results
Using a preheated Dutch oven is a game-changer for achieving professional-quality results with your easy sourdough bread recipe at home. The sealed pot traps the moisture released by the dough as it heats up, effectively creating a miniature steam oven. This humid environment keeps the crust soft and pliable during the initial phase of baking, allowing the loaf to expand freely and achieve maximum oven spring. Without sufficient steam, the crust would set too early, restricting expansion and resulting in a denser loaf with less volume.
After the initial steamed bake (lid on), removing the lid allows the crust to dry out and crisp up beautifully while the interior continues to cook through. The high heat of the preheated Dutch oven also transfers efficiently to the dough, contributing to a strong bottom crust and overall even bake. While other methods exist, the Dutch oven method is widely favored for its reliability and the superior crust and oven spring it helps produce, making it ideal for ensuring success with your easy sourdough loaf.
Baking Without a Dutch Oven: Alternative Methods
While a Dutch oven is ideal, you can still bake a decent easy sourdough loaf without one. The key is to create steam in your regular oven. One common method is to place a baking stone or heavy baking sheet in the oven while it preheats to a high temperature (450-500°F / 230-260°C). When you're ready to bake, carefully slide your shaped and proofed dough (on parchment paper) onto the hot stone or sheet.
To generate steam, immediately place a pan filled with water or ice cubes on a rack below the baking stone, or pour hot water into a preheated cast iron skillet placed on the bottom rack. Close the oven door quickly to trap the steam.
Bake for the initial 20-25 minutes with steam, then carefully remove the steam pan and continue baking for another 20-25 minutes until golden brown. While this method works, it's often less effective at trapping steam than a Dutch oven, which might result in slightly less oven spring and a thinner crust compared to the Dutch oven method for your easy sourdough.
Step 6: Cooling and Slicing - The Final Touches
After your easy sourdough loaf emerges from the oven, golden and fragrant, the final crucial step is allowing it to cool completely on a wire rack. This isn't just about preventing you from burning your mouth; it's essential for the internal structure and flavor development of the bread. As the bread cools, residual heat continues to cook the interior slightly, and moisture redistributes throughout the loaf. Slicing into a hot loaf can result in a gummy texture because the starches haven't fully set.
Allow the loaf to cool for at least 2-3 hours, or ideally until it reaches room temperature. While it's tempting to slice into that beautiful, crispy crust immediately, patience here will be rewarded with the best possible texture and flavor from your easy sourdough bread recipe. Once fully cooled, use a sharp serrated knife to slice the loaf. Admire the open crumb you've created!
Tips for Baking the Perfect Easy Sourdough Bread
Achieving a Crispy Crust: Secrets and Techniques
A hallmark of great sourdough is a wonderfully crispy crust. Several factors contribute to this in your easy sourdough recipe. Firstly, high baking temperature is crucial. Baking at 450-500°F (230-260°C) ensures rapid heat transfer to the dough's surface, promoting crust development. Secondly, steam during the initial part of the bake is non-negotiable (as discussed with the Dutch oven or alternative methods). This steam keeps the crust soft initially, allowing for maximum expansion, and then, once the steam is removed, the high heat can work on drying and crisping the surface.
Finally, ensuring the loaf is baked long enough is key. Don't be afraid of a dark crust; it indicates maillard reactions have occurred, contributing to flavor and crispness. Baking until the internal temperature reaches 205-210°F (96-99°C) and the crust is a deep golden brown guarantees it's cooked through and the crust is properly developed. Cooling completely on a wire rack is also vital; placing a hot loaf on a solid surface will trap steam underneath and make the bottom crust soggy.
Developing an Open Crumb Structure: Mastering Fermentation
An open, airy crumb with irregular holes is a desirable characteristic of sourdough bread, and it's largely a result of successful fermentation and gluten development throughout your easy sourdough process. Starting with an active, vigorous easy sourdough starter recipe is fundamental; it needs to produce enough gas to inflate the gluten network. Proper hydration (70-75% for this recipe) is also important, as wetter doughs tend to yield a more open crumb, although they can be trickier to handle initially.
The series of stretches and folds during bulk fermentation are critical for building the gluten structure strong enough to trap the gases produced by the starter. Without sufficient strength, the dough won't hold its shape or volume, resulting in a dense crumb. Finally, adequate bulk fermentation and proofing time allow the dough to fill with gas bubbles. Learning to read your dough – observing its volume increase, surface bubbles, and feel – rather than relying solely on the clock is essential for mastering fermentation and achieving that coveted open crumb in your easy sourdough loaf.
Common Sourdough Baking Mistakes and How to Avoid Them
Even with an easy sourdough recipe, beginners can encounter issues. One frequent mistake is using an inactive or weak easy sourdough starter recipe. If your starter isn't consistently doubling within several hours after feeding, it won't have enough power to leaven your bread. Ensure your starter is active before you begin. Another common problem is insufficient bulk fermentation; ending this stage too early means the dough hasn't developed enough gas or flavor, resulting in a dense loaf. Learn to recognize the signs of a properly fermented dough (volume increase, bubbles).
Conversely, over-proofing, especially during room temperature proofing, can lead to a loaf that collapses in the oven. This is where cold proofing helps significantly. Not developing enough dough strength through mixing and folding is another pitfall, leading to flat loaves with poor crumb. Ensure you perform the recommended folds. Finally, not baking at a high enough temperature or for long enough will result in a pale crust and potentially undercooked interior. Use a thermometer to check internal temperature and trust the visual cues of a deep golden crust. Learning from each bake is part of the sourdough journey!
Storing Your Homemade Sourdough Bread
Keeping Your Sourdough Fresh for Longer
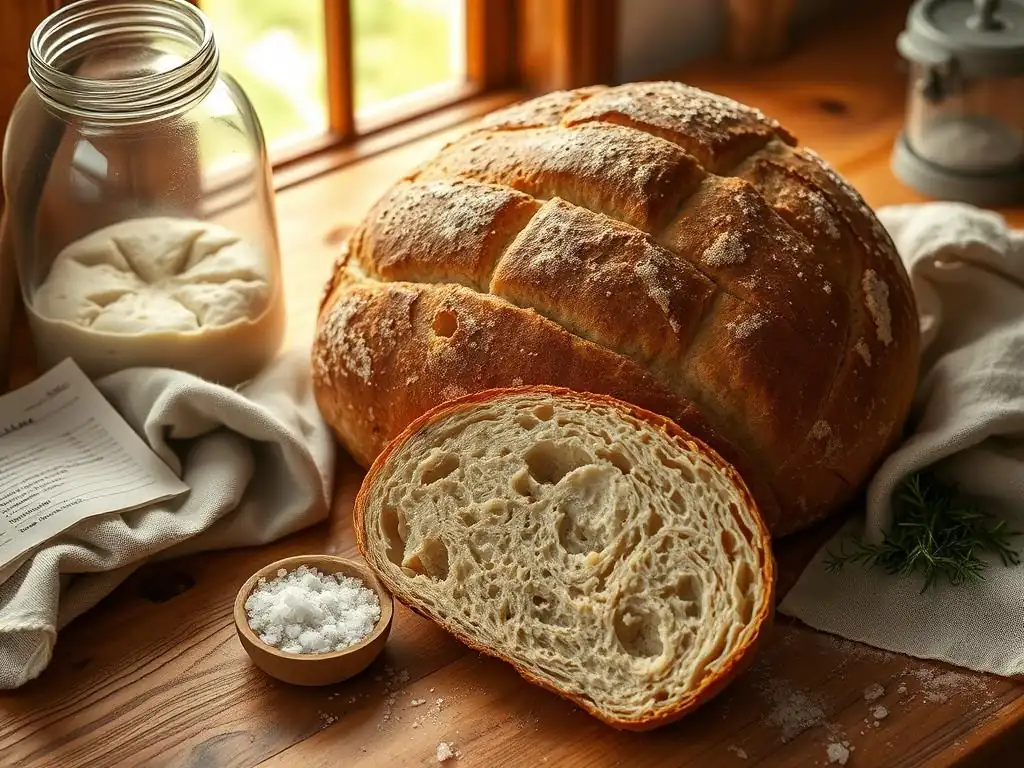
Homemade easy sourdough bread, with its natural acidity, tends to stay fresh longer than commercial yeast breads, but proper storage is still important to maintain its quality. Once the loaf is completely cooled, the best way to store it is at room temperature. A simple cloth bag or a linen bread bag allows the crust to breathe, helping to keep it from becoming soft. Avoid plastic bags for long-term storage at room temperature, as they trap moisture and can make the crust soggy and encourage mold growth relatively quickly.
If you don't plan to eat the loaf within 2-3 days, freezing is an excellent option. Allow the loaf to cool completely, then wrap it tightly in plastic wrap, followed by a layer of aluminum foil or place it in a freezer-safe bag. Frozen sourdough can last for several months.
To enjoy, simply thaw the loaf at room temperature, or for best results with the crust, reheat it in a moderate oven (around 350°F or 175°C) for 10-15 minutes directly from frozen or after thawing. Avoid storing sourdough in the refrigerator, as it tends to dry out the bread quickly due to starch retrogradation.
Creative Ways to Use Leftover Sourdough Bread
Even the best easy sourdough loaf might not be eaten entirely fresh. Stale sourdough is far from wasted; its robust flavor and firm texture make it perfect for various delicious uses. One classic is croutons: cube the bread, toss with olive oil and seasonings, and bake until crispy. These are fantastic in salads or soups. Another popular option is bruschetta or crostini: slice, toast, rub with garlic, and top with tomatoes, cheese, or other toppings.
Stale sourdough also makes excellent breadcrumbs, either fresh or dried and stored. For a hearty meal, consider panzanella, an Italian salad that uses chunks of stale bread soaked in dressing. French toast also benefits from the sturdy texture of day-old sourdough. Finally, it's the perfect bread for grilled cheese sandwiches or simply toasted and served with butter, jam, or avocado. Don't let any part of your wonderful easy sourdough go to waste!
Conclusion: Enjoy Your Homemade Easy Sourdough!
Celebrate Your Baking Success with BakeWithEase
Congratulations! You've taken the steps to bake your very own easy sourdough loaf using your homemade easy sourdough starter recipe. From nurturing your starter to navigating fermentation, shaping, and baking, you've accomplished a significant baking milestone. Take a moment to appreciate the beautiful crust, the tangy aroma, and the satisfying open crumb you've created. This loaf is a testament to your patience and willingness to learn, proving that baking authentic sourdough is achievable for everyone.
Sharing your homemade easy sourdough bread is one of the great joys of baking. Slice it thick, toast it, serve it with soup, or simply enjoy it plain. Each bite carries the unique flavor developed through natural fermentation. We at BakeWithEase are thrilled to have been part of your journey. Keep baking, keep experimenting, and remember that every loaf, regardless of perfection, is a step forward in mastering this rewarding craft. Your success with this easy sourdough recipe is just the beginning!
Frequently Asked Questions
What exactly is a sourdough starter, and why is it important for baking sourdough bread?
A sourdough starter is a live culture of wild yeast and bacteria used to leaven bread. It's important because it gives sourdough its characteristic tangy flavor and chewy texture, differing from commercial yeast.
How long does it typically take to create a sourdough starter from scratch using an easy sourdough starter recipe?
Creating a sourdough starter usually takes around 7-14 days, requiring daily feedings with flour and water. The timing depends on factors like room temperature and flour type.
What are some common problems people encounter when making a sourdough starter, and how can I troubleshoot them based on this easy sourdough starter recipe?
Common problems include lack of activity (not rising) or mold growth. Troubleshooting involves ensuring proper hydration, using whole wheat flour, and maintaining a warm environment.
Can I use different types of flour when feeding my sourdough starter with this easy sourdough starter recipe?
Yes, you can experiment with different flours like rye or whole wheat, which can boost activity. However, using unbleached all-purpose or bread flour is recommended in this easy recipe for consistent results.
How often should I feed my sourdough starter once it's active and ready to be used for baking delicious sourdough bread?
Once active, feed your starter at least once a day if kept at room temperature. If stored in the refrigerator, feed it once a week to maintain its health.
Final Reflection: The Unexpected Joys of Sourdough Simplicity
Baking sourdough bread needn't be a daunting task; mastering the basics unlocks a world of flavour and satisfaction. This article aimed to demystify the process, providing a straightforward recipe and encouraging even the most hesitant baker to try their hand at this ancient craft. The simplicity of the method presented, however, belies the profound connection it fosters between baker and bread, a connection that extends far beyond the kitchen.
The enduring appeal of sourdough lies not just in its delicious tang, but in the meditative process itself. The daily ritual of feeding the starter, the anticipation of the rise, the satisfying thud of the loaf hitting the baking stone – these are moments of mindful creation that resonate deeply. Bread is the staff of life,
a simple phrase, yet it speaks volumes about the fundamental role of bread in our cultures and our lives. This simple recipe, I hope, has helped to reconnect readers with this fundamental act of creation, reminding us of the beauty in the everyday.
Now, I invite you to embrace the challenge. Don't be intimidated by the seemingly complex nature of sourdough; instead, see it as an opportunity for growth, both in your baking skills and in your appreciation for the simple pleasures in life. Try the recipe, adapt it to your own tastes, and share your experiences. The journey of baking sourdough is as much about the process as it is about the product, and the rewards – both tangible and intangible – are well worth the effort. Let the aroma of freshly baked sourdough fill your home and your heart.
Unlock Your Inner Baker: Start Your Sourdough Journey Today!
Thanks for taking the time to explore the world of sourdough baking! We hope this recipe gave you the confidence to create delicious, homemade bread. Now it's time to put your new skills to the test.
- Bake your first loaf: Use the recipe as a starting point, but don't be afraid to experiment with different flours or hydration levels. This is where the real fun begins!
- Share your baking success (or even your struggles!): We'd love to see your sourdough creations on social media! Use #BakeWithEaseSourdough to connect with our community.
- Explore advanced techniques: Ready to level up? Check out our other articles on shaping, scoring, and proofing for even better results.
What unique ingredient will you add to your next sourdough loaf to personalize it? Let's hear your ideas in the comments below!