
Basic Sourdough Country Loaf Recipe (Easy Version)

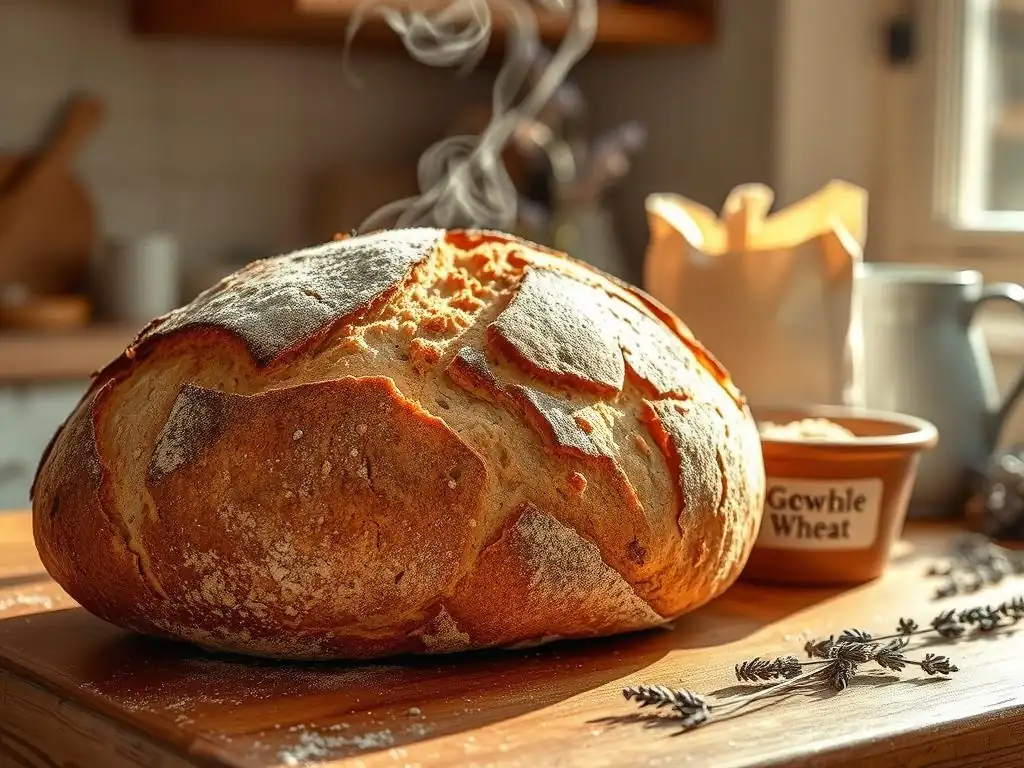
Welcome to BakeWithEase, your companion on the delicious journey of baking! Ever dreamt of pulling a perfectly crusty, tangy loaf from your oven? Unlocking the secrets to sourdough might seem daunting, but we're here to make it effortless. Dive into our Easy Sourdough Loaf Recipe and discover how simple it can be to create bakery-quality bread at home. Ready to experience the magic? Let's get baking!
- Introduction to Easy Sourdough Baking at Home
- Key Ingredients for Your Simple Sourdough Loaf
-
Step-by-Step Guide to Baking an Easy Sourdough Loaf
- Step 1: Preparing Your Sourdough Starter
- Step 2: Mixing the Dough for Your Country Loaf
- Step 3: Bulk Fermentation: Developing Flavor and Strength
- Step 4: Shaping Your Sourdough Country Loaf
- Step 5: Proofing Your Sourdough Loaf
- Step 6: Baking Your Easy Sourdough Bread
- Step 7: Cooling and Enjoying Your Homemade Sourdough
- Troubleshooting Common Sourdough Baking Problems
- Tips and Tricks for Mastering Easy Sourdough Baking
- Variations and Additions to Your Basic Sourdough Recipe
- Conclusion: Enjoy the Rewards of Easy Sourdough Baking
-
Frequently Asked Questions
- What makes this sourdough loaf recipe "easy"?
- What kind of flour is best for this easy sourdough loaf recipe?
- How long does the sourdough starter need to be active before using it in this recipe?
- Can I adjust the hydration level of this sourdough loaf recipe?
- What's the best way to bake this sourdough loaf for a crispy crust?
- Final Reflection: The Humble Loaf, A Gateway to Baking Joy
- Unleash Your Inner Baker: Craft Your Own Crusty Loaf!
Introduction to Easy Sourdough Baking at Home
BakeWithEase Welcomes You to Sourdough Simplicity
Welcome to BakeWithEase, your friendly guide to conquering the world of baking! We understand that sourdough can seem intimidating with its wild yeasts and long fermentation times, but we're here to show you that it doesn't have to be complicated. This basic sourdough country loaf recipe is specifically designed to strip away the complexity and leave you with a rewarding baking experience and a delicious, crusty loaf. Think of this as your first step into a truly satisfying baking journey, made simple.
Our goal at BakeWithEase is to empower home bakers of all skill levels. Whether you've been baking for years or are just starting out, this easy sourdough loaf recipe provides a clear, manageable path to achieving a fantastic result. We've streamlined the process, focusing on the essential techniques needed to produce a beautiful and flavorful loaf without requiring hours of active work or specialized equipment beyond the basics you might already have in your kitchen.
What Makes This Sourdough Loaf Recipe "Easy"?
Many traditional sourdough recipes involve complex schedules, multiple feeding steps, and intricate shaping techniques. Our easy sourdough loaf recipe simplifies these aspects. We focus on a straightforward feeding routine for your starter, a minimal kneading approach using folds, and a forgiving fermentation timeline suitable for busy schedules. The ingredient list is short and uses common pantry staples, making it accessible for anyone wanting to try their hand at baking an authentic homemade sourdough loaf.
Furthermore, this easy sourdough bread recipe emphasizes observation over strict timing. We guide you on how to read your dough and starter, which is a more reliable indicator of readiness than just following a clock. This approach builds confidence and teaches you the fundamentals of sourdough baking in a way that feels intuitive rather than rigid. By breaking down each step and explaining the 'why' behind it, we make the process understandable and, most importantly, enjoyable.
Key Ingredients for Your Simple Sourdough Loaf
Sourdough Starter: The Heart of Your Loaf
Your active sourdough starter is the living leavening agent that gives this bread its unique flavor, texture, and rise. An active starter is one that has been fed within the last 4-12 hours and has doubled or tripled in size, showing lots of bubbles. Using a robust, active starter is crucial for success with this easy sourdough loaf recipe, as it provides the necessary power to lift the dough during fermentation and baking. If your starter isn't active, the dough won't rise properly, resulting in a dense loaf.
Maintaining a healthy starter is key to consistent results in baking an easy sourdough bread. For this recipe, we recommend feeding your starter with a 1:1:1 ratio of starter, water, and flour (e.g., 50g starter, 50g water, 50g flour) about 6-8 hours before you plan to mix your dough. This ensures it's at its peak activity when you need it. You can keep a smaller amount of starter (like 50-100g) and simply feed it to the required amount for your recipe to minimize waste.
Flour Power: Choosing the Right Flour for Sourdough
For a classic country loaf, a blend of bread flour and whole wheat flour works beautifully. Bread flour, with its higher protein content (typically 12-14%), develops gluten easily, providing structure and strength to the dough, which is essential for trapping the gases produced by the starter and achieving a good rise. Whole wheat flour adds flavor and nutrients, though too much can make the dough heavy and harder to work with. A common ratio for a simple sourdough recipe is 90% bread flour and 10% whole wheat flour.
Using a good quality unbleached flour is recommended for the best results when baking an easy sourdough loaf. Bleached flours can sometimes affect the starter's activity. While you can make sourdough with all-purpose flour, bread flour generally yields a better crumb structure and volume. Experimenting with different flour blends is part of the fun of sourdough baking, but for this easy version, starting with the recommended blend provides a reliable foundation.
Water: Hydration is Key to a Great Sourdough
Water hydrates the flour, allowing gluten to develop, and provides the necessary environment for the sourdough starter's microbes to thrive. The ratio of water to flour (hydration percentage) significantly impacts the dough's handling and the final loaf's texture. This easy sourdough loaf recipe uses a moderate hydration level, typically between 70% and 75%, which is easier to handle for beginners compared to very high hydration doughs (80%+).
The temperature of your water can also influence the dough's temperature, which in turn affects fermentation speed. Using lukewarm water (around 80-85°F or 27-30°C) can help kickstart fermentation, especially in cooler environments. However, for this easy sourdough bread recipe, room temperature water is perfectly fine and simplifies the process. The key is consistency and using filtered water if your tap water contains high levels of chlorine, which can inhibit starter activity.
Salt: Enhancing Flavor and Structure
Salt is a critical, though often underestimated, ingredient in baking an easy sourdough loaf. Beyond enhancing the flavor of the bread, salt plays a vital role in controlling fermentation rate and strengthening the gluten network. It tightens the gluten structure, making the dough more manageable and contributing to a better crumb and crust. Without salt, the dough can be sticky and slack, and the bread will taste bland.
For this simple sourdough recipe, fine sea salt or kosher salt is preferred over iodized table salt, as iodine can sometimes negatively impact yeast activity. The typical salt percentage in sourdough is around 2% of the total flour weight. For example, if you use 500g of flour, you would use about 10g of salt. Adding the salt after the autolyse phase (when flour and water are mixed) is common practice, as it allows the flour to fully hydrate initially without the salt interfering with gluten development.
Step-by-Step Guide to Baking an Easy Sourdough Loaf
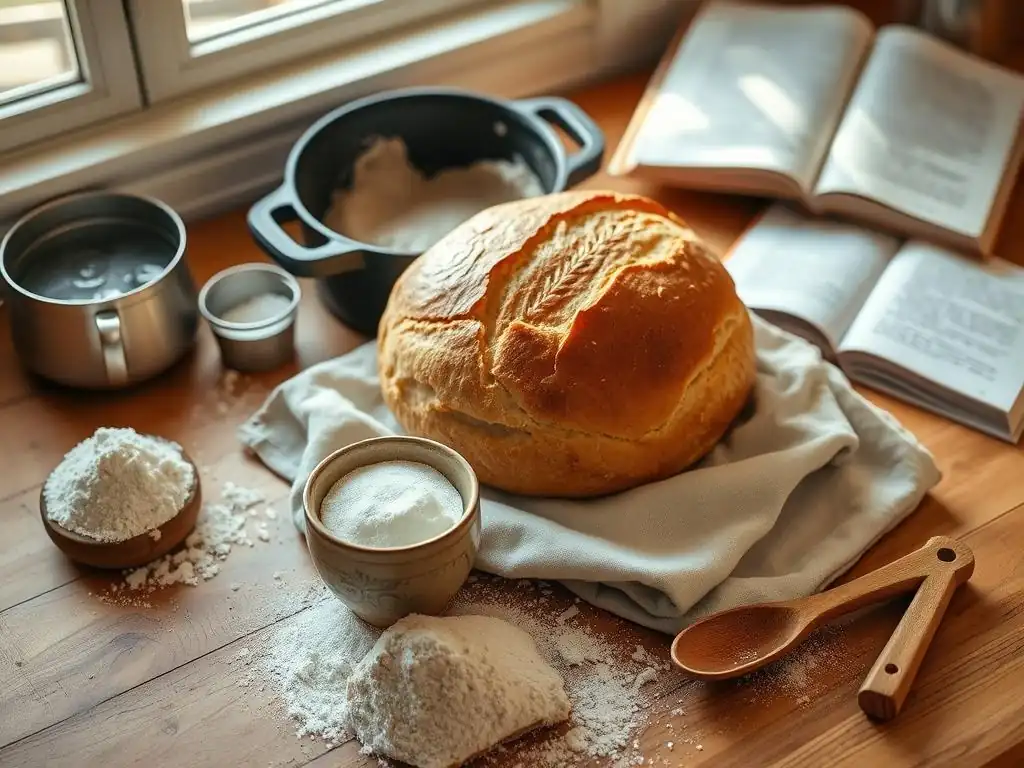
Step 1: Preparing Your Sourdough Starter
Before you begin mixing your dough for this easy sourdough loaf recipe, you need to ensure your sourdough starter is active and ready. This typically involves feeding your starter 6-12 hours before you plan to start mixing. Take a small amount of your mature starter (e.g., 20g), discard the rest (or use it for other recipes), and feed it with equal parts flour and water by weight (e.g., 100g flour and 100g water). Mix it thoroughly in a clean jar, mark the level, and let it sit at room temperature.
An active starter for baking should have significantly increased in volume, ideally doubling or tripling, show lots of bubbles on the surface and throughout the jar, and smell pleasantly tangy. A common test for readiness is the "float test": drop a small spoonful of starter into a glass of water; if it floats, it's active and ready to use. If it sinks, it might need more time or another feeding. Using an active starter is the most crucial step for ensuring your easy sourdough bread rises well.
Feeding Your Starter for Optimal Rise
To ensure your starter is at its peak for this easy sourdough loaf recipe, the feeding ratio and timing are important. A common and effective feeding strategy is a 1:1:1 ratio (starter:water:flour) by weight, as mentioned earlier. For example, if you need 100g of active starter for your recipe, you might take 30g of mature starter and feed it with 35g water and 35g flour about 6-8 hours before mixing. This moderate feeding ratio allows the starter to become very active without peaking too quickly and then falling.
The temperature of your kitchen also plays a significant role in how quickly your starter becomes active. In a warm kitchen (75-80°F or 24-27°C), a starter might be ready in 4-6 hours. In a cooler kitchen (68-72°F or 20-22°C), it could take 8-12 hours. Observing your starter's activity – watching it rise and get bubbly – is more reliable than strictly following a time. For this simple sourdough recipe, patience in waiting for a truly active starter will pay off in a better rise.
Step 2: Mixing the Dough for Your Country Loaf
Mixing the dough for this easy sourdough loaf recipe is a two-step process: the autolyse, followed by incorporating the starter and salt. Begin by combining the specified amount of flour and water in a large bowl. Mix them together with your hands or a spatula until no dry flour remains. The mixture will be shaggy and rough. This initial mixing step is called the autolyse, and it's a simple yet powerful technique.
Once the flour and water are combined, cover the bowl and let it rest for 30 minutes to 1 hour. This rest period allows the flour to fully hydrate and the gluten development to begin naturally without any effort. This pre-hydration makes the dough much easier to mix and handle later, which is a key element of making an easy sourdough bread.
Autolyse: Hydrating the Flour
The autolyse step, typically lasting between 30 minutes and 1 hour for this easy sourdough loaf recipe, is incredibly beneficial. During this time, the water penetrates the flour particles, activating enzymes that start breaking down proteins. This process, called proteolysis, helps relax the dough and makes the gluten network more pliable. It also allows for better absorption of water, leading to a more hydrated dough without it feeling excessively wet.
By skipping the starter and salt initially, the autolyse allows the flour's own enzymes to start building the gluten structure more effectively. When you later add the starter and salt, the dough is already partially developed, reducing the amount of kneading or folding required. This passive development is a core reason why this is an easy sourdough loaf recipe – it lets time and nature do some of the work for you.
Incorporating Starter and Salt
After the autolyse period, add your active sourdough starter and the salt to the dough. Dimple the surface of the dough with wet fingers to create pockets for the starter and salt. Mix everything together thoroughly, either by hand using a "pincer" or "folding" method within the bowl, or by briefly using a stand mixer on low speed for 1-2 minutes. The goal is to evenly distribute the starter and salt throughout the dough.
The dough will initially feel a bit messy and sticky, but keep mixing until the starter and salt are fully incorporated and the dough starts to come together. For this easy sourdough bread, you don't need to achieve a smooth, elastic dough at this stage. The gluten development will continue during the bulk fermentation with periodic folds. Just ensure there are no dry pockets of salt or unmixed starter.
Step 3: Bulk Fermentation: Developing Flavor and Strength
Bulk fermentation, also known as the first rise, is a critical stage in making this easy sourdough loaf recipe. This is when the active sourdough starter begins to ferment the sugars in the flour, producing carbon dioxide gas that causes the dough to rise, and organic acids that contribute to the characteristic sourdough flavor and aroma. It also allows the gluten network to strengthen through time and periodic folding.
The duration of bulk fermentation is highly dependent on temperature. In a warm environment (75-80°F or 24-27°C), it might take 3-4 hours. In a cooler environment (68-72°F or 20-22°C), it could take 6-8 hours or even longer. The dough is ready when it has significantly increased in volume (typically 50-75%), looks visibly bubbly, and feels lighter and aerated. For an easy sourdough bread, focus on the look and feel of the dough rather than a strict timeline.
Folding Techniques for Sourdough Dough
During bulk fermentation, we perform a series of "folds" to develop gluten and build strength in the dough without intensive kneading. For this easy sourdough loaf recipe, we recommend performing 3-4 sets of folds during the first 2-3 hours of bulk fermentation, with 30-45 minutes rest between each set. To perform a fold, lightly wet your hands, grab one edge of the dough, stretch it up gently without tearing, and fold it over the rest of the dough. Repeat this from all four sides (or stretch and fold from around the bowl).
These folds help align the gluten strands, build tension in the dough, and redistribute the yeast and bacteria, ensuring even fermentation. They also help degas the dough slightly, which strengthens the structure. After the first 2-3 hours and the folding sets are complete, let the dough rest undisturbed for the remainder of the bulk fermentation period. This allows the dough to build gas and finish its primary rise undisturbed.
Monitoring Dough Rise and Activity
Knowing when bulk fermentation is complete is key to a successful easy sourdough loaf recipe. Don't rely solely on time; observe your dough. It should look significantly larger, feel airy when you jiggle the bowl, and you should see bubbles on the surface and potentially through the sides of a clear container. A simple test is the "poke test": lightly flour your finger and gently press it into the dough about half an inch deep.
If the indentation slowly springs back only partially, the dough is likely ready. If it springs back immediately, it needs more time. If it stays indented completely, it may be over-fermented.
Aim for roughly a 50-75% increase in volume for this easy sourdough bread. Over-fermenting can lead to a slack dough that's difficult to shape and may collapse during baking. Under-fermenting results in a dense crumb. Learning to read your dough's cues is a fundamental skill in sourdough baking and makes this simple sourdough recipe more intuitive over time.
Step 4: Shaping Your Sourdough Country Loaf
Once bulk fermentation is complete, it's time to shape your easy sourdough loaf. First, gently turn the dough out onto a lightly floured surface. Be careful not to punch out all the precious gas bubbles that have developed. The goal of shaping is to create tension on the surface of the dough, which helps it hold its shape during proofing and baking and contributes to a good oven spring.
For a country loaf, you'll typically shape into a round (boule) or an oval (batard). Regardless of the final shape, the process involves gently coaxing the dough into a tighter form. This tension-building is crucial for preventing the dough from spreading out too much during the final rise and baking. Even for an easy sourdough loaf recipe, mastering basic shaping techniques significantly improves the final result.
Pre-Shaping for Even Structure
Pre-shaping is an intermediate step that helps make the final shaping easier and more effective for this easy sourdough loaf recipe. After turning the dough out, gently fold the edges towards the center to create a rough ball or log, depending on your desired final shape. Don't worry about making it perfect; the goal is just to establish some initial tension and structure.
Once pre-shaped, let the dough rest on the counter, covered, for 20-30 minutes. This resting period allows the gluten to relax, making the dough more pliable and easier to handle during the final shaping without tearing. This simple step prevents frustration and ensures you can build good surface tension in the final shape, contributing to a better rise and structure in your simple sourdough recipe.
Final Shaping: Creating a Tight Dough Ball
After the rest, perform the final shaping. For a boule, gently flip the pre-shaped dough over so the seam is facing up. Then, working from the top, fold the top third down towards the middle. Rotate the dough 180 degrees and fold the new top third down.
Now, using the sides, stretch one side out and fold it over the center, then repeat with the other side. Finally, use a bench scraper or your hands to gently cup the dough and pull it towards you, creating tension on the bottom surface. Repeat this pulling motion a few times, rotating the dough slightly each time, until you have a taut, round ball.
For a batard, the initial folds are similar, but the final step involves rolling the dough up tightly from one end to the other, then sealing the seam by pinching. The key in both shapes for this easy sourdough bread is to create a smooth, taut surface on top and a sealed seam on the bottom. This surface tension is what holds the loaf's shape and encourages a beautiful oven spring.
Step 5: Proofing Your Sourdough Loaf
Proofing, or the final rise, is the period after shaping where the dough rests and accumulates gas before baking. The shaped loaf is typically placed into a floured basket (banneton) or a bowl lined with a floured cloth, seam-side up if baking seam-side down, or seam-side down if scoring and baking seam-side up. This provides support and prevents the dough from spreading.
The duration and temperature of proofing significantly impact the final loaf. For this easy sourdough loaf recipe, we recommend cold proofing in the refrigerator, as it's more forgiving and develops deeper flavor. However, a shorter room-temperature proof is also an option if you're in a hurry.
Cold Proofing vs. Room Temperature Proofing
Cold proofing involves placing the shaped dough in the refrigerator (typically 38-40°F or 3-4°C) for an extended period, usually 8-24 hours. The cold temperature significantly slows down fermentation, allowing the flavors to deepen and making the dough easier to handle and score. This is the preferred method for an easy sourdough bread because it's very flexible – you can bake the loaf anytime within that 24-hour window, fitting baking into your schedule.
Room temperature proofing is faster, typically taking 1-3 hours depending on the ambient temperature. The dough ferments more rapidly, and you need to watch it closely. The dough is ready when it feels light and airy and has increased visibly in volume (though less so than during bulk fermentation). While quicker, it offers less flexibility and requires more precise timing than cold proofing for this simple sourdough recipe.
The Float Test: Checking for Readiness
While the "float test" is commonly used for starter activity, a variation can help determine if your dough is ready after proofing, especially for room temperature proofing. Gently poke the dough with a floured finger. If the indentation slowly springs back only halfway, it's likely perfectly proofed. If it springs back immediately, it's under-proofed and needs more time. If the indentation stays completely and doesn't spring back at all, it's over-proofed and may collapse when baked.
For cold-proofed dough, the poke test is less reliable because the cold dough is firmer. Instead, rely on the visual cue of slight expansion in the basket and the knowledge that cold proofing over 8-12 hours is generally sufficient for this easy sourdough loaf recipe. The cold also makes the dough firm enough for easy scoring.
Step 6: Baking Your Easy Sourdough Bread
Baking sourdough requires high heat and initially a moist environment to achieve a beautiful crust and maximize oven spring. The most common method for home bakers is using a Dutch oven, which mimics a professional bakery oven by trapping steam around the loaf. Preheat your oven and Dutch oven together to a high temperature, typically 450-500°F (230-260°C), for at least 30-60 minutes.
Preheating to a high temperature ensures that when the dough hits the hot surface, it gets an immediate burst of heat, causing rapid expansion (oven spring) before the crust sets. The trapped steam in the Dutch oven keeps the surface of the dough moist, allowing it to expand fully without cracking prematurely and contributing to a thinner, crispier crust. This initial high-heat, steam-rich environment is key to a successful simple sourdough recipe bake.
Preheating Your Oven and Dutch Oven
For this easy sourdough loaf recipe, preheating your oven to 475°F (245°C) with your empty Dutch oven inside is a reliable starting point. Allow at least 45 minutes for both the oven and the heavy pot to reach the target temperature. A properly preheated Dutch oven is crucial for transferring heat effectively to the bottom of the loaf, ensuring a good base crust and overall rise.
Carefully remove the hot Dutch oven from the oven using oven mitts. Gently transfer your proofed dough from the banneton into the hot Dutch oven. You can do this by placing a piece of parchment paper over the banneton, inverting it onto the parchment, and then using the parchment to carefully lower the dough into the pot. This minimizes handling the cold dough and prevents burns.
Scoring Your Loaf: Preventing Explosions
Before placing the dough into the hot Dutch oven, you need to score it. Scoring involves making intentional cuts on the surface of the dough with a sharp blade (like a razor blade or lame). These cuts serve two main purposes: they provide weak points for the dough to expand predictably during oven spring, preventing uncontrolled cracking, and they allow steam to escape from within the loaf, contributing to the final structure.
For this easy sourdough bread, a single long slash or a simple cross pattern is sufficient. Hold the blade at about a 30-45 degree angle to the dough surface and make a swift, confident cut about half an inch deep. The depth and angle of the score influence the final look and spring of the loaf. Scoring cold, proofed dough is significantly easier than scoring dough at room temperature because it's firmer and holds its shape better.
Baking Time and Temperature for a Perfect Crust
Once scored and placed in the preheated Dutch oven, cover it with the lid and place it back in the oven. Bake with the lid on for the first 20 minutes at 475°F (245°C). This trapped steam phase is where most of your oven spring will occur. After 20 minutes, carefully remove the lid. The loaf should look pale but significantly expanded.
Reduce the oven temperature to 450°F (230°C) and continue baking without the lid for another 20-25 minutes. This phase allows the crust to brown and crisp up. The loaf is done when the crust is a deep golden-brown and the internal temperature reaches 200-210°F (93-99°C). If you tap the bottom of the loaf, it should sound hollow. This two-stage baking process ensures both great oven spring and a beautiful, crispy crust on your simple sourdough recipe.
Step 7: Cooling and Enjoying Your Homemade Sourdough
Once your easy sourdough loaf is baked to perfection, carefully remove it from the Dutch oven and transfer it to a wire rack to cool completely. This cooling step is arguably as important as the baking itself. While it's tempting to slice into a warm loaf, cutting too early can result in a gummy texture inside, as the internal structure is still setting and moisture is redistributing.
Allow the loaf to cool for at least 2-3 hours, or ideally longer, before slicing. As it cools, steam escapes, and the starches within the bread structure solidify, leading to the desirable open crumb and firm yet tender texture characteristic of a great homemade sourdough loaf. Patience here will be rewarded with the best possible result from your easy sourdough bread efforts.
The Importance of Cooling Before Slicing
Cooling allows the internal temperature of the loaf to drop gradually. During baking, water inside the bread turns to steam. As the bread cools, this steam condenses and is reabsorbed by the starches, which then solidify. This process is crucial for developing the final crumb structure and ensuring the bread isn't gummy or excessively moist inside. Cutting into a hot loaf disrupts this process, compressing the crumb and releasing steam prematurely.
Think of it like resting a steak; the juices need time to redistribute. Similarly, the moisture and structure in your easy sourdough loaf need time to settle. Letting it cool completely on a wire rack allows air circulation all around the loaf, preventing the bottom crust from becoming soggy from trapped heat and moisture.
Serving Suggestions for Your Sourdough Country Loaf
Once fully cooled, your beautiful homemade sourdough loaf is ready to be enjoyed! Slice it with a serrated knife. The simple, tangy flavor and chewy texture of this easy sourdough bread make it incredibly versatile. Serve thick slices toasted and slathered with butter, use it to make amazing sandwiches, or pair it with soups, stews, or salads.
For a delightful breakfast, try it toasted with avocado and flaky sea salt or with jam and ricotta. It also makes an excellent base for bruschetta or garlic bread. The slightly sour tang complements a wide range of toppings and dishes. Celebrate your success with this simple sourdough recipe by sharing your delicious creation!
Troubleshooting Common Sourdough Baking Problems
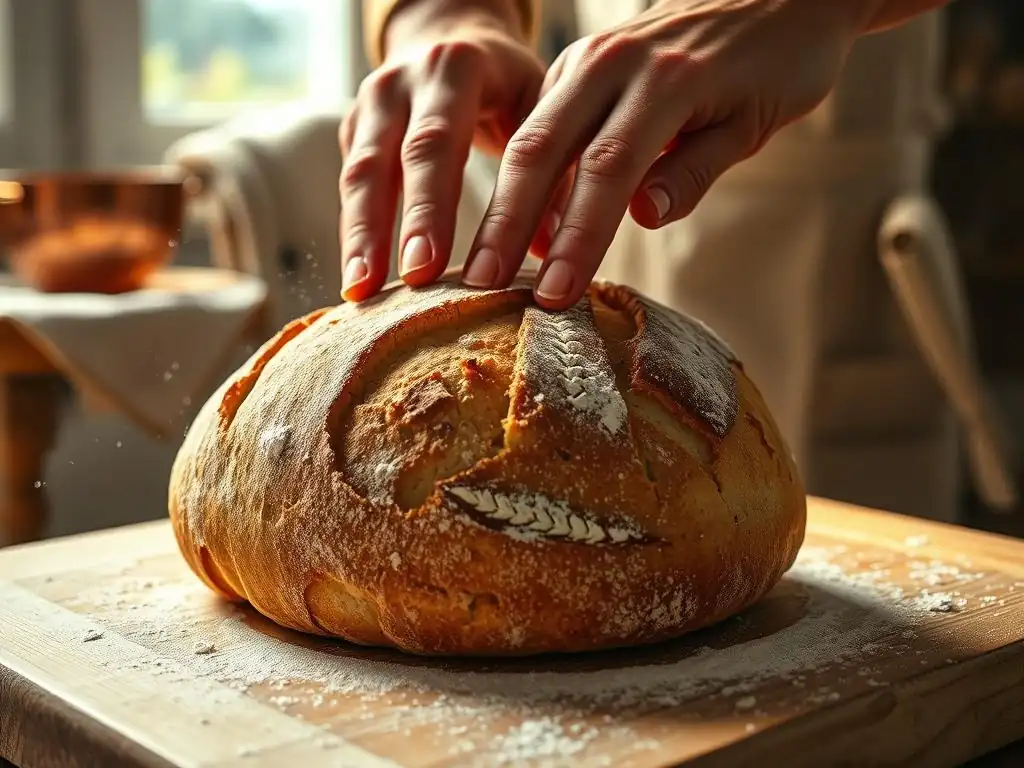
My Sourdough Loaf Didn't Rise
There are several common reasons why an easy sourdough loaf recipe might not rise as expected. The most frequent culprit is an inactive or weak sourdough starter. If your starter wasn't bubbly, significantly increased in volume, and didn't pass the float test before mixing, it didn't have enough leavening power to lift the dough. Ensure your starter is consistently fed and active before baking.
Another reason could be insufficient bulk fermentation or proofing time. If the dough didn't increase by 50-75% during bulk fermentation or feel airy, it needed more time. Similarly, if the final proof was too short, the yeast didn't produce enough gas. Temperature is key here – colder temperatures require longer fermentation times. Using temperature approximations like aiming for a final dough temperature of 75-78°F (24-26°C) after mixing can help ensure consistent fermentation speed.
My Sourdough Loaf is Too Dense
A dense crumb often goes hand-in-hand with a poor rise. In addition to the issues mentioned above (inactive starter, insufficient fermentation), dough hydration can play a role. If the dough is too dry (low hydration), it can be difficult for the gluten network to expand and trap gas effectively. This easy sourdough loaf recipe uses a moderate hydration, but ensure you're measuring accurately, perhaps weighing your ingredients for precision.
Overworking the dough during mixing or shaping can also lead to a dense loaf by tearing the gluten network. Gentle handling during folds and shaping is crucial. Finally, cutting the loaf before it has fully cooled is a major cause of a gummy, dense interior. Always allow your homemade sourdough loaf to cool completely for 2-3 hours before slicing.
My Sourdough Loaf is Sour
While a characteristic tang is desired in an easy sourdough loaf recipe, excessive sourness can occur. This is often due to prolonged fermentation, particularly a very long cold proofing period or bulk fermentation at cooler temperatures. The bacteria in the starter, which produce lactic and acetic acids, are more active at cooler temperatures and over longer durations compared to the yeast.
If you find your simple sourdough recipe consistently too sour, try shortening your bulk fermentation time slightly or proofing at a slightly warmer temperature to favor yeast activity over bacterial activity. Also, ensure you are using an active starter for your bake; using a starter that has peaked and fallen can sometimes contribute to increased sourness.
My Sourdough Loaf is Gummy
A gummy texture is typically caused by insufficient baking or slicing the loaf before it has fully cooled. If the internal temperature of your easy sourdough bread didn't reach 200-210°F (93-99°C), it's likely underbaked, and the starches haven't fully set. Ensure your oven temperature is accurate (an oven thermometer can help) and bake until the crust is deep golden brown and the internal temperature is correct.
As mentioned earlier, cooling is paramount. The internal structure of the bread continues to cook and set as it cools. Cutting into a hot loaf releases steam prematurely and compresses the still-soft interior, resulting in a gummy texture. Always allow your homemade sourdough loaf to cool completely on a wire rack for at least 2-3 hours before slicing.
Tips and Tricks for Mastering Easy Sourdough Baking
Maintaining a Healthy Sourdough Starter
A healthy, active sourdough starter is the bedrock of a successful easy sourdough loaf recipe. Keep your starter consistently fed, ideally at least once a week if stored in the refrigerator. When you plan to bake, take a small amount and feed it 1-2 times at room temperature until it shows reliable activity (doubling or tripling within 6-12 hours).
Observe your starter's behavior. It should smell pleasant, tangy, and slightly yeasty, not strongly alcoholic or like acetone. If it seems sluggish, try feeding it with a different type of flour (like rye or whole wheat for a few feedings) or keeping it in a warmer spot (around 75-80°F or 24-27°C) to boost activity. Consistency in feeding and observation will lead to a robust starter ready for your simple sourdough recipe.
Achieving a Crispy Crust
Several factors contribute to a beautiful, crispy crust on your easy sourdough bread. Using a Dutch oven or creating steam in your oven during the initial baking phase is essential, as it keeps the surface moist and allows for maximum expansion before the crust sets. Preheating your oven and Dutch oven to a high temperature (475-500°F or 245-260°C) is also crucial for that initial burst of heat.
Baking with the lid off for the second half of the bake allows the crust to dry out and brown properly. Ensure this phase is long enough (typically 20-25 minutes) and at a sufficient temperature (around 450°F or 230°C) to achieve a deep color. Finally, cooling the loaf completely on a wire rack is vital; placing it on a solid surface can trap moisture and make the bottom crust soggy.
Storing Your Sourdough Loaf
Proper storage helps maintain the quality of your homemade sourdough loaf. Once completely cooled, a whole loaf can be stored cut-side down on a cutting board or wrapped loosely in a linen or cotton bread bag at room temperature for 1-2 days. Avoid airtight plastic bags or containers initially, as they can soften the crust.
For longer storage or once the loaf is cut, wrap the remaining portion tightly in plastic wrap or place it in a sealed container to prevent it from drying out. Stored this way, it will last 3-4 days at room temperature. For even longer storage, slice the cooled loaf and freeze the slices in a freezer-safe bag. To enjoy, simply toast directly from frozen.
Variations and Additions to Your Basic Sourdough Recipe
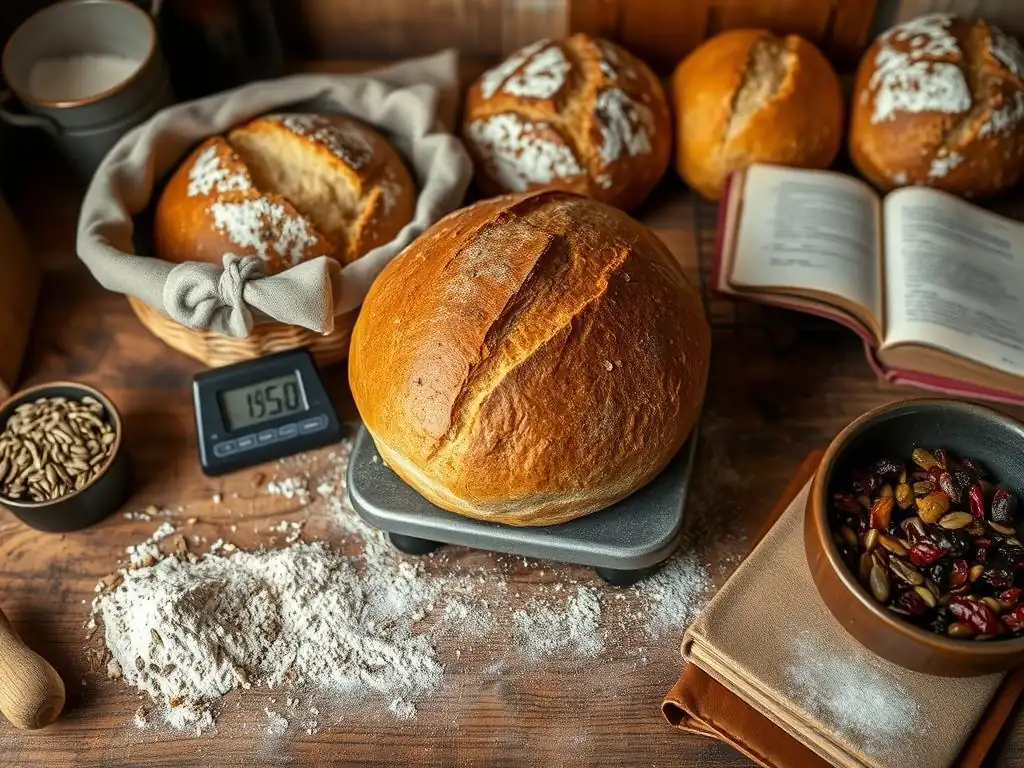
Adding Seeds and Grains for Texture
Once you're comfortable with this easy sourdough loaf recipe, you can start experimenting with additions. Incorporating seeds and grains is a popular variation that adds flavor, texture, and nutrients. You can add a mix of seeds like sunflower, pumpkin, flax, and sesame directly into the dough during the initial mixing phase, typically around 5-10% of the total flour weight (e.g., 25-50g for a 500g flour loaf).
For a more pronounced texture, you can create a "soaker" or "levain" with grains like rolled oats, cracked wheat, or cooked quinoa by soaking them in hot water for a few hours or overnight before adding them to the dough. This prevents them from absorbing moisture from the dough during fermentation. Adding seeds and grains transforms a simple sourdough recipe into a rustic, hearty loaf.
Incorporating Herbs and Spices for Flavor
Adding herbs and spices can elevate the flavor profile of your easy sourdough bread. Dried herbs like rosemary, thyme, or oregano, or spices such as black pepper, caraway seeds, or fennel seeds, can be mixed into the dough during the initial mixing. A common practice is to add about 1-2 teaspoons of dried herbs or spices per 500g of flour, adjusting to your preference.
Cheese is another popular addition. Cubes of cheddar, Gruyere, or Parmesan can be folded into the dough during the later stages of bulk fermentation or during shaping. Olives, sun-dried tomatoes, or roasted garlic are also fantastic savory additions that pair wonderfully with the tang of a homemade sourdough loaf.
Making Different Sourdough Shapes
While this easy sourdough loaf recipe focuses on a country loaf (boule or batard), the same dough can be used to make other shapes. For instance, you can divide the dough and shape it into smaller rolls or baguettes. Rolls will require a much shorter proofing time (perhaps 30-60 minutes at room temperature or a few hours cold proofing) and a shorter bake time (around 20-25 minutes).
Baguettes are trickier due to their high surface area and require specific shaping techniques and baking methods (often involving steam trays in the oven), but the base dough from this simple sourdough recipe is a good starting point. Experimenting with shapes is a fun way to apply your newfound sourdough skills and add variety to your baking repertoire.
Conclusion: Enjoy the Rewards of Easy Sourdough Baking
Celebrate Your Homemade Sourdough Country Loaf
Congratulations! You've successfully baked your first (or latest) easy sourdough loaf. Take a moment to appreciate the journey from active starter to a beautifully baked, crusty loaf. The aroma filling your kitchen is a testament to your patience and effort. This simple sourdough recipe has guided you through the essential steps, proving that baking delicious homemade sourdough is achievable.
Each loaf you bake will teach you something new about reading your dough, understanding fermentation, and mastering the subtle nuances of working with a living culture. Don't worry if your first loaf isn't perfect; every baker has missteps. What matters is the process and the delicious result you've created with this easy sourdough bread recipe.
Continue Your Sourdough Journey with BakeWithEase
This easy sourdough country loaf recipe is just the beginning! Now that you've mastered the basics, you can explore variations, try different flour blends, or tackle more complex sourdough recipes. BakeWithEase is here to support you every step of the way, with resources on maintaining your starter, perfecting your technique, and discovering new sourdough creations.
Keep practicing, keep experimenting, and most importantly, keep enjoying the rewarding process of baking a homemade sourdough loaf. With this simple sourdough recipe as your foundation, the world of sourdough baking is open to you, promising endless opportunities for delicious bread and baking satisfaction. Happy Baking!
Frequently Asked Questions
What makes this sourdough loaf recipe "easy"?
This recipe simplifies the sourdough process by using a higher percentage of starter and a shorter bulk fermentation time, making it more approachable for beginners.
What kind of flour is best for this easy sourdough loaf recipe?
We recommend using a combination of bread flour for structure and all-purpose flour for a softer crumb. You can also experiment with a small amount of whole wheat.
How long does the sourdough starter need to be active before using it in this recipe?
Your starter should be active and bubbly, having at least doubled in size after feeding. This usually takes 4-12 hours depending on your starter's strength and temperature.
Can I adjust the hydration level of this sourdough loaf recipe?
While this recipe is designed for a manageable hydration, you can increase it slightly (by 10-20 grams of water) if you're comfortable working with a wetter dough.
What's the best way to bake this sourdough loaf for a crispy crust?
Baking in a Dutch oven is highly recommended, as it traps steam and creates a crispy, well-browned crust. You can also use a preheated baking stone with a water pan for steam.
Final Reflection: The Humble Loaf, A Gateway to Baking Joy
The accessibility of sourdough baking is transforming home kitchens, proving that crafting a delicious, artisanal loaf isn't the exclusive domain of experienced bakers. This simple recipe demystifies the process, making the satisfaction of a perfectly risen, crusty loaf attainable for everyone. The ease of this method opens up a world of culinary exploration, empowering individuals to connect with the ancient art of bread making.
The enduring appeal of sourdough lies not just in its taste, but in the meditative process itself. The rhythmic feeding of the starter, the gentle kneading, the anticipation of the oven's warmth – these are acts of mindful creation that offer a welcome respite from the frenetic pace of modern life. Bread is the staff of life,
a simple phrase, yet it speaks volumes about the fundamental role of baking in human history and its continued power to nourish us, both physically and spiritually.
Now, consider your own kitchen. Imagine the aroma of freshly baked sourdough filling your home, the satisfying crust giving way to a soft, tangy crumb. This isn't just a recipe; it's an invitation. An invitation to experiment, to learn, and to discover the profound joy of creating something delicious with your own two hands. Take the leap, try this recipe, and experience the magic of sourdough for yourself. You might just surprise yourself with what you can achieve.
Unleash Your Inner Baker: Craft Your Own Crusty Loaf!
Thanks for joining us on this sourdough journey! We hope you've gained the confidence to tackle this classic bread. Now it's time to get baking!
- Bake your own loaf: Grab your ingredients and follow the recipe – you'll be amazed at how rewarding (and delicious!) it is. Don't be afraid to experiment with different flours or additions!
- Share your creation: Post a picture of your masterpiece on social media and tag us @BakeWithEase – we love seeing your baking triumphs!
- Explore more sourdough recipes: Dive deeper into the world of sourdough with our other easy-to-follow recipes on BakeWithEase.com.
What unique twist will you add to your sourdough country loaf? Let us know in the comments below!