
Basic Sourdough Recipe: Using Your Active Starter Effectively

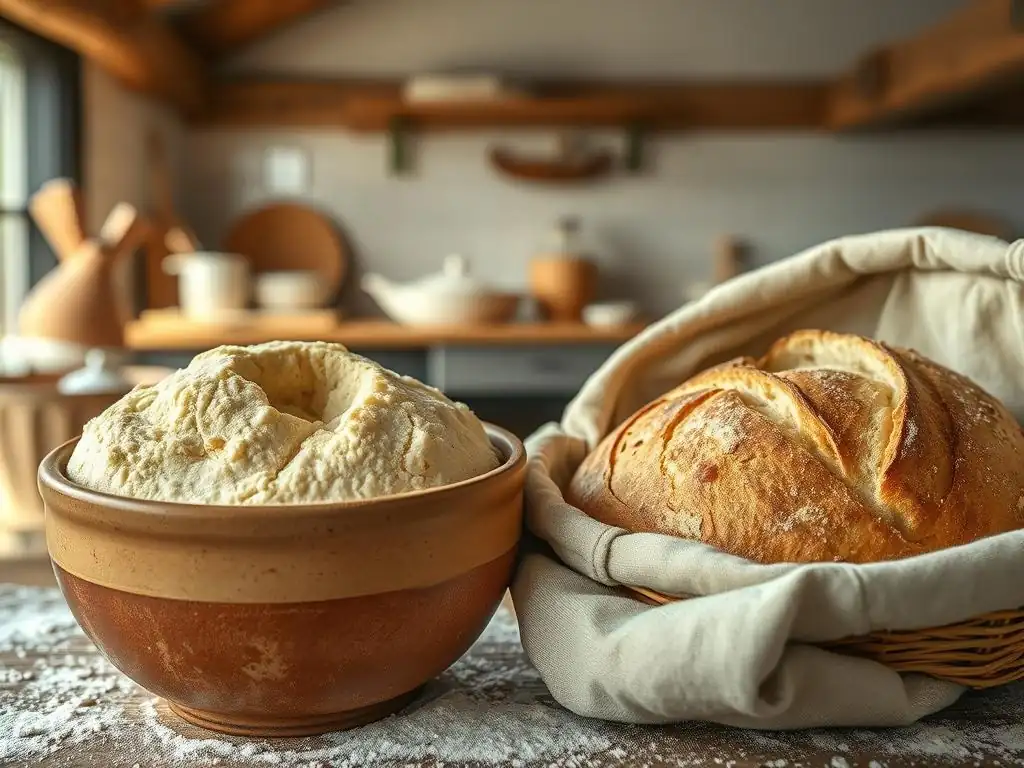
Welcome to BakeWithEase, your trusted guide to baking brilliance! Are you ready to transform your active starter into a masterpiece? Dive into our Basic Sourdough Recipe and unlock the secrets to creating incredible, artisan bread. This isn't just another recipe; it's your next step towards sourdough mastery. Curious about the perfect rise and irresistible tang? Let's get baking!
- Introduction to Baking Sourdough with an Active Starter
- Gathering Your Ingredients for this Sourdough Bread Recipe
-
Step-by-Step Guide to Making Sourdough Bread with Active Starter
- Step 1: Preparing Your Active Sourdough Starter
- Step 2: Autolyse - Hydrating the Flour
- Step 3: Mixing the Dough and Adding the Active Starter
- Step 4: Bulk Fermentation - The First Rise
- Step 5: Shaping the Sourdough Loaf
- Step 6: Proofing the Sourdough
- Step 7: Baking the Sourdough Bread
- Step 8: Cooling and Slicing Your Homemade Sourdough
- Troubleshooting Common Sourdough Baking Problems
- Storing Your Sourdough Bread for Freshness
- Advanced Sourdough Techniques to Explore
- Conclusion: Enjoying Your Homemade Active Starter Sourdough Bread
-
Frequently Asked Questions
- What defines an active starter, as mentioned in the "Basic Sourdough Recipe"?
- Can I use a different type of flour than specified in the "Basic Sourdough Recipe"?
- How long does it take to make sourdough bread using the "Basic Sourdough Recipe"?
- What's the best way to store sourdough bread made with the "Basic Sourdough Recipe"?
- What if my sourdough bread doesn't rise properly, even when using an active starter as indicated in the "Basic Sourdough Recipe"?
- Final Reflection: The Enduring Magic of a Living Starter
- Unleash Your Inner Baker: Mastering Sourdough Today!
Introduction to Baking Sourdough with an Active Starter
Mastering the art of baking sourdough bread might seem intimidating at first glance, but at its heart, it relies on a few fundamental principles and one key ingredient: a vibrant, active sourdough starter. This guide provides a straightforward, reliable active starter sourdough bread recipe designed to help you achieve a beautiful, flavorful loaf right in your home kitchen. It strips away complexity, focusing on the essential steps where your starter's activity is paramount. By understanding and utilizing a starter that is truly ready, you unlock the natural leavening power needed for that signature sourdough rise and open crumb structure.
This recipe is crafted to be accessible while still producing professional-quality results. We emphasize techniques that are easy to follow but yield significant improvements in your bread's texture and flavor. The focus is squarely on how your starter interacts with the dough ingredients and how to manage the fermentation process effectively. Whether you're aiming for your very first successful loaf or looking to refine your technique, this recipe for sourdough with active starter will guide you through each stage, ensuring you build confidence alongside your baking skills.
Understanding the Importance of an Active Starter for Sourdough Bread
An active starter is the lifeblood of any successful sourdough bake. It's a living culture of wild yeasts and beneficial bacteria that work together to leaven the dough, create complex flavors, and improve the bread's digestibility. When we talk about an "active" starter, we mean one that has recently been fed and is bubbling vigorously, has roughly doubled or tripled in size, and smells pleasantly tangy. This peak activity indicates the yeast population is robust and ready to produce the carbon dioxide gas needed to make your bread rise.
Using a starter that isn't sufficiently active is one of the most common reasons for dense, flat sourdough loaves. A sluggish starter simply doesn't have the power to lift the dough during fermentation and baking. Think of it like trying to run a marathon on low energy; the results won't be great. A healthy, active culture ensures that your active starter sourdough bread recipe has the best possible chance of success, contributing significantly to the bread's volume, texture, and the development of those characteristic sour notes that make sourdough so unique and delicious.
Why This Basic Sourdough Recipe Works: Simplicity and Active Starter Power
This particular sourdough bread recipe is designed with simplicity and reliability in mind, specifically leveraging the power of a properly maintained active starter. It uses minimal ingredients and straightforward techniques that are easy to replicate. The process is broken down into manageable steps, from mixing the dough to baking, with clear indicators of what to look for at each stage. This approach demystifies the sourdough process, making it less daunting for bakers who might have had previous attempts fall short.
The core principle behind this basic sourdough recipe using active starter is maximizing the starter's leavening potential. By ensuring your starter is at its peak activity when it's incorporated into the dough, you give the fermentation process a strong start. The recipe relies on relatively standard hydration levels and fermentation times that are forgiving yet effective for developing flavor and structure. It's a foundational recipe that, once mastered, provides a solid basis for exploring more complex sourdough variations.
Gathering Your Ingredients for this Sourdough Bread Recipe
Before you begin mixing, it's crucial to gather all your ingredients and ensure they are measured accurately. Precision in baking, especially with sourdough, can make a significant difference in the final outcome. This active starter sourdough bread recipe typically requires only a few staple items: flour, water, salt, and of course, your active sourdough starter. Having everything prepped and measured before you start the mixing process makes the entire workflow smoother and helps prevent mistakes.
Taking the time to weigh your ingredients using a digital scale is highly recommended for consistent results. Volume measurements can vary significantly depending on how you scoop flour, for example. For this recipe for sourdough with active starter, using grams or ounces ensures you are following the hydration percentages accurately, which is key to managing dough consistency and fermentation.
Essential Ingredients for a Successful Sourdough Loaf
The foundation of this active starter sourdough bread recipe lies in just four simple ingredients. First, you need your active sourdough starter, bubbly and ready to go. Next is flour; while all-purpose flour can work, bread flour is often preferred due to its higher protein content, which helps develop gluten structure. Water is essential for hydrating the flour and activating the starter's microbes; filtered or non-chlorinated water is best as chlorine can potentially inhibit microbial activity. Finally, salt is crucial for flavor, controlling fermentation speed, and strengthening the gluten network.
Here's a typical ratio you might encounter in a basic active starter sourdough recipe:
- Active Sourdough Starter: 20%
- Flour: 100%
- Water: 65-75% (hydration level)
- Salt: 2%
Note: These percentages are based on the weight of the flour. For example, using 500g of flour at 70% hydration would require 350g of water. The starter amount would be 100g, and salt 10g.
Ingredient Quality Matters: Choosing the Best Flour for Your Sourdough
The quality and type of flour you use have a profound impact on your sourdough bread. For this active starter sourdough bread recipe, using a good quality bread flour with a protein content of around 12-14% is highly recommended. This protein forms the gluten network that traps the gases produced by your active starter, allowing the bread to rise and develop that desirable open crumb. Different brands and types of flour absorb water differently, so you might need to adjust the water slightly based on the flour you choose.
Experimenting with different flours can lead to exciting variations in your sourdough. While white bread flour is standard for many basic recipes, incorporating a percentage of whole wheat or rye flour can add deeper flavor and nutrition. For instance, using 10% whole wheat flour (50g whole wheat, 450g white bread flour for a 500g total) will change the dough's characteristics and require slightly more water as whole grains are thirstier. Always source fresh flour and store it properly to maintain its quality and performance in your recipe for sourdough with active starter.
Step-by-Step Guide to Making Sourdough Bread with Active Starter
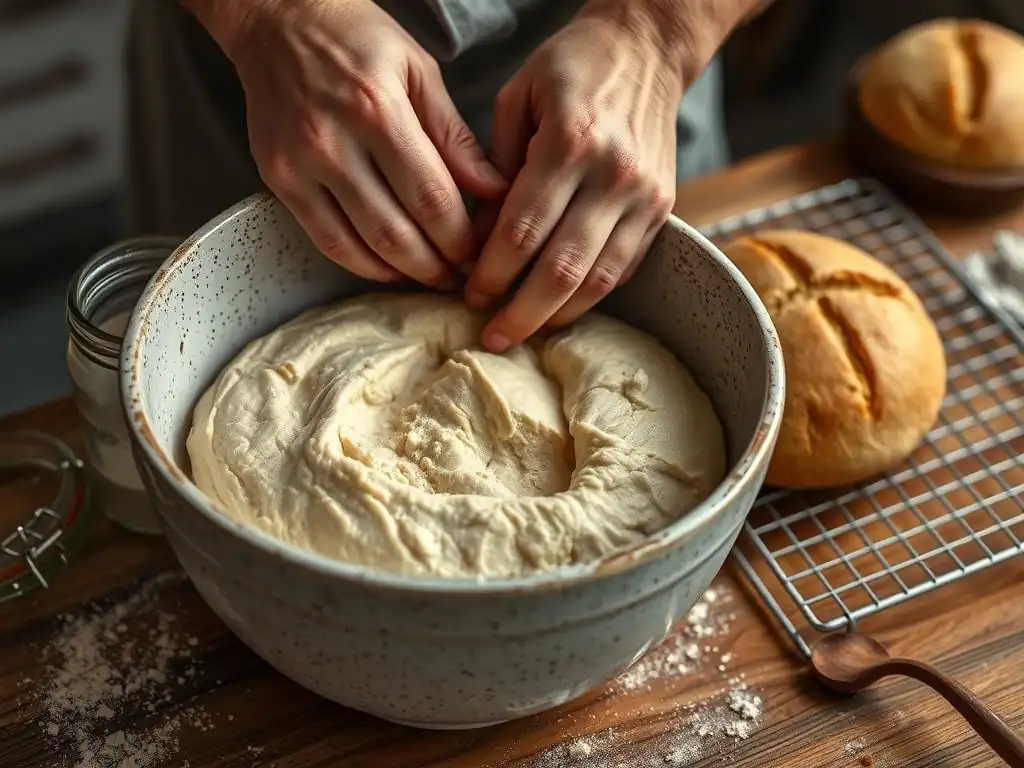
Making sourdough bread is a process that unfolds over several hours, sometimes even days, but each step builds upon the last to create the final loaf. This guide walks you through each stage of this active starter sourdough bread recipe, from preparing your starter to baking the finished bread. Patience and attention to detail are your best allies throughout this journey.
Step 1: Preparing Your Active Sourdough Starter
Ensuring your sourdough starter is active and ready is the critical first step for this active starter sourdough bread recipe. You should feed your starter 4-12 hours before you plan to mix your dough, depending on its usual activity level and the ambient temperature. A common feeding ratio is 1:1:1 by weight (starter:water:flour). For example, if you keep 50g of starter, feed it with 50g of water and 50g of flour. Use the same type of flour you typically feed your starter with.
After feeding, leave your starter at room temperature to become active. It should start showing significant bubbles, increase in volume, and have a domed or slightly flattened top when it's at its peak. The time it takes to reach peak activity varies greatly depending on temperature; in a warm environment (around 75-80°F or 24-27°C), it might be ready in 4-6 hours, while in cooler conditions (around 68-72°F or 20-22°C), it could take 8-12 hours.
Ensuring Your Starter is Ready: The Float Test
A simple way to check if your active starter is ready for your sourdough bread recipe is the float test. Gently scoop a small amount (about a teaspoon) of your fed starter and drop it into a glass of room temperature water. If the starter floats on the surface, it's active and ready to be used. The air bubbles produced by the yeast make it buoyant.
If the starter sinks, it's likely not yet at its peak activity or has passed its peak. If it sinks, give it more time to ferment and try the float test again later. This test is a reliable indicator that your starter is producing enough gas to leaven your dough effectively.
Feeding Your Starter for Optimal Activity
Regular feeding is key to maintaining a healthy and active starter. For this active starter sourdough bread recipe, you want your starter to be at its peak, typically 4-8 hours after feeding, when it has doubled or tripled in size. To achieve this, use a consistent feeding schedule and ratio. A 1:1:1 ratio (starter:water:flour) is standard for refreshing, but you can use a higher ratio like 1:2:2 or 1:3:3 if you need a larger quantity or want to slow down fermentation slightly.
The temperature at which you keep your starter after feeding also influences its activity. Warmer temperatures speed up fermentation, while cooler temperatures slow it down. Aim for a consistent room temperature for predictable results when preparing your starter for a bake. Using filtered water at a temperature close to your target room temperature can also help maintain consistency.
Step 2: Autolyse - Hydrating the Flour
Autolyse is a simple technique that involves mixing just the flour and water from your active starter sourdough bread recipe and letting it rest before adding the starter and salt. This step allows the flour to fully hydrate and the gluten to start developing without the interference of salt or starter activity. It makes the dough easier to mix and handle later on, leading to a smoother, more extensible dough.
During the autolyse period, enzymes naturally present in the flour begin to break down starches into sugars, which will later feed the yeast in your starter. This process, called enzymatic activity, also helps in gluten development. By giving the flour this initial hydration time, you reduce the overall kneading or folding required to achieve a strong dough structure.
Why Autolyse Improves Your Sourdough's Texture
Performing an autolyse significantly improves the texture of your finished sourdough bread. By allowing the flour to hydrate fully, you facilitate the formation of gluten bonds naturally. This leads to a dough that is less sticky and more pliable, making subsequent mixing and shaping steps easier. The improved gluten development contributes to a more open crumb structure in the baked loaf, a hallmark of well-made sourdough.
The autolyse process also aids in the dough's extensibility, meaning it can be stretched thin without tearing. This is beneficial during bulk fermentation and shaping, allowing you to build tension and structure effectively. For this recipe for sourdough with active starter, an autolyse step sets the dough up for optimal fermentation and oven spring.
Autolyse Time and Flour Hydration Levels
The duration of the autolyse can vary depending on the flour used and the recipe, but for this basic sourdough recipe using active starter, a period of 30 to 60 minutes is generally sufficient. Some bakers even extend this period up to several hours, especially when working with high-hydration doughs or less refined flours. The key is to give the flour enough time to absorb the water and for gluten development to begin.
The hydration level (the ratio of water to flour by weight) in your active starter sourdough recipe will also influence the dough's consistency after autolyse. A dough with 70% hydration will be stickier than one with 65% hydration. Observe the dough after the autolyse; it should appear shaggy but cohesive, and feel less floury than when you first mixed it.
Step 3: Mixing the Dough and Adding the Active Starter
After the autolyse, it's time to incorporate your active sourdough starter and salt into the dough. This is where the leavening process officially begins. Gently add the starter and salt to the autolysed dough. You can use your hands or a stand mixer on a low speed for mixing. The goal is to evenly distribute the starter and salt throughout the dough without overworking it initially.
Mixing might feel a bit messy at first, especially when trying to fully incorporate the starter and salt into the already somewhat developed dough. You can use the "pincer" method, where you pinch and pull sections of the dough to integrate the new ingredients, or perform gentle folding and squeezing motions. Ensure there are no pockets of unmixed salt or starter. This step is crucial for setting up the fermentation in your active starter sourdough bread recipe.
Combining the Ingredients with Your Active Starter
Once the autolyse is complete, sprinkle the salt over the dough and dollop your active sourdough starter on top. Using wet hands can help prevent the dough from sticking excessively during mixing. Gently work the salt and starter into the dough, folding and squeezing until they are fully incorporated. The dough will likely become stickier again during this phase as the salt draws out some moisture and the starter begins to interact with the flour.
Continue mixing until the ingredients are just combined and the dough starts to show a bit more elasticity. Avoid aggressive kneading at this point. The structure will be built primarily through the subsequent folding steps during bulk fermentation. A smooth, relatively uniform dough is the aim before moving on to the first rise in your recipe for sourdough with active starter.
The Importance of Gentle Mixing Techniques
Employing gentle mixing techniques at this stage is important to avoid tearing the nascent gluten structure that began forming during the autolyse. Overworking the dough immediately after adding the starter and salt can lead to a tough crumb. Instead, focus on incorporating the ingredients thoroughly but gently.
Techniques like folding the dough over itself or using the pincer method allow you to mix without excessive force. Aim for a dough that feels cohesive but is still relatively soft and extensible. This gentle handling sets the stage for optimal gluten development during the long, slow fermentation that is characteristic of this basic sourdough recipe using active starter.
Step 4: Bulk Fermentation - The First Rise
Bulk fermentation, also known as the first rise, is the period during which the dough develops flavor, volume, and structure. This is where your active sourdough starter really gets to work, consuming sugars and producing carbon dioxide gas and organic acids. The duration of bulk fermentation is influenced by factors like the ambient temperature, the activity of your starter, and the hydration of your dough.
During bulk fermentation, you will perform a series of "folds" to strengthen the dough's gluten network and equalize the temperature throughout the mass. This process typically takes several hours at room temperature. The dough should increase significantly in volume (often by 50-100%) and show signs of fermentation, such as bubbles on the surface and a slightly domed top. This stage is fundamental to a successful active starter sourdough bread recipe.
Managing Bulk Fermentation Time and Temperature
Managing the time and temperature during bulk fermentation is crucial for developing both structure and flavor in your sourdough. A common temperature range for bulk fermentation is between 75-80°F (24-27°C). At these temperatures, bulk fermentation might take 4-6 hours. In cooler environments (e.g., 68-72°F or 20-22°C), it could take 8-12 hours or even longer.
Look for visual cues rather than strictly adhering to a time. The dough should look and feel airy, show numerous bubbles, and have increased significantly in volume. Over-fermenting can lead to a slack, difficult-to-handle dough and a less desirable crumb, while under-fermenting results in a dense loaf with poor oven spring. Understanding how temperature affects the rate of fermentation is key to mastering this recipe for sourdough with active starter.
Performing Folds to Strengthen the Dough
During bulk fermentation, you'll perform a series of folds, typically every 30-60 minutes for the first 2-3 hours. These folds help to strengthen the gluten network, build tension in the dough, and redistribute the yeast and bacteria for even fermentation. A common technique is the stretch and fold: with wet hands, grab one edge of the dough, stretch it upwards gently, and fold it back over the rest of the dough. Rotate the bowl and repeat this motion 3-4 times until all sides have been folded.
The number and frequency of folds depend on the dough's strength and hydration. A higher hydration dough might benefit from more frequent folds initially. As the bulk fermentation progresses, the dough will become smoother, more elastic, and hold its shape better after each fold. These folds are essential for building the structure needed for a beautiful crumb in your active starter sourdough bread recipe.
Step 5: Shaping the Sourdough Loaf
Once bulk fermentation is complete, it's time to shape your sourdough loaf. This step is about creating tension on the surface of the dough, which will help it hold its shape during proofing and baking and contribute to good oven spring. Gently turn the dough out onto a lightly floured surface. Be careful not to degas the dough too much; you want to preserve the air bubbles created during fermentation.
Allow the dough to rest for a short period (15-20 minutes), covered, in a process called 'bench rest'. This allows the gluten to relax, making the dough easier to shape. After the bench rest, proceed with your chosen shaping technique, either for a round loaf (boule) or an oblong loaf (batard). Proper shaping is vital for achieving the desired structure and appearance in your active starter sourdough bread recipe.
Shaping Techniques for a Round (Boule) or Oblong (Batard) Loaf
For a boule (round loaf), gently preshape the dough into a rough ball during the bench rest. After the bench rest, lightly flour the surface, flip the dough over, and gently pull the edges towards the center, creating tension on the top surface. Flip it seam-side down and gently cup your hands around the dough, rotating it against the surface to create a smooth, taut skin.
For a batard (oblong loaf), preshape into a rough rectangle. After the bench rest, gently flatten the dough into a rectangle. Fold the top third down, then the bottom third up, like folding a letter. Then, fold the dough in half lengthwise and seal the seam with your fingers. Roll the dough gently on the surface to elongate it slightly while maintaining tension. Both techniques aim to create a tight surface layer on your recipe for sourdough with active starter.
Ensuring a Tight and Smooth Dough Surface
A tight and smooth surface on your shaped dough is essential for controlling the spread during proofing and maximizing oven spring during baking. The tension created on the surface acts like a skin, holding the dough's shape as it expands. If the surface is loose or torn, the dough will spread outwards rather than upwards in the oven.
Use just enough flour on your work surface to prevent sticking, but not so much that you inhibit the dough from gripping the surface slightly as you shape, which is necessary to build tension. Practice makes perfect with shaping; focus on gentle handling while creating that taught outer layer. A well-shaped loaf is a key indicator of success for your active starter sourdough bread recipe.
Step 6: Proofing the Sourdough
Proofing, or the final rise, is the period after shaping where the dough rests and continues to ferment before baking. This step allows the dough to lighten up and become airy. Proofing can be done at room temperature for a shorter period or in the refrigerator for a longer, colder fermentation. Cold proofing develops more complex flavors and makes the dough easier to score.
The duration of the proofing period depends heavily on the temperature. At room temperature (around 70-75°F or 21-24°C), it might take 2-4 hours. In the refrigerator (around 38-40°F or 3-4°C), it can take 8-16 hours, or even up to 24 hours. Placing the shaped dough seam-side up in a floured proofing basket (banneton) or a bowl lined with a floured cloth is common practice.
Proofing Options: Basket (Banneton) or Bowl
Using a proofing basket, or banneton, is a popular choice for proofing shaped sourdough dough. Bannetons, made from rattan, cane, or plastic, are typically dusted generously with rice flour (which is less likely to stick than wheat flour) to prevent the dough from adhering. They help the dough maintain its shape as it expands during proofing and impart a lovely spiral pattern on the crust.
If you don't have a banneton, you can use any bowl of a similar size and shape, lined with a clean kitchen towel or linen cloth. Dust the cloth generously with rice flour or a mixture of rice flour and wheat flour. Place the shaped dough seam-side up into the prepared basket or bowl. This method works perfectly well for proofing your active starter sourdough bread recipe.
The Poke Test: Knowing When Your Dough is Ready to Bake
Determining when your proofed dough is ready to bake is crucial. Over-proofed dough can collapse in the oven, while under-proofed dough won't achieve good oven spring. The "poke test" is a reliable indicator. Gently press your finger into the side of the dough about half an inch deep.
If the indentation springs back immediately, the dough is under-proofed and needs more time. If the indentation stays completely, the dough is likely over-proofed. If the indentation slowly springs back only partially, the dough is perfectly proofed and ready for baking. This test helps ensure you bake your active starter sourdough bread recipe at the optimal moment.
Step 7: Baking the Sourdough Bread
Baking sourdough bread requires high heat and steam in the initial phase to achieve maximum oven spring and a beautiful, crispy crust. Many home bakers use a Dutch oven or a baking stone with a steam setup to replicate the conditions of a professional bread oven. Preheating your oven to a high temperature is essential.
For this active starter sourdough bread recipe, preheat your oven to around 450-500°F (230-260°C) for at least 30-60 minutes with your baking vessel (like a Dutch oven) inside, if using one. This ensures the vessel is screaming hot, providing an initial burst of heat to the dough. This high heat helps the crust set quickly while the interior continues to expand.
Preheating Your Oven and Dutch Oven (Optional)
Preheating your oven to a high temperature is non-negotiable for achieving good oven spring with sourdough. The intense initial heat causes the water in the dough to turn to steam, rapidly expanding the loaf before the crust hardens. If using a Dutch oven or other lidded pot, place it in the oven during the preheat phase. A typical preheat time is 45-60 minutes at 475°F (245°C).
A preheated Dutch oven traps the steam released by the dough as it bakes, creating a humid environment around the loaf. This keeps the crust soft and pliable during the first 15-20 minutes of baking, allowing the dough to expand fully. After this initial phase, the lid is removed to allow the crust to brown and crisp up. This steam is a critical element for a successful active starter sourdough bread recipe.
Scoring the Dough for Oven Spring
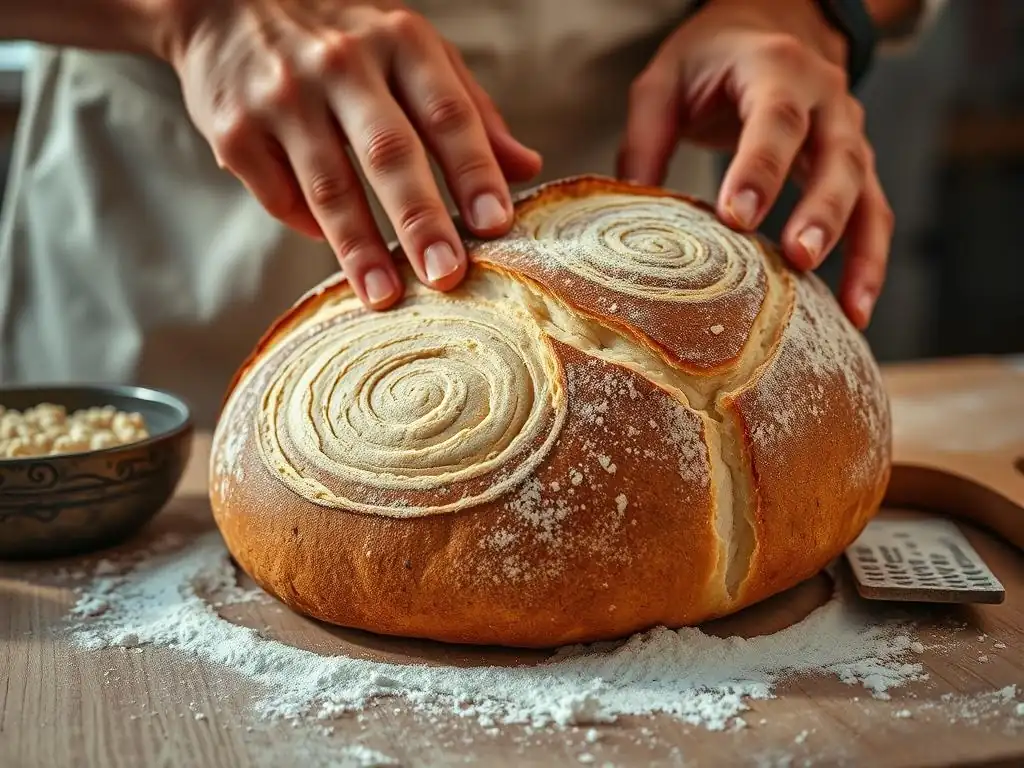
Just before placing the dough into the hot oven, you need to score it. Scoring involves making cuts on the surface of the dough with a sharp razor blade (lame) or knife. These cuts serve two main purposes: they allow the dough to expand in a controlled manner during oven spring, preventing blowouts in unwanted places, and they create beautiful patterns on the finished crust.
Common scoring patterns include a single long slash down the center (for a batard) or a cross or geometric pattern (for a boule). Aim for a depth of about 1/2 inch. Make confident, swift cuts. The way you score will directly influence the shape and appearance of your baked recipe for sourdough with active starter.
Baking Time and Temperature for a Perfect Crust and Crumb
Baking typically involves two stages: the initial phase with steam (or in a lidded Dutch oven) at high heat, and the second phase uncovered at a slightly lower temperature. For a standard 1-1.5 lb loaf from this active starter sourdough bread recipe, bake covered at 475°F (245°C) for 20 minutes. This allows for maximum expansion.
After 20 minutes, remove the lid (if using a Dutch oven) or remove the steam setup. Reduce the oven temperature to 425-450°F (220-230°C) and continue baking for another 20-30 minutes, or until the crust is a deep golden brown and the internal temperature of the loaf reaches 205-210°F (96-99°C). This second phase develops the crust's color, flavor, and crispness.
Step 8: Cooling and Slicing Your Homemade Sourdough
Once your active starter sourdough bread recipe loaf is baked to perfection, resist the urge to slice into it immediately! This is a critical step that allows moisture within the loaf to redistribute and the crumb structure to set properly. Removing the bread from the oven and placing it on a wire rack allows air to circulate around the entire loaf, preventing the bottom crust from becoming soggy.
Allowing the bread to cool completely, ideally for 1-2 hours, results in a better texture and flavor. Slicing too early can lead to a gummy or dense crumb because the internal structure hasn't fully set. The waiting is perhaps the hardest part of this whole process!
Allowing the Bread to Cool Completely
Cooling bread on a wire rack is essential. The rack allows air to circulate freely around the loaf, preventing condensation from forming on the bottom crust and making it soft. Place the hot loaf directly onto the rack as soon as it comes out of the oven.
For a standard-sized sourdough loaf baked using this recipe for sourdough with active starter, a cooling time of at least 1-2 hours is recommended. Larger loaves may require longer. The bread will still be undergoing internal structural changes and flavor development during this time. Patience here is rewarded with a superior crumb texture.
Best Practices for Slicing Sourdough Bread
Once your sourdough loaf has cooled completely, it's ready to be sliced and enjoyed. Use a good quality serrated bread knife for clean, even slices. A sharp serrated knife is essential for cutting through the hard crust without crushing the soft interior.
Place the loaf on a stable cutting surface. Hold the loaf firmly but gently with one hand and use a sawing motion with the serrated knife. Avoid pressing down too hard, as this can compress the crumb. Slice the entire loaf at once for easier storage, or slice off pieces as needed. Enjoy the fruits of your labor from this active starter sourdough bread recipe!
Troubleshooting Common Sourdough Baking Problems
Even with a reliable active starter sourdough bread recipe, you might encounter issues along the way. Sourdough baking is a skill that improves with practice and learning from mistakes. Understanding common problems and their potential causes can help you diagnose issues and adjust your technique for future bakes.
My Sourdough Didn't Rise: Common Causes and Solutions
One of the most frustrating problems is a loaf that doesn't rise properly, resulting in a dense or flat bread. The most common culprit is an inactive or weak sourdough starter. Did your starter pass the float test? Was it at its peak activity when you used it? Ensure your starter is robust and consistently fed before attempting to bake this active starter sourdough bread recipe.
Other causes include under-proofing (not giving the dough enough time for its final rise), over-proofing (where the dough rises too much and then collapses, losing its structure), insufficient gluten development during mixing and folding, or insufficient oven temperature and steam during baking. Review your process: Was your bulk fermentation long enough? Did the poke test indicate readiness? Was your oven fully preheated with steam? Adjusting one or more of these factors can significantly improve rise.
Dealing with a Sticky or Over-Proofed Dough
A sticky or overly wet dough can be challenging to handle and shape. This can result from too high hydration for your flour type or experience level, or from over-proofing. If your dough is excessively sticky after mixing, it might be due to the flour not absorbing enough water; next time, consider slightly reducing the water or using a flour with higher protein content.
Over-proofed dough often feels very soft, airy, and may even start to spread out or collapse. It's difficult to shape because it lacks tension. If you suspect your dough is over-proofed during bulk fermentation, you can try shaping it more gently and proofing for a shorter time or immediately baking it.
If it's severely over-proofed after shaping, you might need to gently reshape it (which will degas it somewhat) and proof for a very short time, or even turn it into a different product like focaccia or pizza dough where structure is less critical. Learning the feel of properly proofed dough is key to success with your recipe for sourdough with active starter.
Achieving the Perfect Crust: Tips and Tricks
A beautiful, crispy crust is a hallmark of great sourdough. Issues like a pale crust, a tough crust, or a lack of blisters can often be traced back to the baking environment. Insufficient heat and lack of steam are primary reasons for a poor crust.
Ensure your oven and baking vessel (like a Dutch oven) are fully preheated to a high temperature (475-500°F or 245-260°C). Using a Dutch oven or creating a steam environment (e.g., placing a tray of hot water on the bottom rack) is crucial for the first part of the bake. This steam keeps the crust soft, allowing it to expand and develop blisters, before it hardens and browns. Baking uncovered at a slightly lower temperature for the second half allows the crust to finish developing its color and crispness. Don't open the oven door frequently during the initial steam phase.
Storing Your Sourdough Bread for Freshness
Proper storage is essential to keep your homemade sourdough bread fresh and delicious for as long as possible. Unlike commercial breads that contain preservatives, sourdough relies on its natural acidity to inhibit mold growth, but it can still dry out or become stale. The best method depends on how quickly you plan to consume the loaf from your active starter sourdough bread recipe.
Avoid refrigerating sourdough, as this actually speeds up the staling process. The ideal environment is room temperature, protected from air circulation that causes drying. With proper storage, a loaf can remain fresh and enjoyable for several days.
Best Practices for Storing Sourdough
For storing your sourdough loaf at room temperature, several options work well. A simple paper bag is great for keeping the crust crispy for the first day, though the interior may start to dry out faster. A cloth bread bag allows the crust to breathe somewhat while protecting the interior.
For longer storage at room temperature (2-4 days), wrapping the cooled loaf in a beeswax wrap or storing it in a dedicated bread bin or a plastic bag (once the crust has fully hardened) can help maintain moisture. If the crust softens in a plastic bag, you can briefly reheat the loaf in a hot oven (around 350°F or 175°C) for 5-10 minutes to crisp it up again.
Freezing Sourdough for Later Enjoyment
If you won't be eating your entire loaf within a few days, freezing is the best option to preserve its quality. Ensure the loaf from your active starter sourdough bread recipe is completely cooled before freezing. You can freeze the loaf whole or sliced.
To freeze whole, wrap the cooled loaf tightly in plastic wrap, then in aluminum foil or place it in a freezer bag. To freeze sliced, slice the cooled loaf, then either wrap sections or place slices in a freezer bag with parchment paper between slices to prevent sticking. Frozen sourdough can last for several months. To enjoy, thaw whole loaves at room temperature, or pop individual slices directly into a toaster or under a broiler.
Advanced Sourdough Techniques to Explore
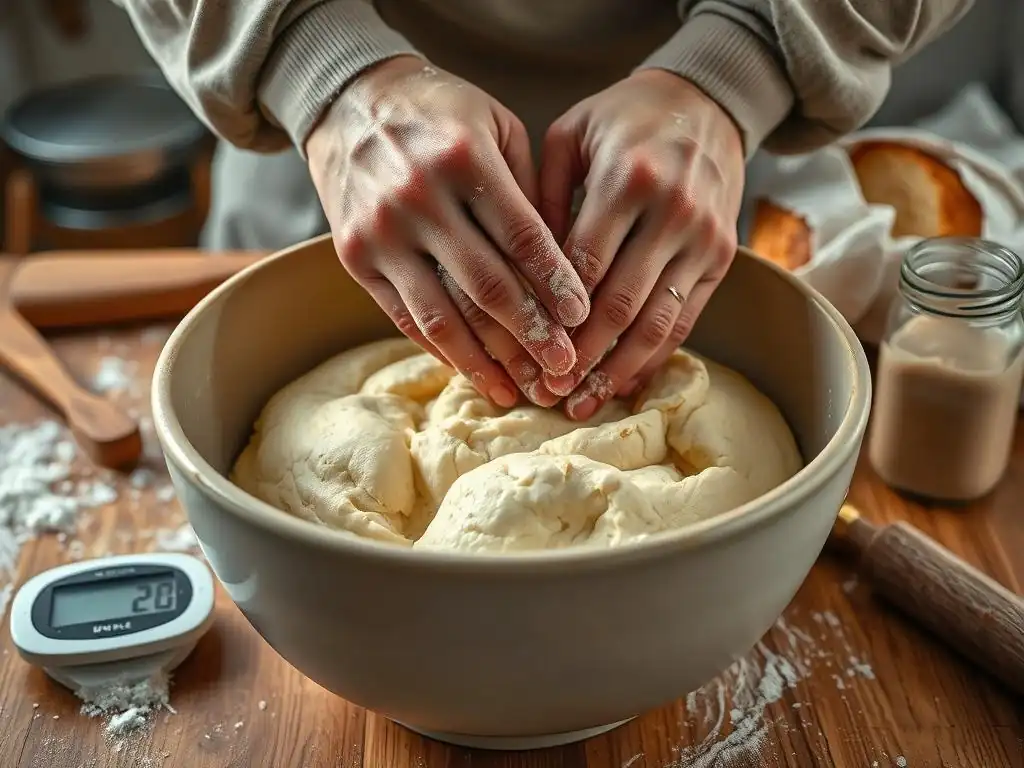
Once you've successfully baked this basic sourdough recipe using active starter a few times, you might feel ready to explore more advanced techniques and variations. Sourdough baking offers a vast landscape of possibilities for experimentation. Building on a solid foundation with an active starter allows you to confidently venture into new territory.
These advanced techniques can further enhance the flavor, texture, and visual appeal of your sourdough bread. They often involve manipulating ingredients, timing, or equipment in more specific ways.
Experimenting with Different Flour Types
Branching out from using only white bread flour is a common next step. Incorporating different types of flour, such as whole wheat, rye, spelt, or even heritage grains, will dramatically change the flavor profile and texture of your sourdough. For instance, including 10-30% whole wheat flour in your active starter sourdough bread recipe will give it a nuttier flavor and denser crumb, while a small percentage of rye can add a distinct tang and color.
Keep in mind that different flours absorb water differently and affect gluten development. Whole grain flours typically require more water than white flours. You might need to adjust the hydration level and potentially the fermentation times when substituting flours. Researching the characteristics of different flours will help you predict how they will behave in your recipe for sourdough with active starter.
Adding Flavors and Inclusions to Your Sourdough
Adding inclusions to your sourdough dough is a fun way to customize your bread. Common additions include nuts (like walnuts or pecans), seeds (such as sesame, poppy, or sunflower), dried fruits (like cranberries or raisins), olives, herbs, or even cheese. These additions not only add flavor and texture but can also make your loaf visually appealing.
Inclusions are typically added during the mixing stage after the starter and salt have been incorporated, or during the first set of folds in bulk fermentation. Be mindful of how much you add, as too many inclusions can interfere with gluten development and oven spring. A general guideline is to add no more than 10-20% of the total flour weight in inclusions for your active starter sourdough bread recipe. For example, with 500g flour, you might add 50-100g of nuts and seeds.
Conclusion: Enjoying Your Homemade Active Starter Sourdough Bread
Baking your own active starter sourdough bread recipe is a rewarding experience. From the simple act of mixing flour and water to the triumphant moment of pulling a golden, crusty loaf from the oven, each step offers a connection to traditional baking methods. By focusing on using a strong, active starter and following the key steps outlined in this guide – from proper fermentation management to effective shaping and baking – you set yourself up for success.
The journey of baking sourdough is one of continuous learning and refinement. Every loaf provides insights into the process, the behavior of your starter, and the impact of environmental factors. Don't be discouraged by imperfect loaves; they are simply steps on the path to mastering this craft. With this reliable recipe for sourdough with active starter, you have a solid foundation. We encourage you to bake often, observe closely, and most importantly, enjoy the delicious, tangy results of your labor! There's nothing quite like the taste and texture of freshly baked homemade sourdough.
Frequently Asked Questions
What defines an active starter, as mentioned in the "Basic Sourdough Recipe"?
An active starter is a sourdough starter that has recently been fed and has at least doubled in size, showing signs of vigorous fermentation. This indicates it's ready for baking.
Can I use a different type of flour than specified in the "Basic Sourdough Recipe"?
While the recipe is optimized for specific flours, you can experiment. Be aware that different flours will affect the hydration and texture of the final product. Expect some adjustments may be needed.
How long does it take to make sourdough bread using the "Basic Sourdough Recipe"?
The entire process, from mixing to baking, can take around 24-48 hours, including the bulk fermentation and proofing stages. This is due to the slow fermentation process.
What's the best way to store sourdough bread made with the "Basic Sourdough Recipe"?
Store your cooled sourdough loaf in a bread box or paper bag at room temperature to maintain its crust. Slicing it only when needed helps to prevent it from drying out.
What if my sourdough bread doesn't rise properly, even when using an active starter as indicated in the "Basic Sourdough Recipe"?
Several factors can contribute to this, including incorrect hydration levels, insufficient gluten development, or inadequate fermentation time. Ensure your starter is truly active and your environment is warm enough.
Final Reflection: The Enduring Magic of a Living Starter
The humble sourdough starter, a simple mixture of flour and water, holds the key to unlocking a world of flavour and texture in bread baking. Its seemingly simple nature belies the complex biological processes at work, a testament to the power of nature's ingenuity in our kitchens. This enduring process connects us to baking traditions spanning centuries, making the act of baking sourdough a truly rewarding experience.
The journey of nurturing an active starter is more than just a recipe; it's a relationship. It demands patience, observation, and a gentle touch. There's a profound satisfaction in witnessing the transformation of simple ingredients into a vibrant, bubbly culture, a living organism thriving under your care. This connection to the process, to the living nature of the starter itself, elevates sourdough baking beyond a mere culinary task. Bread is the staff of life,
they say, and with a sourdough starter, you're actively participating in that life-giving process.
Now, consider your own starter. What will you bake next? Will you experiment with different flours, explore new shaping techniques, or simply savour the simple pleasure of a perfectly risen loaf? The possibilities are endless, limited only by your imagination and the consistent care you provide your active starter. Embrace the journey, learn from each bake, and let the magic of sourdough continue to inspire and delight you. The reward is not just delicious bread, but a deeper connection to the art of baking and the natural world.
Unleash Your Inner Baker: Mastering Sourdough Today!
Thanks for joining us on this sourdough journey! You've now got the tools to bake amazing bread – we hope you feel empowered and inspired. Ready to take the next step?
- Bake your first loaf! Use the recipe you just learned to create your own delicious sourdough bread. Don't be afraid to experiment – even small adjustments make a big difference!
- Share your sourdough success! Post a picture of your creation on social media and tag #BakeWithEaseSourdough – let's see those beautiful loaves!
- Dive deeper into sourdough: Explore our other articles on sourdough maintenance, shaping techniques, and advanced baking methods!
What unique twist will you add to your first sourdough loaf? Let us know in the comments!