
Rye Bread Revolution: A Simple Recipe for Your Bread Machine

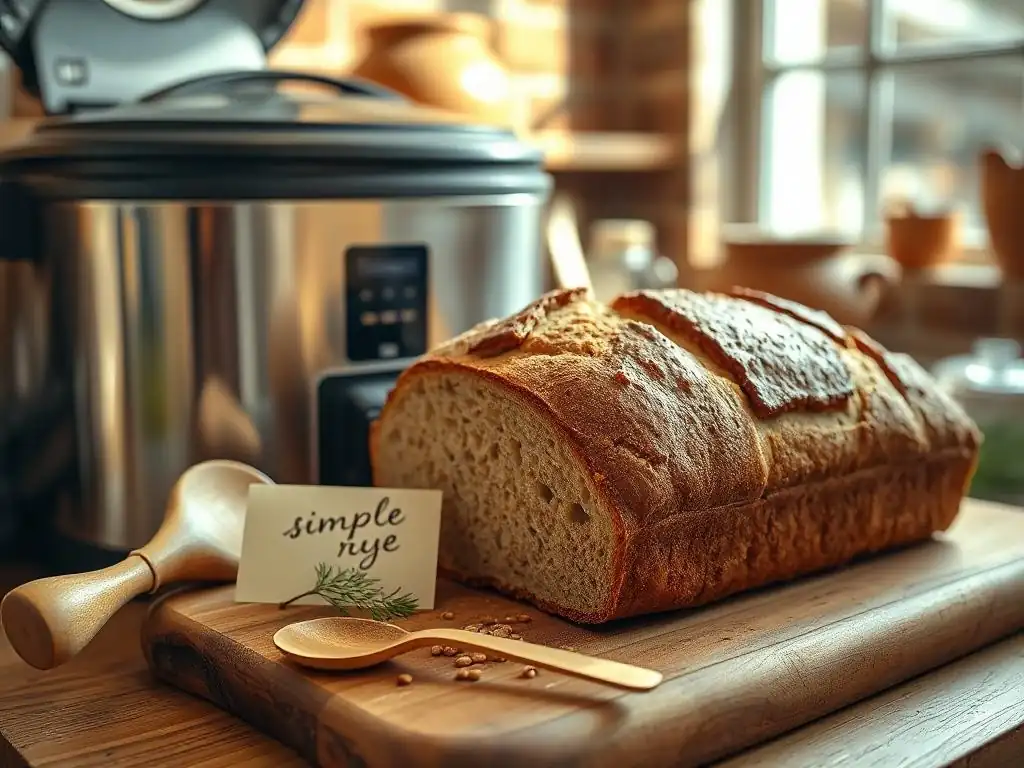
Welcome to BakeWithEase, where every baker finds their rhythm! Tired of complicated recipes and intimidating techniques? Discover the joy of effortlessly delicious baking, starting with our guide to crafting a perfect loaf. Intrigued by the aroma of homemade rye but hesitant to try? Then dive into our Simple bread machine rye recipe below – a game-changer for busy bakers. Unleash the magic of your bread machine and unlock a world of flavor. What are you waiting for? Let's get baking!
- Sourdough Bread Mastery: A Comprehensive Guide
- BakeWithEase Presents: Understanding Sourdough Baking
- Why Bake Sourdough? The Benefits of Homemade Bread
- The Ultimate Sourdough Recipe: A Step-by-Step Guide
- Baking Your Sourdough Bread to Perfection
- Troubleshooting Your Sourdough Bread: Common Issues and Solutions
- Variations and Customizations for Your Sourdough Recipe
- Enjoying Your Freshly Baked Sourdough Bread
- Mastering Sourdough Baking: Beyond the Basic Recipe
-
Frequently Asked Questions
- What makes this rye bread recipe "simple" for a bread machine?
- Can I substitute any ingredients in this rye bread recipe?
- What if my bread machine doesn't have a "rye bread" setting?
- How can I tell if my rye bread is fully baked in the bread machine?
- What is the best way to store my freshly baked rye bread?
- Final Reflection: The Enduring Appeal of Homemade Rye
- Unleash Your Inner Baker: Knead to Know More?
Sourdough Bread Mastery: A Comprehensive Guide
BakeWithEase Presents: Understanding Sourdough Baking
Welcome to the world of sourdough baking! It's a journey that connects you to ancient bread-making traditions, relying on a wild yeast and bacteria culture rather than commercial yeast. This living starter, often called a levain or simply 'the starter', is a blend of flour and water that captures naturally occurring microorganisms from the environment.
These microbes work together to ferment the dough, producing carbon dioxide that makes the bread rise, and organic acids that give sourdough its characteristic tangy flavor and unique texture. Unlike breads made with commercial yeast, which typically rise much faster, sourdough fermentation is a slower process, often taking many hours for bulk fermentation and proofing.
The process of creating and maintaining a sourdough starter is an act of cultivation, requiring patience and consistent care. Over time, your starter develops its own unique microbial community, influenced by your local environment, the type of flour you use, and your feeding routine. This means that every sourdough loaf is truly unique!
Mastering sourdough involves understanding the nuances of your starter's activity, the impact of temperature and time on dough development, and the techniques for shaping and baking. It's a rewarding skill that yields incredibly flavorful and satisfying bread, far removed from the often bland loaves found in supermarkets.
Why Bake Sourdough? The Benefits of Homemade Bread
Baking sourdough at home offers a myriad of benefits, extending beyond just the delicious taste and aroma that fills your kitchen. It's a rewarding craft that allows you to control every ingredient that goes into your bread, avoiding artificial additives and preservatives often found in commercial loaves.
The process itself can be incredibly therapeutic, offering a tactile and mindful activity that provides a tangible reward at the end. Beyond the personal satisfaction, homemade sourdough often boasts a superior texture – a crisp, crackly crust giving way to a soft, open, and chewy interior crumb – a complexity rarely matched by store-bought alternatives.
Furthermore, baking your own sourdough is often more economical in the long run, especially if you are a regular bread consumer. While the initial investment in a few tools might be necessary, the cost of flour and water to maintain a starter and bake loaves is significantly less than repeatedly purchasing artisanal bread. There's also the joy of sharing freshly baked sourdough with friends and family, a simple pleasure that connects people and traditions. It's not just about making bread; it's about engaging in a craft, understanding fermentation, and creating something truly nourishing from simple ingredients.
The Unique Qualities of Sourdough
The defining feature of sourdough is its complex flavor profile, which ranges from subtly tangy to distinctly sour, depending on the starter's maturity, fermentation time, and temperature. This tanginess comes from the lactic and acetic acids produced by the Lactobacillus bacteria in the starter. Lactic acid provides a milder, yogurt-like tang, while acetic acid contributes a sharper, vinegary note, often more prominent in colder fermentations.
The balance of these acids, along with other compounds produced during the long fermentation, creates a depth of flavor that is simply unmatched by quick-rise breads. For instance, a sourdough fermented at cooler temperatures (around 60-70°F or 15-21°C) for 12-18 hours will typically develop more acetic acid, resulting in a tangier loaf, compared to a warmer fermentation (around 75-80°F or 24-27°C) which favors lactic acid production.
Beyond flavor, sourdough possesses a unique texture. The extended fermentation process allows enzymes to break down starches and proteins more thoroughly than in commercial yeast doughs. This contributes to a more elastic dough structure, capable of trapping gas more effectively, leading to that desirable open, airy crumb structure often sought after by bakers.
The crust, when baked properly at high temperatures, becomes wonderfully crisp and caramelized due to the sugars broken down during fermentation and the Maillard reaction. A well-baked sourdough loaf, perhaps made using a simple bread machine rye recipe starter adaptation (though traditional sourdough often involves oven baking), will exhibit this signature combination of a sturdy crust and a tender, complex interior. The slower fermentation also helps develop gluten more gradually, contributing to the dough's strength and extensibility.
Health Benefits of Sourdough Bread
Sourdough bread is often considered easier to digest than bread made with commercial yeast, particularly for individuals sensitive to conventional bread. The long fermentation process breaks down some of the gluten and fructans (a type of carbohydrate) in the flour. While it's not gluten-free, the breakdown of these compounds can make it more tolerable for some people who experience digestive discomfort from regular bread.
Studies, such as those exploring the impact of fermentation on gluten structure, suggest that certain sourdough processes can reduce the levels of specific proteins that can be problematic. For example, fermentation times exceeding 8 hours can significantly reduce levels of certain FODMAPs, including fructans, potentially easing digestive issues for some individuals with Irritable Bowel Syndrome (IBS).
Furthermore, the lactic acid bacteria in sourdough can act as prebiotics, feeding the beneficial bacteria in your gut. The fermentation process also increases the bioavailability of vitamins and minerals in the flour. Phytic acid, a compound found in grains that can bind to minerals like iron, zinc, and calcium, is significantly reduced during the long sourdough fermentation.
This means your body can absorb more of these essential nutrients from the bread. For instance, studies have shown phytic acid reduction rates in sourdough fermentation potentially exceeding 50% compared to unfermented dough or dough fermented quickly with commercial yeast. This makes sourdough a more nutrient-rich option compared to many conventionally produced breads.
The Ultimate Sourdough Recipe: A Step-by-Step Guide
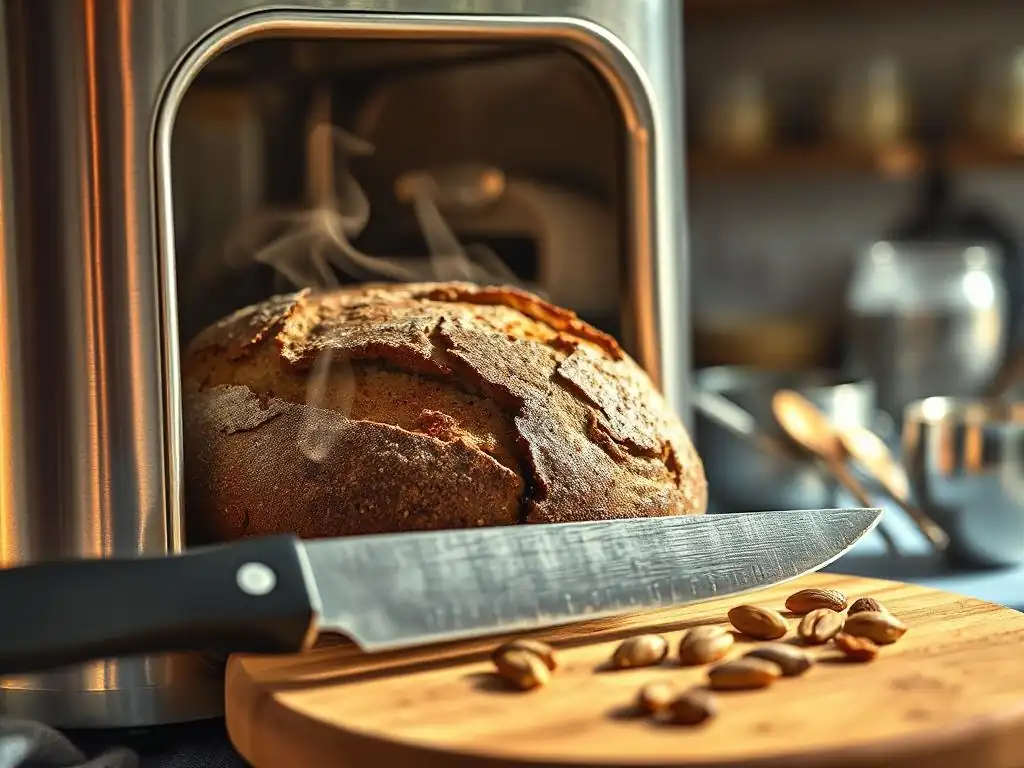
Ready to bake your own sourdough masterpiece? This guide will walk you through the essential steps, from nurturing your starter to achieving that perfect loaf. While countless variations exist, this framework provides a solid foundation for understanding the process. Remember that sourdough baking is as much an art as a science, and results can vary based on environmental factors like temperature and humidity. Don't be discouraged by imperfect loaves initially; every bake is a learning experience!
The core of any sourdough recipe involves combining your active starter with flour and water to create the main dough, followed by periods of rest, stretching, and folding to develop gluten, shaping, proofing, and finally, baking. Unlike a simple bread machine rye recipe where the machine does much of the work, traditional sourdough involves more hands-on steps, but the reward is a loaf with unparalleled depth of flavor and texture. We'll break down each stage to help you understand the purpose behind the techniques and achieve consistent success in your kitchen.
Culturing Your Starter: The Foundation of Sourdough
Your sourdough starter is the heart of your bread. It's a living culture of wild yeast and bacteria, typically made by mixing equal parts flour and water and feeding it regularly. To create one from scratch, combine about 50g of unbleached all-purpose or whole wheat flour with 50g of lukewarm water in a clean jar. Mix thoroughly until no dry spots remain.
Cover loosely (allowing air exchange but preventing drying) and leave at room temperature (around 70-75°F or 21-24°C). Each day, discard about half of the starter (around 50g) and feed it with fresh flour and water (e.g., 50g flour, 50g water). You should start seeing signs of activity, like small bubbles, within a few days. It typically takes 7-14 days for a new starter to become strong and active enough to reliably leaven bread, showing consistent doubling in size between feedings.
A healthy, active starter is crucial for successful sourdough baking. It should have a pleasant, slightly tangy aroma (not strongly vinegary or alcoholic) and be bubbly and active, ideally doubling or tripling in volume within 4-8 hours after being fed, especially at room temperature. The texture should be light and airy.
If your starter isn't showing these signs after a couple of weeks, try switching to a different type of flour (whole rye flour is excellent for boosting microbial activity) or adjust the water temperature slightly. Consistency in feeding and observation are key to developing a robust starter ready to perform.
Maintaining a Healthy Sourdough Starter
Maintaining a healthy sourdough starter requires regular feeding to keep the wild yeast and bacteria active. The frequency of feeding depends on how you store it. If kept at room temperature, feeding once or twice a day is usually necessary, especially if you bake frequently. A common ratio is 1:1:1 (1 part starter : 1 part flour : 1 part water by weight).
So, if you keep 50g of starter, you would feed it with 50g flour and 50g water. If you don't bake often, you can store your starter in the refrigerator. Refrigerated starters only need to be fed about once a week. When you want to bake, take it out, feed it once or twice at room temperature, and wait until it's active and bubbly before using.
Signs of a healthy starter include consistent rising and falling after feeding, a bubbly texture throughout, and a mild, tangy smell. If you see a layer of liquid on top (called "hooch"), it means your starter is hungry and needs feeding. Just pour off the hooch, discard some starter, and feed as usual. If you see mold, discard the entire starter and start over. Regular feeding with good quality, unbleached flour and filtered water helps maintain a balanced microbial ecosystem.
Troubleshooting Starter Issues
It's common to encounter issues when maintaining a sourdough starter, especially when you're new to it. One frequent problem is a starter that doesn't become active or rise consistently. This can be due to insufficient time (new starters take patience), cold temperatures (wild yeast are less active below 70°F or 21°C), using chlorinated water (chlorine can harm microbes), or using bleached flour.
To troubleshoot, ensure you're using unbleached flour and filtered water, keep the starter in a warm spot, and give it adequate time, feeding it consistently. Increasing the feeding ratio (e.g., 1:2:2 or 1:3:3) can sometimes help weaker starters by providing more 'food'.
Another issue is a starter that develops a strong, unpleasant, or overly alcoholic smell. This often indicates it's hungry and producing a lot of alcohol as a byproduct of fermentation. Feeding it more regularly or with a higher ratio of fresh flour and water can help. If the starter consistently produces hooch quickly after feeding, it might need more frequent feeding or a larger feeding ratio. Remember to discard a portion before each feeding; this helps manage the volume and concentrates the microbial population in fresh food. Patience and observation are your best tools for troubleshooting.
Preparing Your Dough: Autolyse, Mixing, and Bulk Fermentation
Once your sourdough starter is active, it's time to prepare the dough. The process typically begins with mixing the flour and water, often incorporating a technique called autolyse. After a resting period, the starter and salt are added, and the dough is mixed until the ingredients are fully incorporated.
Unlike a simple bread machine rye recipe which automates mixing, sourdough often involves manual kneading or stretch-and-fold techniques to develop gluten. Following mixing, the dough undergoes bulk fermentation, a crucial phase where the dough rises significantly and develops flavor and structure. This stage can last several hours, depending on temperature and the dough's activity.
During bulk fermentation, the dough is usually given a series of "stretch and folds" or "coil folds" at intervals (e.g., every 30-60 minutes for the first 2-3 hours). These gentle manipulations help strengthen the gluten network without degassing the dough too much.
Observing the dough's behavior – its increase in volume, the development of surface tension, and the presence of bubbles – is key to knowing when bulk fermentation is complete. A typical bulk fermentation might involve 3-5 sets of folds and last anywhere from 4 to 12 hours, depending on the ambient temperature and the desired level of sourness.
The Autolyse Technique
Autolyse (pronounced auto-leez) is a simple technique where you mix just the flour and water from your recipe and let it rest for a period, usually 20 minutes to an hour, sometimes longer. The word comes from Greek and means "self-digestion."
During this rest, the flour absorbs the water fully, and enzymes naturally present in the flour begin to break down proteins, which helps the gluten network start to form without any mechanical effort. This step hydrates the flour thoroughly and allows the gluten to relax, making the dough easier to mix and handle once the starter and salt are added.
Implementing an autolyse phase results in a dough that is less sticky, more extensible, and easier to develop strength in. It can lead to a more open crumb structure in the final bread. For example, allowing a mix of bread flour and water to rest for 30 minutes will make it significantly easier to incorporate the stiff sourdough starter and salt afterward compared to mixing all ingredients at once. This technique is particularly beneficial when working with higher hydration doughs or flours that are harder to hydrate fully initially.
Bulk Fermentation: Time and Temperature Considerations
Bulk fermentation is the first rise of the dough after mixing, and it's a critical stage for developing flavor, texture, and structure. The time required for bulk fermentation is highly dependent on temperature and the activity of your starter. Warmer temperatures (around 75-80°F or 24-27°C) will accelerate fermentation, potentially completing in 4-6 hours, while cooler temperatures (around 70-74°F or 21-23°C) will slow it down, potentially taking 8-12 hours or even longer. The goal is typically for the dough to increase in volume by about 30-60%, becoming noticeably bubbly and airy.
Monitoring the dough's progress, rather than strictly following a time, is essential. Look for visual cues: the dough should feel lighter, show signs of gas production (bubbles on the surface and sides of the container), and pass the "windowpane test" (stretching a small piece thin enough to see light through without tearing) indicating good gluten development. Over-fermenting can lead to a dough that collapses during shaping or baking, while under-fermenting results in a dense crumb. Using a clear container with markings can help you track the volume increase accurately.
Shaping and Proofing Your Sourdough Loaf
After bulk fermentation, the dough is divided (if making multiple loaves), gently preshaped into a round or rectangle, and allowed to rest briefly (15-30 minutes). This rest period, called bench rest, allows the gluten to relax before the final shaping. Final shaping is where you give the dough its final form, creating tension on the surface which helps the loaf hold its shape and contributes to oven spring.
Techniques vary depending on whether you're making a round loaf (boule) or an oval one (batard). Unlike the simple process of placing dough into a bread machine pan, sourdough shaping requires developing surface tension.
Once shaped, the dough needs to proof, which is the final rise before baking. Proofing allows the dough to become airy and light. It can be done at room temperature or in the refrigerator.
Room temperature proofing is faster (1-4 hours) but requires careful monitoring to prevent over-proofing. Cold proofing in the refrigerator (8-16 hours or even longer) slows down fermentation dramatically, develops more complex flavors, and makes the dough easier to handle and score before baking. The dough should increase in volume but not necessarily double, and it should pass the "poke test" – when gently poked, the indentation should spring back slowly but not completely.
Shaping Techniques for Different Loaf Styles
Shaping is a crucial step that builds tension on the surface of the dough, providing structure and helping the loaf rise upwards rather than spreading outwards in the oven. For a boule (round loaf), the goal is to create a tight ball. This is often achieved by gently folding the edges of the dough into the center and then using your hands to cup the dough and rotate it on an unfloured surface, creating surface tension. Imagine pulling the dough towards you slightly while rotating it.
For a batard (oval loaf), the process involves folding the dough into a rectangle, then folding one side over about two-thirds of the way, and finally rolling it up tightly from the other side, sealing the seam with your fingers. The key for both shapes is to be firm enough to create tension but gentle enough not to tear the dough or deflate the gas built during fermentation. Practicing these techniques will improve your loaf's shape and oven spring significantly.
Proofing: Refrigerator vs. Room Temperature
Choosing between room temperature and refrigerator proofing impacts both the timeline and the final characteristics of your sourdough loaf. Room temperature proofing is much quicker, typically taking 1 to 4 hours depending on the warmth of your kitchen. This method is useful if you want to bake the same day you mix the dough. However, it requires close attention as dough can over-proof quickly, especially in warm conditions, leading to a slack dough that doesn't hold its shape well during baking.
Cold proofing in the refrigerator, usually at temperatures between 38-45°F (3-7°C), significantly slows down fermentation. This allows for a longer proofing period, often 8 to 16 hours or even up to 24-48 hours. The extended cold fermentation develops more complex flavors and acidity, resulting in a tangier bread. Cold dough is also much easier to handle and score cleanly just before baking. This method offers flexibility, allowing you to bake the next morning or even later. Most bakers prefer cold proofing for its flavor benefits and ease of handling.
Baking Your Sourdough Bread to Perfection
Baking is the final, exciting step in your sourdough journey. Achieving a beautiful crust and a well-risen loaf requires high heat and steam in the oven. Unlike the enclosed, controlled environment of a bread machine, traditional sourdough is often baked in a very hot oven, frequently within a Dutch oven or on a baking stone with added steam. This initial burst of high heat causes rapid oven spring, where the dough expands dramatically before the crust sets.
The ideal baking temperature for sourdough is typically very high, often starting around 450-500°F (230-260°C). The dough is usually baked in a covered environment (like a Dutch oven) for the first 20-30 minutes to trap steam released by the dough itself. This steam keeps the surface of the dough moist and elastic, allowing it to expand fully before the crust hardens. After the initial covered period, the lid is removed, and the temperature is often reduced slightly (to around 425-450°F or 220-230°C) to allow the crust to brown and crisp up for another 20-30 minutes.
Understanding Oven Temperatures and Steam
High oven temperature is crucial for achieving good oven spring and developing a flavorful crust on sourdough. Temperatures between 450°F and 500°F (230°C and 260°C) are common. This intense heat provides the initial energy boost needed for the yeast and bacteria to produce a final surge of carbon dioxide, causing the dough to expand rapidly before the gluten structure sets.
Baking at too low a temperature will result in a flatter loaf with a less developed crust. Preheating your oven thoroughly, often for 30-60 minutes with your baking vessel inside, is essential to ensure the temperature is stable and high enough.
Steam plays an equally vital role, especially during the first phase of baking. When the dough is placed in a steamy environment, the moisture prevents the surface from drying out and forming a hard crust too quickly. This keeps the dough pliable, allowing it to expand maximally during oven spring.
Using a Dutch oven with a lid is the most common and effective way to create a steamy microclimate around the loaf. Alternatively, you can place a tray of hot water or ice cubes on a rack below your baking stone or steel, though this method is less efficient at trapping steam directly around the loaf compared to a Dutch oven.
Achieving the Perfect Crust and Ear
The hallmark of a great sourdough loaf is a beautiful, caramelized crust and, often, a pronounced "ear" – the flap of crust that lifts up where the dough was scored. Achieving this requires a combination of proper dough development, shaping techniques, and baking methods. Scoring the dough just before it goes into the oven is essential. Scoring allows the dough to expand in a controlled manner during oven spring. A single, deep score at an angle (about 20-30 degrees) with a sharp razor blade or lame is typically used to achieve a prominent ear on a batard.
Baking in a Dutch oven is arguably the most effective way to get a great crust and ear. The sealed environment traps steam, ensuring the surface stays moist and stretchy during the initial rapid expansion. Once the lid is removed, the dry, high heat allows the crust to crisp up and brown beautifully. The Maillard reaction, a chemical process between amino acids and reducing sugars that gives browned food its desirable flavor and color, occurs rapidly at these high temperatures, contributing to the rich color and complex flavor of the sourdough crust.
Cooling and Slicing Your Homemade Sourdough
Patience is key even after the bread comes out of the oven. It is crucial to let your sourdough loaf cool completely on a wire rack before slicing into it. As the bread cools, moisture redistributes evenly throughout the loaf, and the internal structure sets properly. Slicing into a hot loaf can result in a gummy, dense texture because the steam and moisture haven't had a chance to settle. A standard-sized loaf typically requires at least 1-2 hours to cool completely.
Cooling on a wire rack allows air circulation around the entire loaf, preventing the bottom crust from becoming soggy from trapped steam. Once cooled, use a sharp serrated knife to slice your bread. A good serrated knife will glide through the crust without crushing the delicate crumb inside. The aroma of a freshly cooled loaf is one of the most rewarding parts of the sourdough baking process, a simple pleasure that makes all the effort worthwhile.
Troubleshooting Your Sourdough Bread: Common Issues and Solutions
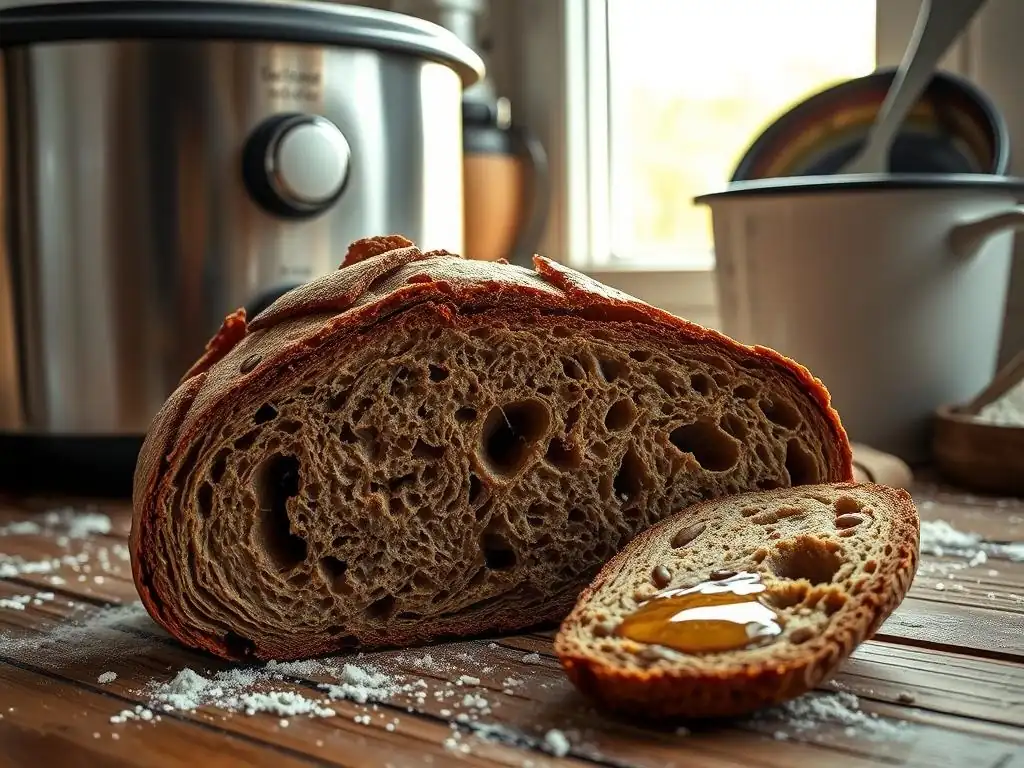
Even experienced bakers encounter challenges with sourdough. Its reliance on a live culture and sensitivity to environmental factors means that results can sometimes be unpredictable. However, most common issues can be diagnosed and corrected with a little understanding of the process. Don't be discouraged if your first few loaves aren't perfect; analyze what happened and adjust your technique for the next bake. Unlike the consistent results often expected from a simple bread machine rye recipe, sourdough offers more variables to master.
Common problems include loaves that are dense, flat, or gummy, or issues with the starter's activity. By carefully observing your starter's behavior, paying attention to dough temperature and fermentation times, and refining your shaping and baking techniques, you can overcome most hurdles. Keeping a baking journal can be incredibly helpful in tracking variables and identifying patterns. Note down things like ambient temperature, starter activity, fermentation times, and dough behavior at each stage.
Dense or Gummy Sourdough: What Went Wrong?
A dense or gummy crumb is one of the most common and frustrating issues in sourdough baking. This usually indicates that the dough did not ferment or rise properly before baking. One primary culprit is an inactive or weak starter. If your starter isn't doubling in size reliably after feeding, it won't have enough leavening power to lift the dough. Ensure your starter is active and bubbly by feeding it consistently and using it at its peak (when it's most bubbly and before it starts to fall).
Another frequent cause is under-proofing. If the bulk fermentation or final proofing time was too short, the dough hasn't had enough time to develop sufficient gas to create an open structure. Check the dough's volume increase during bulk fermentation (aiming for 30-60%) and use the poke test during the final proof. Dough that springs back too quickly is likely under-proofed. Using insufficient water (low hydration) can also contribute to a dense crumb, as wetter doughs generally lead to a more open structure, assuming proper gluten development.
Flat Sourdough: Possible Causes and Fixes
If your sourdough loaf spreads out during baking instead of rising upwards, resulting in a flat disc, several factors could be at play. Over-proofing is a very common cause. If the dough proofs for too long, the gluten structure that holds the gas can weaken and collapse, leaving the dough with no energy left for oven spring. Check the dough's volume increase and use the poke test – dough that doesn't spring back at all when poked is likely over-proofed.
Poor shaping is another major contributor to flatness. If you don't create enough surface tension during the final shaping, the dough won't have the structure needed to hold its shape in the oven. Practice your shaping techniques, focusing on creating a tight surface layer. Additionally, a weak starter or insufficient gluten development during mixing and bulk fermentation can lead to a dough that lacks the strength to support itself. Ensure your starter is active and that you are performing enough stretch and folds or kneading to build a strong gluten network.
Over-Proofed Dough: Identifying and Correcting
Over-proofing occurs when the dough has fermented for too long, either during bulk fermentation or the final proof. Identifying over-proofed dough is crucial. During bulk fermentation, it might look extremely bubbly, potentially starting to collapse or become very slack and difficult to handle. During the final proof, the dough might look puffy but feel very fragile and may completely fail the poke test, leaving a permanent indentation. It might also have a very strong, overly acidic smell.
Unfortunately, there's no magic fix for severely over-proofed dough if you intended to bake a freeform loaf. The gluten structure is likely too degraded to hold its shape. However, you can sometimes salvage it by gently reshaping it and baking it immediately, accepting that it will likely be flatter.
A better approach is to avoid over-proofing by monitoring your dough closely, especially in warmer temperatures. If you think the dough is proofing too quickly, put it in the refrigerator to slow fermentation down. If you realize your dough is slightly over-proofed before baking, you can try baking it in a loaf pan or Dutch oven to provide structural support.
Variations and Customizations for Your Sourdough Recipe
Once you've mastered the basic sourdough process, a world of variations and customizations opens up. Sourdough is incredibly versatile and lends itself well to incorporating different flours, seeds, herbs, cheeses, and more. Experimenting with these additions can dramatically change the flavor, texture, and appearance of your bread, keeping your baking exciting and tailored to your preferences. Unlike the fixed settings of some basic bread machine recipes, sourdough encourages creative exploration.
Adding whole grains is a popular way to enhance both the nutritional value and the flavor complexity of your sourdough. Incorporating seeds or nuts adds crunch and visual appeal. Herbs and spices can infuse your loaf with aromatic notes, while cheese can create savory, indulgent variations. Even using your sourdough discard – the portion of starter you remove before feeding – in other recipes is a great way to minimize waste and add a touch of sourdough tang to things like pancakes, crackers, or muffins.
Adding Whole Grains for Enhanced Flavor and Texture
Incorporating whole grains into your sourdough recipe is an excellent way to deepen the flavor profile and introduce textural variations. Whole wheat flour, for example, adds a nutty, earthy taste and a denser crumb compared to bread made solely with white flour. When substituting whole wheat, you may need to slightly increase the water in your recipe, as whole wheat absorbs more moisture. A common starting point is replacing 10-30% of the white flour with whole wheat.
Beyond whole wheat, a variety of other whole grain flours can be used, each offering unique characteristics. Rye flour, even a small percentage (5-20%), imparts a distinct tang and moistness. Spelt flour offers a slightly sweeter, nuttier flavor and a more tender crumb.
Einkorn, Kamut, and other ancient grains can also be incorporated, bringing their own unique flavors and nutritional benefits. When working with higher percentages of certain whole grains like rye, which has weaker gluten, you might need to adjust your technique or expect a slightly different crumb structure compared to a pure wheat loaf. For instance, a sourdough incorporating 20% rye might have a slightly tighter crumb than a pure white flour loaf.
Incorporating Different Flours: Rye, Spelt, and More
Experimenting with different types of flour is a fantastic way to explore the diversity of sourdough. Rye flour, available in light, medium, and dark varieties, significantly impacts flavor and texture. Even a small amount (e.g., 10% of total flour weight) in a wheat-based sourdough adds a noticeable tang and keeps the crumb moist.
Higher percentages of rye (50% or more) result in denser, more traditional rye sourdoughs, which often require different handling techniques due to rye's low gluten content. These high-rye doughs are often sticky and shaped with wet hands or in pans, rather than relying on strong gluten development.
Spelt flour is another popular choice. It's an ancient grain with a slightly sweet, nutty flavor and a more delicate gluten structure than modern wheat. Using spelt (e.g., 20-40% of total flour) can result in a tender, flavorful loaf. Other flours like durum, semolina, or even alternative grain flours like buckwheat or oat flour (though these require careful handling due to lack of gluten) can be incorporated in smaller percentages to add unique dimensions to your sourdough creations.
Experimenting with Add-Ins: Seeds, Herbs, and Cheeses
Adding seeds, herbs, spices, or cheese can transform a basic sourdough loaf into a highly personalized and flavorful bread. Seeds like sesame, poppy, sunflower, flax, or pumpkin seeds can be incorporated into the dough during mixing or sprinkled on the exterior before baking. Adding 5-10% of the total flour weight in seeds is a good starting point. Toasted seeds offer a more intense flavor. For example, adding 50g of toasted sesame seeds to a 500g flour recipe adds a pleasant crunch and nutty flavor.
Fresh or dried herbs like rosemary, thyme, or dill, and spices like black pepper, caraway seeds (classic in rye bread), or even cinnamon in a sweeter dough, can infuse the bread with aroma and taste. Cheese, such as sharp cheddar, Gruyère, or Parmesan, can be folded into the dough during the final stages of bulk fermentation or shaping.
About 10-15% of the total dough weight in cheese is a good amount for a noticeable flavor without making the dough too difficult to handle. For instance, adding 80g of grated cheddar to a 800g dough recipe creates a delicious savory loaf.
Creating a Sourdough Discard Recipe
Sourdough discard refers to the portion of your starter that you remove before feeding it. Rather than throwing it away, this discard, which is less active than a peak starter but still contains flavor and some leavening power, can be used in a variety of recipes. Using discard is a great way to reduce waste and add a subtle tang to baked goods that don't rely solely on the starter for rise. Recipes using discard often incorporate baking soda or powder for leavening alongside the discard.
Popular discard recipes include pancakes, waffles, muffins, crackers, biscuits, and quick breads. The amount of discard used can vary, but often ranges from 100g to 250g or more depending on the recipe. For example, a recipe for sourdough discard pancakes might use 150g of discard, flour, milk, eggs, and a pinch of baking soda. These recipes benefit from the flavor complexity of the sourdough fermentation without requiring the starter to be at its peak activity. It's a simple way to enjoy the benefits of your sourdough starter beyond just baking loaves.
Enjoying Your Freshly Baked Sourdough Bread
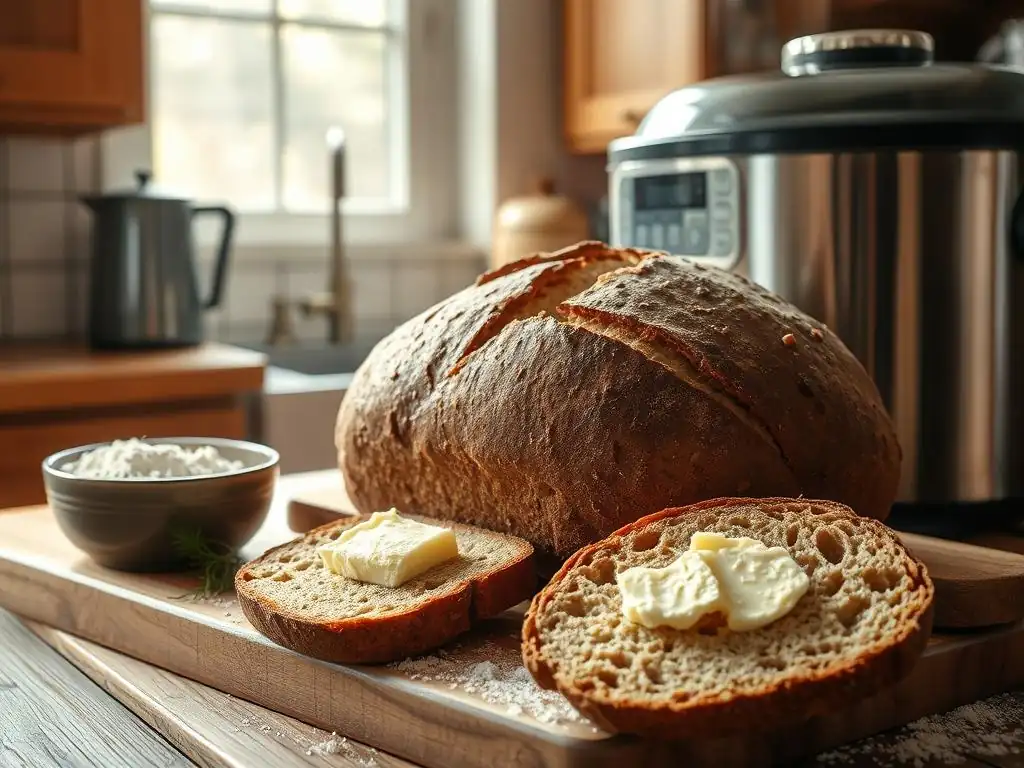
After all your hard work, the moment arrives to slice into your beautiful, homemade sourdough loaf. The aroma alone is a reward. Serving and enjoying your bread is the culmination of the entire process. Sourdough is incredibly versatile and can be enjoyed in countless ways, from a simple slice with butter to the base for elaborate meals.
Proper storage is essential to keep your sourdough fresh and preserve its wonderful texture and flavor. Unlike commercial breads that might contain preservatives, homemade sourdough will start to stale within a few days. Knowing the best ways to store it will ensure you can savor its quality for as long as possible. The open crumb structure, achieved through careful fermentation and baking, is perfect for soaking up flavors.
Serving Suggestions and Pairings
Freshly baked sourdough is delicious on its own, perhaps just with a smear of good quality butter. Its robust flavor and chewy texture make it an excellent accompaniment to soups, stews, and salads. A thick slice toasted and topped with avocado, eggs, or smoked salmon makes for a fantastic breakfast or brunch. Sourdough also makes the best base for open-faced sandwiches or classic grilled cheese.
The tanginess of sourdough pairs particularly well with rich or creamy foods. Try serving it with a cheese board featuring sharp cheeses, creamy brie, or goat cheese. It's also wonderful with charcuterie. For a simple appetizer, toast slices and top with bruschetta or tapenade. The possibilities are truly endless, showcasing the versatility of this rustic bread. For instance, a slice of sourdough with a dollop of ricotta cheese and a drizzle of honey offers a delightful contrast of tangy bread and sweet, creamy topping.
Storing Your Homemade Sourdough for Optimal Freshness
To keep your sourdough bread fresh, avoid refrigerating it, as this can actually speed up the staling process. The best way to store a whole or partial loaf for 1-2 days is at room temperature, wrapped in a clean linen towel or placed cut-side down on a cutting board. The towel allows the crust to breathe, maintaining some of its crispness, while protecting the crumb.
For longer storage, freezing is the best option. Allow the loaf to cool completely, then wrap it tightly in plastic wrap, followed by a layer of aluminum foil or place it in a freezer-safe bag. Whole loaves or halves can be frozen for up to a few months.
To thaw, remove from the freezer and let it sit at room temperature, still wrapped, for several hours. For best results with a frozen loaf, once thawed, you can briefly reheat it in a preheated oven (around 350°F or 175°C) for 10-15 minutes to refresh the crust. Sliced bread can also be frozen and individual slices toasted from frozen.
Mastering Sourdough Baking: Beyond the Basic Recipe
Baking a successful basic sourdough loaf is a significant achievement, but it's just the beginning of your sourdough journey. There are many ways to refine your techniques, experiment with different flours and hydration levels, and explore more advanced methods that can further improve the quality and consistency of your bread. Unlike a simple bread machine rye recipe which offers limited variation, sourdough provides a lifetime of learning and experimentation.
Continuous learning and practice are key to mastering sourdough. Pay attention to the subtle cues your dough gives you – its feel, smell, and appearance throughout the fermentation process. Don't be afraid to try new techniques or adjust variables like hydration or fermentation time based on your environment and starter's behavior. Joining online sourdough communities or reading books by experienced bakers can provide valuable insights and inspiration.
Advanced Sourdough Techniques
Once you're comfortable with the basics, you can explore more advanced sourdough techniques that can enhance your bread's structure and crumb. Lamination is one such technique, involving stretching the dough out into a thin rectangle and folding it like a business letter. This process helps build strength evenly throughout the dough and can be a good time to incorporate inclusions like seeds or cheese. It's typically performed early in bulk fermentation after a few hours.
Coil folds are another popular technique used during bulk fermentation. Instead of stretching and folding the dough in the bowl, the dough is lifted from the center with wet hands, allowing the edges to coil underneath. This is repeated a few times, turning the container each time. Coil folds are gentler than traditional stretch and folds and are particularly useful for high-hydration doughs, helping to build structure without tearing the fragile gluten network. Mastering these techniques requires practice but can lead to noticeable improvements in your loaf's volume and crumb structure.
Tips for Consistent Sourdough Baking Success
Consistency in sourdough baking comes from understanding the variables and learning to adapt. One of the most important factors is temperature – both the temperature of your kitchen and the temperature of your dough. Using water at a specific temperature to achieve a target dough temperature (DDT) can help control fermentation speed. For example, aiming for a DDT of 75-78°F (24-26°C) often leads to predictable bulk fermentation times.
Another key tip is to use an active, strong starter, fed regularly. Learn to recognize its peak activity. Pay attention to timing and dough development cues rather than strictly following recipe times, as fermentation speed is influenced by many factors. Keep detailed notes in a baking journal – recording temperatures, times, hydration levels, and observations about the dough's behavior. This data will help you understand what works in your environment and replicate successful bakes. Finally, practice makes perfect; the more you bake, the better you'll become at reading your dough and achieving consistent, delicious results.
Frequently Asked Questions
What makes this rye bread recipe "simple" for a bread machine?
This recipe prioritizes easy-to-find ingredients and a straightforward process specifically designed for bread machine functionality. It minimizes the complexity often associated with rye bread making.
Can I substitute any ingredients in this rye bread recipe?
While the recipe is optimized for best results, some substitutions are possible. However, altering the ratio of flours or liquids can significantly impact the final texture and rise of the bread.
What if my bread machine doesn't have a "rye bread" setting?
If your bread machine lacks a rye setting, use the "whole wheat" setting or the setting closest in duration and kneading cycle. Monitor the dough during kneading to ensure proper consistency.
How can I tell if my rye bread is fully baked in the bread machine?
Use a digital thermometer to check the internal temperature; it should reach 200-210°F (93-99°C). Also, the crust should be a deep golden brown and the loaf should sound hollow when tapped.
What is the best way to store my freshly baked rye bread?
To maintain freshness, store your rye bread in a sealed plastic bag or bread box at room temperature. Slicing only when needed will further prevent the bread from drying out too quickly.
Final Reflection: The Enduring Appeal of Homemade Rye
The humble bread machine, once a kitchen novelty, is experiencing a resurgence, driven by a renewed appreciation for simple pleasures and the desire for wholesome, homemade food. This renewed interest is perfectly exemplified by the enduring popularity of rye bread, a hearty and flavorful loaf that, with the right recipe, can be surprisingly easy to make even in a bread machine. The simplicity of the recipe presented in this article speaks to a deeper desire for connection – a connection to the process of food creation and the satisfaction of enjoying something crafted with your own hands.
The journey from flour to finished loaf is more than just a recipe; it's a journey of rediscovering the tactile and sensory experiences often lost in our fast-paced world. The aroma of baking rye bread filling a home is a powerful reminder of simpler times, a comforting tradition passed down through generations. Bread is the staff of life,
a common saying reminds us of its fundamental importance, and making it ourselves elevates that importance to a new level of appreciation. This simple act of baking connects us to our heritage and allows us to share a piece of ourselves with others.
Now, consider your own kitchen. Imagine the warmth of that freshly baked rye bread, its crust crackling slightly as you slice into it. Don't let this recipe remain just words on a page. Take the time to gather the ingredients, follow the steps, and experience the magic of transforming simple ingredients into something truly nourishing and delicious. Embrace the simplicity, savor the process, and share the joy of homemade rye bread with those you love. The revolution starts in your kitchen.
Unleash Your Inner Baker: Knead to Know More?
Thanks for joining us on this delicious journey into the world of homemade rye bread! You've now got the knowledge to bake amazing loaves from the comfort of your own kitchen. Ready to take your baking skills to the next level?
- Bake your first loaf today! Grab your ingredients and follow our recipe – you'll be surprised how easy it is.
- Share your baking triumphs (or tales!) with us on social media! Use #BakeWithEaseRye to connect with fellow bread enthusiasts.
- Experiment with different rye flour blends. What unique flavors can you create?
So, what exciting rye bread adventure will you embark on next?