
Achieve Sharp Cake Edges with These MustHave Tools

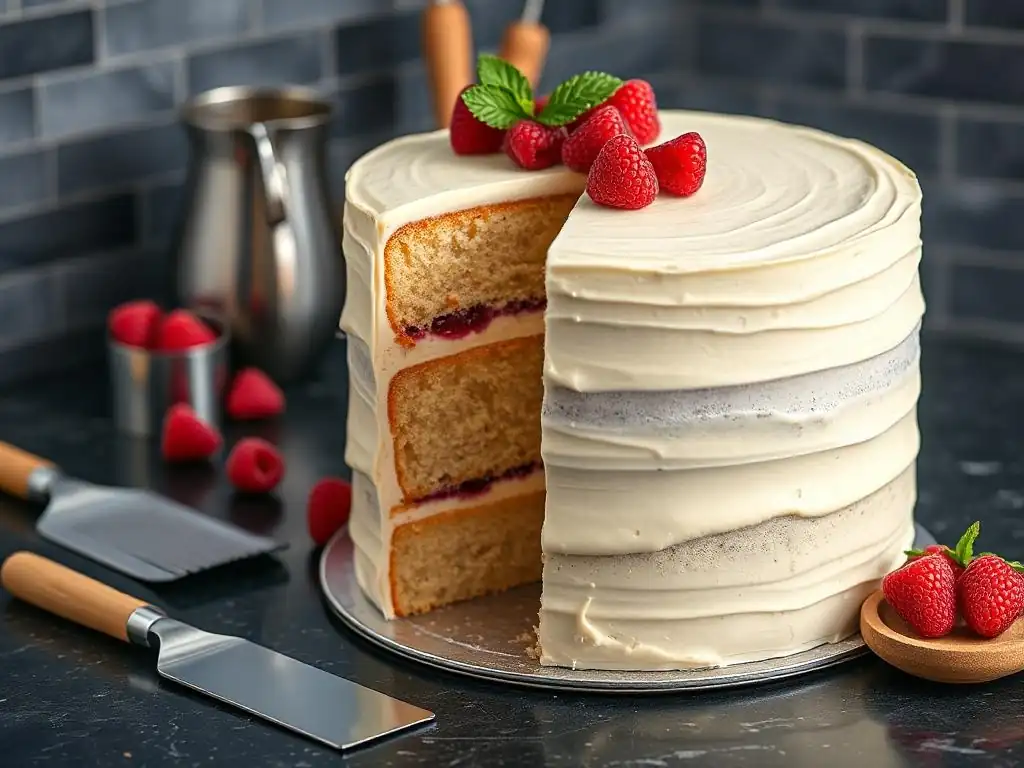
Welcome to BakeWithEase, your haven for all things baking! Ever dreamt of cakes so perfectly sculpted they look professionally made? Achieving those coveted sharp cake edges is easier than you think. Discover the essential tools and techniques we'll unveil in this guide to transform your cakes from delicious to dazzling. Intrigued? Let's dive in and unlock the secrets to flawless cake artistry!
- Why Sharp Cake Edges Matter for a Professional Finish
- Essential Tools for Achieving Sharp Cake Edges: A Comprehensive Overview
- Step-by-Step: Using Your Tools to Create Sharp Cake Edges
- Advanced Techniques for Ultra-Sharp Cake Edges
- Troubleshooting Common Problems with Cake Edges
- Maintaining Your Tools for Long-Lasting Sharp Edges
-
Frequently Asked Questions
- What are the most important tools for achieving sharp cake edges?
- How does a cake turntable help achieve sharp cake edges?
- What is the best type of frosting for creating sharp cake edges?
- What is the "hot water" method and how does it help with sharp cake edges?
- What are some common mistakes that prevent sharp cake edges?
- Final Reflection: The Art and Science of Perfectly Sharp Cake Edges
- Unleash Your Inner Cake Artist!
Why Sharp Cake Edges Matter for a Professional Finish
The Importance of Achieving Clean, Crisp Cake Edges
Achieving clean, crisp, and sharp cake edges is often the hallmark of a professionally decorated cake. While the flavor is paramount, the visual presentation significantly impacts how a cake is perceived. Imagine a beautifully frosted cake with perfectly smooth sides and razor-sharp edges; it speaks volumes about the care and skill that went into its creation.
These sharp edges provide a polished, refined look that elevates even a simple design. They create a defined structure, making the cake appear more stable and expertly crafted. Whether you're aiming for a sleek modern design or a foundation for intricate piping, those defined edges are crucial.
Beyond aesthetics, sharp edges provide a superior base for further decoration. Trying to pipe intricate borders, apply fondant, or add drip effects onto soft, rounded edges can be frustrating and often leads to messy results. Sharp edges give you a clean line to work from, allowing for more precise and professional-looking decorative elements.
For instance, a sharp 90-degree edge is ideal for creating a flawless ganache drip that falls evenly down the sides, or for attaching a perfectly smooth band of fondant around the base of the cake. Mastering the techniques for creating sharp cake edges tips the scale from amateur to impressive.
First Impressions: How Sharp Edges Elevate Your Cake
The first impression a cake makes is visual. Before anyone takes a bite, they see its shape, color, and finish. A cake with sharp, defined edges immediately conveys quality and attention to detail.
It suggests that the baker has taken the time to refine their technique, treating the cake as a piece of edible art. This level of finish can make a standard celebration cake look like it came from a high-end patisserie, significantly enhancing its perceived value and appeal. Think of wedding cakes or special occasion cakes – sharp edges are practically a requirement for that elegant, sophisticated look.
Consider two identical cakes, one with soft, slightly slumped edges and another with perfectly sharp corners. The latter will invariably look more appealing, professional, and delicious. This visual appeal is especially important if you're baking for others, whether friends and family or paying customers. Achieving those sharp cake edges tips is a skill that pays dividends in presentation, making your cakes stand out and leaving a lasting positive impression on anyone who sees and tastes them. It’s a fundamental step towards mastering cake decorating.
Essential Tools for Achieving Sharp Cake Edges: A Comprehensive Overview
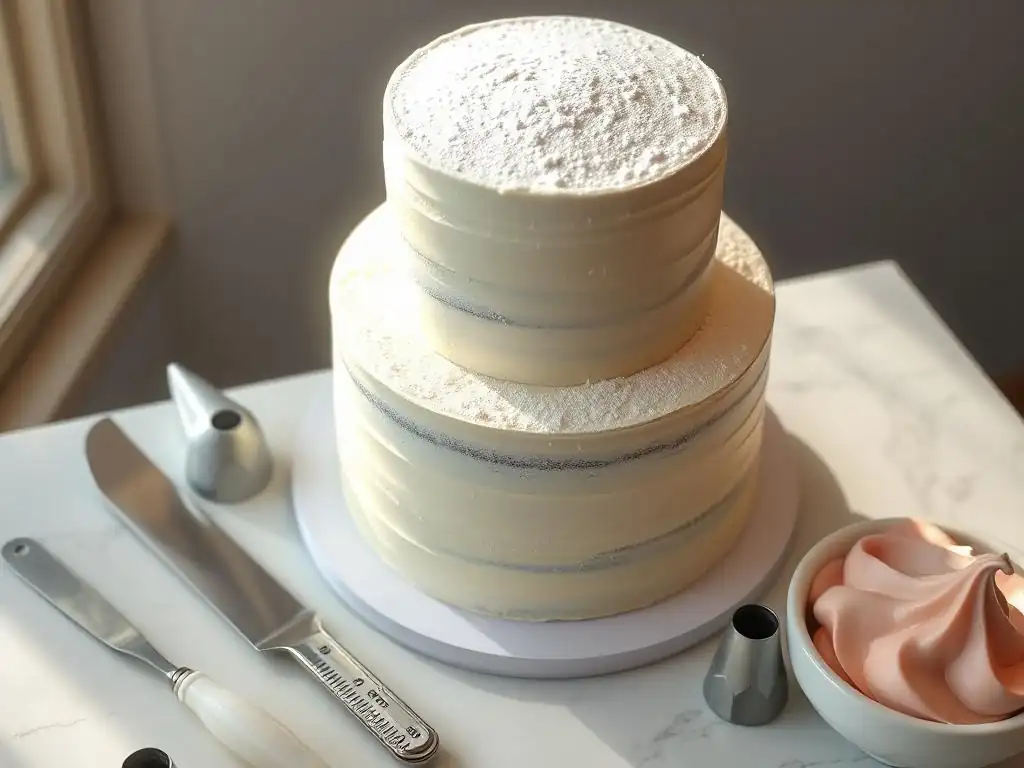
The Right Cake Pans for Sharp Edges
Using Straight-Sided Cake Pans for Best Results
The foundation of sharp cake edges begins before the frosting even comes out. Using the right cake pans is absolutely critical. Pans with straight, vertical sides are essential. Avoid pans with sloped sides or those that taper outwards, as these will produce cakes with rounded bases that are difficult to build a sharp edge upon. A standard round pan with truly straight sides, typically 2 to 3 inches deep, is ideal. For square or rectangular cakes, ensure the corners are as close to 90 degrees as possible.
- Why Straight Sides?
- Creates a vertical cake layer, minimizing the need for excessive trimming.
- Provides a stable base for stacking layers.
- Makes it easier to align layers perfectly.
- Results in cakes that are uniform in diameter from bottom to top.
Exploring Different Cake Pan Materials: Aluminum vs. Stainless Steel
Cake pans come in various materials, each affecting baking performance and durability. Lightweight aluminum pans are popular because they heat quickly and evenly, promoting a consistent bake and preventing hot spots that can cause uneven rising. Anodized aluminum pans, specifically, have a hard finish that resists scratching and corrosion and provides excellent heat distribution. These pans are a top choice for achieving even layers, which is the first step towards sharp cake edges tips.
Stainless steel pans are more durable and resistant to warping, but they don't conduct heat as evenly as aluminum. This can sometimes lead to cakes with slightly darker edges or uneven centers if not managed carefully. However, their sturdiness makes them a long-term investment. Ultimately, for reliable, even baking crucial for sharp edges, many professional bakers prefer quality heavy-gauge aluminum pans with straight sides. Silicone pans, while easy to release, often result in less defined edges and are generally not recommended when sharp cake edges are the goal.
Choosing the Correct Cake Pan Size for Your Recipe
Using the correct pan size specified in your recipe is vital. Overfilling a pan leads to the batter spilling over or creating a domed top that is challenging to level without significant waste. Underfilling results in thin layers that can be fragile and difficult to handle. A general rule of thumb is to fill cake pans about two-thirds full with batter. This allows enough room for the cake to rise properly without overflowing, resulting in a layer that is easier to level and stack.
For example, if a recipe calls for a 8-inch round pan and yields approximately 6 cups of batter, you should use an 8-inch pan that can comfortably hold that volume while being only two-thirds full. Pans that are 2 inches deep are standard for single layers, while 3-inch deep pans are excellent for baking a single, thicker layer that can be torted (sliced horizontally) into multiple thinner layers. Using the correct size ensures consistent layer thickness and height, foundational elements for achieving those sought-after sharp cake edges tips.
Leveling Tools: Ensuring a Flat Cake Top
The Importance of a Cake Leveler for Even Layers
Once your cakes are baked and cooled, leveling them is the next critical step towards achieving sharp cake edges. A cake leveler is a specialized tool designed to slice off the dome from the top of your cake layers, creating a perfectly flat surface. This consistency is vital for stacking straight layers without gaps, which can compromise the stability and final appearance of your cake's edges. Using a leveler ensures each layer is the same height, making the overall cake straight and easier to frost smoothly.
Adjustable cake levelers, which allow you to set the wire at different heights, are particularly useful as they accommodate various cake sizes and desired layer thicknesses. For instance, setting the wire to 1.5 inches allows you to easily slice two even layers from a 3-inch deep cake. Using a leveler consistently across all layers ensures uniformity, which is fundamental to building a cake with impeccable sharp cake edges tips.
Using a Serrated Knife for Leveling Cakes
While a cake leveler offers unparalleled precision, a long, sharp serrated knife can also be used effectively for leveling. The key is to use a sawing motion rather than pressing down, which can compress the cake. Hold the knife parallel to your work surface and gently saw through the cake's dome, keeping your hand steady. It requires a bit more practice to achieve a perfectly even cut compared to a leveler, but it's a readily available tool for most bakers.
To improve accuracy when using a knife, some bakers place guides on either side of the cake, such as two books or cutting boards of equal thickness, and rest the knife on them as they cut. This helps maintain a consistent height across the cake. While perhaps not as foolproof as a dedicated leveler, a skilled hand with a good serrated knife can certainly achieve the flat tops necessary for developing sharp cake edges tips.
Alternative Leveling Methods: Using a Thread or Dental Floss
Surprisingly, a simple piece of thread or unflavored dental floss can be used to level cake layers. This method is best suited for softer, tender cakes. To use this technique, make a small incision around the cake's perimeter where you want to slice. Then, wrap the thread or floss around the cake at that incision line, cross the ends, and pull them tautly. As you pull, the thread will slice cleanly through the cake.
This method requires a steady hand and can be tricky on larger cakes. It's also less precise than a leveler or knife for achieving a perfectly flat surface every time. However, in a pinch, it's a viable option for removing domes. While perhaps not the go-to for achieving ultra-sharp cake edges tips consistently, it demonstrates that basic tools can sometimes serve multiple purposes in the kitchen.
Frosting Tools: The Key to Smooth Application
Offset Spatulas: Your Best Friend for Frosting
When it comes to applying and smoothing frosting, the offset spatula is indispensable. Its bent shape keeps your knuckles from dragging through the frosting, allowing for a cleaner application. Offset spatulas come in various sizes, from small ones perfect for spreading filling or working on delicate details to large ones ideal for covering the entire cake surface quickly. A medium-sized offset spatula, around 8-10 inches long, is a versatile tool for most standard cakes.
Using an offset spatula, you can apply frosting to the top and sides of the cake, spreading it evenly. The smooth, flat blade is crucial for creating a uniform layer of frosting before moving on to the final smoothing steps. For sharp cake edges tips, getting this initial layer as even as possible with your offset spatula makes the subsequent scraping much easier and more effective.
Bench Scrapers: Achieving Smooth Sides and Sharp Edges
The bench scraper, also known as a cake scraper or side scraper, is arguably the most crucial tool for achieving truly sharp cake edges. This flat, rectangular tool, often made of metal or plastic, is held vertically against the side of the cake while the cake is rotated on a turntable. As you scrape, it removes excess frosting, leaving a smooth, even layer. The straight edge of the scraper is what allows you to build that sharp angle where the top meets the side.
Metal bench scrapers are generally preferred for their rigidity and ability to heat up slightly (more on that later), which aids in smoothing. Using a bench scraper requires practice to maintain even pressure and a consistent angle, but it is the most effective way to achieve those perfectly smooth sides and crisp sharp cake edges tips. Holding the scraper at a slight angle towards the cake can help coax the frosting upwards towards the top edge.
Turntables: Essential for Even Frosting Application
A rotating cake stand, or turntable, is absolutely essential for applying frosting smoothly and creating sharp edges. Trying to frost and scrape a cake while it sits stationary is incredibly difficult and often results in uneven coverage and wobbly edges. A good quality turntable allows you to easily rotate the cake smoothly with one hand while you work on it with the other.
Look for a turntable that is stable, rotates smoothly, and has a non-slip base or surface to prevent the cake from shifting. Heavy-duty turntables, often made of metal, provide excellent stability and a smooth spin, which is crucial when you are using a bench scraper to create sharp cake edges tips. Plastic turntables are more affordable but can sometimes be wobbly or less smooth in their rotation.
Chilling and Freezing: Solidifying Your Edges
The Role of Chilling in Achieving Sharp Edges
Chilling your cake layers and frosted cake is a non-negotiable step for achieving sharp cake edges. Cold cake layers are firmer and less likely to crumble when you're leveling or handling them. More importantly, chilling a crumb-coated or fully frosted cake stiffens the frosting. This firm surface is much easier to scrape smooth and provides the necessary rigidity to create and maintain a sharp edge.
After applying a crumb coat (a thin layer of frosting to trap crumbs), chilling the cake for at least 20-30 minutes in the refrigerator until the frosting is firm is essential before applying the final layer. Similarly, after applying the final layer, a period of chilling (30-60 minutes or longer) before attempting to smooth and create sharp edges allows the frosting to firm up sufficiently to hold its shape when scraped. This chilling process is fundamental to all sharp cake edges tips.
Freezing Cake Layers for Easier Frosting
Freezing cake layers can make them incredibly easy to handle, particularly if they are delicate or need to be torted. Wrap cooled cake layers tightly in plastic wrap and then in foil, and freeze for at least a few hours, or even overnight. Frozen layers are firm and won't crumble when you level or slice them. They are also less prone to breaking during stacking.
While you wouldn't freeze a fully frosted cake if the goal is just chilling for scraping, freezing individual layers beforehand is a great prep step. Just be sure to allow them to thaw slightly in the refrigerator before frosting, as frosting directly onto a rock-hard frozen cake can cause condensation issues. Using slightly chilled or partially frozen layers is one of the sharp cake edges tips that can significantly simplify the initial stages of cake assembly.
Optimal Chilling/Freezing Times for Different Cakes
The ideal chilling or freezing time depends on the size of the cake and the type of frosting used. Buttercream, especially one with a higher butter ratio, will firm up relatively quickly, often within 30-60 minutes in the refrigerator. Cream cheese frosting or whipped cream based frostings may take longer to firm up sufficiently, perhaps 1-2 hours or even longer.
For crumb coating, a quick 20-30 minute chill is usually sufficient to set that thin layer. For the final frosting layer before scraping, aim for at least 45-60 minutes in the refrigerator, or until the frosting feels firm to the touch but not frozen solid. Smaller cakes will chill faster than larger, multi-tiered ones. Experimentation based on your specific recipe and refrigerator temperature is key, but a general guideline of 30-60 minutes for chilling frosted cakes is a good starting point for achieving those crisp sharp cake edges tips.
Step-by-Step: Using Your Tools to Create Sharp Cake Edges
Preparing Your Cake Layers: Leveling and Trimming
The process begins with your baked and cooled cake layers. Ensure they are completely cool, ideally chilled for at least 30 minutes in the refrigerator, before you start. Place a layer on your turntable. Using your cake leveler set to the desired height (or a serrated knife with guides), carefully slice off the dome to create a perfectly flat top. Repeat for all layers. If needed, you can also gently trim the sides if they are not perfectly straight, although using straight-sided pans minimizes this.
- Task List: Preparing Layers
- Allow cakes to cool completely.
- Chill layers in the refrigerator for 30-60 minutes.
- Place one layer on the turntable.
- Use a cake leveler or serrated knife to remove the dome.
- Repeat for all layers.
- (Optional) Trim sides if necessary.
Crumb Coating: Sealing in the Crumbs
Applying a Thin, Even Crumb Coat
A crumb coat is a thin layer of frosting applied to the entire cake surface before the final, thicker layer of frosting. Its primary purpose is to trap any loose crumbs, preventing them from getting into your final layer of frosting and ruining its smooth appearance. Apply a small amount of frosting to the top and sides using an offset spatula, spreading it thinly and evenly. Don't worry about perfection at this stage; just aim for full coverage.
This crumb coat doesn't need to be thick, perhaps only 1/8 to 1/4 inch deep. Ensure it covers every part of the cake. Use your offset spatula to smooth it slightly, removing any large ridges. This step is crucial for a clean final finish, which is necessary for achieving sharp cake edges tips without crumb interruptions.
Chilling the Crumb Coat for a Smooth Finish
Once the crumb coat is applied, place the cake back in the refrigerator to chill. This step is non-negotiable. Chill the cake for at least 20-30 minutes, or until the crumb coat feels firm and dry to the touch. This chilling time allows the thin layer of frosting to set, effectively locking in all those pesky crumbs.
A properly chilled crumb coat provides a stable, crumb-free surface for applying the final layer of frosting. Trying to apply the final layer over a soft crumb coat will only result in pulling up crumbs and creating a messy finish. Chilling is a simple but vital technique among the sharp cake edges tips that ensures your final frosting application is smooth and clean.
Final Frosting: Achieving the Perfect Edge
Applying the Final Layer of Frosting
With the crumb coat firm and chilled, it's time for the final layer of frosting. Apply a generous amount of frosting to the top and sides of the cake using your offset spatula. Don't be stingy; it's easier to scrape away excess than to add more later. Aim for a layer that is thicker than your crumb coat, perhaps 1/4 to 1/2 inch deep. Get the frosting onto the cake surface as evenly as possible using your offset spatula.
Ensure you have slightly more frosting built up at the top edge of the cake than elsewhere. This excess frosting is what you will use to create the sharp edge. Apply frosting to the top first, smoothing it roughly, then apply frosting to the sides, working your way around the cake. This ample frosting layer provides material for the bench scraper to work with when creating sharp cake edges tips.
Using a Bench Scraper to Smooth the Sides
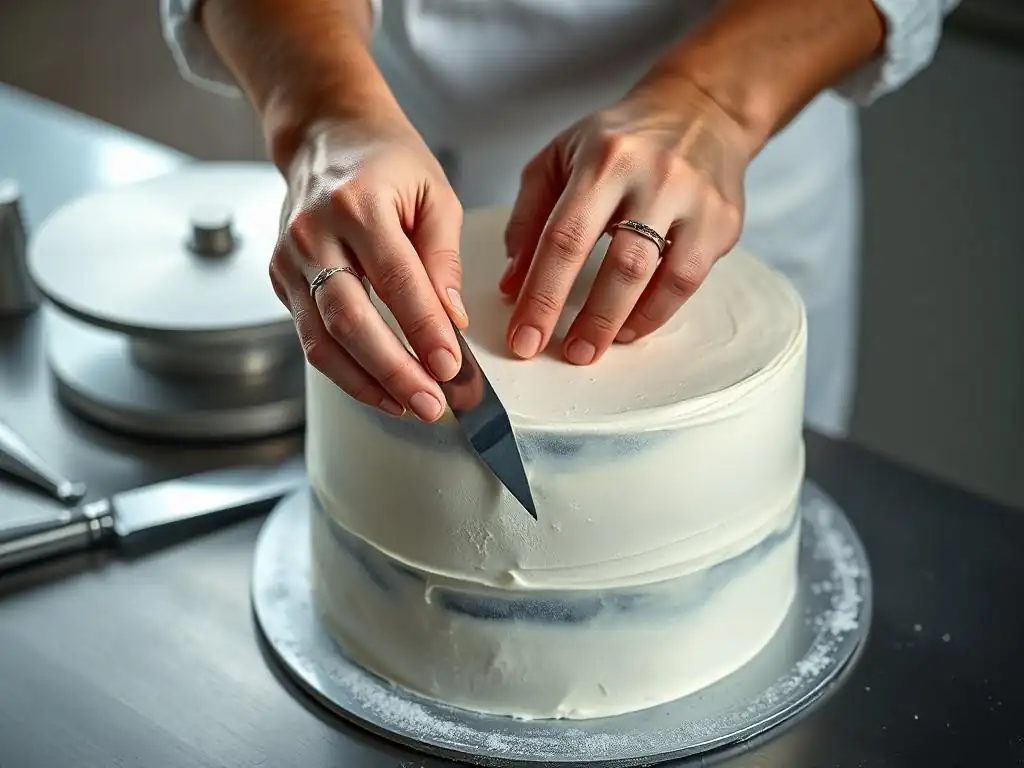
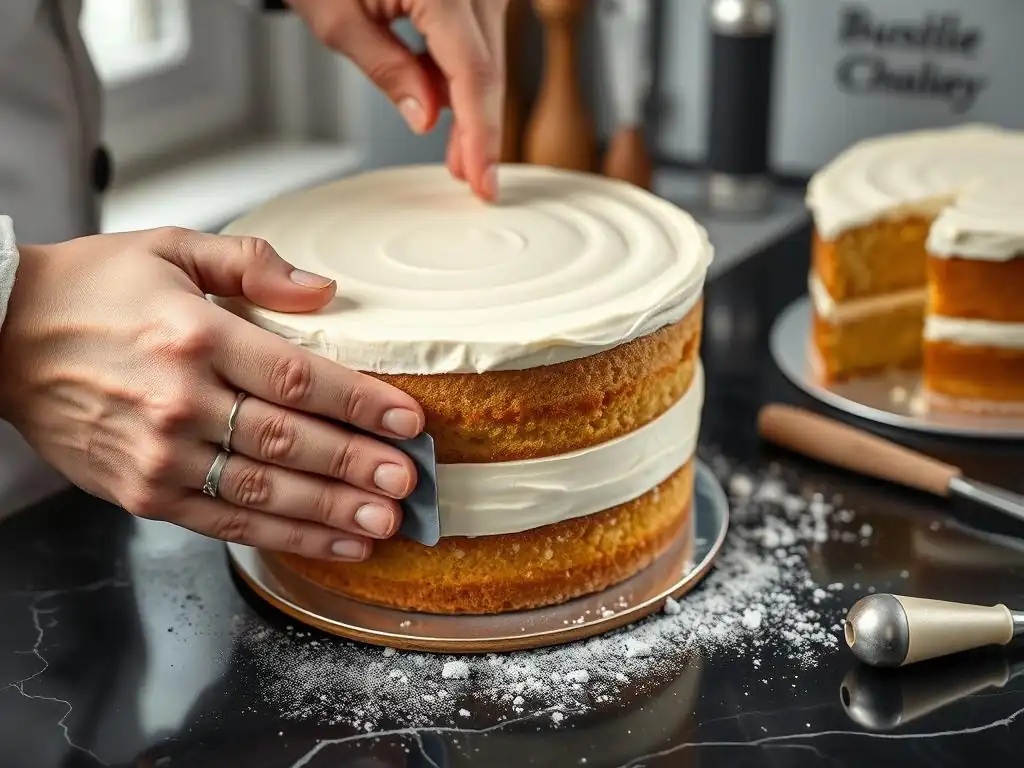
This is where the magic happens for achieving sharp cake edges. Hold your bench scraper vertically against the side of the cake, at a slight angle pointing towards the cake. Keep the bottom edge of the scraper flat against the turntable. With one hand holding the scraper steady, use your other hand to slowly and smoothly rotate the turntable. As you rotate, the scraper will remove excess frosting, leaving behind a smooth, even surface.
Scrape repeatedly, cleaning the scraper with a clean towel or paper towel after each pass, until the sides are perfectly smooth and straight. Ensure your scraper is held consistently vertical. This process might take several passes. The goal is perfectly flat, vertical sides, which are the base for your sharp cake edges tips.
Creating Sharp Edges with a Hot Scraper Technique
Once the sides are smooth, you'll have a slight ridge of frosting built up around the top edge. To create the sharp edge, use your offset spatula or the clean bench scraper. Dip the blade of the spatula or scraper into hot water, wipe it completely dry, and then use the edge of the spatula/scraper to gently pull that excess frosting from the edge inwards towards the center of the cake top.
Work your way around the cake, cleaning and reheating your tool as needed. Each pull should be a smooth, single stroke from the outside edge towards the center. This technique smooths the very top edge and defines that crisp line where the side meets the top. Using a hot, dry scraper slightly melts the surface of the frosting, allowing for an incredibly smooth finish and helping to achieve those ultra-sharp cake edges tips.
Refining Your Edges: Techniques for a Flawless Finish
The "Hot Water" Method for Smoothing
As mentioned in the previous step, the hot water method is invaluable for achieving a glass-smooth finish and perfecting sharp edges. For the sides, you can briefly dip your bench scraper in hot water, wipe it completely dry, and then use it to make one final pass around the cake sides. The slight warmth helps to melt the outermost layer of frosting, resulting in a perfectly smooth surface with no drag marks.
For the top edge, heating your offset spatula or the edge of your bench scraper in hot water, drying it thoroughly, and then pulling the excess frosting inwards is the standard technique for defining the sharp line. Ensure your tool is dry, as water droplets will ruin the smooth finish. This simple application of warmth is one of the most effective sharp cake edges tips for a flawless look.
Using a Spatula to Define the Edge
After using the bench scraper on the sides and pulling the excess frosting inwards on the top, you might need to make minor adjustments to the edge using a small offset spatula. Look at the cake from the side at eye level. If the edge isn't perfectly straight or sharp, use the tip of a clean, dry offset spatula to gently push or pull the frosting to refine the line.
This requires a steady hand and a light touch. Work in small sections, cleaning your spatula frequently. You're essentially sculpting the final edge to be as crisp as possible. This fine-tuning step with a spatula is crucial for achieving truly professional-looking sharp cake edges tips.
Addressing Imperfections and Blemishes
Even with the best tools and techniques, you might encounter small air bubbles, tiny gaps, or slight unevenness. For small imperfections on the side, you can apply a tiny bit more frosting with a small offset spatula and then re-scrape that section gently. For air bubbles, you can sometimes smooth over them with a hot spatula pass.
If the top edge isn't perfectly flat after pulling the frosting inwards, you can use a flat spatula held parallel to the cake top to skim over the surface very lightly, removing any bumps. Patience and repeated, gentle passes with clean tools are key to addressing blemishes and achieving a flawless finish and perfect sharp cake edges tips. Don't rush this final refinement stage.
Advanced Techniques for Ultra-Sharp Cake Edges
The Upside-Down Method for Perfectly Sharp Edges
One of the most effective advanced techniques for achieving razor-sharp edges, particularly on the top of the cake, is the "upside-down" method. After applying the final layer of frosting and smoothing the sides with a bench scraper, you invert the chilled cake onto a flat surface covered with parchment paper. The weight of the cake presses the top edge (which is now the bottom) against the surface, creating a perfectly flat and sharp line.
To do this, ensure your cake is well-chilled after the final frosting layer. Place a piece of parchment paper or a cake board slightly larger than the cake on top. Then, carefully and confidently flip the cake over. Gently lift the cake pan or board that was previously the base. You'll see a perfectly flat, sharp bottom edge. This edge will become the top when you flip the cake back over. This method requires a sturdy cake and firm frosting, but it yields unparalleled sharp cake edges tips.
Using Ganache for a Professional Finish
Ganache, a mixture of chocolate and cream, can also be used to achieve incredibly sharp edges, especially for a sleek, modern look. Ganache sets much firmer than most buttercreams, providing a very stable coating that is easy to scrape smooth. A 2:1 ratio of chocolate to cream (by weight) for dark chocolate, or a 3:1 ratio for milk or white chocolate, typically yields a ganache firm enough for coating.
Once the ganache is made and cooled to a spreadable consistency, apply it to the chilled cake as you would frosting. Use a bench scraper dipped in hot water and dried to smooth the sides. Because ganache sets firmly, it holds a sharp edge exceptionally well when scraped. Chilling the ganache-coated cake further solidifies it, allowing for incredibly precise and sharp cake edges tips.
Mastering Different Frosting Consistencies for Sharpness
The consistency of your frosting plays a significant role in how easily you can achieve sharp edges. Frostings that are too soft or runny will never hold a sharp shape, no matter how much you scrape. Conversely, frostings that are too stiff can be difficult to spread smoothly and may tear the cake.
An ideal frosting consistency for sharp edges is smooth, spreadable, but firm enough to hold its shape. American buttercream might need a tablespoon or two of powdered sugar added for stiffness, or a brief chill. Swiss or Italian meringue buttercreams are often naturally suited for sharp edges due to their stable structure, but ensure they aren't too warm. Royal icing or fondant, while not traditional frostings applied with a scraper, are other mediums inherently suited to creating incredibly sharp lines and corners on cakes, representing different approaches to achieving sharp cake edges tips through material choice.
Troubleshooting Common Problems with Cake Edges
Dealing with Bulging Cakes
Bulging sides are a common issue, often caused by too much filling between layers, uneven layers, or insufficient chilling. If your cake layers aren't level, the weight of the upper layers can push filling outwards. To prevent this, ensure layers are perfectly level and use a moderate amount of filling. Chilling the cake after filling helps to set the filling and prevent bulges.
If a bulge occurs after frosting, it's difficult to fix perfectly. You might be able to gently push the bulge back in with a warm spatula and re-scrape the area, but it's often a sign that the internal structure or filling is unstable. For future cakes, focus on level layers, stable fillings (like buttercream or ganache, not just fruit), and thorough chilling after filling and crumb coating as key sharp cake edges tips to avoid bulges.
Preventing Air Bubbles in Your Frosting
Air bubbles in frosting can create frustrating pits on your smooth surface, ruining your sharp edges. Air bubbles are often introduced during the mixing process or when applying the frosting. To minimize bubbles, mix buttercream on low speed for several minutes after it comes together to push out trapped air. You can also press the frosting against the side of the bowl with a spatula before using it.
When applying frosting, try to avoid whipping air into it. Use smooth, even strokes. If you see bubbles on the cake surface before scraping, you can gently pop them with the tip of a spatula and smooth over the area. After scraping, small bubbles can sometimes be smoothed out with a final pass using a hot, dry bench scraper. Preventing bubbles upfront is easier than fixing them – slower mixing and careful application are crucial sharp cake edges tips.
Fixing Uneven Frosting Application
Uneven frosting thickness is a major obstacle to achieving sharp edges, as the bench scraper will expose the inconsistencies. This is often a result of not applying enough frosting initially or not distributing it evenly with the offset spatula. If you notice thin spots or areas with too much frosting before scraping, add or remove frosting as needed with your offset spatula until the layer is relatively uniform.
During scraping, if you find an area is too thin, apply a bit more frosting to that specific spot using a small offset spatula and then re-scrape that section carefully, blending it into the rest of the side. Achieving even application takes practice, but generous initial frosting and careful scraping are the methods for correcting unevenness and perfecting your sharp cake edges tips.
Maintaining Your Tools for Long-Lasting Sharp Edges
Proper Cleaning and Storage of Cake Pans
Proper care of your tools ensures they perform optimally and last longer. For cake pans, wash them thoroughly after each use, ideally by hand with warm, soapy water. Avoid abrasive scrubbers, especially on anodized aluminum or non-stick surfaces, as they can damage the finish. Dry pans completely before storing to prevent rust (for steel) or corrosion (for aluminum).
Store pans carefully, avoiding stacking them in a way that could bend or warp their sides. Warped pans will not produce straight cake layers, directly impacting your ability to get sharp edges. Storing them individually or with padding between them is recommended. Maintaining your pans' shape is fundamental to getting consistent results and achieving those crisp sharp cake edges tips.
Keeping Your Spatulas and Scrapers in Top Condition
Offset spatulas and bench scrapers are relatively low maintenance. Wash them after each use with warm, soapy water and dry them thoroughly. For metal tools, drying is particularly important to prevent water spots or rust. Store them flat or in a way that their blades are protected from bending or nicking.
A bent spatula or a nicked bench scraper edge can make achieving a smooth finish and sharp edges incredibly difficult. If a metal bench scraper develops a slight bend or burr, it might be possible to gently straighten or smooth it, but often a damaged scraper needs replacing. Keeping these tools clean and straight is vital for consistent sharp cake edges tips.
Ensuring Your Turntable Operates Smoothly
A smooth-spinning turntable is essential for effortless frosting and scraping. Keep your turntable clean, wiping off any frosting or crumbs after each use. For turntables with moving parts (like ball bearings), refer to the manufacturer's instructions for cleaning and lubrication if needed.
If your turntable starts to wobble or spin unevenly, check its base and the surface it's on. Ensure it's placed on a stable, flat counter. If the issue persists, the internal mechanism might be dirty or worn. A sticky or jerky turntable makes smooth scraping nearly impossible, directly hindering your efforts to achieve sharp cake edges tips. Investing in a sturdy, reliable turntable pays off in the long run.
Frequently Asked Questions
What are the most important tools for achieving sharp cake edges?
The most important tools include a cake turntable, an offset spatula, and a bench scraper. These help create smooth, even frosting layers.
How does a cake turntable help achieve sharp cake edges?
A cake turntable allows for smooth and consistent frosting application, enabling you to create a clean and even base for achieving sharp edges. It provides 360-degree access.
What is the best type of frosting for creating sharp cake edges?
A firm and stable frosting like American buttercream or Swiss meringue buttercream is ideal. These hold their shape well and allow for precise sculpting.
What is the "hot water" method and how does it help with sharp cake edges?
The "hot water" method involves dipping your offset spatula or bench scraper in hot water and drying it before smoothing. This helps to melt the frosting slightly, creating a smooth and flawless surface.
What are some common mistakes that prevent sharp cake edges?
Common mistakes include uneven frosting layers, air bubbles trapped in the frosting, and inconsistent pressure while smoothing. Addressing these prevents rounded edges.
Final Reflection: The Art and Science of Perfectly Sharp Cake Edges
The pursuit of the perfect cake edge transcends mere aesthetics; it's a testament to precision, patience, and the power of the right tools. A flawlessly sharp edge elevates a simple cake into a masterpiece, instantly communicating a level of skill and care that delights both the baker and the recipient. In today's visually-driven world, where even the smallest detail can make a significant impact, mastering this technique is more relevant than ever.
The journey to achieving sharp cake edges has profoundly impacted my own baking journey. It's taught me the importance of meticulous preparation and the surprising influence even seemingly insignificant tools can have on the final product. The details are not the details. They make the design.
– Charles Eames. This quote perfectly encapsulates the essence of sharp cake edges; they are the details that elevate the entire creation. The subtle satisfaction of a perfectly straight, clean edge is a reward in itself, a tangible representation of dedication and skill.
Now, it's your turn. Don't just bake a cake; craft a cake. Experiment with the tools and techniques discussed, and discover the joy of achieving those flawlessly sharp edges. Embrace the challenge, refine your skills, and watch as your baking transforms from a hobby into a true art form. The journey to mastering sharp cake edges is a journey of continuous learning and improvement – a journey I invite you to embark on today.
Unleash Your Inner Cake Artist!
Thanks for taking the time to level up your baking game! You now have the knowledge to create flawlessly sharp cake edges – a true game-changer for stunning desserts. Ready to put your new skills to the test?
- Master the perfect edge: Grab your favorite spatula and try baking a cake today, focusing on the techniques we discussed. Pay close attention to the frosting application!
- Share your masterpiece: Show off your perfectly edged cake on social media using #BakeWithEaseSharpEdges – we'd love to see your creations!
- Explore more advanced techniques: Check out our other articles on cake decorating for even more inspiration and expert tips!
What's your favorite tool for achieving perfectly sharp cake edges? Let's discuss in the comments below!