
Troubleshooting Your Bread Machine: Fix Common Baking Problems

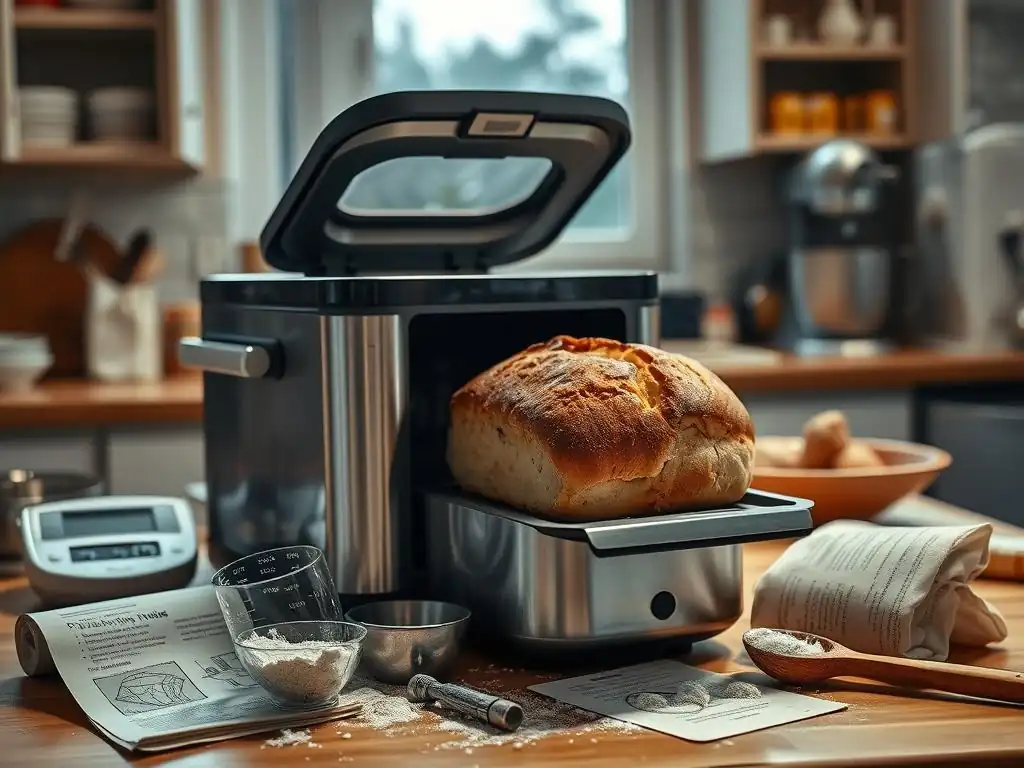
Welcome to BakeWithEase, your trusted companion on your baking journey!
Are you tired of inconsistent loaves and puzzling malfunctions from your bread machine? Unlock the secrets to perfect bread every time! Dive into our Bread Machine Troubleshooting Tips Guide and discover practical solutions to common baking problems. Don't let a faulty machine hold you back from the joy of freshly baked bread. Start exploring now and say goodbye to bread-making frustrations!
- Bread Machine Troubleshooting Tips Guide: Fix Common Baking Problems
- Introduction to Bread Machine Troubleshooting for Baking Perfection
- Problem 1: Bread Doesn't Rise Properly
- Problem 2: Loaf Collapses After Baking
- Problem 3: Bread is Too Dense or Heavy
- Problem 4: Crust Too Dark or Too Light
- Problem 5: Loaf Sticks to the Pan
- Problem 6: Burnt Smell During Operation
- Problem 7: Doughy or Gummy Bread
- Advanced Bread Machine Troubleshooting Tips
- Conclusion: Achieving Baking Success
-
Frequently Asked Questions
- What are some common problems that occur when using a bread machine?
- What are some of the most common errors people make when using a bread machine?
- How do I troubleshoot bread that comes out too dense from a bread machine?
- What causes bread to collapse in a bread machine, and how do I prevent it?
- What should I do if my bread machine's paddle gets stuck or breaks?
- Final Reflection: The Joy (and Troubleshooting) of Homemade Bread
- Unleash Your Inner Baker: Conquer Bread Machine Troubles!
Bread Machine Troubleshooting Tips Guide: Fix Common Baking Problems
Introduction to Bread Machine Troubleshooting for Baking Perfection
Why Bread Machine Troubleshooting is Essential
Even the most seasoned bakers encounter hiccups, and bread machines, while simplifying the process significantly, are no exception. Understanding basic bread machine troubleshooting is absolutely essential for consistent baking perfection. Without the ability to diagnose and fix common issues, you might find yourself repeatedly dealing with dense loaves, collapsed tops, or uneven crusts, leading to frustration instead of the joy of fresh, homemade bread. A good bread machine troubleshooting tips guide empowers you to understand the science behind the bake and how your specific machine interacts with ingredients.
Mastering the art of bread machine troubleshooting tips guide allows you to turn potential failures into learning opportunities. Instead of discarding a less-than-perfect loaf, you can analyze what went wrong, adjust your ingredients or settings, and achieve better results the next time. This not only saves ingredients and time but also builds your confidence in using your bread machine to its full potential, whether you're making a simple white loaf or a complex enriched dough. It's about gaining control over the baking process, even when using automated equipment.
Identifying Common Bread Machine Issues
Identifying the root cause is the first step in effective bread machine troubleshooting. Common problems range from the bread failing to rise, collapsing during or after baking, having a dense or heavy texture, issues with the crust color (too dark or too light), the loaf sticking to the pan, or even a burnt smell during operation. Recognizing the symptoms is key. For instance, a loaf that rises beautifully but then sinks might indicate over-proofing or too much liquid, while a loaf that barely rises could point to yeast issues or incorrect water temperature.
This bread machine troubleshooting tips guide will walk you through diagnosing these frequent issues. We'll cover everything from ingredient-related problems like yeast activity and flour type to machine-specific factors like cycle settings and pan condition. By systematically addressing each potential cause, you can pinpoint exactly what went wrong with your loaf. Think of it as detective work for your kitchen; each failed loaf provides clues that, when interpreted correctly using a comprehensive bread machine troubleshooting tips guide, lead you closer to baking success.
Problem 1: Bread Doesn't Rise Properly
Understanding the Role of Yeast
Yeast is the magical leavening agent responsible for making your bread light and airy. It's a living organism that feeds on sugars in the dough, producing carbon dioxide gas as a byproduct. This gas gets trapped in the gluten structure of the dough, causing it to expand or rise.
The type of yeast matters; active dry yeast typically needs to be proofed in warm water first, while instant yeast can often be added directly to the dry ingredients. Using the correct amount is also crucial; too little yeast means insufficient gas production, while too much can cause the dough to rise too quickly and potentially collapse. A typical guideline is about 1 to 2 teaspoons of instant yeast per cup of flour, though this can vary based on the recipe and cycle.
Effective bread machine troubleshooting tips guide often starts with checking the yeast. If your bread isn't rising, the yeast is likely the culprit. It might be inactive, expired, or killed by incorrect water temperature or direct contact with salt or sugar before mixing begins. Understanding how yeast functions in your bread machine's specific cycle – where it gets hydrated and when mixing begins – is vital. Some machines have a separate dispenser for yeast, while others require you to layer ingredients carefully to keep yeast away from liquids, salt, and sugar until the mixing phase starts.
Troubleshooting Yeast Problems: Activation and Expiration
One of the most common reasons for poor rise is inactive or expired yeast. Active dry yeast, in particular, benefits from being proofed before use. To test it, dissolve 1 teaspoon of sugar in 1/4 cup of warm water (around 105-115°F or 40-46°C) and stir in 2 1/4 teaspoons of active dry yeast. Let it sit for 5-10 minutes.
If it becomes foamy and doubles in volume, the yeast is active. If not, it's likely dead and needs replacing. Even instant yeast can lose potency over time; checking the expiration date on the packet is a simple but essential bread machine troubleshooting tips guide.
Storing yeast properly is also key. Once opened, yeast should be stored in an airtight container in the refrigerator or freezer to maintain its viability. Exposure to air, moisture, or heat can kill the yeast or significantly reduce its activity. If you're unsure about the age or storage of your yeast, it's often best to buy a new packet. A fresh, active packet of yeast is a small investment that can make a huge difference in the success of your bread machine baking, preventing many frustrating non-rises.
Checking Water Temperature for Yeast Activation
Water temperature plays a critical role in activating yeast. Water that is too cold won't activate the yeast, leading to little to no rise. Water that is too hot, especially above 130°F (54°C), can kill the yeast, resulting in a dense, brick-like loaf. For active dry yeast, the ideal water temperature for proofing is typically between 105-115°F (40-46°C). Instant yeast is more forgiving and can often be added directly to cool or lukewarm water, but using water in the 80-90°F (27-32°C) range is generally safe and effective in a bread machine.
Always use a thermometer to check your water temperature when troubleshooting yeast issues. Relying on the "feel" of the water can be misleading. Even water that feels warm to your hand might be too hot or too cold for optimal yeast activity. Some bread machine troubleshooting tips guide suggest adding liquids first to the pan, then dry ingredients, with yeast placed last on top of the flour, away from salt and sugar, to ensure it interacts with water at the right time in the cycle. This layering technique helps protect the yeast until the machine begins mixing.
Gluten Development Issues Affecting Rise
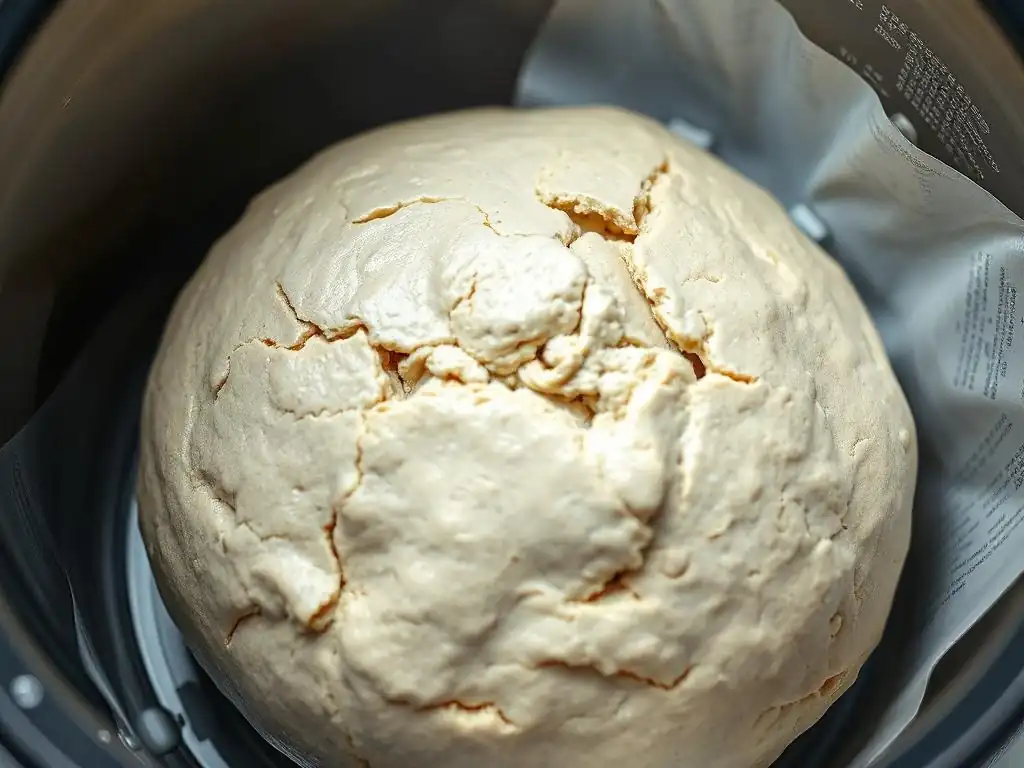
Beyond yeast, proper gluten development is essential for a good rise. Gluten, formed when proteins in flour (glutenin and gliadin) combine with water and are worked through kneading, creates an elastic network that traps the carbon dioxide gas produced by the yeast. If the dough is not kneaded sufficiently, this network won't be strong enough to hold the gas, resulting in a poor rise and a dense texture. Bread machines are designed to knead the dough, but sometimes issues like incorrect ingredient ratios or adding ingredients out of order can hinder this process.
Troubleshooting gluten development involves checking your recipe's flour-to-liquid ratio. Too much liquid can make the dough too wet and sticky for the machine's paddle to knead effectively, while too little liquid results in a dry, stiff dough that doesn't develop gluten properly. Observing the dough during the kneading cycle is part of a good bread machine troubleshooting tips guide. It should form a smooth, elastic ball that pulls away from the sides of the pan. If it's too wet, you might need to add a tablespoon of flour at a time; if too dry, add water similarly.
Environmental Factors Impacting Rise (Humidity, Temperature)
The environment in your kitchen can also play a role in how your bread machine dough rises, even within the controlled environment of the machine. High humidity can cause dough to be stickier and rise faster, potentially leading to over-proofing. Conversely, a cold kitchen can slow down yeast activity significantly, resulting in a longer, slower rise or a reduced final volume. While bread machines provide a relatively stable temperature during the rise cycles, extreme ambient conditions can still have an effect.
If you suspect environmental factors are affecting your bread machine's performance, especially if you live in a climate with significant temperature or humidity swings, you might need to make slight adjustments to your recipe. In high humidity, a touch less liquid might be beneficial.
In a cold environment, ensuring your ingredients (especially water and flour) are at room temperature before adding them can help kickstart yeast activity. While the machine controls the internal temperature during baking, the initial rise phases can be influenced by the surrounding air temperature, making this an important consideration in your bread machine troubleshooting tips guide.
Problem 2: Loaf Collapses After Baking
Over-Proofing: A Major Cause of Collapsed Loaves
One of the most frustrating issues is watching your beautifully risen loaf collapse during or shortly after the baking cycle. A primary culprit here is often over-proofing. This happens when the dough is allowed to rise for too long or in too warm an environment, causing the gluten structure to stretch too thin and become weak. The yeast eventually exhausts its food source and dies off, and the fragile structure can no longer support the weight of the dough, leading to a collapse, often resulting in a sunken top or a mushroom shape.
In a bread machine, over-proofing can occur if the cycle length is too long for the specific recipe or conditions, or if the kitchen is unusually warm, accelerating the rise phases programmed into the machine. Some bread machine troubleshooting tips guide for this issue involves carefully monitoring the dough's rise.
If it reaches the top of the pan or slightly above significantly before the baking cycle begins, it might be over-proofing. While you can't manually stop the machine's cycle easily, understanding this cause helps you modify future bakes, perhaps by slightly reducing the yeast or sugar, or trying a shorter cycle if available.
Too Much Liquid: Adjusting Ratios
An excessive amount of liquid in the dough is another common cause of collapsed loaves. While hydration is necessary for gluten development and a moist crumb, too much water or milk makes the dough structure too weak to hold its shape once it rises and bakes. The gluten network simply doesn't have the strength to support the volume achieved during the final rise in the hot oven phase of the bread machine cycle, leading to a dramatic fall.
If your loaves consistently collapse and you've ruled out over-proofing, examine your liquid measurements. Even slight inaccuracies can make a difference. A good bread machine troubleshooting tips guide suggests reducing the liquid by a tablespoon or two in your next attempt if you suspect this is the issue. Observe the dough during the kneading cycle; it should be slightly sticky but form a cohesive ball. If it's consistently a wet, sloppy mass that doesn't clean the sides of the pan, you likely have too much liquid.
Flour Imbalance: Understanding Protein Content
The type of flour you use significantly impacts gluten development and the dough's structure. Using flour with insufficient protein content, such as cake flour or pastry flour, will result in a weak gluten network that cannot support the rise, leading to collapse. Bread flour, with its higher protein content (typically 12-14%), is usually recommended for bread machines because it develops strong gluten essential for structure. All-purpose flour (around 10-12% protein) can work for many recipes, but may be more prone to collapse if other factors aren't perfect.
If your loaves are collapsing and you're not using bread flour, switching might be the simple solution according to a comprehensive bread machine troubleshooting tips guide. If you are using bread flour, ensure it's fresh. Old flour can lose some of its protein integrity. Also, consider the overall balance of ingredients. Too much sugar or fat can weaken gluten development, making the dough more susceptible to collapse. While these ingredients enhance flavor and texture, excessive amounts can compromise the structural integrity needed for a tall, well-shaped loaf.
Troubleshooting Bread Machine Settings: Cycle Selection and Timing
The specific cycle selected on your bread machine plays a vital role in the timing of kneading, rising, and baking phases. Using the wrong cycle for your recipe can easily lead to issues like collapse. For example, using a "Rapid" or "Express" cycle for a recipe designed for a standard cycle might not allow enough time for proper gluten development or could rush the rise, while using a standard cycle for a recipe designed for a shorter cycle might lead to over-proofing.
Consult your bread machine's manual and the recipe's instructions carefully to ensure you are using the appropriate cycle. Some machines also offer options like different loaf sizes or crust colors, which adjust timing and temperature slightly. Experimenting with these settings based on your observations is part of effective bread machine troubleshooting tips guide. If your loaf is collapsing consistently on a standard cycle, and you've addressed ingredients, try a slightly shorter basic cycle if available, or one designed for a smaller loaf size if you are using a larger recipe amount.
Problem 3: Bread is Too Dense or Heavy
Insufficient Kneading: Ensuring Gluten Development
A dense or heavy loaf is often a sign of insufficient kneading. As mentioned earlier, kneading develops the gluten network, which is crucial for trapping gases and creating a light, airy crumb structure. If the dough isn't kneaded enough, the gluten won't be strong or elastic enough to hold the CO2 produced by the yeast, resulting in a compact, heavy texture that lacks the desired open crumb. Bread machines automate kneading, but issues can still arise.
Observe your dough during the kneading cycle in the bread machine. A properly kneaded dough should look smooth and elastic, forming a cohesive ball that is slightly sticky but pulls away from the sides of the pan. If the dough looks rough, shaggy, or doesn't form a smooth ball after the initial kneading phase, it might not be developing gluten sufficiently. This could be due to incorrect ingredient ratios, particularly liquid and flour balance. Following a detailed bread machine troubleshooting tips guide for dough consistency during kneading can help you identify this issue early.
Ingredient Measurement Errors: Accuracy is Key
Inaccurate ingredient measurements are a frequent culprit behind dense bread. Baking is a science, and the ratios of flour, liquid, yeast, salt, sugar, and fat are carefully balanced to achieve the desired outcome. Too much flour or too little liquid will result in a dry, stiff dough that is difficult to knead properly and will produce a dense loaf. Conversely, while too much liquid can cause collapse, it can also contribute to a dense, gummy texture if the gluten doesn't develop adequately to support the excess moisture.
Using a kitchen scale for measuring ingredients, especially flour, is highly recommended for accuracy. Volume measurements (using cups) can vary significantly depending on how the ingredient is scooped and leveled. For example, scooping flour directly from the bag can pack it down, adding substantially more flour than the recipe intends (potentially 20-30 grams extra per cup). A precise bread machine troubleshooting tips guide will always emphasize the importance of weighing ingredients for consistent results and avoiding the density issues caused by measurement errors.
Whole Wheat Flour Considerations: Techniques for Lighter Whole Wheat Bread
Baking with whole wheat flour often results in a denser loaf compared to white bread. This is because the bran and germ particles in whole wheat flour interfere with gluten development, preventing the formation of as strong or elastic a network as that achieved with white flour. While you can't make whole wheat bread as light as white bread, you can use specific techniques to improve its texture and reduce density in your bread machine.
Many bread machine troubleshooting tips guide for whole wheat bread suggest adding vital wheat gluten, typically 1-2 tablespoons per cup of whole wheat flour. This boosts the protein content, helping to build a stronger gluten structure.
Soaking some of the whole wheat flour or other grains (like oats or flax seeds) in a portion of the liquid before adding them to the machine can also help soften the bran, making it less disruptive to gluten development. Ensuring adequate hydration (often slightly more liquid than white bread recipes) and sometimes a longer kneading time (if your machine allows for manual cycle adjustments or programming) are also beneficial techniques for a lighter whole wheat loaf.
Troubleshooting Bread Machine Age and Performance
Like any appliance, bread machines can wear out over time, and their performance can decline. An older machine might have a weaker motor, leading to less vigorous kneading. The heating element might not maintain temperature as accurately, affecting yeast activity during rising or baking temperature. The seals might degrade, allowing heat or moisture to escape. All these factors can contribute to a dense or poorly risen loaf over time.
If you've tried all other bread machine troubleshooting tips guide related to ingredients and recipes but are still consistently getting dense bread, consider the age and condition of your machine. Look for signs of wear, such as a paddle that doesn't turn smoothly, inconsistent heating, or unusual noises. While some parts can be replaced, a very old or heavily used machine might simply not be performing optimally anymore. Sometimes, the best troubleshooting step is recognizing when it might be time to replace the appliance to achieve consistent, high-quality results.
Problem 4: Crust Too Dark or Too Light
Sugar and Fat Content: Adjusting for Crust Color
The sugar and fat content in your bread recipe significantly impacts the crust color. Sugar caramelizes during baking, contributing to a darker, browner crust. Recipes with higher sugar content, like brioche or challah, will naturally develop a darker crust than a lean French bread. Similarly, fats (like butter or oil) can contribute to browning and also create a softer crust texture. An imbalance in these ingredients can lead to unexpected crust color results.
If your crust is consistently too dark, you might be using too much sugar for the cycle or setting selected. Try slightly reducing the sugar content by a teaspoon or two in your next bake. If the crust is too light, ensure you haven't accidentally omitted sugar or fat, or consider slightly increasing one or both if the recipe allows without negatively impacting the crumb. Consulting a bread machine troubleshooting tips guide focused on recipe adjustments can help you fine-tune these amounts based on your desired outcome.
Bread Machine Crust Settings: Understanding Your Options
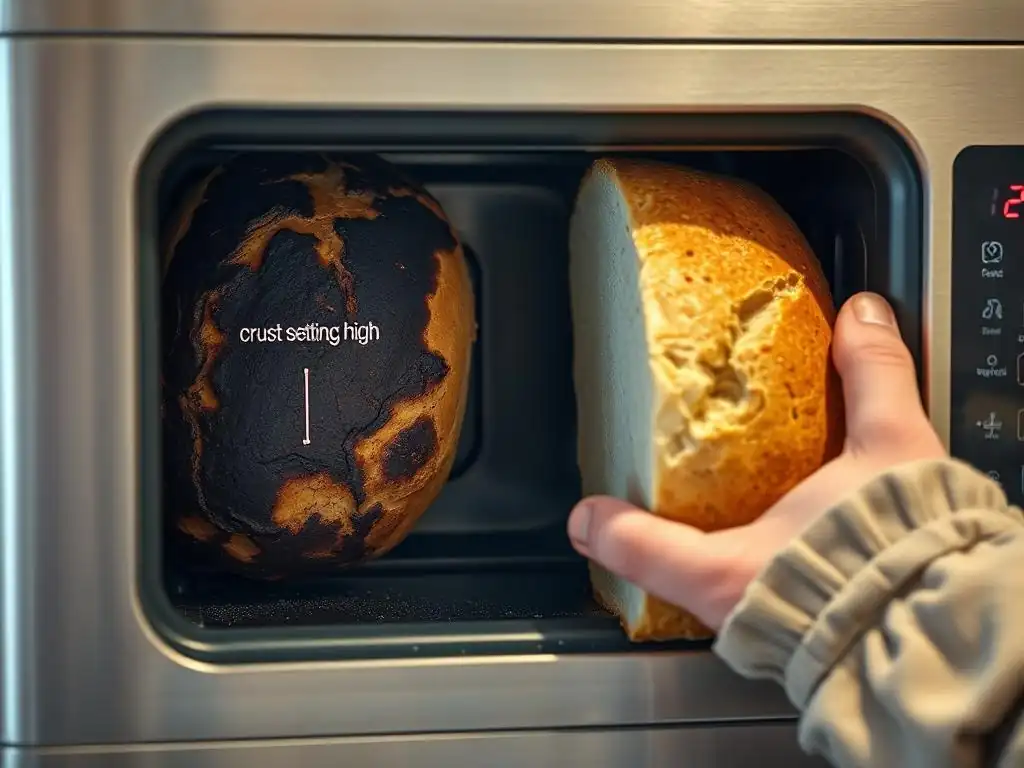
Most bread machines offer crust color settings: light, medium, and dark. These settings typically adjust the duration and possibly the temperature of the final baking phase. Selecting the wrong setting for your recipe or preference is a common reason for unsatisfactory crust color. For instance, a recipe with a moderate amount of sugar baked on a "Dark" setting will likely result in a very dark, perhaps even burnt, crust.
Always ensure you select the appropriate crust setting for your recipe and preference. If your crust is too dark, try the "Medium" or "Light" setting next time. If it's too light, switch to "Medium" or "Dark". Familiarize yourself with how your specific machine's settings affect the final product. A good bread machine troubleshooting tips guide will encourage you to experiment with these settings, noting the results, until you find the perfect combination for your favorite recipes.
Troubleshooting the Heating Element
Issues with the bread machine's heating element can also cause crust problems. If the heating element isn't reaching the correct temperature, the crust might be too light or the bread might be underbaked. Conversely, if it's overheating or cycling improperly, the crust could become too dark or burnt before the inside is fully cooked. While less common than ingredient or setting issues, a malfunctioning heating element is a possibility.
Diagnosing a heating element problem can be difficult without professional tools. However, if you consistently experience extreme crust issues (burnt or very pale) across different recipes and settings, and you've ruled out all other causes, it might indicate a hardware issue. Some bread machine troubleshooting tips guide suggest observing the inside of the machine during the bake cycle (carefully, without touching hot surfaces!) to see if the element appears to be heating evenly. If you suspect a heating element problem, consulting the manufacturer or a repair service might be necessary.
Ambient Temperature's Effect on Crust Browning
While the bread machine controls the internal temperature during baking, the ambient temperature of your kitchen can have a subtle effect, particularly on the rise phases which in turn influence how the dough surface dries out before baking. A very hot kitchen might lead to a slightly drier dough surface going into the bake, which could brown faster. Conversely, a very cold kitchen might slow down the initial rise, affecting the dough's readiness for the final bake and potentially leading to a lighter crust.
This is a less significant factor than settings or ingredients, but worth considering in extreme conditions. If you're consistently getting unexpected crust results and your kitchen temperature is significantly different from standard room temperature (around 70-75°F or 21-24°C), it might be contributing. Unfortunately, there's little specific bread machine troubleshooting tips guide for this beyond ensuring your kitchen is within a reasonable temperature range for optimal bread machine operation.
Problem 5: Loaf Sticks to the Pan
Proper Greasing Techniques
A common frustration is a loaf that refuses to slide out of the bread machine pan. The primary reason for this is usually insufficient or improper greasing of the pan and the kneading paddle. While some modern non-stick pans are quite effective, a little bit of extra help is often needed, especially after repeated use or if the non-stick coating is starting to wear. The dough adheres directly to the metal or worn coating during the rise and bake cycles, making removal difficult.
A simple but crucial bread machine troubleshooting tips guide is to grease the pan thoroughly before adding ingredients. Use butter, vegetable shortening, or a baking spray containing flour (like Baker's Joy or similar). Ensure you coat the bottom, sides, and corners of the pan, as well as the kneading paddle. Get into the habit of doing this every single time, even if your pan claims to be non-stick. This creates a barrier that prevents the baked bread from welding itself to the pan's surface.
Troubleshooting a Damaged Pan
Even with perfect greasing, if your bread machine pan is damaged, the loaf may still stick. The non-stick coating can wear off over time, especially with frequent use, washing in a dishwasher (many manufacturers recommend hand washing bread pans), or using metal utensils inside the pan. Scratches or areas where the coating has flaked away become prime spots for the bread to adhere.
Inspect your bread machine pan regularly. Look for scratches, peeling, or areas where the non-stick surface looks dull or worn compared to the rest of the pan. If the damage is significant, no amount of grease will prevent sticking. In this case, the most effective bread machine troubleshooting tips guide is to replace the bread pan. A new pan with an intact non-stick coating, combined with proper greasing, should solve the sticking problem immediately.
Cooling the Loaf Before Removing
Attempting to remove the loaf from the hot pan immediately after the baking cycle finishes can also contribute to sticking or result in a damaged loaf. The bread is still quite soft and fragile when it first comes out of the oven, and the steam is still trapped within the pan and the bread itself. Trying to force it out at this stage can cause it to tear or leave portions stuck to the paddle or bottom of the pan.
A recommended bread machine troubleshooting tips guide is to allow the loaf to cool in the pan for a specific amount of time after the bake cycle is complete. Most recipes and bread machine manuals suggest letting it rest in the pan for 5-15 minutes. This allows the structure of the bread to firm up slightly and gives time for condensation to form between the loaf and the pan, which helps release it. After this brief cooling period, carefully invert the pan and gently shake the loaf out onto a wire rack to cool completely.
Problem 6: Burnt Smell During Operation
Sugar Caramelization and Troubleshooting Burnt Smells
A burnt smell during bread machine operation can be alarming, but it's not always a sign of a major problem. Often, a slight burnt smell is simply due to sugar caramelizing on the heating element or the bottom of the pan. This is more likely to occur with recipes that are high in sugar or if there are any sugar spills around the heating element before the cycle starts. Sugar burns at a lower temperature than flour or yeast, so it's often the first ingredient to cause a burnt odor if it's in the wrong place.
If you notice a burnt smell, especially towards the end of the baking cycle, first check if any ingredients have spilled onto the heating element or the bottom of the machine cavity before starting the next loaf. Ensure the bread pan is properly seated. If the smell persists and isn't accompanied by smoke or error codes, it might just be normal caramelization. However, a strong or acrid smell warrants further investigation, as detailed in a thorough bread machine troubleshooting tips guide.
Checking for Spilled Ingredients
Before starting any bread machine cycle, it's crucial to check the inside of the machine cavity for any spilled ingredients from previous bakes. Flour, sugar, seeds, or other small particles can easily fall outside the bread pan when you're adding ingredients or removing the baked loaf. If these ingredients land on the heating element or the floor of the machine cavity, they will burn during the baking cycle, creating unpleasant smells and potentially smoke.
Make it a habit to quickly wipe out the inside of the bread machine cavity before inserting the pan for a new loaf. Use a dry cloth or brush to remove any crumbs or spills. This simple step, highlighted in many bread machine troubleshooting tips guide, can prevent burnt smells and potential fire hazards. If you do find spilled ingredients that have burned, ensure the machine is cool, unplug it, and carefully clean the area before using it again.
Troubleshooting Heating Element Malfunctions
While less common, a persistent or strong burnt smell, especially early in the cycle or accompanied by smoke, could indicate a more serious issue with the heating element itself or the machine's electrical components. An element that is shorting out, malfunctioning, or has something permanently stuck to it could cause burning smells that are beyond simple sugar caramelization.
If you suspect a heating element malfunction, stop the machine immediately, unplug it, and allow it to cool completely. Visually inspect the heating element (usually located at the bottom of the machine cavity) for any visible damage or debris that cannot be easily removed.
If there's no obvious external cause and the burnt smell is strong and persistent across multiple uses, it's best to consult your bread machine's manual for bread machine troubleshooting tips guide specific to error codes or heating issues, or contact the manufacturer or a qualified appliance repair technician. Do not attempt to operate a machine you suspect has an electrical or heating element fault.
Problem 7: Doughy or Gummy Bread
Incomplete Baking Cycle: Ensuring Proper Cooking Time
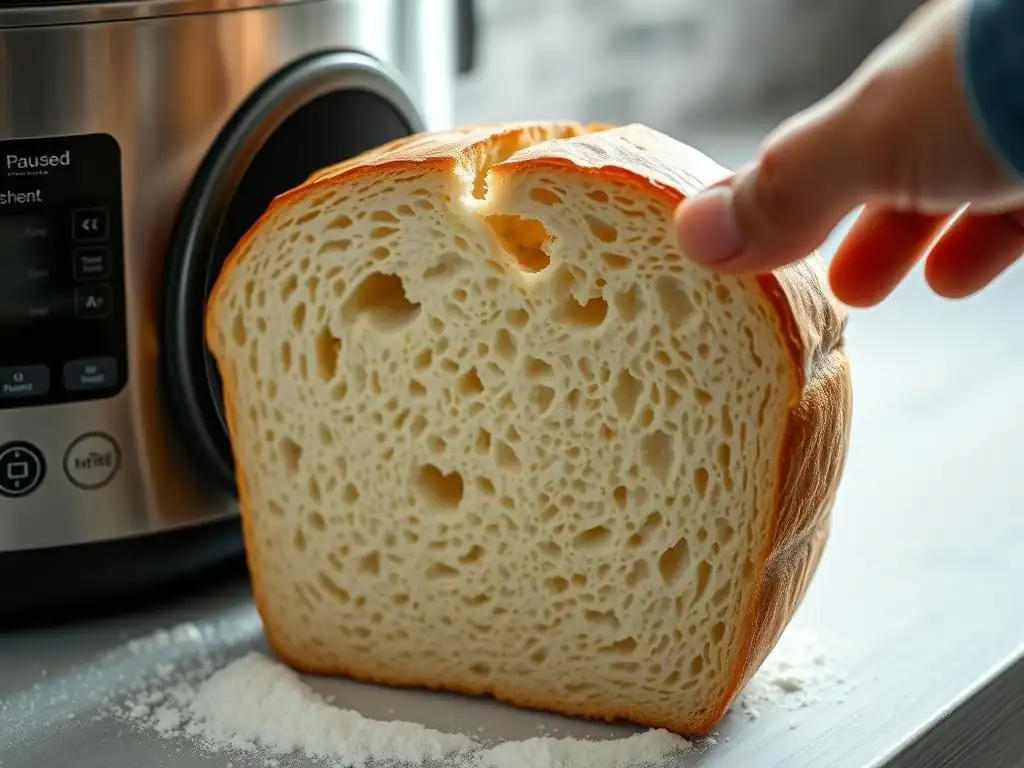
Doughy or gummy bread is a clear sign that the loaf did not bake completely. Even if the crust looks done, the interior requires sufficient time at temperature to cook through and set the crumb structure. In a bread machine, this usually means the selected cycle was too short for the recipe or the loaf size, or there was an interruption to the cycle.
Ensure you are using the correct cycle for the recipe and the loaf size you are making. A 2-pound loaf typically requires a longer baking time than a 1-pound loaf. If your machine allows, check the display to confirm the cycle completed without interruption. If you are consistently getting doughy results on the recommended cycle, some bread machine troubleshooting tips guide suggest using a lighter crust setting (which can slightly increase the overall cycle time on some machines) or, if your machine has this feature, adding a few minutes to the baking phase if it allows for manual adjustment.
Internal Temperature Check: Confirming Doneness
The most reliable way to determine if bread is fully baked is to check its internal temperature. For most standard yeast breads, the internal temperature should reach between 190-210°F (88-99°C). Using an instant-read thermometer is an excellent bread machine troubleshooting tips guide for ensuring your bread is cooked through and avoiding a doughy center.
Carefully remove the loaf from the bread machine pan (using oven mitts!) and insert the thermometer into the bottom or side of the loaf, reaching towards the center. If the temperature is below the recommended range, the bread is underbaked. While you can't put the loaf back into the bread machine to bake further easily, knowing the internal temperature helps you confirm underbaking and adjust your cycle selection or recipe for future loaves.
High Humidity and its Impact
High ambient humidity can subtly impact the final texture of bread baked in a machine, sometimes contributing to a slightly doughy or excessively moist crumb. In very humid conditions, the dough absorbs more moisture from the air during the rise cycles, and the machine's baking cycle might not be perfectly calibrated to compensate for this extra internal moisture.
While bread machines are relatively self-contained, extreme humidity can still play a role. If you live in a very humid climate and consistently get slightly doughy bread despite using the correct cycle and checking internal temperature, you might consider slightly reducing the liquid in your recipe (by perhaps a tablespoon or two) to account for the extra moisture absorbed from the air. This is a less common issue but is included in comprehensive bread machine troubleshooting tips guide for challenging environments.
Advanced Bread Machine Troubleshooting Tips
Calibrating Your Bread Machine: Ensuring Accurate Settings
While not all bread machines offer calibration features, understanding the concept is part of advanced bread machine troubleshooting tips guide. Calibration ensures that the machine's internal temperature sensors and timers are accurate. An uncalibrated machine might run hotter or cooler than intended, or its cycle phases might be slightly off, leading to inconsistent results.
If your machine has a calibration function (check your manual), follow the instructions to ensure it's operating within specifications. If it doesn't, and you suspect temperature or timing inaccuracies are causing persistent problems, you can try using an oven thermometer placed inside the empty machine cavity (during a short bake cycle, without the pan) to get an approximate idea of the actual baking temperature compared to what's expected. Significant discrepancies might indicate a need for professional service.
Troubleshooting Bread Machine Error Codes
Modern bread machines often display error codes when something goes wrong. These codes are invaluable bread machine troubleshooting tips guide as they pinpoint specific issues the machine has detected, such as overheating, motor overload, or temperature sensor failures. The meaning of each code is unique to the manufacturer and model.
- Consult your bread machine's user manual immediately if an error code appears.
- The manual will provide a list of codes and their corresponding meanings.
- Follow the recommended troubleshooting steps for that specific code, which might involve letting the machine cool down, checking for obstructions, or contacting customer support.
- Do not ignore error codes, as they often indicate a problem that needs to be addressed before the machine can operate safely or correctly again.
Bread Machine Maintenance for Optimal Performance
Regular cleaning and maintenance are fundamental bread machine troubleshooting tips guide for preventing problems before they occur and ensuring optimal performance over the lifespan of your appliance. A well-maintained machine is less likely to develop issues like sticking loaves, uneven baking, or motor strain.
Maintenance tasks include:
- Cleaning the bread pan and kneading paddle thoroughly after each use (hand washing is often recommended).
- Wiping down the inside of the machine cavity to remove spills and crumbs.
- Checking the heating element for any debris.
- Inspecting the power cord for damage.
- Ensuring the kneading paddle shaft is clean and moves freely.
- Checking the lid and seals for proper closure.
Taking a few minutes for maintenance after each use can save you hours of frustration and troubleshooting down the line, contributing significantly to consistent baking success.
Conclusion: Achieving Baking Success
Mastering your bread machine and achieving consistent baking success is a journey that involves understanding your ingredients, your recipe, and the specific workings of your appliance. This bread machine troubleshooting tips guide has covered many common issues, from basic ingredient imbalances to machine-specific problems like error codes and maintenance. Armed with this knowledge, you are better equipped to diagnose why a loaf didn't turn out perfectly and make informed adjustments for your next bake.
Remember that every bread machine and kitchen environment is slightly different. What works perfectly for one person might need slight modification for another. Use this bread machine troubleshooting tips guide as a starting point, but don't be afraid to experiment and keep notes on what adjustments you make and how they affect the outcome. With patience and practice, you'll be able to troubleshoot issues effectively and enjoy delicious, perfectly baked bread from your machine time after time.
Frequently Asked Questions
What are some common problems that occur when using a bread machine?
Common bread machine problems include uneven baking, a collapsed loaf, or a doughy center. These are often caused by incorrect ingredient measurements or improper settings.
What are some of the most common errors people make when using a bread machine?
Frequent errors involve using expired yeast, incorrect liquid-to-flour ratios, or overloading the machine. Ensuring ingredient freshness and precise measurements is crucial.
How do I troubleshoot bread that comes out too dense from a bread machine?
A dense loaf usually indicates too much flour or not enough yeast. Try reducing the flour slightly or ensuring your yeast is active before use.
What causes bread to collapse in a bread machine, and how do I prevent it?
Collapsed bread often happens due to too much liquid or excess yeast. Reduce the liquid by a small amount, and make sure your yeast is fresh.
What should I do if my bread machine's paddle gets stuck or breaks?
If the paddle gets stuck, try soaking the bread pan in warm water to loosen the bread. For a broken paddle, contact the manufacturer for a replacement part or consider purchasing a universal bread machine paddle.
Final Reflection: The Joy (and Troubleshooting) of Homemade Bread
The quest for perfect homemade bread, once a daunting task, is now readily accessible thanks to the humble bread machine. However, even with this technological marvel, challenges arise. Understanding and overcoming these common baking pitfalls is key to unlocking the consistent satisfaction of freshly baked loaves. This guide has provided a roadmap to navigate those hurdles, transforming frustration into flour-powered triumph.
The journey of baking, much like life itself, is filled with unexpected twists and turns. This article has explored the most frequent bread machine mishaps, from gummy dough to unevenly baked crusts, highlighting the importance of understanding the underlying causes rather than simply accepting imperfect results. The greatest pleasure in life is doing what people say you cannot do.
This quote, though not directly about bread making, perfectly encapsulates the spirit of troubleshooting and the rewarding feeling of overcoming challenges to achieve something meaningful.
Now, it's your turn. Take the knowledge gained from this guide and apply it to your next baking adventure. Don't be discouraged by a less-than-perfect loaf; see it as an opportunity to learn, adjust, and refine your technique. Embrace the process, experiment with different recipes and settings, and savor the delicious rewards of your own homemade bread. The journey to becoming a bread-baking master is a rewarding one, filled with the aroma of freshly baked goodness and the satisfaction of creating something truly special.
Unleash Your Inner Baker: Conquer Bread Machine Troubles!
Thanks for taking the time to explore common bread machine issues and their solutions! We hope you now feel more confident in tackling those baking challenges. Ready to take the next step?
- Bake your masterpiece: Put your newfound knowledge into practice! Try out a new recipe or work on that loaf that's been giving you trouble. This is your chance to perfect your technique!
- Share your baking triumphs (or funny fails!): Join our BakeWithEase community on social media and share your experiences—both the successes and the learning moments! Let's bake together!
- Experiment with different flours: Explore the nuances of various flours and discover how they impact your bread's texture and flavor. You might be surprised at what you create!
What innovative bread recipe will you tackle first?