
Troubleshooting Your Starter: Fix Common Sourdough Issues Fast

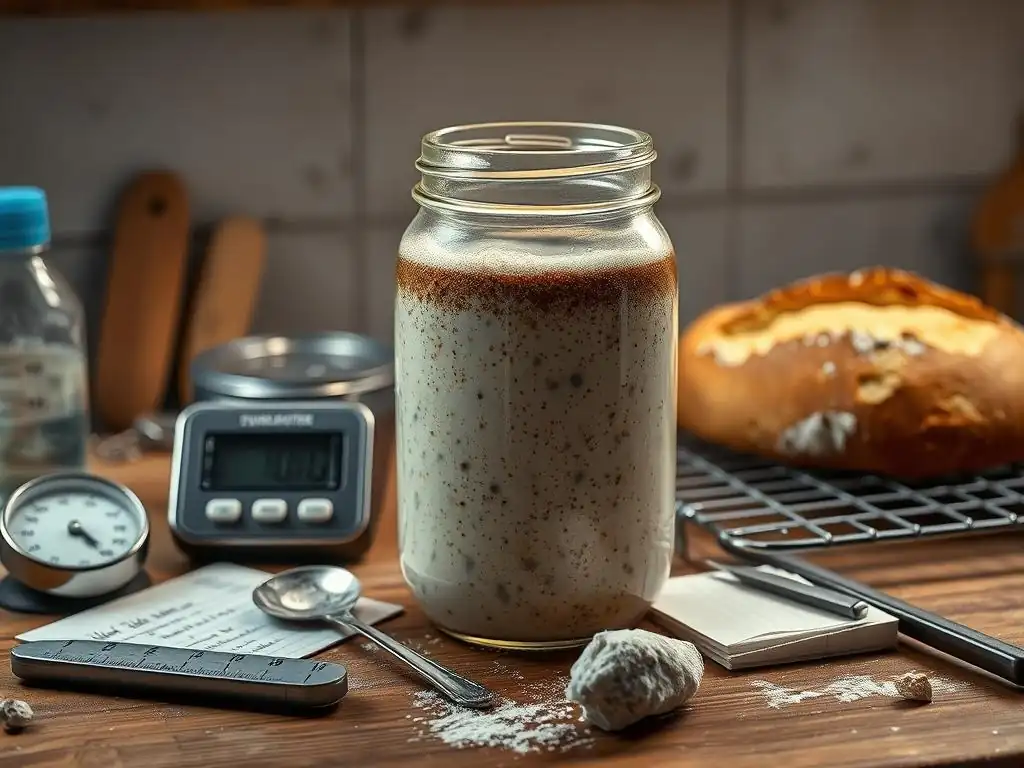
Welcome to BakeWithEase, your haven for all things baking! Are you facing frustrating issues with your sourdough starter? Don't despair! This guide dives deep into sourdough starter troubleshooting problems fast, offering quick and effective solutions to get your starter back on track and baking beautiful loaves again. Discover the secrets to a thriving starter and unlock the magic of naturally leavened bread. Let's get baking!
- Troubleshooting Your Starter: Fix Common Sourdough Issues Fast - BakeWithEase
- Introduction to Sourdough Starter Troubleshooting
- Common Sourdough Starter Problems and Solutions
- Preventative Measures for a Healthy Sourdough Starter
- Advanced Sourdough Starter Troubleshooting Techniques
- Conclusion: Mastering Sourdough Starter Troubleshooting
-
Frequently Asked Questions
- What are the most common signs that my sourdough starter needs troubleshooting?
- My sourdough starter isn't doubling in size after feeding. What could be the problem?
- How can I quickly address a sourdough starter that has developed a layer of dark liquid on top (hooch)?
- My sourdough starter smells strongly of acetone or alcohol. Is this normal, and how do I fix it?
- How can I speed up the process of reviving a weak or inactive sourdough starter?
- Final Reflection: The Resilient Joy of Sourdough
- Unlock Your Sourdough Potential: Master Your Starter Today!
Troubleshooting Your Starter: Fix Common Sourdough Issues Fast - BakeWithEase
Introduction to Sourdough Starter Troubleshooting
Why Sourdough Starters Sometimes Go Wrong
Even the most pampered sourdough starter can occasionally hit a snag. These living cultures, a mix of wild yeast and bacteria, are sensitive to their environment, their food (flour and water), and even the air around them. Just like any living organism, they have needs that, if not met consistently, can lead to issues.
Common triggers for sourdough starter problems include fluctuations in room temperature, changes in the type or quality of flour used, inconsistent feeding schedules, or even minor contamination. Understanding these potential pitfalls is the first step in mastering sourdough starter troubleshooting and keeping your culture happy and active.
It's important to remember that a sourdough starter is a dynamic ecosystem. The balance between the yeast and lactic acid bacteria (LAB) is crucial for the desired rise and flavor in your baking. When this balance is disrupted – perhaps the yeast become sluggish due to cold temperatures, or the bacteria overproduce acid because of infrequent feeding – you start seeing common sourdough issues. Troubleshooting these problems effectively requires patience and a systematic approach, looking at factors like temperature, feeding ratios, and frequency.
The Importance of Identifying Sourdough Problems Quickly
Spotting the signs of a struggling starter early can save you time, flour, and potential disappointment in your baking. An inactive or off-smelling starter won't properly leaven your bread, leading to dense, flat loaves. Furthermore, some issues, like mold contamination, can render your starter unusable and even pose health risks. Learning to identify common sourdough starter troubleshooting problems fast allows you to intervene before the issue becomes severe, often making it easier to revive your culture.
Prompt identification also helps you understand the cause of the problem. Was it the sudden cold snap affecting your kitchen temperature? Did you accidentally leave it unfed for too long? Pinpointing the root cause is vital for implementing the correct fix and preventing the same issue from recurring. Mastering these quick troubleshooting techniques is a key skill for any dedicated sourdough baker looking to maintain a robust and reliable starter.
Common Sourdough Starter Problems and Solutions
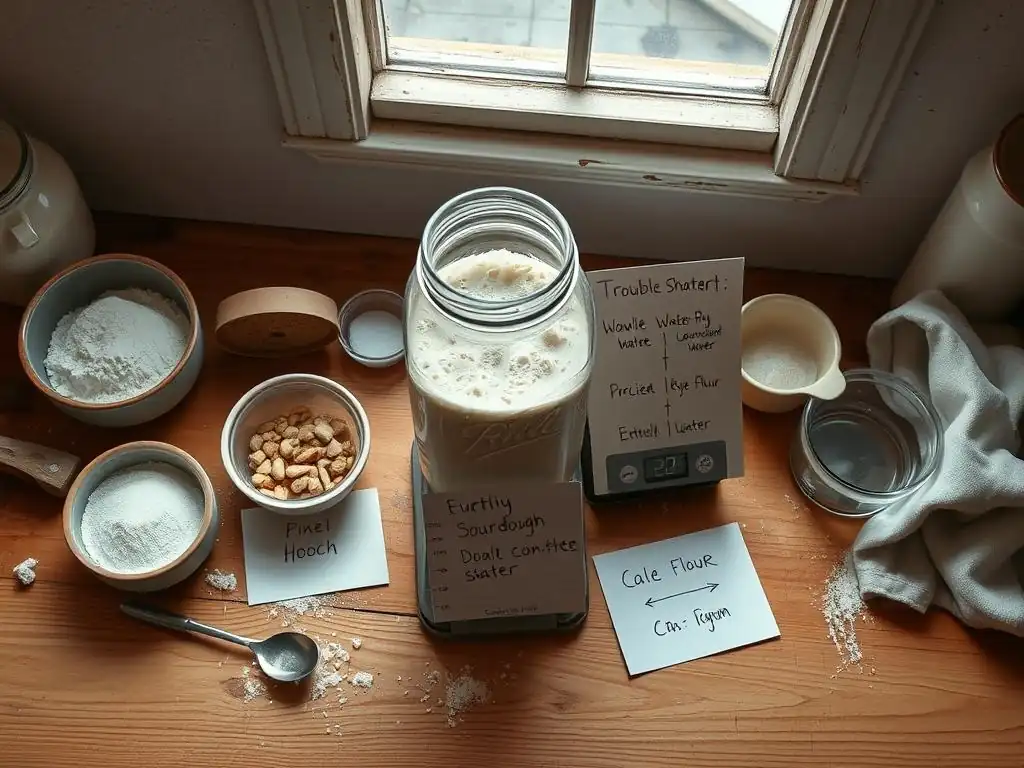
1. Inactive Starter: Not Rising or Bubbling
Identifying an Inactive Sourdough Starter
An active sourdough starter is typically bubbly, rises significantly after feeding (often doubling or tripling in volume within 4-8 hours at room temperature), and has a pleasant, slightly tangy aroma. An inactive starter, on the other hand, shows little to no visible activity. You might notice very few bubbles, minimal or no rise after feeding, and the texture might remain dense or just slightly change. This lack of vigor is a clear sign you need to start your sourdough starter troubleshooting process.
Sometimes, a starter might seem active right after feeding due to the initial mixing incorporating air, but if it doesn't continue to develop bubbles and rise over the next few hours, it's likely inactive. You might observe a thin layer of liquid (hooch) forming quickly on top, which can also be a symptom of underfeeding relative to its activity level, but the primary indicator of inactivity is the lack of significant volume increase.
Reasons for Inactivity in Sourdough
Temperature Issues and Your Starter
Temperature is perhaps the most critical factor influencing starter activity. Yeast and bacteria thrive within specific temperature ranges. Too cold, and their metabolic processes slow down dramatically, leading to little or no fermentation and thus, no rise or bubbles. Temperatures consistently below 70°F (21°C) can significantly inhibit activity. Conversely, extremely high temperatures can stress or even kill the microorganisms, though this is less common in a typical home environment unless the starter is left in a very hot spot.
Ideal temperatures for robust starter activity are typically between 75-80°F (24-27°C). If your kitchen is cooler than this, especially during winter months, your starter will be sluggish. This is a very common reason for sourdough starter troubleshooting problems fast, particularly for beginners who might not realize how much ambient temperature affects fermentation speed.
Incorrect Feeding Ratios
Feeding your starter involves adding flour and water. The ratio of existing starter to new flour and water significantly impacts activity. A common ratio is 1:1:1 by weight (1 part starter, 1 part flour, 1 part water). If you use too little new flour and water relative to the amount of starter (e.g., feeding a large amount of starter with only a tiny bit of food), the food is consumed too quickly, and the starter peaks and becomes inactive before you notice significant rise. The microorganisms essentially run out of fuel too fast.
Conversely, using too much new flour and water relative to the starter can dilute the microbial population too much, making it take a very long time to show activity. For a sluggish starter, sometimes a slightly higher ratio of new food (e.g., 1:2:2 or 1:3:3) can help provide ample fuel for the yeast and bacteria to multiply and become more active over time, though consistency is key.
Contamination from Foreign Substances
While less common than temperature or feeding issues, exposure to certain substances can inhibit or kill the microorganisms in your starter. Residual soap or sanitizer in a jar can be detrimental. Using tap water with high levels of chlorine can also negatively affect starter activity, as chlorine is designed to kill microorganisms. Even using flour treated with certain preservatives or anti-caking agents could potentially impact the culture, though this is rare with standard baking flours.
Ensuring your jars and utensils are clean but thoroughly rinsed is important. If your tap water is heavily chlorinated, letting it sit out for 24 hours before use allows the chlorine to dissipate. While not a primary culprit for most, ruling out contamination is a step in thorough sourdough starter troubleshooting.
Solutions for Reviving a Sluggish Starter
Adjusting Temperature for Optimal Fermentation
The most effective way to boost a sluggish starter is often to increase its temperature. Aim for that sweet spot of 75-80°F (24-27°C). You can achieve this by placing the starter in a warmer spot in your home, such as near a warm appliance (but not on one), in a turned-off oven with the light on (check temperature first, as oven lights can get quite warm), or using a proofing box or temperature-controlled mat. Even a simple hack like placing the jar in a bowl of warm water (ensure the water doesn't get into the starter) can help.
Maintaining a consistent warm temperature is more effective than sporadic bursts of heat. Once the starter shows consistent doubling within 4-8 hours at this temperature, you can gradually transition it back to slightly cooler conditions if desired, but keeping it consistently warm for a few feedings is often the fastest way to revive it.
Refining Your Feeding Schedule and Ratios
Consistent feeding is crucial. If your starter is inactive, try feeding it more frequently, perhaps every 12 hours instead of 24, especially if it's warm. This provides a steady supply of food for the microorganisms to multiply. Also, evaluate your feeding ratio. If you've been using a very low ratio of new food (e.g., 1:0.5:0.5), try increasing it to 1:1:1 or even 1:2:2 (starter:flour:water by weight) for a few cycles. This ensures the starter has enough food to build up its population.
For example, if you typically keep 50g of starter and feed it 50g flour and 50g water (1:1:1), and it's sluggish, try discarding down to 25g of starter and feeding it 50g flour and 50g water (1:2:2). This higher food ratio can give the smaller starter population more resources to grow vigorously. Monitor its response and adjust as needed.
Using Whole Wheat Flour to Boost Activity
Sometimes, a starter just needs a little kickstart. Whole wheat or rye flour can provide this boost. These flours contain more nutrients and wild yeasts naturally present on the grain husks than refined white flour. Substituting a portion of your regular flour with whole wheat or rye for a few feedings can significantly increase microbial activity.
For instance, if you usually feed with 100% white bread flour, try feeding with a mix like 80% white bread flour and 20% whole wheat flour for a few cycles. You should notice increased bubbling and faster rising times. Once your starter is back to its normal vigor, you can switch back to your preferred flour type if you wish. This is a well-known trick in sourdough starter troubleshooting circles.
2. Sourdough Starter Smells Bad: Off-Putting Odors
Recognizing Unpleasant Smells in Sourdough
A healthy, active sourdough starter should smell pleasantly tangy, perhaps slightly yeasty, and sometimes even a little like ripe fruit or yogurt. This is due to the production of lactic and acetic acids by the beneficial bacteria. However, off-putting odors are a clear sign of imbalance or contamination, requiring immediate sourdough starter troubleshooting. Common bad smells include strong acetone (nail polish remover), cheesy, putrid (like rotten eggs or garbage), or even moldy odors.
A strong acetone smell usually indicates an excess production of acetic acid, often a sign that the starter is hungry or has been unfed for too long, leading to the formation of hooch. Cheesy or putrid smells, on the other hand, can signal the presence of undesirable bacteria that are overpowering the beneficial ones. Mold will often have a distinct musty or damp odor associated with it.
Causes of Foul Smells in Sourdough Starters
Hooch Formation and Its Impact
Hooch is the liquid that separates on top of a sourdough starter. It's a byproduct of fermentation, primarily alcohol (ethanol) and acetic acid. A thin layer of hooch, especially after the starter has peaked and started to fall, is normal, and it can contribute to a slightly alcoholic or vinegary smell.
However, a thick layer of hooch, often accompanied by a strong smell of acetone or paint thinner, means the starter has run out of food and is essentially starving. The yeast and bacteria are breaking down the flour's components in different ways to survive, leading to that pungent acidic smell.
While hooch itself isn't necessarily harmful, its presence in large amounts indicates the starter is stressed and its microbial balance might be shifting. The strong acetic acid smell is directly linked to the hooch and indicates the need for more frequent or larger feedings.
Bacterial Imbalance and Putrid Smells
Healthy sourdough relies on a symbiotic relationship between wild yeasts and lactic acid bacteria (LAB). If undesirable bacteria are introduced or if the conditions favor their growth over the beneficial LAB, you can end up with very unpleasant, putrid, or cheesy smells. These smells often indicate the presence of bacteria that produce different, less desirable compounds than the typical lactobacilli. This can happen if the starter is kept at suboptimal temperatures for extended periods, if it's not fed consistently, or in rare cases, due to contamination from airborne bacteria.
A starter with a strong putrid smell is often struggling significantly. Unlike hooch, which is a sign of hunger, these smells suggest a fundamental shift in the microbial community towards unwanted species. This is a serious sourdough starter troubleshooting problem.
Mold Contamination: Is Your Starter Ruined?
Mold is a clear sign that your starter has been contaminated by airborne fungal spores. It typically appears as fuzzy or powdery patches on the surface, which can be white, green, blue, black, or even pink/orange. Mold often has a musty or damp smell associated with it. Unlike hooch or unpleasant bacterial smells which might be fixable, mold is generally considered a sign that the starter is ruined.
The hyphae (roots) of mold penetrate deep into the starter, and while you might scrape off the visible part, the contamination is likely throughout. Some molds can produce mycotoxins, which are harmful. Therefore, identifying and handling mold correctly is critical.
Fixing Unpleasant Smells in Your Starter
Discarding Excess Hooch Properly
If you see a layer of hooch, you have two options: stir it in or pour it off. Stirring it in incorporates the acidic liquid back into the starter, which can help lower the pH and inhibit undesirable bacteria, but it will also make the starter more acidic and potentially slower to rise initially. Pouring off the hooch removes the excess acid and alcohol. For a starter with a very strong acetone smell and thick hooch layer, pouring it off is often the better approach to quickly improve the smell.
After dealing with the hooch (stirring or discarding), immediately feed your starter generously using your standard ratio (like 1:1:1 or even 1:2:2 if it was very hungry). Do this consistently, perhaps every 12 hours for a few days, until the hooch formation is minimal and the acetone smell disappears, replaced by a clean, tangy aroma.
Consistent Feeding to Restore Balance
For cheesy or mildly off-smelling starters (without mold), consistent and proper feeding is key to restoring the balance of beneficial microorganisms. Increase the frequency of feeding to every 12 hours for a few days. Use a standard feeding ratio (like 1:1:1 by weight) and ensure you are using good quality flour and non-chlorinated water. Keeping the starter slightly warmer (75-80°F) can also help the beneficial yeast and bacteria outcompete the undesirable ones.
Discard a significant portion of the starter before each feeding – keeping only a small amount relative to the new flour and water (e.g., 1:3:3 ratio) – can help dilute the population of undesirable bacteria and give the beneficial ones a chance to flourish with the fresh food. Be patient; it might take several consistent feedings for the smell to return to normal.
Recognizing and Dealing with Mold (When to Discard)
If you see any fuzzy or powdery patches of mold, regardless of color, you should almost always discard the entire starter. While some sources suggest scraping off small spots, the risk of mycotoxin production and invisible hyphae throughout the culture makes this ill-advised for food safety. It is better to be safe than sorry.
### Task List: Checking for Mold

*   [ ] Visually inspect the surface for fuzzy or powdery spots.
*   [ ] Check along the sides of the jar above the starter line.
*   [ ] Note the color (white, green, blue, black, pink, orange).
*   [ ] Smell the starter for a musty odor.
*   [ ] If mold is present, prepare to discard the starter and sanitize the jar.
Discard the moldy starter into the trash, clean the jar thoroughly with hot, soapy water, and sanitize it (e.g., with boiling water or a mild bleach solution followed by thorough rinsing) before starting a new starter. It's unfortunate, but a necessary step in sourdough starter troubleshooting when mold appears.
3. Sourdough Starter is Too Runny (Thin Consistency)
Understanding Ideal Sourdough Starter Consistency
A healthy, recently fed sourdough starter typically has a consistency similar to a thick, pourable batter or a very thick pancake batter. It should be hydrated enough that the flour and water are fully incorporated, but not so liquid that it runs like water. When you stir it, you should feel some resistance, and it should slowly slump back down in the jar, not immediately flatten out. This consistency is usually achieved with a 100% hydration ratio (equal weights of flour and water, e.g., 100g flour + 100g water).
The desired consistency can vary slightly depending on the type of flour used – whole wheat absorbs more water than white flour – but generally, a runnable yet thick texture is the goal. If your starter is consistently thin and watery after feeding, it indicates an imbalance in your feeding process or the starter's development.
Reasons for a Watery or Thin Sourdough Starter
Excessive Water in the Feeding Process
The most common reason for a runny starter is simply using too much water relative to the amount of flour during feeding. While 100% hydration (equal weights of flour and water) is standard, slight variations can drastically change consistency. For example, if you accidentally use 110g of water for 100g of flour, the starter will be noticeably thinner than if you used 100g water. Using volume measurements instead of weight can also lead to inconsistencies, as flour compacts differently, making a cup of flour vary in weight.
Ensuring accurate measurements, preferably by weight using a kitchen scale, is crucial for maintaining the desired consistency. If your starter looks too thin, it's highly likely your water-to-flour ratio is too high for the desired 100% hydration.
Weak Gluten Development
The gluten network formed by the flour proteins helps give the starter structure and viscosity. If the flour you are using is low in protein (like some all-purpose flours compared to bread flour) or if the starter is very young and hasn't had time to fully develop its microbial population, the gluten network might be weak. This can result in a starter that doesn't hold its shape well and appears thinner or more watery, especially after it has risen and fallen.
A young starter (less than a few weeks old) often goes through phases of varying consistency as the microbial community establishes itself and the gluten structure develops. Using a stronger flour can help build a more robust structure over time.
Solutions for a Runny Sourdough Starter
Reducing Water Content in Feedings
To fix a runny starter, simply adjust your feeding ratio to include less water relative to the flour. If you were aiming for 100% hydration (equal weights), double-check your measurements using a scale. If you were already using accurate 1:1 ratios by weight and it's still too thin for your preference, try reducing the water slightly. For example, feed 100g starter with 100g flour and only 90g water. This creates a slightly stiffer starter (90% hydration relative to the flour).
Continue feeding at this slightly lower hydration level for a few cycles until the desired consistency is achieved. Remember that changing hydration will also affect the starter's activity speed and the resulting bread's characteristics, so find the balance that works for you.
Using Stronger Flour for Better Gluten
Switching to a flour with a higher protein content, such as bread flour, can help create a stronger gluten network in your starter, resulting in a thicker, more viscous consistency. Bread flour typically contains 12-14% protein, compared to 10-12% for all-purpose flour. The extra protein develops more gluten when hydrated and mixed, providing better structure.
If you've been using all-purpose flour and your starter is consistently runny, try feeding it with bread flour for a week or two. You should notice a difference in how it holds its shape and its overall thickness. This is a simple but effective sourdough starter troubleshooting step for consistency issues.
Allowing for Longer Fermentation Times
Sometimes, a starter appears runny because it has peaked and fallen completely, and the gluten structure has broken down. While this isn't a "problem" in the sense of being unhealthy, it might give the impression of being too thin. If your starter rises well but then collapses into a watery mess, it might be that you're just observing it long after it peaked.
Ensure you are feeding your starter at its peak or just after it has started to fall. If you're feeding it only once every 24 hours, and it's peaking much faster (e.g., in 6-8 hours), it will be very runny by the time you get to it. Increase feeding frequency or store it in a cooler place to slow down fermentation if you need it to hold its peak longer.
4. Sourdough Starter is Moldy: Identifying and Handling Mold
Identifying Mold in Sourdough Starter
Identifying mold is crucial because, unlike other issues, it often means the end of your starter. Mold typically appears as fuzzy or powdery patches on the surface of the starter. These patches can be various colors, including white, green, blue, black, pink, or orange. Do not confuse mold with dry, crusty bits of starter that might form on the sides of the jar above the wet line – these are harmless and can be scraped off. Mold is distinctly fuzzy or powdery.
Sometimes, mold might appear as small, isolated spots, while other times it can cover a large portion of the surface. Check carefully, especially if you haven't fed your starter in a while or if it's been stored in less-than-ideal conditions.
Different Types of Mold and Their Dangers
Various types of mold can grow on food, including sourdough starter. While some molds might be relatively harmless, others can produce mycotoxins, which are toxic compounds that can cause adverse health effects if ingested. Common molds like Penicillium and Aspergillus species, which can appear green, blue, or black, are known mycotoxin producers. Pink or orange molds are often species of Geotrichum, which can also indicate spoilage.
Because it's impossible to know visually whether a mold is producing toxins, and because mold hyphae penetrate below the surface, the general consensus in the baking community and food safety guidelines is that moldy sourdough starter should be discarded. Attempting to save a moldy starter by scraping off the visible parts is risky.
Is a Moldy Starter Salvageable?
In almost all cases, a moldy sourdough starter is not salvageable and should be discarded for safety reasons. The visible mold is just the fruiting body; the microscopic threads (hyphae) that produce it extend deep into the starter, contaminating the entire culture. Scraping off the visible mold does not remove the contamination.
While it can be disheartening to discard a starter you've nurtured, starting fresh is the safest approach. Think of it as gaining valuable experience in sourdough starter troubleshooting and prevention for your next culture.
Safe Disposal of Contaminated Sourdough Starter
To safely dispose of a moldy starter, scrape it into the trash. Do not attempt to compost it unless you have a very hot composting system that can break down potential toxins. Avoid pouring it down the drain, as large amounts of starter can clog pipes. Once the starter is discarded, thoroughly clean the jar and any utensils that came into contact with it using hot, soapy water.
Follow cleaning with a sanitizing step to ensure no mold spores remain. You can do this by boiling the jar and lid in water for several minutes or using a diluted bleach solution (1 teaspoon of bleach per quart of water), letting it sit for a few minutes, and then rinsing thoroughly. Allow everything to air dry completely before using the jar again for a new starter or other food.
5. Sourdough Starter Not Doubling: Slow Growth
Understanding Expected Starter Growth
A healthy, active sourdough starter, when fed at its peak and kept at optimal temperatures (around 75-80°F or 24-27°C) with a standard ratio like 1:1:1 (starter:flour:water by weight), should typically double or even triple in volume within 4 to 8 hours. This predictable rise and fall is a key indicator of strong yeast activity, which is essential for leavening bread. Observing this doubling is a primary way bakers gauge their starter's readiness for baking.
Using a jar with straight sides and marking the level of the starter immediately after feeding can help you easily track its rise. If your starter is consistently failing to double within a reasonable timeframe (considering temperature and feeding ratio), it's a sign that its activity level is lower than desired, pointing towards potential sourdough starter troubleshooting needs.
Reasons for Slow or No Doubling
Inconsistent Feeding Schedule
One of the most common culprits for slow growth is an inconsistent feeding schedule. Sourdough starters thrive on routine. If you feed it irregularly – sometimes every 12 hours, sometimes every 24, or even longer – the yeast and bacteria don't have a stable food supply. This can lead to periods of starvation followed by sudden feeding, preventing the population from establishing a consistent growth pattern. The starter spends too much time recovering or waiting for food instead of actively multiplying.
Regularly feeding your starter at approximately the same time each day (or twice a day if keeping it at room temperature) helps maintain a robust and predictable microbial population capable of consistent doubling.
Underdeveloped Yeast Population
A young starter (less than a few weeks old) often exhibits slow growth because the yeast population is still establishing itself and competing with other microorganisms. It takes time for the wild yeasts from the flour and air to multiply to a level sufficient for significant leavening power. During the first week or two, irregular or slow bubbling and minimal rise are normal.
Even established starters can have their yeast population weaken if they are consistently underfed, kept too cold, or exposed to chlorinated water. The yeast are less resilient than the bacteria to certain stresses, and their numbers might dwindle, leading to slow rise, even if the starter smells okay (due to bacterial activity).
Weak Flour Quality
The type and quality of flour used play a significant role in starter activity and growth. Refined white flours have less natural yeast and fewer nutrients compared to whole grain flours. Using a low-protein, highly refined flour might result in a starter that struggles to double vigorously compared to one fed with strong bread flour or whole wheat flour.
Flour quality can also vary by brand and even batch. Stale or aged flour might have less enzymatic activity needed to break down starches into sugars for the yeast to consume. While not always the primary reason, using fresh, good quality flour is essential for promoting strong starter growth and avoiding sourdough starter troubleshooting related to food source.
Troubleshooting Slow Growth: Encouraging Doubling
Consistent Feeding at Regular Intervals
To encourage doubling, commit to a consistent feeding schedule. If keeping your starter at room temperature (70-80°F), feed it every 24 hours, or even every 12 hours if you want to boost activity quickly. Use a reliable feeding ratio like 1:1:1 or 1:2:2 (starter:flour:water by weight). Feeding consistently ensures the starter has a steady supply of nutrients, allowing the yeast population to grow and thrive predictably.
Marking the jar after feeding and noting the time helps you track the rise and understand its current cycle. After a week or two of consistent, regular feeding, you should see a noticeable improvement in doubling time and volume.
Strengthening the Yeast Population with Time
Patience is key, especially with younger starters. Continue feeding consistently, ensuring optimal temperature (75-80°F), and use good quality flour and water. Over time, the yeast population will naturally strengthen and become more dominant, leading to more vigorous doubling. For an established starter that has become sluggish, consistent feeding at optimal temperatures is the best way to rebuild the yeast population.
Consider a few feedings with a portion of whole wheat or rye flour (e.g., 20-30% of the flour weight) as these flours can help boost yeast activity. This can often jumpstart a sluggish starter and help it regain its doubling power.
Switching to a Higher Protein Flour
If your starter is consistently slow to double despite consistent feeding and optimal temperature, the flour might be the limiting factor. Try switching to a higher protein flour, such as bread flour (12-14% protein) or even a good quality all-purpose flour (11-12% protein) if you were using something lower. The increased protein helps create a stronger gluten network, which traps gases produced by the yeast more effectively, resulting in a more visible and significant rise (doubling).
Switching to a mix of white and whole wheat or rye flour (e.g., 80% bread flour, 20% whole wheat) can combine the benefits of stronger gluten with the extra nutrients and wild yeast from the whole grain, often leading to faster and more reliable doubling.
Preventative Measures for a Healthy Sourdough Starter
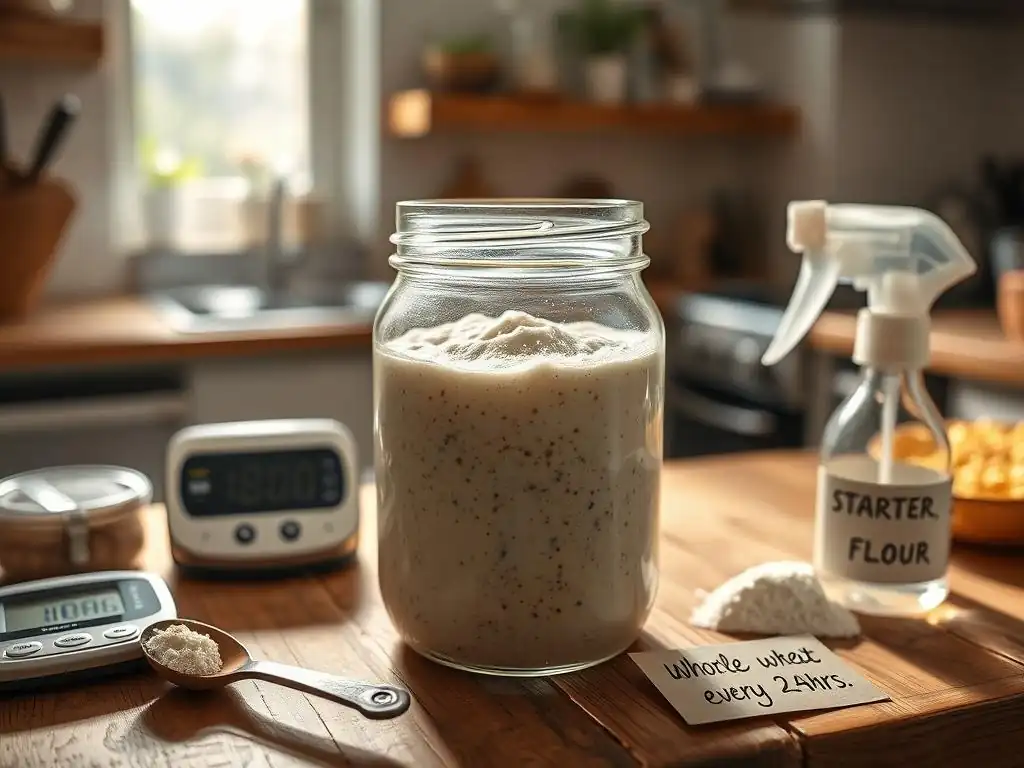
Maintaining a Consistent Feeding Routine
Consistency is the cornerstone of a healthy, active sourdough starter. Just like any pet, it needs to be fed regularly. For a starter kept at room temperature (70-80°F), this typically means feeding it once every 24 hours, or even every 12 hours if you are actively baking frequently. If you store your starter in the refrigerator, you can feed it less often, perhaps once a week, but it's still important to establish and stick to that routine.
Feeding consistently, ideally around the same time each day, helps maintain a stable microbial environment. The yeast and bacteria have a predictable food source, allowing their populations to thrive without periods of starvation or excessive accumulation of metabolic byproducts like hooch. This preventative step significantly reduces the likelihood of common sourdough starter troubleshooting problems fast.
Using Quality Flour and Water
The "food" you give your starter directly impacts its health and activity. Use unbleached flour, as the bleaching process can sometimes affect microbial activity. While you can use various types of flour (all-purpose, bread, whole wheat, rye), using a consistent type helps maintain stability. Many bakers find that a mix of white and whole grain flour provides a good balance of structure and nutrients for vigorous activity.
Equally important is the water. Avoid using tap water that is heavily chlorinated, as chlorine is designed to kill microorganisms. If your tap water has a strong chlorine smell, let it sit out in an open container for 24 hours before using it, or use filtered or bottled water. These simple steps help prevent issues related to poor nutrition or chemical inhibition.
Creating an Optimal Environment for Fermentation
Temperature is paramount for starter health and activity. The ideal range for robust fermentation is typically 75-80°F (24-27°C). Keeping your starter consistently within this range promotes strong yeast and bacterial activity, leading to predictable doubling and a healthy balance of flavors. Temperatures below 70°F will slow everything down, while temperatures consistently above 80°F can stress the culture.
Find a warm, stable spot in your kitchen, or use simple tools like a proofing box, oven with the light on, or a seedling mat to maintain the temperature. Protecting your starter from extreme temperature swings is a key preventative measure in sourdough starter troubleshooting and ensuring consistent baking results.
Advanced Sourdough Starter Troubleshooting Techniques
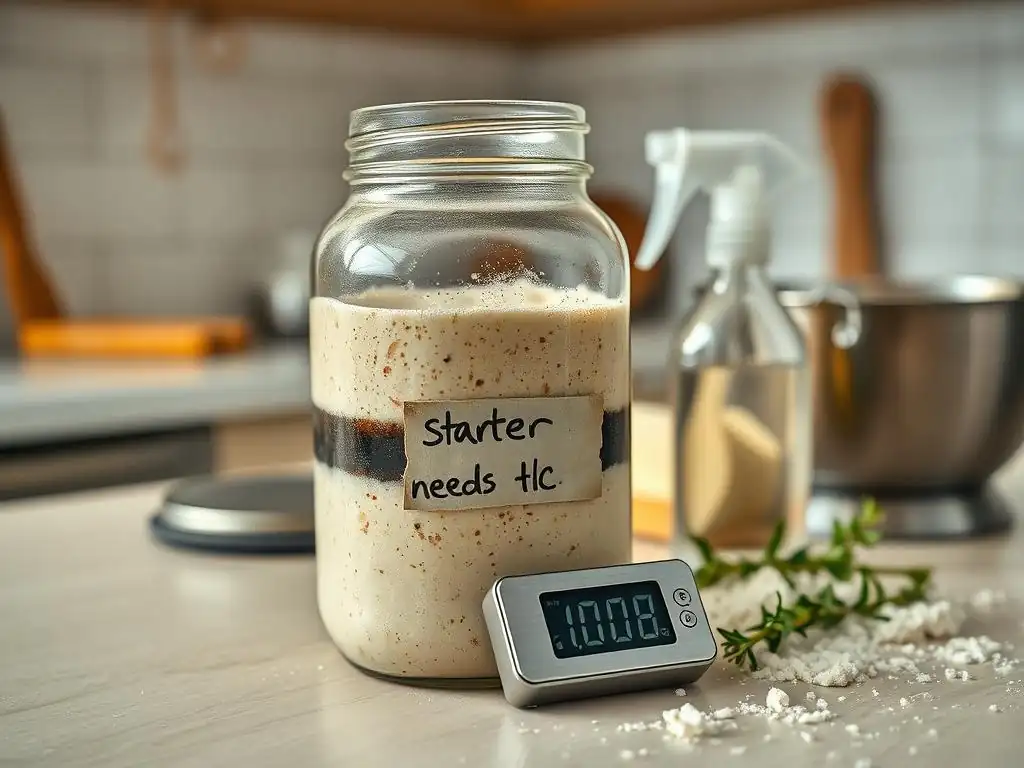
Diagnosing Complex Sourdough Issues
Sometimes, a starter might present a combination of symptoms or issues that aren't immediately obvious. Perhaps it smells okay but doesn't rise, or it rises but has a very strange texture. Diagnosing these complex sourdough issues often requires a more analytical approach, looking at the interplay of temperature, hydration, feeding ratio, and flour type over time. Keeping a log of feeding times, ratios, temperatures, and observed activity (rise, smell, texture) can be incredibly helpful in identifying patterns or recent changes that might be causing the problem.
Consider the history of your starter: Has it always behaved this way? Did the issue start after a specific change (new flour, different feeding schedule, change in kitchen temperature)? Thinking like a detective and isolating variables can help you pinpoint the root cause when simple sourdough starter troubleshooting steps aren't enough.
Adjusting Hydration Levels for Specific Problems
While 100% hydration is standard, adjusting the water-to-flour ratio can be a troubleshooting tool. A slightly stiffer starter (lower hydration, e.g., 80-90%) can sometimes appear to rise more dramatically and might be less prone to developing a thick layer of hooch. A wetter starter (higher hydration, e.g., 110-120%) ferments faster and can be easier to mix, though it might look runnier.
If your starter is consistently producing excessive hooch despite regular feeding at 100% hydration, try reducing the water slightly (e.g., 95% hydration) for a few feedings. If your starter is very stiff and slow to get going, increasing the hydration slightly might help. Experimenting with hydration can help fine-tune your starter's behavior to your specific environment and flour type, addressing certain sourdough starter troubleshooting problems fast.
Understanding the Role of Different Flours
Different flours don't just affect consistency; they impact the microbial balance and activity. Whole grain flours (wheat, rye, spelt) introduce more wild yeasts and nutrients, often leading to faster, more vigorous fermentation and a tangier flavor profile due to different bacteria being favored. White flours (bread flour, all-purpose) tend to produce a milder starter with a focus on reliable rising power, especially with higher protein types.
If you're troubleshooting issues like slow growth or lack of tang, experimenting with incorporating different flours can be beneficial. For example, a starter struggling to double might get a boost from a few feedings with 20% rye flour. A starter that is too acidic might benefit from being fed solely with white flour for a while. Understanding how different flours influence your specific starter is an advanced sourdough starter troubleshooting technique.
Conclusion: Mastering Sourdough Starter Troubleshooting
Key Takeaways for Successful Sourdough Baking
Mastering sourdough starter troubleshooting problems fast boils down to understanding that your starter is a living ecosystem with basic needs: consistent food (flour and water) and a stable, warm environment. Pay attention to its cues – how it looks, smells, and behaves after feeding. Common issues like inactivity, bad smells, or inconsistent texture can almost always be traced back to variations in feeding schedule, ratio, temperature, or flour quality.
Don't be discouraged by setbacks. Every problem encountered is a learning opportunity that deepens your understanding of fermentation and makes you a more intuitive baker. By applying systematic troubleshooting steps, maintaining consistency in your care routine, and being patient, you can revive most struggling starters and keep your culture healthy for years to come.
Resources for Further Sourdough Starter Support
While this guide covers common sourdough starter troubleshooting problems fast, the world of sourdough is vast and full of nuances. Many online communities, forums, and baking blogs offer invaluable support and shared experiences from bakers facing similar challenges. Books dedicated to sourdough baking often have extensive troubleshooting sections.
Consulting reliable resources allows you to see how other bakers handle specific issues, learn about different techniques, and find encouragement. Remember, the baking community is generally very helpful, and chances are, someone else has already successfully navigated the sourdough starter troubleshooting problem you're currently facing. Happy baking!
Frequently Asked Questions
What are the most common signs that my sourdough starter needs troubleshooting?
The most common signs include a lack of rise after feeding, a foul or unusual smell, or the presence of mold indicating contamination.
My sourdough starter isn't doubling in size after feeding. What could be the problem?
Several factors can cause this, including the room temperature being too cold, the flour being used is not ideal, or the starter needing more time to mature.
How can I quickly address a sourdough starter that has developed a layer of dark liquid on top (hooch)?
"Hooch" indicates starvation. To fix it, simply pour off the liquid, feed your starter with fresh flour and water, and monitor it closely.
My sourdough starter smells strongly of acetone or alcohol. Is this normal, and how do I fix it?
This smell often indicates the starter is underfed and needs more frequent feedings. Regular feedings with a higher ratio of flour and water can resolve this.
How can I speed up the process of reviving a weak or inactive sourdough starter?
Try feeding it twice a day with a 1:1:1 ratio (starter:flour:water) and keeping it in a slightly warmer environment (around 75-80°F) to encourage activity.
Final Reflection: The Resilient Joy of Sourdough
The seemingly simple act of nurturing a sourdough starter mirrors the unpredictable yet rewarding journey of life itself. From the frustrating setbacks of a sluggish starter to the triumphant rise of a perfectly bubbly levain, the process teaches patience, resilience, and the profound satisfaction of creating something truly special from humble beginnings. This isn't just about baking bread; it's about mastering a living organism and understanding the delicate balance of nature.
The enduring popularity of sourdough, despite its challenges, speaks volumes about our innate desire to connect with the natural world and reclaim traditional skills. It's a testament to the power of slow food, mindful processes, and the simple pleasure of creating something delicious with your own two hands. Bread is the staff of life,
they say, and in the case of sourdough, it's a staff forged through patience, understanding, and a deep respect for the process. This connection to the past, to the rhythms of fermentation, offers a counterpoint to our increasingly fast-paced modern lives.
Now, consider your own starter. Perhaps it's currently thriving, or maybe it's stubbornly refusing to cooperate. Either way, remember the lessons learned within these pages. Don't be discouraged by setbacks; view them as opportunities for learning and growth. Embrace the unpredictable nature of your starter, and in doing so, you'll not only bake better bread, but you'll cultivate a deeper appreciation for the simple, yet profound, joys of life's journey. The next time your starter falters, remember this: patience, persistence, and a little understanding can lead to remarkable results.
Unlock Your Sourdough Potential: Master Your Starter Today!
Thanks for diving into the world of sourdough with us! You've just gained valuable insights into tackling those pesky starter problems. Now it's time to put that knowledge into action.
- Experiment with your starter's feeding schedule: Try adjusting the frequency or amount of feedings based on your observations and see what works best for your environment. This is your key to consistent success!
- Share your sourdough journey: Post a picture of your thriving (or even struggling!) starter on social media and tag us #BakeWithEaseSourdough. Let's connect and learn from each other!
- Dive deeper into our Sourdough 101 guide: Find even more tips and recipes to help you confidently bake amazing sourdough bread (link omitted as per instructions).
Ready to bake your best sourdough yet? What small change will you make to your starter routine today?