
Mastering Lamination by Hand for Home Bakers

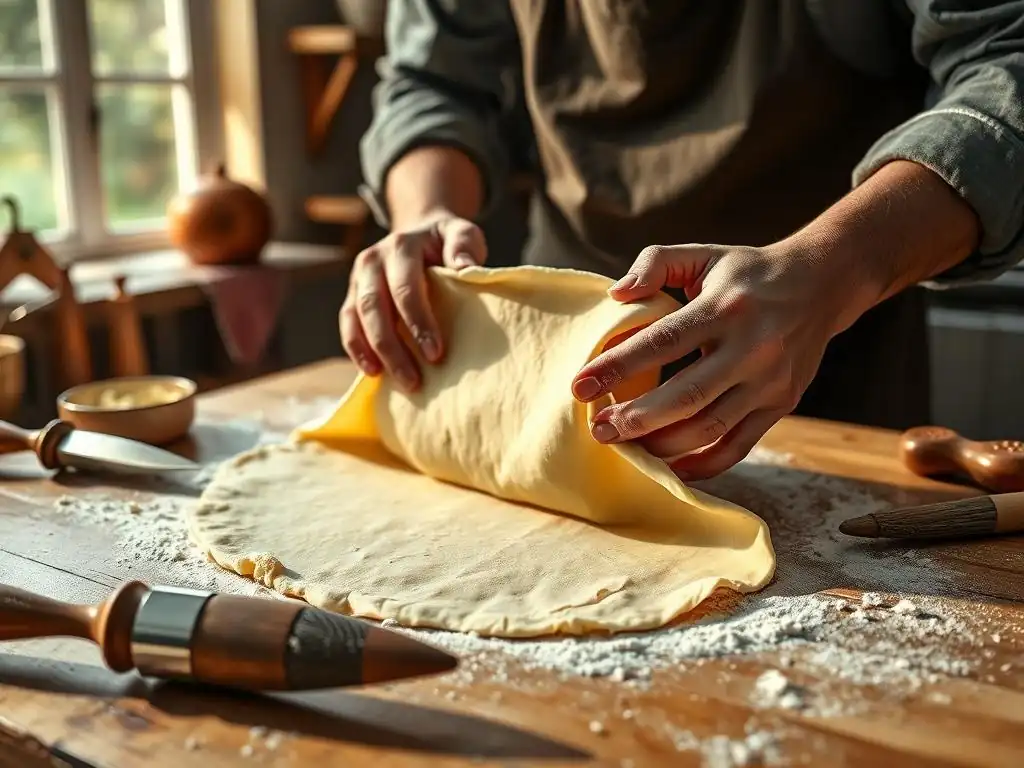
Welcome to BakeWithEase, your guide to unlocking the delicious world of home baking! Ever dreamt of creating those perfectly flaky, buttery pastries you see in bakeries? This week, we're demystifying the art of hand laminated pastry dough. Discover the secrets to achieving professional-quality results without needing fancy equipment, and prepare to impress with your newfound skills. Ready to elevate your baking game? Let's get started!
- Mastering Hand Laminated Pastry Dough for Exquisite Croissants at Home
- Introduction to Hand Lamination: The BakeWithEase Guide
- Essential Tools and Ingredients for Hand Lamination Success
- The Step-by-Step Guide to Hand Lamination
- Troubleshooting Common Hand Lamination Challenges
- Baking Your Hand Laminated Croissants: From Dough to Deliciousness
- Tips and Tricks for Perfect Hand Laminated Pastry Every Time
- Beyond Croissants: Exploring Other Hand Laminated Pastries
- Conclusion: Embrace the Art of Hand Lamination with BakeWithEase
-
Frequently Asked Questions
- What is hand-laminated pastry dough, and why is it important for baking?
- What are the key differences between hand-laminated and machine-laminated dough?
- What type of butter is best for hand-laminating pastry dough?
- What are some common mistakes to avoid when hand-laminating dough?
- How can I tell if my hand-laminated dough is properly laminated before baking?
- Final Reflection: The Enduring Art of Hand-Laminated Pastry
- Unleash Your Inner Pastry Chef: Laminate Like a Pro!
Mastering Hand Laminated Pastry Dough for Exquisite Croissants at Home
Introduction to Hand Lamination: The BakeWithEase Guide
Welcome to the rewarding world of hand lamination, a core technique for creating the flaky, buttery layers that define classic pastries like croissants and pain au chocolat. At BakeWithEase, we believe that achieving exceptional results is well within the reach of home bakers, even without specialized machinery. Mastering hand laminated pastry dough is a journey of patience and precision, but the outcome—pastries with hundreds of delicate layers that shatter upon the first bite—is truly unparalleled.
This guide will walk you through every step, from preparing the initial dough to the final bake, providing you with the knowledge and confidence to create stunning hand laminated pastry dough in your own kitchen. We'll demystify the process, focusing on the subtle cues and techniques that make all the difference. Get ready to transform simple ingredients into edible works of art using just your hands and a rolling pin.
Why Choose Hand Lamination Over Machine Lamination?
While professional bakeries often use industrial laminators for efficiency and consistency, hand lamination offers distinct advantages for the home baker. Primarily, it allows for a deeper connection with the dough, enabling you to feel its resistance, temperature, and elasticity. This tactile feedback is invaluable for learning how the dough behaves and adapting your technique in real-time, something a machine cannot teach. It's a more artisanal approach, celebrating the craft of baking.
Furthermore, hand lamination doesn't require expensive equipment. All you need are basic kitchen tools like a rolling pin, a cool surface, and your hands. It's an accessible method that allows anyone with a passion for baking to achieve professional-quality results at home. The slight variations inherent in hand-worked dough can also lend a unique, rustic charm to your finished pastries, a signature of truly handmade goods.
Understanding the Fundamentals of Hand Laminated Pastry
At its heart, hand laminated pastry dough is created by repeatedly folding a block of butter within a simple dough (known as the détrempe). This process, called lamination, creates alternating layers of dough and butter. When the pastry bakes, the water in the butter turns to steam, forcing the dough layers apart and creating that characteristic light, airy, and flaky texture. The quality of your final pastry is directly proportional to the care taken during each folding step.
The success of hand laminated pastry dough hinges on maintaining precise temperatures and handling the dough gently. The butter needs to be firm but pliable, and the dough cool and relaxed. As you roll and fold, you are multiplying the layers exponentially. For instance, a typical croissant recipe involves three turns (folds), resulting in potentially hundreds of layers of dough and butter, provided the layers remain distinct and don't merge.
Essential Tools and Ingredients for Hand Lamination Success
Achieving perfect hand laminated pastry dough requires not only technique but also the right equipment and high-quality ingredients. While you don't need a professional setup, having the correct tools will make the process significantly smoother and more enjoyable. Similarly, selecting the best flour and butter is crucial, as they form the backbone of your pastry's structure and flavor.
Investing in quality ingredients and ensuring you have the necessary tools on hand before you begin will set you up for success. Preparation is key in baking, especially when working with temperature-sensitive dough like hand laminated pastry dough. Having everything ready minimizes stress and reduces the risk of errors during the critical lamination steps.
The Baker's Toolkit: Must-Have Equipment for Hand Lamination
A good quality rolling pin is indispensable for hand lamination. A heavy, solid rolling pin, such as a marble or French-style wooden pin, helps apply even pressure across the dough, which is essential for creating uniform layers. The weight assists in rolling without tearing the delicate layers of butter and dough. Ensure your rolling pin is long enough to comfortably roll out the dough to the required dimensions.
Another crucial item is a cool, smooth work surface. Marble or granite countertops are ideal as they naturally stay cool, which helps prevent the butter from melting during rolling. If you don't have a stone counter, a large silicone pastry mat or even a large cutting board can work, especially if chilled beforehand. Having ample space to roll out the dough is also important; aim for a surface that allows you to roll the dough to at least 50-60 cm (about 20-24 inches) in length or width depending on the fold type.
Selecting the Best Ingredients for Flaky, Delicious Pastry
The foundation of any great hand laminated pastry dough lies in the quality of its components. While the process of lamination is key to texture, the flavor and richness come from the ingredients themselves. Choosing the right type of flour and, perhaps most importantly, the right kind of butter, will elevate your pastries from good to truly outstanding.
High-quality ingredients not only taste better but also perform better during the lamination process. For example, butter with a higher fat content is less prone to melting and leaking, contributing to cleaner layer separation. Similarly, using the appropriate flour ensures the dough has the right balance of elasticity and extensibility, making it easier to handle and less likely to tear.
Flour Selection: Choosing the Right Flour for Lamination
For hand laminated pastry dough, a medium-protein flour is generally recommended. All-purpose flour works well for home bakers, typically containing around 10-12% protein. This level of protein allows for sufficient gluten development to create a strong, elastic dough that can withstand repeated rolling and folding without tearing, yet remains tender enough for a flaky bite. Strong bread flour (12-14% protein) might develop too much gluten, resulting in a tough pastry, while cake flour (6-8% protein) might be too weak to hold the structure.
Some bakers prefer using a blend of all-purpose and bread flour to strike the perfect balance between strength and tenderness. A common ratio might be 75% all-purpose and 25% bread flour. The key is finding a flour that allows you to roll the dough thinly without resistance but still provides enough structure to support the many layers. The specific protein content can vary by brand and region, so experimentation might be needed to find your preferred flour.
Butter: The Key to Perfect Layers in Hand Laminated Dough
Butter is arguably the most critical ingredient in creating flaky hand laminated pastry dough. Its role is not just flavor but the physical separation of dough layers during baking. For successful lamination, you need butter that is high in fat and low in water content. European-style butters, which typically contain 82-86% butterfat compared to the 80% minimum in many American butters, are often preferred because their lower water content results in less steam loss during baking and more distinct layers.
The consistency of the butter is also vital. It must be cold but pliable, not hard and brittle straight from the fridge, nor soft and greasy. A good test is to bend a stick of butter; it should bend slightly without snapping and feel cool to the touch but not rigid.
If the butter is too cold, it will break through the dough layers; if too warm, it will melt into the dough, preventing lamination. Using a butter designed specifically for lamination, often called "dry" or "pliable" butter, can make the process easier due to its consistent texture and higher melting point.
The Step-by-Step Guide to Hand Lamination
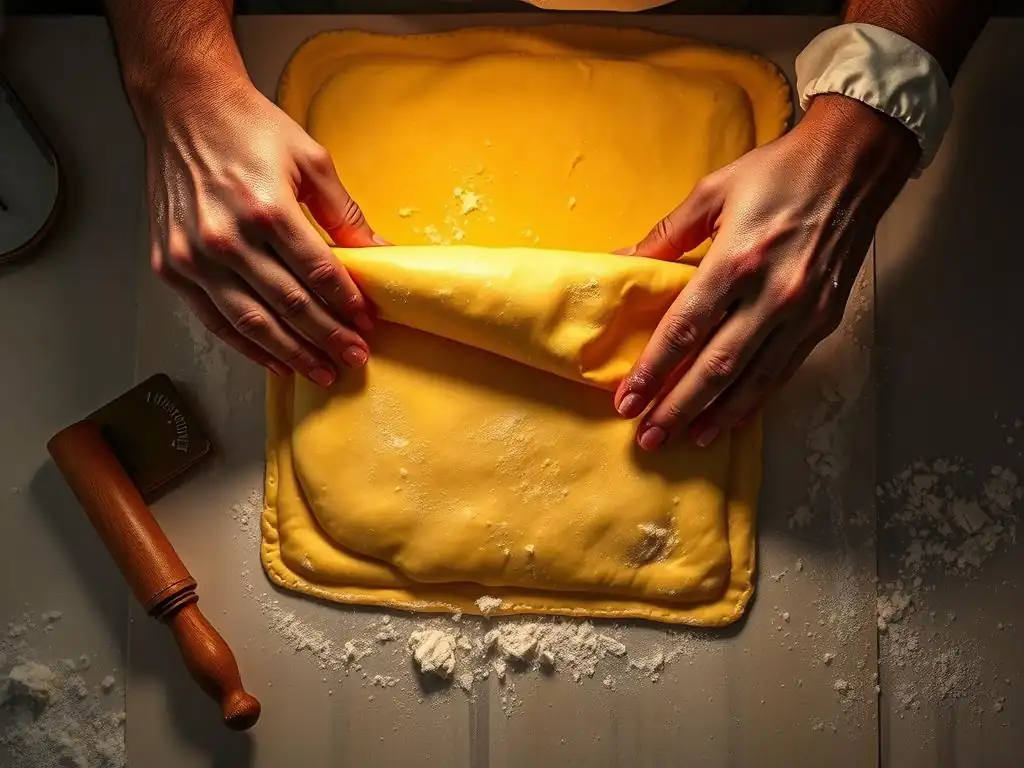
Mastering hand laminated pastry dough is a process that requires patience and precision. Each step builds upon the last, contributing to the final structure and flakiness of your pastry. This detailed guide breaks down the lamination process into manageable stages, ensuring you understand the purpose behind each action and how to execute it effectively in your home kitchen.
From preparing the initial dough to the final series of folds, paying close attention to temperature and handling will yield the best results. Remember that slight variations in your kitchen environment can affect the dough, so be prepared to adjust resting times and chilling periods as needed. The goal is to keep both the dough and the butter cool, firm, and cooperative throughout the entire lamination process.
Step 1: Preparing the Détrempe (Base Dough)
The détrempe is the foundation of your hand laminated pastry dough. It's a simple dough made from flour, water (or milk), yeast (for croissants), sugar, salt, and often a small amount of butter or egg for richness. Unlike a standard bread dough, the détrempe for lamination is typically mixed until just combined, avoiding excessive gluten development initially.
The texture of the détrempe is crucial. It should be relatively firm, smooth, and elastic enough to be rolled thinly without tearing. Over-mixing can lead to a tough dough that resists rolling during lamination, while under-mixing might result in a weak dough that struggles to hold its structure. Aim for a dough that pulls away from the sides of the bowl cleanly but isn't overly sticky.
Mixing the Détrempe: Achieving the Right Consistency
Begin by combining your dry ingredients (flour, sugar, salt, yeast if using) in a large bowl. In a separate bowl, whisk together your wet ingredients (cold water or milk, potentially melted butter or egg). Gradually add the wet ingredients to the dry, mixing with a spoon or in a stand mixer on low speed until a shaggy dough forms. For a typical recipe using 500g of flour, you might use around 250-300g of cold liquid.
Turn the dough out onto a light floured surface and knead briefly, just until it comes together into a smooth ball. This usually takes only a few minutes by hand, or 2-3 minutes in a stand mixer. Avoid prolonged kneading; the goal is to hydrate the flour and bring the ingredients together, not to develop strong gluten networks at this stage. The dough should feel smooth and relatively firm, holding its shape when placed on the counter.
Resting the Détrempe: Allowing Gluten Development
After mixing, the détrempe needs a significant rest period. This serves two main purposes: allowing the gluten to relax, making the dough easier to roll, and for yeast doughs, allowing a slow, initial fermentation. Wrap the dough tightly in plastic wrap, ensuring no air pockets, and refrigerate for at least 4 hours, but ideally overnight (10-12 hours). This long, cold rest is critical.
During the cold rest, enzymes in the flour start to break down proteins, further relaxing the gluten. The cold temperature also solidifies any butter in the dough, making it easier to handle alongside the butter block. This extended chilling period is non-negotiable for successful hand laminated pastry dough; attempting to laminate a warm or insufficiently rested dough will lead to frustration and poor results.
Step 2: Preparing the Butter Block (Beurrage)
The butter block, or beurrage, is the heart of hand laminated pastry dough. It's a block of butter that is incorporated into the détrempe and forms the distinct layers. Preparing the butter block correctly is just as important as the détrempe itself. It needs to be the correct temperature, consistency, and size relative to your dough.
The butter should be pliable but cold. If it's too hard, it will crack and break during rolling; if too soft, it will melt into the dough. The goal is for the butter to have a similar consistency to the dough when you begin lamination, allowing them to roll out together evenly without resistance or tearing.
Shaping the Butter Block: Achieving Uniform Thickness
Start with cold butter (preferably high-fat European style). For a 500g flour détrempe, you might use 250-400g of butter for the beurrage, depending on the desired richness. Cut the cold butter into pieces and arrange them on a piece of parchment paper or plastic wrap. Cover with another sheet and pound the butter with a rolling pin to soften it slightly and flatten it into a rough rectangle.
Once the butter is pliable but still cool, use the rolling pin and your hands to shape it into a neat, uniform rectangle. The dimensions of this rectangle will depend on the size you plan to roll your détrempe, but a common starting point is about 20 cm x 15 cm (8 inches x 6 inches). Ensure the thickness is consistent across the entire block, typically around 0.5 cm (about 1/4 inch). A uniform butter block is essential for creating even layers in your hand laminated pastry dough.
Chilling the Butter Block: Ensuring Optimal Workability
After shaping, the butter block must be chilled until it reaches the ideal working temperature and consistency. Wrap the shaped butter block tightly and refrigerate it for at least 30-60 minutes. The goal is for the butter to be firm but still flexible – it should bend slightly without snapping.
The ideal temperature for the butter block is typically between 4°C and 10°C (39°F and 50°F). If it's too cold, let it sit at room temperature for a few minutes to soften slightly. If it's too soft, return it to the refrigerator. Having the butter at the correct temperature and consistency is paramount for smooth lamination and preventing butter leakage through the dough.
Step 3: Incorporating the Butter into the Dough (Enfolding)
This is the critical first step of lamination, where the prepared butter block is enclosed within the chilled détrempe. The method you use to enclose the butter will determine the initial structure of your hand laminated pastry dough and how easily you can perform the subsequent folds. There are a couple of common techniques, but the goal is always to completely seal the butter within the dough.
Successful enfolding ensures that when you begin rolling, the butter is fully encased and won't squeeze out, leading to uneven layers or butter leakage. Patience and precision are key here; take your time to ensure the seams are well-sealed.
The First Fold: Encasing the Butter Block
One common method is to roll the chilled détrempe into a rectangle roughly twice the width of your butter block and slightly longer than its length. Place the butter block on one half of the dough rectangle, leaving a border around the edges. Fold the other half of the dough over the butter block, like closing a book. Press the edges firmly together to seal the butter completely within the dough envelope.
Alternatively, you can roll the détrempe into a square and place the square butter block diagonally in the center. Fold the four corners of the dough over the butter block to meet in the center, like an envelope. Whichever method you choose, the aim is to create a package where the butter is fully enclosed, ready for the first turn. Ensure the dough is cold and elastic enough to stretch without tearing as you fold it over the butter.
The First Turn: Creating the Initial Layers
Once the butter is sealed inside the dough envelope, you perform the first "turn" or fold. Gently flour your work surface and the top of the dough package. Using your rolling pin, gently but firmly roll the dough package into a long rectangle. Roll away from you, then towards you, and to the sides, applying even pressure to stretch the dough without tearing it or squeezing the butter out.
Roll the dough until it is about 3 times as long as it is wide, and about 6-8 mm (1/4 - 1/3 inch) thick. Brush off any excess flour from the surface. Now, perform the first fold. A common method is the 'single fold' or 'letter fold': fold one end of the rectangle inwards by a third, then fold the other end over the first, like folding a letter.
This creates three layers of dough separated by two layers of butter. Rotate the dough 90 degrees, wrap it tightly, and refrigerate for at least 30-60 minutes to rest and chill. This first turn is crucial for establishing the initial layer count in your hand laminated pastry dough.
Step 4: Folding and Turning the Dough for Optimal Lamination
The magic of hand laminated pastry dough happens during the repeated folding and rolling process, known as "turns." Each turn multiplies the number of layers in your dough. The type and number of turns determine the final structure and flakiness of your pastry. This stage requires patience, consistent temperature control, and careful handling.
The goal is to roll the dough evenly and fold it precisely to create uniform layers. Rushing this process or allowing the dough or butter to get too warm will result in uneven layers or worse, the butter melting into the dough, destroying the lamination.
The Importance of Resting Between Turns
Resting the dough between turns is absolutely essential for successful hand lamination. After each turn, the gluten in the dough becomes tighter and more resistant to rolling. Wrapping the dough tightly and refrigerating it for at least 30-60 minutes (or longer) allows the gluten to relax, making the dough pliable and easy to roll again without tearing.
Chilling also ensures the butter remains firm and distinct from the dough layers. If the dough resists rolling or the butter feels too soft, extend the resting time in the refrigerator. Attempting to force a resistant dough will likely result in uneven thickness, torn layers, or butter leakage, compromising the quality of your hand laminated pastry dough.
Performing Single and Double Folds: Techniques for Layer Development
There are two primary folding techniques used in hand lamination:
- Single Fold (Letter Fold): Roll the dough into a rectangle about 3 times as long as it is wide. Fold one end up by a third, then fold the other end down over the first, like folding a letter into thirds. This multiplies the layer count by 3 (e.g., 3 layers become 9, 9 become 27).
- Double Fold (Book Fold): Roll the dough into a rectangle about 4 times as long as it is wide. Fold both ends inward so they meet in the center, then fold the dough in half along the center line, like closing a book. This multiplies the layer count by 4 (e.g., 3 layers become 12, 12 become 48).
Most croissant recipes call for a combination of single and double folds, typically three turns in total, often starting with a double fold followed by two single folds. Always rotate the dough 90 degrees after each fold before rolling for the next turn, ensuring even development of layers across the entire block of hand laminated pastry dough.
Step 5: Achieving the Perfect Number of Layers for Croissants
The number of layers in your hand laminated pastry dough directly impacts the flakiness and rise of your croissants. Too few layers might result in a bready texture, while too many can make the dough difficult to handle and potentially lead to layers merging during baking. There's a sweet spot that provides the ideal balance of structure and delicate flakiness.
Understanding the math behind the folds helps you appreciate the complexity achieved through simple repetitions. Each turn significantly increases the layer count, transforming a simple dough and butter block into a marvel of laminated structure, ready to yield hundreds of individual flakes when baked.
Determining the Ideal Number of Lamination Turns
For classic croissants, the standard number of turns is typically three. Starting with the butter enclosed in the dough (which counts as 3 layers of dough separated by 2 layers of butter, or sometimes just considered the base layer count before the first fold), the layer count multiplies with each fold:
- After 1st Single Fold: 3 layers * 3 = 9 layers
- After 2nd Single Fold: 9 layers * 3 = 27 layers
- After 3rd Single Fold: 27 layers * 3 = 81 layers
If a double fold is used:
- Initial (Butter Enfolded): 3 layers
- After 1st Double Fold: 3 layers * 4 = 12 layers
- After 2nd Single Fold: 12 layers * 3 = 36 layers
- After 3rd Single Fold: 36 layers * 3 = 108 layers
Many recipes opt for a sequence like one double fold followed by two single folds, resulting in over 100 layers. This number provides the optimal balance for a classic croissant's structure and flakiness.
Evaluating Dough Texture: Knowing When to Stop Laminating
Beyond the number of turns, the feel of the dough is a crucial indicator of successful lamination. After the final turn and a sufficient rest (at least 1-2 hours in the refrigerator, or ideally longer), the hand laminated pastry dough should feel firm yet pliable. When you gently press it, it should have some resistance but not snap or crack.
When rolled out for shaping, the dough should stretch evenly without tearing or excessive resistance. You should be able to see faint lines indicating the layers along the cut edges. If the dough feels tough and springs back excessively, it might need a longer rest. If it feels greasy or the butter seems to be melting into the dough, it likely got too warm during lamination. Trust your tactile senses; they are invaluable when working with hand laminated pastry dough.
Troubleshooting Common Hand Lamination Challenges
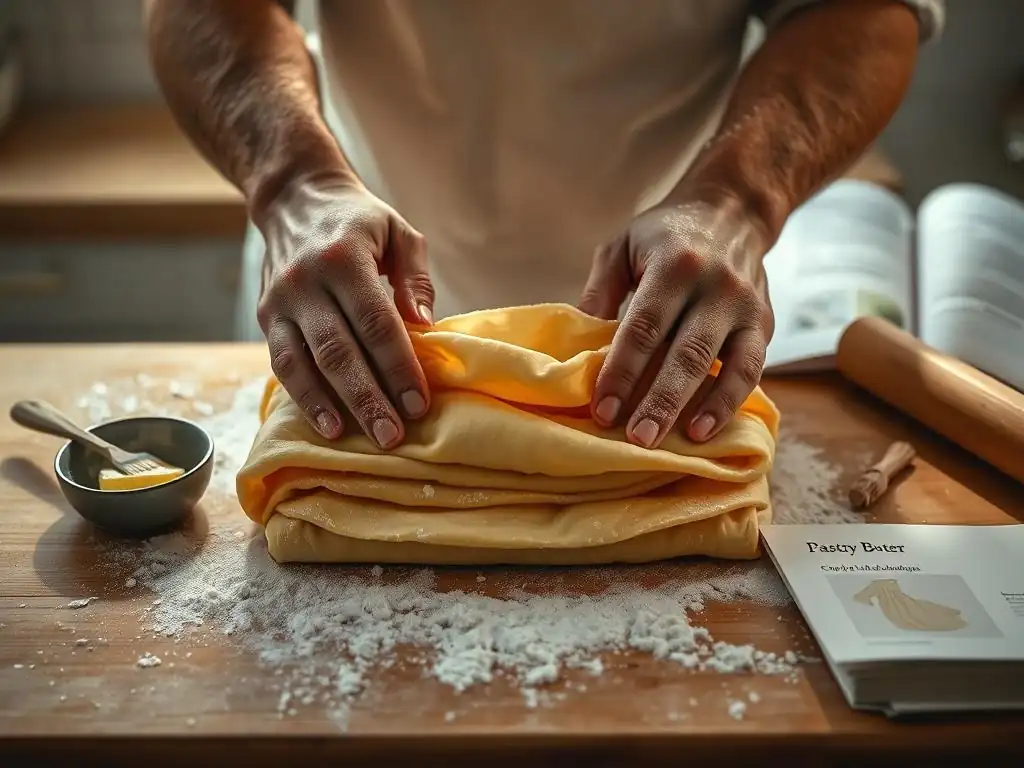
Working with hand laminated pastry dough can present a few hurdles, especially when you're first learning the technique. Issues like butter leaking out, dough resisting rolling, or layers looking uneven are common. Fortunately, most of these challenges can be anticipated and addressed with a bit of understanding and careful handling.
Don't be discouraged if your first attempt isn't perfect. Hand lamination is a skill that improves with practice. Identifying the problem is the first step to fixing it, and understanding the underlying causes (usually related to temperature or gluten development) will help you prevent them in the future.
Butter Leakage: Preventing and Addressing Butter Melt
Butter leakage, where soft or melted butter oozes out from the edges of the dough during rolling, is a common and frustrating problem. It typically occurs because the butter block or the dough is too warm, or because the dough has been rolled too aggressively or unevenly, tearing the layers. The ideal working temperature for hand laminated pastry dough is usually between 10°C and 15°C (50°F and 59°F).
To prevent leakage, ensure both your détrempe and butter block are properly chilled before you begin lamination and between each turn. Work quickly on a cool surface. If you notice butter starting to ooze, immediately stop rolling, gently patch any tears with a piece of dough if possible, brush off excess flour, wrap the dough tightly, and return it to the refrigerator for a longer chill (30-60 minutes or more) until the butter firms up again. Sometimes, a brief stint in the freezer (10-15 minutes) can help in a pinch.
Dough Resistance: Managing Gluten Development
If your dough springs back excessively and resists being rolled out into a large rectangle after a turn, it's a sign that the gluten is too tense. This usually happens if the dough hasn't rested long enough between turns, or if you've overworked the dough initially when mixing the détrempe. Forcing a resistant dough will lead to uneven thickness and potentially tears.
The solution is simple: rest the dough longer. Wrap the dough tightly and return it to the refrigerator for an additional 30-60 minutes, or even longer if needed. The cold helps relax the gluten fibers. When you resume rolling, start gently, gradually increasing pressure. If the dough still resists significantly, give it another rest. Patience is key to allowing the gluten to relax and making the hand laminated pastry dough manageable.
Uneven Layers: Achieving Uniform Thickness Throughout the Dough
Uneven layers can result in pastries that don't rise uniformly and have inconsistent textures. This is often caused by rolling the dough unevenly, applying more pressure in some areas than others, or starting with a butter block that isn't uniformly thick. It can also happen if the dough or butter isn't at the correct consistency, leading to them rolling at different rates.
To achieve uniform layers in your hand laminated pastry dough, focus on applying even pressure across the entire surface of the dough as you roll. Start from the center and roll outwards, turning the dough frequently (not just rotating 90 degrees for the fold, but flipping it over periodically as well) to ensure even stretching. Make sure your butter block is a consistent thickness from the start. If you notice a thicker or thinner spot in the dough during rolling, try to gently coax that area to the desired thickness without tearing the layers.
Baking Your Hand Laminated Croissants: From Dough to Deliciousness
Once your hand laminated pastry dough is perfectly layered and rested, the next exciting phase is shaping and baking. This is where the magic of lamination truly comes to life, transforming the flat dough into golden, airy, and flaky croissants. Correct shaping, proofing, and baking temperatures are crucial to maximizing the rise and achieving that signature texture and color.
Approaching this final stage with care ensures that all your hard work during the lamination process pays off. The goal is a pastry that is light, well-risen, with clearly defined layers and a rich, buttery flavor.
Shaping the Croissants: Techniques for Consistent Results
After the final rest, roll the hand laminated pastry dough to the required thickness for croissants, typically about 3-4 mm (about 1/8 inch). Aim for a large, even rectangle. Using a sharp knife or pastry wheel, trim the edges to create clean lines – this helps with even rising. Cut the dough into triangles. For standard croissants, the base of the triangle is usually around 8-10 cm (3-4 inches) wide, and the height is about 20-25 cm (8-10 inches).
Make a small notch or slit (about 1.5 cm or 1/2 inch) in the center of the base of each triangle. Gently open the notch slightly and begin rolling the triangle up from the base towards the point. As you roll, gently stretch the point of the triangle with one hand while rolling with the other. This stretching helps create more turns in the final croissant, contributing to flakiness. Roll tightly but without squashing the layers. Curve the ends inwards to form the classic crescent shape.
Proofing the Croissants: Achieving Optimal Volume
Proofing is the final rise for your shaped croissants before baking. During proofing, the yeast ferments, producing carbon dioxide gas, which expands the dough and separates the layers created during lamination. Place the shaped croissants on a baking sheet lined with parchment paper, leaving ample space between them as they will expand significantly.
The ideal proofing environment is warm and humid, typically around 24°C - 27°C (75°F - 80°F) with about 70-80% humidity. Avoid temperatures above 28°C (82°F), as this can melt the butter. Proofing time varies depending on temperature and humidity, usually taking 2-3 hours. The croissants are ready when they are visibly puffed, jiggly when gently shaken, and the layers are clearly defined. They should look airy but not so fragile that they collapse.
Baking Temperatures and Times for Golden Perfection
Baking hand laminated pastry dough requires a hot oven to create the necessary steam from the butter and achieve a rapid, even rise. Preheat your oven to a high temperature, typically between 200°C and 220°C (400°F and 425°F). Some bakers start at a high temperature for the first 10-15 minutes to maximize oven spring, then reduce the temperature to 180°C or 190°C (350°F - 375°F) to allow the croissants to bake through and achieve a deep golden-brown color without burning.
Baking time for standard croissants is usually between 15 and 25 minutes, depending on size and oven. They are done when they are a rich golden-brown all over, including the sides. For the best results, consider using a baking stone or steel to ensure even heat transfer to the bottom of the croissants, promoting a good base rise.
Tips and Tricks for Perfect Hand Laminated Pastry Every Time
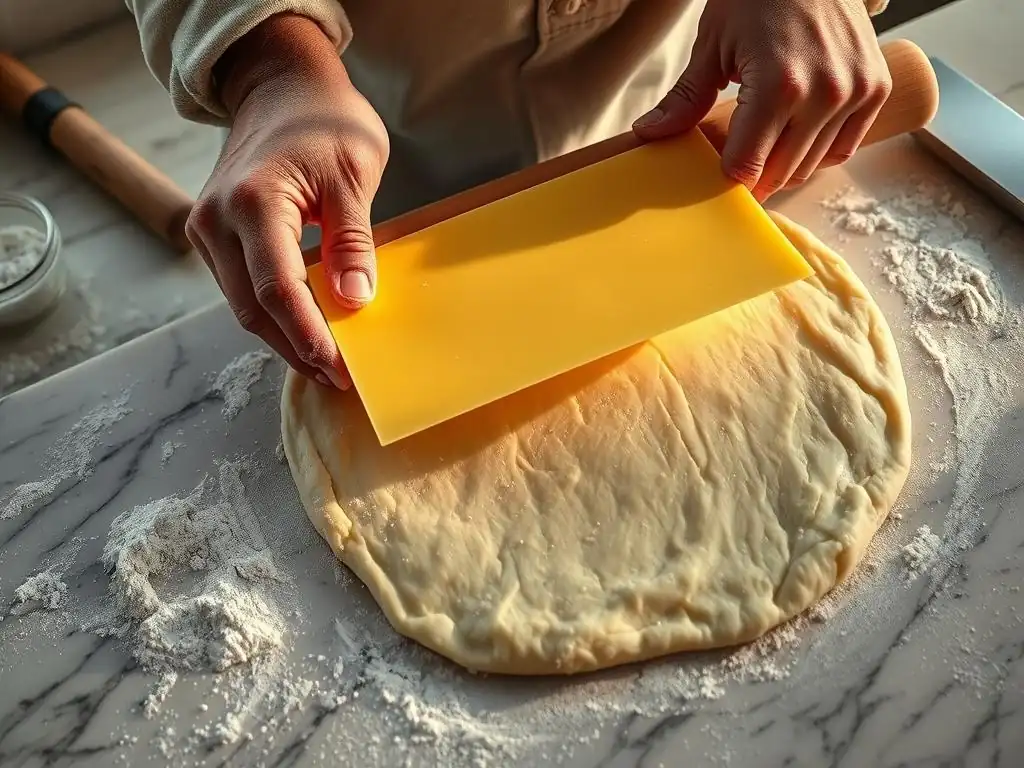
Even with a solid step-by-step guide, a few extra tips can help ensure your hand laminated pastry dough journey is successful. These insights come from experience and address common nuances that can make a significant difference in your final results. Implementing these simple practices can elevate your baking and help you consistently achieve those coveted flaky layers.
From managing temperatures to utilizing simple tools, these tricks are designed to make the lamination process smoother and more predictable, leading to more consistent and delicious pastries.
Maintaining Consistent Temperature Control
Temperature is the single most critical factor when working with hand laminated pastry dough. Both the dough and the butter must remain cool throughout the entire lamination process. If your kitchen is warm, consider breaking up the lamination process over two days, allowing longer chilling times between turns. Work quickly during the rolling and folding steps to minimize the time the dough is exposed to room temperature.
Keep your work surface cool, potentially wiping it down with cold water before drying thoroughly, or even placing ice packs nearby (but not directly on the surface). If using a marble or granite slab, refrigerate it beforehand. Your hands also transfer heat, so handle the dough gently and only as much as necessary. A cool environment and diligent chilling are your best friends for preventing butter melt and ensuring distinct layers.
Using a Dough Docker for Even Baking
While not strictly necessary for lamination itself, a dough docker (a roller with spikes) can be helpful for certain applications of hand laminated pastry dough, particularly flat pastries like puff pastry squares or danishes. Gently running a docker over the dough surface before baking creates small perforations that prevent the pastry from puffing up too much in the center, encouraging a more even rise and preventing large air pockets in unwanted areas.
For croissants, you typically don't use a docker as you want the full, dramatic rise. However, understanding this tool's purpose highlights how different techniques are applied to hand laminated dough depending on the desired final pastry structure. It's a useful tool to have if you plan to explore a wider range of laminated pastries beyond croissants.
Freezing Hand Laminated Dough for Future Use
One of the great benefits of mastering hand laminated pastry dough is the ability to prepare it in advance. After the final turn, you can wrap the dough block very tightly in multiple layers of plastic wrap and a layer of aluminum foil and freeze it for up to 2-3 weeks. This allows you to have ready-to-shape dough whenever the craving strikes.
To use frozen hand laminated dough, transfer it to the refrigerator and let it thaw completely overnight. Once thawed, let it sit at room temperature for 10-15 minutes until it's pliable enough to roll. You can then proceed with shaping, proofing, and baking as usual. Freezing is a fantastic way to manage your baking schedule and enjoy fresh laminated pastries without dedicating a full day to the process each time.
Beyond Croissants: Exploring Other Hand Laminated Pastries
The hand lamination technique is the foundation for a wide array of delicious pastries beyond the classic croissant. Once you've mastered the basic hand laminated pastry dough, you can explore other variations that utilize this same layered structure but offer different shapes, fillings, and flavors. Expanding your repertoire is part of the fun!
Understanding how the base hand laminated pastry dough is adapted for different pastries allows you to appreciate the versatility of this technique. It opens up a world of possibilities for your home baking adventures, from sweet morning treats to savory applications.
Pain au Chocolat: A Classic Variation
Pain au chocolat is a beloved French pastry that uses the exact same hand laminated pastry dough as croissants. The difference lies in the shaping and filling. Instead of cutting triangles, the dough is typically cut into rectangles, and one or two pieces of dark chocolate are placed at one end before rolling the dough up like a scroll.
The lamination process provides the same incredible flakiness and buttery richness found in croissants. Baking temperatures and times are usually very similar, resulting in a golden pastry with a molten chocolate center. Mastering the hand laminated pastry dough for croissants means you are already equipped to bake perfect pain au chocolat!
Kouign Amann: A Breton Butter Cake
Kouign Amann (pronounced "queen-ah-mahn") is a rich, caramelized pastry from the Brittany region of France. It also starts with a variation of hand laminated pastry dough, though it often incorporates more butter and sugar within the layers during the folding process itself, rather than just enclosing a butter block. The dough is typically given fewer turns than croissant dough.
After shaping, the dough is often coated in sugar, which caramelizes during baking, creating a crispy, sweet exterior that contrasts beautifully with the soft, buttery interior. While the dough composition and folding might differ slightly, the core principle of creating layers through rolling and folding is the same, showcasing another application of the hand laminated dough technique.
Other Applications of Hand Laminated Pastry Dough
The versatility of hand laminated pastry dough extends to many other baked goods. Puff pastry, which is often made without yeast, follows a very similar lamination process and is used for everything from palmiers and turnovers to savory tarts and beef Wellington. Danish pastries, while often enriched with egg and sugar in the détrempe and sometimes filled before baking, also rely on lamination for their structure.
Even certain types of layered breads or savory pastries can utilize a form of hand laminated dough. Understanding the mechanics of creating these layers through rolling and folding opens the door to adapting the technique for countless recipes. It's a fundamental skill that unlocks a wide range of baking possibilities.
Conclusion: Embrace the Art of Hand Lamination with BakeWithEase
Mastering hand laminated pastry dough is a rewarding endeavor that brings the art of classic French baking into your home kitchen. While it requires patience and attention to detail, the process is incredibly fulfilling, culminating in pastries with an unparalleled flaky texture and rich, buttery flavor. At BakeWithEase, we hope this guide has demystified the steps and empowered you to begin your own lamination journey.
Remember that practice makes perfect. Your first batch of hand laminated pastry dough might not be flawless, but each attempt will teach you more about the dough, the butter, and the subtle cues that lead to success. Embrace the process, enjoy the tactile experience of working with the dough, and savor the incredible results. With this knowledge and a little practice, you'll be creating exquisite hand laminated pastries that are truly a cut above.
Frequently Asked Questions
What is hand-laminated pastry dough, and why is it important for baking?
Hand-laminated pastry dough involves creating alternating layers of dough and butter through a series of folds. This technique is crucial for achieving the flaky, light texture characteristic of croissants and other pastries. It's a fundamental skill for any serious home baker.
What are the key differences between hand-laminated and machine-laminated dough?
Hand-lamination relies on manual folding and rolling, offering more control over dough consistency and butter distribution. Machine-lamination, used in commercial settings, is faster but less adaptable to small-batch recipes and individual preferences.
What type of butter is best for hand-laminating pastry dough?
Using European-style butter with a high fat content (82% or more) is recommended. The higher fat content ensures a proper separation of dough layers and contributes to a richer flavor and flakier texture.
What are some common mistakes to avoid when hand-laminating dough?
Avoid overworking the dough, which can develop the gluten and result in a tough pastry. Also, ensure the butter remains cold throughout the process to prevent it from melting and seeping into the dough.
How can I tell if my hand-laminated dough is properly laminated before baking?
The dough should have a distinct layered appearance when cut. You should be able to see the visible alternating layers of dough and butter. This visual confirmation indicates successful lamination.
Final Reflection: The Enduring Art of Hand-Laminated Pastry
The meticulous craft of hand-laminating pastry dough remains a testament to the enduring power of patience and precision in baking, a skill increasingly valued in our fast-paced world. While readily available puff pastry offers convenience, the unique texture and flavor achieved through the painstaking process of hand lamination are simply unmatched. This dedication to the traditional method yields a reward far beyond the final product; it's a journey of connection to the history and artistry of baking.
The influence of hand-lamination extends beyond the simple creation of delicious pastries; it represents a mindful approach to food preparation, a counterpoint to the often rushed nature of modern life. It's a practice that fosters a deeper appreciation for ingredients and the transformative power of technique. The best things in life are worth waiting for,
a sentiment perfectly encapsulates the rewarding experience of crafting hand-laminated dough. This dedication to process, this slow and deliberate creation, speaks to a growing desire for authenticity and connection in our increasingly automated world.
Now, consider your own baking journey. Will you embrace the challenge of hand-lamination, allowing yourself the time and focus to master this ancient technique? The rewards – the flaky layers, the satisfying crunch, the deep sense of accomplishment – await you. Don't just bake a pastry; create a pastry. Embrace the process, savor the journey, and discover the profound satisfaction that comes from connecting with the timeless art of hand-laminated dough.
Unleash Your Inner Pastry Chef: Laminate Like a Pro!
Thanks for diving into the world of handmade laminated dough! You've now unlocked a skill that will elevate your baking to a whole new level. Ready to put your newfound knowledge into practice?
- Master the Fold: Try laminating your favorite pastry recipe today. Focus on perfecting your folds for the best results. This is your chance to shine!
- Share Your Success: Snap a photo of your beautiful, flaky creation and share it with us on social media! Use #BakeWithEaseLaminated to join the conversation.
- Challenge Yourself: Experiment with different fillings and pastry types. What unique laminated treat will you create next?
What delicious laminated delight will you bake first? Let us know in the comments below!