
Unlocking the Secret to Croissant Flakiness: A Lamination Guide

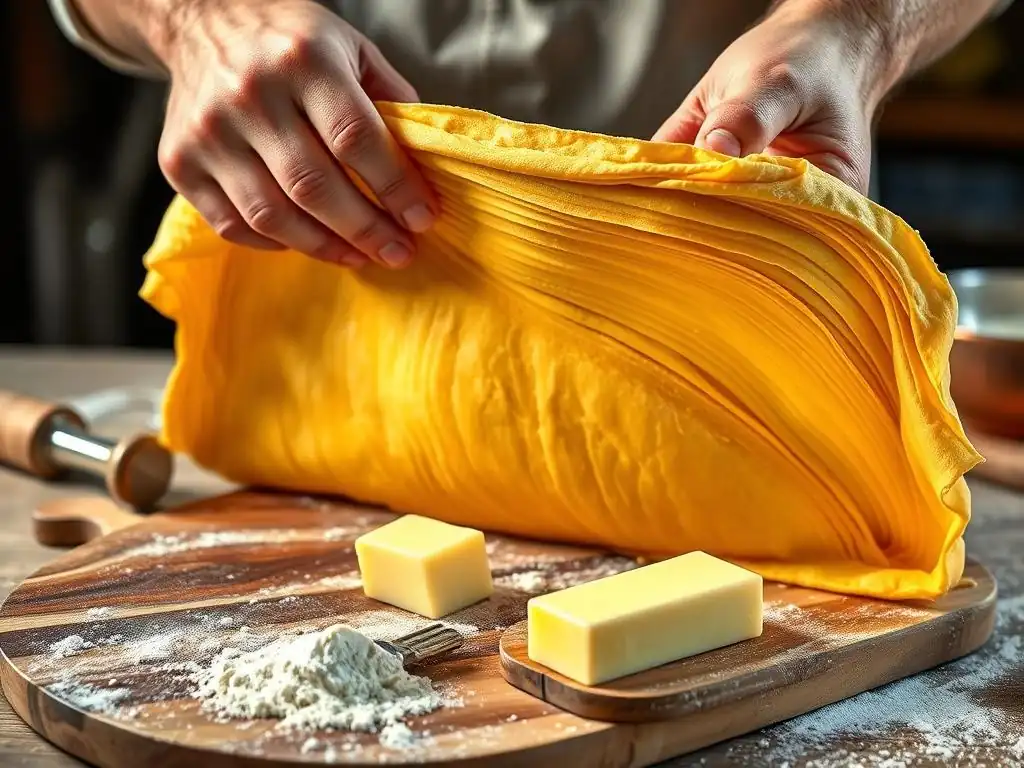
Welcome to BakeWithEase, where the journey to baking bliss begins! Ever dreamt of crafting croissants with that perfectly flaky, melt-in-your-mouth texture? Then you're in the right place. We're diving deep into the heart of croissant lamination technique, revealing the secrets to achieving light, airy layers that will elevate your baking game. Curious how to transform simple dough into a masterpiece? Read on to uncover the steps and unlock the art of lamination!
- Introduction to Croissant Lamination: Achieving the Perfect Flake
- Mastering the Dough: Essential Croissant Dough Recipe and Preparation
- Butter Block Perfection: Preparing the Butter for Lamination
- The Lamination Process: A Step-by-Step Guide to Perfecting the Technique
- Troubleshooting Common Lamination Problems: Tips and Tricks
- Shaping and Baking Your Laminated Croissants
- Advanced Lamination Techniques for Expert Bakers
- Conclusion: Elevate Your Croissant Baking with Perfect Lamination
-
Frequently Asked Questions
- What exactly is lamination in the context of making croissants?
- Why is lamination so crucial for achieving a perfect croissant?
- What are some common mistakes bakers make when laminating croissant dough?
- How can I ensure my butter stays cold enough during the lamination process?
- What are some signs that my croissant dough has been properly laminated?
- Final Reflection: The Enduring Allure of the Perfect Croissant
- Unlock Your Inner Baker: Master the Croissant
Introduction to Croissant Lamination: Achieving the Perfect Flake
Perfecting croissant lamination technique is the ultimate goal for any home baker aiming for that iconic, airy, and shatteringly crisp pastry. Lamination is the process of repeatedly folding and rolling dough with a layer of butter enclosed within, creating numerous alternating layers of dough and fat. When baked, the water in the butter turns to steam, forcing the dough layers apart and resulting in the characteristic flaky texture that defines a great croissant. This technique requires precision, patience, and temperature control, but the reward is a pastry far superior to anything mass-produced.
Mastering this delicate process isn't just about following steps; it's about understanding the why behind each action. From selecting the right type of butter to controlling dough temperature during every fold, each detail contributes to the final outcome. Achieving uniform, distinct layers is the hallmark of successful croissant lamination, and this guide will break down the process, helping you elevate your baking skills and consistently produce croissants with incredible height and flakiness.
Why Lamination is Crucial for Exceptional Croissants
Lamination is the sole reason croissants possess their signature light, airy interior and crisp, flaky exterior. Without this process, you would simply have a rich, bread-like dough. The magic happens when the thin layers of dough and butter are heated in a hot oven. The butter melts rapidly, and the water content (typically around 15-18% in European-style butter) flashes into steam. This steam is trapped between the dough layers, forcing them to expand and separate, creating hundreds of individual, delicate strata.
Consider a well-laminated croissant, which can have upwards of 48 distinct layers. This intricate structure provides a delightful contrast in texture – a crisp shell giving way to a tender, open crumb. In contrast, a poorly laminated dough might result in a dense, bready texture with fewer, thicker layers or, worse, a greasy interior if the butter wasn't properly incorporated or melted out during baking. The goal is maximum lift and separation between layers, which is directly achieved through careful and precise lamination.
Understanding the Science Behind Flaky Layers
The science of flaky layers in croissants hinges on the interplay between gluten development in the dough and the melting properties of the butter. The dough provides the structure, built by developing gluten through mixing and resting. This gluten network needs to be strong enough to be rolled thin repeatedly without tearing, yet elastic enough to trap the steam generated during baking. A typical croissant dough might have a hydration level around 55-60%, balanced to allow for extensibility.
The butter acts as the separating agent. It's crucial that the butter remains solid and pliable during the rolling and folding process, typically at a temperature range of 13-16°C (55-60°F). If the butter is too cold, it will break into pieces and tear the dough; if too warm, it will melt into the dough, preventing distinct layers from forming.
During baking at temperatures often around 190-200°C (375-390°F), the butter melts, lubricates the layers, and then creates steam, which inflates the dough. The rapid heat sets the gluten structure around the steam pockets, creating the characteristic open crumb and flaky texture.
Mastering the Dough: Essential Croissant Dough Recipe and Preparation
The foundation of a great croissant is a well-prepared dough. It needs to be extensible yet strong, capable of withstanding multiple rounds of rolling and folding without tearing, while still developing enough gluten structure to support the final bake. This dough is typically leaner than brioche but richer than standard bread dough, containing milk, a moderate amount of sugar, and often a little butter or egg for richness and tenderness.
Achieving the correct dough consistency and temperature is paramount before you even think about introducing the butter. The dough should be smooth and elastic after mixing, having developed a moderate amount of gluten. A good initial fermentation (often called the bulk fermentation) allows flavors to develop and the gluten structure to relax slightly, making the dough easier to roll. Following this with adequate chilling is non-negotiable; the dough must be firm and cold to match the consistency of the butter block during lamination.
Ingredients for a Superior Croissant Dough
Selecting quality ingredients is the first step towards perfecting your croissant lamination technique. The type of flour, yeast, and dairy all play significant roles.
- Strong Bread Flour: Look for flour with a protein content typically between 12-14%. This provides the necessary gluten structure to create strong, thin layers that won't tear during rolling and can support the rise from steam. Using a weaker flour might result in a dough that's too delicate.
- Instant Dry Yeast: Reliable and easy to use, instant yeast can be mixed directly into the dry ingredients. The quantity will depend on the recipe and desired fermentation time, but often ranges from 0.8% to 1.2% of the flour weight for an overnight cold fermentation.
- Milk: Whole milk is commonly used for its fat content, which adds richness and contributes to a tender crumb. Ensure it's cold when adding to the dough mixture, as this helps control the initial dough temperature.
- Sugar: A small amount of sugar (typically 5-10% of flour weight) provides food for the yeast, aids in browning during baking, and adds a touch of sweetness.
- Salt: Essential for flavor and controlling yeast activity, salt is usually used at 1.5-2% of the flour weight.
- Butter: While the majority of butter is for lamination, some recipes include a small amount (around 5-10%) in the dough itself for added richness and a softer texture.
- Optional: A small amount of egg yolk or a teaspoon of malt powder can be added for color, richness, or improved browning.
Using precise measurements, ideally by weight, is crucial for consistency. For example, a common ratio might be 500g strong bread flour, 10g instant yeast, 25g sugar, 9g salt, 275g cold whole milk, and 25g soft butter.
Step-by-Step Dough Preparation: From Mixing to First Rise
Preparing the dough for lamination involves several key stages to ensure it's ready to accept the butter block and be rolled out thinly.
- Mixing: Combine dry ingredients (flour, yeast, sugar, salt). Add cold milk and any wet ingredients (like melted butter or egg). Mix, typically using a stand mixer with a dough hook, until the dough comes together. Then, knead for about 8-10 minutes on low to medium speed until a smooth, elastic dough forms. It should pass the windowpane test, meaning you can stretch a small piece thinly enough to see light through it without tearing.
- Initial Fermentation (Bulk Fermentation): Place the dough in a lightly oiled bowl, cover, and let it ferment at room temperature for 1-2 hours, or until it has increased in volume by about 50%. This develops flavor and relaxes the gluten.
- First Chill: Punch down the dough gently to remove gas. Shape it into a rough rectangle or square, depending on how you plan to enclose the butter. Wrap tightly in plastic wrap and refrigerate for at least 4-6 hours, or preferably overnight (10-12 hours). This chilling step is critical; it slows yeast activity, firms the butter in the dough, and makes the dough much easier to roll and laminate without sticking or tearing. Aim for a dough temperature around 4-6°C (39-43°F) before lamination.
Proper chilling ensures the dough and butter are at compatible temperatures and consistencies, which is fundamental to perfecting croissant lamination technique. Rushing this step is a common mistake that leads to difficulty during subsequent folding stages.
The Importance of Dough Temperature for Lamination Success
Maintaining the correct dough temperature throughout the lamination process is arguably the most critical factor in achieving perfect layers. The dough needs to be cold and firm, ideally between 4°C and 8°C (39°F and 46°F), whenever it is rolled. If the dough is too warm, it becomes soft and sticky, making it difficult to roll thinly and evenly. A warm dough also causes the butter block to melt into the dough rather than staying as a distinct layer, ruining the lamination before you even start folding.
Furthermore, the dough temperature directly impacts the butter's behavior. When rolling, the physical friction generates heat. If the dough starts too warm, this added heat quickly raises the temperature of both the dough and the butter, leading to the butter becoming too soft and potentially leaking out. Keeping the dough cold ensures that the butter remains solid and pliable (not hard and brittle), allowing both layers to stretch evenly together without tearing the dough or breaking the butter block. This requires frequent refrigeration steps between folds, allowing the dough and butter to firm up and relax.
Butter Block Perfection: Preparing the Butter for Lamination
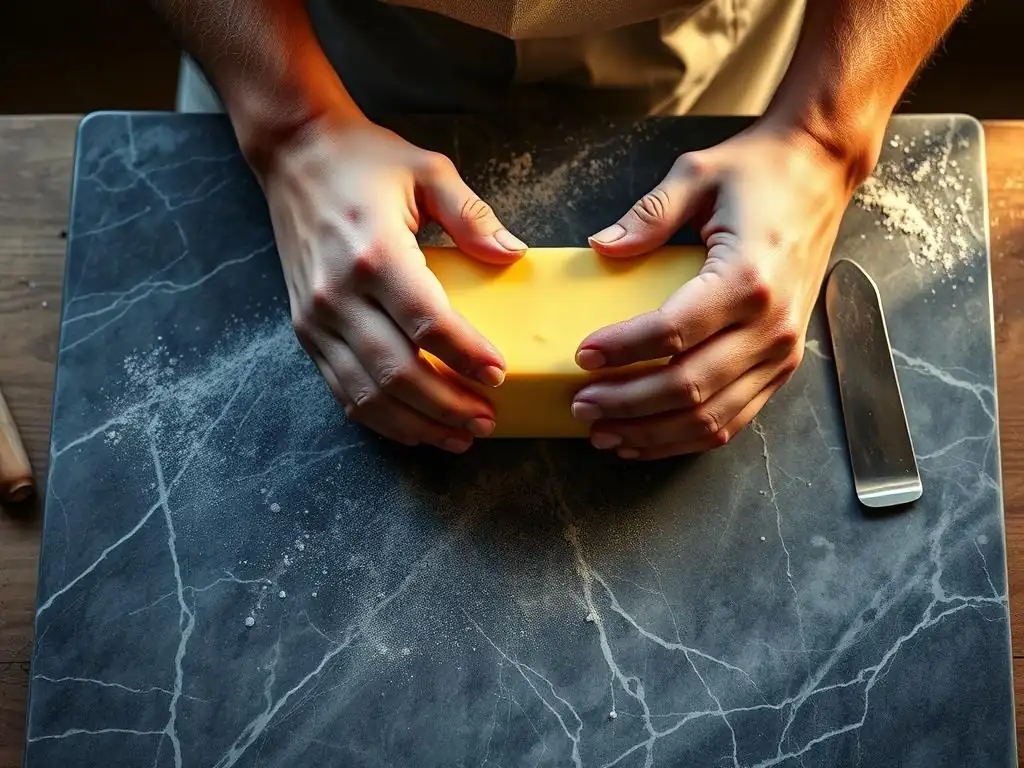
Just as crucial as the dough is the butter block you will be laminating into it. The quality, type, and preparation of the butter significantly impact the flakiness and flavor of the final croissant. You need a butter that is pliable, has a high melting point, and contains relatively low water content.
Preparing the butter block involves shaping it into a consistent rectangle and ensuring it is at the correct temperature and consistency before being enclosed in the dough. This step must be done carefully, as an uneven or improperly tempered butter block will lead to uneven layers and difficulty during rolling and folding, hindering your efforts towards perfecting croissant lamination technique.
Choosing the Right Butter for Lamination
The choice of butter is paramount for successful lamination. European-style butter is highly recommended because it typically has a higher fat content (around 82-84%) and lower water content (15-18%) compared to American-style butter (around 80% fat, 18-20% water). The higher fat content makes the butter more pliable at a wider temperature range and contributes to richer flavor and better flakiness. Less water means less steam, but more importantly, less chance of the butter emulsifying into the dough.
Using a good quality, unsalted butter is essential. Avoid whipped or spreadable butters. Some bakers even prefer using specific "dry" butters designed for lamination, which have been processed to have an even lower water content and higher melting point. While regular high-fat European-style butter works well for home baking, experimenting with different types can help you find your preference for achieving the best flaky layers.
Shaping and Tempering the Butter Block
Once you've chosen your butter, you need to prepare it for lamination. Start with cold butter, typically 250-300g for 500g of flour, resulting in a common dough-to-butter ratio of around 1:0.5 or 1:0.6. Cut the butter into pieces and arrange them on parchment paper. Cover with another sheet of parchment and pound the butter gently with a rolling pin to soften it slightly without melting.
The goal is to create a flat, even rectangle, typically about 18-20 cm (7-8 inches) square or rectangular, depending on the size of your dough rectangle. The butter should be pliable enough to bend without breaking but still cool and firm. This step requires careful handling to avoid warming the butter too much. Once shaped, wrap the butter block tightly in plastic wrap and refrigerate it until it reaches the ideal temperature for lamination, usually around 13-16°C (55-60°F). It should be firm but slightly yielding when pressed – similar consistency to the chilled dough.
Achieving the Ideal Butter Consistency for Lamination
The success of your lamination hinges on the butter and dough being at compatible consistencies. The butter block should be firm enough to hold its shape and be rolled out with the dough without melting or becoming greasy, but pliable enough to stretch evenly without breaking into pieces. This "pliable but firm" state is crucial.
If the butter is too cold and hard (straight from the fridge at 4°C or 39°F), it will shatter into shards when you try to roll the dough, creating uneven layers and potentially tearing the dough. If it's too warm and soft (above 18°C or 65°F), it will melt into the dough during rolling, preventing the formation of distinct layers and resulting in a greasy, dense crumb.
The ideal temperature range of 13-16°C (55-60°F) allows the butter to be rolled out into an incredibly thin sheet alongside the equally firm, chilled dough, ensuring perfect layer separation during baking and truly perfecting the croissant lamination technique.
The Lamination Process: A Step-by-Step Guide to Perfecting the Technique
Lamination is a series of rolling and folding steps, interspersed with chilling periods. The goal is to create multiple thin, alternating layers of dough and butter. A typical croissant dough undergoes three turns (folds), resulting in a theoretical maximum of 27 or 48 layers, depending on the types of folds used. Precision and patience are key; rushing or forcing the dough will lead to problems.
This process requires a cool workspace and a light touch. Flour your surface and rolling pin sparingly, only as needed to prevent sticking. Excessive flour can dry out the dough edges and prevent layers from sticking together properly. Work quickly but carefully, maintaining the rectangular shape of the dough throughout the process.
Step 1: Enclosing the Butter Block
Begin with your chilled dough rectangle and your pliable butter block, both at the ideal temperature (around 4-8°C for dough, 13-16°C for butter). Roll out the dough on a lightly floured surface into a rectangle that is roughly twice the size of your butter block. A common ratio is to roll the dough to about 40cm x 20cm (16in x 8in) if your butter block is 20cm x 20cm (8in x 8in).
Place the butter block on one half of the dough rectangle, leaving a small margin around the edges. Fold the other half of the dough over the butter block, carefully aligning the edges. Pinch the edges firmly to seal the butter completely inside the dough pocket. Ensure the butter is fully enclosed with no gaps or leaks. This initial step is crucial for a successful lamination process, as any exposed butter can leak out during rolling.
Step 2: The First Single Fold (Simple Fold)
This is the first "turn" of the dough. With the sealed dough-and-butter packet seam-side up (or down, depending on preference, but be consistent), gently begin rolling it out into a long rectangle. Roll evenly from the center outwards, maintaining a consistent thickness (aiming for about 6-8mm or 1/4 inch). Try to keep the edges straight and the corners square. Roll the rectangle to approximately three times its width in length.
Once rolled, brush off any excess flour. Imagine the rectangle is divided into three equal sections. Fold one end of the dough rectangle over the middle section, then fold the other end over the first fold, like folding a letter. This creates three layers of dough and two layers of butter within the packet.
Rotate the folded dough 90 degrees (so the open seam is to your right or left, like the spine of a book). This prepares it for the next rolling step. Wrap tightly and refrigerate for at least 30-60 minutes to allow the gluten to relax and the butter to firm up.
Step 3: The First Double Fold (Book Fold)
After chilling, retrieve the dough and place it on your lightly floured surface with the open seam facing you (or away from you, again, consistency is key). Gently roll the dough out again into a long rectangle, aiming for a similar thickness (around 6-8mm or 1/4 inch) and keeping the edges straight. This time, roll it out to approximately four times its width in length.
Brush off excess flour. Imagine the rectangle is divided into four equal sections. Fold both ends of the dough rectangle towards the center, so their edges meet. Then, fold the dough in half along the center line, like closing a book. This creates four layers of dough and three layers of butter within the packet. This is called a "double fold" or "book fold." Rotate the folded dough 90 degrees. Wrap tightly and refrigerate for at least 60-90 minutes. This longer rest is important after a double fold, as it involves more intensive rolling and folding.
Step 4: Refrigeration and Dough Relaxation
Refrigeration periods between turns are non-negotiable for perfecting croissant lamination technique. Each time the dough is rolled and folded, the gluten network is stretched and becomes tense, and the butter warms up slightly from handling and friction. Chilling serves two vital purposes:
- Relaxes the Gluten: Allowing the dough to rest in the cold refrigerator gives the gluten network time to relax. This makes the dough less elastic and easier to roll out thinly and evenly during the next turn without snapping back or tearing. A typical rest period after a single fold is 30-60 minutes, while a rest after a double fold might be 60-90 minutes.
- Firms the Butter: The cold temperature solidifies the butter again, ensuring it remains a distinct layer ready to be rolled out thinly in the next step. If the butter is too soft, it will integrate into the dough, compromising the layers. Ensure the dough is thoroughly chilled, ideally back down to 4-8°C (39-46°F), before proceeding.
Skipping or shortening these chilling steps is a common cause of lamination failure, leading to uneven layers, butter leakage, and a dense final product.
Step 5: The Second Single Fold (Simple Fold)
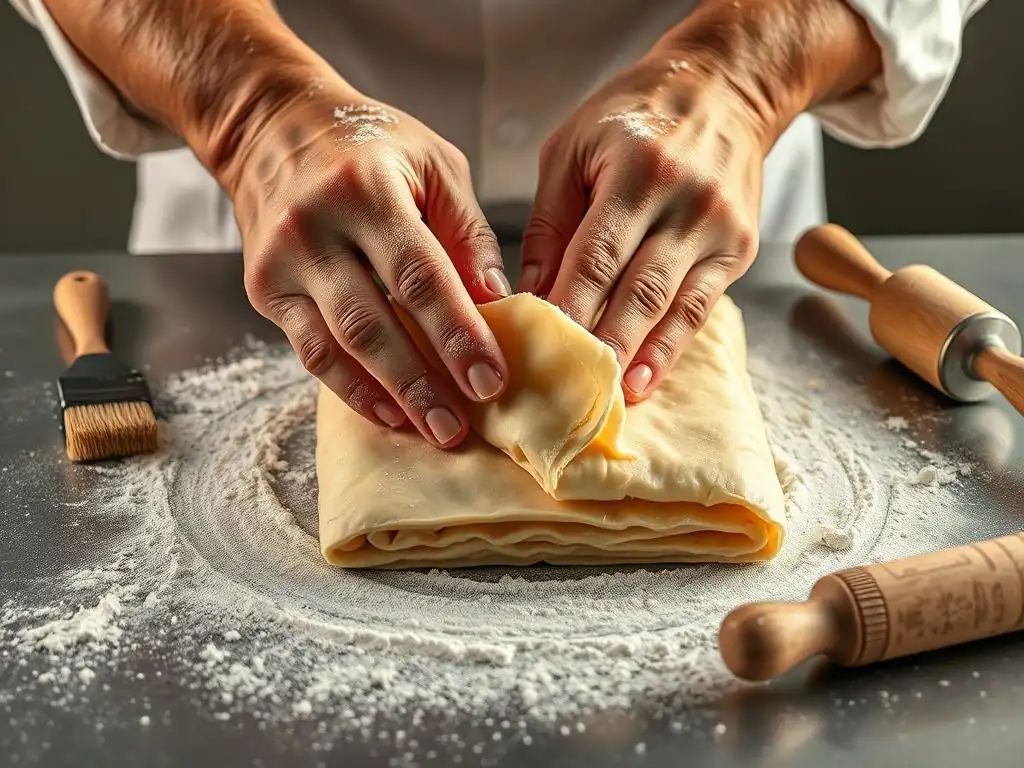
Retrieve the dough after its rest. Place it on your lightly floured surface, oriented correctly (seam to the side). Gently roll the dough out again into a long rectangle, aiming for approximately three times its width in length and a thickness of around 6-8mm (1/4 inch). Maintain straight edges and square corners as much as possible.
Brush off excess flour. Fold one end of the dough over the middle section, then fold the other end over the first fold, creating another single fold (three dough layers, two butter layers added to the existing ones). Rotate the folded dough 90 degrees. Wrap tightly and refrigerate for at least 60 minutes. After this fold, the dough will have accumulated a significant number of layers (theoretically 27 if starting with a single fold, then double, then single). The dough might feel a bit more resistant to rolling now due to the accumulated layers and gluten development.
Step 6: The Second Double Fold (Book Fold)
After the second single fold and subsequent rest, you can optionally perform a second double fold for maximum layers and flakiness. Retrieve the dough and place it on your lightly floured surface, oriented correctly. Roll the dough out again into a long rectangle, aiming for approximately four times its width in length and a thickness of around 6-8mm (1/4 inch).
Brush off excess flour. Fold both ends towards the center, then fold in half like a book. This completes the folding process, resulting in a dough packet with potentially 48 layers of dough and 47 layers of butter (starting with a single fold, then double, then single, then double). Rotate 90 degrees. This level of lamination is key to achieving the incredibly light and open crumb structure characteristic of truly exceptional croissants.
Step 7: Final Refrigeration Before Shaping
Once all the required folds are completed (often 3 turns total, using a combination of single and double folds), the dough must undergo a final, longer refrigeration period. This rest is crucial for several reasons:
- Further Gluten Relaxation: Allows the highly worked gluten network to fully relax, making the dough easy to roll thinly for shaping without excessive spring-back.
- Butter Solidification: Ensures the butter layers are completely firm, which is essential for clean cuts during shaping and prevents the butter from melting out prematurely during proofing or the initial stages of baking.
- Flavor Development: A longer cold rest (8-12 hours or even up to 24 hours) allows for slow fermentation, which develops complex flavors in the dough.
Wrap the laminated dough block tightly in plastic wrap and refrigerate for at least 8 hours, or preferably overnight. The dough should be firm and cold throughout before you attempt to roll it out for cutting and shaping. This final chill sets you up for success in the last stages of perfecting croissant lamination technique and the subsequent bake.
Troubleshooting Common Lamination Problems: Tips and Tricks
Even with careful attention, issues can arise during the lamination process. Understanding common problems and their solutions is key to perfecting your croissant lamination technique and ensuring a successful outcome. Most issues relate back to temperature control and handling of the dough and butter.
Don't be discouraged if your first attempt isn't perfect. Croissant making is a skill that improves with practice. Learning to recognize the signs of trouble and how to correct them will make you a more confident and capable baker.
Butter Leaking During Lamination: Prevention and Solutions
Butter leakage is a common and frustrating problem. It occurs when the butter gets too warm and soft, melting and squeezing out from between the dough layers during rolling. This can happen if the dough or butter wasn't properly chilled beforehand, if the workspace is too warm, or if you are rolling too aggressively or for too long without adequate chilling breaks.
To prevent leakage, ensure your dough and butter are at the correct, cool temperatures before starting and between each fold (dough 4-8°C, butter 13-16°C). Work in a cool kitchen environment if possible. Roll gently and evenly, applying firm but not excessive pressure.
If you notice butter starting to leak, stop immediately. Gently patch the area with a little extra dough if possible, then wrap the dough tightly and place it in the freezer for 10-15 minutes, or the refrigerator for 30-60 minutes, until everything is firm again. Once chilled, you can carefully resume rolling, being mindful of applying less pressure over the patched area.
Dough Tearing: Causes and Corrective Measures
Dough tearing usually indicates one of two things: either the gluten network wasn't sufficiently developed during mixing, or the dough wasn't adequately rested and relaxed between folds. If the gluten is weak, the dough won't have the strength to stretch thinly. If the gluten is too tight (not relaxed), it will resist rolling and eventually tear under pressure.
Ensure your dough passes the windowpane test after initial mixing and kneading, indicating sufficient gluten development. The most common cause of tearing during lamination is insufficient chilling and resting between turns. If the dough is springy and resistant, it needs more time to relax in the refrigerator.
If you encounter a small tear during rolling, gently patch it by pressing the dough together or using a small piece of excess dough from the edges. If the tear is large or happens repeatedly, it's a strong sign that the dough needs a longer rest period, perhaps 1-2 hours in the refrigerator before you attempt to roll again. Patience here is key.
Uneven Layers: Achieving Consistent Flakiness
Uneven layers result in a croissant that is dense in some spots and potentially greasy in others, lacking that uniform, airy structure. This is often caused by uneven rolling or an improperly shaped butter block. If the butter block is not a consistent thickness or shape, it will not spread evenly within the dough. Similarly, if you roll the dough more thickly in some areas than others, the layers will be inconsistent.
Start with a butter block that is uniformly thick and shaped into a neat rectangle. When rolling the dough and butter packet, apply even pressure across the entire surface. Roll from the center outwards, ensuring the dough is the same thickness from edge to edge. Pay special attention to keeping the corners square and the edges straight during each roll and fold. Using a ruler can help initially. Consistent rolling and folding techniques are fundamental to achieving perfectly uniform layers and mastering the croissant lamination technique.
Temperature Control: Maintaining Optimal Dough and Butter Temperatures
Temperature control is the single most important factor in successful lamination. The ideal range for the dough is typically 4-8°C (39-46°F) and for the butter is 13-16°C (55-60°F) when you are actively rolling and folding. If the dough or butter gets too warm, problems like leakage, sticking, and integration of butter into dough will occur.
Work in a cool environment if possible. Handle the dough as little as necessary to minimize heat transfer from your hands. If your kitchen is warm, consider working in shorter bursts and increasing the frequency or duration of refrigeration periods. Use a thermometer to check the internal temperature of your dough and butter if you are unsure. If the dough feels soft or the butter feels very pliable or greasy, stop and chill it again. It's always better to over-chill slightly than to work with dough or butter that is too warm when perfecting croissant lamination technique.
Shaping and Baking Your Laminated Croissants
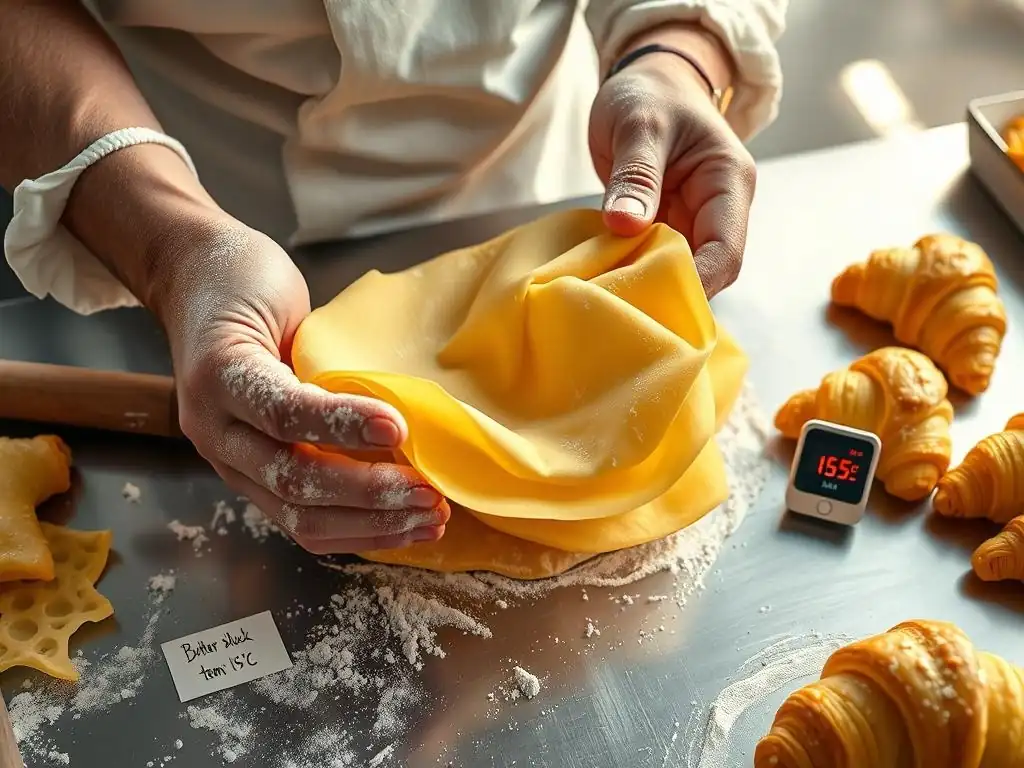
After the final lamination turns and a thorough rest, your dough is ready to be shaped and baked into beautiful croissants. This stage is where the hard work of lamination pays off, as the potential for those incredible layers is finally realized in the oven.
Precise shaping and attentive baking are crucial to ensure the laminated structure expands correctly and you achieve that desirable golden-brown, flaky crust and airy interior.
Cutting and Shaping the Croissants
Retrieve your well-chilled, laminated dough from the refrigerator. On a lightly floured surface, gently roll the dough out into a large, thin rectangle, typically about 3-4mm (1/8 inch) thick. Aim for a rectangle with straight edges and square corners. Use a ruler and sharp knife or pastry wheel to trim the edges neatly – this exposes the layers and helps with even expansion.
Cut the large rectangle into long triangles. The base width of the triangle will determine the size of your croissant; a common base is 8-10 cm (3-4 inches). The length of the triangle should be sufficient to allow for several rolls, typically 25-30 cm (10-12 inches). Make a small notch (about 1-1.5 cm or 1/2 inch) in the center of the base of each triangle. Starting from the base, gently stretch the triangle slightly while rolling it up towards the point, tucking the point underneath the finished shape. Curve the ends inward to form the classic crescent shape.
Proofing for Optimal Oven Spring
Proofing is a critical step where the shaped croissants are allowed to rise before baking. During proofing, the yeast ferments, producing gas that expands the dough layers. This expansion is essential for achieving a light, open crumb structure and good oven spring. Croissants are typically proofed at a warm, humid temperature, ideally around 24-27°C (75-80°F) with about 70-80% humidity.
Place the shaped croissants on a baking sheet lined with parchment paper, leaving plenty of space between them as they will expand significantly. Proofing can take anywhere from 1.5 to 3 hours, depending on the temperature. They are ready when they look visibly puffier, the layers are more defined, and they jiggle gently when the tray is nudged. A properly proofed croissant will be light and airy but not so fragile that it collapses. Over-proofing can cause the layers to separate prematurely or the butter to melt out; under-proofing results in a dense, heavy croissant.
Baking Techniques for Golden-Brown Croissants
Baking laminated dough requires high heat to rapidly melt the butter and create steam, which lifts the layers. Croissants are typically baked in a hot oven, often preheated to 200-220°C (400-425°F). Some bakers start at a higher temperature to maximize oven spring and then reduce the temperature partway through baking to ensure the interior cooks evenly without the exterior burning.
An egg wash (a mixture of egg and a little milk or water) applied gently to the surface before baking gives the croissants a beautiful golden-brown color and a slight sheen. Be careful not to let the egg wash pool between the layers, as this can glue them together and inhibit flaking. Baking time varies depending on size and oven, but typically ranges from 15 to 25 minutes.
Achieving the Perfect Croissant Bake: Temperature and Time
The ideal baking temperature and time balance achieving maximum lift and flakiness with cooking the interior thoroughly and developing a rich golden-brown crust. A common approach is to bake at 200°C (400°F) for the first 10-12 minutes, then reduce the temperature to 180-190°C (350-375°F) for the remaining 10-15 minutes.
The initial high heat provides a strong burst of steam and rapid expansion (oven spring). Reducing the temperature allows the inner layers to cook through without the exterior becoming too dark. Croissants are done when they are deeply golden brown all over, feel light when lifted, and the layers are clearly separated and flaky. An internal temperature of around 93-96°C (200-205°F) indicates they are fully baked. Allowing them to cool slightly on a wire rack before eating allows the butter to set and the layers to crisp up further.
Advanced Lamination Techniques for Expert Bakers
For those who have mastered the basics of perfecting croissant lamination technique and want to explore further, there are several advanced methods and considerations that can refine your process and results. These techniques often involve variations in folding, equipment, or ingredient choices.
Exploring these methods requires a solid understanding of the fundamental principles of lamination and a willingness to experiment. They can offer greater efficiency, different textural outcomes, or allow for larger-scale production.
Exploring Different Folding Techniques (e.g., Inverted Lamination)
While the single (letter) and double (book) folds are standard, variations exist. One advanced technique is "inverted lamination." In the standard method, the butter block is enclosed within the dough. In inverted lamination, the dough block is placed on top of the butter block, and the butter is then folded over the dough.
This method is often used for large batches or in professional settings. It can sometimes result in a slightly different distribution of butter layers and potentially a slightly different rise. Another variation involves the number and sequence of folds; while three turns (like S-D-S or S-S-D) are common, some recipes call for four turns (e.g., S-S-S-S or S-S-D-S) for an even higher layer count, though this requires very careful handling to avoid tearing the dough. Experimenting with different sequences can subtly alter the final crumb structure.
Utilizing a Laminator Machine for Efficiency
For serious home bakers or those producing larger quantities, a dough laminator machine can significantly increase efficiency and consistency when perfecting croissant lamination technique. These machines consist of two adjustable rollers that allow you to pass the dough through repeatedly, quickly and evenly reducing its thickness.
Using a laminator eliminates the need for manual rolling, reducing physical effort and speeding up the process. It also helps ensure uniform thickness across the entire sheet of dough, which is crucial for even layers. While a significant investment, a laminator provides unparalleled consistency in rolling, making it easier to produce large quantities of precisely laminated dough for croissants, puff pastry, or danishes with less risk of unevenness or tearing compared to hand-rolling large batches.
Experimenting with Different Flours and Butter Types
Beyond standard bread flour and European-style butter, expert bakers might experiment with alternative ingredients to fine-tune their croissants. Using a blend of bread flour and a weaker flour (like all-purpose) can subtly change the dough's extensibility and the final crumb texture. Some bakers incorporate a small percentage of rye or whole wheat flour for flavor, although this can impact gluten development and requires careful handling.
Similarly, experimenting with butters from different regions or producers can yield variations. The fat content and specific fatty acid composition of butter can influence its melting point and pliability. Some professional bakers use specialty butters specifically formulated for lamination, which have very high fat content (sometimes 84-86%) and precise melting characteristics. Understanding how different flours and butters behave requires experience but allows for greater control over the final product's texture, flavor, and flakiness.
Conclusion: Elevate Your Croissant Baking with Perfect Lamination
Perfecting croissant lamination technique is a rewarding journey that transforms simple ingredients into a culinary masterpiece. It's a process that demands patience, attention to detail, and a keen understanding of temperature control. From preparing the right dough and butter to executing precise folds and rests, each step contributes to the ultimate goal: a croissant with hundreds of delicate, flaky layers and a light, airy interior.
While challenges like butter leakage or tearing can arise, they are part of the learning process. By understanding the science behind lamination and practicing the techniques outlined in this guide, you can troubleshoot common issues and continuously improve your results. The effort invested in achieving perfect lamination is evident in every crisp bite and every visible layer of a truly exceptional homemade croissant.
Recap of Key Lamination Techniques
Achieving perfect croissant lamination relies on mastering several core techniques:
- Precise Ingredient Ratios: Using the correct balance of flour, liquid, and fat.
- Proper Dough Development and Chilling: Ensuring the dough is elastic, relaxed, and sufficiently cold (4-8°C or 39-46°F) before lamination.
- Butter Block Preparation: Shaping and tempering the butter to the ideal pliable but firm consistency (13-16°C or 55-60°F).
- Even Rolling: Consistently rolling the dough and butter packet to a uniform thickness during each turn.
- Accurate Folding: Executing single and double folds correctly to create the desired number of layers.
- Essential Refrigeration: Allowing adequate rest periods between folds to relax gluten and firm butter.
- Temperature Control: Maintaining optimal dough and butter temperatures throughout the entire process.
- Careful Shaping and Proofing: Handling the laminated dough gently and proofing correctly to prepare for baking.
Further Resources for Croissant Baking Excellence
Continuing to learn and refine your skills is part of the joy of baking. While this guide provides a comprehensive overview of perfecting croissant lamination technique, there are many resources available to deepen your knowledge.
Consider exploring books by renowned pastry chefs who specialize in viennoiseries, as they often provide detailed insights into the nuances of laminated doughs. Online baking communities and forums can be valuable places to ask questions, share experiences, and learn from others who are also on their journey to master croissants. Additionally, practicing regularly is the best way to build intuition and feel for the dough and butter, which is indispensable for achieving consistent excellence in croissant baking.
Frequently Asked Questions
What exactly is lamination in the context of making croissants?
Lamination is the process of folding butter into dough multiple times to create thin, alternating layers. This results in the signature flaky texture of croissants.
Why is lamination so crucial for achieving a perfect croissant?
Proper lamination creates hundreds of butter and dough layers, which separate during baking. The melting butter creates steam, lifting the dough and resulting in a light and airy interior.
What are some common mistakes bakers make when laminating croissant dough?
Common mistakes include using butter that is too soft or too hard, not keeping the dough cold enough, and overworking the dough. These lead to a poorly defined lamination.
How can I ensure my butter stays cold enough during the lamination process?
Keep the dough and butter chilled in the refrigerator between turns. Working in a cool environment is also beneficial in preventing the butter from melting.
What are some signs that my croissant dough has been properly laminated?
The dough should be smooth and elastic, and when cut, you should see distinct layers of butter and dough. The croissants should also rise significantly during baking.
Final Reflection: The Enduring Allure of the Perfect Croissant
The pursuit of the perfect croissant, with its shatteringly crisp layers and buttery richness, is more than just a culinary quest; it's a testament to the power of precision and patience. This article has explored the intricacies of lamination, the crucial technique that transforms simple dough into a masterpiece of airy texture. Understanding this process isn't merely about baking a delicious pastry; it's about appreciating the artistry involved in transforming simple ingredients into something truly extraordinary.
The impact of mastering lamination extends beyond the kitchen. The dedication required, the attention to detail, the precise execution – these are skills transferable to any endeavor. The process mirrors life's own layering, where small, deliberate actions accumulate to create something beautiful and complex. As the renowned chef Julia Child once said, Find something you're passionate about and keep tremendously interested in it.
This sentiment perfectly encapsulates the spirit of croissant-making, and indeed, the pursuit of any skill requiring dedication and precision.
Now, consider your own journey. Perhaps you've already attempted to make croissants, experiencing both triumphs and setbacks. Remember the feeling of that first perfectly layered croissant, the satisfaction of a job well done. But even if your attempts haven't yielded perfect results yet, remember the process itself. The act of learning, of striving for improvement, is just as valuable as the final product. So, I encourage you: embrace the challenge, refine your technique, and continue to unlock the secrets of the perfect croissant. The journey, like the pastry itself, is richly rewarding.
Unlock Your Inner Baker: Master the Croissant
Thanks for taking the time to explore the art of croissant lamination! We hope you now feel confident in tackling this seemingly daunting pastry. Ready to put your new skills to the test?
- Bake your own perfect croissants: Don't just read about it – do it! Gather your ingredients and follow the recipe from the article. The satisfaction of biting into a flaky, buttery croissant you made yourself is unparalleled.
- Share your croissant creations: Snap a picture of your masterpiece and show off your baking skills! Use #BakeWithEaseCroissants on social media – we'd love to see them.
- Challenge a friend to a bake-off: Why not spread the joy (and the flaky goodness)? Dare a friend to bake their own croissants and compare results!
Ready to experience the buttery bliss of a perfectly laminated croissant? What ingredient are you most excited to work with in your next baking adventure?