
Mastering the Proof: How to Get That Perfect Croissant Rise Every Time

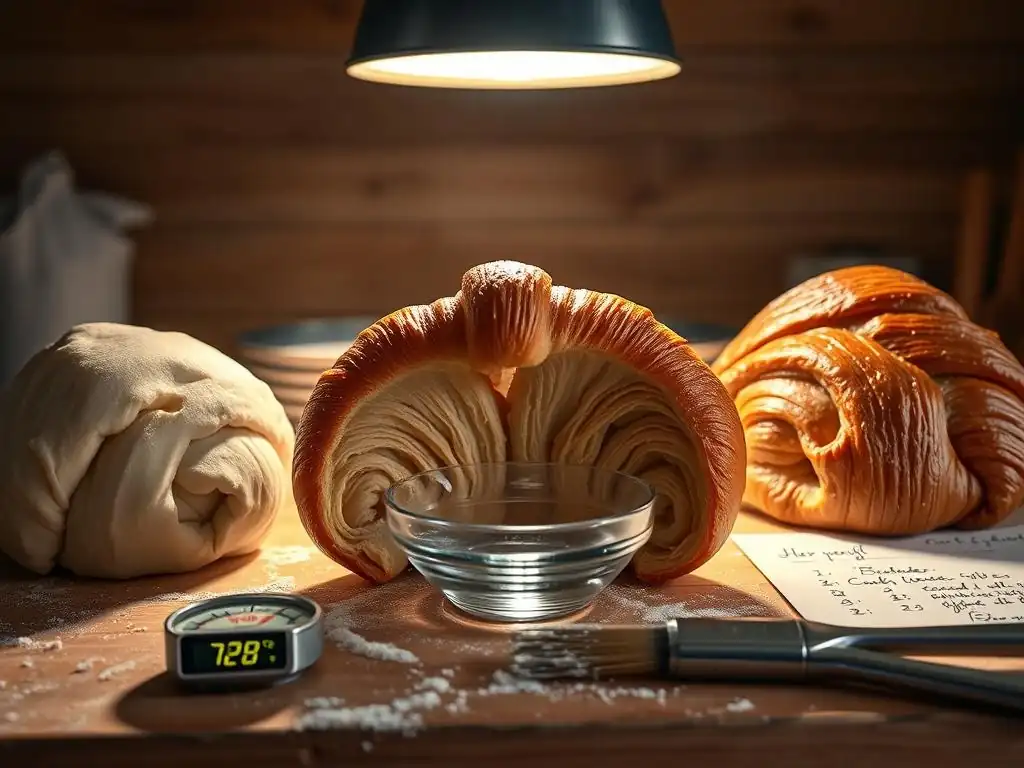
Welcome to BakeWithEase, your haven for baking brilliance! Are you ready to unlock the secrets to truly exceptional croissants? Achieving that perfect, airy rise can feel like a baker's holy grail. This article dives deep into the perfect croissant proofing technique, revealing the crucial steps and subtle nuances that separate a good croissant from a truly unforgettable one. Curious to know the ideal temperature and humidity for your dough? Let's get started and transform your croissant game forever!
- Introduction to Perfect Croissant Proofing Technique
- Essential Factors for Successful Croissant Proofing
- Step-by-Step Guide to Croissant Proofing at Home
- Troubleshooting Common Croissant Proofing Problems
- Advanced Croissant Proofing Techniques
- Visual Cues for Perfectly Proofed Croissants
- Baking Your Proofed Croissants to Perfection
- Tips and Tricks for Consistently Perfect Croissant Rise
- Conclusion: Achieving Croissant Mastery with Proper Proofing
- Frequently Asked Questions
- Final Reflection: The Golden Ratio of Patience and Precision
- Unlock Your Croissant Mastery: Perfect Rises, Guaranteed!
Introduction to Perfect Croissant Proofing Technique
Why Croissant Proofing is Crucial for BakeWithEase Bakers
Achieving that signature light, airy, and flaky texture in a croissant isn't just about the lamination process (folding butter into dough); it's equally, if not more, about the proofing. Proofing, or fermentation, is the stage where yeast produces gases that cause the dough to rise. Without proper proofing, even the most expertly laminated dough will result in dense, heavy croissants. For BakeWithEase bakers, mastering the perfect croissant proofing technique is the critical step that transforms raw dough into potential golden, flaky perfection. It's the difference between a good croissant and an unforgettable one.
This crucial phase allows the gluten structure developed during mixing and folding to relax and expand, trapping the carbon dioxide produced by the yeast. Simultaneously, fermentation develops complex flavors in the dough, contributing significantly to the final taste profile. Rushing this step or doing it incorrectly means the dough won't reach its optimal volume or internal structure, leading to a flat, tough, or unevenly baked product. Understanding and controlling the proofing environment is paramount for consistently achieving that coveted open crumb and significant lift.
Understanding the Science Behind Croissant Proofing
Croissant proofing relies on the biological activity of yeast. Yeast are living organisms that feed on sugars in the dough, producing ethanol and carbon dioxide gas as byproducts. This gas is what inflates the dough, causing it to rise. During proofing, the dough's temperature, humidity, and the amount of available food for the yeast (sugars) all influence the rate of fermentation. A successful perfect croissant proofing technique balances these factors to ensure steady, controlled gas production and retention within the dough's delicate gluten network, which has been reinforced by the many layers created during lamination.
Furthermore, enzymes naturally present in the flour and yeast break down complex starches and proteins into simpler sugars and amino acids. This enzymatic activity not only provides more food for the yeast but also contributes to flavor development and helps tenderize the dough. The ethanol produced evaporates during baking, contributing to the aroma. Controlling the proofing process, therefore, isn't just about volume; it's a sophisticated interplay of biological and chemical reactions that build flavor and texture, making the dough ready for its dramatic expansion in the hot oven.
Essential Factors for Successful Croissant Proofing
The Importance of Yeast Activity in Croissants
Yeast is the engine driving the croissant rise. The type of yeast used (active dry, instant, or fresh) and its viability directly impact proofing speed and effectiveness. Using too little yeast, or yeast that is old or inactive, will result in a sluggish or non-existent rise, preventing you from achieving the perfect croissant proofing technique. Conversely, too much yeast can lead to overly rapid fermentation, potentially causing the dough to rise too quickly, producing large, uneven bubbles, and sometimes collapsing before baking.
The temperature of the dough significantly affects yeast activity. Yeast is most active within a temperature range of roughly 75°F to 85°F (24°C to 29°C). Below this range, activity slows down, which is why cold proofing takes much longer but develops more flavor. Above 90°F (32°C), yeast activity accelerates rapidly but can also produce undesirable flavors and potentially die off at even higher temperatures. Ensuring your yeast is healthy and using the correct amount for your recipe are foundational steps before you even think about the proofing environment itself.
Controlling Temperature for Optimal Croissant Dough Proofing
Temperature is arguably the most critical factor in achieving the perfect croissant proofing technique. A consistent temperature promotes even fermentation throughout the dough. For a relatively quick proof (often called a "warm proof"), a temperature range of 75°F to 80°F (24°C to 27°C) is often recommended. This environment encourages yeast activity without being so warm that the butter layers within the dough melt and bleed out, which would destroy the lamination and result in a greasy, flat croissant.
Maintaining this temperature can be tricky in a home kitchen. Options include using a dedicated proofing box, placing the dough in an oven with only the light on (which typically provides a temperature around 80-85°F or 27-29°C, but monitor closely), or creating a makeshift warm environment using a cooler with a bowl of hot water inside. Avoiding drafts and sudden temperature changes is also vital, as these can shock the dough and disrupt the fermentation process, hindering the development of the ideal internal structure.
Humidity's Role in Achieving the Perfect Croissant Rise
Humidity plays a crucial supporting role in the perfect croissant proofing technique. A humid environment prevents the surface of the dough from drying out and forming a skin. If the surface dries, it becomes inelastic and restricts the dough's ability to expand freely during proofing. This can lead to uneven rising, tearing of the surface, and a less voluminous final product.
An ideal humidity level for proofing croissants is typically around 75-85%. In a home setting, this can be achieved by placing the dough in a proofing box or oven with a tray of hot water, or by loosely covering the dough with lightly oiled plastic wrap, ensuring there's enough space for the dough to rise without touching the plastic. Proper humidity ensures the dough surface remains pliable, allowing the delicate layers to stretch and puff up uniformly as the yeast produces gas, contributing to that beautiful, flaky texture.
Step-by-Step Guide to Croissant Proofing at Home

Preparing Your Croissant Dough for Proofing
Before proofing, your croissant dough should have completed its lamination process – typically involving multiple folds (like a double turn and a single turn) to create hundreds of layers of dough and butter. After the final fold, the dough usually benefits from a short rest in the refrigerator (around 30-60 minutes) to allow the gluten to relax and the butter to firm up slightly before shaping. This rest makes the dough easier to handle and shape without tearing or warming the butter too much.
Once rested, the dough is rolled out to the appropriate thickness (often about 4-5 mm or 0.15-0.2 inches) and cut into the characteristic triangle shapes. These triangles are then rolled up, starting from the base, to form the croissant shape. Handle the dough gently during rolling and shaping to avoid degassing it excessively or warming the butter layers. Properly shaped croissants are the foundation for a successful rise.
Setting Up Your Croissant Proofing Environment
As discussed, temperature and humidity are key. For a warm proof, aim for a consistent temperature between 75°F and 80°F (24°C to 27°C). You can use a proofing box, an oven with the light on and a pan of hot water, or a large plastic container with a damp towel or bowl of hot water inside. The goal is a stable, warm, and moist environment.
Place the shaped croissants on a baking sheet lined with parchment paper, leaving ample space between them (at least 2-3 inches or 5-7 cm), as they will expand significantly. Cover them loosely but securely to maintain humidity – plastic wrap lightly sprayed with cooking spray works well, or place the entire baking sheet inside a large, clear plastic bag, propped up so it doesn't touch the croissants. Ensure your setup consistently maintains the target temperature and humidity for the entire proofing duration.
The First Proof: Bulk Fermentation for Croissant Dough
While less common for shaped croissants than for straight doughs, sometimes recipes incorporate a bulk fermentation step before shaping. This initial rise allows for significant gas production and flavor development in the main dough mass. If your recipe includes this, it typically happens after the initial mixing and kneading but before the lamination begins.
However, in many classic croissant methods, the primary "proofing" happens after shaping. The bulk fermentation is effectively integrated into the chilling periods between folds during lamination, where the yeast slowly works in the cold environment, contributing to flavor. The main rise for shaped croissants is often referred to as the second proof or final proof, focusing purely on achieving volume and lightness before baking.
Shaping Croissants for the Second Proof
Shaping is where the magic starts to become visible. After chilling the laminated dough, roll it out evenly to the specified thickness (often around 4mm). Using a sharp knife or pizza cutter, cut the dough into long triangles. The base width typically dictates the final size of the croissant; a common size is a base of about 4-5 inches (10-12 cm) and a length of 8-10 inches (20-25 cm).
To shape, gently stretch the base of the triangle slightly, then roll it up tightly from the base towards the point. Some bakers make a small notch in the base before rolling to help create the classic crescent shape. Roll firmly enough to avoid large gaps but loosely enough to allow expansion. Place the shaped croissants on a lined baking sheet, leaving plenty of room for them to double (or more) in size during the upcoming proof.
The Second Proof: Achieving the Ideal Croissant Volume
This is the main event for the perfect croissant proofing technique. After shaping, the croissants undergo their final proof, typically in a warm, humid environment (75-80°F or 24-27°C and 75-85% humidity). The duration can vary significantly based on temperature, yeast activity, and dough hydration, but it commonly takes 1.5 to 3 hours. During this time, the croissants should visibly expand, becoming significantly larger and puffy.
The goal is to achieve roughly a 2 to 2.5 times increase in volume. The layers should start to separate slightly, and the surface should appear smooth and slightly jiggly. They should feel very light and airy when gently lifted. This stage is crucial for developing the open, honeycomb interior structure. Under-proofing leads to a dense crumb, while over-proofing can cause the structure to collapse in the oven. Patience and observation are key here.
Troubleshooting Common Croissant Proofing Problems
Croissants Not Rising: Identifying the Issue
Several factors can cause croissants to fail to rise adequately during proofing. The most common culprits are inactive yeast (check the expiry date and whether it was properly activated if required), a proofing environment that is too cold (yeast activity slows dramatically below 70°F/21°C), or dough that was overworked or handled too roughly, damaging the gluten structure needed to trap gases.
Other potential issues include using water that was too hot when activating yeast (killing it), insufficient sugar in the recipe (yeast needs food), or adding salt directly to the yeast (salt inhibits yeast). If your croissants show little to no growth after a reasonable time in a warm environment, first check your yeast, then verify your proofing temperature and humidity. Gently warming the environment slightly might help a slow proof, but ensure you don't melt the butter.
Over-Proofed Croissants: Rescue and Prevention
Over-proofing occurs when the dough rises too much, and the gluten structure becomes too weak to hold the gas. Signs include a very puffy appearance, potential deflation or wrinkling, and a fragile dough surface. Over-proofed croissants may collapse in the oven or bake up flat with a coarse, uneven crumb. Prevention is key: monitor proofing time closely, especially in warmer conditions, and rely on visual cues rather than just the clock.
If you suspect your croissants are slightly over-proofed but haven't collapsed, you can try a quick chill in the refrigerator (15-30 minutes) to firm them up slightly before baking. This can sometimes provide enough structure to withstand the oven heat. However, severely over-proofed dough is difficult to rescue and often results in compromised texture. Learning to recognize the point of perfect croissant proofing technique through observation is the best defense.
Under-Proofed Croissants: Corrective Measures
Under-proofing is more common and results in dense, heavy croissants with a tight crumb and less volume. The croissants won't have expanded significantly during proofing and will feel heavy for their size. They might also burst along the seams during baking because the internal pressure from gas expansion is too high for the underdeveloped gluten structure.
If you realize your croissants are under-proofed, the best course of action is to simply continue proofing them in the warm, humid environment. Check them every 15-30 minutes until they show the characteristic signs of a ready-to-bake croissant (doubled in size, puffy, slightly jiggly). While you can't reverse under-proofing once baked, catching it before baking allows you to complete the process and achieve a much better result than baking them prematurely.
Advanced Croissant Proofing Techniques

Using a Proofer for Consistent Results
For bakers serious about achieving the perfect croissant proofing technique consistently, a dedicated proofing box or chamber is an invaluable tool. These devices allow precise control over both temperature and humidity, eliminating the variability of ambient kitchen conditions. A typical home proofer can be set to a specific temperature, like 78°F (26°C), and maintain a high humidity level, ensuring an ideal environment for the yeast and preventing the dough surface from drying out.
Using a proofer drastically reduces the guesswork involved in proofing. You can expect more predictable proofing times (though still influenced by dough temperature and yeast activity) and a higher likelihood of achieving the desired volume and texture consistently, batch after batch. While not strictly necessary, a proofer elevates your ability to execute the perfect croissant proofing technique with reliability.
Cold Proofing Croissants for Enhanced Flavor
Cold proofing involves placing the shaped croissants in a refrigerator (typically 38-40°F or 3-4°C) for an extended period, often 8 to 12 hours, or even up to 24 hours. At these low temperatures, yeast activity is significantly slowed but not stopped. This slow fermentation develops much more complex flavors in the dough, resulting in croissants with a richer, more nuanced taste compared to those warm-proofed quickly.
While cold proofing requires more time, it also offers convenience, allowing you to prepare the croissants the day before and bake them fresh in the morning. It's crucial to cover the croissants well to prevent drying in the refrigerator's low-humidity environment. After cold proofing, croissants are often left at room temperature for 30-60 minutes before baking to take the chill off and allow for a final slight expansion, ensuring they are ready for the oven spring.
Adjusting Proofing Time Based on Your Kitchen Environment
Proofing times listed in recipes are often guidelines. The actual time required for the perfect croissant proofing technique will vary based on several factors: the temperature of your kitchen (or proofing environment), the temperature of your dough, the type and activity of your yeast, and even the type of flour used. A warmer kitchen will result in faster proofing, while a cooler one will slow things down.
Therefore, it is essential to learn to read the dough rather than relying solely on the clock. Use the recommended proofing time as a starting point, but pay close attention to the visual cues of a properly proofed croissant. If your kitchen is warmer, start checking sooner. If it's cooler, be prepared for proofing to take longer. This adaptability is key to consistently achieving the desired result regardless of external conditions.
Visual Cues for Perfectly Proofed Croissants
Recognizing the Signs of a Ready-to-Bake Croissant
Determining when your croissants have reached the perfect croissant proofing technique stage is a skill developed through practice and observation. Visually, well-proofed croissants will have roughly doubled, or slightly more than doubled, in size since shaping. They should appear significantly puffier and lighter. The layers should be more pronounced and slightly separated, indicating that the gas has expanded within the laminated structure.
The surface of the dough should look smooth, taut but not stretched thin, and slightly shiny if proofed in a humid environment. The shaped layers should still be discernible, but the overall form will be much more rounded and voluminous. There should be no signs of deflation or wrinkling, which can indicate over-proofing. Trust your eyes – they are your primary tool at this stage.
The "Jiggle Test" and Other Proofing Indicators
Beyond visual inspection, the "jiggle test" is a common method to check for proper proofing. Gently nudge the baking sheet; the croissants should jiggle noticeably like a firm jelly. This indicates they are light and filled with gas but still have enough structural integrity to hold their shape. If they don't jiggle, they likely need more time. If they wobble excessively or look like they might collapse, they might be approaching over-proofing.
Another indicator is the "poke test," though it's used more cautiously with delicate croissant dough than with rustic bread. Gently press the side of a croissant with a fingertip. If the indentation springs back very slowly and only partially, the croissant is likely well-proofed. If it springs back immediately, it needs more time. If the indentation remains completely, it might be over-proofed. Combine these tactile tests with visual cues for the most accurate assessment of your perfect croissant proofing technique.
Baking Your Proofed Croissants to Perfection
Preheating Your Oven for the Ideal Croissant Bake
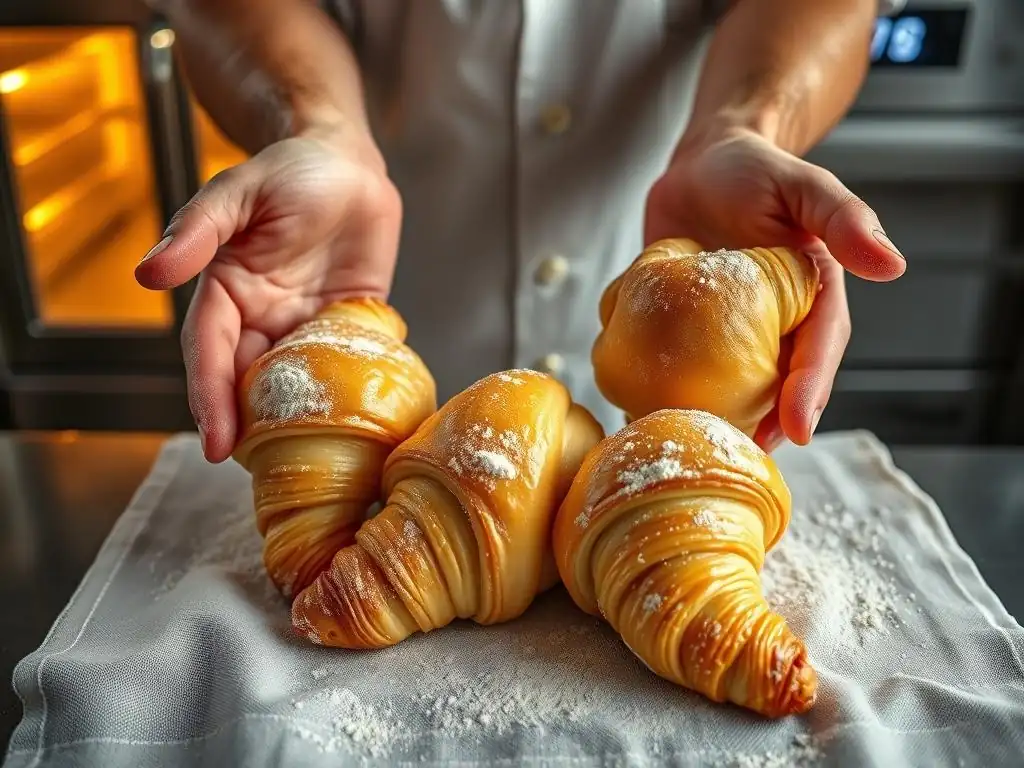
Proper oven temperature is critical for getting great oven spring and achieving that golden, flaky exterior on your perfectly proofed croissants. Always preheat your oven thoroughly, usually to a high temperature, typically around 400°F (200°C). It's often recommended to preheat for at least 20-30 minutes after the oven indicates it has reached temperature, especially if using a baking stone or steel, to ensure the heat is fully saturated.
A hot oven provides the necessary thermal shock to the dough. The sudden heat causes the water in the dough and butter layers to turn rapidly into steam. This steam is trapped by the gluten layers, causing a dramatic expansion – the "oven spring" – which creates the open, airy interior structure characteristic of a well-baked croissant. Insufficient preheating will result in less oven spring and a denser texture.
Baking Time and Temperature for Golden-Brown Croissants
Baking time and temperature can vary slightly depending on your oven and the size of your croissants, but a common approach is to bake at a high temperature initially, then potentially reduce it slightly. For instance, baking at 400°F (200°C) for 15-20 minutes, or until deeply golden brown, is a standard guideline. Some bakers might start at 425°F (220°C) for the first 5-10 minutes to maximize oven spring, then reduce to 375-400°F (190-200°C) to ensure the interior bakes through without the exterior burning.
The croissants are done when they are deeply golden brown all over, feel light for their size, and sound hollow when tapped on the bottom. An internal temperature of around 200-210°F (93-99°C) indicates they are fully baked. Don't be afraid of a dark golden color; this indicates proper caramelization of sugars and contributes significantly to the flavor and crisp texture. Baking them too pale will result in a doughy interior.
Tips and Tricks for Consistently Perfect Croissant Rise
Using a Dough Thermometer for Accuracy
While visual and tactile cues are essential for the perfect croissant proofing technique, using a simple digital thermometer can add a layer of precision, especially when troubleshooting. Monitoring the internal temperature of your proofing environment ensures it remains within the optimal range (75-80°F or 24-27°C for warm proofing). This eliminates guesswork about whether your setup is actually warm enough.
Furthermore, you can measure the temperature of your dough itself. Dough temperature influences yeast activity; warmer dough ferments faster. Knowing your dough's temperature can help you estimate proofing time more accurately and understand why proofing might be faster or slower than expected. Aiming for a final dough temperature in the low 70s°F (around 22-23°C) after mixing and before lamination is a good starting point.
Maintaining Consistent Humidity Levels
As highlighted earlier, humidity prevents the dough surface from drying. A dry skin inhibits the rise and can lead to a poor-quality crumb. Simply covering the croissants loosely with plastic wrap is a good start, but ensuring humidity within the proofing environment is better. Using a pan of hot water in the oven (light on) or proofer, or a damp towel in a sealed container, helps create that necessary moist atmosphere.
You should be able to see condensation forming on the inside of your proofing container or plastic wrap. If there's no condensation, your humidity is likely too low. If the plastic wrap is sticking heavily to the croissants, it might be too humid or the plastic is too close. A relative humidity of 75-85% is ideal for the perfect croissant proofing technique, keeping the surface pliable for maximum expansion.
Choosing the Right Flour for Croissant Success
The type of flour you use significantly impacts the dough's structure and ability to proof correctly. Croissants benefit from a flour with a moderate to high protein content, typically bread flour (around 12-14% protein). The higher protein develops strong gluten when kneaded and folded, creating a robust framework that can trap the gases produced during proofing and support the layers during baking.
Using all-purpose flour (typically 10-12% protein) can work, but it may result in a less structured dough that is harder to laminate and might not achieve the same dramatic rise or open crumb as dough made with bread flour. The gluten needs to be strong enough to stretch without tearing as the yeast works, supporting the delicate laminated structure through the entire perfect croissant proofing technique cycle.
Conclusion: Achieving Croissant Mastery with Proper Proofing
The journey to baking consistently incredible croissants is paved with mastering each step, and proofing stands out as one of the most influential. It's the stage where the careful lamination and dough work translate into the potential for that signature light, airy, and flaky texture. Understanding the science behind yeast activity, controlling temperature and humidity, and patiently observing your dough's progress are the cornerstones of the perfect croissant proofing technique.
BakeWithEase: Your Partner in Perfect Croissant Baking
At BakeWithEase, we believe every baker can achieve croissant mastery. By focusing on the details of proofing – from preparing your dough correctly, setting up the ideal environment, patiently waiting for the right visual and tactile cues, and troubleshooting common issues – you are well on your way to baking croissants that are not only beautiful but also deliciously light and flavorful. Remember that practice makes perfect, and each batch is a learning opportunity to refine your perfect croissant proofing technique. Keep baking, keep learning, and enjoy the incredible reward of a perfectly proofed and baked croissant.
Frequently Asked Questions
What is the most important factor in achieving a perfect croissant proof?
The most important factor is maintaining the correct temperature and humidity during proofing. This allows the yeast to activate properly and create the necessary rise.
How can I tell if my croissants are properly proofed?
Properly proofed croissants will appear puffy and light, almost doubled in size. They should also jiggle slightly when gently shaken.
What temperature range is ideal for proofing croissants?
The ideal temperature range for proofing croissants is typically between 75-80°F (24-27°C). Avoid higher temperatures, as this can melt the butter layers.
What happens if I over-proof my croissants?
Over-proofed croissants will lose their shape and may collapse during baking. They can also develop a sour taste due to excessive yeast activity.
Can I proof croissants in the refrigerator?
Yes, you can cold-proof croissants in the refrigerator, which will slow down the proofing process. This can result in enhanced flavor development and a more manageable schedule.
Final Reflection: The Golden Ratio of Patience and Precision
The pursuit of the perfect croissant rise isn't merely about baking; it's a metaphor for mastering any challenging endeavor. Achieving that airy, flaky perfection requires meticulous attention to detail, a deep understanding of the process, and, perhaps most importantly, patience. The techniques outlined in this article – from controlling temperature and humidity to understanding the crucial role of fermentation – are not just recipes; they are pathways to understanding the delicate balance required for success.
The journey of perfecting the croissant, for me, has been a profound lesson in the rewards of perseverance. It's a testament to the power of observation and the importance of understanding the underlying principles at play. The subtle shifts in dough texture, the delicate dance of yeast and gluten, all contribute to the final masterpiece. As the renowned pastry chef, Pierre Hermé, once said: Baking is a science, but it's also an art. It's about feeling the dough, understanding its needs, and letting your intuition guide you.
This sentiment perfectly encapsulates the essence of mastering the croissant rise, and indeed, mastering any complex skill.
Now, I invite you to take this knowledge and apply it to your own baking journey. Don't be discouraged by initial setbacks; embrace the learning process. Each imperfect croissant is a step closer to perfection. Remember the principles discussed here, experiment with your own techniques, and most importantly, enjoy the journey. The reward – that first bite of a perfectly risen, buttery, flaky croissant – is worth every moment of dedication and patience.
Unlock Your Croissant Mastery: Perfect Rises, Guaranteed!
Thanks for taking the time to delve into the world of flaky, buttery perfection! We hope you gained valuable insights into achieving that coveted croissant rise. Ready to put your new knowledge into practice?
- Bake your dream croissants: Grab your ingredients and try the recipe – the results will speak for themselves! Don't be afraid to experiment – even small adjustments can yield big differences.
- Share your success (or challenges!): We'd love to see your croissant creations! Post a picture on social media using #BakeWithEaseCroissants and tag us.
- Explore our other baking guides: Want to master other classic pastries? Check out our library of detailed recipes and techniques to expand your baking skills.
So, what innovative twist will you add to your next batch of croissants? Let's hear your ideas in the comments below!