
The Importance of Rest: Why Croissant Dough Needs Time


Welcome to BakeWithEase, where we unlock the secrets to baking success! Ever wondered why your croissants aren't quite as flaky and airy as you'd hoped? This week, we're diving deep into a crucial, often overlooked, aspect of croissant making: resting your dough properly. Unlock the key to perfect layers and a melt-in-your-mouth texture – keep reading to discover why time is your best ingredient!
- The Importance of Rest: Why Croissant Dough Needs Time for Perfect Baking
- Understanding the Crucial Role of Resting Croissant Dough
- Mastering the Art of Resting Croissant Dough Properly: A Step-by-Step Guide
- The Impact of Insufficient Rest on Your Croissants: Common Mistakes
- Optimizing Your Croissant Dough Resting Environment for BakeWithEase Success
- Troubleshooting Common Croissant Dough Resting Problems
- Advanced Techniques: Different Resting Methods for Croissant Dough
- Resting Croissant Dough Properly: Achieving BakeWithEase Perfection
-
Frequently Asked Questions
- How long should I rest croissant dough in the refrigerator between folds?
- What happens if I don't rest the croissant dough enough?
- Can I rest the croissant dough for too long in the refrigerator?
- Why is resting the dough important specifically for croissants?
- What's the best temperature for resting croissant dough?
- Final Reflection: The Unsung Power of Patience in Baking (and Life)
- Unlock Your Baking Potential: Master the Art of Dough Resting
The Importance of Rest: Why Croissant Dough Needs Time for Perfect Baking
Making flaky, buttery croissants at home is a rewarding challenge, and one of the most critical, yet often underestimated, steps is allowing the dough adequate time to rest. It might seem counterintuitive to wait when you're eager to get your croissants in the oven, but mastering how to rest croissant dough properly is the secret ingredient to achieving that coveted light and airy texture with distinct, crisp layers. Skipping or rushing the resting periods can lead to dense, tough pastries that lack the signature flakiness we all love.
Think of resting as a series of essential pauses that allow the dough's structure to develop, flavors to deepen, and the butter to maintain its integrity. These moments of inactivity are where the magic truly happens, transforming a simple mixture of flour, water, yeast, butter, and sugar into the complex, layered dough required for perfect croissants. Learning to rest croissant dough properly is perhaps the single most impactful technique you can adopt to elevate your homemade croissants from good to truly exceptional, ensuring BakeWithEase results every time.
Understanding the Crucial Role of Resting Croissant Dough
Resting croissant dough isn't just about convenience; it's a fundamental part of the biochemical and physical processes that occur during baking. It allows the gluten network, which provides structure, to relax after being worked, preventing toughness. It also gives the yeast time to ferment, producing gases that create air pockets, and allowing the butter to firm up, which is essential for creating those distinct layers during baking. Without proper rest, the dough would be difficult to handle, the butter would melt prematurely, and the final product would suffer significantly.
Each resting phase in the croissant-making process serves a specific purpose, building upon the previous steps. From the initial bulk fermentation rest that starts flavor development and gluten relaxation, to the crucial chilling periods between turns that firm up the butter and make lamination possible, to the final proofing rest where the shaped croissants double in size – each pause is vital. Understanding the 'why' behind these rests helps you appreciate their importance and empowers you to make adjustments based on your kitchen environment, ensuring you rest croissant dough properly for optimal results.
Why Resting Croissant Dough is Essential for BakeWithEase Results
To achieve the signature flakiness and tender interior of a perfect croissant, the dough needs time to undergo crucial transformations. Primarily, resting allows the gluten network, developed during mixing and kneading, to relax. When dough is worked, the gluten strands become tight and elastic. Without rest, the dough would spring back excessively when rolled, making lamination (the process of folding butter into the dough) incredibly difficult and resulting in uneven layers or even torn dough. A relaxed dough is pliable and easy to work with, allowing for thin, even rolling and precise folding, which are non-negotiable for beautiful layers.
Furthermore, resting periods facilitate the proper chilling of the dough and, critically, the butter within it. The layers of butter must remain cold and solid throughout the lamination process. If the dough isn't sufficiently rested and chilled between folds, the butter will warm up, soften, and potentially integrate into the dough rather than remaining as distinct layers. This leads to croissants that are greasy rather than flaky, lacking that delicate separation of layers. Aiming for a dough temperature around 4°C to 8°C ( 40°F to 46°F) during chilling rests is typical and helps maintain the butter's state. Properly resting croissant dough ensures the butter stays cold enough to create steam in the oven, which is what pushes the layers apart.
The Science Behind Dough Relaxation: Gluten Development and Fermentation
The relaxation of gluten during rest is a physical process. When dough is kneaded, protein molecules (glutenin and gliadin) link together to form long, elastic gluten chains. These chains are under tension. Resting allows the bonds within this network to rearrange and loosen, reducing the dough's elasticity and increasing its extensibility. Think of it like stretching a rubber band repeatedly – it becomes taut. Giving it a break allows it to return to a more relaxed state. A typical bulk fermentation rest might last anywhere from 1 hour to 3 hours at room temperature (around 20-24°C or 68-75°F), followed by a longer cold rest. This initial rest is crucial for the gluten to begin relaxing before lamination starts.
Parallel to gluten relaxation is the ongoing process of fermentation, driven by yeast. During resting periods, especially the longer, colder ones, yeast continues to consume sugars and produce carbon dioxide gas and various flavor compounds. While cold temperatures slow down yeast activity significantly compared to warmer temperatures, it doesn't stop completely. A cold rest of 8-12 hours (or even up to 24 hours) in the refrigerator (around 4°C) allows for slow fermentation, which develops more complex flavors in the dough. This slow, cold fermentation also strengthens the gluten network gently and makes the dough easier to handle during lamination. Resting croissant dough properly involves balancing these processes – relaxing gluten for workability while allowing fermentation to build flavor and structure.
Mastering the Art of Resting Croissant Dough Properly: A Step-by-Step Guide
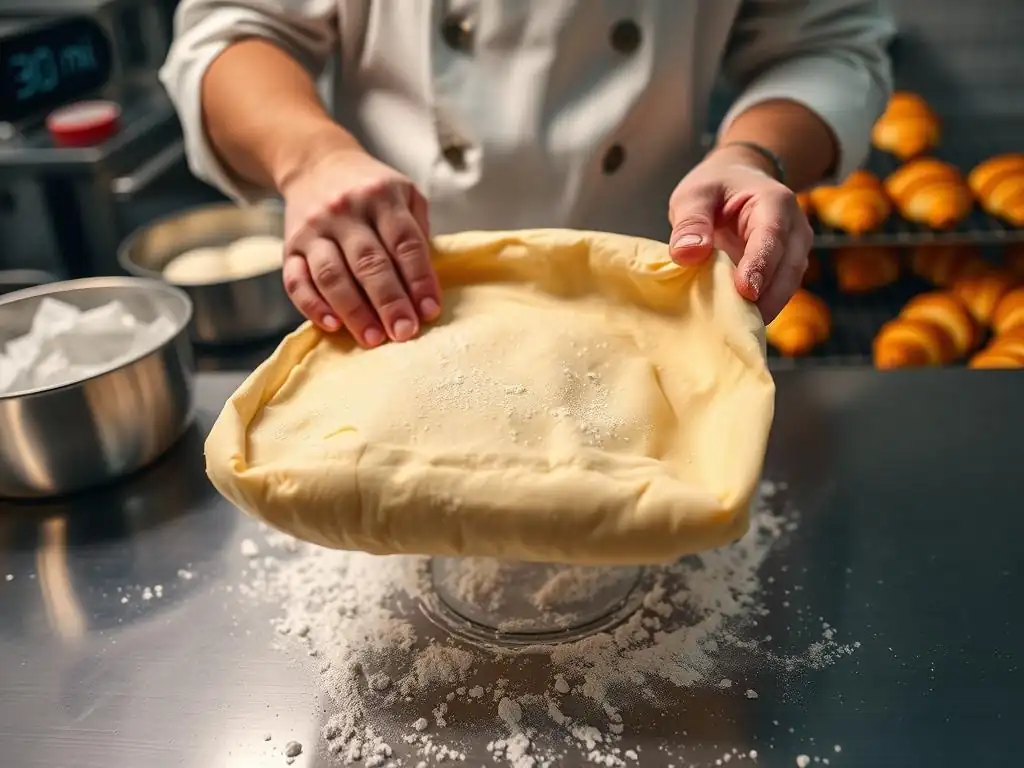
Achieving perfect croissants requires not just knowing that you need to rest the dough, but how and when to do it effectively. Each stage of the croissant-making process has specific resting requirements that contribute to the final structure, flavor, and texture. Following a disciplined resting schedule is just as important as precise measuring or careful lamination. This guide breaks down the key resting periods from start to finish.
Resting croissant dough properly involves paying attention to time, temperature, and the dough's feel. It's a process that rewards patience and observation. While recipes provide general guidelines, understanding the purpose of each rest allows you to make minor adjustments based on your kitchen conditions and the dough's behavior, ensuring optimal results.
Step 1: Initial Dough Mixing and the First Rest
The very first rest period occurs after the initial mixing of the dough ingredients. This is often called the bulk fermentation rest. After the dough comes together and is kneaded (either by hand or machine) until it's relatively smooth and elastic, it needs time to relax and begin fermenting. This initial rest typically takes place at room temperature or slightly cooler, often covered to prevent drying. A common timeframe for this first rest is 1 to 2 hours at around 22°C ( 72°F), during which the dough might increase slightly in volume.
Following this initial room-temperature rest, the dough is usually transferred to the refrigerator for a longer, cold rest. This cold rest is crucial for two main reasons: it slows down fermentation, allowing flavors to develop over time, and it chills the dough thoroughly, preparing it for the incorporation of the cold butter block in the next stage. This refrigeration period can range from a minimum of 4 hours to overnight ( 8-12 hours), or even up to 24 hours. This extended cold rest is fundamental to learning how to rest croissant dough properly, as it sets the stage for successful lamination.
Achieving Optimal Gluten Development in the First Rest
The initial rest after mixing plays a vital role in allowing the gluten network, which was developed through kneading, to relax from its stressed state. When you knead dough, you align the gluten strands, creating tension. If you tried to roll this dough out immediately, it would be very resistant and spring back significantly.
Resting allows the gluten proteins to hydrate further and the network to rearrange into a more relaxed configuration, making the dough more extensible and easier to roll thinly without tearing. This is sometimes called the autolyse phase if done before adding salt and yeast, but even after full mixing, a rest period achieves similar relaxation benefits.
Furthermore, the initial bulk fermentation rest allows the yeast to become active and start producing carbon dioxide. This gas production helps to gently stretch the gluten network from within, further contributing to its development and structure. While the primary goal of the first rest might seem like relaxation for easier handling, it's also the beginning of the fermentation process that will ultimately give the croissants their light texture and complex flavor profile. Ensuring the dough rests adequately during this initial phase, particularly the cold rest, is a cornerstone of learning to rest croissant dough properly.
Step 2: Lamination and Subsequent Resting Periods
Lamination is the process of repeatedly folding a block of cold butter into the dough, creating alternating layers. This process requires the dough and butter to be cold and firm. After each fold (often called a "turn"), the dough is rolled out again. This rolling process creates tension in the dough and slightly warms the butter. To prevent the butter from melting into the dough and to allow the gluten to relax again before the next turn, resting periods between folds are absolutely essential.
Typically, after each turn (e.g., a single fold or a double fold), the dough is wrapped well and returned to the refrigerator for a rest. The duration of these rests between turns is usually shorter than the initial cold rest, often ranging from 30 minutes to 1 hour. This allows the butter to firm up again and the gluten to relax sufficiently so the dough can be rolled out evenly for the next turn without excessive resistance or tearing. Most croissant recipes call for 2 to 4 turns, and each turn must be followed by a proper rest.
The Importance of Cold Resting Between Folds for Perfect Layers
The success of croissant lamination hinges entirely on maintaining the butter layers as distinct entities within the dough. During rolling, the butter softens from the pressure and slight temperature increase. The cold rest between folds, ideally at 4°C ( 40°F), is critical because it solidifies the butter again. If the butter is too soft when you attempt the next roll, it will break through the dough layers or simply smear into the dough rather than creating clean, defined layers. This is a common issue when bakers rush the process and fail to rest croissant dough properly between turns.
These intermittent cold rests also allow the gluten network, which is stretched and stressed during rolling, to relax. Trying to roll out dough that hasn't rested after a turn will result in significant spring-back, making it difficult to achieve the required thinness and potentially leading to uneven layers or even holes.
By allowing the dough to rest and the gluten to relax, you ensure that the dough is pliable and cooperative for the subsequent rolling and folding, setting the stage for the maximum number of distinct butter and dough layers to form during lamination – potentially hundreds or even thousands by the final turn.
Step 3: Final Proofing and the Last Rest Before Baking
After the lamination process is complete and the croissants are shaped (rolled and formed), they undergo their final and often longest rest period: proofing. This rest allows the yeast activity, which has been slowed by refrigeration, to resume and accelerate, causing the shaped croissants to expand significantly. During proofing, the croissants should roughly double in size and become visibly lighter and puffier. This phase is critical for developing the final airy texture.
Proofing conditions are different from the cold rests. It typically takes place at a warmer temperature and higher humidity to encourage yeast activity and prevent the surface of the dough from drying out. A common proofing environment is around 24°C to 26°C ( 75°F to 79°F) with high humidity, perhaps achieved in a proofer, a slightly warm oven with a pan of hot water, or simply on the counter in a warm kitchen covered loosely. The duration varies greatly depending on the temperature, but can range from 1.5 hours to 3 hours. Knowing how to rest croissant dough properly during this final proofing stage is crucial for achieving the right volume and texture before baking.
Ensuring a Light and Airy Texture Through Proper Proofing Rest
The final proofing rest is where the significant volume increase occurs, driven by the carbon dioxide produced by the yeast. As the gas is generated, it expands the air pockets within the dough, creating the open, airy structure characteristic of a well-made croissant. During proofing, the gluten network, already developed and relaxed through previous steps, stretches to accommodate this expansion. If the croissants are under-proofed, they will be dense and heavy with a tight crumb because insufficient gas has been produced.
Conversely, over-proofing can also be detrimental. If the dough proofs for too long or at too high a temperature, the gluten structure can weaken and collapse, and the delicate layers might merge. This can lead to croissants that deflate in the oven or have a coarse, uneven texture.
The goal is to proof until the croissants are significantly expanded, jiggly when gently shaken, but still have enough structure to hold their shape. A good test is the "poke test": gently indent the dough with a finger; if the indentation slowly springs back halfway, it's likely ready. Mastering this final stage of how to rest croissant dough properly is the last step before the oven transforms the dough into golden, flaky perfection.
The Impact of Insufficient Rest on Your Croissants: Common Mistakes
Rushing the resting periods is one of the most common mistakes novice bakers make when attempting croissants. While it's tempting to speed up the process, insufficient rest at any stage can have cascading negative effects on the final product. Understanding these potential pitfalls emphasizes why learning to rest croissant dough properly is non-negotiable for success.
Ignoring the recommended resting times compromises both the workability of the dough and the integrity of the butter layers, leading to a host of problems that detract from the classic croissant experience. From a tough texture to a disappointing lack of flakiness, the consequences of impatience are clear in the finished pastry.
Tough and Dense Croissants: The Result of Under-Resting
When dough does not rest adequately after mixing or between turns, the gluten network remains tight and resistant. Attempting to roll out this tense dough requires excessive force, which can further toughen the gluten and make it difficult to achieve thin, even layers. If the gluten is too tense during shaping and proofing, it restricts the dough's ability to expand properly from the yeast activity, resulting in croissants that are smaller, heavier, and have a dense, bread-like crumb rather than the desired light and airy texture.
Insufficient initial rest also means the dough hasn't had enough time for initial fermentation and flavor development. This contributes to a blander taste profile in the final croissant. The cold rest, in particular, is crucial for developing those complex, nuanced flavors that distinguish a truly great croissant. Skipping or shortening this step means you miss out on this vital flavor-building time. To rest croissant dough properly means giving it the time it needs to relax and develop both structure and flavor simultaneously.
Butter Leakage and Poor Layer Definition: Consequences of Rushing the Process
One of the most visible failures resulting from insufficient rest, particularly the cold rests between turns, is butter leakage during baking. If the dough and butter are not sufficiently chilled and firm before rolling and folding, the butter softens and integrates too much with the dough. This makes it impossible to create distinct, clean layers. Instead of having solid sheets of butter interleaved with dough, you end up with butter that is partially mixed into the dough.
When baked, this integrated butter melts and seeps out of the dough onto the baking sheet, resulting in greasy croissants and a significant loss of flakiness. The steam created by the melting butter is what separates the layers in the oven, but if the butter isn't in distinct layers to begin with, this separation cannot happen effectively.
Croissants made from dough that wasn't properly rested between turns will have poor layer definition, lacking the characteristic honeycomb interior and crisp, flaky exterior. Learning to rest croissant dough properly between turns ensures the butter stays where it belongs – in cold, distinct sheets ready to create steam.
Uneven Baking and Lack of Flakiness: Why Patience is Key
Dough that hasn't rested properly can be difficult to handle, leading to uneven rolling and shaping. If the layers within the croissant vary significantly in thickness, it can lead to uneven baking. Thinner sections may burn, while thicker sections remain undercooked or doughy. The lack of proper layer separation due to insufficient cold rests also contributes to poor heat distribution during baking; heat cannot penetrate and cook the layers evenly when they are not well-defined.
Ultimately, the hallmark of a great croissant is its flakiness – the way the outer layers shatter and the interior reveals a delicate, open structure. This flakiness is a direct result of well-defined, separate layers of dough and butter expanding in the oven. When resting periods are cut short, the conditions necessary for this layered expansion are not met.
The gluten is too tight, the butter is too soft or integrated, and the yeast hasn't had sufficient time to proof the final shape adequately. The result is a croissant that is dense, possibly greasy, and fundamentally lacks that essential flakiness. To rest croissant dough properly is to embrace patience, knowing that the waiting time is an investment in achieving that perfect texture.
Optimizing Your Croissant Dough Resting Environment for BakeWithEase Success
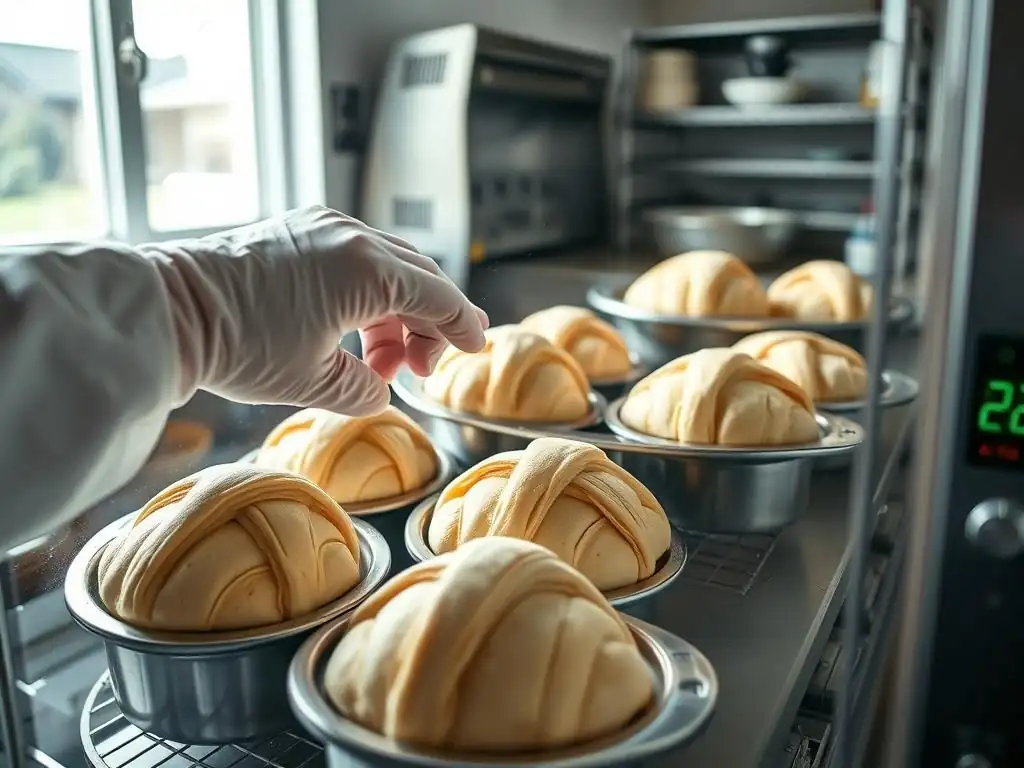
Simply placing your dough aside isn't enough; the conditions under which your croissant dough rests are just as important as the duration. Controlling temperature and humidity ensures the dough relaxes effectively, ferments correctly, and the butter stays firm when needed. Creating the right resting environment is a key component of learning to rest croissant dough properly.
Paying attention to these environmental factors can prevent common issues like dough drying out, over-proofing, or butter melting, significantly increasing your chances of baking perfect croissants.
Temperature Control: The Ideal Temperature for Dough Relaxation
Temperature is perhaps the most critical factor in controlling the resting process. For the initial bulk fermentation and subsequent cold rests during lamination, a refrigerator temperature of around 4°C ( 40°F) is ideal. This temperature range significantly slows down yeast activity while keeping the butter solid and firm. If the refrigerator is too warm (e.g., above 8°C or 46°F), the butter may soften prematurely, making lamination difficult and risking leakage. If it's too cold (e.g., near freezing), the dough can become excessively stiff and difficult to roll immediately after removing it, requiring a brief warm-up period.
For the final proofing rest, a warmer temperature is needed to activate the yeast and encourage expansion. A range of 24°C to 26°C ( 75°F to 79°F) is often recommended. Temperatures significantly higher than this can accelerate proofing too quickly, potentially leading to over-proofing or butter leakage if the layers aren't perfectly sealed. Temperatures too low will result in very slow proofing, which is less efficient, although a slower, cooler proof can sometimes enhance flavor if managed correctly. Using an oven with the light on, a dedicated proofing box, or simply finding a warm spot in your kitchen can help maintain the ideal proofing temperature.
Humidity Considerations: Preventing Dough from Drying Out
While temperature controls the rate of fermentation and butter firmness, humidity plays a crucial role in preventing the surface of the dough from drying out during resting periods. If the surface dries, it forms a skin, which restricts the dough's ability to expand evenly and can lead to a tough crust. This is particularly important during the longer cold rests and the final proofing.
To maintain adequate humidity during refrigeration, always wrap the dough tightly in plastic wrap or place it in an airtight container. This creates a humid micro-environment around the dough. During final proofing, which often occurs at warmer temperatures, the risk of drying is even higher. Proofing in a humid environment, such as a proofing box or a turned-off oven with a pan of hot water on the rack below, is highly recommended. Aim for around 70-80% humidity during proofing. This prevents skin formation, allowing the croissants to expand fully and evenly, contributing to a light and delicate texture. Protecting your dough from drying is a simple yet essential step to rest croissant dough properly.
Protecting Your Dough: Covering Techniques for Optimal Resting
Properly covering your croissant dough during resting periods is essential for both temperature control and humidity maintenance. During the initial bulk fermentation and all subsequent cold rests in the refrigerator, the dough should be wrapped tightly in plastic wrap. Ensure there are no gaps where air can reach the dough surface. Alternatively, you can place the dough in a large, clean plastic bag and seal it, or use an airtight plastic container. The goal is to prevent moisture loss and keep the surface supple.
For the final proofing stage, where the shaped croissants are resting at a warmer temperature, covering is also necessary but requires care not to damage the delicate shapes. Loosely draping plastic wrap over the tray of croissants is a common method. You can lightly spray the inside of the plastic wrap with cooking spray or water to prevent it from sticking to the rising dough.
Another effective technique is to place the entire baking sheet inside a large plastic bag, propping it up so the bag doesn't touch the croissants. If using a proofing box or an oven with a pan of hot water, the ambient humidity might be sufficient, but a light covering can still offer extra protection. Learning how to rest croissant dough properly includes mastering these simple covering techniques.
Troubleshooting Common Croissant Dough Resting Problems
Even when following a recipe closely, issues can arise during the resting phases. Knowing how to identify and address these common problems will help you salvage your dough and improve your technique for future batches. Troubleshooting is a key part of learning to rest croissant dough properly.
Being observant and understanding the signs your dough is giving you is crucial. Is it rising too fast or too slow? Is it difficult to roll? These are clues that the resting conditions might not be ideal.
Over-Proofing Your Dough: Signs and Solutions
Over-proofing typically occurs during the final rest before baking. Signs include the croissants expanding too much, losing their defined shape, looking bubbly or fragile on the surface, or collapsing slightly when gently moved. The poke test will show an indentation that doesn't spring back at all. Over-proofed dough has exhausted its rising power and the gluten structure may have weakened.
If you suspect your croissants are slightly over-proofed but not fully collapsed, you might still be able to bake them, but handle them extremely gently. They may not rise much more in the oven and could have a less open crumb. If they are significantly over-proofed and collapsing, they are likely unsalvageable as croissants. To prevent over-proofing, pay close attention to the recommended proofing time and temperature.
It's better to slightly under-proof and rely on oven spring than to over-proof. Using a thermometer to check your proofing environment temperature is highly recommended. Adjust proofing time based on temperature; a few degrees difference can significantly change the required time.
Dough That's Too Cold: How to Adjust Resting Time
If your dough is too cold after a long rest in the refrigerator (e.g., below 4°C or 40°F), it will be very stiff and difficult to roll out without cracking the butter layers. Attempting to force it will likely result in uneven layers or butter breaking through the dough. This can happen if your refrigerator runs particularly cold or if the dough rested for a very long time.
The solution is simple: allow the dough to sit at room temperature for 10 to 20 minutes before attempting to roll it. This brief period allows it to warm up just enough to become pliable without softening the butter too much. The dough should still feel very cold to the touch but be flexible enough to roll without excessive force. Finding this sweet spot is part of mastering how to rest croissant dough properly after cold storage.
Achieving Consistent Results: Tips for Reproducible Resting Schedules
Consistency in baking, especially with something as technical as croissants, comes from controlling your variables. To achieve reproducible resting schedules and therefore consistent results, consider these tips:
- Use a Thermometer: Monitor your refrigerator temperature to ensure it's consistently within the
4°Cto8°Crange. Use an oven thermometer to verify your proofing temperature. - Time Accurately: Use timers for all resting periods, especially the shorter ones between turns.
- Observe Your Dough: Learn to read your dough. Does it feel relaxed enough to roll? Is it proofed sufficiently based on the poke test? Relying solely on time isn't always enough, as ambient temperature and humidity in your kitchen can vary.
- Document: Keep notes on your resting times and temperatures and how the final croissants turned out. This helps you learn what works best in your specific kitchen environment and allows you to rest croissant dough properly batch after batch.
Advanced Techniques: Different Resting Methods for Croissant Dough
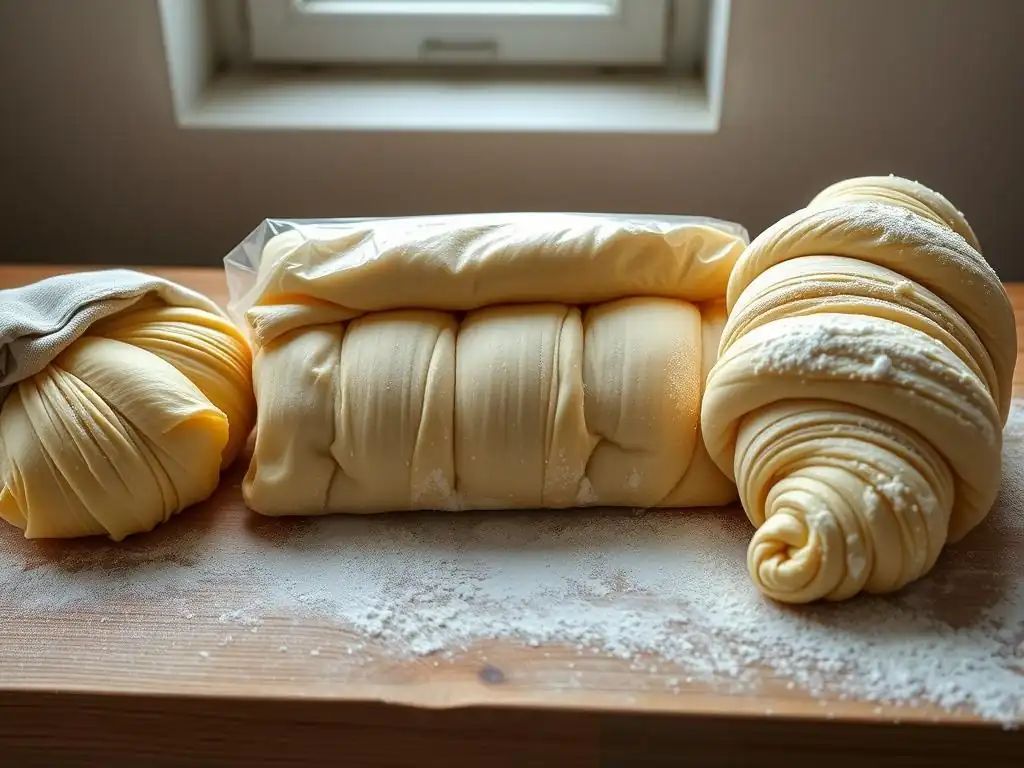
Beyond the standard resting schedule, experienced bakers sometimes employ variations in resting techniques to influence flavor, texture, and workflow. Exploring these methods can further enhance your understanding of dough behavior and help you elevate your croissant game.
These techniques often involve longer, colder fermentation periods that allow for deeper flavor development and easier handling. While they require more time, the results can be well worth the wait for those aiming for truly exceptional croissants.
Overnight Resting: Maximizing Flavor Development
One of the most popular "advanced" resting techniques is an extended cold rest, often referred to as overnight resting or cold fermentation. This involves resting the dough in the refrigerator ( 4°C) for a significantly longer period than the minimum required, typically 8 to 24 hours after the initial mixing and possibly after the first turn.
This prolonged cold rest slows down yeast activity considerably but allows enzymes in the flour to break down starches into simpler sugars. Yeast then consumes these sugars slowly, producing a wider range of flavorful compounds (like organic acids and alcohols) than a quick, warm fermentation. The result is a croissant with a more complex, nuanced flavor profile and a slightly tangier note, similar to sourdough. This long, slow rest also further relaxes the gluten, making the dough incredibly easy to roll during lamination. Learning to rest croissant dough properly for extended periods unlocks deeper flavors.
Cold Fermentation: Enhancing Texture and Complexity
Cold fermentation is essentially the principle behind overnight resting, applied more broadly. It emphasizes keeping the dough at refrigerator temperatures for extended periods throughout the process, not just overnight. This can involve longer rests between turns (e.g., 1.5-2 hours instead of 30-60 minutes) or a very long bulk cold fermentation before lamination even begins.
Beyond flavor, cold fermentation contributes to a better texture. The slow enzymatic activity helps condition the gluten, making it stronger yet more extensible. This results in dough that is easier to handle and less prone to tearing during rolling. The slow gas production also creates more uniform, smaller air pockets initially, which then expand dramatically during proofing and baking, contributing to a very open and airy crumb structure. Implementing cold fermentation techniques is a sophisticated way to rest croissant dough properly for superior texture and depth of flavor.
Bulk Fermentation: Achieving Consistent Results for Large Batches
While not strictly a different type of rest, managing the initial bulk fermentation rest is particularly critical when working with larger quantities of dough. Allowing the entire batch to undergo its initial rest and cold fermentation as one large mass provides greater consistency in temperature and yeast activity throughout the dough. This is often preferred by professional bakers.
After the bulk cold fermentation, the dough is then divided and laminated. Working with a single large mass for the initial rest ensures that all portions of the dough have undergone the same initial relaxation and flavor development before being portioned and shaped. This contrasts with potentially dividing the dough earlier, where smaller pieces might warm up or cool down at different rates. For consistent results when making multiple croissants, mastering the bulk fermentation rest before division and lamination is a key strategy for how to rest croissant dough properly on a larger scale.
Resting Croissant Dough Properly: Achieving BakeWithEase Perfection
The journey to baking perfect croissants at home is one that requires patience, precision, and a deep appreciation for the resting process. It's clear that simply mixing ingredients and shaping dough isn't enough; the magic happens during those quiet periods of rest, allowing the dough and butter to transform.
Learning to rest croissant dough properly is the most significant factor in achieving the coveted light, flaky, and buttery layers that define a truly exceptional croissant. It's a skill that takes practice and observation, but the rewards are immense.
The Key to Light, Flaky, and Delicious Homemade Croissants
Every resting period in the croissant-making process serves a vital function, contributing to the final texture and flavor. The initial rest relaxes the gluten and begins fermentation. The cold rests between turns firm up the butter and allow the gluten to recover, ensuring sharp, distinct layers. The final proofing rest gives the croissants their volume and airy interior. Each step is non-negotiable for achieving that perfect balance of crisp exterior and tender, open crumb.
Without sufficient rest, you risk tough dough, butter leakage, poor layer separation, and ultimately, dense, disappointing pastries. By understanding the science behind dough relaxation and fermentation, controlling your resting environment, and patiently allowing the dough the time it needs, you unlock the potential for truly spectacular results. To rest croissant dough properly is to embrace the core principle of this challenging yet rewarding bake.
Mastering the Art of Patience: Your Path to Croissant Baking Success
Croissant baking is often seen as a test of skill, but it is perhaps more accurately described as a test of patience. The process cannot be rushed. From the long cold fermentation to the crucial chilling periods between turns and the final, delicate proofing, waiting is an integral part of the recipe.
Embracing the resting times, observing your dough, and allowing it to dictate the pace (within reasonable limits) is the path to success. Don't be afraid to add an extra 15-30 minutes of chilling if your dough feels too warm or resistant. Don't rush the proofing; wait until the croissants look and feel ready, even if it takes longer than the recipe states. By mastering the art of patience and learning to rest croissant dough properly at every stage, you will consistently produce beautiful, flaky, and utterly delicious homemade croissants that rival your favorite bakery.
Frequently Asked Questions
How long should I rest croissant dough in the refrigerator between folds?
The ideal resting time is generally 2-3 hours in the refrigerator. This allows the gluten to relax and the butter to firm up, preventing it from melting during lamination.
What happens if I don't rest the croissant dough enough?
Insufficient resting can lead to several problems, including tough dough, butter leakage, and a final product that is not flaky. The gluten needs time to relax.
Can I rest the croissant dough for too long in the refrigerator?
Yes, you can over-rest the dough. If left for too long, the dough might become too relaxed and difficult to handle. A good rule of thumb is no longer than 24 hours for each rest period.
Why is resting the dough important specifically for croissants?
Resting is crucial for croissant dough because it allows the gluten to relax and the butter to solidify, which are essential for creating the distinctive layers that give croissants their flaky texture.
What's the best temperature for resting croissant dough?
The ideal temperature for resting croissant dough is in the refrigerator, around 35-40°F (2-4°C). This ensures that the butter remains firm and doesn't melt, which is vital for achieving proper lamination.
Final Reflection: The Unsung Power of Patience in Baking (and Life)
The art of baking, specifically the meticulous process of resting croissant dough, is far more than just a recipe; it's a potent metaphor for the importance of patience and deliberate action in achieving excellence. Properly resting your dough isn't merely a step in a process; it's the cornerstone upon which a flaky, golden masterpiece is built. Without it, the final product falls short, a testament to the power of allowing time to work its magic.
The influence of this seemingly simple act extends beyond the kitchen. We live in a culture that often prioritizes speed and immediate gratification, overlooking the transformative power of rest and reflection. Slow down and everything will become clear.
This quote, often attributed to various sources, perfectly encapsulates the essence of what resting croissant dough teaches us. It's a reminder that true growth and achievement require a deliberate slowing down, a conscious choice to allow for the necessary time for development and maturation, both in our baking and in our lives.
Consider this your invitation to embrace the power of patience. Don't rush the process, whether it's perfecting a croissant recipe or navigating the complexities of life. Allow yourself the time to rest, to reflect, to let the ingredients – be they flour and butter or experiences and emotions – fully integrate and develop. The result, I promise you, will be far more rewarding than any hastily achieved outcome. Take your time, savor the process, and discover the magic that unfolds when you allow things to rise.
Unlock Your Baking Potential: Master the Art of Dough Resting
Thanks for taking the time to learn about the crucial role of rest in creating flaky, delicious croissants! You've gained valuable insights into a technique that elevates your baking. Now, it's time to put your new knowledge into practice.
- Embrace the Pause: Try resting your croissant dough for the recommended time – you'll be amazed by the difference it makes in texture and flavor. Don't rush the process!
- Share Your Success: Post a picture of your perfectly rested (and baked!) croissants on social media and tag us – we’d love to see your creations!
- Explore Deeper: Dive into our other baking tutorials to discover more time-tested techniques for creating bakery-quality goods at home.
Ready to transform your baking game? What surprising results are you hoping to achieve by incorporating longer dough resting times into your next baking project?