
Exploring Different Lamination Fold Techniques Explained


Welcome to BakeWithEase, your haven for all things baking! Ever wondered how professional bakers achieve those perfectly flaky layers in their croissants and pastries? Dive in and discover the secrets behind successful lamination fold techniques explained in our latest article. Unlock the art of layering dough and butter for an irresistible texture, and elevate your baking skills to a whole new level. Intrigued? Let's get started!
- Exploring Different Lamination Fold Techniques Explained for Croissant Baking
- Understanding Lamination in Croissant Dough: A Beginner's Guide
- Essential Lamination Fold Techniques Explained: Step-by-Step Guides
- Comparing Lamination Fold Techniques: Which One is Right for You?
- Troubleshooting Common Lamination Problems
- Advanced Lamination Techniques and Tips for Expert Croissant Bakers
- Lamination Fold Techniques Explained: Achieving Croissant Perfection at Home
-
Frequently Asked Questions
- What is lamination in baking, and why is it important?
- What are some common lamination fold techniques explained on BakeWithEase?
- How do I prevent the butter from melting during lamination?
- What are the key differences between a single fold and a double fold?
- How does BakeWithEase simplify the lamination process for beginners?
- Final Reflection: The Enduring Power of the Fold
- Unleash Your Inner Pastry Chef: Master Lamination!
Exploring Different Lamination Fold Techniques Explained for Croissant Baking
Understanding Lamination in Croissant Dough: A Beginner's Guide
What is Lamination and Why is it Crucial for Croissants?
Lamination is the cornerstone process that gives croissants their signature flaky, airy texture. It involves encasing a block of cold butter within a sheet of dough and then repeatedly rolling and folding the dough. Each fold multiplies the number of butter and dough layers. When baked, the water in the butter turns to steam, forcing the thin layers of dough apart and creating hundreds of distinct, crisp layers. Without proper lamination, you would simply have butter mixed into dough, resulting in a cake-like or bready texture rather than the delicate honeycomb structure characteristic of a perfect croissant.
The goal of lamination is to achieve a high number of very thin, alternating layers of dough and butter. A typical croissant dough might undergo 3-4 folds, resulting in potentially hundreds or even thousands of layers depending on the specific lamination fold techniques explained in a recipe. For instance, three single folds yield 3 x 3 x 3 = 27 layers, while two single folds followed by a double fold result in 3 x 3 x 4 = 36 layers. This geometric increase in layers is what transforms simple dough and butter into a marvel of pastry engineering.
The Science Behind Layers: Gluten Development and Butter Incorporation
The success of lamination hinges on the interplay between gluten development in the dough and the state of the butter. The dough needs sufficient gluten structure to be elastic and strong enough to be rolled out thinly without tearing, yet pliable enough to fold neatly. Over-developed gluten can make the dough tough and resistant to rolling, leading to uneven layers or butter breakage.
Conversely, under-developed gluten can result in a dough that tears easily, preventing the formation of distinct layers. Achieving the right level of gluten means kneading just enough to pass the windowpane test, where a small piece of dough can be stretched thin enough to see light through it without tearing.
The butter, often referred to as the "beurrage," must be cold and firm but still pliable – think the consistency of cold playdough. It needs to be able to roll out along with the dough without melting into it or cracking into pieces. The fat in the butter serves as a barrier, preventing the gluten layers from bonding during rolling and resting.
As the dough rests and chills between folds, the gluten relaxes, making it easier to roll, and the butter solidifies, maintaining its structure within the layers. Using a high-quality butter with a higher fat content, typically 82-84% like European-style butter, is often preferred over standard American butter (around 80% fat) because its lower water content results in flakier layers and less risk of leakage during handling.
Achieving the Perfect Dough Consistency for Optimal Lamination
The initial dough, often called the "detrempe," is crucial for successful lamination fold techniques explained. It should be relatively low in fat (compared to the butter block) and have moderate hydration, typically around 50-60% of the flour weight. The dough should be mixed and kneaded until it is smooth, elastic, and passes the windowpane test, indicating good gluten development. However, it's important not to overwork the dough, as this can make it too tough and difficult to roll thinly during the lamination process. A slightly tacky but not sticky consistency is ideal.
After mixing, the detrempe usually undergoes a bulk fermentation period, often a short time at room temperature followed by a long, cold rest in the refrigerator, sometimes for 8-12 hours or even longer. This cold rest is vital. It slows down yeast activity, allowing flavors to develop, and more importantly, it firms up the dough and relaxes the gluten. A well-rested, chilled dough is much easier to roll evenly and withstands the stress of multiple folds without tearing or shrinking excessively. The temperature of the dough should be similar to the butter block, ideally around 4°C to 8°C ( 40°F to 46°F) before lamination begins.
Essential Lamination Fold Techniques Explained: Step-by-Step Guides

The Single Fold (Simple Fold) Technique: A Gentle Introduction
The single fold is the most basic of the lamination fold techniques explained and is often the first fold performed, especially in recipes requiring many layers. It's a simple process that multiplies the number of layers by three with each execution. It's less stressful on the dough and butter than other methods, making it a good starting point or suitable for doughs that are slightly less elastic.
To perform a single fold, you first roll your dough with the encased butter block into a large rectangle. The dimensions aren't fixed but are often roughly three times longer than they are wide. Ensure the thickness is even across the entire rectangle, typically around 6-8 mm ( 1/4 - 1/3 inch). Visually divide the rectangle into three equal sections along its length. Fold one end of the dough rectangle inwards, covering the middle section. Then, fold the other end over the first folded section, like closing a letter. This creates three layers of dough separated by two layers of butter.
How to Perform a Single Fold: A Detailed Walkthrough
Let's break down the single fold step-by-step for clarity on this fundamental lamination fold technique explained:
- Prepare: Ensure your dough and butter block are cold and pliable. Lightly flour your work surface and rolling pin.
- Roll: Roll the dough rectangle evenly until it is approximately three times longer than it is wide and about
6-8 mmthick. Maintain square corners if possible. - Dust: Brush off any excess flour from the surface of the dough.
- Fold 1: Take one short end of the dough rectangle and fold it inward so that it covers the middle third of the rectangle. Align the edges neatly.
- Fold 2: Take the other short end and fold it over the first folded section. This should create a neat packet with three layers.
- Seal & Mark: Gently press the edges to seal slightly. Rotate the dough 90 degrees so the open seam is facing you (or away from you). This orientation is important for the next roll. Some bakers gently indent the dough with a finger or mark with tape to indicate it has had one fold.
- Rest: Wrap the dough tightly in plastic wrap and refrigerate for the recommended time, usually
30-60 minutes, to allow the gluten to relax and the butter to firm up.
Tips for Achieving Even Butter Distribution with the Single Fold
Even butter distribution is paramount for uniform flakiness when using this lamination fold technique explained. The primary challenge is preventing the butter from breaking or melting during rolling and folding. Ensure both the dough and butter are at the correct temperature – cold but pliable. If the butter is too hard, it will crack; if too soft, it will squeeze out or melt into the dough. Rolling should be firm but not aggressive. Use even pressure across the rolling pin, working from the center outwards, and lifting the dough occasionally to prevent sticking.
Another key tip is to keep your work surface and rolling pin lightly floured, but brush off any excess flour before folding. Too much flour can prevent the layers from sealing properly, leading to separation issues later. Also, take your time during the folding process.
Align the edges carefully before completing each fold to ensure the resulting layers are as uniform as possible. If the dough starts to resist rolling or the butter feels too soft, stop, wrap the dough, and return it to the refrigerator for a quick chill before continuing. Patience is your ally in mastering these lamination fold techniques explained.
The Double Fold (Book Fold) Technique: Creating More Layers
The double fold, also known as the book fold, is a more efficient way to create layers, multiplying them by four in a single step. It results in a higher layer count faster than the single fold, which can be beneficial in recipes aiming for maximum flakiness with fewer total folding steps. This technique requires slightly more careful handling as it involves more manipulation of the dough.
To perform a double fold, you roll the dough into a rectangle, often wider than for a single fold, perhaps roughly four times longer than wide. Visually divide the rectangle into four sections. Bring both short ends of the rectangle inwards so they meet precisely in the center. Then, fold the dough in half along the center line where the two ends met, like closing a book. This creates four layers of dough separated by three layers of butter.
Mastering the Double Fold: Step-by-Step Instructions
Here is a detailed breakdown of the double fold, a powerful lamination fold technique explained:
- Prepare: Dough and butter should be cold and pliable. Lightly flour your surface and rolling pin.
- Roll: Roll the dough rectangle evenly until it is approximately four times longer than it is wide and about
6-8 mmthick. Pay close attention to keeping the width consistent. - Dust: Brush off excess flour.
- Fold 1: Fold one short end inward so it meets the approximate center point of the rectangle.
- Fold 2: Fold the other short end inward so it also meets the approximate center point, right next to the first fold. The two folded edges should meet or have a very small gap.
- Fold 3: Fold the dough in half along the center line where the two ends met, like closing a book.
- Seal & Mark: Gently press the edges. Rotate the dough 90 degrees. Mark the dough (e.g., two finger indents) to indicate it's had a double fold.
- Rest: Wrap tightly and refrigerate for
45-90 minutesor until firm.
Avoiding Butter Breakage During the Double Fold
Butter breakage is a common issue with the double fold due to the greater amount of manipulation and tighter folds involved in this lamination fold technique explained. The key to avoiding it is ensuring the butter's temperature and consistency are just right. It should be cold enough to hold its shape but warm enough to bend without snapping. If the butter feels too hard, let the dough sit at room temperature for a few minutes (literally 2-5 minutes) before rolling to allow the butter to soften slightly.
Consistent rolling pressure is also vital. Avoid pressing down too hard in one spot, which can push the butter out. Roll gently and evenly, working from the center outwards. Ensure the dough is rolled to an even thickness before folding.
If one area is significantly thinner, the butter layers will be uneven, making them more prone to breaking during the fold. Finally, fold the dough carefully and deliberately, aligning the edges precisely to minimize stress on the butter layers. If you feel the butter resisting or cracking, stop rolling or folding and give the dough a short rest in the refrigerator.
The French Fold (Letter Fold) Technique: An Advanced Approach
The French fold, sometimes also referred to as a letter fold (though the single fold is more commonly called a letter fold), is another method that results in four layers per fold, similar to the double fold, but uses a slightly different motion. It's considered by some bakers to be slightly more challenging to execute perfectly but can result in very even layers when mastered.
In the French fold, you roll the dough into a large rectangle. You then fold one short end of the rectangle inwards, bringing it almost all the way to the other short end, leaving a gap of about 1-2 cm ( 1/2 - 1 inch). Then, you fold the dough in half at the point where the first fold ended, effectively folding the larger section over the smaller, already folded section. This creates four layers.
Executing the French Fold: A Comprehensive Guide
Here's how to perform the French fold, one of the more precise lamination fold techniques explained:
- Prepare: Dough and butter should be cold and pliable. Lightly flour your surface and rolling pin.
- Roll: Roll the dough rectangle evenly to about
6-8 mmthickness. This rectangle doesn't need to be as long as for a double fold; roughly 3.5 times longer than wide is sufficient. - Dust: Brush off excess flour.
- Fold 1: Take one short end and fold it inwards, bringing it almost to the opposite short end, leaving a gap of about
1-2 cm. The fold line will be offset from the center. - Fold 2: Fold the dough in half by bringing the unfolded short end over the folded section. The fold line should be where the first fold ended, covering the
1-2 cmgap. - Seal & Mark: Gently press the edges. Rotate the dough 90 degrees. Mark the dough (e.g., two finger indents) to indicate it's had a French fold.
- Rest: Wrap tightly and refrigerate for
45-90 minutesor until firm.
Optimizing Butter Temperature for the French Fold
Just like with other lamination fold techniques explained, butter temperature is critical for the French fold, perhaps even more so due to the specific folding motion. The butter needs to be pliable enough to fold sharply without cracking but firm enough not to ooze. The ideal temperature range for the butter block before lamination is typically between 10°C and 13°C ( 50°F and 55°F). This is slightly warmer than refrigerator temperature for many homes, meaning you might need to take the prepared butter block out a few minutes before the dough.
If the butter is too cold, it will crack as you make the sharp folds, leading to uneven layers or pockets of butter. If it's too warm, it will melt into the dough during rolling and folding, compromising the layer separation. Pay close attention to how the butter feels as you roll and fold. If you feel significant resistance or hear cracking, the butter is likely too cold. If the dough feels greasy or you see butter seeping out, it's too warm. Adjust by resting in the refrigerator or briefly at room temperature as needed.
Comparing Lamination Fold Techniques: Which One is Right for You?
Single Fold vs. Double Fold vs. French Fold: A Side-by-Side Comparison
Understanding the differences between these lamination fold techniques explained is key to choosing the right one for your recipe and skill level. The single fold multiplies layers by 3, while both the double and French folds multiply layers by 4. This means you can achieve a similar number of layers with fewer double or French folds compared to single folds. For example, four single folds result in 3^4 = 81 layers, while three double folds result in 4^3 = 64 layers.
| Technique | Layers Added Per Fold | Rolling Dimensions | Difficulty | Stress on Dough/Butter | Common Use |
|---|---|---|---|---|---|
| Single Fold | 3 | ~3x longer than wide | Beginner | Low | First folds, recipes needing many thin layers |
| Double Fold | 4 | ~4x longer than wide | Intermediate | Moderate | Faster layer building, fewer total folds |
| French Fold | 4 | ~3.5x longer than wide | Intermediate | Moderate | Alternative to double fold, precise layers |
Generally, single folds are considered easier on the dough and butter, making them a good choice for beginners or when working with a delicate dough. Double and French folds are more efficient for building layers quickly but require more careful handling to prevent butter breakage or unevenness. Many classic croissant recipes use a combination, perhaps starting with one or two single folds followed by one or two double or French folds to balance ease of handling with efficient layer building.
Choosing the Right Fold Based on Butter Content and Dough Strength
The choice of lamination fold techniques explained can also be influenced by the recipe's butter content and the strength of the dough. Recipes with a very high butter-to-dough ratio (e.g., close to 1:1 by weight) might benefit from starting with a single fold. This gentler method puts less stress on the butter layers, reducing the risk of leakage, especially during the initial folds when the butter block is thickest. As the dough and butter layers become thinner with subsequent folds, you might switch to a double or French fold.
Similarly, if your dough is slightly less elastic or prone to tearing, starting with a single fold is often advisable. The less aggressive nature of the single fold is more forgiving. Stronger doughs with good gluten development can typically handle the double or French fold earlier in the process. Ultimately, the best lamination fold techniques explained for your situation depend on the specific recipe's requirements, the quality of your ingredients (especially butter), and your comfort level with each method. Experimentation is encouraged!
When to Use Each Technique: Recipes and Applications
Different recipes call for different sequences of lamination fold techniques explained. A classic croissant recipe might specify three single folds with rests in between. This builds 27 layers and is a reliable method for creating a good crumb structure. Another recipe might call for two single folds followed by one double fold, resulting in 36 layers. This can yield a slightly flakier result with one less rolling step. Some recipes might even use two double folds, resulting in 16 layers, which can produce larger, more open honeycomb cells inside the croissant.
- Single Fold: Ideal for the initial folds in most recipes, or for recipes requiring a very high number of total layers built up gradually. Great for beginners.
- Double Fold: Excellent for efficiently building layers after the initial folds, particularly when aiming for a high layer count with fewer total folding steps. Suitable for intermediate bakers comfortable with rolling evenly.
- French Fold: A precise alternative to the double fold for building layers quickly. Can be preferred by bakers who find its folding motion easier to execute neatly.
Consider the end result you desire. More layers generally mean finer, more delicate flakiness. Fewer layers (like from just two double folds) can result in a bolder, more open crumb structure. The specific lamination fold techniques explained in a recipe are usually chosen to achieve a particular texture, so following the recipe's instructions is a good starting point.
Troubleshooting Common Lamination Problems

Preventing Butter Leakage During Folding
Butter leakage, often called "butter blow-out," is one of the most frustrating problems when practicing lamination fold techniques explained. It happens when the butter melts or breaks through the dough layers during rolling or folding. The primary cause is usually the butter or dough being too warm. If the butter is too soft, the pressure of the rolling pin will squeeze it out the sides or ends of the dough.
To prevent leakage:
- Ensure both dough and butter are adequately chilled before starting and between each fold. Aim for
4°Cto8°C. - If your kitchen is warm, work quickly or consider chilling your rolling pin.
- Use firm but gentle and even pressure when rolling. Avoid sudden, hard presses.
- If you see butter starting to ooze, stop immediately, wrap the dough, and return it to the refrigerator until the butter is firm again.
- Make sure your folds are sealed neatly at the edges to contain the butter.
Fixing Uneven Layers in Croissant Dough
Uneven layers can lead to croissants that are flaky in some parts and dense in others. This is often a result of inconsistent rolling or inaccurate folding when executing the lamination fold techniques explained. If the dough rectangle is not rolled to an even thickness before folding, the resulting layers will be thicker in some areas than others. Similarly, if the folds are not aligned precisely (e.g., in a single fold, one third is shorter than the others), the layers will not be uniform.
To achieve more even layers:
- Practice rolling the dough to a consistent thickness across the entire rectangle. Use a ruler if necessary.
- Pay close attention to the dimensions specified or implied by the folding technique (e.g., 3x longer for a single fold, 4x for a double).
- Brush off excess flour before folding, as clumps of flour can prevent layers from adhering properly during baking.
- Align the dough edges carefully during each fold. Don't rush this step.
- Ensure sufficient rest time between folds. This allows the gluten to relax, making the dough easier to roll evenly without snapping back.
Addressing Dough Toughness and Lack of Flakiness
If your baked croissants are tough or lack that beautiful, distinct flakiness, several factors related to the lamination fold techniques explained could be at play. Overworking the dough during the initial mixing can develop too much gluten, making it resistant to rolling and resulting in tough layers. Insufficient resting time between folds is another major culprit; it prevents the gluten from relaxing, leading to a dough that springs back excessively when rolled, making it hard to create thin layers and potentially tearing them.
Consider these points:
- Do not overmix the initial dough (detrempe). Mix only until the gluten is developed just enough to be elastic.
- Ensure adequate chilling and resting time between every fold. This is non-negotiable for relaxing gluten and firming butter. A minimum of
30 minutes, often60-90 minutes, is usually required. - Avoid using too much flour during rolling, as excess flour can dry out the dough and interfere with lamination.
- Make sure your oven is preheated to the correct temperature. Croissants require a hot oven, typically around
200-220°C(400-430°F), to create the necessary steam for puffing the layers. - Ensure your butter quality is good and that you're using enough of it as specified by the recipe. The fat is essential for separating the layers.
Advanced Lamination Techniques and Tips for Expert Croissant Bakers
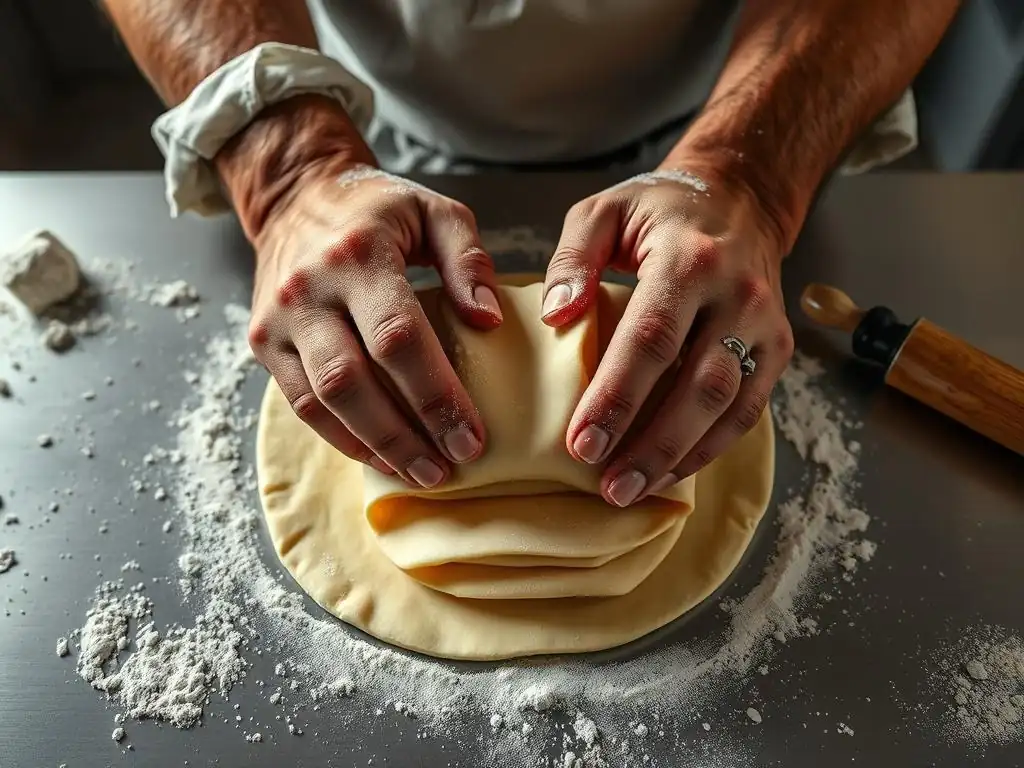
Incorporating Different Types of Butter for Unique Flavors
Beyond mastering the fundamental lamination fold techniques explained, advanced bakers can experiment with butter variations to influence flavor and texture. As mentioned, European-style butter with a higher fat content (82-84%) is often preferred for its plasticity and flavor. However, different brands and origins of butter can impart subtle differences. Some bakers prefer butter from specific regions known for their dairy quality.
- Consider using cultured butter. This butter is made from cream that has been fermented with bacterial cultures, giving it a tangier, more complex flavor profile compared to sweet cream butter. This can add a delightful depth to your croissants.
- Experiment with clarified butter or ghee within the lamination process (though this is less common for traditional croissants) or brushed between layers during shaping for extra richness, although this deviates from classic lamination.
- Ensure the butter's melting point is suitable. Butters with higher melting points are more forgiving in warmer kitchens but might not yield the same delicate texture as those with lower melting points. Most good quality European butters are formulated for lamination.
Exploring Alternative Folding Methods for Variations in Texture
While the single, double, and French folds are the standard lamination fold techniques explained, some bakers experiment with variations or different sequences to achieve specific results. For instance, some methods might involve more folds but with less aggressive rolling in between, aiming for finer layers.
- Consider the "reverse lamination" technique. In this method, the butter block is on the outside of the dough. The dough is rolled thin, then placed on top of a large, equally thin sheet of butter. The dough and butter are then folded together. This can sometimes make handling easier in hot environments as the butter is less exposed initially.
- Experiment with the number and sequence of folds. Instead of three single folds, try two single folds and one double fold, or even just two double folds. Each sequence will produce a different number of layers and a slightly different crumb structure. Document your results to see which lamination fold techniques explained work best for your desired outcome.
The Importance of Resting Time Between Folds for Optimal Results
Resting time is arguably as critical as the folding techniques themselves in achieving croissant perfection. Between each fold, the dough must be wrapped and refrigerated for a sufficient period, usually 30-90 minutes. This rest serves two primary purposes:
- Relaxing Gluten: The rolling and folding process develops and stretches the gluten network. Resting allows the gluten to relax, preventing the dough from springing back excessively when you try to roll it out for the next fold. A relaxed dough is easier to roll thinly and evenly, leading to better layers.
- Chilling the Butter: The heat from your hands, the rolling pin, and friction from rolling can soften the butter. Resting in the refrigerator firms the butter back up, ensuring it remains distinct from the dough layers and doesn't melt or leak during the subsequent fold.
Skipping or shortening the rest time will lead to a dough that is difficult to work with – it will resist rolling, tear easily, and the butter will be too soft, increasing the risk of leakage and uneven layers. Patience during the resting periods is a hallmark of mastering lamination fold techniques explained and is essential for developing that signature flaky croissant texture.
Lamination Fold Techniques Explained: Achieving Croissant Perfection at Home
Mastering the lamination fold techniques explained is a journey that requires practice, patience, and attention to detail. Whether you opt for the simplicity of the single fold, the efficiency of the double fold, or the precision of the French fold, each method plays a vital role in building the hundreds of layers that define a perfect croissant. Understanding the science behind why these techniques work – the interplay of gluten development, butter consistency, and temperature control – empowers you to troubleshoot common issues and refine your process.
By paying close attention to the temperature of your ingredients, ensuring even rolling, executing precise folds, and respecting the crucial resting times between each step, you can significantly improve your croissant-baking success. Don't be discouraged by initial challenges; even experienced bakers sometimes encounter issues like butter leakage or uneven layers. Each attempt is a learning opportunity. As you practice these lamination fold techniques explained, you'll develop a feel for the dough and butter, leading to increasingly beautiful and delicious results. Embrace the process, enjoy the journey, and soon you'll be pulling golden, flaky croissants from your own oven.
Frequently Asked Questions
What is lamination in baking, and why is it important?
Lamination in baking refers to the process of creating thin, alternating layers of dough and fat, typically butter. This is crucial for achieving a flaky and airy texture in pastries like croissants and puff pastry.
What are some common lamination fold techniques explained on BakeWithEase?
BakeWithEase explores various techniques, including the single fold, double fold, and letter fold (also known as the three-fold). Each technique impacts the final number of layers and the resulting texture.
How do I prevent the butter from melting during lamination?
Maintaining the right temperature of both the dough and butter is key. Keep them consistently cold and work quickly in a cool environment to prevent premature melting.
What are the key differences between a single fold and a double fold?
A single fold creates three layers of dough and butter, while a double fold creates four. Therefore, a double fold results in more layers with each lamination pass.
How does BakeWithEase simplify the lamination process for beginners?
BakeWithEase provides step-by-step guides with clear instructions and visual aids, making even complex techniques like lamination accessible to bakers of all skill levels. We also offer tips for troubleshooting common issues.
Final Reflection: The Enduring Power of the Fold
The art of lamination folding, once a niche skill, is experiencing a resurgence, driven by both practical applications and a renewed appreciation for handcrafted artistry. From the intricate folds of origami to the precise layering in bookbinding, the techniques explored in this article demonstrate a versatility that continues to surprise and inspire. This isn't just about creating aesthetically pleasing objects; it's about understanding the structural integrity and creative potential hidden within a simple fold.
The impact of lamination folding extends far beyond the immediate creation of a finished product. It represents a tangible connection to history, echoing centuries of craftsmanship and innovation. The simplest things are often the most profound,
a sentiment that perfectly encapsulates the beauty and power found in mastering these techniques. From ancient cultures utilizing folding for preservation and protection to modern designers employing it for innovative packaging and architectural designs, the influence of the fold is undeniable and continues to shape our world in subtle yet significant ways.
Consider the possibilities. You've now explored a range of lamination fold techniques, each with its own unique characteristics and applications. I encourage you to experiment, to push boundaries, and to discover the joy of transforming a flat surface into something beautiful and functional. Don't just read about these techniques; live them. Embrace the challenge, appreciate the process, and let the enduring power of the fold inspire your own creative journey.
Here's a Call to Action (CTA) tailored for the article "Exploring Different Lamination Fold Techniques Explained" on BakeWithEase.com:
Unleash Your Inner Pastry Chef: Master Lamination!
Thanks for exploring the world of lamination folds with us! You've now got the knowledge to create incredibly flaky and delicious pastries. Ready to put your newfound skills to the test?
- Bake your masterpiece: Choose your favorite laminated pastry recipe (croissants, pain au chocolat, etc.) and try out a new fold technique today! This is your chance to shine!
- Share your creations: Show off your baking prowess on social media using #BakeWithEaseLamination – let's see those golden layers!
- Join our baking community: Share your experiences (and any questions!) in the comments below. What challenges did you face, and what tricks did you discover?
Ready to transform your baking game? What delicious laminated treat will you bake first?