
The 'Windowpane Test' for Croissant Dough: Is Your Dough Ready?

Welcome to BakeWithEase, where baking becomes an achievable delight! Ever wondered if your croissant dough is truly ready for those delicate layers? This article dives deep into the ' Windowpane Test' for croissant dough, a crucial technique that separates flaky success from dense disappointment. Discover how to master this essential skill and unlock the secrets to perfectly laminated pastries. Ready to achieve croissant perfection? Let's get baking!
- Achieving Optimal Gluten Development in Croissant Dough
- Understanding Gluten's Role in Croissant Structure
- The Windowpane Test: Assessing Gluten Strength
- Performing the Windowpane Test: A Practical Guide
- Troubleshooting Gluten Development Issues
- Optimizing Gluten Development Techniques
- Beyond the Windowpane Test: Additional Indicators of Readiness
- Conclusion: Mastering Gluten for Exceptional Croissants
-
Frequently Asked Questions
- What is the Windowpane Test and why is it important for croissant dough?
- How do I perform the Windowpane Test on my croissant dough?
- What happens if my croissant dough fails the Windowpane Test?
- Can I over-knead croissant dough, and how does that affect the Windowpane Test?
- What are some signs besides the Windowpane Test that my croissant dough is ready for lamination?
- Final Reflection: The Enduring Power of the Windowpane Test
- Unlock Your Perfect Croissant: Master the Windowpane Test!
Achieving Optimal Gluten Development in Croissant Dough
Understanding Gluten's Role in Croissant Structure
Why Strong Gluten is Essential for Flaky Croissants
The magic of a perfect croissant lies in its delicate, airy layers. This structural integrity is heavily reliant on a robust gluten network developed within the dough. Gluten, formed when proteins like glutenin and gliadin in flour combine with water and are agitated through kneading, creates an elastic and extensible web. This web acts like a balloon, capable of trapping the gases produced during fermentation and the steam generated during baking, causing the dough to rise and expand dramatically. Without a strong gluten structure, the dough would collapse, resulting in dense, heavy croissants lacking those coveted flaky layers.
Think of the gluten network as the scaffolding for your croissant. During the lamination process, where layers of butter are encased and folded into the dough, this elastic network allows the dough to be rolled out incredibly thin without tearing. As the croissants bake, the butter melts, creating steam that pushes the layers apart.
A well-developed gluten structure provides the strength necessary to hold these thin layers separate, forming distinct pockets of air that define the classic croissant texture. A weak gluten network would tear during rolling or be unable to support the steam, leading to a less impressive rise and crumb structure.
Factors Influencing Gluten Development
Several key factors contribute to how well gluten develops in your croissant dough. The type of flour is paramount; high-protein flours (like bread flour, typically 12-14% protein) contain more gluten-forming proteins than lower-protein flours (like cake flour). Hydration level also plays a crucial role; water is necessary for gluten formation, and doughs with adequate hydration (croissant doughs are often around 60-70% hydration relative to flour weight) allow proteins to bond effectively. However, too much water can make the dough overly sticky and difficult to handle, while too little hinders gluten development.
Beyond ingredients, the mechanical action of kneading is essential. Kneading stretches and aligns the gluten strands, strengthening the network. The duration and intensity of kneading directly impact gluten development. Dough temperature is another critical element; gluten development happens more efficiently within a specific temperature range, typically between 24-26°C (75-79°F). Finally, rest periods, such as an autolyse or bulk fermentation, allow the gluten network to relax and continue developing passively, making the dough more extensible and easier to work with later.
The Windowpane Test: Assessing Gluten Strength
Defining the Windowpane Test: Evaluating Dough Elasticity
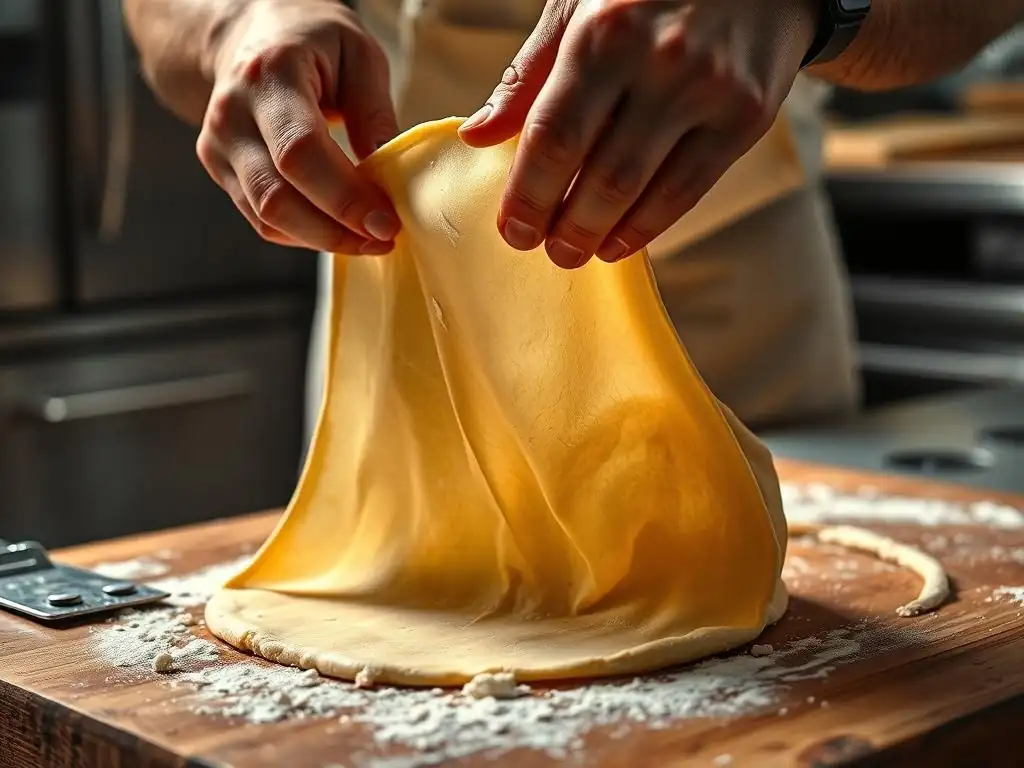
The "Windowpane Test" is a classic baking technique used to assess the level of gluten development in a dough. It's a tactile and visual evaluation that helps bakers determine if the dough has been kneaded sufficiently to create a strong, elastic gluten network. The test involves taking a small piece of dough and gently stretching it between your fingers. The goal is to stretch the dough as thinly as possible without it tearing.
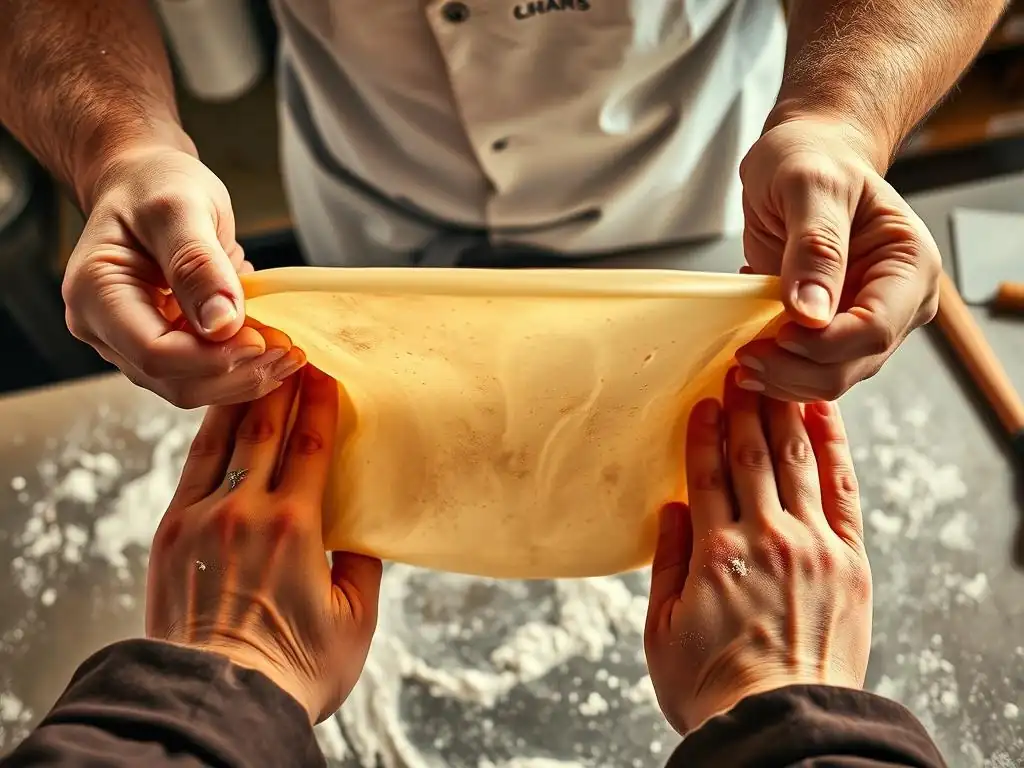
What you're looking for is the dough's ability to stretch into a translucent membrane, so thin that you can see light or even your fingers through it, much like looking through a windowpane. If the dough tears quickly when you try to stretch it thin, it indicates that the gluten is underdeveloped and requires more kneading. If it stretches easily into a thin, transparent sheet, the gluten is well-developed and the dough is ready for the next stage of processing. This test is particularly valuable for doughs like croissant dough, where gluten strength is critical for structure and texture.
Interpreting Results: Determining Dough Readiness
Interpreting the results of the windowpane test requires practice, but the principle is simple: the thinner the dough can be stretched without tearing, the stronger and more developed the gluten network is.
- If the dough tears almost immediately when you start stretching, or before it becomes even slightly translucent, the gluten is significantly underdeveloped. The dough needs more kneading time.
- If the dough stretches a bit but tears before becoming thin enough to see through, the gluten is partially developed but not yet strong enough for a delicate structure like a croissant. Continue kneading and re-test periodically.
- If the dough stretches into a thin, translucent sheet that you can see light through, and it holds its structure without tearing easily, the gluten is well-developed. The dough has passed the windowpane test and is ready.
- If the dough feels very tight, resists stretching, and snaps back aggressively, it might be overdeveloped or simply needs a short rest period to relax the gluten before testing again. Overdeveloped gluten can result in a tough final product.
By carefully observing how the dough behaves during the stretch, you gain valuable insight into its internal structure and readiness for subsequent steps like bulk fermentation and lamination.
Performing the Windowpane Test: A Practical Guide
Preparing the Dough: Ensuring Accurate Assessment
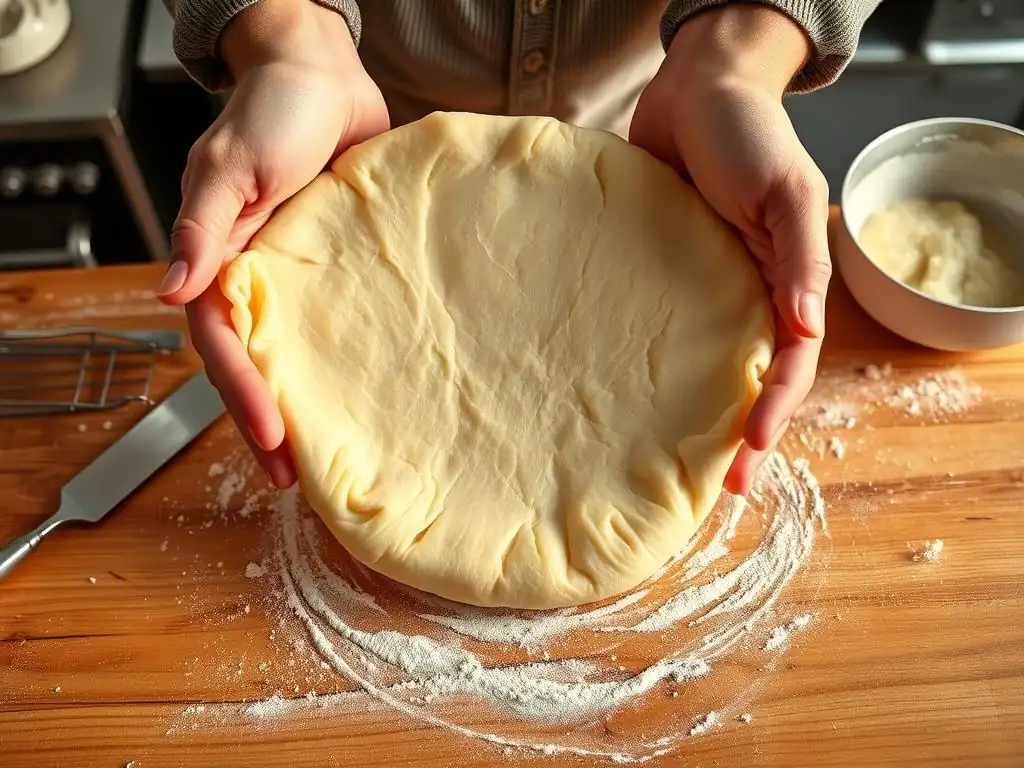
To perform the windowpane test on your croissant dough, start by taking a small, walnut-sized piece of dough. It's important to take this piece from the main mass after you believe it has been sufficiently kneaded, whether by hand or machine. Avoid taking dough from the very edge or bottom of the bowl, as these areas might not have been worked as thoroughly. Gently shape the small piece into a smooth ball.
Ensure your hands are clean and dry, or lightly floured if the dough is particularly sticky, but avoid excessive flour which can interfere with the test. The goal is to handle the dough minimally before the actual stretching, as any significant manipulation at this stage could artificially strengthen the piece you're testing and give a false positive result. You want to assess the gluten development achieved during the bulk kneading process, not just the strength of this small sample after recent handling.
Stretching Technique: Gentle and Consistent Pressure
Once you have your small ball of dough, begin the stretching process. Hold the dough piece between the thumbs and forefingers of both hands. Start by gently pressing the center of the dough ball, flattening it slightly. Then, using your thumbs and forefingers, begin stretching the dough outwards from the center, rotating the dough as you go.
The key is to use gentle, consistent pressure. Avoid pulling or tearing the dough aggressively. Imagine you are carefully spreading a delicate fabric. Continue stretching and rotating until the dough becomes very thin. The aim is to stretch it evenly across the entire piece. If one area feels thicker, focus your gentle stretching there to even it out. This technique allows you to observe the dough's elasticity and strength as the gluten network is extended.
Evaluating Transparency: Identifying Ideal Dough Strength
As you stretch the dough, observe its thickness and transparency. A dough with well-developed gluten will stretch thinner and thinner without breaking. You are looking for the point where the dough becomes translucent enough that you can see light passing through it, or even the outline of your fingers on the other side. This is the "windowpane."
- If you can stretch the dough to this point without it tearing, congratulations! The gluten development is likely optimal for croissant dough.
- If the dough tears before it reaches this level of transparency, it needs more kneading.
- If it stretches thin but tears almost immediately after becoming translucent, it might be close but could benefit from a little more work or a short rest.
This visual evaluation is the core of the windowpane test croissant dough assessment. It provides a clear, physical indicator of the dough's internal structure and its readiness to support the intricate layering required for croissants.
Pass or Fail: Understanding the Implications
Successfully passing the windowpane test means your croissant dough has achieved a sufficient level of gluten development. This indicates the gluten network is elastic enough to be stretched thin during lamination without tearing, and strong enough to trap gases and support the structure during proofing and baking, leading to those desirable flaky layers. A dough that passes is ready to move on to the next stage, typically bulk fermentation and chilling before lamination begins.
If your dough fails the test – meaning it tears before forming a thin, translucent membrane – it signifies that the gluten is underdeveloped. This dough will not perform optimally for croissants. It needs more kneading to strengthen the gluten network.
You should return the dough to your mixer or continue hand kneading for a few more minutes, then re-test. Failing the test is not a setback, but rather a clear indicator that the dough needs more work to reach its full potential. It's crucial to get this right before proceeding, as insufficient gluten development at this stage cannot be fully corrected later in the process.
Troubleshooting Gluten Development Issues
Weak Gluten: Causes and Solutions
Weak gluten development is a common issue, often indicated by a dough that feels slack, tears easily during kneading or testing, and fails the windowpane test. Several factors can cause this. Using a low-protein flour is a primary culprit; flour with less than 12% protein simply doesn't have enough gluten-forming proteins. Insufficient kneading time is another major cause; the proteins haven't had enough mechanical action to properly link and form a strong network. Low hydration can also hinder development, as water is necessary for the proteins to bond.
To address weak gluten:
- Check your flour: Ensure you are using a high-protein bread flour (12-14% protein).
- Increase kneading time: If kneading by machine, increase the time, perhaps by 5-10 minutes. If kneading by hand, continue for another 10-15 minutes. You might need to increase the speed slightly if using a stand mixer.
- Adjust hydration (carefully): If the dough feels very dry, you can try adding a tiny amount of water (a teaspoon or two at a time) while kneading, but be cautious not to make the dough too wet.
- Consider temperature: Ensure your dough is within the optimal temperature range (24-26°C or 75-79°F). Cold dough develops gluten more slowly.
Overdeveloped Gluten: Identifying and Correcting
While underdeveloped gluten is more common, it is possible to overdevelop gluten, especially when using a stand mixer on high speed for too long. Overdeveloped dough feels very tight, dense, and resistant to stretching. It might snap back aggressively when you try to pull it, and even if it stretches thin, it might feel tough or break rather than stretching smoothly. This can result in a tough, chewy final product rather than light, flaky layers.
Correcting overdeveloped gluten is more challenging than fixing weak gluten, as the protein structure has been worked too intensely.
- Rest is key: The best remedy for overdeveloped gluten is rest. Give the dough an extended rest period (30 minutes to an hour at room temperature, or even longer in the refrigerator). This allows the gluten network to relax.
- Gentle handling: After resting, handle the dough very gently. Avoid aggressive kneading or stretching.
- Adjust subsequent steps: You may need to be extra careful during lamination, rolling more gently and allowing sufficient rest between folds to prevent the dough from tearing or resisting.
Prevention is better than cure. Pay close attention to your dough's texture while kneading. Stop kneading as soon as it passes the windowpane test and feels smooth and elastic, but not overly tight.
Inconsistent Gluten: Achieving Uniform Results
Sometimes, gluten development isn't uniform throughout the dough mass. This can happen with hand kneading if the dough isn't worked evenly, or in a stand mixer if parts of the dough stick to the bottom or sides and aren't fully incorporated into the kneading action. You might find that one section of dough passes the windowpane test while another tears easily.
To achieve more uniform gluten development:
- Scrape down the bowl: If using a stand mixer, periodically stop the mixer and scrape down the sides and bottom of the bowl to ensure all the dough is being worked by the hook.
- Adjust hand kneading technique: If kneading by hand, ensure you are folding and working the entire mass of dough consistently. Use techniques like the "stretch and fold" method to incorporate all parts.
- Gentle folding during rest: During bulk fermentation, performing one or two gentle "stretch and fold" sets can help even out the gluten structure throughout the dough.
Consistent technique during the initial kneading phase is the best way to prevent inconsistent gluten development, ensuring your entire batch of croissant dough is ready for the delicate process ahead.
Optimizing Gluten Development Techniques

Flour Selection: Choosing High-Protein Flour
The foundation of strong gluten development in croissant dough begins with selecting the right flour. A high-protein flour is essential because it contains a greater percentage of the proteins (glutenin and gliadin) that form the gluten network when hydrated and kneaded. Bread flour, typically containing 12% to 14% protein, is the standard choice for croissants. All-purpose flour (around 10-12% protein) can sometimes work, but it may require longer kneading or result in a less robust structure. Pastry or cake flour (lower protein) is unsuitable as it will not develop sufficient gluten strength for the necessary structure and flakiness.
Using a high-quality bread flour provides the necessary building blocks for a strong, elastic dough capable of withstanding the rigorous process of lamination and producing those signature airy layers. Some bakers even experiment with specific types of bread flour or blends to fine-tune the protein content for their desired result. Checking the protein percentage on the nutrition label is a good practice when selecting your flour for croissant baking.
Kneading Methods: Hand vs. Machine
Kneading is the mechanical process that aligns and strengthens the gluten network. Both hand kneading and machine kneading can achieve optimal gluten development, though they differ in technique and time required. Machine kneading, typically using a stand mixer with a dough hook, is generally faster and more efficient. It applies consistent force, rapidly developing gluten. A typical machine kneading time for croissant dough might be 10-15 minutes on medium speed, but this varies by mixer and recipe. It's crucial to monitor the dough and not rely solely on time, using the windowpane test as your guide.
Hand kneading requires more physical effort but allows for a more tactile connection with the dough, helping you feel its development. Techniques like the French fold or stretch and fold are effective. Hand kneading usually takes longer, perhaps 20-30 minutes or even more, to reach the same level of gluten development as machine kneading. Regardless of the method, the goal is the same: to transform a shaggy mass into a smooth, elastic dough that passes the windowpane test, indicating the gluten network is ready.
Autolyse: Enhancing Hydration and Gluten Formation
An autolyse is a simple technique that can significantly improve gluten development and dough handling. It involves mixing just the flour and water from your recipe and letting the mixture rest for a period, typically 20 minutes to an hour, before adding other ingredients like salt and yeast and beginning the main kneading. During this rest, the flour fully hydrates, and enzymes naturally present in the flour (proteases) begin to break down proteins, while other enzymes start gluten development.
The benefits of an autolyse are twofold: it allows for more complete hydration of the flour, which is essential for gluten formation, and it gives the gluten network a head start in forming without the interference of salt (which can tighten gluten) or yeast (which starts fermentation). Dough that has undergone an autolyse is often smoother, more extensible, and requires less kneading time to reach the desired gluten development, making the windowpane test easier to pass.
Dough Temperature: Maintaining Optimal Conditions
Dough temperature plays a vital role in the speed and efficiency of gluten development, as well as fermentation. The ideal temperature range for gluten development is roughly 24-26°C (75-79°F). Within this range, the proteins hydrate and link effectively. If the dough is too cold, gluten development is sluggish, requiring longer kneading time. If it's too warm, gluten can develop too quickly, potentially leading to overworking, and fermentation can become too rapid before the structure is fully formed.
Controlling dough temperature involves considering the temperature of your kitchen, your ingredients (especially water), and the heat generated by kneading, particularly with a stand mixer. Using cool water can help keep the final dough temperature within the desired range. Monitoring the dough temperature with an instant-read thermometer is a good practice to ensure optimal conditions for both gluten development and subsequent fermentation steps crucial for light and airy croissants.
Importance of Rest: Allowing Gluten Relaxation
Beyond the initial kneading, rest periods are crucial for the dough, and particularly for allowing the gluten network to relax and become more extensible. After initial kneading and passing the windowpane test, the dough undergoes bulk fermentation. This rest period allows the gluten strands to relax, making the dough less tight and easier to handle for the intricate process of lamination. A proper rest also allows the gluten network to continue developing passively and become more uniform throughout the dough mass.
Resting the dough between folds during lamination is equally important. Each time the dough is rolled out and folded, the gluten network is stretched and tightened. Resting the dough, often in the refrigerator, allows the gluten to relax again. This prevents the dough from shrinking back excessively (recoil) and makes subsequent rolling easier, reducing the risk of tearing the delicate layers. Without sufficient rest, the dough would be difficult to laminate thinly and evenly, compromising the final structure of the croissant.
Beyond the Windowpane Test: Additional Indicators of Readiness
Dough Texture: Assessing Smoothness and Elasticity
While the windowpane test is a powerful tool, it's not the only indicator of a dough's readiness. The overall texture of the dough provides valuable clues about its gluten development. Before even performing the windowpane test, a sufficiently kneaded dough should feel smooth and supple, no longer shaggy or sticky (assuming the hydration is correct). It should have a matte appearance, indicating the gluten network is well-formed just beneath the surface.
When you press the dough gently with a finger, it should exhibit elasticity – it should spring back slowly. If the indentation remains, the dough is likely underdeveloped. If it springs back immediately and aggressively, it might be overdeveloped or needs a brief rest. A dough that feels alive, smooth, and elastic is a strong indicator that the gluten has developed well, complementing the findings from your windowpane test croissant dough assessment.
Fermentation: Observing Volume and Activity
Observing the dough during bulk fermentation also provides insight into its gluten development and overall health. As yeast produces gases, the dough should visibly increase in volume. A well-developed gluten network is necessary to trap these gases effectively, allowing the dough to rise. If the dough doesn't rise much, or if it spreads out rather than expanding upwards, it could indicate weak gluten development, even if it seemed to pass the windowpane test.
Furthermore, the surface of the dough might show small bubbles, another sign of fermentation activity within a structure capable of holding gas. The dough should feel lighter and possibly more airy as fermentation progresses. The rate of fermentation is influenced by temperature, but the dough's ability to hold the gas is a direct result of its gluten strength.
Lamination: Evaluating Butter Incorporation
The lamination process itself serves as a final, practical test of your croissant dough's readiness and gluten development. A dough with well-developed gluten will be relatively easy to roll out thinly and evenly without tearing. It will stretch smoothly, allowing the butter layer to remain intact and spread evenly between the dough layers. There will be minimal shrinkage or resistance (recoil) between rolling passes, especially after proper rest periods.
If the dough tears frequently during rolling, resists stretching significantly, or if the butter starts breaking through too easily, it suggests that the gluten might be underdeveloped or inconsistent, or that the dough needs more rest. Successful lamination, where you can achieve thin, even layers and clean folds, is the ultimate confirmation that your initial gluten development and subsequent handling of the croissant dough were on point.
Conclusion: Mastering Gluten for Exceptional Croissants
The Windowpane Test: A Valuable Tool for Bakers
The windowpane test is more than just a technique; it's a fundamental skill for any baker serious about yeasted doughs, and particularly crucial for the intricate structure of croissants. It provides a direct, visual assessment of gluten development, offering a clear indication of whether your dough is ready to proceed or needs more work. Mastering this test helps eliminate guesswork, allowing you to adjust kneading time based on the dough's actual state rather than just following a recipe's time estimate, which can vary based on flour, hydration, and equipment.
Incorporating the windowpane test into your croissant-making process empowers you to achieve consistent, high-quality results. It ensures that the gluten network is sufficiently strong and elastic to support the delicate lamination process, trap fermentation gases effectively, and ultimately produce those signature light, airy, and flaky layers that define a truly exceptional croissant. It's a simple yet profound technique that bridges the gap between recipe instructions and the physical reality of your dough.
Continuous Improvement: Refining Your Croissant Baking Skills
Achieving the perfect windowpane test croissant dough is a significant step, but it's part of a larger journey in mastering croissant baking. Each batch offers an opportunity to learn and refine your skills. Pay attention to how your dough feels throughout the process – during kneading, resting, and lamination. How did it stretch during the windowpane test? How did it handle during rolling? Did it resist or tear?
Keep notes on the flour you use, the hydration level, the kneading time, and the dough temperature. Over time, you'll develop an intuitive feel for what properly developed croissant dough should look and feel like. Combining the scientific assessment of the windowpane test with your developing tactile sense will lead to greater consistency and confidence in your baking. Embrace the learning process, and you'll be well on your way to baking truly exceptional, flaky croissants that you can be proud of.
Frequently Asked Questions
What is the Windowpane Test and why is it important for croissant dough?
The Windowpane Test is a way to check if your gluten development is sufficient. It's important for croissant dough because it ensures the dough is strong and elastic enough to hold the butter layers during lamination and baking, preventing butter leakage.
How do I perform the Windowpane Test on my croissant dough?
Take a small piece of dough and gently stretch it between your fingers. If you can stretch it thin enough to see light through it without tearing, like a windowpane, then the gluten is developed enough.
What happens if my croissant dough fails the Windowpane Test?
If the dough tears easily and doesn't stretch thin, it means the gluten hasn't developed sufficiently. Continue kneading the dough for a few more minutes and then re-test.
Can I over-knead croissant dough, and how does that affect the Windowpane Test?
Yes, over-kneading is possible. Over-kneaded dough will become tough and inelastic. It may pass the Windowpane Test, but the dough will be difficult to work with and the final croissants may be tough.
What are some signs besides the Windowpane Test that my croissant dough is ready for lamination?
Besides the Windowpane Test, the dough should feel smooth and elastic. It should also have risen slightly during the initial proofing stage, indicating active yeast.
Final Reflection: The Enduring Power of the Windowpane Test
The windowpane test isn't just a baker's trick; it's a fundamental principle of gluten development, crucial for achieving the perfect croissant. Mastering this seemingly simple test unlocks the potential for flaky, buttery layers and a truly transcendent pastry experience, a testament to the power of understanding fundamental baking techniques. Its relevance today extends beyond the croissant, impacting the quality of countless bread and pastry recipes.
The windowpane test's influence on my own baking journey has been profound. It moved me from frustrating failures to consistent success, transforming my understanding of dough behavior. The proof of the pudding is in the eating,
they say, and the proof of a well-developed dough is undeniably in the delicate, translucent windowpane. This simple test embodies the patience and precision required to achieve culinary excellence, a lesson applicable far beyond the confines of the kitchen.
Now, I invite you to consider your own baking practices. Are you relying on intuition alone, or are you embracing the scientific precision of the windowpane test? Take the time to truly understand your dough, to feel its texture, to witness its transformation. The next time you bake, remember the windowpane test – it's not just a test; it's a gateway to unlocking your full baking potential and creating pastries that will truly delight.
Unlock Your Perfect Croissant: Master the Windowpane Test!
Thanks for diving into the world of flaky, buttery croissants with us! You've now got the knowledge to judge your dough's readiness – a game-changer for achieving that perfect texture. Ready to put your new skills to the test?
- Perform the windowpane test on your next batch: Don't just bake – really understand your dough's consistency!
- Share your results: Snap a picture of your successful (or slightly less-than-successful!) windowpane test and share it on social media using #BakeWithEaseWindowpane. Let's learn together!
- Experiment with different flours: Try the windowpane test with various types of flour to see how it affects the results. What unexpected discoveries will you make?
So, what unique flour will you try next to perfect your croissant game?