
From Beginner to Baker: Your First Intermediate Croissant Project


Welcome to BakeWithEase, where we transform baking aspirations into delicious realities! Ever dreamt of flaky, buttery croissants, but felt intimidated? Our Easy Beginner Croissant Recipe Guide is just the starting point. Get ready to elevate your skills beyond the basics – this guide offers a taste of what's possible, and we're about to embark on your first intermediate croissant project. Curious to see how you can conquer even more advanced techniques? Let's get baking!
- Mastering Croissants: An Intermediate Baker's Guide to Success
- Elevate Your Baking: Achieving Consistent Results with Refined Techniques
- Key Differences: Beginner vs. Intermediate Croissant Techniques
-
The Intermediate Croissant Recipe: A Detailed Guide for Home Bakers
- Step 1: Preparing the Détrempe (Dough) for Optimal Gluten Development
- Step 2: Crafting the Beurre (Butter Block) for Uniform Lamination
- Step 3: Lamination: Achieving Uniform Layers and Gluten Relaxation
- Step 4: Shaping and Proofing Your Intermediate Croissants for Maximum Rise
- Step 5: Baking Your Intermediate Croissants to Golden Perfection
- Troubleshooting Common Intermediate Croissant Baking Challenges
- Tips and Tricks for Baking Perfect Intermediate Croissants at Home
- Celebrating Your Intermediate Croissant Success
-
Frequently Asked Questions
- What makes this croissant recipe "intermediate" instead of "beginner"?
- What are the key ingredients I need to make these croissants?
- How long does the entire croissant-making process take?
- What is "lamination" and why is it important for croissants?
- What are some common mistakes beginners make when making croissants?
- Final Reflection: The Sweet Taste of Achievement and the Promise of More
- Unleash Your Inner Croissant Connoisseur!
Mastering Croissants: An Intermediate Baker's Guide to Success
Baking croissants at home is a rewarding journey, moving from simple recipes to more nuanced techniques. If you've successfully tackled basic doughs and are ready for a more challenging, yet incredibly satisfying project, this guide is for you. We'll walk through the steps to create beautiful, flaky croissants, building upon the fundamental knowledge you gained from following an easy beginner croissant recipe guide. This is where precision meets patience, resulting in those coveted layers and buttery aroma.
Elevate Your Baking: Achieving Consistent Results with Refined Techniques
Transitioning from beginner baking to intermediate means focusing on consistency and understanding the why behind each step. For croissants, this means paying close attention to dough temperature, butter handling, and proofing conditions. Achieving consistent results isn't just about following instructions; it's about developing a feel for the dough and anticipating its behavior. This level of detail is what separates a good croissant from a truly exceptional one, making your effort worthwhile.
Beyond the Basics: Mastering Lamination and Flavor Development at Home
Lamination is the heart of a great croissant, the process of folding butter into dough multiple times to create thin, alternating layers. While an easy beginner croissant recipe guide might introduce the concept, the intermediate stage demands precision in keeping the butter and dough at optimal temperatures, ensuring the butter remains a pliable sheet rather than melting or breaking. Typically, this involves chilling the dough for 30-60 minutes between folds to maintain firmness, especially crucial in warmer home kitchens that might reach 22°C (72°F) or higher.
Flavor development in croissants goes beyond just butter. The dough itself benefits from a longer, slower fermentation than many beginner recipes might call for. Allowing the dough to ferment slowly in the refrigerator for 8-12 hours, sometimes even up to 24 hours, allows yeasts to produce more complex flavors and organic acids. This cold fermentation not only enhances taste but also strengthens the gluten structure, which is vital for trapping steam during baking and achieving that airy, open crumb structure alongside the flaky layers from the lamination.
Key Differences: Beginner vs. Intermediate Croissant Techniques
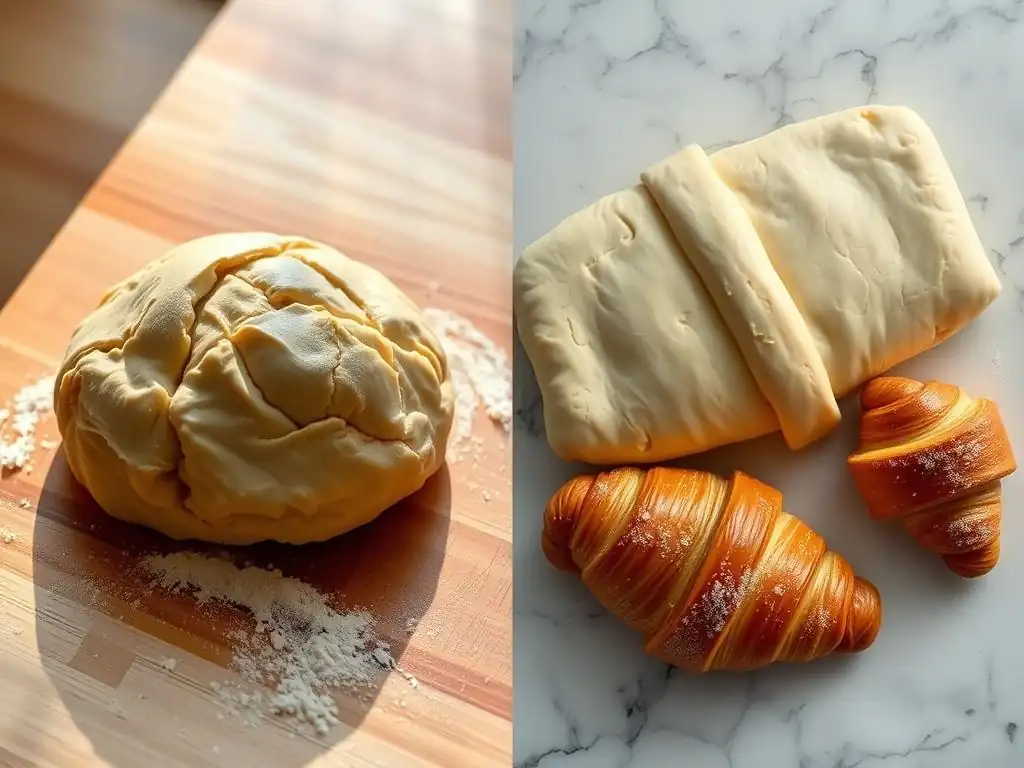
Moving from an easy beginner croissant recipe guide to an intermediate level means embracing more rigorous techniques. Beginner recipes often simplify steps like lamination or use less precise measurements. Intermediate techniques, however, emphasize exactness in temperature control, rolling thickness, and shaping, understanding that small variations significantly impact the final product's texture and volume.
Precise Shaping and Proofing for Enhanced Volume
Shaping at the intermediate level requires uniformity. Each croissant should be rolled to a consistent thickness (often around 3-4mm or about 1/8 inch) before cutting and rolling. This ensures even baking and consistent layers. A common error in beginner shaping is uneven rolling, leading to dense spots. Intermediate bakers focus on creating consistent triangles with a base width of roughly 8-10 cm (about 3-4 inches) and a length of 20-25 cm (about 8-10 inches) before rolling tightly from the base to the tip.
Proofing is arguably the most critical stage for achieving maximum volume and the classic honeycomb interior. Unlike a simple bread proof, croissant proofing requires specific humidity and temperature. An ideal proofing environment is warm and humid, typically around 24-26°C (75-79°F) with 75-85% humidity. This allows the yeast to activate and the butter to soften slightly without melting. Under-proofing results in dense, heavy croissants, while over-proofing can cause the butter to leak out during baking. Proper proofing takes about 2-3 hours at these conditions, resulting in croissants that are visibly puffy and jiggly.
Exploring Different Butter Types and Their Impact on Flavor
The type of butter used profoundly affects the flavor and flakiness of croissants. While standard supermarket butter (often around 80% butterfat) works for an easy beginner croissant recipe guide, intermediate bakers often opt for European-style butter, which typically contains a higher butterfat percentage, ranging from 82% to 84%. This higher fat content means less water, resulting in clearer layers during lamination and a richer, more pronounced buttery flavor in the baked croissant.
Consider the difference: a standard stick of US butter contains about 14-16% water, while European butter might contain only 12-14%. This seemingly small difference significantly impacts how the butter behaves during lamination and baking. The higher fat content of European butter like Kerrygold or Plugrá makes it more pliable at cooler temperatures, reducing the risk of it breaking through the dough layers during rolling. The less water means less steam is generated during baking, which, paradoxically, leads to a flakier result because the layers are less likely to fuse together.
The Intermediate Croissant Recipe: A Detailed Guide for Home Bakers
This section outlines the steps for creating intermediate-level croissants, building on the foundational knowledge from an easy beginner croissant recipe guide. Precision and patience are key at each stage.
Step 1: Preparing the Détrempe (Dough) for Optimal Gluten Development
The détrempe is the foundational dough for croissants. Its proper preparation is crucial for developing the gluten structure needed to support the many layers of butter.
Selecting Flour with the Ideal Protein Content for Croissant Structure
For croissants, a bread flour with a protein content between 11.5% and 13% is generally recommended. This range provides enough gluten-forming proteins to create a strong, elastic dough that can be rolled thin without tearing during lamination, while still being extensible enough to fold repeatedly.
Using flour with too low protein (like cake flour, ~8-10%) would result in a weak dough unable to hold its structure, while flour with excessively high protein (like certain high-gluten flours, >14%) could make the dough too tough and resistant to rolling. A typical all-purpose flour might work, but bread flour offers more reliable results for this intermediate project.
Mastering the Autolyse Technique for Improved Dough Hydration
The autolyse is a simple yet effective technique that involves mixing just the flour and water (and sometimes yeast) and letting it rest for 20-60 minutes before adding other ingredients like salt and butter. This resting period allows the flour to fully hydrate and enzyme activity to begin breaking down starches into sugars, making the dough more extensible and easier to work with. For a croissant détrempe, an autolyse of about 30 minutes is often sufficient. This step reduces mixing time needed later and promotes a smoother, more pliable dough, which is essential for successful lamination.
Step 2: Crafting the Beurre (Butter Block) for Uniform Lamination
The beurre, or butter block, is just as important as the dough. It needs to be the correct consistency and shape to create distinct layers within the détrempe.
Selecting European-Style Butter with High Fat Content
As discussed earlier, European-style butter with 82-84% butterfat is preferred. This butter has a higher melting point and remains pliable over a wider temperature range compared to standard butter. Brands like Plugrá, Kerrygold, or specific European imports are excellent choices. Using butter that is too soft will cause it to incorporate into the dough rather than forming layers, while butter that is too hard will break into pieces. The high fat content also contributes significantly to the rich flavor.
Shaping and Tempering the Butter Block for Optimal Plasticity
The butter block must be shaped into a uniform rectangle, typically measuring about 15x20 cm (6x8 inches) and about 6mm (1/4 inch) thick for a standard batch. It's often formed by pounding softened butter with a rolling pin between two sheets of parchment paper, then chilling it until it is firm but still pliable, like cold playdough. The ideal temperature is around 13-16°C (55-60°F). This plasticity allows the butter to roll out evenly with the dough without breaking or melting during the lamination process.
Step 3: Lamination: Achieving Uniform Layers and Gluten Relaxation
Lamination is the core technique for creating the flaky layers. It involves enclosing the butter block within the dough and repeatedly folding and rolling.
The Importance of Consistent Dough Temperature and Resting Times
Maintaining a consistent cold temperature for both the dough and butter is paramount during lamination. The ideal temperature range for the dough during rolling is typically 4-10°C (40-50°F). If the dough or butter gets too warm, the butter will melt into the dough, destroying the layers.
Between each fold (or "turn"), the dough must be chilled in the refrigerator for at least 30-60 minutes. This resting period is crucial for firming up the butter and allowing the gluten in the dough to relax, making it easier to roll out evenly for the next turn. Skipping or shortening rests leads to tough, shrinking dough and messy lamination.
Mastering the French Fold Lamination Technique for Enhanced Flakiness
The French fold (or single fold) and the book fold (or double fold) are common lamination techniques. For intermediate croissants, a combination or specific series of these folds is used to achieve the desired number of layers. A typical schedule might involve one book fold followed by two single folds, or three single folds in total. Each fold increases the number of butter and dough layers exponentially.
For instance, a single fold creates 3 layers of dough and 2 layers of butter. After three single folds, you'd have theoretically (3^3)-1 = 26 layers of butter and 27 layers of dough (or 2^2 * 3^1 - 1 = 11 layers of butter after a book fold and one single fold, depending on the exact sequence). The goal is uniform thickness and sharp edges on the folded dough block before chilling.
Step 4: Shaping and Proofing Your Intermediate Croissants for Maximum Rise
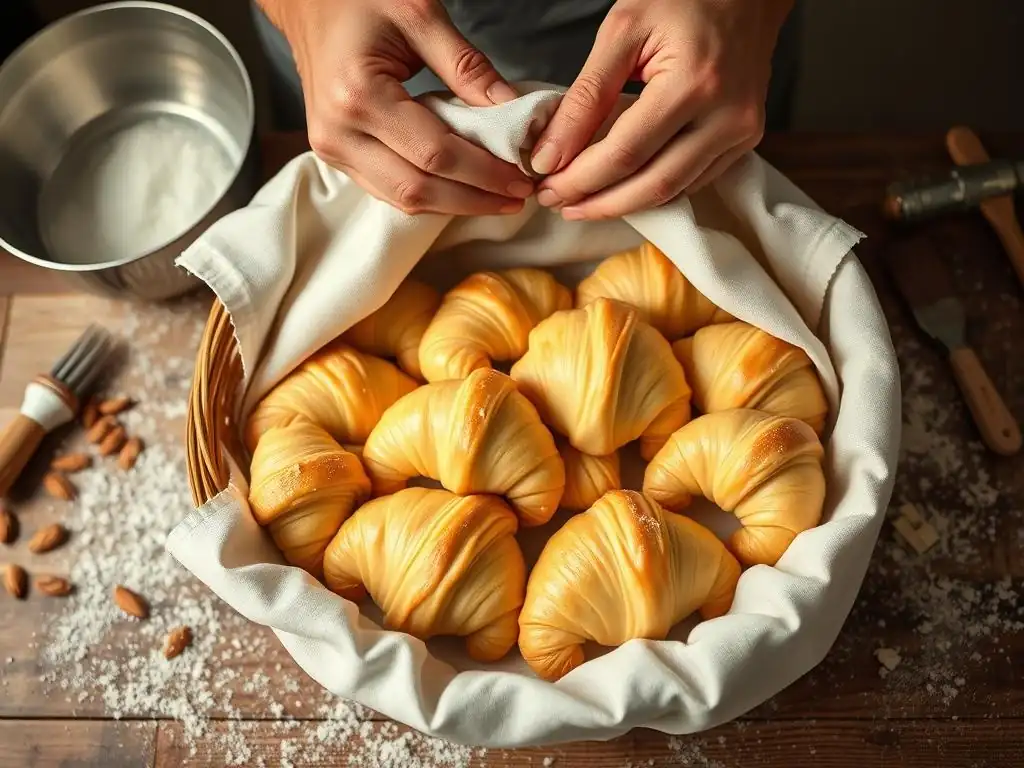
Once lamination is complete, the dough is ready to be shaped and proofed, the final stages before baking.
Achieving the Classic Croissant Shape: A Step-by-Step Visual Guide
After the final lamination turn and rest, the dough is rolled out to a thin sheet, typically about 3-4mm (1/8 inch) thick. Using a sharp knife or pizza cutter, the dough is trimmed into a rectangle and then cut into long, isosceles triangles with a base of about 8-10 cm (3-4 inches) and a height of 20-25 cm (8-10 inches). A small notch (about 1-2 cm or 1/2 inch) is often cut into the center of the base.
The triangle is then gently stretched from the base and rolled up tightly from the base towards the tip, finishing with the tip tucked underneath. Some bakers gently curve the ends inwards to form the classic crescent shape.
Creating a Controlled Proofing Environment for Optimal Volume and Texture
Proofing is where the magic happens – the yeast produces gas, expanding the dough, while the butter remains solid but pliable. The ideal proofing environment is warm and humid, around 24-26°C (75-79°F) with 75-85% humidity. This can be achieved in a proofing box, a slightly warm oven with a pan of hot water, or even a microwave with a cup of hot water (turned off).
Proper proofing takes 2-3 hours. The croissants are ready when they have increased significantly in volume (almost doubled), appear puffy, and jiggle slightly when the tray is gently nudged. They should look airy and delicate, not tight or dense.
Step 5: Baking Your Intermediate Croissants to Golden Perfection
Baking transforms the laminated dough into a flaky, airy pastry. Temperature and timing are crucial for achieving the ideal texture and color.
Optimal Oven Temperature and Baking Time for a Crispy Exterior and Soft Interior
Croissants bake at a relatively high temperature to create steam rapidly from the butter and dough's water content, which helps separate the layers and puff up the pastry. A common baking temperature is 190-200°C (375-390°F). Baking typically takes between 15 and 25 minutes, depending on the oven and croissant size. The initial high heat helps set the layers and create lift, while the remaining time ensures the interior is fully cooked and the exterior is golden brown and crisp. The internal temperature should reach around 93-96°C (200-205°F).
Achieving a Rich, Golden-Brown Crust: The Role of Egg Wash and Sugar Glaze
Applying an egg wash before baking is essential for a beautiful, shiny, golden-brown crust. A standard egg wash is typically one whole egg whisked with a tablespoon or two of milk or water. For an even deeper color and richer finish, some bakers use an egg yolk mixed with cream.
The wash is applied gently with a pastry brush to the surface of the proofed croissants, avoiding the cut edges to prevent sealing the layers. For extra shine and a touch of sweetness, a light sugar syrup (equal parts sugar and water, boiled briefly and cooled) can be brushed on the hot croissants immediately after they come out of the oven.
Troubleshooting Common Intermediate Croissant Baking Challenges
Even with a solid easy beginner croissant recipe guide foundation, intermediate challenges arise. Here's how to tackle some common issues.
Managing Dough Elasticity and Preventing Shrinkage
If your dough springs back excessively during rolling, it's likely too tense. This often happens if the gluten hasn't relaxed enough between folds. The solution is simple: more rest. Wrap the dough tightly and refrigerate it for another 30-60 minutes. You can even pop it in the freezer for 10-15 minutes for a quicker fix, but be careful not to freeze it solid. Ensuring the dough temperature stays cool (around 4-10°C or 40-50°F) during rolling also helps manage elasticity. Trying to force a cold, tense dough to roll will only lead to frustration and potentially torn layers.
Another cause of shrinkage is uneven rolling or inconsistent pressure. Apply even pressure across the rolling pin and roll away from your body, then towards it, rotating the dough frequently. Aim for consistent thickness across the entire sheet. If you notice one area is thicker, focus your gentle rolling pressure there during the next pass. Patience and gentle handling are key to preventing the dough from fighting back.
Preventing Butter Softening and Separation During Lamination
Butter melting or oozing out during lamination is a common problem, especially in warmer environments. This usually indicates the butter or dough is too warm, or you're rolling too aggressively. The butter should be pliable but still cool to the touch, around 13-16°C (55-60°F). The dough should be refrigerator cold, 4-10°C (40-50°F). Work quickly, especially if your kitchen is warm (above 22°C or 72°F).
If you notice butter starting to soften or poke through the dough, stop immediately, wrap the dough, and return it to the refrigerator for at least 30 minutes to firm up. Using a marble slab or a cold surface can help keep the dough and butter cool while rolling. Also, avoid overworking the dough; excessive rolling generates heat. Aim for smooth, even strokes rather than heavy pressure.
Ensuring Even Baking and Preventing Soggy Bottoms
Uneven baking can result in some croissants being perfectly golden while others are pale or burnt. This is often due to hot spots in your oven. To combat this, rotate the baking sheet halfway through the baking time (e.g., after 10-12 minutes). Using a reliable oven thermometer can help verify your oven's actual temperature, as many home ovens can be off by 10-20°C (20-40°F).
Soggy bottoms occur when moisture gets trapped underneath the croissant. This can happen if the proofing surface is too damp, or if the baking sheet is cold when the proofed croissants are placed on it. Baking on a preheated baking stone or steel can help conduct heat quickly to the bottom of the croissants, ensuring they cook through evenly.
Alternatively, placing the baking sheet on the middle rack of the oven, where heat circulation is often best, can help. Ensure the croissants are baked until they are a deep golden brown, indicating they are fully cooked and dried out inside.
Tips and Tricks for Baking Perfect Intermediate Croissants at Home
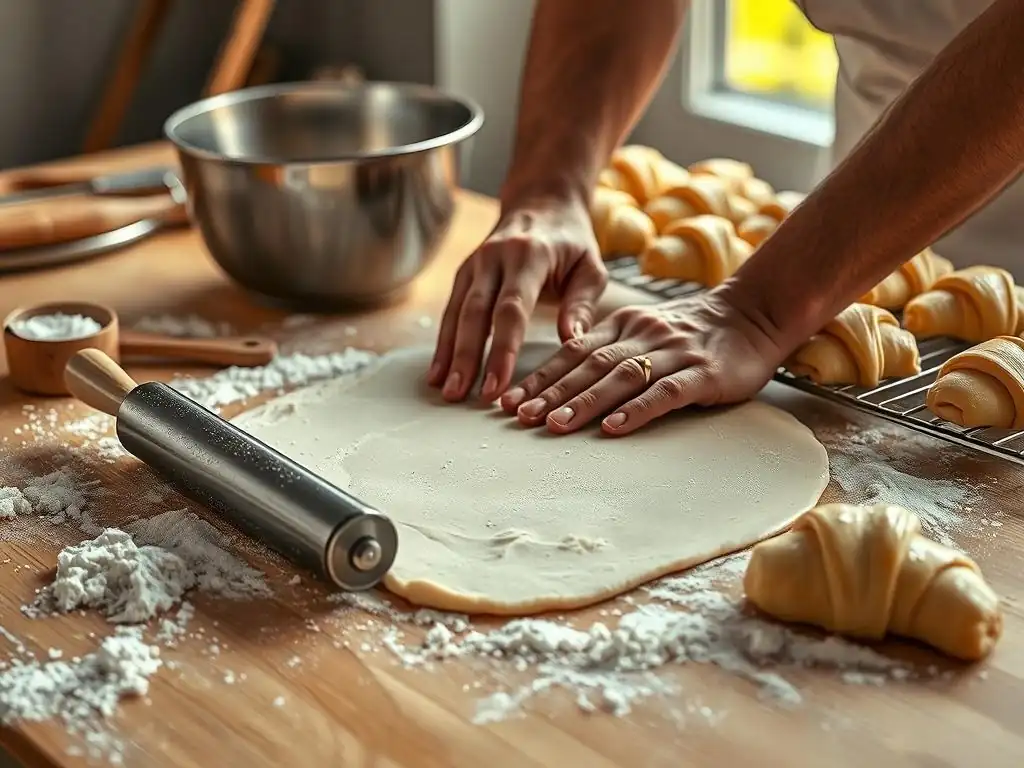
Elevate your intermediate croissant baking game with these helpful hints.
Utilizing a Marble Slab for Temperature Control During Lamination
A marble slab is an excellent tool for working with laminated dough. Marble naturally stays cooler than other surfaces, drawing heat away from the dough and butter. This is incredibly beneficial during the rolling and folding stages of lamination, helping to keep the butter firm and preventing it from melting into the dough, especially if your kitchen is warm.
Before you begin rolling, you can even place the marble slab in the refrigerator for 15-20 minutes to make it extra cold. When rolling the dough on this cool surface, the butter stays firmer, allowing you to achieve cleaner, more distinct layers. While not strictly necessary, using a cold surface like marble significantly improves the chances of successful lamination, making the intermediate process smoother.
Investing in a Humidity-Controlled Proofer for Consistent Results
Achieving the perfect proof is critical for croissants, and environmental conditions play a huge role. While makeshift proofing methods (like a warm oven with water) can work, they often lack the precise temperature and humidity control needed for truly consistent results. A dedicated humidity-controlled proofer, or even a small bread proofer box, allows you to set the exact temperature (around 24-26°C or 75-79°F) and humidity level (75-85%).
This controlled environment ensures that the yeast activates optimally, the dough expands properly, and the butter softens just enough without melting. Consistent proofing leads to consistent volume, texture, and the desirable honeycomb interior structure in every single croissant. For the intermediate baker aiming for reliable success, this investment can be invaluable.
Experimenting with Flavor Variations: Pain au Chocolat, Almond Croissants, Savory Fillings
Once you've mastered the basic intermediate croissant, the door opens to delicious variations. Pain au chocolat is a classic: simply place one or two batons of good quality dark chocolate at the base of the triangle before rolling. Almond croissants utilize stale croissants, split horizontally, dipped in syrup, filled with frangipane (almond cream), topped with more frangipane and sliced almonds, and re-baked.
You can also explore savory options. Before rolling, add fillings like ham and cheese, spinach and feta, or even a mushroom duxelles. Ensure fillings are not too wet, as excess moisture can make the dough soggy. These variations allow you to apply your intermediate croissant skills in creative ways, expanding your baking repertoire beyond the classic buttery shape and making your easy beginner croissant recipe guide knowledge a stepping stone to more complex delights.
Celebrating Your Intermediate Croissant Success
You've done it! You've navigated the challenges of intermediate croissant baking and produced flaky, buttery pastries at home. Take a moment to appreciate your achievement.
Presenting your freshly baked croissants beautifully enhances the experience. Arrange them on a simple platter or in a bread basket lined with a linen napkin. The warm, golden-brown color and the irresistible aroma are presentation enough! For an extra touch, dust them lightly with powdered sugar or serve them with a side of jam, butter, or even a rich hot chocolate.
Consider serving them warm, perhaps gently reheated for a few minutes in a low oven (around 160°C or 320°F). Sharing your homemade croissants with friends and family is a wonderful way to celebrate your baking progress and the delicious results of following this intermediate guide building on your easy beginner croissant recipe guide experience.
Further Baking Adventures: Exploring Advanced Laminated Doughs
Mastering intermediate croissants is a significant step and opens up a world of other laminated pastries. Consider tackling pain aux raisins, which uses a similar dough but involves spreading a layer of pastry cream and raisins before rolling and slicing. Puff pastry is another related dough, often simpler in composition (just flour, water, butter, and salt) but requiring precise lamination techniques for maximum lift.
Other advanced projects include kouign amann, a caramelized laminated pastry, or even brioche feuilletée, a laminated version of rich brioche dough. Each offers unique challenges and rewards, allowing you to continue refining your skills in handling delicate doughs and creating stunning, multi-layered baked goods. Your journey from an easy beginner croissant recipe guide to intermediate success is just the beginning!
Frequently Asked Questions
What makes this croissant recipe "intermediate" instead of "beginner"?
This recipe introduces more complex techniques like lamination and requires a better understanding of dough handling compared to simpler baking projects. It builds upon basic baking knowledge.
What are the key ingredients I need to make these croissants?
You'll need high-quality flour, cold unsalted butter, fresh yeast, sugar, salt, and water. The quality of the butter significantly impacts the flakiness of the croissants.
How long does the entire croissant-making process take?
Expect a total time commitment of around 24-36 hours, including chilling and proofing. This includes overnight refrigeration for optimal dough development and butter hardening.
What is "lamination" and why is it important for croissants?
Lamination is the process of folding butter into the dough to create distinct layers. These layers, when baked, produce the characteristic flaky and airy texture of croissants.
What are some common mistakes beginners make when making croissants?
Common mistakes include using warm butter, overworking the dough, and insufficient proofing. These can result in dense, flat, or misshapen croissants.
Final Reflection: The Sweet Taste of Achievement and the Promise of More
Mastering the croissant, even at an intermediate level, is not just about baking; it's about embracing a process, celebrating small victories, and discovering the incredible satisfaction of creating something beautiful and delicious from scratch. This journey, detailed in this guide, highlights the accessibility of seemingly complex baking projects, proving that with patience, practice, and the right instructions, even the most intimidating recipes can be conquered.
The impact of baking, particularly projects like croissants, extends far beyond the kitchen. It's a meditative practice, a creative outlet, and a way to connect with tradition and culinary heritage. The process itself—from the careful layering of butter to the delicate shaping and the anticipation of that golden-brown crust—is deeply rewarding. As Julia Child famously said, Find something you're passionate about and keep tremendously interested in it.
For me, that's the magic of baking, and croissants, in particular, represent the pinnacle of that passion. The satisfaction of sharing these creations with loved ones only amplifies the experience.
Now it's your turn. Don't be intimidated by the seemingly complex world of baking. Take the lessons learned here—the importance of precise measurements, the beauty of patience, and the joy of experimentation—and apply them to your own culinary adventures. What will you bake next? What new challenge will you embrace? The possibilities are as endless as your imagination, and the taste of success, just as sweet.
Unleash Your Inner Croissant Connoisseur!
Thanks for joining us on this delicious journey into the world of intermediate croissants! We hope you've gained the confidence to tackle this classic pastry. Now it's time to put your new skills to the test!
- Bake your own masterpiece! Use the techniques we've shared to create your first batch of stunning, layered croissants. Don't be afraid to experiment – even small adjustments can lead to surprising results!
- Share your baking journey! Snap a picture of your croissants and tag us on social media – we'd love to see your creations!
- Explore advanced techniques: Ready for a new challenge? Browse our website for more advanced baking tutorials, focusing on intricate fillings and unique shapes.
Ready to take your croissant game to the next level? What unique filling or shape will you try first?