
Under or OverProofed? Spotting Croissant Proofing Issues

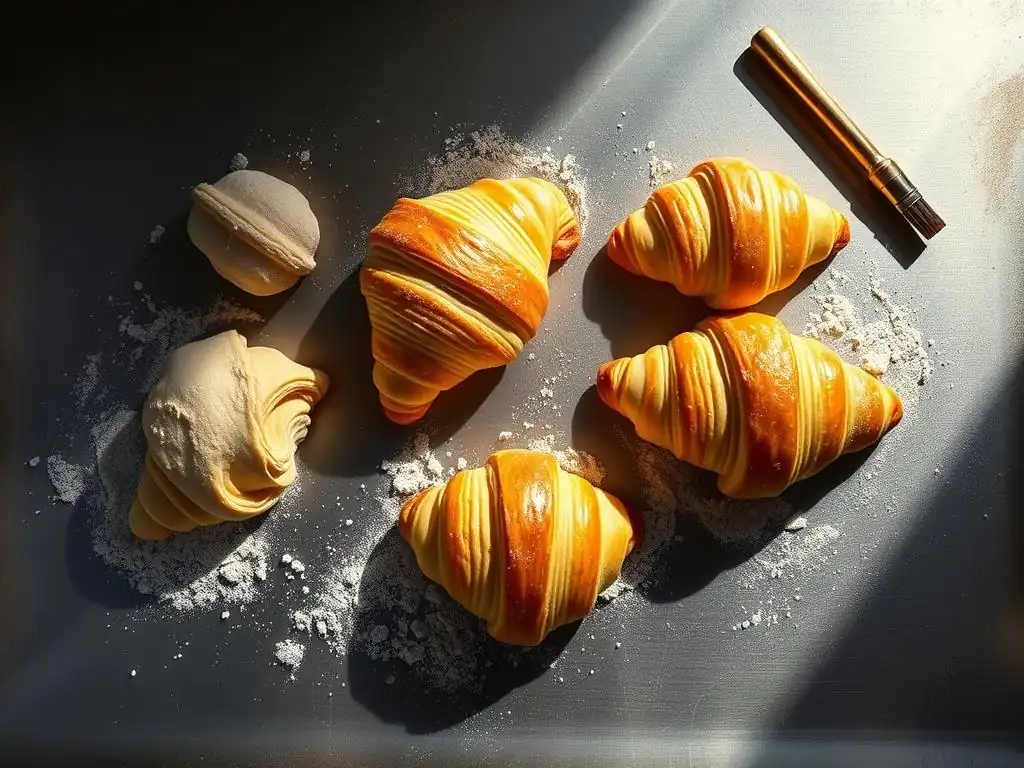
Welcome to BakeWithEase, your guide to baking bliss! Ever wondered why your croissants aren't quite achieving that perfect, flaky rise? You're not alone. Dive into our article, " Under or OverProofed? Spotting Croissant Proofing Issues," and unlock the secrets to mastering this delicate step. Discover the telltale signs of improper proofing and learn how to troubleshoot your technique for bakery-worthy results. Ready to perfect your croissant game? Let's get baking!
- Mastering Croissant Proofing: Achieving Light and Flaky Perfection
- Introduction to Croissant Proofing and Common Challenges
- Identifying Underproofed Croissants: Signs and Solutions
- Recognizing Overproofed Croissants: Signs and Solutions
- Croissant Proofing Troubleshooting: A Comprehensive Guide
- Mastering Croissant Proofing for Baking Success
- Conclusion: Achieving Consistent Croissant Proofing Results
-
Frequently Asked Questions
- What are the main signs of an underproofed croissant?
- What are the visual cues that indicate a croissant is overproofed?
- How does temperature impact the proofing time of croissants?
- What is the ideal environment for proofing croissants?
- Can I refrigerate croissants after shaping but before baking, and if so, how does this affect the proofing process?
- Final Reflection: The Delicate Dance of Croissant Proofing
- Unlock Your Perfect Croissant: Master the Proof!
Mastering Croissant Proofing: Achieving Light and Flaky Perfection
Introduction to Croissant Proofing and Common Challenges
Welcome to the wonderful world of croissant baking! Achieving that perfect, airy texture and crisp, flaky layers is the ultimate goal, and it all hinges significantly on one critical step: proofing. Proofing is the final rise of the dough before baking, where yeast activity produces carbon dioxide gas, causing the dough to expand and develop flavor. Understanding this stage is key to avoiding common croissant proofing issues explained here.
Proper proofing transforms a dense, laminated dough into light, airy pastries ready for the oven. It’s a delicate balance – too little proofing, and your croissants will be heavy and dense; too much, and they’ll collapse or lose their structure. Mastering this stage is a significant step towards consistently successful croissant baking at home, helping you navigate the common croissant proofing issues explained in this guide.
Why Proper Proofing is Essential for Exceptional Croissants
Proper proofing is the cornerstone of a croissant's signature texture. During proofing, the yeast consumes sugars and produces carbon dioxide and alcohol. The carbon dioxide gets trapped within the gluten network and the layers created during lamination, causing the dough to rise. This expansion separates the butter layers, creating space for steam to generate during baking, which pushes the layers apart and results in flakiness.
Without adequate proofing, the dough remains too dense. The gluten network hasn't relaxed enough, and insufficient gas has been produced. This leads to croissants that are small, heavy, and lack that desirable open crumb structure. Conversely, perfect proofing allows the dough to reach its optimal volume and internal structure, ensuring maximum oven spring and the development of those beautiful, distinct layers we all crave in a perfectly baked croissant.
Understanding Yeast Activity: A Baker's Perspective on Proofing
Yeast is a living organism, and its activity is heavily influenced by environmental factors, primarily temperature and moisture. In croissant dough, yeast ferments sugars present in the flour and any added sugar, producing gas. This fermentation also contributes to the flavor development of the croissant. A slow, controlled fermentation during proofing helps develop complex flavors.
Think of yeast as tiny workers that need the right conditions to do their job effectively. They work best within a specific temperature range. Too cold, and they are sluggish; too hot, and they become overly active, potentially exhausting themselves or producing off-flavors. Understanding this temperature sensitivity and managing it is fundamental to preventing common croissant proofing issues explained throughout this article.
Common Croissant Proofing Challenges: Achieving the Right Balance
Bakers often face two primary croissant proofing issues explained by their effects on the final product: underproofing and overproofing. Both result in less-than-ideal croissants, though the symptoms differ significantly. Underproofing is perhaps more common for beginners, leading to dense, heavy pastries. Overproofing, while seemingly allowing maximum rise, can lead to structural collapse and loss of flakiness.
Achieving the "right balance" means finding the sweet spot where the dough has expanded sufficiently, the gluten has relaxed, and the yeast activity is optimal for baking. This balance is influenced by ambient temperature, humidity, the dough's internal temperature, and the amount and type of yeast used. Learning to read the dough itself, rather than relying solely on a clock, is crucial for navigating these common croissant proofing issues explained here.
Identifying Underproofed Croissants: Signs and Solutions
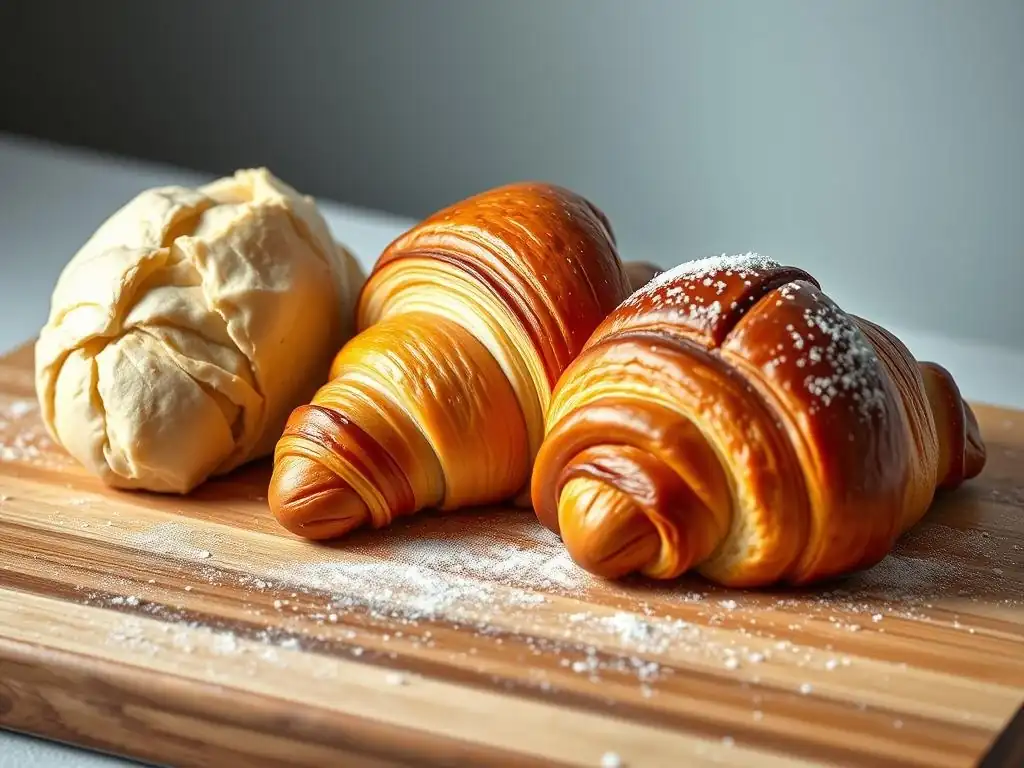
Underproofing is a frequent culprit behind disappointing croissants. When the dough hasn't had enough time or the right conditions to rise adequately, it goes into the oven dense and underdeveloped. Identifying these signs early can help you take corrective action or understand why your baked goods didn't turn out as expected.
Recognizing the visual and tactile cues of underproofing is a skill every baker should develop. It's not just about the size of the croissant; it's about the feel and resilience of the dough. Learning to spot these signs is the first step in addressing croissant proofing issues explained by insufficient fermentation.
Visual Cues of Underproofed Croissants: Key Indicators
Underproofed croissants often look smaller and feel heavier than properly proofed ones. They might still hold their shape well, but they lack the inflated, airy appearance of dough that has risen sufficiently. The layers might appear less defined even before baking, as the expansion hasn't fully separated them.
After baking, underproofed croissants exhibit several tell-tale signs. They will have limited oven spring, meaning they don't puff up much in the heat. The crust might look tight and less flaky. The overall volume will be significantly less than expected, resulting in a dense, squat pastry.
Dense Texture and Limited Rise in Underproofed Croissants
The most obvious sign of underproofing is the dense texture and limited rise in the final baked product. Instead of a light, airy interior, you get something much heavier, almost bread-like, but without the desirable open crumb of a well-proofed bread. The height of the baked croissant will be noticeably less than a properly proofed one, perhaps only increasing by 20-30% in the oven compared to a potential 50-75% rise for correctly proofed dough.
This density comes directly from the lack of sufficient gas production and dough relaxation during proofing. The internal structure hasn't developed properly, leaving it compacted. If you slice an underproofed croissant, you'll see a tight, uniform crumb with very few large air pockets, contrasting sharply with the open, irregular structure of a perfectly baked one.
Tight Crumb Structure: A Sign of Insufficient Fermentation
Examining the crumb structure of a baked croissant is a definitive way to diagnose underproofing. An underproofed croissant will have a tight, compact crumb. The individual layers will be difficult to discern, and the air pockets will be small and evenly distributed, if present at all. This is a clear indication that the yeast did not produce enough gas to expand the dough and separate the layers effectively.
Compare this to a well-proofed croissant, which reveals a beautiful, open structure with irregular, large air pockets nestled between distinct, flaky layers. The tight crumb of an underproofed croissant is a direct consequence of insufficient fermentation time or suboptimal proofing conditions that hindered yeast activity. Addressing these factors helps resolve these croissant proofing issues explained by poor fermentation.
Doughy Interior Even After Baking
Another common sign of underproofing is a doughy or raw-like interior, even if the exterior crust seems adequately browned. This happens because the dense dough takes longer to bake through, and if the baking time or temperature isn't adjusted significantly, the inside may not reach the proper temperature to set completely. The texture is often gummy or pasty rather than light and dry.
This doughy interior is frustrating, as it ruins the eating experience. It's a direct result of the poor internal structure developed during proofing. The lack of air pockets means heat doesn't penetrate as efficiently into the center of the croissant. While slightly increasing baking time might help somewhat, it often leads to an over-browned exterior before the interior is fully cooked, highlighting the importance of correcting the proofing stage itself to avoid these croissant proofing issues explained here.
The Poke Test: Assessing Underproofed Croissant Dough
The poke test is a classic method for assessing the proofing level of many types of dough, including croissants. To perform the poke test, gently flour your finger and lightly press the surface of a croissant. Observe how quickly the indentation springs back.
For underproofed dough, the indentation will spring back almost immediately and completely. This indicates that the gluten structure is still very tight and elastic, and the dough hasn't relaxed or filled with enough gas. It's like poking a firm balloon – it resists the pressure and quickly returns to its original shape. This rapid spring-back is a clear sign that the dough needs more time to proof and relax.
Causes of Underproofing: Troubleshooting Your Proofing Environment
Underproofing is typically caused by conditions that slow down yeast activity or limit the time the dough has to rise. The two most common culprits are insufficient temperature and inadequate proofing time relative to the dough's development needs. Understanding these causes is key to preventing croissant proofing issues explained by slow fermentation.
Other factors can contribute, such as using old or inactive yeast, or the dough being too cold internally when proofing begins. However, temperature and time in the proofing environment are usually the primary variables to troubleshoot when faced with underproofed croissants.
Temperature Control for Optimal Croissant Proofing (75-80°F Recommended)
Yeast thrives in warmth, but not excessive heat. The ideal temperature range for proofing croissants is generally between 75°F and 80°F (about 24°C to 27°C). Temperatures below this range significantly slow down fermentation. For example, proofing at room temperature (say, 68°F or 20°C) might take 3-4 hours or even longer, whereas proofing at 78°F could take just 2-2.5 hours. If your proofing environment is too cool, the yeast simply won't produce gas quickly enough to achieve the desired rise within a typical timeframe.
Maintaining a consistent temperature is also important. Fluctuations can stress the yeast and lead to uneven proofing. Using a thermometer to check the ambient temperature in your proofing area is highly recommended. Simply leaving dough on a cold countertop in a cool kitchen is a common cause of underproofing.
Insufficient Proofing Time: Adjusting Your Schedule Based on Dough Temperature
Even at the correct temperature, insufficient time will result in underproofed dough. Recipes provide estimated proofing times, but these are just guidelines. The actual time needed depends heavily on the dough's initial temperature, the ambient temperature, the amount of yeast, and even the type of flour. For instance, dough starting at 65°F will take longer to reach optimal proof than dough starting at 70°F, even in the same 78°F proofing environment.
It's crucial to watch the dough and use the poke test rather than relying solely on the clock. If your recipe suggests 2 hours at 78°F, but after 2 hours, the poke test indicates underproofing (springs back too quickly), you need to extend the proofing time. This flexibility and observation are vital skills in preventing croissant proofing issues explained by rigid scheduling.
Fixing Underproofed Croissants: Rescue Techniques
While it's always best to proof correctly from the start, there are some potential rescue techniques for slightly underproofed croissants. Severely underproofed dough, however, is much harder to salvage as croissants and might need to be repurposed.
The key is to gently encourage more fermentation without damaging the delicate structure you've worked hard to create. These methods aim to give the yeast the conditions it needs to finish its job.
Possible Solutions for Slightly Underproofed Croissants: Extending Proofing Time
If your croissants are only slightly underproofed according to the poke test (they spring back quickly but not instantly) and haven't shown significant visual rise, the simplest solution is to extend the proofing time. Return them to your controlled proofing environment (75-80°F) and check them again after 15-30 minutes.
Continue checking periodically with the poke test until the indentation slowly springs back, leaving a slight mark – the sign of perfectly proofed dough. Be careful not to leave them unattended for too long once they start to show signs of nearing optimal proof, as they can quickly tip into overproofing. Patience here can turn a dense failure into a flaky success when dealing with croissant proofing issues explained by prematurity.
Salvaging Severely Underproofed Croissants: Repurposing the Dough
If your croissants are still dense and barely risen after a significant extension of proofing time, they may be severely underproofed, perhaps due to inactive yeast or a consistently cold environment. Trying to bake them as croissants will likely result in very dense, heavy pastries. In this case, the best approach is often to repurpose the dough.
While you won't get flaky croissants, the dough can sometimes be gently gathered (without kneading) and reshaped into something like danishes with a filling, or even baked as small, dense rolls. The lamination structure will be compromised, but the dough itself is still usable. This is a practical approach when facing severe croissant proofing issues explained by major fermentation failure.
Recognizing Overproofed Croissants: Signs and Solutions
Overproofing is the opposite problem to underproofing, but equally detrimental to the final croissant. When dough proofs for too long or in too warm an environment, the yeast overproduces gas, the gluten structure weakens, and the delicate laminated layers can be compromised. Identifying overproofing is crucial for preventing disappointing results.
Unlike underproofing, which results in a dense product, overproofing often leads to a fragile, potentially collapsed structure. Learning to spot the visual and tactile signs before baking is key to attempting mitigation.
Visual Cues of Overproofed Croissants: Key Indicators
Overproofed croissants often look puffy and fragile. They may have expanded significantly, perhaps even doubling in size, but they might also look a bit 'bloated' or spread out rather than having a defined upward rise. The layers might look less distinct on the surface compared to perfectly proofed dough.
Before baking, they might feel extremely delicate to the touch, almost like they could deflate easily. After baking, overproofed croissants often exhibit a lack of structure, poor oven spring (or even deflation), and a pale crust.
Deflated Shape and Loss of Lamination Definition
A classic sign of overproofing, especially severe overproofing, is a deflated or flattened shape. The dough rose significantly but then couldn't maintain its structure, perhaps starting to collapse before it even hit the oven, or collapsing immediately upon entering the heat. The delicate layers, which should be distinct, might appear smudged or merged, losing their definition.
This happens because the gluten network, which provides the dough's structure, has been stretched too thin by excessive gas production and prolonged relaxation. It loses its elasticity and can no longer hold its shape or support the layers effectively. This loss of structural integrity is a major component of croissant proofing issues explained by excessive fermentation.
Large, Irregular Air Pockets and a Weak Structure
While a perfectly proofed croissant has lovely, irregular air pockets, overproofed dough can develop excessively large, often gaping, air pockets, especially in the top layers. These large voids indicate that the gas production was too rapid or prolonged, and the dough couldn't support the large bubbles. The overall crumb structure will appear weak and potentially uneven.
The interior might look torn or collapsed in places, lacking the uniform yet open structure of a correctly proofed croissant. The mouthfeel can also be negatively affected, feeling fragile and perhaps slightly dry due to the large voids.
Pale Color and Lack of Oven Spring
Overproofed croissants often bake up pale and lack significant oven spring. The pale color occurs because the yeast has consumed most of the available sugars during the extended proofing period. These sugars are needed for the Maillard reaction (browning) in the oven. With fewer residual sugars, the crust doesn't brown as effectively.
The lack of oven spring is due to the weakened gluten structure. While there's plenty of gas in the dough, the structure isn't strong enough to support a final push upwards in the oven's heat. Instead of expanding dramatically, the croissant might just spread slightly or even flatten further. These visual cues are strong indicators of croissant proofing issues explained by over-fermentation.
The Poke Test: Assessing Overproofed Croissant Dough
The poke test for overproofed dough yields a very different result than for underproofed dough. When you gently poke an overproofed croissant, the indentation will remain and may not spring back at all, or it will spring back very slowly and only partially.
This lack of spring-back indicates that the gluten structure is overly relaxed and weakened. It no longer has the elasticity to push the indentation back out. The dough feels fragile and delicate to the touch. If the indentation stays completely and the dough feels airy and ready to collapse, it's likely significantly overproofed.
Causes of Overproofing: Troubleshooting Your Proofing Environment
Overproofing is typically caused by a proofing environment that is too warm, too humid, or by simply leaving the dough to proof for too long. These conditions accelerate yeast activity beyond the optimal rate and duration.
Understanding how temperature and time interact is key to preventing overproofing. It's a balance that requires careful monitoring, especially when environmental conditions are not precisely controlled.
Excessive Warmth and Humidity: Accelerating Fermentation
Just as cool temperatures slow yeast, excessive warmth dramatically speeds it up. Proofing croissants in an environment significantly warmer than the recommended 75-80°F (e.g., 85°F or higher) can cause them to overproof very quickly, potentially in less than an hour, compared to the typical 2-3 hours. High humidity can also play a role, as it keeps the surface of the dough moist, allowing the yeast on the surface to remain active.
A common mistake is proofing in a warm oven without proper temperature control, especially if the oven was recently used and is still hot. Even a pilot light can generate enough heat to overproof dough rapidly. Using a thermometer to ensure the proofing temperature is within the target range is crucial to avoid these croissant proofing issues explained by heat.
Extended Proofing Time: Monitoring Dough Development Closely
Even at the correct temperature, leaving the dough to proof for too long will eventually lead to overproofing. The yeast continues to produce gas and the gluten continues to relax. If this goes on past the optimal point, the structure weakens to the point of failure.
This is where monitoring the dough's appearance and using the poke test becomes indispensable. Simply setting a timer based on a recipe's estimate and walking away is risky. Dough development isn't linear and can be influenced by subtle factors. Regularly checking your croissants, perhaps every 15-30 minutes once they start looking puffy, allows you to catch them before they become overproofed.
Addressing Overproofed Croissants: Mitigation Strategies
Once dough is significantly overproofed, it's very difficult, if not impossible, to fully salvage it back into perfect croissants. The gluten structure is already compromised. However, there are some strategies to mitigate the damage for slightly overproofed dough, and a realistic acceptance of the outcome for severely overproofed dough.
The goal is often to handle the dough minimally and bake it in a way that might preserve some structure, even if the ideal flakiness is lost.
What to Do with Slightly Overproofed Croissants: Baking at a Lower Temperature
If your croissants are only slightly overproofed (poke test springs back very slowly but still shows some resilience), you might be able to mitigate the issue by adjusting your baking strategy. Baking them at a slightly lower temperature (e.g., 375°F instead of 400°F) for a slightly longer time might help the structure set before the gas expands too rapidly and causes collapse.
However, this is not a guaranteed fix, and the resulting croissants will likely still be paler and have less oven spring than perfectly proofed ones. Handle them extremely gently when transferring them to the oven, as they are fragile and can easily deflate. This is a partial solution for croissant proofing issues explained by minor over-extension.
Dealing with Severely Overproofed Croissant Dough: Accepting Imperfection or Starting Over
For severely overproofed croissant dough, where the poke test shows no spring-back and the dough looks deflated or extremely fragile, the best course of action is often acceptance or starting fresh. The delicate laminated structure is likely destroyed, and attempting to bake them as croissants will almost certainly result in flat, pale, dense pastries.
While you could try baking them at a lower temperature, managing expectations is key. They won't be the flaky croissants you hoped for. Sometimes, the most valuable lesson learned from severe croissant proofing issues explained by significant over-fermentation is the importance of careful monitoring for the next batch. The dough could potentially be repurposed into a flatbread or cracker-like bake, but the signature croissant texture is lost.
Croissant Proofing Troubleshooting: A Comprehensive Guide
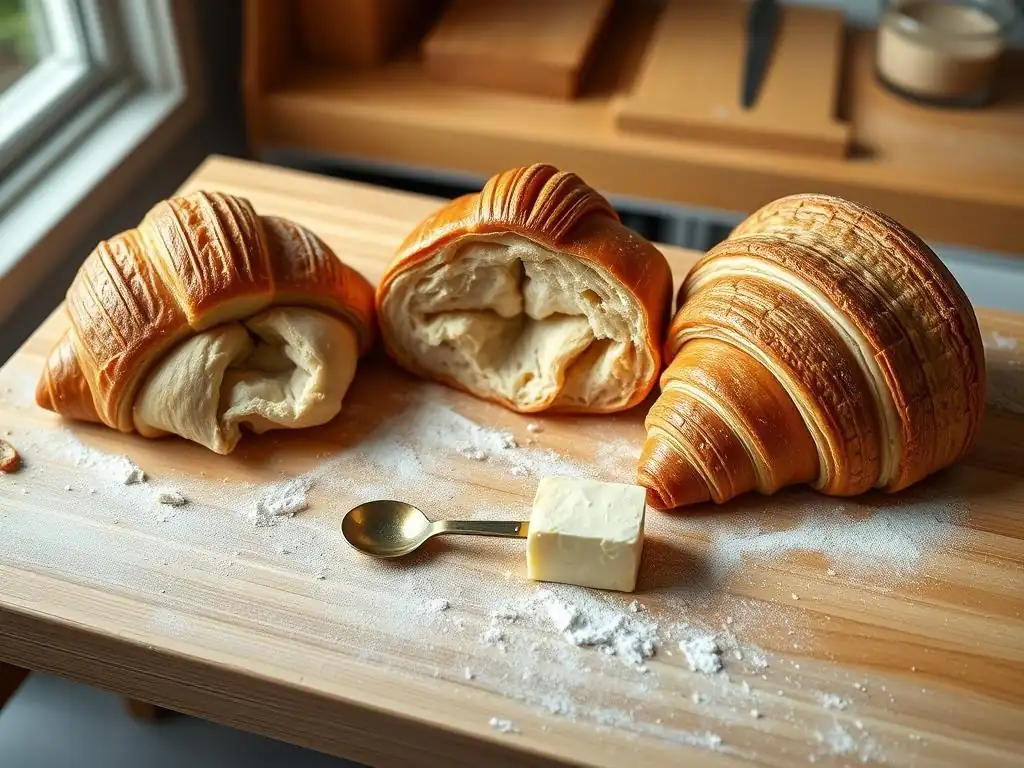
Mastering croissant proofing involves understanding the environmental factors and dough characteristics that influence yeast activity. Troubleshooting croissant proofing issues explained here requires a systematic approach, focusing on temperature, time, and careful handling.
This section provides a comprehensive guide to creating the ideal proofing environment and managing the process effectively to achieve consistent, perfect results.
Temperature and Humidity: Creating the Ideal Proofing Environment
Controlling temperature and humidity is paramount for successful croissant proofing. Aiming for that sweet spot of 75-80°F (24-27°C) with moderate humidity (around 70-80%) provides optimal conditions for yeast activity without being too fast or drying out the dough surface.
Achieving these conditions consistently at home can be a challenge, as ambient kitchen temperature and humidity fluctuate. Dedicated tools or creative DIY solutions are often necessary to maintain the ideal proofing environment and avoid croissant proofing issues explained by environmental instability.
Using a Proofer or Modified Oven for Controlled Proofing
A dedicated proofing box offers the most precise control over temperature and humidity. These appliances maintain a constant environment, eliminating guesswork. For home bakers, a modified oven can serve a similar purpose. Many modern ovens have a "proofing" setting, typically around 80-85°F, which works well.
Alternatively, you can create a proofing environment in your oven by placing the dough inside along with a pan of hot water on the rack below. Close the oven door. The residual heat and steam from the water will create a warm, humid environment. Use an oven thermometer to monitor the temperature inside to ensure it stays within the 75-80°F range and doesn't get too hot. This DIY method is effective in preventing croissant proofing issues explained by inconsistent conditions.
Maintaining Consistent Temperature Using a Thermometer
Regardless of your proofing method, using a reliable thermometer to measure the ambient temperature within your proofing space is non-negotiable. Don't trust the oven's dial or assume your kitchen is the stated temperature. Place a thermometer near your croissants and monitor it throughout the proofing process.
If the temperature drops, you may need to refresh the hot water in your oven setup or adjust your proofer. If it rises too high, slightly vent the oven door or adjust your proofer setting. Consistent temperature is key to predictable proofing times and avoiding both under and overproofing.
Time Management: Balancing Proofing Time with Dough Development
While temperature sets the stage, time is the duration over which the yeast performs its work. Effective time management in croissant proofing means more than just setting a timer; it means using time in conjunction with visual cues and the poke test to judge the dough's readiness.
Recipes provide a starting point, but the actual proofing time can vary significantly. Learning to read the dough is the most important skill in mastering croissant proofing issues explained by temporal factors.
Tips for Estimating Proofing Time Based on Dough Temperature and Yeast Activity
Proofing time is inversely related to temperature – warmer dough/environment means shorter proofing time. A general rule of thumb is that proofing at 78°F might take around 2-2.5 hours, while proofing at 75°F might take 2.5-3 hours. The amount of yeast also plays a role; more yeast means faster proofing.
Consider the dough's internal temperature when it goes into the proofing environment. Colder dough will take longer to warm up and start actively proofing. Using a dough thermometer can give you insight into how long the dough might take to come up to temperature before significant proofing begins. This helps refine your time estimates and prevent croissant proofing issues explained by temperature lag.
Adjusting Proofing Time Based on Recipe and Environmental Factors
Always treat recipe proofing times as estimates. Factors like altitude, flour type, and even the season can subtly affect yeast activity. Pay close attention to the recipe's description of what the dough should look like when proofed (e.g., "nearly doubled," "puffy," "jiggly").
Use the poke test regularly once the dough shows visible signs of rising. If the recipe says 2 hours, but at 1.5 hours the poke test is already indicating perfect proof, it's time to bake! Conversely, if 2 hours have passed and the poke test indicates underproofing, give it more time. Flexibility and observation are your best tools against croissant proofing issues explained by rigid timing.
Dough Handling: Preventing Damage During Proofing
The laminated structure of croissants is delicate, especially as the dough proofs and becomes airy. Mishandling proofed dough can easily deflate it, collapsing the carefully formed layers and resulting in dense, disappointing pastries even if proofing was otherwise perfect.
Gentle handling is crucial from the moment the croissants finish proofing until they are safely in the oven.
Gentle Handling Techniques to Preserve Lamination
Once your croissants are proofed, handle them as little as possible. When transferring them to the baking sheet (if they weren't proofed on it), use a wide, thin spatula to support the entire croissant and avoid squeezing or pressing it.
Arrange them on the baking sheet with adequate space between them (at least 2-3 inches), as they will expand further in the oven. Avoid bumping the tray or subjecting the proofed dough to sudden movements or drafts, which can cause them to collapse.
Avoiding Over-Manipulation of the Dough
Before and during proofing, avoid unnecessary manipulation of the formed croissants. Shaping should be done efficiently. Once shaped and placed in the proofing environment, leave them undisturbed except for checking their progress.
Excessive touching or moving the dough during proofing can disrupt the delicate gluten network and gas bubbles, leading to a less airy final product. Respect the dough's fragile state during this critical phase to prevent croissant proofing issues explained by rough treatment.
Mastering Croissant Proofing for Baking Success
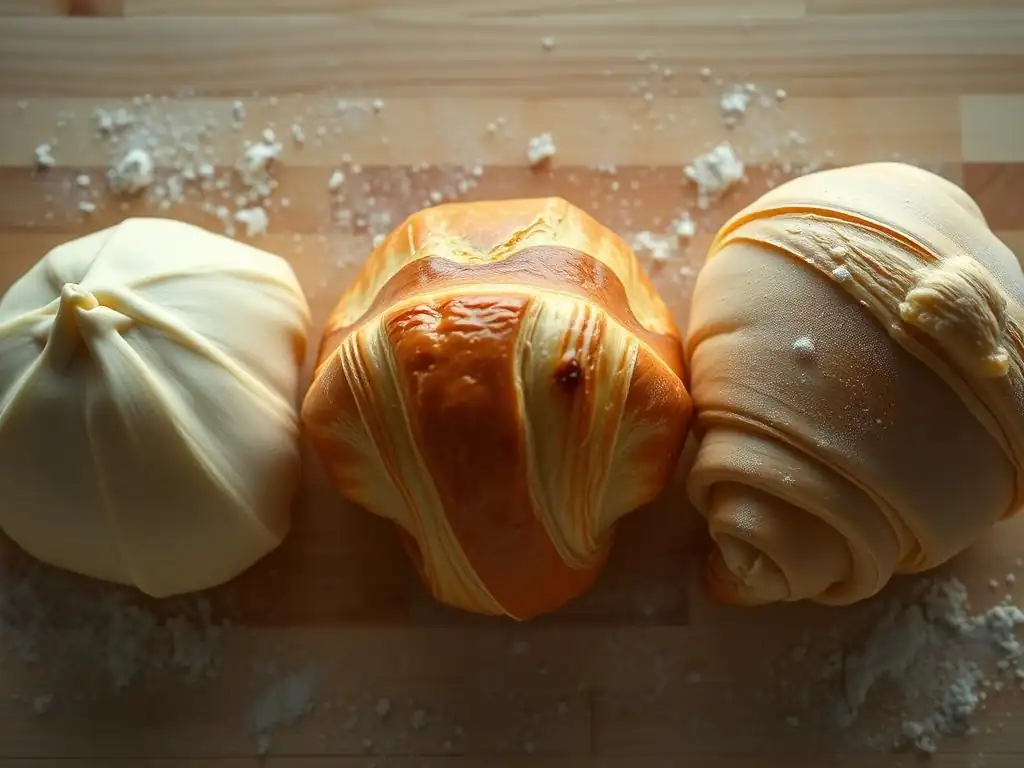
Achieving consistently perfect croissant proofing is a skill that develops with practice and observation. It involves understanding the science behind yeast activity and learning to interpret the subtle cues the dough provides.
By focusing on creating the right environment, managing time effectively, and handling the dough gently, you can significantly improve your croissant baking results.
Achieving the Perfect Proof: A Step-by-Step Approach
Here's a simplified step-by-step approach to aiming for perfect croissant proofing:
- Shape croissants and place them on a baking sheet lined with parchment paper, spaced appropriately.
- Prepare your proofing environment: Set up your proofer or oven with hot water to achieve a consistent temperature of 75-80°F (24-27°C).
- Transfer croissants to the proofing environment.
- Begin monitoring: After about half the estimated proofing time, start visually checking the croissants. They should look puffier.
- Perform the poke test: Once they appear significantly risen (perhaps 50% larger), gently perform the poke test.
- Continue monitoring: Check every 15-30 minutes using the poke test until the indentation slowly springs back, leaving a slight mark.
- Handle with care: Once perfectly proofed, move them very gently to the oven for baking.
This iterative process of checking and testing is far more reliable than relying solely on a timer for navigating croissant proofing issues explained by variability.
The Importance of Patience and Observation in Croissant Baking
Patience is perhaps the most undervalued ingredient in croissant baking, especially during the proofing stage. Rushing the process or becoming impatient can lead to underproofed dough. Conversely, neglecting to monitor the dough can easily result in overproofing.
Developing keen observation skills allows you to read the dough's readiness. Look for the visual cues – the degree of puffiness, the definition of layers, the surface tension. Combine these visual cues with the tactile feedback from the poke test. This holistic approach is key to successfully managing croissant proofing issues explained by impatience or inattention.
Advanced Techniques for Perfect Croissant Proofing: Retarding the Dough
One advanced technique that helps manage proofing time and develop flavor is retarding the dough in the refrigerator overnight after shaping, but before the final warm proof. This slow, cold fermentation develops more complex flavors and makes the dough easier to handle.
After retarding (typically 8-12 hours at 38-40°F or 3-4°C), the croissants are then transferred to the warm proofing environment (75-80°F) for their final rise. The time needed for this final proof will be shorter than if they were proofed warm from the start, perhaps 1-2 hours, depending on how cold the dough is initially. This technique provides a buffer and helps avoid rushed croissant proofing issues explained by needing a quicker turnaround.
Conclusion: Achieving Consistent Croissant Proofing Results
Mastering croissant proofing is a journey that requires understanding, practice, and attention to detail. By recognizing the signs of under and overproofing, troubleshooting common causes like temperature and time, and handling your dough with care, you can dramatically improve the quality of your homemade croissants.
Remember that each batch of dough and each baking environment is slightly different. Learning to adapt and respond to what the dough is telling you is the hallmark of a skilled baker. Don't be discouraged by initial setbacks; each attempt teaches you more about managing these complex but rewarding croissant proofing issues explained here.
Key Takeaways for Avoiding Croissant Proofing Problems
- Control Temperature: Aim for 75-80°F (24-27°C) using a proofer or modified oven and a thermometer.
- Monitor Time: Use recipe times as estimates, but rely on visual cues and the poke test to determine readiness.
- Learn the Poke Test: Understand how the dough's spring-back indicates under-, perfect, or overproofing.
- Handle Gently: Avoid deflating delicate proofed dough.
- Observe: Pay attention to how the dough looks and feels throughout the process.
- Be Patient: Don't rush the proofing stage.
[ ] Set up proofing environment temperature
[ ] Monitor proofing environment temperature with a thermometer
[ ] Perform the poke test at intervals
[ ] Observe visual cues of dough development
[ ] Handle proofed dough gently
Further Resources for Mastering Croissant Baking at Home
For those looking to delve deeper into the nuances of croissant making, including detailed guides on lamination, shaping, and baking techniques, explore additional resources available on BakeWithEase.com. Learning about different types of butter, flour hydration, and yeast handling can further enhance your ability to prevent and solve common croissant proofing issues explained in this guide. With practice and knowledge, those perfectly flaky, airy croissants are within your reach.
Frequently Asked Questions
What are the main signs of an underproofed croissant?
Underproofed croissants will often have a dense, tight crumb and may not have achieved their full volume. They may also spring back aggressively when pressed lightly.
What are the visual cues that indicate a croissant is overproofed?
Overproofed croissants can appear deflated or collapsed. The layers may also be less defined and the structure will be generally weak.
How does temperature impact the proofing time of croissants?
Warmer temperatures will accelerate the proofing process, while colder temperatures will significantly slow it down. It's crucial to monitor your dough closely.
What is the ideal environment for proofing croissants?
The ideal environment is a warm, humid space, typically around 75-80°F (24-27°C). This helps the yeast activity and ensures even proofing.
Can I refrigerate croissants after shaping but before baking, and if so, how does this affect the proofing process?
Yes, you can refrigerate them, which will significantly slow down the proofing. You'll need to allow extra proofing time at room temperature before baking to achieve the desired rise.
Final Reflection: The Delicate Dance of Croissant Proofing
Mastering croissant proofing isn't just about achieving a golden-brown crust; it's about understanding the delicate balance between under- and over-proofing, a balance that directly impacts the final texture and flavor of this beloved pastry. The seemingly simple process of letting dough rise is, in reality, a complex interplay of time, temperature, and humidity, each factor crucial to the success—or failure—of your croissants. Ignoring these nuances can lead to disappointment, but understanding them unlocks the path to flaky, buttery perfection.
The journey of learning to proof croissants perfectly is a testament to the patience and precision required in baking. It's a process that mirrors life itself, where careful attention to detail and a willingness to learn from mistakes are paramount. The more you know, the more you realize you don't know.
This quote perfectly encapsulates the ongoing learning process involved in perfecting the art of croissant making, a journey that extends far beyond simply following a recipe. The subtle shifts in dough behavior, the nuances of environmental conditions, all contribute to the unique character of each batch.
So, reader, I invite you to reflect on your own baking experiences. Have you wrestled with under-proofed, dense croissants? Or perhaps battled the collapse of an over-proofed batch? Remember these lessons, embrace the challenges, and don't be afraid to experiment. Each failed attempt brings you closer to understanding the subtle cues of your dough, guiding you towards that perfect, airy, and utterly delicious croissant. The journey is as rewarding as the destination.
Unlock Your Perfect Croissant: Master the Proof!
Thanks for taking the time to learn about croissant proofing – mastering this crucial step is key to achieving flaky, buttery perfection! You’ve gained valuable insights into identifying over- and under-proofed dough. Now, it's time to put that knowledge into action.
- Bake your own perfect croissants: Using what you've learned, try proofing a batch of croissants today! Pay close attention to the subtle signs of proper proofing.
- Share your croissant journey: Post a picture of your baking success (or even your learning curve!) on social media using #BakeWithEaseCroissants. We'd love to see your results!
- Dive deeper into croissant techniques: Explore other articles on our site for more tips and tricks on achieving flawless pastries.
What unique proofing challenge are you most excited to tackle in your next batch of croissants?