
The Ultimate Guide to Baking Flaky Croissants at Home

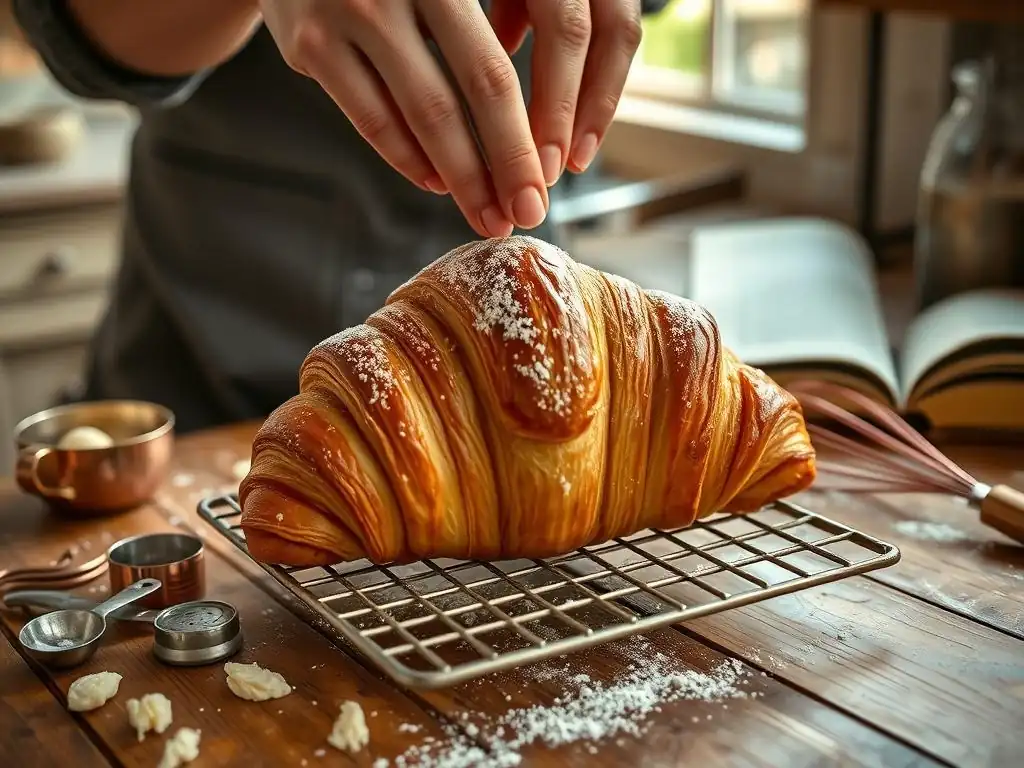
Welcome to BakeWithEase, your kitchen companion for all things baking! Ever dreamt of creating perfectly flaky croissants in the comfort of your own home? You're in the right place. We're about to unlock the secrets to achieving that delicate, buttery texture that rivals even the finest patisseries. Intrigued? Let's get baking!
- Introduction to Homemade Croissant Baking: Achieve Bakery-Quality Flakiness
- Essential Ingredients for Perfect Homemade Croissants
- Mastering the Croissant Dough: A Step-by-Step Guide
- The Lamination Process: Creating Layers of Flakiness
- Shaping and Proofing Your Homemade Croissants
- Baking Your Homemade Croissants to Golden Perfection
- Troubleshooting Common Croissant Baking Problems
- Tips and Tricks for Baking Exceptional Flaky Croissants
- Storing and Reheating Homemade Croissants
- Advanced Croissant Techniques and Variations
- Conclusion: Celebrate Your Homemade Croissant Success
-
Frequently Asked Questions
- How difficult is it to bake flaky croissants at home for a beginner?
- What are the key ingredients needed for flaky croissants, and are there any substitutes?
- What is "lamination" and why is it important for flaky croissants?
- What are some common mistakes people make when baking croissants at home, and how can I avoid them?
- How long does it typically take to bake flaky croissants from start to finish, including preparation and baking time?
- Final Reflection: The Enduring Allure of the Homemade Croissant
- Unleash Your Inner Pastry Chef!
Introduction to Homemade Croissant Baking: Achieve Bakery-Quality Flakiness
Baking flaky croissants at home is often seen as the pinnacle of intermediate baking. It's a process that requires patience, precision, and a good understanding of ingredients and techniques. But the reward? Warm, buttery, incredibly flaky pastries straight from your oven – a true taste of Paris in your own kitchen. This guide will walk you through every step, helping you master the art of creating those coveted layers.
Achieving that signature flakiness isn't just about following a recipe; it's about understanding the science behind the layers. It involves carefully laminating dough with butter, chilling, folding, and repeating. While it might seem daunting, breaking down the process makes it achievable for any home baker willing to put in the effort. Let's embark on this delicious journey to baking flaky croissants at home.
Why Bake Croissants at Home? The Joy of Homemade Pastries
There's a unique satisfaction that comes with pulling a batch of beautifully golden, flaky croissants from your oven. The aroma filling your kitchen is incomparable, and the taste of a fresh, still-warm croissant you made yourself is an experience that store-bought versions simply cannot replicate. Beyond the sensory delights, baking croissants at home offers complete control over ingredients, allowing you to choose high-quality butter and flour for superior results.
Moreover, the process itself, though challenging, is incredibly rewarding. Each fold of the dough, each moment of patient chilling, builds anticipation. Successfully executing the steps and seeing those perfect layers emerge after baking provides a significant sense of accomplishment. It's not just baking; it's a craft, and mastering it allows you to share truly special treats with friends and family, making the effort of baking flaky croissants at home truly worthwhile.
Understanding the Challenges of Flaky Croissants
The primary challenge in baking flaky croissants at home lies in the lamination process – creating distinct layers of dough separated by thin layers of butter. This requires careful temperature control; if the butter gets too warm, it melts into the dough instead of staying in sheets, resulting in a bready or greasy texture instead of flakiness. Consistency in folding and chilling is paramount to developing uniform layers throughout the pastry.
Another hurdle is the proofing stage. Croissants require a humid, warm environment to proof properly, roughly doubling in size. Underproofing leads to dense, heavy croissants, while overproofing can cause the butter to leak out during baking or the structure to collapse. Balancing these elements – temperature, time, and technique – is key to overcoming the common pitfalls and successfully baking flaky croissants at home.
Essential Ingredients for Perfect Homemade Croissants
The quality of your final croissant is heavily dependent on the ingredients you use. While the process is crucial, starting with the right foundation makes a significant difference in achieving that desirable flaky texture and rich flavor. Think of your ingredients as the building blocks; using premium materials will result in a stronger, more beautiful structure.
Selecting the best flour, butter, and yeast is not just a recommendation; it's a necessity for authentic, high-quality flaky croissants. Each ingredient plays a specific role, from providing structure to creating richness and aiding in leavening. Let's look closer at what you need for successful flaky croissants baking at home.
High-Quality Flour: The Foundation of Flaky Croissants
For flaky croissants, you need a flour with a moderate to high protein content, typically around 11-13%. This protein develops into gluten when kneaded, providing the dough with the necessary structure and elasticity to withstand the rolling and folding process without tearing. A strong gluten network is essential for trapping the steam created by the melting butter during baking, which is what pushes the layers apart to create flakiness.
Using a good quality bread flour or a strong all-purpose flour is generally recommended. The specific protein percentage can vary slightly by brand and region, so checking the nutritional information or description on the packaging is helpful. A flour with insufficient protein won't develop enough strength, leading to a fragile dough that's difficult to laminate, while overly high protein might result in a tougher texture if not handled correctly.
The Importance of European-Style Butter for Lamination
European-style butter is often specified for croissant making, and for good reason. It typically has a higher butterfat content (around 82-84%) compared to American butter (around 80%). This higher fat content means less water, which is crucial for creating distinct layers during lamination. The butter needs to be pliable but cold enough to remain in sheets between the dough layers.
The higher melting point of European butter also contributes to its suitability for lamination. It stays solid longer during the rolling and folding process, allowing you to create those numerous thin layers without the butter melting into the dough prematurely. Using cold, high-quality butter is perhaps the single most critical factor for achieving truly flaky croissants baking at home.
Yeast Selection: Choosing the Right Type for Croissant Dough
Most croissant recipes call for instant dry yeast or active dry yeast. Instant dry yeast is convenient as it can be mixed directly into the dry ingredients, while active dry yeast usually needs to be proofed first in warm liquid (around 105-115°F or 40-46°C). Both types work well, but instant yeast is often preferred for its reliability and ease of use in longer, cold-fermented doughs like croissant dough.
The amount of yeast used is typically relatively small compared to other bread recipes because the dough undergoes several long, cold rests, which allow the yeast to work slowly and develop flavor. Too much yeast can cause the dough to rise too quickly, potentially before the gluten structure is fully developed or the butter is sufficiently chilled, leading to issues during lamination and proofing.
Other Key Ingredients: Milk, Sugar, and Salt
Milk provides liquid for the dough, contributes to richness, and helps create a tender crumb. Whole milk is often preferred for its fat content, which adds to the overall richness of the finished croissant. The temperature of the milk is important when activating the yeast; it should be lukewarm, not hot, to avoid killing the yeast.
Sugar provides food for the yeast, aids in browning during baking, and adds a touch of sweetness to balance the richness of the butter. While not a large amount is typically used in traditional croissants, it plays a role in the dough's fermentation and appearance. Salt is essential for flavor and also helps control yeast activity and strengthen the gluten structure. Using fine sea salt or table salt is common, ensuring it dissolves evenly in the dough.
Mastering the Croissant Dough: A Step-by-Step Guide
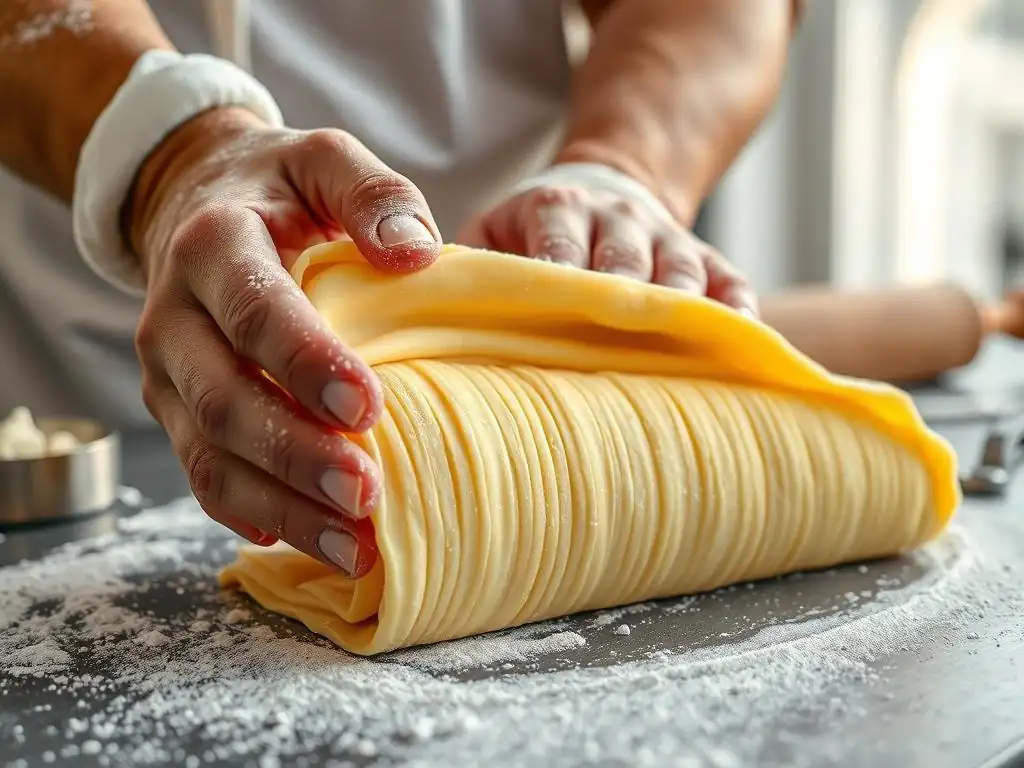
Creating the base dough for croissants is the first major step. Unlike simple bread doughs, croissant dough requires careful handling and specific techniques to prepare it for the subsequent lamination process. It's about creating a smooth, elastic dough that can be rolled thin repeatedly without tearing, while also having the right consistency to work in harmony with the cold butter block.
This stage sets the foundation for the flaky layers to come. Paying close attention to mixing, kneading, and the initial proofing will ensure your dough is strong and ready for the demanding steps of lamination involved in baking flaky croissants at home.
Step 1: Mixing the Dough – Achieving the Right Consistency
The dough for flaky croissants is typically a lean dough, meaning it contains relatively little fat or sugar compared to enriched doughs. It's made from flour, water (or milk), yeast, sugar, and salt. The ingredients are mixed until a shaggy dough forms, then kneaded until smooth and elastic. This can be done by hand or using a stand mixer with a dough hook.
Kneading is crucial for developing the gluten network. You want a dough that pulls away from the sides of the bowl and passes the "windowpane test" – you should be able to stretch a small piece of dough thin enough to see light through it without it tearing. Over-kneading should be avoided, as it can make the dough tough. The final dough temperature after mixing is ideally around 75-78°F (24-26°C).
Step 2: First Proofing – Developing the Gluten Structure
After mixing and kneading, the dough needs an initial proofing period. This proof is usually relatively short at room temperature (perhaps 1-2 hours, depending on the ambient temperature and yeast activity) followed by a longer rest in the refrigerator, often overnight or for at least 4-6 hours. The cold rest is critical.
The cold temperature slows down yeast activity, allowing the dough to develop flavor slowly. More importantly, it chills the dough thoroughly, making it firm and easier to handle during lamination. It also allows the gluten to relax, which is essential for rolling the dough thin without resistance. This cold conditioning is a non-negotiable step for successful flaky croissants baking at home.
Step 3: Creating the Butter Block – Shaping and Chilling
While the dough is chilling, you prepare the butter block. This involves shaping cold, European-style butter into a flat rectangle or square, typically about 1/4 to 1/2 inch (approx. 0.5-1 cm) thick. This is often done by placing the butter between two sheets of parchment paper and rolling it with a rolling pin or gently pounding it.
The goal is to create a block of butter that is pliable but still cold and firm, roughly one-third the size of your rolled-out dough. The dimensions should be consistent so it fits neatly within the dough when you begin the lamination process. The butter block should be chilled until it's firm but still bendable, not brittle, ideally around 50-55°F (10-13°C).
The Lamination Process: Creating Layers of Flakiness
Lamination is the heart of croissant making. It's the process of repeatedly folding and rolling the dough and butter together to create alternating layers. Each fold (or "turn") multiplies the layers. For instance, a single fold creates 3 layers, and a double fold creates 4 layers. After a single fold, you have 3 layers of dough and 2 layers of butter. After another single fold, you have 3x3=9 layers of dough and 2x3=6 layers of butter, and so on.
The standard for flaky croissants typically involves 3-4 turns (a combination of single and double folds) to achieve hundreds of layers. The precision and temperature control during this stage are what determine the ultimate flakiness of your homemade croissants.
Step 4: Encasing the Butter – The First Fold
Once the dough and butter block are properly chilled and at the correct consistency, you begin the lamination. The dough is rolled out into a rectangle about three times the width of your butter block and slightly longer than the block's length. The chilled butter block is placed on one half of the dough rectangle, leaving a margin around the edges.
The other half of the dough is then folded over the butter block, completely encasing it. The edges are pressed together firmly to seal the butter inside. This creates the initial package with one layer of butter sandwiched between two layers of dough. This first step is crucial for ensuring the butter stays contained during subsequent rolling and folding.
Step 5: Folding Techniques: Single vs. Double Folds for Croissants
There are two primary folding techniques used in lamination: the single fold (or letter fold) and the double fold (or book fold).
- Single Fold: The dough rectangle is folded into thirds, like folding a letter. Bring one end up to about two-thirds of the way, then fold the other end over it. This triples the number of layers.
- Double Fold: The dough rectangle is folded into quarters. Bring both ends towards the center, leaving a small gap, then fold the dough in half along the center line. This quadruples the number of layers.
Most croissant recipes use a combination, often starting with a single fold, followed by a double fold, and then perhaps another single fold. The specific sequence and number of folds (typically 3 or 4 turns total) are designed to create enough layers for flakiness without making the dough too difficult to roll. A typical schedule might be: Single fold, rest, Double fold, rest, Single fold, rest. This results in 3x4x3 = 36 layers of dough and 35 layers of butter, which becomes hundreds after rolling thin.
Step 6: The Importance of Cold Lamination – Preventing Butter Melt
Maintaining a cold temperature throughout the lamination process is absolutely critical for successful flaky croissants baking at home. The butter must remain solid and in distinct sheets between the dough layers. If the dough or butter warms up too much, the butter will soften or melt and integrate into the dough, destroying the layers and resulting in a bready or greasy croissant.
Ideally, the dough and butter should be kept between 50-60°F (10-15°C) during rolling and folding. Working quickly in a cool kitchen environment is helpful. If the dough becomes resistant or you notice the butter softening or oozing, stop immediately, cover the dough, and return it to the refrigerator for 20-30 minutes or until it is firm enough to work with again. Patience and chilling time are your best friends here.
Step 7: Multiple Turns and Resting – Building the Flaky Layers
After each fold (or turn), the dough must be rested and chilled in the refrigerator for a significant period, typically 30-60 minutes. This resting time allows the gluten in the dough to relax after being stretched, making it easier to roll out for the next turn without tearing or shrinking excessively. It also ensures the butter remains cold and firm.
A typical lamination schedule involves 3-4 turns with chilling periods in between. For example, you might do a single fold, chill, then a double fold, chill, then a single fold, chill. After the final turn, the dough requires a longer rest, often several hours or overnight, to fully relax and chill before the final shaping stage. This systematic process of rolling, folding, and chilling is what builds the hundreds of micro-layers that define flaky croissants.
Shaping and Proofing Your Homemade Croissants
Once the dough is laminated and properly rested after its final turn, it's time to transform the flat sheet of layered dough into the classic crescent shape. This stage requires careful handling to maintain the integrity of the layers. After shaping, the croissants undergo their final, crucial proofing phase, where they expand and become light and airy before baking.
Proper shaping and proofing are essential for achieving the correct structure and texture in your flaky croissants. Rushing these steps can undo all the careful work of lamination.
Step 8: Rolling and Cutting the Croissant Dough
After the final long rest, the laminated dough is ready to be rolled out for shaping. The dough should be rolled evenly into a large, thin rectangle, typically about 1/8 to 1/6 inch (approx. 3-4 mm) thick. It's important to maintain an even thickness across the entire sheet to ensure uniform baking and flaking. Use light flouring on your work surface and rolling pin if needed, but avoid using too much, as it can affect the layers.
Once rolled, the dough is cut into triangles. The traditional method is to cut the rectangle into long, isosceles triangles with a base of about 3-4 inches (approx. 7-10 cm). A sharp knife or pizza cutter works well for this. The exact size depends on how large you want your final croissants to be, but consistency is key for even proofing and baking.
Step 9: Shaping Techniques: Achieving the Classic Croissant Form
Shaping the triangles into croissants involves gently stretching the base of the triangle slightly, then starting to roll from the base towards the point. Some bakers make a small notch or slit in the center of the base before rolling to help create the classic crescent shape. Roll the dough up, keeping the point tucked underneath the croissant to prevent it from unrolling during proofing or baking.
As you roll, try not to compress the dough too much, as this can hinder the flaking. The goal is to create a shape that will allow the layers to expand properly in the oven. Once rolled, the ends are typically curved inwards to form the crescent shape. Handle the shaped croissants gently to preserve the delicate layers created during lamination.
Step 10: Second Proofing – Achieving Optimal Volume and Lightness
The final proofing stage is critical for achieving light, airy flaky croissants. Shaped croissants need to proof in a warm, humid environment until they are significantly increased in size and feel puffy and delicate. This usually takes 2-3 hours at a temperature of around 75-80°F (24-27°C) with high humidity. A common way to create this environment at home is in a turned-off oven with a pan of hot water on the rack below.
Proper proofing is essential. The croissants should look visibly larger and jiggly when gently shaken. When lightly pressed, the indentation should spring back slowly. If it springs back immediately, they need more proofing. If the indentation remains, they are overproofed and may collapse. Underproofed croissants will be dense, while overproofed ones may lose their structure or have poor oven spring. This stage is where the yeast does its final work, expanding the dough before the heat of the oven sets the structure and melts the butter.
Baking Your Homemade Croissants to Golden Perfection
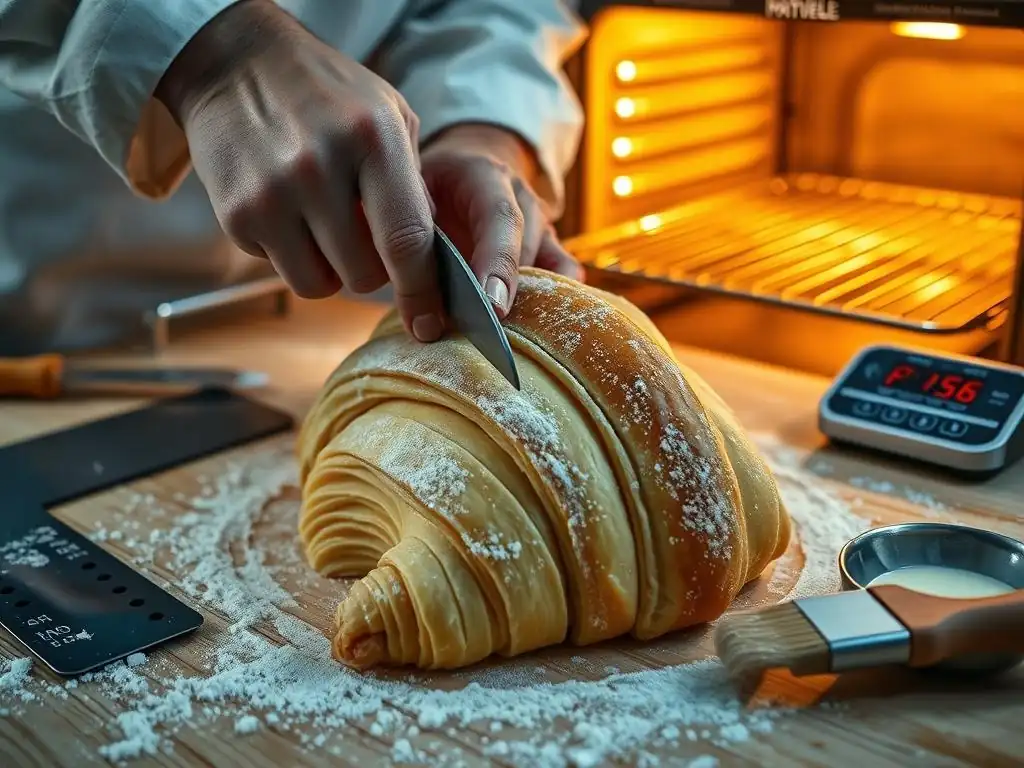
The moment of truth! Baking is where the magic happens – the heat of the oven causes the trapped moisture in the butter and dough layers to turn to steam, which rapidly expands and pushes the layers apart, creating that incredible flakiness. The high temperature also sets the gluten structure and browns the exterior to a beautiful golden hue.
Precise temperature and timing are key to ensuring your flaky croissants bake through, develop a crisp exterior, and achieve optimal internal flakiness.
Step 11: Egg Wash – Achieving a Shiny, Golden-Brown Crust
Before baking, the proofed croissants are typically brushed with an egg wash. A common egg wash is a mixture of one egg beaten with a tablespoon or two of milk or water. This wash gives the baked croissants a beautiful, shiny, golden-brown crust and helps seal the layers slightly, preventing them from separating too much during baking.
Apply the egg wash gently with a pastry brush, being careful not to deflate the delicate, proofed dough. Ensure the wash covers the entire surface evenly for uniform color. Some bakers apply two thin coats for an extra rich color.
Step 12: Baking Temperature and Time – Tips for Perfect Baking
Flaky croissants are usually baked at a relatively high temperature initially to encourage rapid oven spring and layer separation, then the temperature is often reduced to ensure they bake through without burning. A common starting temperature is around 400-425°F (200-220°C) for the first 10-15 minutes, followed by a reduction to 350-375°F (175-190°C) for another 10-20 minutes, or until deeply golden brown and baked through.
Total baking time can range from 20 to 30 minutes, depending on the size of the croissants and your oven. They should be a deep golden brown all over, including the undersides. If they are browning too quickly, you can loosely tent them with foil. Properly baked flaky croissants will sound hollow when tapped on the bottom.
Step 13: Cooling and Enjoying Your Freshly Baked Croissants
Once baked to perfection, transfer the croissants to a wire rack immediately to cool. Cooling on a rack allows air circulation around the entire pastry, preventing the bottom from becoming soggy and helping the crust remain crisp. While it's tempting to tear into them right away, letting them cool for at least 15-20 minutes is recommended.
Cooling allows the internal structure to set properly. The layers will continue to crisp slightly as they cool. Enjoy your hard-earned homemade flaky croissants warm, perhaps with butter or jam, or simply on their own to savor the incredible buttery flakiness you've achieved through your efforts in baking flaky croissants at home!
Troubleshooting Common Croissant Baking Problems
Baking flaky croissants at home is a journey, and like any journey, you might encounter a few bumps along the way. Understanding common issues and how to address them can save you frustration and help you improve with each batch. Don's be discouraged by imperfections; they are part of the learning process.
Here are some typical problems bakers face when making croissants and how to troubleshoot them to get closer to that perfect flaky result.
Dealing with Dough That's Too Sticky
If your dough is too sticky after the initial mix and knead, it could be due to too much liquid or insufficient kneading. Ensure you measure your ingredients accurately, preferably using a kitchen scale for flour and other dry ingredients. If kneading by hand, it might take longer than expected to reach the desired elasticity.
If the dough feels sticky during lamination, it's likely too warm. Return it to the refrigerator immediately to chill thoroughly (at least 30-60 minutes). A very light dusting of flour on your work surface and rolling pin can help, but avoid incorporating too much extra flour into the dough, as this can make the final product tough. Consistent chilling is key to managing stickiness during rolling.
Preventing Butter Leakage During Baking
Butter leakage, often called "blowouts," occurs when the butter melts and escapes the dough before the structure is set in the oven. This is usually caused by insufficient chilling during lamination, overproofing, or insufficient sealing of the dough around the butter block. If the butter is too soft during folding, it can break the layers, creating weak spots.
Ensure your dough and butter are consistently cold during lamination and resting periods. Don't rush the chilling steps (Steps 6 & 7). Also, avoid overproofing (Step 10); if the dough proofs too long, the yeast activity can weaken the gluten structure, making it unable to contain the melting butter. Ensure the initial butter encasement (Step 4) is well-sealed.
Achieving a Uniform Shape and Size
Inconsistent shapes and sizes can result from uneven rolling or cutting of the dough (Step 8) or inconsistent shaping technique (Step 9). Ensure you roll the final dough sheet to an even thickness across its entire surface. Use a ruler if necessary when cutting the triangles to ensure their bases are roughly the same width.
When shaping, try to use consistent tension and rolling technique for each triangle. Practice helps! While absolute perfection might take time, aiming for consistency will lead to a batch of croissants that proof and bake more evenly, resulting in a better overall outcome for your flaky croissants baking at home.
Solving Problems with Underproofed or Overproofed Dough
Proofing is arguably the most challenging stage to get right.
- Underproofed dough results in dense, heavy croissants with poor oven spring and a tight crumb. They might also have large, irregular air pockets. This happens if they haven't proofed long enough or in a warm/humid enough environment (Step 10). The dough should look significantly larger and puffy before baking.
- Overproofed dough can cause the croissants to collapse in the oven or have a very weak structure. The butter might also leak out more readily. Overproofed dough feels very fragile and doesn't spring back when gently poked. This occurs if they proof too long or in an environment that's too warm.
Use the poke test (gently press the dough; it should spring back slowly) and visual cues (significant increase in size, puffy appearance) to judge proofing. Control the proofing environment's temperature and humidity carefully. If your kitchen is cold, use a proofing box or a turned-off oven with hot water.
Tips and Tricks for Baking Exceptional Flaky Croissants
Beyond the fundamental steps, a few nuances and techniques can elevate your homemade croissants from good to exceptional. These tips often involve attention to detail and understanding how minor adjustments can impact the final texture and flavor. Implementing these can refine your process for baking truly flaky croissants at home.
Consider these additional pointers to help you achieve bakery-quality results and make your croissant baking journey even more successful.
The Importance of Precise Measurements
Baking, especially intricate pastries like croissants, is a science where ratios matter. Using a kitchen scale to measure ingredients, particularly flour and butter, is highly recommended over volume measurements (like cups). A cup of flour can vary significantly in weight depending on how it's scooped and leveled, potentially throwing off the dough's hydration and consistency.
Precise measurements ensure you have the correct balance of ingredients, which is fundamental to developing the right dough structure and managing the butter during lamination. Consistency in measurement leads to consistency in results, making it easier to troubleshoot and replicate successful batches.
Maintaining Consistent Dough Temperature
Temperature control is paramount throughout the entire process, not just during lamination. From the initial dough mixing temperature (Step 1) to the cold rests (Steps 2, 7) and the final proofing temperature (Step 10), maintaining the correct temperature range is vital. Too warm, and the yeast can become too active, or the butter melts. Too cold, and the dough becomes stiff and difficult to roll, or proofing takes excessively long.
Using a probe thermometer to check the internal temperature of the dough during mixing and after chilling periods is a great way to ensure you are within the ideal ranges. Working in a cool kitchen environment also significantly helps manage dough and butter temperature.
Using a Dough Thermometer for Accuracy
As mentioned, a digital probe thermometer is an invaluable tool for baking flaky croissants at home. You can use it to:
- Check the temperature of your liquid before adding yeast.
- Verify the final dough temperature after mixing to ensure it's not too warm (ideally 75-78°F or 24-26°C).
- Monitor the internal temperature of the dough and butter block during chilling periods to ensure they are adequately cold but still pliable (butter around 50-55°F or 10-13°C, dough slightly colder).
- Check the internal temperature of the baked croissants to ensure they are fully cooked (around 200-210°F or 93-99°C).
Accurate temperature readings take the guesswork out of these critical steps and greatly increase your chances of success.
Experimenting with Different Flours and Butters
Once you've mastered the basic technique, you might consider experimenting with different types and brands of flour and butter. The protein content and quality of flour can vary, affecting gluten development. Different European-style butters can also have slightly different melting points and flavors.
Try a high-quality bread flour specifically milled for pastries or consider different brands of butter known for their high fat content and quality. Note how these changes affect your dough handling, lamination, and the final texture and flavor of your flaky croissants. This experimentation is part of the joy of refining your baking skills.
Storing and Reheating Homemade Croissants
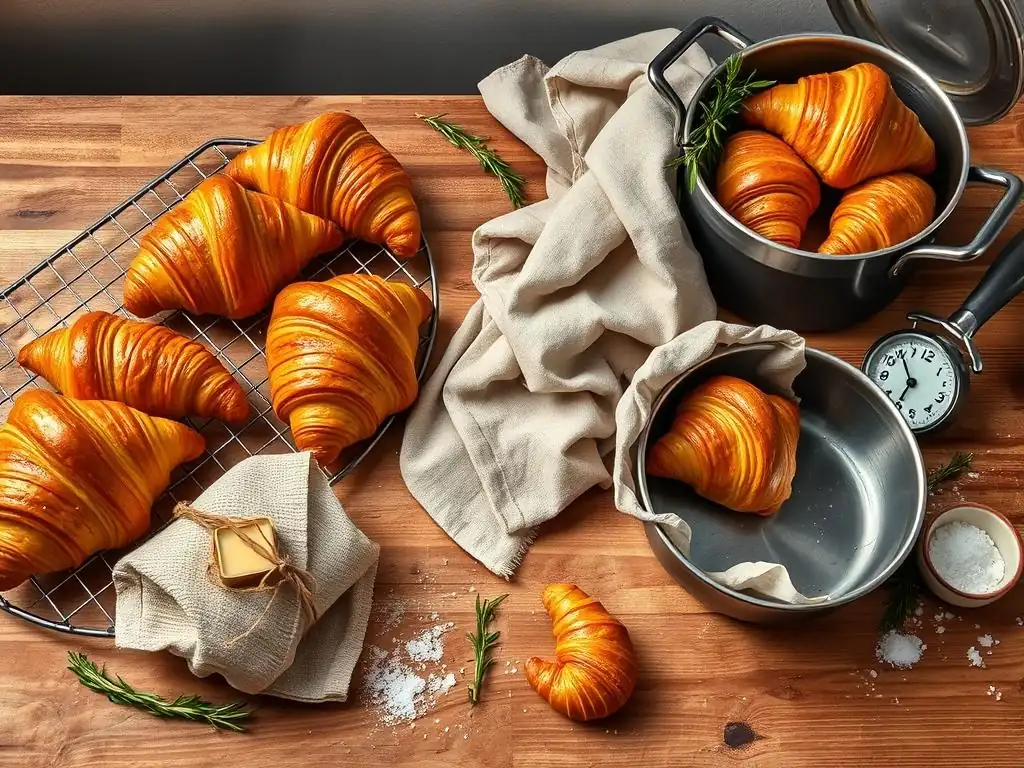
Freshly baked croissants are undoubtedly best enjoyed warm from the oven. However, if you have leftovers (a rare occurrence! ), proper storage and reheating techniques can help preserve their deliciousness and, importantly, their flakiness. Don't let your hard work go to waste by storing them incorrectly.
Here's how to keep your homemade flaky croissants enjoyable for a little longer and bring them back to their near-fresh glory.
Best Practices for Storing Freshly Baked Croissants
Baked croissants are best stored at room temperature in an airtight container or a paper bag placed inside a plastic bag. A paper bag helps maintain a crisp crust, while the outer plastic bag prevents them from drying out too quickly. Avoid refrigerating baked croissants, as the cold environment can make them stale faster and negatively impact their texture.
Stored this way, flaky croissants are typically best enjoyed within 1-2 days. For longer storage, you can freeze baked croissants. Wrap them individually in plastic wrap, then place them in a freezer-safe bag or container. They can be frozen for up to 1-2 months.
Reheating Techniques to Preserve Flakiness
To enjoy that fresh-baked experience again, reheating is key. Avoid the microwave, as it will make your croissants soft and chewy rather than flaky. The best method is using an oven or toaster oven.
Preheat your oven or toaster oven to around 300-325°F (150-160°C). Place the croissants directly on the oven rack or on a baking sheet. Reheat for 5-10 minutes for room-temperature croissants, or 10-15 minutes if reheating from frozen (no need to thaw first). This gentle heat warms them through and helps crisp up the layers, bringing back some of that wonderful flakiness.
Advanced Croissant Techniques and Variations
Once you've successfully mastered baking plain flaky croissants at home, you can explore variations and fillings. The laminated dough serves as a versatile base for numerous delicious pastries. Expanding your repertoire allows you to use your newfound skills in exciting new ways.
Here are a few popular variations that build upon the basic croissant technique, letting you diversify your homemade pastry offerings.
Chocolate Croissants (Pain au Chocolat) Baking at Home
Pain au chocolat, or chocolate croissants, are a classic variation. This involves placing one or two sticks of dark chocolate (called batons de chocolat) at the wide end of the dough triangle before rolling it up. As you roll, the chocolate becomes encased within the layers.
The shaping is similar to a plain croissant, just ensuring the chocolate is wrapped securely inside. Baking pain au chocolat follows the same temperature and time guidelines as plain croissants. The result is a delightful pastry with a molten chocolate center nestled within the flaky layers – a truly decadent treat achieved through your flaky croissants baking at home skills.
Almond Croissants – A Delicious Croissant Transformation
Almond croissants are often made from day-old plain croissants, giving them a second life. They are typically sliced horizontally, dipped in a sugar syrup (often flavored with rum or almond extract), filled with a rich almond cream (frangipane), topped with more frangipane and sliced almonds, and then baked again.
This process transforms a plain croissant into a moist, flavorful, and slightly crispy pastry. While not made from scratch laminated dough in the same way as the initial croissant, it's a popular and delicious use of homemade croissants that showcases their versatility.
Savory Croissant Variations – Exploring Different Flavors
Beyond sweet options, the versatile croissant dough can also be used for savory applications. Instead of chocolate, you could fill the triangles with cheese, ham and cheese, spinach and feta, or other savory combinations before rolling and shaping.
The baking process remains largely the same, although you might omit the egg wash or use a different topping depending on the filling. Savory flaky croissants are perfect for breakfast, brunch, or a light lunch, demonstrating the adaptability of the core technique you've learned for baking flaky croissants at home.
Conclusion: Celebrate Your Homemade Croissant Success
Baking flaky croissants at home is an ambitious project, but one that is incredibly rewarding. You've navigated the complexities of lamination, temperature control, proofing, and baking to create something truly special. Take a moment to appreciate the beautiful layers and the rich aroma of your freshly baked pastries. This achievement is a testament to your patience and growing baking skills.
Each batch you bake will likely improve as you gain experience and a feel for the dough. Don't worry if your first attempt wasn't perfect; every baker starts somewhere. The journey of mastering flaky croissants is as enjoyable as the destination.
You've Baked Flaky Croissants at Home! Next Steps in Baking
Congratulations on successfully baking flaky croissants at home! This accomplishment opens up a world of possibilities in pastry making. You now have a solid understanding of lamination, a technique used in many other pastries like puff pastry, danishes, and kouign amanns.
Consider trying variations like pain au chocolat or almond croissants, or perhaps venture into making puff pastry from scratch for tarts or palmiers. The skills you've honed in temperature control, precise rolling, and patient proofing will serve you well in tackling other challenging but rewarding baking projects. Keep practicing, keep experimenting, and keep enjoying the process!
We'd love to hear about your experience baking flaky croissants at home! What challenges did you face? What tips or tricks did you discover along the way that helped you achieve that perfect flakiness? Sharing your journey can inspire and help other home bakers who are just starting out on their own croissant adventure.
Your insights, whether about managing butter temperature, perfecting your shaping technique, or finding the ideal proofing environment, are valuable to the BakeWithEase community. Let's celebrate the art of homemade pastries together!
Frequently Asked Questions
How difficult is it to bake flaky croissants at home for a beginner?
While croissants can seem daunting, our guide breaks down the process into manageable steps. Beginners can achieve success by focusing on precise measurements and following the lamination technique carefully.
What are the key ingredients needed for flaky croissants, and are there any substitutes?
The essential ingredients are flour, butter, water, sugar, salt, and yeast. While substitutions are possible, using high-quality butter is crucial for achieving the desired flakiness.
What is "lamination" and why is it important for flaky croissants?
Lamination is the process of creating alternating layers of dough and butter. This is essential for creating the distinct layers that give croissants their flaky texture and airy interior.
What are some common mistakes people make when baking croissants at home, and how can I avoid them?
Common mistakes include using butter that is too soft or too cold, and not allowing enough time for proofing. Ensure the butter remains cold and follow the recommended proofing times for optimal results.
How long does it typically take to bake flaky croissants from start to finish, including preparation and baking time?
Baking flaky croissants is a multi-day process. The total time, including dough preparation, lamination, proofing, and baking, can range from 24 to 36 hours, mostly due to resting and proofing stages.
Final Reflection: The Enduring Allure of the Homemade Croissant
The pursuit of the perfect flaky croissant, once a culinary Everest, is now within reach for the home baker. This guide has demystified the process, revealing that with patience, precision, and a touch of culinary courage, the golden, buttery layers are achievable in your own kitchen. The seemingly insurmountable challenges—lamination, proofing, shaping—become manageable steps when broken down and understood.
The journey of mastering croissant baking is more than just acquiring a new skill; it's a testament to the enduring power of tradition and the joy of creation. The simple act of transforming humble ingredients into something so exquisite speaks to a deeper human need for connection—a connection to our culinary heritage, to the satisfaction of creating something beautiful, and to the pleasure of sharing the fruits of our labor. Baking is at once child's play and adult joy. And love, of course.
– Paul Hollywood. This quote perfectly encapsulates the emotional resonance of this process, extending far beyond the simple act of baking.
Now, armed with the knowledge and techniques shared within these pages, I invite you to embark on your own croissant adventure. Don't be afraid to experiment, to embrace the occasional imperfection, and to savor the journey as much as the delicious reward. The flaky, buttery layers are waiting to be created, and the satisfaction of a perfectly executed croissant, made entirely by your own hands, is a truly unforgettable experience. So, gather your ingredients, preheat your oven, and let the magic begin.
Unleash Your Inner Pastry Chef!
Thanks for joining us on this croissant journey! We hope you’ve gained the confidence to tackle this seemingly daunting pastry. Now it's time to put your new skills to the test.
- Bake your perfect croissants: Grab your ingredients and follow the recipe – we know you've got this! Don't be afraid to experiment with fillings or glazes.
- Share your creations: Post a picture of your masterpiece on social media and tag us @BakeWithEase – we'd love to see your results!
- Try a variation: Explore the recipe notes for tips on making chocolate croissants or pain au chocolat.
What unique twist will you add to your homemade croissants? Let us know in the comments below!