
How to Achieve That Coveted Honeycomb Interior in Your Croissants

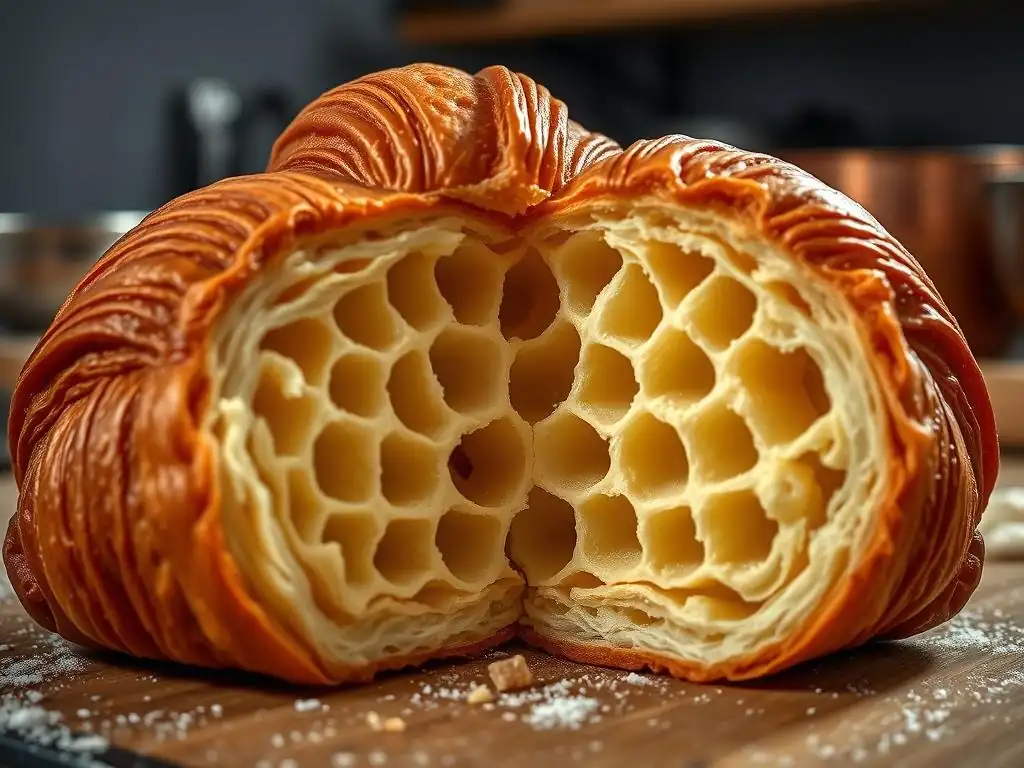
Welcome to BakeWithEase, your trusted guide to baking brilliance! Ever dreamt of achieving that perfectly airy, honeycomb interior in your croissants? You're in the right place. Discover the secrets and techniques behind this coveted texture, and elevate your baking game from ordinary to extraordinary. Let's unlock the secrets together – keep reading to delve into our expert Honeycomb croissant interior baking tips!
- Achieving a Defined Honeycomb Structure in Croissants
- Understanding Croissant Structure: The Key to Baking Success
- Key Factors for Optimal Croissant Lamination
- Step-by-Step Guide to Laminated Croissant Dough
- Troubleshooting Common Croissant Issues
- Advanced Croissant Techniques
- Tips for Home Bakers
- Achieving the Perfect Croissant: A Summary
-
Frequently Asked Questions
- How critical is dough temperature when aiming for a honeycomb croissant interior?
- What type of flour is best for achieving a honeycomb interior?
- What is the importance of proper lamination in achieving the honeycomb interior?
- How does proofing time affect the final honeycomb structure of a croissant?
- What is the best method for baking croissants to maximize honeycomb formation?
- Final Reflection: The Golden Promise of the Honeycomb Croissant
- Unleash Your Inner Croissant Artist!
Achieving a Defined Honeycomb Structure in Croissants
Understanding Croissant Structure: The Key to Baking Success
Defining the Ideal Honeycomb Croissant Interior
The hallmark of a perfectly baked croissant is its airy, open internal structure, often referred to as the "honeycomb." This isn't just a random collection of holes; it's a delicate network of thin, flaky layers separated by air pockets. When sliced horizontally, the interior should resemble the intricate pattern of a beehive, with varying sizes of irregular holes distributed throughout, rather than a dense, uniform crumb like bread or cake. This structure is the direct result of steam expanding between the thin layers of dough and butter during baking.
Achieving this specific honeycomb croissant interior requires precision at multiple stages of the baking process. It's not just about the final bake, but meticulous attention to ingredient quality, lamination technique, and proofing. The size and distribution of the "cells" in the honeycomb indicate how well the lamination created distinct layers and how effectively the dough rose during proofing and baking. A truly exceptional honeycomb interior signifies a light, tender texture that melts in your mouth.
The Importance of Honeycomb Structure: Taste and Texture
The honeycomb structure is paramount to the sensory experience of eating a croissant. Texturally, it provides that signature crisp exterior giving way to an incredibly light, airy, and tender interior. Without the distinct layers and air pockets, a croissant would feel heavy, dense, and bread-like, losing its characteristic flakiness. This textural contrast is what elevates a good croissant to a great one.
Beyond texture, the honeycomb contributes significantly to the flavor. The numerous thin layers, separated by melted butter, create a rich, buttery taste that is distributed throughout every bite. The air pockets allow the delicate flavors of the fermented dough and rich butter to fully develop and be perceived. A dense croissant lacks this intricate layering of flavor and texture, making achieving the perfect honeycomb interior a key goal for any serious baker aiming for authentic, delicious croissants.
Key Factors for Optimal Croissant Lamination
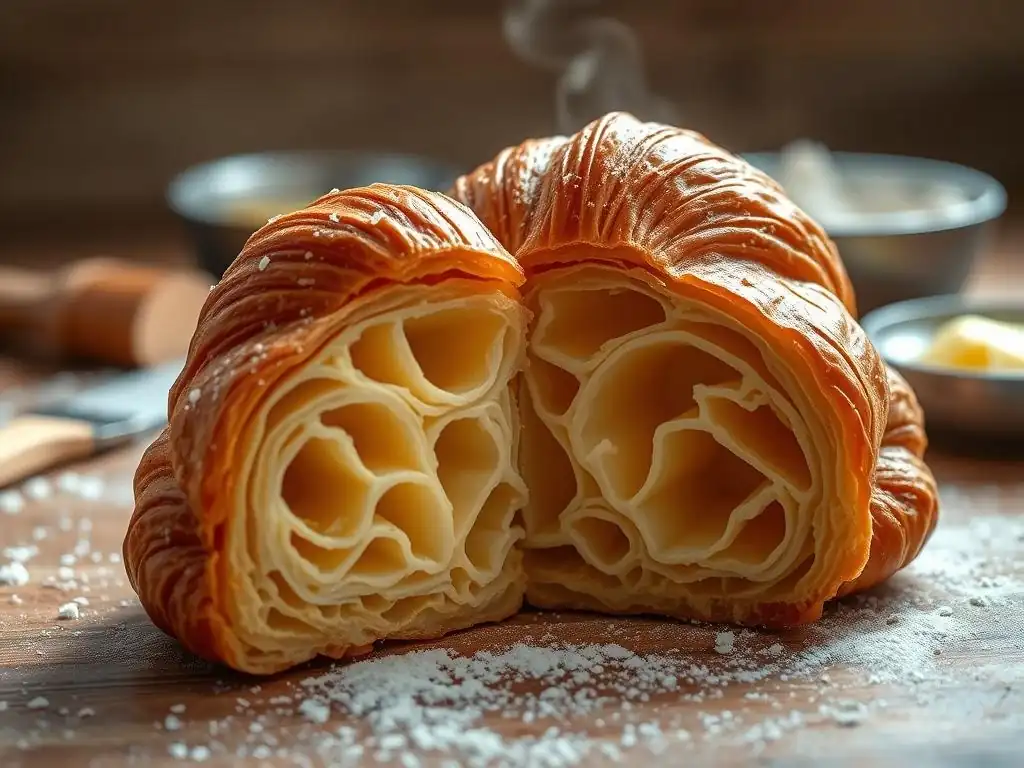
High-Quality Ingredients for Croissant Development
The foundation of a great croissant, and thus a great honeycomb structure, lies in the quality of your starting ingredients. Using subpar flour or butter will significantly hinder your ability to create and maintain the delicate layers necessary for that airy interior. Investing in the right ingredients is one of the most crucial honeycomb croissant interior baking tips you can follow.
This means selecting ingredients specifically suited for laminated doughs. While other factors are important, starting with high-quality flour and butter sets the stage for success. Think of it as building a house – a strong foundation is essential before you start adding the walls and roof. The right ingredients provide the necessary building blocks for gluten development and layer formation.
Flour Selection: Protein Content and Gluten Development
The type of flour you use is critical for developing the dough's structure. For croissants, a medium-to-high protein bread flour is typically recommended, often ranging from 11% to 13% protein content. This protein forms gluten when hydrated and kneaded, providing the dough with the strength and elasticity needed to withstand the rolling, folding, and stretching involved in lamination without tearing. Strong gluten development is essential for trapping the steam that creates the honeycomb structure during baking.
Using a flour with insufficient protein (like cake flour, around 8-10% protein) will result in a weak dough that tears easily during rolling, preventing the formation of distinct layers. Conversely, a very high protein flour (above 13-14%) might make the dough too tough to roll thinly without excessive effort. Aim for a balance that allows for strong, elastic dough development capable of holding its shape through multiple folds and proofing, contributing directly to a well-defined honeycomb croissant interior.
Butter: Fat Content and Melting Point Considerations
Butter is arguably the most defining ingredient in croissants, responsible for both flavor and the crucial separation of layers. High-quality butter, particularly European-style butter with a higher fat content (typically 82% or more, compared to around 80% in many American types), is preferred. The higher fat content means less water, resulting in flakier layers and a richer taste. More importantly, the butter needs to have a specific plasticity when cold – firm enough to be rolled out into a sheet without melting into the dough, but pliable enough not to crack.
The melting point of the butter is also a factor, though less variable between standard butters. What's critical is keeping the butter cold and firm during the lamination process. If the butter melts into the dough prematurely, you lose the distinct layers needed for the honeycomb. The goal is for the butter to remain as a separate sheet within the dough layers until it melts rapidly in the hot oven, creating steam that puffs up the dough layers into that desirable honeycomb structure.
Mastering Lamination: Techniques for Layering Dough and Butter
Lamination is the heart of croissant making, the process of repeatedly folding and rolling the dough and butter together to create hundreds of alternating layers. This meticulous technique is paramount to achieving that light, airy honeycomb croissant interior. It requires patience, precision, and careful temperature control to ensure the butter remains solid and distinct from the dough throughout the process.
Successful lamination isn't just about the number of folds; it's about the quality of those folds. Each fold must be executed neatly, with the dough and butter spread evenly. The dough should be rolled consistently thin at each stage, ensuring uniform layers. Any inconsistencies in thickness or distribution will lead to an uneven honeycomb structure, or worse, a dense, buttery mess where the layers haven't properly separated. Mastering these techniques is central to successful honeycomb croissant interior baking tips.
Dough Temperature Control: Preventing Butter Softening
Maintaining the correct temperature of both the dough and the butter is perhaps the single most critical factor during lamination. The ideal temperature range for the dough during rolling and folding is typically between 4°C and 8°C (39°F to 46°F). At this temperature, the dough is firm but pliable, and the butter remains solid and flexible, not brittle or soft. If the dough gets too warm, the butter will start to melt and integrate into the dough, destroying the distinct layers needed for the honeycomb.
This requires frequent chilling periods between folds. After each roll and fold cycle, the dough package should be rested in the refrigerator for at least 30-60 minutes, or until it is firm and cold to the touch. This allows the gluten structure to relax, making the dough easier to roll, and more importantly, it chills the butter back down to a workable consistency. Skipping or shortening these chilling steps is a common pitfall that leads to poor layer separation and a disappointing crumb.
Achieving Even Layers: Uniform Thickness and Distribution
Uniformity is key during lamination. When rolling out the dough and butter package, it's essential to apply even pressure across the surface to ensure the dough is the same thickness from edge to edge. Inconsistent rolling will result in areas with thicker layers and areas with thinner layers, leading to an uneven honeycomb structure after baking. Use gentle, consistent pressure and roll from the center outwards in all directions.
Similarly, when folding the dough, ensure the edges align neatly. Any misaligned folds or trapped pockets of air will create uneven layers and potentially dense spots in the final croissant. The goal is to create perfectly parallel layers of dough and butter throughout the entire package. This uniformity is what allows the steam to lift every layer equally during baking, resulting in a consistently open and airy honeycomb croissant interior.
Proofing for Volume and Structure
Proofing is the fermentation and final rise stage before baking, where the yeast produces carbon dioxide gas that expands the dough. For croissants, proofing is crucial for developing the final volume and setting the stage for the honeycomb structure to fully expand in the oven. It's a delicate balance – too little proofing results in dense, heavy croissants, while over-proofing can collapse the structure before it even hits the heat. Proper proofing is a vital piece of the honeycomb croissant interior baking tips puzzle.
During proofing, the yeast consumes sugars and releases gases, causing the dough to double or even triple in size. This expansion separates the layers created during lamination, filling the space with gas. When the croissant enters the hot oven, this trapped gas, along with the steam from the melting butter and water in the dough, expands dramatically, pushing the layers apart and solidifying the honeycomb structure.
Proofing Environment: Temperature and Humidity Guidelines
The ideal proofing environment for croissants is a warm, humid place. A temperature range of 24°C to 27°C (75°F to 80°F) is often recommended. This temperature encourages active yeast fermentation and dough expansion. Humidity is equally important; a relative humidity of around 75-80% prevents the surface of the croissants from drying out and forming a skin, which would restrict their rise and inhibit the separation of layers.
Many home bakers achieve this by placing croissants in a slightly warm oven (turned off, perhaps after being on for a few minutes and then off) with a pan of hot water on the rack below. This creates a warm, steamy environment. Avoid temperatures that are too high (above 30°C/86°F) as this can melt the butter prematurely before the dough has fully risen, leading to collapsed layers and a greasy, dense crumb instead of a beautiful honeycomb croissant interior.
Avoiding Over-Proofing: Assessing Dough Stability
Knowing when your croissants are perfectly proofed is an art. Over-proofing is a common mistake that can ruin the honeycomb structure. An over-proofed croissant will look puffy and delicate, but its gluten structure will be weakened. When you gently poke it, it will either collapse immediately or the indentation will remain permanently. In the oven, an over-proofed croissant often spreads out rather than rising upwards, resulting in a flat, dense pastry with little to no honeycomb.
A properly proofed croissant will have increased significantly in size (often looking quite jiggly and fragile), but when gently poked, the indentation should slowly spring back. This indicates the dough has enough gas for expansion but the gluten network is still strong enough to hold its structure during baking. This stage is often referred to as being "jiggly but not wobbly." Learning to recognize this stage is critical for successful honeycomb croissant interior baking tips.
Step-by-Step Guide to Laminated Croissant Dough
Creating laminated croissant dough at home is a rewarding process that, when executed correctly, yields pastries with that coveted honeycomb structure. It involves several distinct steps, each building upon the last to create the hundreds of layers necessary for flakiness and airiness. This section outlines the typical process, from preparing the initial dough to the final folds.
While recipes vary slightly, the core principles of dough preparation, butter inclusion, and repeated folding remain constant. Patience is key, as the process involves significant resting and chilling times. These steps are not merely pauses; they are essential for allowing the dough to relax and the butter to firm up, ensuring clean layer separation during subsequent rolling and folding, leading to a superior honeycomb croissant interior.
Preparing the Détrempe: Mixing and Resting
The process begins with making the détrempe, the base dough. This is typically a lean dough made from flour, water or milk, a small amount of sugar, salt, and yeast. Ingredients are mixed until just combined, then kneaded until a smooth, elastic dough forms. Unlike bread dough, it doesn't require extensive kneading initially, as further gluten development occurs during lamination.
After mixing, the détrempe is often shaped into a rectangle or square, wrapped tightly, and refrigerated for several hours, often overnight. This cold rest is crucial. It slows down yeast activity, allowing flavors to develop, and more importantly, it chills the dough thoroughly. Cold dough is easier to handle and roll without tearing, and it helps maintain the temperature difference between the dough and the butter during lamination, which is vital for achieving distinct layers and the resulting honeycomb structure.
Lamination: Folding and Resting Cycles
Lamination involves enclosing a block of cold butter within the chilled détrempe and then repeatedly rolling and folding the package. The goal is to create alternating layers of dough and butter. The most common methods involve "single folds" (folding the dough in thirds like a letter) or "double folds" (folding both ends to the center, then folding in half). A typical recipe might call for 3-4 single folds or a combination of single and double folds, resulting in hundreds or even thousands of layers.
Between each fold, the dough must be rested and chilled in the refrigerator for 30-60 minutes. This resting period is non-negotiable. It allows the gluten network to relax after being stretched, preventing the dough from springing back excessively when rolled again. Crucially, it re-chills the butter, ensuring it remains a solid sheet rather than melting into the dough, which is absolutely essential for developing the distinct layers that bake into the desired honeycomb croissant interior.
First Single Fold: Creating Initial Layers
After the détrempe has been chilled and the butter block prepared and enclosed, the first fold is performed. The dough package is rolled out to a specific size (e.g., three times as long as it is wide) and then folded into thirds. This creates the initial layers – three layers of dough separated by two layers of butter. This first fold is critical as it establishes the foundation for all subsequent layers.
Care must be taken to ensure the butter is evenly distributed within the dough before rolling, and that the rolling results in uniform thickness. After the fold, the dough package is wrapped securely and placed back in the refrigerator to chill. This rest allows the dough to relax and the butter to firm up, preparing it for the next rolling and folding step.
Second Single Fold: Refining Layer Distribution
After the first rest, the dough is rotated 90 degrees and rolled out again to the required dimensions. It is then folded into thirds once more. This second single fold multiplies the number of layers. If the first fold created 3 layers of dough, the second fold on top of that results in 3x3 = 9 layers of dough (separated by butter). The key is consistent rolling and neat folding to maintain the integrity of the layers.
Following the second fold, the dough is again wrapped and returned to the refrigerator for another rest. This chilling period is just as important as the first, allowing the dough to relax further and the butter to re-solidify. This repeated chilling and folding is what builds the complex structure that will eventually expand into the honeycomb croissant interior during baking.
Third Single Fold: Finalizing Dough Lamination
After the second rest, the dough is rotated 90 degrees again and rolled out for the third and final single fold (assuming a recipe calls for three). Folding the dough into thirds for the third time results in a significant number of layers: 9 layers from the previous stage multiplied by 3, equaling 27 layers of dough (separated by butter). Some recipes may call for additional folds (like a fourth single fold resulting in 81 layers, or double folds which multiply layers faster), but three single folds is a common standard.
With the final fold completed, the dough is given a final, often longer, rest in the refrigerator (usually several hours or overnight). This final chill is crucial before shaping. It allows the gluten to fully relax, making the dough pliable enough to roll and shape without excessive tension, and ensures the layers are well-defined and cold, ready for cutting and shaping into croissants before the critical proofing stage.
Shaping and Proofing Croissants for Optimal Rise
Once the laminated dough has had its final rest, it's ready to be shaped into individual croissants. This involves rolling the dough out one last time to a specific thickness (often around 3-4mm) and cutting it into triangles. The triangles are then rolled up from the wide base towards the point, creating the classic croissant shape. Precise cutting and rolling help maintain the integrity of the layers right up to the final shape.
After shaping, the croissants are placed on baking sheets and left to proof. As discussed earlier, this is a critical stage where the yeast does its work, expanding the dough and separating the layers. Proper proofing is vital for achieving height and an open honeycomb structure. The croissants should significantly increase in volume, becoming visibly puffy and delicate, indicating they are filled with enough gas to expand dramatically in the oven.
Baking for Golden Color and Flaky Texture
Baking is the final act where the magic truly happens. Croissants are typically baked in a hot oven, often starting at a higher temperature (e.g., 200-220°C or 400-425°F) for the first 10-15 minutes, then sometimes reduced slightly (e.g., to 180-190°C or 350-375°F) to finish baking through without burning. The initial high heat causes the butter to melt rapidly and turn into steam, which forces the layers apart, creating the rise and the honeycomb structure.
As the baking continues, the exterior browns and becomes crisp, while the interior cooks through and the structure sets. The steam trapped between the layers expands the air pockets, solidifying the open, airy honeycomb. A well-baked croissant will be a deep golden brown, feel light for its size, and have a visibly layered and flaky exterior, promising that desirable honeycomb croissant interior within.
Troubleshooting Common Croissant Issues

Even with careful attention to detail, issues can arise when baking croissants at home. Recognizing common problems and understanding their causes is essential for improving your technique and consistently achieving that perfect honeycomb interior. Don's be discouraged by initial setbacks; troubleshooting is a normal part of mastering laminated doughs.
Identifying the root cause of a problem – whether it's dense crumb, uneven layers, or flat croissants – allows you to adjust your process for the next batch. Many issues can be traced back to temperature control, lamination technique, or proofing. By systematically addressing these areas, you can refine your skills and get closer to your goal of perfect honeycomb croissants.
Dense Croissants: Causes and Solutions
A dense, heavy croissant is one of the most common disappointments and indicates a failure to develop sufficient air pockets, meaning the honeycomb structure is missing or severely underdeveloped. The primary cause is often insufficient proofing. If the croissants haven't proofed long enough, there isn't enough trapped gas to expand the layers in the oven. Ensure your proofing environment is warm and humid, and allow adequate time for the dough to double in size and become visibly airy.
Another major cause of density is poor lamination. If the butter melted into the dough during folding due to warm temperatures or insufficient chilling, the distinct layers are lost, preventing separation during baking. Using too much flour during rolling can also inhibit layers from sealing properly. Ensure your dough and butter are kept cold throughout lamination and use minimal flour on your work surface. Baking at too low a temperature can also contribute, as the butter may not turn to steam rapidly enough to lift the layers.
Uneven Honeycomb: Identifying and Correcting Lamination Errors
An uneven honeycomb, where some areas are airy and others are dense or have collapsed layers, is typically a sign of inconsistent lamination. If the dough was rolled unevenly during the folding stages, some sections will have thicker layers than others. These thicker sections will not expand as much as the thinner ones, leading to an irregular crumb structure.
To correct this, focus on applying even pressure across the dough surface when rolling. Roll from the center outwards, checking the thickness frequently. Also, ensure your folds are neat and the edges are aligned. Any trapped air bubbles during folding can also disrupt layer formation. Pay close attention during the rolling and folding steps to maintain uniformity throughout the entire dough package.
Flattened Croissants: Addressing Proofing and Baking Problems
Flat croissants that spread outwards rather than rising upwards are often the result of over-proofing or issues during the initial moments of baking. If croissants are over-proofed, the gluten structure weakens significantly, and the dough essentially deflates or collapses slightly before or upon entering the oven. The dough lacks the strength to hold its shape and expand vertically.
Alternatively, if the oven isn't hot enough at the start of baking, the butter may melt and seep out before it has a chance to create steam and lift the layers. This results in buttery pools around the croissants and a flattened, dense final product. Ensure your oven is properly preheated to the correct high temperature before loading the croissants. If over-proofing is the issue, reduce the proofing time or lower the proofing temperature slightly in your next batch.
Advanced Croissant Techniques
Once you've mastered the basics of lamination and consistently achieve a good honeycomb croissant interior, you might explore more advanced techniques to further enhance flavor, texture, and the overall baking experience. These methods build upon the fundamental principles but introduce variations in ingredients or fermentation processes.
These advanced tips for honeycomb croissant interior baking can add complexity and depth to your pastries. They are typically explored after a baker has gained confidence with the standard recipe and process, allowing for experimentation and fine-tuning to personal preference.
Utilizing a Poolish for Enhanced Flavor and Texture
Incorporating a poolish (a type of preferment made with equal parts flour and water, plus a small amount of yeast, left to ferment for several hours or overnight) into your détrempe can significantly enhance both the flavor and texture of your croissants. The longer fermentation of the poolish develops more complex flavors and organic acids, contributing a subtle tanginess that balances the richness of the butter.
Furthermore, the enzymatic activity during the poolish fermentation can break down starches, potentially leading to a more tender crumb and a slightly more open structure. While not strictly necessary for a honeycomb interior, a poolish adds another layer of sophistication to your croissants, elevating them beyond a simple rich pastry. Typically, a poolish might constitute 20-30% of the total flour weight in the final dough.
Incorporating Whole Wheat Flour for a Nutty Flavor Profile
While classic croissants are made with white bread flour, incorporating a small percentage of fine whole wheat flour (perhaps 10-15% of the total flour weight) can add a pleasant nutty flavor and slightly different texture. This requires careful handling, as whole wheat flour absorbs more water and its bran can interfere with gluten development.
Using whole wheat flour will likely result in a slightly less open honeycomb compared to 100% white flour, as the bran disrupts the gluten network. However, for those seeking a more rustic flavor profile, it's an interesting variation. Adjustments to hydration might be necessary, and ensuring robust gluten development despite the whole wheat is key to maintaining as much of the desired honeycomb structure as possible.
Exploring Different Butter Types for Unique Aromas
Beyond standard European-style butter, experimenting with butters from different regions or even cultured butters can introduce unique flavor nuances. For instance, some French or regional European butters might have distinct terroirs or be cultured longer, developing more pronounced dairy or even slightly cheesy notes.
Cultured butter, made from cream that has been fermented with bacterial cultures before churning, often has a tangier flavor and can contribute to a richer, more complex taste in the final croissant. While the fundamental process of lamination remains the same, the choice of butter can significantly impact the final aroma and taste, offering another avenue for enhancing your honeycomb croissants.
Tips for Home Bakers
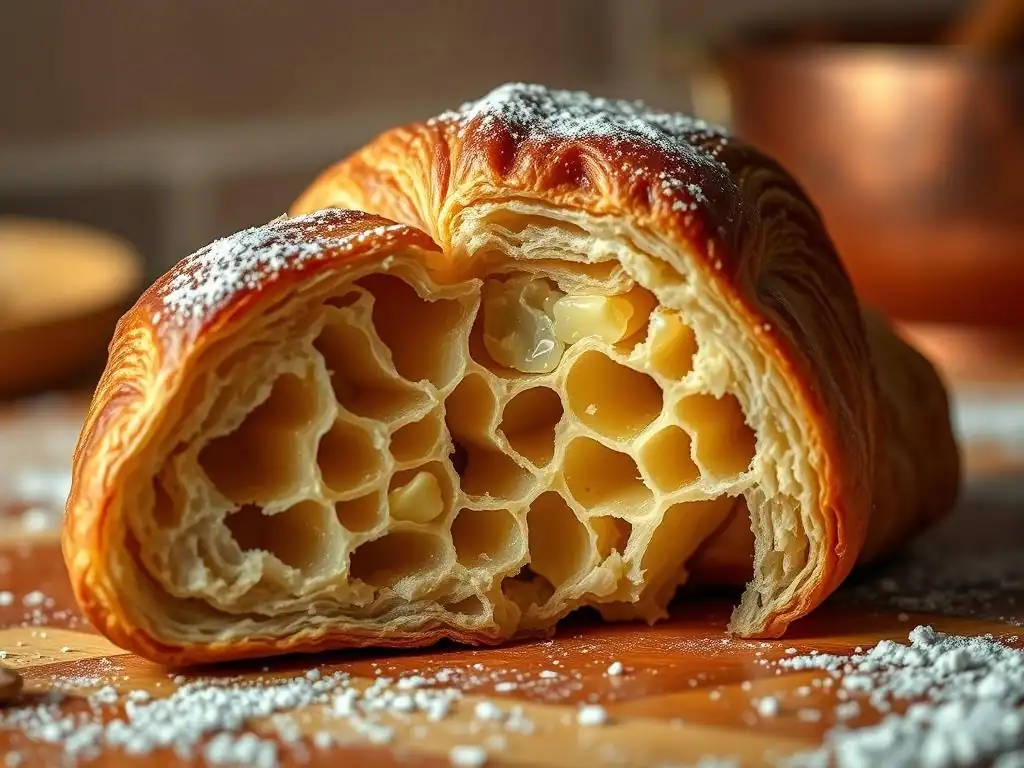
Baking croissants at home presents unique challenges compared to a professional bakery environment, mainly related to temperature control and equipment. However, with a few practical tips, home bakers can significantly improve their chances of achieving that desired honeycomb croissant interior. These simple yet effective strategies can make the lamination process much more manageable in a standard kitchen.
Adapting professional techniques to a home setting is key. While you might not have walk-in coolers or professional dough sheeters, creative solutions can help you maintain the cold temperatures and achieve the consistent rolling needed for successful lamination. These honeycomb croissant interior baking tips are specifically tailored for the home environment.
Maintaining a Cold Environment: Practical Cooling Techniques
Keeping the dough and butter cold throughout lamination is paramount. In a warm kitchen, this can be tricky. Work quickly, and don't hesitate to return the dough to the refrigerator whenever it feels too warm or soft. Consider working on a cool surface, like a marble pastry board if you have one, or even placing a baking sheet in the freezer beforehand to use as a temporary cold surface.
If your kitchen is particularly warm, you might need longer chilling times between folds, perhaps 60-90 minutes instead of 30-60. Some bakers even recommend doing the lamination process in stages over two days to ensure adequate chilling. Having all your tools ready and the workspace clean before you start each rolling session minimizes the time the dough is exposed to room temperature.
Using a Rolling Pin: Achieving Consistent Dough Thickness
Achieving uniform thickness when rolling laminated dough with a rolling pin requires practice. Avoid pressing down too hard initially; use steady, even pressure. Roll from the center outwards, lifting the pin slightly as you reach the edges to prevent thinning them too much. Rotate the dough frequently (after every few rolls) and flip it over occasionally to ensure even rolling on both sides.
Using measurement guides on your work surface or rolling pin can help maintain consistency in size and thickness. Aim for a smooth, even sheet of dough before each fold. Any lumps or thin spots will carry through the layers and result in an uneven honeycomb structure. Patient, consistent rolling is key to successful lamination.
Cutting and Shaping: Maintaining Uniformity
Even after perfect lamination, inconsistent cutting and shaping can negatively impact the final result. Use a sharp knife or pizza cutter to make clean cuts through the dough without dragging, which can seal the layers together. Measure your triangles to ensure they are roughly the same size, which helps them proof and bake uniformly.
When rolling the triangles into croissants, roll them with gentle, even tension, stretching the point slightly. Avoid rolling too tightly, as this can compress the layers and inhibit the honeycomb formation. The goal is to create a shape that will allow the layers to expand freely during proofing and baking, resulting in a beautiful, open interior.
Achieving the Perfect Croissant: A Summary
Mastering the art of baking croissants with a beautiful honeycomb interior is a journey that requires patience, practice, and attention to detail at every step. From selecting the right ingredients to executing precise lamination and proofing techniques, each stage plays a vital role in the final outcome. While challenging, the reward of a perfectly flaky, airy, and buttery croissant is well worth the effort.
Remember that consistency is key. Maintaining cold temperatures, achieving even layers during lamination, and proofing correctly are non-negotiable steps. Don't be discouraged by imperfections in your first few attempts; each batch is a learning opportunity. With dedication and practice, you can consistently achieve that coveted honeycomb croissant interior in your home kitchen.
Key Takeaways for Consistent Results
- Use high-protein flour (11-13%) and high-fat butter (82%+) for optimal structure and flavor.
- Maintain cold temperatures (4-8°C / 39-46°F) for dough and butter throughout lamination with adequate chilling breaks.
- Execute lamination folds neatly and roll the dough to a uniform thickness to ensure even layers.
- Proof croissants in a warm, humid environment (24-27°C / 75-80°F, 75-80% humidity) until visibly airy and jiggly.
- Bake in a hot oven (starting around 200-220°C / 400-425°F) to promote rapid butter melting and steam expansion.
- Troubleshoot issues like density (insufficient proofing, poor lamination) and unevenness (inconsistent rolling).
Final Thoughts
Achieving the perfect honeycomb croissant interior is a hallmark of baking skill. It's a process that demands respect for the ingredients and the technique. While it may seem daunting at first, breaking it down into manageable steps and focusing on the critical factors like temperature and lamination makes it achievable for home bakers.
Armed with these honeycomb croissant interior baking tips, you are well on your way to producing croissants that are not only delicious but also visually stunning, boasting that light, airy structure that defines this classic pastry. Happy baking!
Frequently Asked Questions
How critical is dough temperature when aiming for a honeycomb croissant interior?
Dough temperature is extremely critical. Maintaining a consistently cold dough prevents the butter from melting and ensures distinct layers, essential for a honeycomb structure.
What type of flour is best for achieving a honeycomb interior?
Using a strong bread flour with a high protein content is generally recommended. This flour develops more gluten, which provides the necessary structure for holding the honeycomb shape.
What is the importance of proper lamination in achieving the honeycomb interior?
Proper lamination is the foundation of the honeycomb structure. Ensure even layers of dough and butter are created through precise folding techniques, preventing butter leakage and promoting distinct layers.
How does proofing time affect the final honeycomb structure of a croissant?
Over-proofing can lead to a collapsed and dense croissant. Careful monitoring and short, controlled proofing are vital to maintain the delicate layers and achieve the desired honeycomb interior.
What is the best method for baking croissants to maximize honeycomb formation?
Baking at a high initial temperature creates steam, which helps the layers separate and puff up. Then, reducing the temperature allows the croissant to bake through without burning, resulting in a well-developed honeycomb.
Final Reflection: The Golden Promise of the Honeycomb Croissant
The pursuit of the perfect honeycomb croissant interior is more than just a baking challenge; it's a testament to the power of precision and patience in achieving culinary artistry. This article has explored the crucial techniques – from the careful selection of ingredients to the mastery of lamination and baking – that elevate a simple croissant to a masterpiece. The demand for this visually stunning and texturally delightful treat continues to grow, proving that the allure of perfectly layered, airy pastry remains strong.
The journey to understanding the honeycomb effect has been a fascinating exploration of both science and art. The delicate balance of butter, hydration, and temperature is a constant reminder of the intricate processes at play in even the simplest-looking baked goods. This pursuit resonates deeply with me, as it mirrors the dedication and attention to detail required in any creative endeavor. The details are not the details. They make the design.
– Charles Eames. This quote perfectly encapsulates the importance of mastering the seemingly small aspects of croissant making that ultimately determine the success of the final product.
Now, it's your turn. Don't be intimidated by the seemingly complex process. Take the knowledge gained from this article, experiment with the techniques, and embrace the journey. Each attempt, whether successful or not, will bring you closer to understanding the magic behind that coveted honeycomb interior. The reward? Not just a visually stunning croissant, but a deeper appreciation for the artistry and science of baking, and the satisfaction of creating something truly beautiful with your own hands. So, gather your ingredients, preheat your oven, and embark on your own croissant adventure. The golden promise of the honeycomb awaits.
Unleash Your Inner Croissant Artist!
Thanks for joining us on this buttery journey into the heart of perfect croissant making! We hope you gained valuable insights into achieving that stunning honeycomb interior. Now it's time to put your newfound knowledge into practice.
- Master the Laminating Technique: Practice makes perfect! Try making a small batch of croissants, focusing specifically on the lamination process detailed in the article. Pay close attention to the butter's temperature and the folding technique.
- Share Your Success (or Challenges!): We'd love to see your croissant creations! Share photos on social media using #BakeWithEaseCroissants and tag us. Let's inspire each other!
- Experiment with Different Butters: Try using a different type of butter – perhaps a higher-fat content one – and observe the effect on your honeycomb structure. Document your results!
Ready to bake your most beautiful croissants yet? What unique twist will you add to your next batch?