
Learn to Build 3D Elements on Your Decorated Cookies


Welcome to BakeWithEase, your passport to a world of delightful baking! Ever dreamt of turning your cookies into edible masterpieces? This week, we're diving into the captivating world of 3D cookie decorating, revealing a tutorial that unlocks a whole new dimension of creativity. Discover the secrets to crafting stunning, three-dimensional elements that will transform your ordinary cookies into extraordinary works of art. Intrigued? Let's get started and explore how to elevate your pastry and dessert skills!
- Learn to Build 3D Elements on Your Decorated Cookies: A BakeWithEase Tutorial
- Introduction to 3D Cookie Decorating Techniques
- Essential Tools and Materials for 3D Cookie Art
-
Step-by-Step 3D Cookie Decorating Tutorial: 3D Butterfly on a Floral Cookie
- Planning Your 3D Cookie Design: Sketching and Considerations
- Baking the Base Cookies: Ensuring a Strong Foundation
- Preparing Royal Icing for 3D Construction
- Creating Individual 3D Components: Butterfly Wings
- Creating Individual 3D Components: Small Royal Icing Flowers
- Assembling Your 3D Cookie Masterpiece
- Advanced 3D Cookie Decorating Tips and Tricks
- Inspiring 3D Cookie Decorating Ideas and Projects
- Maintaining and Storing Your Decorated 3D Cookies
- Conclusion: Mastering the Art of 3D Cookie Decoration
- Frequently Asked Questions
- Final Reflection: Elevating Cookie Decorating to New Heights
- Unleash Your Inner Cookie Artist: Master 3D Decorating!
Transforming flat decorated cookies into multi-dimensional edible art pieces is a thrilling next step for any enthusiastic baker. This advanced technique, often explored in a comprehensive 3D cookie decorating tutorial, involves creating elements that literally stand up from the cookie surface, adding depth, realism, and a "wow" factor that simple flooding cannot achieve. Imagine delicate royal icing flowers that look ready to pick, intricate butterflies poised for flight, or miniature scenes unfolding on a cookie canvas. This level of detail moves cookie decorating into the realm of sculptural art, pushing creative boundaries and delighting recipients with unexpected visual complexity.
Achieving successful 3D cookie art requires mastering specific skills beyond basic flooding and piping. It involves understanding structure, working with different consistencies of royal icing, allowing for proper drying times, and often constructing components separately before assembly. While it might seem daunting at first, breaking down the process into manageable steps, as we will in this 3D cookie decorating tutorial, makes it accessible. The payoff is immense: cookies that are not just delicious treats but truly memorable works of edible art, perfect for special occasions, gifts, or simply challenging your own creative limits.
Adding dimension fundamentally changes the visual impact of your decorated cookies. A flat cookie, no matter how beautifully flooded and piped, exists on a single plane. Introducing 3D elements creates shadows, highlights, and a sense of realism that draws the viewer in. For example, a simple cookie decorated with flat royal icing flowers is lovely, but adding piped 3D petals that overlap and curl brings those flowers to life, making them appear more organic and vibrant. This technique is particularly effective for themes like nature, architecture, or characters, where realistic form is key to conveying the subject.
Beyond aesthetics, building 3D elements offers unique creative opportunities. You can tell more complex stories or create miniature scenes on a cookie. Consider a holiday cookie scene: a flat design might show a house and trees, but adding a 3D snowman, a tiny sleigh, or layered snowdrifts transforms it into a charming, tactile diorama.
This depth also makes cookies more engaging and interactive; people are naturally drawn to examine the intricate details of a 3D piece up close. For those looking to refine their skills and stand out, incorporating 3D techniques learned in a dedicated 3D cookie decorating tutorial is a fantastic way to elevate their craft.
Successfully building 3D elements on cookies requires a slightly expanded toolkit compared to basic decorating. High-quality meringue powder or royal icing mix is crucial, as the structural integrity of your 3D components depends heavily on the icing's strength once dried. You'll need a variety of piping bags (both disposable and reusable), couplers, and piping tips.
Essential tips include round tips in various small sizes (like Wilton #1, #2, #3) for fine details and outlines, and star tips (like Wilton #16, #18) or petal tips (like Wilton #101, #104) for creating textured elements like flowers or ruffles. A scribe tool or toothpick is invaluable for manipulating icing and popping air bubbles.
Other helpful supplies include parchment paper or acetate sheets for piping elements that will dry separately, a sturdy cookie drying rack or flat surface, and small containers for mixing different icing colors and consistencies. Food coloring gels are preferred over liquid colors as they don't add excess moisture to the icing, which is vital for maintaining structure.
Having a fan or dehydrator set to a low temperature (around 90-100°F or 32-38°C) can significantly speed up drying times, reducing the risk of collapse or damage while elements are curing. Investing in quality tools makes the process smoother and improves the final outcome of your 3D cookie decorating tutorial projects.
Royal Icing Consistency for 3D Elements: A Detailed Guide
Achieving the correct royal icing consistency is perhaps the most critical factor in successful 3D cookie decorating. Unlike flood consistency (which spreads smoothly) or outline consistency (which holds a defined edge but is still relatively soft), 3D elements require a stiff, structural consistency. This icing should hold its shape perfectly when piped, without slumping or losing detail. When you lift your spatula or spoon from the bowl, the peak should stand firm without curling over. A good test is to pipe a small dot; it should maintain its round shape with a slight peak.
This stiff consistency is achieved by using less water (or liquid) relative to the meringue powder and powdered sugar compared to softer consistencies. For building free-standing structures or thick layered elements, the icing needs to be firm enough to support its own weight and the weight of subsequent layers as it dries. If the icing is too soft, your 3D elements will collapse or spread, losing their intended form.
Conversely, if it's too stiff, it can be difficult to pipe smoothly and may crack easily when drying. Finding that sweet spot – firm but pliable – is key and often requires testing small batches and adjusting with tiny amounts of water or powdered sugar until it's just right for the specific 3D cookie decorating tutorial step you're working on.
While many 3D elements are built directly on a base cookie or piped separately, the choice of cookie cutter for your base cookie is still important. For detailed 3D designs, a sturdy cookie base is essential. Avoid overly thin or delicate cookie shapes that might break under the weight of added 3D elements or during handling.
Simple, classic shapes like circles, squares, or ovals provide a stable canvas. However, you can also use more complex shapes, such as a butterfly cutter for a base on which to build 3D wings, or a flower cutter for a base supporting 3D petals.
Consider the overall design when selecting your base cutter. If you plan to build a complex scene, a larger, simpler shape offers more space. If the 3D element is the main focus, like a standing animal or object, you might need specialty cutters that allow the cookie to stand on its own (e.g., cutters with a flat base) or plan to use royal icing "glue" to attach multiple cookies together to form a standing structure.
For components piped separately, like individual petals or leaves, no cutter is needed – they are piped freehand or using templates onto parchment paper. The key is ensuring your base cookie is baked evenly and robust enough to support the weight and handling required for your 3D cookie decorating tutorial project.
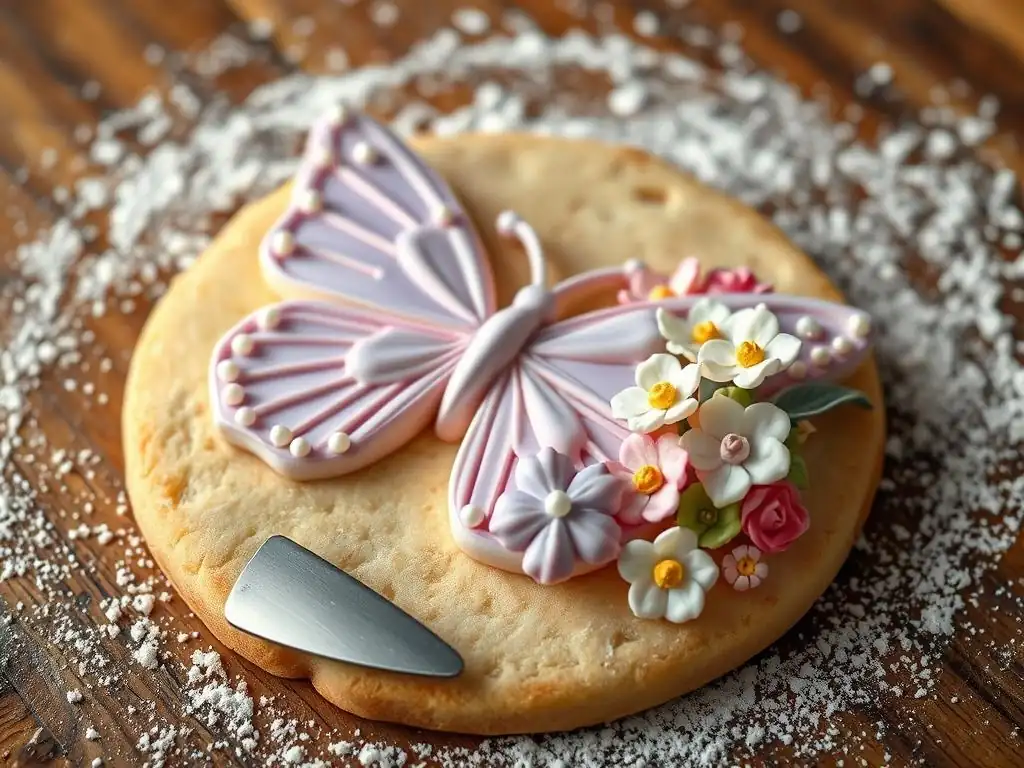
Before dipping into the icing, planning is paramount for a successful 3D cookie decorating tutorial project. Start by sketching your design on paper, imagining how the 3D elements will interact with the flat base cookie. For our 3D butterfly on a floral cookie example, sketch the size and placement of the base cookie, then draw the planned flat floral design on the cookie surface. Next, sketch the butterfly, considering the size and shape of its wings relative to the cookie.
Will the wings be attached flat and then built up? Or will they be piped and dried separately to stand up? For a realistic look, piping wings separately and attaching them later is often preferred.
Consider the logistics of drying and assembly. If piping elements separately, plan how you will support them as they dry (e.g., draping wings over a curved surface). Think about the order of operations: What needs to dry before the next step can be applied?
For the butterfly, the wings must be completely dry and hardened before they can be attached to the cookie body. Also, consider the weight of the 3D elements and how they will be secured to the base cookie. Jot down notes on estimated drying times and required icing consistencies for each part of your 3D cookie decorating tutorial plan.
A sturdy base cookie is non-negotiable for supporting 3D royal icing elements. Use a reliable recipe for cut-out cookies that holds its shape well during baking and doesn't spread excessively. A typical recipe might include 1 cup of unsalted butter, 1.5 cups of granulated sugar, 2 large eggs, 1 teaspoon of vanilla extract, 3 cups of all-purpose flour, and 1 teaspoon of baking powder. Cream the butter and sugar, beat in eggs and vanilla, then add dry ingredients gradually. Chill the dough for at least 30-60 minutes before rolling to a thickness of about 3/8 inch (roughly 1 cm).
Bake the cookies on parchment-lined baking sheets in a preheated oven, typically around 350°F (175°C), for 8-12 minutes, depending on size and thickness, until the edges are lightly golden. Avoid under-baking, as soft cookies can't support weight well. Allow the cookies to cool completely on the baking sheet for a few minutes before transferring them to a wire rack to cool fully. Ensure they are perfectly flat; any doming or unevenness can make attaching 3D elements challenging. A well-baked, flat, sturdy cookie provides the ideal canvas for your intricate 3D cookie decorating tutorial project.
Preparing Royal Icing for 3D Construction
For constructing 3D elements like butterfly wings or flower petals, you will need royal icing mixed to a stiff consistency. A standard recipe using meringue powder often calls for 4 cups of powdered sugar, 3 tablespoons of meringue powder, and approximately 1/2 cup of warm water. Whisk the meringue powder and water until frothy, then gradually add the powdered sugar, mixing on low speed until combined.
Increase speed to medium-high and beat for 5-7 minutes until the icing is stiff, glossy, and forms firm peaks. You might need slightly more or less water depending on humidity and the specific meringue powder used.
Once your basic stiff icing is ready, divide it into portions for coloring. Use gel food colors sparingly to achieve desired hues without adding too much moisture. For instance, a tiny drop of yellow and red gel can make orange.
Remember that colors deepen slightly as the icing dries. Keep any icing you aren't actively using covered with a damp cloth or plastic wrap pressed directly onto the surface to prevent it from drying out and forming a crust. Having separate bowls of icing ready in stiff consistency, perhaps one for the butterfly body, one for wings, and various colors for flowers, streamlines the 3D cookie decorating tutorial process.
Creating Individual 3D Components: Butterfly Wings
Creating the butterfly wings separately allows them to dry into a desired shape before being attached, making them appear more delicate and realistic. On a piece of parchment paper or acetate, draw or trace templates of the butterfly wings. You will need four wings per butterfly – two larger forewings and two smaller hindwings. Place the parchment over a slightly curved surface, like a rolling pin, crumpled foil, or a specialized drying form, so the wings dry with a gentle curve, giving a sense of movement.
Using stiff royal icing colored appropriately, pipe the outline of each wing directly onto the parchment, following your template. Immediately fill the outline using the same stiff icing or a slightly softer consistency (like 10-second flood consistency) depending on the desired texture and thickness. Use a scribe tool or toothpick to gently spread the icing to the edges and remove air bubbles. For added strength, especially for larger wings, you can pipe a thin layer of icing, let it set for 15-20 minutes, and then add a second layer.
Piping Techniques for Delicate Wing Details
Once the base layer of the wings is piped and has crusted over (usually within 30-60 minutes depending on humidity), you can add delicate details using stiff or medium-consistency royal icing and small round piping tips (like #1 or #0). Pipe veins onto the wings, following natural patterns or creating decorative swirls. You can also add dots, stripes, or other intricate designs. For a lace-like effect, you can pipe intricate patterns directly onto the parchment and then lift the dried lace element and attach it to the wing base with a tiny dot of icing.
For extra realism or sparkle, you can add edible glitter or dust while the icing is still wet. Gently tap the excess off once the icing is dry. Allow these detailed wing components to dry completely on their curved surface for at least 8-12 hours, or preferably overnight, until they are hard and brittle. Drying time is crucial; attempting to move or attach them too soon will result in breakage. Once fully dry, carefully peel them off the parchment paper.
Drying and Storing 3D Wing Elements
Proper drying is absolutely essential for creating strong, non-breakable 3D elements. As mentioned, allow the piped wings to dry on a curved surface for a minimum of 8-12 hours, ideally in a low-humidity environment. Using a fan or dehydrator set to a low temperature (around 95°F or 35°C) can significantly speed this up, potentially reducing drying time to 4-6 hours, but always check for complete hardness. The wings should snap cleanly if broken (though try not to break them! ).
Once fully dry, handle the delicate wings with extreme care. Store them in an airtight container layered with parchment paper to prevent them from sticking together or breaking. Keep the container in a cool, dry place away from direct sunlight. Properly dried and stored royal icing pieces can last for weeks or even months, allowing you to prepare elements in advance for your 3D cookie decorating tutorial project. Just be mindful of moisture, as humidity can cause them to soften or lose shape.
Creating Individual 3D Components: Small Royal Icing Flowers
Small royal icing flowers are another classic 3D element often added to cookies. These can be piped directly onto the base cookie or, for more dimension and ease of placement, piped and dried separately on parchment paper. Using stiff royal icing and a small petal tip (like Wilton #101 or #104), pipe individual petals onto parchment paper, overlapping them slightly to form a bloom. You can create simple five-petal flowers or more complex roses by piping a cone base and wrapping petals around it.
For smaller accent flowers, a star tip (like Wilton #16) can create simple rosettes or starbursts. A round tip (#2 or #3) can be used to pipe small dots or buds. Experiment with different tip angles and pressure to create varied petal shapes and sizes. Pipe a few extra flowers in case of breakage during assembly. Allow these small floral components to dry completely on a flat surface for at least 6-8 hours, or until hard.
Piping Techniques for 3D Flowers
Beyond basic petals, explore techniques like piping layered ruffles with a petal tip to create fuller blooms or using a leaf tip to add dimensional leaves. For a realistic rose, pipe a small mound of stiff icing as the base, then use a petal tip (#104) to pipe petals starting from the center and working outwards, slightly overlapping each petal. Hold the tip with the wider end towards the base and the narrower end facing outwards.
For smaller, simpler flowers like primroses, use a small petal tip (#101) and pipe five petals in a circle, allowing them to slightly overlap at the base. You can add a dot of contrasting color in the center once the petals have crusted over. Practice these techniques on parchment paper before attempting them for your final 3D cookie decorating tutorial pieces to get a feel for the pressure and angle required for different tips.
Attaching Wire for Added Stability (Optional)
For certain 3D floral designs, particularly sugar flowers intended to stand tall or be arranged in a bouquet-like fashion on a larger cookie or cake, adding floral wire can provide crucial stability. Use thin, food-safe floral wire (typically gauge 26 or 28). Before the royal icing flower component dries completely (while it's still soft but holding its shape), gently insert one end of the wire into the base of the flower. You may need to add a tiny dot of fresh icing around the wire entry point to secure it.
Ensure the wire is inserted far enough to be stable but not so far that it pokes through the petals. Allow the flower to dry completely with the wire attached, often by sticking the wire into a block of floral foam or styrofoam so the flower hangs or stands freely.
While less common for simple cookie attachments than for elaborate sugar flowers, this technique can be useful if you plan to create very delicate or tall 3D floral arrangements on a cookie. However, for basic attachments like those in our 3D cookie decorating tutorial butterfly example, wire is usually not necessary.
Once all your individual 3D components (butterfly wings, flowers, etc.) are completely dry and hardened, it's time for the final assembly onto your base cookie. This stage requires patience and a steady hand. Have your base cookie decorated with any flat background elements (like flooded grass or sky) that need to be dry. You'll need a small amount of stiff royal icing to act as glue.
Plan the placement of your 3D elements before applying any icing. For the butterfly, decide where the body will sit and how the wings will be angled. For flowers, arrange them loosely on the cookie to visualize the final layout. Once you have a plan, work carefully, attaching one element at a time.
Gluing Techniques: Attaching 3D Elements with Royal Icing
Stiff royal icing serves as an excellent edible adhesive for attaching dried 3D elements to the base cookie. Using a piping bag with a small round tip (#2 or #3) or even just a toothpick, apply a small dot or line of stiff icing to the area on the base cookie where the 3D element will sit, or directly onto the back of the 3D element itself. For example, to attach the butterfly wings, apply a thin line of icing along the edge where the wing will meet the butterfly body on the cookie.
Carefully pick up the dried 3D element (like a wing) and gently press it into the wet "glue" icing on the base cookie. Hold it in place for a few seconds until it feels secure enough to stand on its own. For elements that need to stand upright, you might need to apply icing to the base of the element and press it onto the cookie, holding it until it doesn't wobble. Use just enough icing to secure the piece; too much can squeeze out and look messy.
Supporting Structures: Ensuring Stability During Drying
Once 3D elements are attached with wet royal icing glue, they need support while the glue dries and hardens. This is a crucial step to prevent them from shifting, sagging, or falling off. For the butterfly wings attached at an angle, you might use small props like crumpled paper towels, small blocks of foam, or even other small cookies positioned strategically to hold the wings in the desired position while the connecting icing dries.
For elements that need to stand vertically, you might need to prop them up from the sides. Be creative with what you use as supports – just ensure they don't touch the wet icing in a way that will mar the finish. Leave the cookie with its supports undisturbed for several hours (ideally 4-6 hours or longer) until the glue icing is completely dry and the 3D elements are firmly attached. Patience here prevents heartbreak later!
Finishing Touches: Adding Details and Refinements
Once the 3D elements are securely attached and the glue icing is dry, you can add final details and refinements to bring your 3D cookie decorating tutorial piece to life. Use thin consistency icing or edible paint to add small details like antennae to the butterfly, veins on leaves, or centers to the flowers. You can use edible markers for fine lines or dots.
Consider adding edible glitter or metallic edible dust (applied with a dry brush) to highlight certain areas, like the edges of butterfly wings or the tips of flower petals, for extra sparkle and dimension. Use a small amount of stiff icing to cover any visible glue points if necessary. Step back and look at the cookie from different angles to ensure all elements are balanced and the overall design is cohesive. These final touches elevate your piece from assembled parts to a finished work of 3D cookie art.
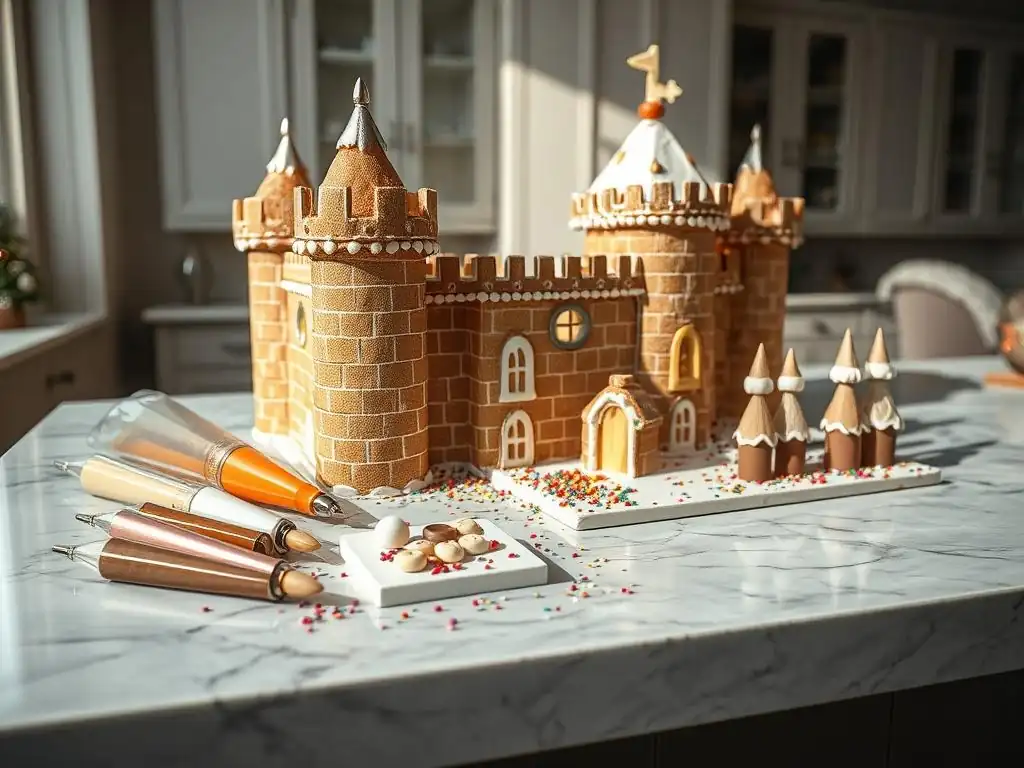
Creating realistic textures adds another layer of sophistication to 3D cookie decorating. For instance, to replicate wood grain, pipe lines of brown icing and gently drag a scribe tool or toothpick through them while still wet. For stone or rock textures, apply a layer of grey icing and stipple it with a brush or sponge before it dries. Crumbling up parchment paper and pressing it onto slightly wet icing can create a cracked earth effect.
For fur or hair, use a grass tip (like Wilton #233) and pipe short, overlapping strokes of icing. Experiment with different icing consistencies and tip sizes to vary the look. For fabric-like textures, try piping ruffles or folds using a petal tip. You can also dust dried 3D elements with edible powders or airbrush them with food coloring to create shading and highlight textures, mimicking the natural world. Practice these textural techniques on scrap pieces of dried icing before applying them to your finished 3D cookie decorating tutorial project.
Working with Multiple Colors in 3D Designs
Incorporating multiple colors into your 3D elements adds vibrancy and depth. When piping multi-colored elements like flower petals that transition from one color to another, you can use a single piping bag filled with two or more colors side-by-side. As you pipe, the colors will blend slightly at the edges, creating a gradient effect. This works well for leaves with darker veins or petals that are lighter at the tips.
Alternatively, you can pipe sections of an element in different colors and allow them to crust slightly before adding adjacent colors to prevent bleeding. For instance, pipe the base of a flower petal in one color, let it set for 10-15 minutes, then pipe the tip in a different color. For separate components like butterfly wings, you can pipe different sections of the wing in various colors and then add details over the top once dry. Keep your colors vibrant by using quality gel food colors and mixing them thoroughly into your stiff royal icing.
Even experienced decorators encounter challenges with 3D cookie art. One common issue is elements cracking after drying. This can happen if the icing is too stiff, dries too quickly on the surface before the inside, or if the piece is moved while still slightly wet. To prevent cracking, ensure your icing isn't overly stiff, consider drying in a slightly more humid environment (though still with air circulation), or cover the piece loosely while drying to slow the surface crusting.
Another problem is 3D structures collapsing or sagging before they dry. This almost always indicates the royal icing is too soft. Ensure you are using a true stiff consistency that holds sharp peaks. If working with large or heavy elements, build them in layers, allowing each layer to dry and gain strength before adding the next. Use adequate supports during the initial drying phase to help the element maintain its shape until the icing is fully cured. Patience and proper icing consistency are your best allies in troubleshooting 3D cookie decorating issues.
Preventing Royal Icing from Cracking
Cracking is a frustrating issue that can ruin a perfectly piped 3D element. Several factors contribute to it. Firstly, icing that is too thick or stiff can be prone to cracking as it dries and shrinks slightly. Ensure your stiff consistency is still pliable enough to pipe smoothly. Secondly, drying too quickly, especially the surface, can cause the underlying wet icing to crack the crust as it dries. Avoid direct strong fan airflow initially; let a crust form naturally for 20-30 minutes before introducing gentle air circulation.
Environmental factors also play a role; very low humidity can exacerbate cracking. If you live in a dry climate, you might slightly increase the water content in your icing (just a tiny amount!) or dry in a slightly less arid spot. Applying icing too thinly over a large area can also lead to cracks. For larger or thicker elements, consider piping them with two layers of icing, allowing the first to crust before applying the second, which adds strength and reduces the chance of a single thick layer cracking.
Dealing with Collapsing 3D Structures
Collapsing structures are a clear sign that your royal icing lacks sufficient structural integrity, usually due to being too soft. The most direct solution is to remake your icing to a stiffer consistency. If you're already working with stiff icing and still experiencing collapse, consider if the design itself is too ambitious for a single layer of icing. Very tall or wide unsupported elements will likely need internal support or need to be built up in stages.
For example, a tall chimney on a gingerbread house cookie might need a small piece of dried spaghetti or a toothpick inserted internally for support while the icing dries around it. For wide, flat elements that need to stand up, like a signpost, you might need to pipe it on its side and let it dry completely flat, then use a thick bead of stiff icing to glue its edge onto the base cookie, supporting it from the sides until the glue is rock hard.
Don't rush the drying process for structural elements; they need ample time to cure fully before supports are removed.
Spring is the perfect season to explore 3D floral cookie designs. Beyond simple piped flowers, you can create cookies featuring cascading vines with 3D leaves and blossoms, or a cookie base shaped like a flower pot with 3D flowers "growing" out of it. Imagine a cookie shaped like a watering can, with piped 3D water droplets seeming to pour onto 3D royal icing flowers below.
Consider creating cookies topped with miniature bouquets of various 3D flowers – roses, tulips, daffodils – piped separately and then arranged and glued onto a base cookie. Use different shades of green stiff icing to pipe realistic 3D leaves, varying the pressure on a leaf tip to create natural shapes. A large circular cookie could become a stunning floral wreath, with 3D flowers and leaves layered around the edge. The possibilities are as endless as the varieties of spring blooms!
Holidays offer fantastic themes for elaborate 3D cookie decorating tutorial projects. For Christmas, gingerbread house cookies are a classic, but you can enhance them with 3D elements like standing trees made from piped green icing, a snowman constructed from piped balls, or even tiny 3D reindeer or Santa figures. A large cookie could be a snowy hill with 3D sleds and figures sliding down.
Easter provides opportunities for 3D bunnies, chicks popping out of eggs, or baskets filled with piped 3D eggs. Halloween cookies could feature spooky scenes with 3D gravestones, pumpkins, or witches' hats. For any holiday, think about iconic elements and how they can be translated into standing or raised royal icing components to create miniature edible dioramas that tell a festive story.
Creating 3D animals is a popular application of these techniques. For a 3D hedgehog cookie, start with an oval-shaped base cookie. Cover the cookie with brown flood icing for the body base. Once dry, use stiff brown icing and a grass tip (#233) to pipe short, overlapping strokes all over the back and sides of the oval, building up layers to create the hedgehog's quills.
For the face, pipe a small round mound of brown icing at one end of the oval before adding the quills. Use a small amount of black icing and a tiny round tip (#1) to pipe eyes and a nose onto the face area. You can add small 3D ears by piping two small dots of brown icing that stand up slightly. This simple 3D cookie decorating tutorial for a hedgehog demonstrates how layering and specific tips can create realistic animal textures and forms.
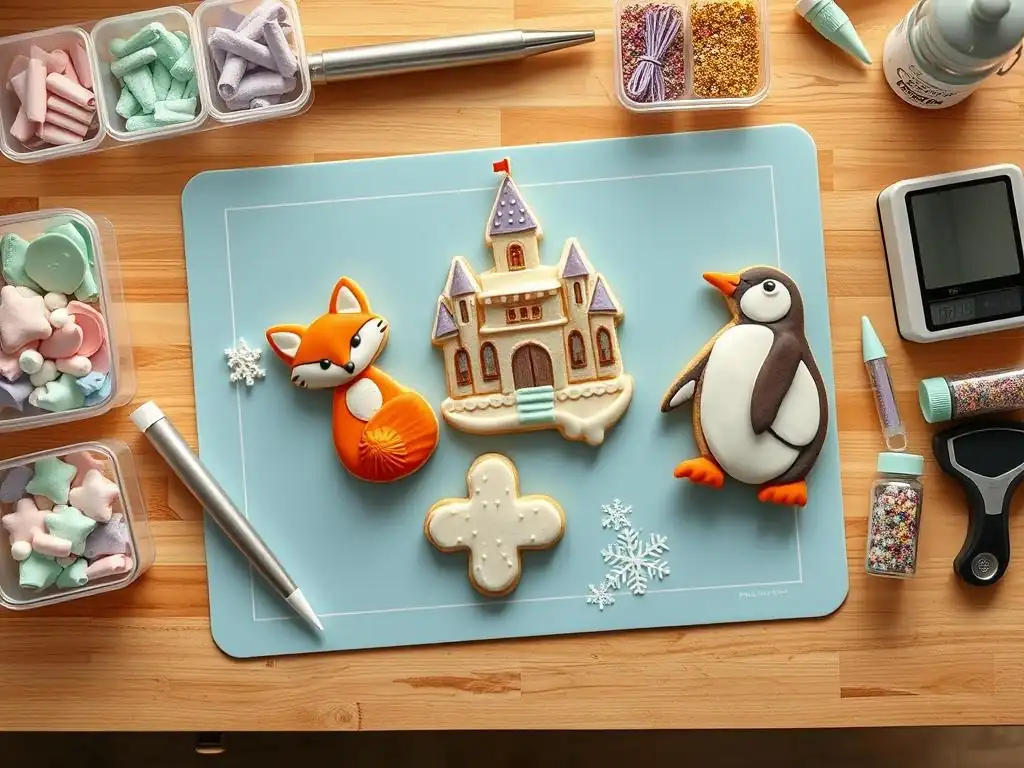
Proper handling and storage are crucial for preserving your intricate 3D cookie art. Once the cookies are completely dry – meaning all layers of icing, including the glue holding 3D elements, are hard – they can be carefully moved. Avoid stacking cookies with 3D elements directly on top of each other, as this will inevitably cause breakage.
Store decorated 3D cookies in a single layer in an airtight container. If you must layer them, use sheets of parchment paper or tissue paper between layers, ensuring the paper doesn't rest directly on the most fragile 3D components. Keep the container in a cool, dry place away from direct sunlight, which can fade colors. Avoid refrigeration or freezing, as condensation can damage royal icing decorations.
Packaging for Display and Gifting
Packaging 3D decorated cookies requires extra care to protect the delicate elements. For individual cookies, consider placing each one in a clear cellophane bag. Seal the bag, then place the bagged cookie into a small box with tissue paper or crinkle paper filler around the sides to prevent movement. Ensure the box is deep enough that the lid doesn't press down on the 3D elements.
For displaying or gifting multiple cookies, use a sturdy box with dividers or individual compartments. You can also use bakery boxes and secure each cookie to the bottom with a small dot of stiff royal icing or a food-safe adhesive dot (if not being eaten immediately). Arrange them thoughtfully so that 3D elements do not bump into each other. Presenting your 3D cookie decorating tutorial creations safely ensures they arrive looking just as stunning as when they were finished.
Preventing Damage During Transport
Transporting 3D cookies is perhaps the riskiest part of the process. Pack them securely in their boxes as described above. Use additional padding, like bubble wrap or packing peanuts, around the boxes if they will be placed in a larger carton for transport. Ensure the cookies cannot shift within their immediate packaging or within the larger transport box.
Place the box of cookies on a flat, stable surface in your vehicle, ideally where it won't slide or be jostled excessively. Placing the box on the floor behind a seat or securing it with a seatbelt can help. Drive carefully, avoiding sudden stops or sharp turns. For long distances or air travel, consider packing the cookies in carry-on luggage where they can be kept upright and handled gently. Taking these precautions helps ensure your beautiful 3D cookie decorating tutorial efforts arrive at their destination intact.
Mastering 3D cookie decoration is a significant step forward in your baking journey. It moves beyond flat surfaces, challenging you to think spatially and structurally. By learning to control icing consistency, build elements layer by layer, and assemble them carefully, you unlock the ability to create cookies that are truly works of art. This 3D cookie decorating tutorial has provided a foundation, but continued practice and experimentation are key.
Each new design will present unique challenges, from supporting complex shapes to achieving specific textures. Embrace the learning process, don't be discouraged by occasional breakages or collapses, and celebrate your successes. The skills you develop in creating 3D elements will not only enhance your cookies but can also be applied to other confectionery projects like cake decorating or gingerbread house construction. Keep exploring, keep practicing, and watch your edible art evolve.
Resources for Further Learning: Links to other BakeWithEase articles
To continue expanding your cookie decorating knowledge, explore other resources available here on BakeWithEase. We offer tutorials covering fundamental techniques that are essential building blocks for 3D work.
- Learn about basic royal icing consistencies.
- Discover flood filling techniques for base layers.
- Explore different piping tips and how to use them.
- Find recipes for sturdy cut-out cookies.
By strengthening your foundational skills and experimenting with the techniques outlined in this 3D cookie decorating tutorial, you'll be well-equipped to tackle increasingly complex and impressive edible creations. Happy decorating!
Frequently Asked Questions
3D cookie decorating involves creating dimensional elements that extend beyond the flat surface of the cookie. This adds visual interest and texture, making your cookies more visually appealing and unique.
Common materials include royal icing (often in different consistencies), fondant, gumpaste, and edible glue. Royal icing is popular for its versatility in creating intricate details and stable structures.
While it can seem intimidating, 3D cookie decorating can be approachable for beginners with patience and practice. Starting with simple shapes and techniques is key to building confidence and skill.
Basic techniques include piping, layering, and shaping icing or fondant. Understanding icing consistencies and using templates can greatly improve your results, especially when building complex structures.
Websites like BakeWithEase.com offer step-by-step guides and tutorials for bakers of all skill levels. Look for tutorials that focus on specific 3D elements you want to create.
The art of 3D cookie decorating is more than just a trend; it's a testament to the enduring power of creativity and the limitless possibilities within a seemingly simple medium. This tutorial has explored various techniques to build stunning, three-dimensional elements onto your cookies, transforming them from flat canvases into miniature edible sculptures. The skills learned here aren't just about aesthetics; they empower you to express your unique artistic vision and create truly personalized treats.
The impact of this skill extends beyond the individual cookie. It's about the joy of creation, the satisfaction of mastering a new technique, and the ability to share that joy with others. The process of building these intricate designs fosters patience, precision, and a deeper appreciation for the artistry involved in baking and decorating. As the renowned pastry chef, Pierre Hermé, once said, Pastry is a form of art, and like all art, it should be approached with passion and precision.
This sentiment perfectly encapsulates the spirit of 3D cookie decorating, pushing the boundaries of what's possible and inspiring a sense of wonder in both the creator and the recipient.
Now, it's your turn. Don't be afraid to experiment, to push your own creative boundaries, and to let your imagination run wild. Take the techniques you've learned here, adapt them to your own style, and create cookies that are as unique and individual as you are. The world of 3D cookie decorating is vast and waiting to be explored – what incredible edible creations will you bring to life?
Thanks for joining us on this delicious journey into the world of 3D cookie decorating! We hope you've gained valuable techniques and inspiration to elevate your baking skills. Ready to take your cookie artistry to the next level?
- Try a new 3D element this week: Challenge yourself to incorporate one of the techniques you learned today into your next batch of cookies. Even a small change can make a big impact!
- Share your creations: Post pictures of your 3D decorated cookies on social media and tag us – we'd love to see your amazing work!
- Join our community forum: Connect with fellow bakers, share tips, and ask questions in our supportive community. We're always ready to help you grow!
What incredible 3D cookie design will you create next?