
Easy Steps to Your First Incredible Rustic Bread or Ciabatta Loaf

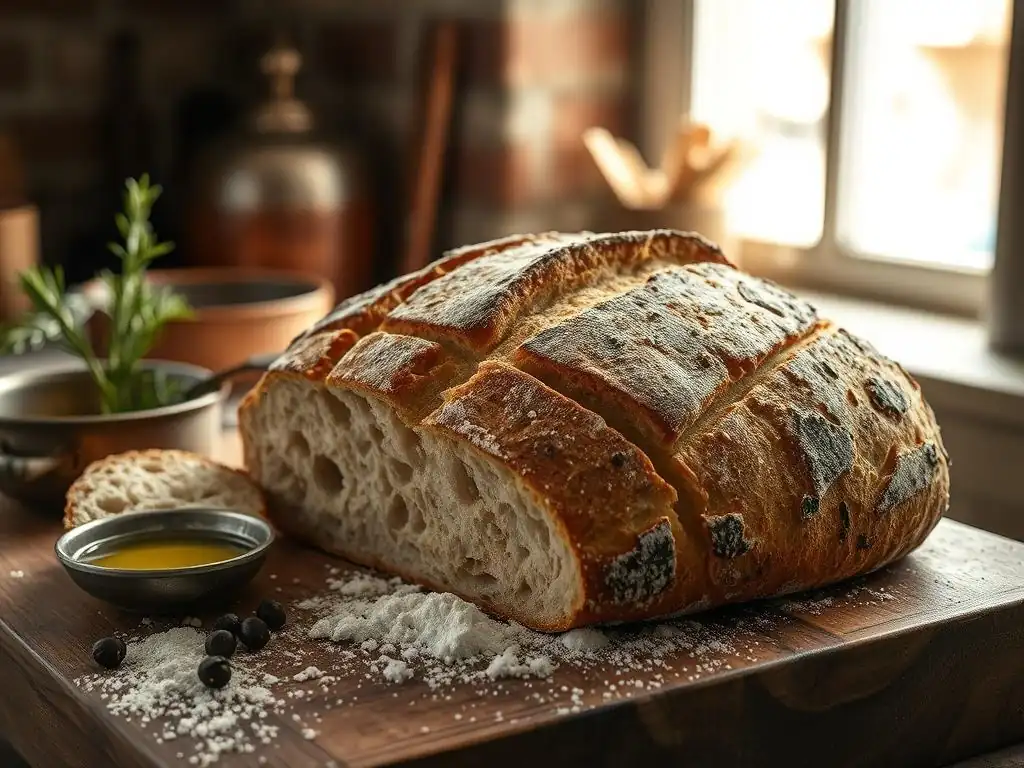
Welcome to BakeWithEase, your kitchen companion on the journey to baking bliss!
Ever dreamt of pulling a perfectly crusty, aromatic loaf from your oven? This is where that dream starts. Dive into our easy steps and unlock the secrets to a truly incredible rustic bread loaf recipe. Discover how simple ingredients and straightforward techniques can transform your kitchen into a delightful bakery. Eager to experience the unparalleled satisfaction of baking your own bread? Let's get started!
- BakeWithEase: Your Guide to Rustic Bread Baking
- Why Bake Rustic Bread at Home? The Appeal of Homemade Loaves
- Rustic Bread Loaf Recipe: A Beginner's Guide
- Step-by-Step: Baking Your First Rustic Bread Loaf
- Troubleshooting Common Rustic Bread Baking Issues
- Elevate Your Rustic Bread Baking: Advanced Techniques
- Enjoying Your Homemade Rustic Bread: Serving and Storage Tips
-
Frequently Asked Questions
- What makes this rustic bread loaf recipe "easy" compared to other recipes?
- Can I substitute the flour in this rustic bread loaf recipe?
- How do I know when my rustic bread loaf is properly baked?
- What's the difference between a rustic bread loaf and a ciabatta loaf?
- How should I store my homemade rustic bread loaf to keep it fresh?
- Final Reflection: The Humble Loaf, A Journey Worth Taking
- Unleash Your Inner Baker: Craft Your First Rustic Loaf!
BakeWithEase: Your Guide to Rustic Bread Baking
Welcome to BakeWithEase, where we demystify the wonderful world of baking! If you've ever dreamt of pulling a warm, crusty loaf of bread from your oven, filling your kitchen with that irresistible aroma, you're in the right place. Rustic bread, with its invitingly uneven crust and airy, open crumb, might seem intimidating, but it's surprisingly accessible for beginners.
This guide walks you through the simple steps needed to create your very own incredible rustic bread loaf or a delightful ciabatta. We'll cover everything from understanding the basic ingredients that make a great rustic bread loaf recipe to troubleshooting common issues. Get ready to discover the simple joy and immense satisfaction of baking beautiful, artisanal-style bread right in your own home.
Why Bake Rustic Bread at Home? The Appeal of Homemade Loaves
Baking your own bread, especially a rustic bread loaf or ciabatta, offers a unique blend of simple pleasure and tangible reward. Beyond just saving a trip to the bakery, the process itself is deeply satisfying, and the result is often superior in taste and texture. It's a culinary journey that connects you to age-old traditions with modern ease.
There's a special magic that happens when flour, water, yeast, and salt transform into a golden, crusty loaf. The appeal lies not just in the final product, but in the entire experience – the feel of the dough, the anticipation as it rises, and the incredible aroma that fills your home as it bakes.
The Joy of Baking Fresh, Crusty Bread
There's an unparalleled sensory experience in baking a fresh rustic bread loaf. Imagine the sound of the crackling crust as it cools, the feeling of slicing through it to reveal the network of airy holes within, and the immediate warmth that emanates from the center. This isn't just food; it's an experience that engages multiple senses and creates lasting memories, often associated with comfort and home.
Beyond the sensory delight, the sheer accomplishment of baking something so fundamental and delicious from scratch is incredibly rewarding. Many bakers find the rhythmic process of mixing, folding, and watching the dough develop over hours to be meditative and stress-relieving. It's a tangible skill that produces a beautiful, edible result, making this rustic bread loaf recipe a perfect project for a weekend afternoon.
Healthier Ingredients and Homemade Flavor
One of the biggest advantages of baking your own rustic bread is complete control over the ingredients. Store-bought breads, while convenient, often contain preservatives, dough conditioners, and added sugars to extend shelf life and standardize texture. When you bake at home, your rustic bread loaf recipe uses only the essentials: flour, water, yeast, and salt, perhaps with a touch of olive oil for ciabatta.
This control means you can choose high-quality flours, opt for organic ingredients, and avoid anything artificial. The flavor of homemade rustic bread is often richer and more complex than commercial versions, too. The slow fermentation process, often used in rustic bread baking, develops nuanced flavors that simply can't be rushed. For example, a longer bulk ferment can break down starches into sugars, resulting in a slightly sweeter, more flavorful crust.
Rustic Bread Baking: Easier Than You Think
Contrary to popular belief, baking a fantastic rustic bread loaf doesn't require complex techniques or hours of intensive kneading. Many popular rustic bread loaf recipes utilize minimal kneading methods, like the no-knead approach popularized by Jim Lahey of Sullivan Street Bakery. This technique relies on time, specifically a long fermentation period (often 12-18 hours at room temperature), rather than manual effort, to develop the gluten structure.
While some recipes might involve a few sets of folds over the initial rise, the active time involved is surprisingly short – perhaps 15-20 minutes spread across several hours. The majority of the work is done by time and the yeast. This makes baking rustic bread, including a basic ciabatta loaf recipe, highly achievable even for those with busy schedules or limited baking experience.
Rustic Bread Loaf Recipe: A Beginner's Guide
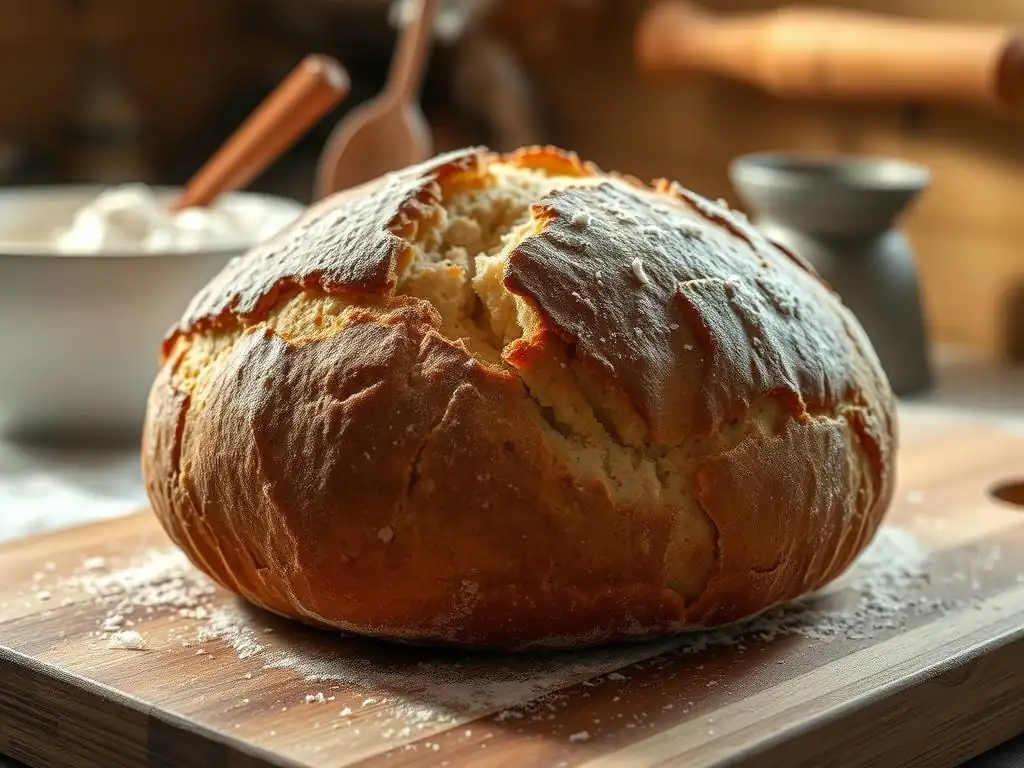
Ready to bake your first incredible rustic bread loaf? This beginner's guide breaks down the process into manageable steps, focusing on understanding the core components and techniques. We'll start with the foundation: the ingredients that give rustic bread its unique character and flavor.
This simple rustic bread loaf recipe is designed to be forgiving and educational, guiding you through the transformation of simple pantry staples into a bakery-worthy loaf. Pay attention to the details about ingredients, as they are crucial for success in rustic bread baking.
Understanding the Key Ingredients for Authentic Rustic Bread
The beauty of a great rustic bread loaf recipe lies in its simplicity. It typically requires just four basic ingredients, each playing a vital role in the final texture, flavor, and appearance of your loaf. Understanding how flour, water, yeast, and salt interact is fundamental to successful rustic bread baking.
Think of these ingredients as the building blocks. The quality and ratio of each will significantly impact the outcome. For instance, using bread flour versus all-purpose flour will change the dough's structure and the final crumb. Similarly, the amount of water (hydration) is key to achieving that signature open texture often found in rustic loaves and ciabatta.
Flour Selection: The Foundation of Your Loaf
Flour is the main structural component of your rustic bread loaf. For rustic loaves and many ciabatta loaf recipes, bread flour or a good quality all-purpose flour is recommended. Bread flour typically has a higher protein content, usually ranging from 12% to 14%. This higher protein means more gluten development, which creates a stronger, more elastic dough capable of trapping the gases produced by yeast, resulting in a chewier texture and better oven spring.
Using all-purpose flour (typically 10-12% protein) is also possible and will yield a slightly softer crumb. Some bakers like to mix flours, for example, adding a small percentage of whole wheat flour (which has high protein but also bran that can cut gluten strands) or rye flour for added flavor complexity. Experimenting with different flours, while slightly advanced, is a great way to elevate your rustic bread baking once you're comfortable with the basics.
Water: Hydration and Dough Development
Water is critical for activating the yeast and developing the gluten in the flour. The ratio of water to flour, known as hydration, is a key factor in rustic bread baking. Rustic loaves and ciabatta are often made with relatively high hydration doughs, sometimes ranging from 65% to 80% or even higher (based on flour weight). Higher hydration doughs are stickier and harder to handle, but they tend to produce a more open, airy crumb structure.
The temperature of the water is also important, especially when using active dry yeast, which typically needs water between 105°F and 115°F (40-46°C) to activate effectively. Instant yeast is more forgiving and can be mixed directly with dry ingredients and cooler water. Using filtered water is often recommended, as chlorine in tap water can potentially inhibit yeast activity, although this is less of a concern in many areas.
Yeast: Activating the Magic of Fermentation
Yeast is the living organism responsible for fermentation, the process that makes your rustic bread loaf rise and develops much of its flavor. As yeast consumes sugars in the flour, it produces carbon dioxide gas and alcohol. The gas gets trapped by the gluten network, causing the dough to expand, while the alcohol contributes to the bread's aroma and flavor.
There are two common types for a rustic bread loaf recipe: active dry yeast and instant yeast. Active dry yeast comes in granules and needs to be proofed (activated) in warm water before use. Instant yeast is finer and can be mixed directly with the dry ingredients; it also tends to work faster. The amount of yeast used will affect fermentation time – less yeast means a slower rise, which can lead to more complex flavors.
Salt: Flavor Enhancer and Dough Strengthener
Salt does more than just add flavor to your rustic bread loaf; it plays a crucial role in controlling yeast activity and strengthening the gluten structure. Without salt, fermentation would happen too quickly, and the dough would be slack and difficult to handle. Salt slows down yeast activity, allowing for a more controlled and flavorful rise.
Salt also tightens the gluten network, making the dough more elastic and easier to shape. It is typically added at a percentage of 1.8% to 2.2% of the flour weight in a standard rustic bread loaf recipe. Using non-iodized salt, such as sea salt or kosher salt, is often preferred by bakers as iodine can sometimes interfere with yeast, although this effect is often minimal in standard recipes.
Step-by-Step: Baking Your First Rustic Bread Loaf
Now that we understand the key ingredients, let's get hands-on with the process of making your first rustic bread loaf. This step-by-step guide covers the essential stages, from mixing the dough to enjoying the final product. Follow these steps carefully, and you'll be well on your way to mastering this rustic bread loaf recipe.
Remember that baking is both a science and an art. While following the steps is important, also pay attention to how the dough feels and looks – these are often the best indicators of progress in rustic bread baking.
Step 1: Preparing the Dough - Mixing and Initial Rise
The first step in any rustic bread loaf recipe is combining your ingredients to form the dough. For a no-knead or minimal-knead dough, this is incredibly simple. You'll typically mix the flour, salt, and yeast in a large bowl, then add the water and mix until just combined – there shouldn't be any dry pockets of flour left. The dough will look shaggy and sticky, which is perfectly normal, especially for a high-hydration rustic dough.
After mixing, the dough undergoes its first and longest rise, known as bulk fermentation. This stage is critical for developing flavor and structure. For many rustic bread loaf recipes, particularly no-knead versions, this can take anywhere from 8 to 18 hours at room temperature (around 70°F or 21°C), or even longer if proofing in a cooler spot like a refrigerator (which develops even more flavor). The dough should roughly double in size and show significant bubbling on the surface.
Combining Ingredients for the Perfect Rustic Dough
Start by accurately measuring your ingredients. Using a kitchen scale for flour and water is highly recommended for consistent results in your rustic bread loaf recipe, as volume measurements can vary widely. In a large bowl, whisk together the dry ingredients (flour, salt, yeast). If using active dry yeast, bloom it in the warm water first according to package directions before adding to the dry ingredients.
Pour the water into the dry ingredients and mix with a wooden spoon, spatula, or your hands until no dry flour remains. Avoid overmixing; just get everything hydrated. The dough for a rustic bread loaf recipe is often wet and sticky at this stage, which is desirable for an open crumb. Cover the bowl tightly with plastic wrap or a damp towel to prevent the dough from drying out during the rise.
The Importance of the First Rise: Bulk Fermentation
Bulk fermentation is where the magic of rustic bread baking truly begins. During this long rest, yeast actively ferments the sugars, producing gas that inflates the dough and organic acids that contribute to flavor and help strengthen the gluten. This slow process allows complex flavors to develop, giving your homemade rustic bread its characteristic depth.
Observing the dough during bulk fermentation is key. It should increase significantly in volume and develop bubbles. If your kitchen is cooler, the rise will take longer; if it's warmer, it will be faster. A good visual cue is often the dough roughly doubling in size. You may also notice the surface becoming smoother and more domed. This stage is crucial for the final texture and taste of your rustic bread loaf.
Step 2: Shaping Your Rustic Bread Loaf or Ciabatta
After the initial rise, your dough is ready to be shaped. This step requires a gentle touch to avoid deflating the airy structure you worked hard to create during bulk fermentation. The goal is to form the dough into your desired shape while creating some surface tension, which helps the loaf hold its form and encourages a good oven spring.
Rustic bread shapes are typically simple, like a round loaf (boule) or an oval one (batard). Ciabatta, meaning "slipper" in Italian, has a more irregular, flattened shape. Whichever you choose, handling the dough minimally and gently is paramount for an open, airy crumb in your rustic bread loaf or ciabatta.
Gentle Handling for an Airy Texture
High-hydration doughs for rustic bread loaf recipes are often very delicate after their long rise because the gluten structure is already well-developed and filled with gas. When turning the dough out onto your lightly floured surface, use a bowl scraper to help release it without tearing. Avoid punching the dough down aggressively; instead, gently coax it out of the bowl.
During shaping, use just enough flour on your hands and the work surface to prevent sticking, but not so much that it dries out the dough or creates dry pockets inside the loaf. The goal is to stretch and fold the dough gently to create surface tension without squeezing out all the precious air bubbles that will form the open crumb of your rustic bread loaf.
Shaping Techniques for Rustic Bread
For a classic rustic boule or batard, the shaping process involves folding the dough onto itself to create tension. Gently stretch the dough into a rough rectangle or circle on a lightly floured surface. Then, fold the edges into the center like an envelope or letter. Flip the dough over so the seam is underneath and gently cup your hands around the dough, rotating it to create a smooth, taut surface.
The key is to build tension on the outside of the loaf, which will help it hold its shape and expand upwards in the oven. Place the shaped dough seam-side up in a proofing basket (banneton) lined with a floured cloth, or seam-side down on parchment paper if proofing without a basket. This prepares it for the second rise.
Shaping Techniques for Ciabatta
Ciabatta shaping is quite different, as the goal is a flat, elongated loaf with a very open interior. Ciabatta dough is typically very wet and sticky, often too much so to handle like a boule. After the bulk rise, gently pour or scrape the dough onto a generously floured surface (often a linen couche or parchment paper).
Instead of tight folds, ciabatta is usually shaped by gently stretching or patting the dough into a rough rectangle, then dividing it into smaller rectangles or squares. Minimal handling is key. The high hydration and gentle shaping are what contribute to ciabatta's signature large, irregular holes and flatter shape. This method is integral to a great ciabatta loaf recipe.
Step 3: The Second Rise - Proofing Your Loaf
After shaping, your rustic bread loaf undergoes a second, shorter rise called proofing or final fermentation. This allows the dough to relax, accumulate more gas, and increase slightly in volume before baking. Proper proofing is essential – under-proofed dough won't expand well in the oven, while over-proofed dough can collapse or spread out.
The proofing time and environment are critical factors. The dough needs a warm, humid place to rise optimally. Knowing how to tell when your dough is perfectly proofed is a skill that comes with practice, but there's a reliable test you can use. This stage finalizes the structure before the heat of the oven sets it.
Creating the Ideal Environment for Proofing
The ideal proofing environment for a rustic bread loaf is warm and slightly humid, typically between 75°F and 85°F (24-30°C). This temperature range encourages yeast activity without being too hot. You can create this environment by placing the proofing basket or dough on parchment inside a turned-off oven with the light on (the light generates enough warmth).
Another method is to place the covered dough in a microwave or oven alongside a cup of hot water, which creates humidity. The goal is to prevent the surface of the dough from drying out, which would inhibit its ability to expand during baking. If proofing in a basket, dusting the cloth generously with rice flour or a mix of rice and wheat flour helps prevent sticking.
Knowing When Your Dough is Ready to Bake
Determining when your rustic bread loaf is perfectly proofed before baking is crucial. The most common test is the "poke test." Gently press your finger about a half-inch deep into the side of the dough. If the indentation springs back immediately, the dough is under-proofed. If it stays indented completely, it's likely over-proofed.
For a perfectly proofed loaf, the indentation should spring back slowly, only partially filling in. This indicates that the gluten structure is relaxed enough to expand in the oven but still has enough strength to hold its shape. Proofing time varies greatly depending on room temperature and the dough's temperature, typically ranging from 30 to 90 minutes at room temperature, or several hours if cold-proofing in the refrigerator.
Step 4: Baking Your Rustic Bread to Golden Perfection
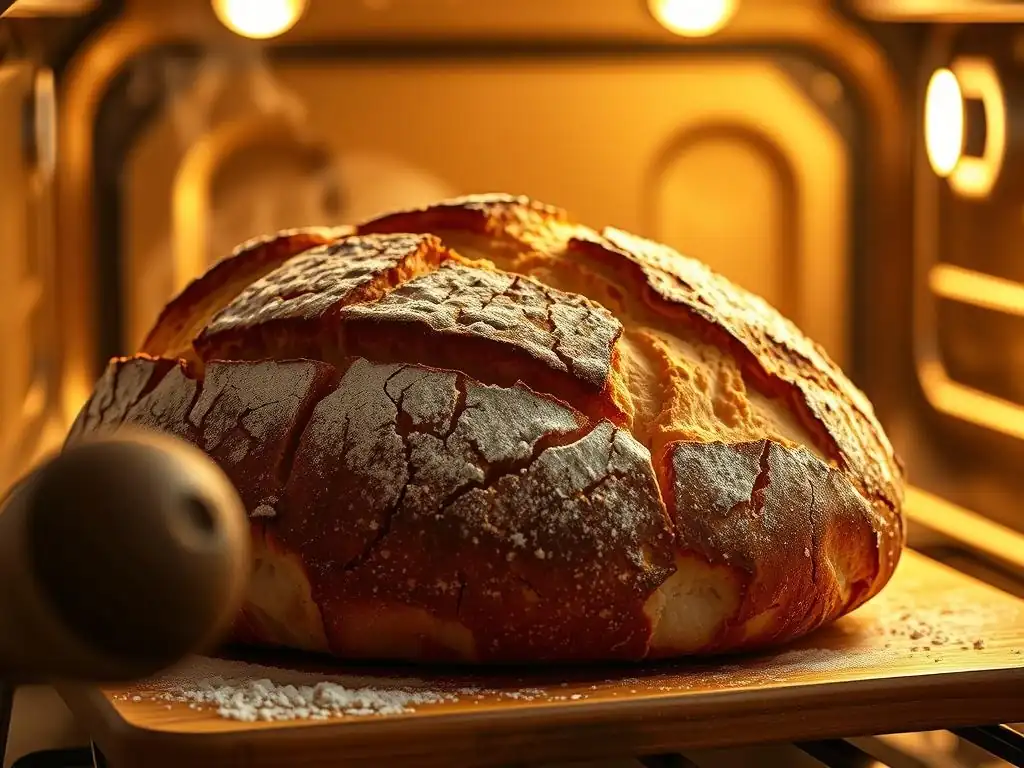
Baking is the climax of your rustic bread loaf recipe journey! The intense heat of the oven causes the dough to undergo rapid expansion (oven spring) and transforms the soft, pale dough into a crusty, golden loaf. Achieving that signature rustic crust requires high temperatures and steam.
Many home bakers achieve excellent results for their homemade rustic bread using a Dutch oven or a pizza stone with added steam. These methods mimic the conditions of a professional bakery oven, ensuring a beautiful crust and maximum oven spring.
Oven Temperature and Baking Time
Rustic bread is typically baked at high temperatures, often between 450°F and 500°F (230-260°C). High heat is necessary for achieving a good oven spring and a thick, crispy crust. Many rustic bread loaf recipes call for preheating the oven, often with a Dutch oven or baking stone inside, for at least 30-60 minutes to ensure everything is screaming hot.
Baking time varies depending on the size and shape of the loaf, but a standard 1-1.5 pound loaf might bake for 30-45 minutes total. Often, the bread is baked for the first 20-25 minutes covered (in a Dutch oven or with a lid/steam method) to trap steam, and then uncovered for the remaining time to allow the crust to brown and crisp up. The internal temperature of a fully baked rustic bread loaf should be between 200°F and 210°F (93-99°C).
Creating Steam for a Crispy Crust
Steam is essential in the initial phase of baking a rustic bread loaf. High heat causes the dough to expand rapidly, and steam keeps the surface moist and pliable. This allows the crust to stretch as the loaf expands, resulting in maximum oven spring and a thinner, crispier crust. Without steam, the crust would set too quickly, restricting expansion and leading to a denser loaf with a thick, hard crust.
Using a preheated Dutch oven is one of the easiest ways to create steam at home; the lid traps the moisture released by the dough. Alternatively, if using a baking stone, you can create steam by placing a tray of hot water or tossing a handful of ice cubes onto a hot tray placed on the bottom rack of the oven just as you load the bread. Be cautious when creating steam this way to avoid burns.
Step 5: Cooling and Enjoying Your Homemade Rustic Bread
You've done it! You've baked your first incredible rustic bread loaf. The aroma filling your kitchen is your reward. But resist the urge to slice into it immediately. Cooling is a critical, often overlooked, step in the rustic bread loaf recipe process.
Allowing the bread to cool properly ensures the internal structure sets completely and moisture is evenly distributed. Slicing too early can result in a gummy texture. Once cooled, it's time to enjoy the fruits of your labor – your very own homemade rustic bread!
The Importance of Cooling Before Slicing
As your rustic bread loaf cools on a wire rack, several important processes occur. The internal temperature gradually decreases, allowing the starches to solidify and the gluten structure to set. Moisture within the loaf equalizes; excess moisture migrates from the center towards the crust, contributing to its crispness, while some moisture from the crust moves inward, preventing it from becoming too hard.
Slicing into a hot loaf interrupts these processes, potentially resulting in a steam release that leads to a slightly gummy or doughy interior texture. For best results with your rustic bread loaf recipe, allow a standard-sized loaf to cool for at least 1-2 hours on a wire rack before slicing. Smaller loaves might need less time, while larger ones could require longer.
Serving Suggestions for Your Freshly Baked Loaf
Once your homemade rustic bread has cooled, the possibilities for enjoying it are endless! Its hearty crust and open crumb make it perfect for various uses. A simple slice toasted and topped with butter or olive oil is a classic. It's also the ideal foundation for sandwiches, allowing fillings to sit comfortably within its structure.
Rustic bread pairs beautifully with soups, stews, and salads – use it to sop up every last drop. Consider making bruschetta or crostini by toasting slices and topping them with fresh tomatoes, garlic, and basil, or various cheeses and spreads. Sharing your warm, freshly baked rustic bread loaf with friends and family is one of the greatest pleasures of rustic bread baking.
Troubleshooting Common Rustic Bread Baking Issues
Even experienced bakers encounter challenges sometimes. If your first rustic bread loaf didn't turn out exactly as planned, don't be discouraged! Understanding common issues and how to address them is part of the learning process in rustic bread baking. Here are some typical problems and how to troubleshoot them.
Remember that factors like ambient temperature, humidity, and even the specific flour you use can affect the outcome of your rustic bread loaf recipe. Keep notes on your process to help identify variables.
Dough Too Sticky? Tips for Handling Difficult Dough
A high-hydration dough, characteristic of many rustic bread loaf recipes and ciabatta, is naturally sticky. This stickiness is key to achieving an open, airy crumb. However, if the dough is excessively difficult to handle, it might be slightly over-hydrated for your flour type or skill level. Using a small amount of flour on your hands and work surface is acceptable, but avoid incorporating too much into the dough, as this will change the hydration ratio.
Instead of adding lots of flour, try using a bench scraper to maneuver the dough. Keeping your hands slightly wet can also prevent sticking without adding dry flour. Sometimes, simply allowing the dough to rest for 10-15 minutes (a process called bench rest) after the initial shaping can help, as it allows the gluten to relax, making the dough less resistant and easier to handle for final shaping. Ensure your flour has adequate protein content (like bread flour) to support the hydration level.
Bread Not Rising? Understanding Yeast Activation
If your rustic bread loaf didn't rise properly during bulk fermentation or proofing, the most common culprit is inactive yeast. Active dry yeast needs warm water (around 105-115°F) to activate; water that is too hot will kill it, while water that is too cold won't activate it effectively. You can test active dry yeast viability by dissolving it in warm water with a pinch of sugar; it should become foamy within 5-10 minutes. If it doesn't, the yeast is likely dead.
Other reasons for poor rise include using expired yeast, not giving the dough enough time to ferment (especially in a cool environment), or not providing enough "food" for the yeast (though standard flour provides plenty for a basic rustic bread loaf recipe). Ensure your kitchen isn't too cold for fermentation; temperatures below 70°F (21°C) can significantly slow down the process.
Dense or Gummy Texture? Addressing Common Problems
A dense or gummy interior in your rustic bread loaf can stem from several issues. One frequent cause is under-proofing; if the dough hasn't had enough time to develop gases and expand properly before baking, it won't achieve an open crumb. Conversely, over-proofing can also lead to a dense loaf if the gluten structure collapses after reaching its peak expansion.
Other factors include insufficient gluten development (though less common with minimal-knead methods that rely on time), not creating enough steam during baking (leading to a restricted oven spring and denser crumb), or slicing the loaf before it has completely cooled (which traps steam and results in a gummy texture). Ensure your oven reaches the correct high temperature, as insufficient heat can also impact oven spring and texture.
Elevate Your Rustic Bread Baking: Advanced Techniques
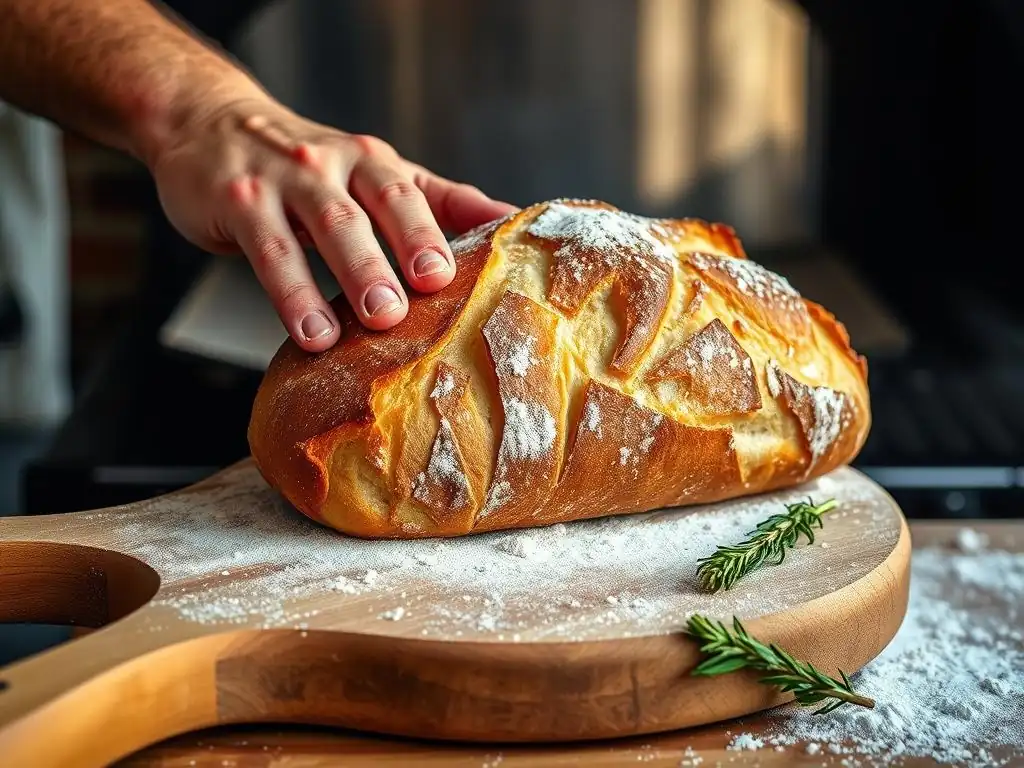
Once you've successfully baked your first rustic bread loaf using a basic rustic bread loaf recipe, you might feel inspired to explore variations and more advanced techniques. Rustic bread baking offers a vast landscape for experimentation, from incorporating different ingredients to exploring longer fermentation methods like sourdough.
These techniques can add new dimensions of flavor, texture, and complexity to your homemade rustic bread. They build upon the foundational skills you've already learned, allowing you to further refine your craft.
Experimenting with Different Flours for Unique Flavors
Expanding beyond standard all-purpose or bread flour is a great way to add unique flavors and textures to your rustic bread loaf. Incorporating whole wheat flour (even just 10-20% of the total flour weight) adds nutty notes and increases fiber content. Flours like rye, spelt, or einkorn introduce distinct tastes and can affect the dough's handling and hydration needs due to differing protein structures and absorption rates.
For instance, rye flour is low in gluten-forming proteins and absorbs a lot of water, often resulting in denser loaves with a tangy flavor, even without sourdough. Spelt offers a slightly nutty, sweet flavor and is easier to digest for some people. When substituting flours in your rustic bread loaf recipe, start with small percentages (e.g., replacing 15-20% of the white flour) and gradually increase as you become comfortable with how the dough behaves.
Adding Seeds, Herbs, and Other Flavor Enhancements
Infusing your rustic bread loaf with seeds, herbs, cheese, or other additions can transform a simple loaf into something truly special. Popular additions include sesame seeds, poppy seeds, sunflower seeds, or a mix of everything for a multi-seed loaf. Herbs like rosemary, thyme, or oregano can be kneaded into the dough or sprinkled on top.
Olives, sun-dried tomatoes, or grated cheese (like Parmesan or Gruyère) also make delicious additions. These ingredients are typically added during the initial mixing phase or during the first set of folds in the bulk fermentation. Be aware that adding wet ingredients like olives or cheese can slightly increase the overall hydration of the dough, so you might need to adjust water slightly.
Mastering Sourdough Rustic Bread: A Future Challenge
For many bakers, the pinnacle of rustic bread baking is mastering sourdough. Sourdough bread uses a live culture (a sourdough starter) instead of commercial yeast for leavening. This starter is a mixture of flour and water that hosts a colony of wild yeast and lactic acid bacteria. Sourdough fermentation is much slower than commercial yeast fermentation, often taking 12-24 hours or more for the bulk rise.
The benefits of sourdough include a more complex, tangy flavor profile, improved digestibility due to the breakdown of phytic acid and gluten during the long fermentation, and a longer shelf life. While a sourdough rustic bread loaf recipe follows a similar structure (mixing, rising, shaping, baking), managing a starter and understanding the nuances of sourdough fermentation requires patience and practice. It's a rewarding step for those looking to deepen their rustic bread baking skills.
Enjoying Your Homemade Rustic Bread: Serving and Storage Tips
Congratulations on baking your incredible homemade rustic bread loaf! You've put in the effort, and now it's time to savor the rewards. Knowing the best ways to serve and store your loaf will help you maximize its freshness and enjoyment.
From a simple slice with butter to creative culinary uses, your rustic bread is versatile. Proper storage ensures that its delicious crust and tender crumb stay at their best for as long as possible.
Best Ways to Serve Your Freshly Baked Loaf
The simplest way to enjoy your homemade rustic bread loaf is often the best: sliced and served warm (after cooling, of course!) with just a smear of good butter or a drizzle of high-quality olive oil. The bread's natural flavors truly shine this way. Its sturdy structure makes it ideal for open-faced sandwiches or substantial, satisfying regular sandwiches.
Rustic bread is the perfect companion for hearty meals. Use thick slices for dipping into rich soups or stews, or serve it alongside salads or pasta dishes. Toasted slices become perfect vehicles for toppings like avocado, smoked salmon, or various spreads. For a classic appetizer, make bruschetta by topping toasted slices with a mixture of chopped tomatoes, garlic, basil, and olive oil – a true celebration of simple, fresh ingredients on your beautiful rustic bread.
Proper Storage for Optimal Freshness
To keep your homemade rustic bread loaf fresh for as long as possible, store it at room temperature. Avoid refrigerating bread, as this actually accelerates the staling process. The best way to store rustic bread is often in a paper bag or a cloth bread bag, which allows the crust to breathe and maintain some crispness while protecting the interior.
If you have a bread box, that's an excellent option for maintaining a balanced environment. For longer storage, rustic bread freezes exceptionally well. Allow the loaf to cool completely, then wrap it tightly in plastic wrap, followed by a layer of aluminum foil, or place it in a freezer-safe bag. Frozen bread can last for up to 3 months. To thaw, simply unwrap and let it sit at room temperature, or reheat in a warm oven for a few minutes to revive the crust. Cutting the loaf cut-side down also helps minimize air exposure to the crumb.
Frequently Asked Questions
What makes this rustic bread loaf recipe "easy" compared to other recipes?
This recipe focuses on simple ingredients and straightforward techniques. It avoids complicated steps, making it perfect for beginners new to bread baking.
Can I substitute the flour in this rustic bread loaf recipe?
While we recommend using bread flour for the best results, you can experiment. However, different flours may affect the texture and rise of your loaf.
How do I know when my rustic bread loaf is properly baked?
The loaf should be golden brown and sound hollow when tapped on the bottom. An internal temperature of around 200-210°F (93-99°C) indicates it's done.
What's the difference between a rustic bread loaf and a ciabatta loaf?
While similar, ciabatta typically has a higher hydration (more water) than a rustic loaf, leading to a more open crumb structure and irregular air pockets.
How should I store my homemade rustic bread loaf to keep it fresh?
Store your loaf in a paper bag or a bread box at room temperature. For longer storage, you can freeze it, well-wrapped, for up to a few months.
Final Reflection: The Humble Loaf, A Journey Worth Taking
The art of baking rustic bread, once a cornerstone of community and sustenance, is experiencing a powerful resurgence. More than just a recipe, crafting your own loaf is a journey of discovery, connecting us to ancient traditions and the simple pleasures of homemade goodness. This renewed interest isn't just a trend; it's a testament to our desire for authenticity and connection in a fast-paced world.
The process of kneading, proofing, and baking a rustic loaf is deeply meditative, a quiet rebellion against the instant gratification of modern life. It's a tangible reminder of the time and care that goes into creating something beautiful and nourishing. As the aroma fills your kitchen, you're not just baking bread; you're creating an atmosphere, a memory, a connection to something larger than yourself. Bread is the staff of life,
they say, and in making it, we rediscover the profound truth within those words.
Now, I invite you to take the first step. Don't be intimidated by the seemingly complex process; embrace the challenge. Experiment with different flours, explore variations on the recipe, and most importantly, enjoy the journey. The satisfaction of slicing into your first perfectly crusty, airy loaf is an experience unlike any other. The skills you gain will not only enrich your culinary repertoire but also nourish your soul. So, gather your ingredients, preheat your oven, and embark on this rewarding adventure. Your incredible rustic bread loaf awaits.
Unleash Your Inner Baker: Craft Your First Rustic Loaf!
Thanks for joining us on this baking adventure! We hope you've gained the confidence to tackle rustic bread or ciabatta. Now it's time to put your newfound knowledge to the test!
- Knead your way to deliciousness: Grab those ingredients and start baking! Follow the recipe closely for your first attempt – you'll be amazed at the results. This is your primary step to success!
- Share your sourdough journey: Snap a picture of your beautiful loaf and share it with us on social media! Tag us @BakeWithEase (we're on all the major platforms!) Let's celebrate your baking achievements together!
- Try a variation: Once you've mastered the basic recipe, explore different flour blends, herbs, or seeds to create your unique signature loaf. What exciting flavor combinations will you discover?
Ready to transform your kitchen into a rustic bakery? What's the first ingredient you'll reach for?