
Get a Perfect Rise: Mastering Bread Roll Proofing

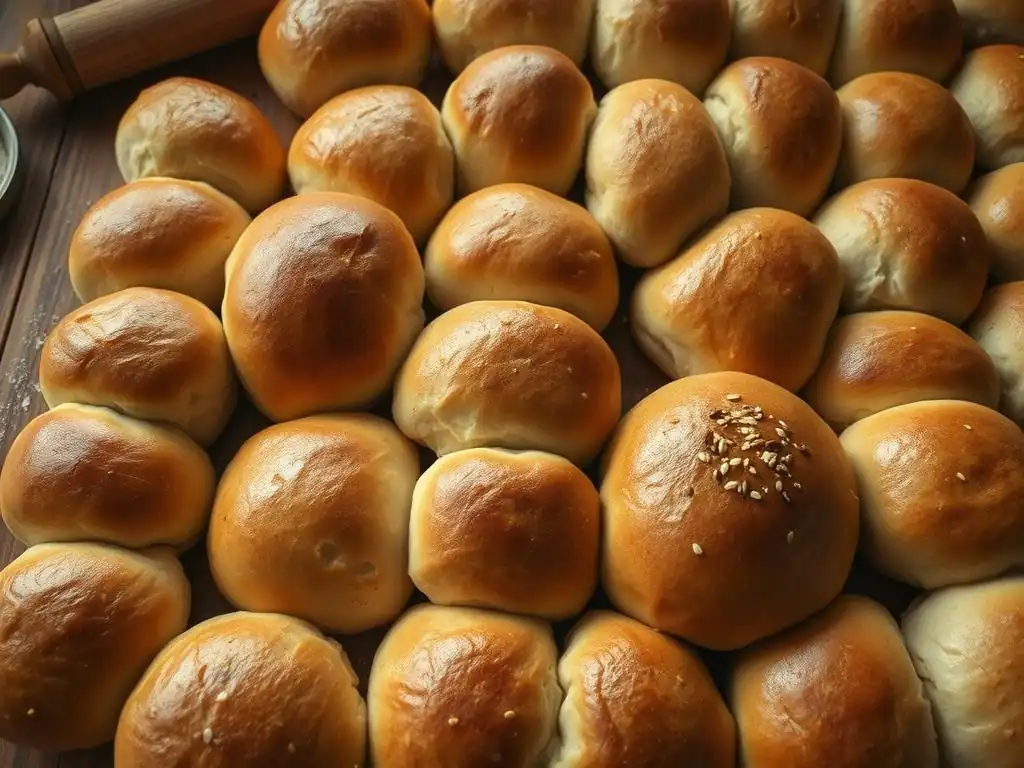
Welcome to BakeWithEase, your companion in the delightful world of baking! Ever dreamt of achieving those perfectly fluffy, irresistibly soft bread rolls?
Unlock the secrets to perfect bread roll proofing and say goodbye to dense, disappointing bakes. We'll guide you through the essential techniques and tips you need to master this crucial step, ensuring a light and airy texture every time. Ready to elevate your bread baking game? Let's get started!
- Introduction to Perfect Bread Roll Proofing
- Essential Tools and Ingredients for Bread Roll Proofing Success
- Step-by-Step Guide to Achieving Perfect Bread Roll Proofing
- The Second Proof: Final Rise for Light and Airy Bread Rolls
- Troubleshooting Common Bread Roll Proofing Problems
- Proofing Variations for Different Types of Bread Rolls
- Baking Your Perfectly Proofed Bread Rolls
- Tips and Tricks for Consistently Perfect Bread Rolls
- Enjoying Your Homemade Bread Rolls
- Frequently Asked Questions
- Final Reflection: The Transformative Power of a Perfect Proof
- Unlock Your Perfect Roll: Take Your Baking to the Next Level!
Introduction to Perfect Bread Roll Proofing
Why Perfect Proofing is Crucial for Delicious Bread Rolls
Achieving perfect bread roll proofing is perhaps the single most important step in transforming simple dough into light, airy, and flavorful rolls. Proofing, also known as fermentation, is the period where the yeast in your dough gets to work, consuming sugars and producing carbon dioxide gas. This gas gets trapped within the gluten network developed during kneading, causing the dough to expand and rise. Without proper proofing, your rolls can end up dense, heavy, or even tough, lacking that desirable soft texture and complex flavor profile. It's the difference between a lackluster roll and one that's truly delightful.
The duration and environment of proofing significantly impact the final structure and taste. Under-proofed dough hasn't had enough time for sufficient gas production, resulting in a compact crumb and potentially bursting in the oven. Over-proofed dough, on the other hand, has expanded too much, weakening the gluten structure; it can collapse during baking or result in a pale crust and coarse, uneven texture. Mastering the art of perfect bread roll proofing ensures your rolls have the ideal volume, a tender interior, and a beautiful crust, delivering that satisfying bite every time. It's the heart of achieving a perfect rise.
Understanding the Science Behind Bread Roll Proofing: Yeast Activation and Gluten Development
At its core, bread roll proofing is a biological process driven by yeast. Yeast are single-celled organisms that, when hydrated and provided with food (sugars from the flour) and warmth, become active. They metabolize these sugars through fermentation, producing ethanol (which evaporates during baking) and, crucially for us, carbon dioxide gas. This gas is what inflates the dough like a balloon. The rate of this activity is highly dependent on temperature – yeast thrive in a warm environment, typically between 75°F and 85°F (24°C-30°C), but can be killed by temperatures above 130°F (54°C).
Simultaneously, the gluten network you've developed during kneading plays a vital role. Gluten, formed by proteins in the flour when hydrated and worked, creates an elastic, stretchy matrix. This matrix is essential because it's what traps the carbon dioxide gas produced by the yeast. As the gas accumulates, the gluten network stretches, allowing the dough to expand. A well-developed gluten structure is robust enough to hold the gas during proofing but also elastic enough to stretch without tearing, leading to that perfect rise and open crumb structure in your finished perfect bread roll proofing.
Essential Tools and Ingredients for Bread Roll Proofing Success
Choosing the Right Flour for Optimal Bread Roll Rise
The type of flour you use is fundamental to achieving a perfect rise in your bread rolls. Flour provides the structure through its protein content, which forms gluten when combined with water and kneaded. For most classic bread rolls, a good quality all-purpose flour or bread flour is recommended. Bread flour typically has a higher protein content, often ranging from 12% to 14%, compared to all-purpose flour's 10% to 12%. This higher protein means it can develop a stronger gluten network, capable of trapping more gas and supporting a more substantial rise during perfect bread roll proofing.
While all-purpose flour can certainly produce delicious rolls, especially for softer varieties, using bread flour often provides a more reliable and robust structure, leading to a more significant and consistent rise. If you're using flours with lower protein, like pastry flour, you'll find it harder to achieve a strong structure and thus a substantial rise. Conversely, using flours with added vital wheat gluten can boost the protein content, enhancing the dough's ability to rise, which can be particularly helpful when incorporating non-gluten flours or aiming for an exceptionally chewy texture.
The Importance of Water Temperature in Yeast Activation
Water isn't just for hydrating the flour; its temperature is critical for waking up your yeast and kickstarting the proofing process. For active dry yeast, the ideal water temperature is typically between 105°F and 115°F (40°C-46°C). This range is warm enough to dissolve and activate the yeast granules without being so hot that it damages or kills them. Think of it as giving the yeast a cozy, warm bath to get them ready for work.
Instant yeast, being more robust, can often be mixed directly with the dry ingredients, and cooler water (around 80°F-90°F or 27°C-32°C) is sufficient, though warmer water within the active dry range can speed up the initial activity. Using water that is too cold (below 70°F or 21°C) will significantly slow down yeast activity, leading to a much longer, potentially unpredictable proofing time. Conversely, water that is too hot (above 130°F or 54°C) will kill the yeast, resulting in dough that simply won't rise at all, making perfect bread roll proofing impossible.
Proofing Equipment: Bowls, Baskets, and Covers
Having the right equipment can make a significant difference in achieving consistent and perfect bread roll proofing. A large mixing bowl is essential for the initial bulk fermentation. Glass, ceramic, or plastic bowls work well, but avoid reactive metals like aluminum. The bowl should be large enough to accommodate the dough as it doubles or triples in size. Lightly oiling the bowl prevents the dough from sticking as it rises.
For the second proof (final rise), you might use baking sheets lined with parchment paper, especially if baking freeform rolls. For shaped rolls like buns, simply placing them on a baking sheet with adequate spacing is common. If you're making rolls that require a specific shape and structure, like certain artisan-style rolls, proofing baskets (bannetons) lined with flour or rice flour can be used to hold the shape during the final rise before being inverted onto a baking surface.
Regardless of the container, covering the dough is crucial to prevent a dry skin from forming, which inhibits proper expansion. Plastic wrap, a damp kitchen towel, or a proofing box lid are common covering methods.
Step-by-Step Guide to Achieving Perfect Bread Roll Proofing
Preparing Your Dough for the First Proof: Bulk Fermentation
After mixing and kneading your dough to develop the gluten structure, it's time for the first rise, often called bulk fermentation. This stage is critical for developing flavor and beginning the initial expansion of the dough. The dough should be placed in a lightly oiled bowl, turning it once to coat the surface with oil. This prevents drying and sticking. Cover the bowl tightly with plastic wrap or a damp towel to create a humid environment.
The ideal temperature for bulk fermentation for perfect bread roll proofing is typically between 75°F and 85°F (24°C-30°C). In a warm kitchen, this might happen on the counter. In a cooler environment, you might need to find a warmer spot, such as inside a turned-off oven with the light on (which generates a little heat), or on top of the refrigerator. The duration of the first proof varies widely depending on the recipe, yeast type, dough temperature, and ambient temperature, but it usually takes anywhere from 1 to 2 hours, or until the dough has roughly doubled in size.
Shaping Your Bread Rolls for Even Proofing
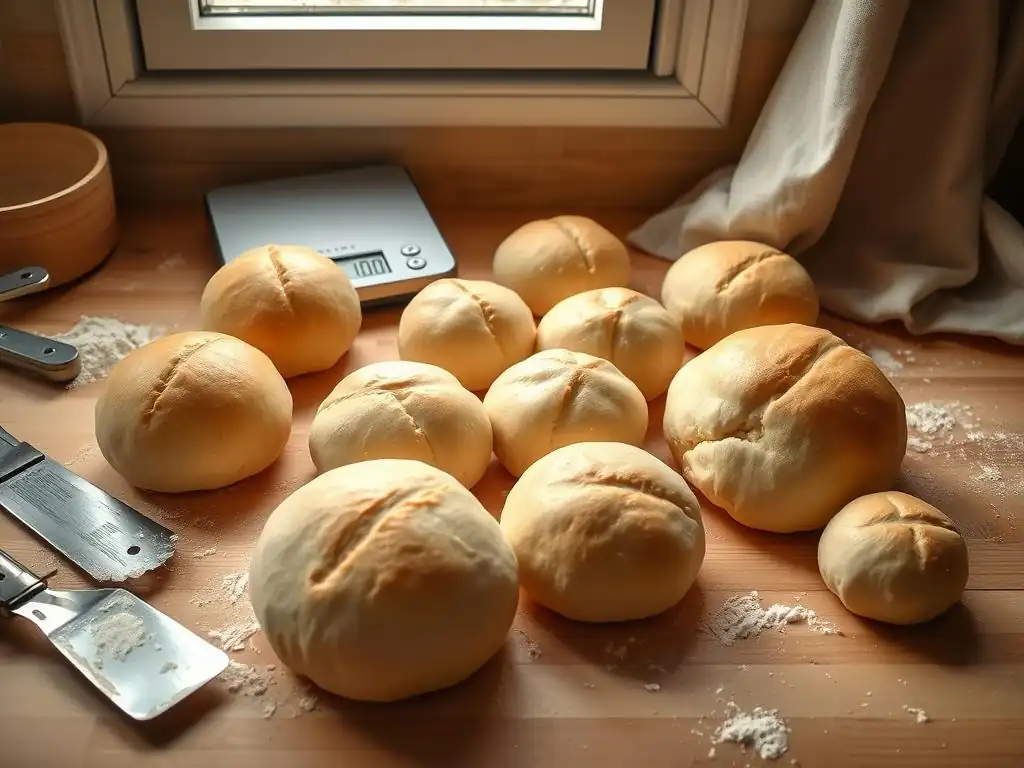
Once the bulk fermentation is complete and you've gently deflated the dough, it's time to divide and shape it into individual rolls. Consistent shaping is key to achieving even proofing and uniform baking results. Weighing your dough portions ensures that each roll is the same size, leading to them proofing and baking at the same rate. Aim for consistent tension on the surface of each roll as you shape it, whether you're forming simple rounds, knots, or other shapes.
Proper shaping creates a smooth "skin" on the outside of the roll. This surface tension helps the roll hold its shape during the second proof and provides structure for oven spring.
Avoid incorporating excess flour during shaping, as this can create dry spots and interfere with the dough's ability to stretch during the final rise. Place the shaped rolls seam-side down (if applicable) on your prepared baking surface, leaving adequate space between them to allow for expansion during the second proof and baking – typically 1-2 inches apart depending on how "kissing" rolls or freestanding rolls are desired for perfect bread roll proofing.
The First Proof: Creating Flavor and Structure
The first proof, or bulk fermentation, isn't just about making the dough bigger; it's a crucial stage for developing the complex flavors characteristic of good bread. As the yeast ferments, it produces not only carbon dioxide but also various organic acids and alcohols, which contribute significantly to the aroma and taste of the finished rolls. Longer, slower bulk fermentations, especially at slightly cooler temperatures, tend to develop more complex flavors compared to rapid, warm proofs.
This stage also continues to strengthen the gluten network, although more gently than kneading. The stretching and folding techniques sometimes employed during bulk fermentation (known as "folds" or "punch-downs") help realign the gluten strands, increasing the dough's elasticity and ability to hold gas. By the end of the first proof, the dough should be noticeably larger, feel airy and slightly puffy, and show signs of fermentation like small bubbles on the surface or around the edges of the bowl. This sets the stage for achieving a perfect rise in the subsequent steps.
Monitoring Dough Temperature During the First Proof
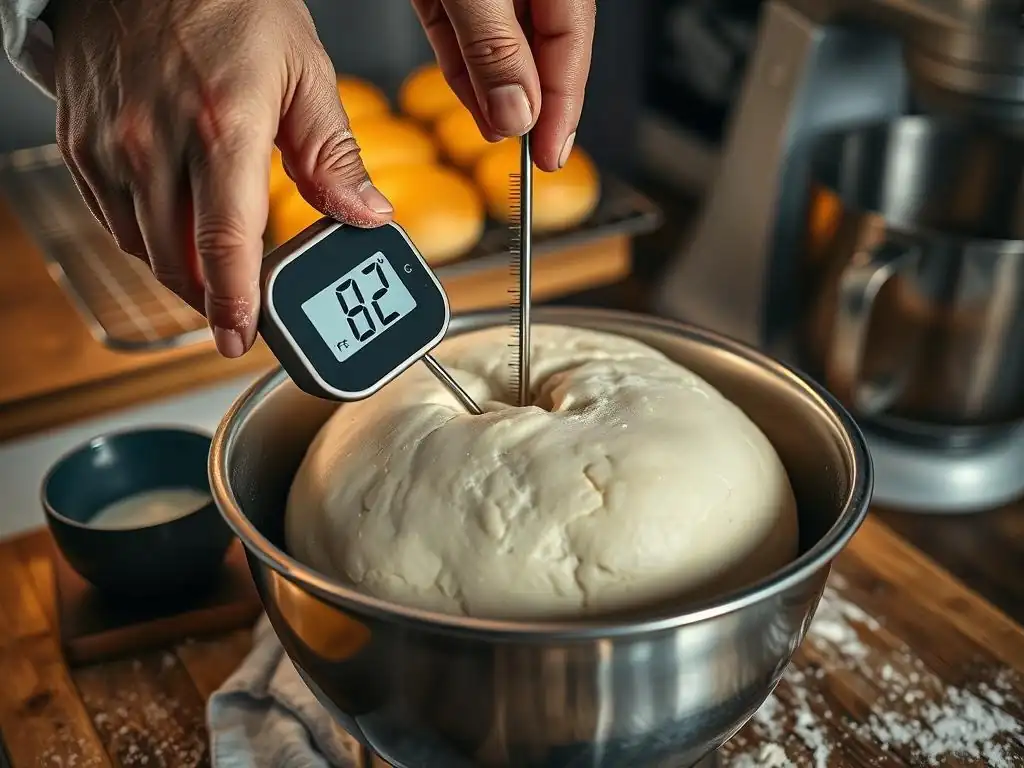
Maintaining the correct dough temperature is vital for controlling the rate of fermentation during the first proof and ensuring perfect bread roll proofing. Yeast activity is highly sensitive to temperature. For optimal activity, aim for a dough temperature between 75°F and 85°F (24°C-30°C). If your dough is cooler, the yeast will be sluggish, and the proofing time will be extended. If it's warmer, the yeast will be hyperactive, potentially leading to over-proofing before sufficient flavor development occurs.
You can monitor dough temperature using an instant-read thermometer inserted into the center of the dough mass. To control the temperature, place the covered dough in a warm environment (like a proofing box, a warm oven with the light on, or near a warm appliance) if your kitchen is cool. If your kitchen is very warm, you might need to proof in a slightly cooler spot or even briefly refrigerate the dough if it's rising too quickly. Consistent temperature management leads to more predictable and perfect bread roll proofing results.
Deflating the Dough: Knocking Back the Air
After the first proof, the dough needs to be "knocked back" or gently deflated. This process involves gently punching down or folding the dough to release some of the accumulated carbon dioxide gas. While it might seem counter-intuitive after working to build gas, this step serves several purposes essential for achieving perfect bread roll proofing in the final product.
Deflating the dough redistributes the yeast and its food supply throughout the dough, giving the yeast a fresh boost for the second rise. It also equalizes the temperature within the dough mass and helps to relax the gluten network, making the dough easier to handle and shape into individual rolls without excessive elasticity. Furthermore, knocking back helps to break up large air pockets, promoting a finer, more even crumb structure in the finished rolls. It's a gentle process – you don't need to pound the dough aggressively, just enough to reduce its volume significantly.
The Second Proof: Final Rise for Light and Airy Bread Rolls
Preparing Your Proofing Environment: Temperature and Humidity Control
The second proof, also known as the final proof or 'proving', is where your shaped rolls undergo their last significant rise before baking. The environment for this stage is just as important as for the first proof to ensure perfect bread roll proofing. A warm, humid environment is ideal. Aim for a temperature again in the range of 75°F to 85°F (24°C-30°C). Consistency is key here, as uneven temperatures can lead to uneven rising among your rolls.
Humidity is crucial to prevent the surface of the rolls from drying out and forming a skin. A dry skin restricts the dough's ability to expand and can lead to a poor rise or even bursting during baking.
You can create a humid environment by placing the baking sheet of rolls inside a large plastic bag, using a dedicated proofing box with humidity control, or by placing a pan of hot water in the bottom of the oven while the rolls proof inside (with the oven turned OFF). A warm, humid setting allows the rolls to expand gently and evenly, setting them up for a perfect rise in the oven.
Choosing the Right Proofing Container: Bannetons vs. Baking Sheets
The choice of container for the second proof depends largely on the desired shape and style of your bread rolls. For freeform rolls that will bake directly on a baking sheet, you'll proof them on the same parchment-lined sheet they'll bake on. This minimizes handling after proofing, which is important as the dough is delicate at this stage. Ensure they are spaced adequately apart (typically 1-2 inches) to allow for expansion without touching, unless you specifically want "pull-apart" rolls.
For rolls where you want a specific shape maintained, like round sandwich buns or rolls meant to hold a perfect round shape, proofing rings or even individual ramekins can be used. Artisan-style rolls might benefit from proofing in floured bannetons (proofing baskets). The basket supports the dough's shape as it rises, and the flour coating prevents sticking. When ready to bake, the dough is gently inverted onto the baking surface. Both methods aim to support the dough structure during the final, delicate rise for perfect bread roll proofing.
The Importance of Covering Your Dough During the Second Proof
Covering your shaped bread rolls during the second proof is non-negotiable for achieving a perfect rise. As mentioned, a dry surface skin is the enemy of proper expansion. If the surface dries out, it becomes inelastic, preventing the dough from stretching as the gas inside expands. This can result in a restricted rise, a tough crust, or even cracks and tears on the surface during baking as the internal pressure builds.
The cover should be light and non-sticking. Loosely draped plastic wrap (oiled on the side facing the dough to prevent sticking), a large, clear plastic bag placed over the entire baking sheet, or a clean, damp (not wet) kitchen towel are common methods. Ensure the cover doesn't press down on the dough, allowing it room to expand. If using a towel, make sure it stays damp throughout the proofing period. Proper covering ensures the surface remains pliable, allowing for maximum oven spring and contributing to perfect bread roll proofing.
Avoiding Over-Proofing: Signs to Watch For
Over-proofing is a common pitfall in bread making, and it can ruin your perfect bread roll proofing efforts. While under-proofed dough doesn't rise enough, over-proofed dough has risen too much, and the gluten structure has become weak and unable to support the accumulated gas. Signs of over-proofing include dough that looks excessively puffy and fragile, has potentially started to spread rather than hold its shape, and may even show signs of collapse around the edges.
If you gently prod over-proofed dough, the indentation will remain completely or collapse further, indicating the structure is compromised. The dough might also smell strongly alcoholic or overly yeasty. Baking over-proofed rolls often results in them collapsing in the oven, producing a flat, dense loaf with a coarse, uneven crumb. It's a delicate balance – you want maximum rise without pushing the dough past its structural limit.
The Finger Dent Test: Determining Proofing Readiness
The finger dent test is the classic method for determining if your bread rolls have achieved perfect bread roll proofing and are ready to bake. To perform the test, lightly flour one of your fingers and gently but firmly press it about half an inch (about 1-1.5 cm) into the side of a roll. Observe how quickly the indentation springs back.
- If the indentation springs back immediately and completely: The dough is under-proofed. It needs more time to rise.
- If the indentation springs back slowly, only partially filling the dent: The dough is perfectly proofed and ready to bake! It has enough structure to hold its shape but is relaxed enough to expand further in the oven (oven spring).
- If the indentation remains completely or the dough deflates slightly: The dough is likely over-proofed. While you can still try baking it, the results may not be optimal.
This test is a reliable indicator, but it takes a little practice to interpret correctly. Combine it with visual cues – the rolls should look significantly larger (often doubled or nearly doubled in size) and feel light and airy.
Troubleshooting Common Bread Roll Proofing Problems
Dough Not Rising? Identifying Potential Issues
One of the most frustrating issues is when your dough simply refuses to rise during proofing, preventing perfect bread roll proofing. Several factors could be at play. The most common culprit is inactive or dead yeast. This can happen if the yeast is old and expired, or if it was killed by using water that was too hot (above 130°F or 54°C) during mixing. Always check the expiration date on your yeast and verify water temperature with a thermometer.
Another issue could be the dough temperature being too cold. Yeast activity slows dramatically below 70°F (21°C). Ensure your proofing environment is warm enough, ideally between 75°F and 85°F (24°C-30°C). Insufficient kneading can also hinder rising; if the gluten network isn't developed, it can't trap the gas produced by the yeast. Finally, certain ingredients like excessive salt or sugar can inhibit yeast activity if added directly to the yeast without dilution or if their concentrations are too high in the recipe.
Over-Proofed Dough: Salvaging Your Bread Rolls
If you've returned to find your dough looking overly puffy, perhaps starting to spread or even slightly deflated (indicating over-proofing), don't despair entirely. While you won't achieve the most perfect bread roll proofing possible, you might still be able to salvage them. Gently deflate the dough completely by punching it down or folding it over on itself. Reshape the rolls carefully, trying to build some tension back into the surface.
After reshaping, let the rolls rest for a very short second proof – perhaps only 15-30 minutes, just enough for them to look slightly puffy again, but nowhere near doubled. The goal is just a minimal re-inflation before baking. Bake them immediately. The resulting rolls might be a bit flatter, have a coarser crumb, and potentially a paler crust than perfectly proofed ones, but they should still be edible and reasonably tasty. Consider using them for something where structure is less critical, like breadcrumbs or croutons.
Uneven Proofing: Tips for Consistent Results
Sometimes, despite your best efforts, some rolls rise beautifully while others lag behind, leading to uneven proofing and inconsistent perfect bread roll proofing across your batch. This is often due to variations in temperature or shaping. Ensure your proofing environment has a consistent temperature throughout; areas near windows or vents might be cooler. Placing the baking sheet inside a large plastic bag or using a dedicated proofing box helps create a more uniform microclimate.
Inconsistent shaping is another major factor. Rolls that are shaped more tightly or have more tension on their surface will typically rise slightly slower than those shaped loosely. Rolls of significantly different sizes will also proof at different rates. Using a scale to portion your dough ensures all rolls start at the same weight, and practicing consistent shaping techniques will lead to more uniform tension and thus more even proofing times across the entire batch.
Fixing a Sticky Dough During Proofing
Dough becoming excessively sticky during proofing can make handling and shaping difficult, impacting your ability to achieve perfect bread roll proofing. This stickiness is often related to the hydration level of the dough or the environment. If the dough was mixed with too much water relative to the flour, it will naturally be stickier. This can sometimes be corrected during kneading by adding a small amount of flour, though adding too much can make the dough tough.
During proofing, excessive stickiness on the surface is usually a sign that the humidity is too high without adequate surface tension, or if the dough isn't properly covered and is exposed to fluctuating temperatures. Ensure your covering (like plastic wrap) is lightly oiled where it touches the dough. If the dough is simply very wet, handling it with lightly oiled hands or using a bench scraper can help. Sometimes, a brief chill in the refrigerator (15-30 minutes) can make a sticky dough easier to handle for shaping after the first proof.
Dealing with Cold or Hot Environments During Proofing
Ambient temperature significantly impacts proofing time and the potential for perfect bread roll proofing. In a cold kitchen (below 70°F or 21°C), yeast activity is slow. Proofing will take much longer, potentially several hours for the first proof. To speed things up, find or create a warmer spot: a turned-off oven with the light on (typically reaches 75-85°F), near a warm appliance, or a dedicated proofing box. Be patient; slower, colder proofs can sometimes develop more flavor.
In a hot kitchen (above 85°F or 30°C), yeast activity is rapid. Dough can over-proof very quickly, potentially within 30-60 minutes for the first proof. Monitor the dough closely and be prepared to move it to a cooler location if it's rising too fast, such as a slightly cooler room or even briefly in the refrigerator to slow it down. While faster, hot proofs develop less complex flavors. Adjusting proofing times based on your environment is key to consistent perfect bread roll proofing.
Proofing Variations for Different Types of Bread Rolls
Proofing Enriched Doughs: Brioche Rolls and Sweet Buns
Enriched doughs, like those used for brioche, challah rolls, or sweet buns (cinnamon rolls, sticky buns), present unique proofing considerations. These doughs contain significant amounts of fat (butter, oil), sugar, and sometimes eggs and milk. These enriching ingredients tenderize the dough and add flavor, but they also inhibit gluten development and slow down yeast activity compared to lean doughs (just flour, water, salt, yeast).
As a result, enriched doughs typically require longer proofing times, even at warm temperatures, to achieve perfect bread roll proofing. The high fat content also means they are less prone to drying out, but still benefit from covering. Due to their richness, they can sometimes handle a slightly cooler proof, which further enhances flavor development without risking over-proofing too quickly. Monitor these doughs by size and the finger dent test, but expect them to take potentially 1.5 to 2 times longer than a basic lean dough.
Proofing Whole Wheat Bread Rolls: Adjusting Proofing Times
Working with whole wheat flour for bread rolls requires adjustments to your proofing approach for perfect bread roll proofing. Whole wheat flour contains the bran and germ of the wheat kernel, which are sharp and can cut the developing gluten strands, resulting in a weaker gluten network compared to white flour. This weaker structure means whole wheat doughs may not achieve the same dramatic rise as white flour doughs.
Additionally, the bran and germ absorb more water, potentially making the dough feel heavier. Proofing times for whole wheat doughs can vary. Some bakers find they proof slightly faster initially due to enzymatic activity from the bran, while others find them slower due to the inhibited gluten development. It's crucial to rely more on visual cues (dough doubling in size) and the finger dent test rather than strict timing. Often, a blend of whole wheat and white flour (e.g., 50/50) is used to balance flavor, nutrition, and reliable rise.
Proofing Sourdough Bread Rolls: A Longer, Slower Rise
Proofing sourdough bread rolls is a different ballgame compared to commercial yeast, requiring patience for perfect bread roll proofing. Sourdough relies on a wild yeast culture and lactic acid bacteria. This fermentation process is significantly slower, especially at typical room temperatures (70-75°F or 21-24°C). Bulk fermentation for sourdough can take anywhere from 3 to 6 hours, or even longer, depending on the starter's activity and temperature.
The second proof for sourdough rolls is also slower. Many sourdough bakers opt for a cold proof (retarding) in the refrigerator for the second rise, which can take 8 to 12 hours or even up to 24 hours. Cold proofing significantly slows yeast activity while allowing the bacteria to produce more flavorful organic acids, resulting in the characteristic sourdough tang and improving crust development. When proofing sourdough, pay less attention to the clock and more to the dough's expansion (aiming for maybe 50-75% increase in volume for the second proof) and the finger dent test.
Proofing Gluten-Free Bread Rolls: Special Considerations
Proofing gluten-free bread rolls presents unique challenges because there is no gluten network to trap the gas produced by the yeast, making perfect bread roll proofing different. Gluten-free doughs rely on alternative binders like xanthan gum, psyllium husk, or starches to provide some structure. These binders don't behave like gluten; they often create a batter-like or very soft dough rather than an elastic one.
As a result, gluten-free doughs typically require a shorter, warmer proofing time. Over-proofing is a significant risk, as the fragile structure can collapse easily. Often, gluten-free recipes call for only one proofing stage after mixing and shaping, or a very short second proof (e.g., 30-45 minutes). The dough may not double in size as dramatically as wheat dough. Rely heavily on the recipe's guidance and look for noticeable puffiness rather than a full doubling, and handle the dough very gently after proofing.
Baking Your Perfectly Proofed Bread Rolls
Scoring Techniques for Optimal Oven Spring
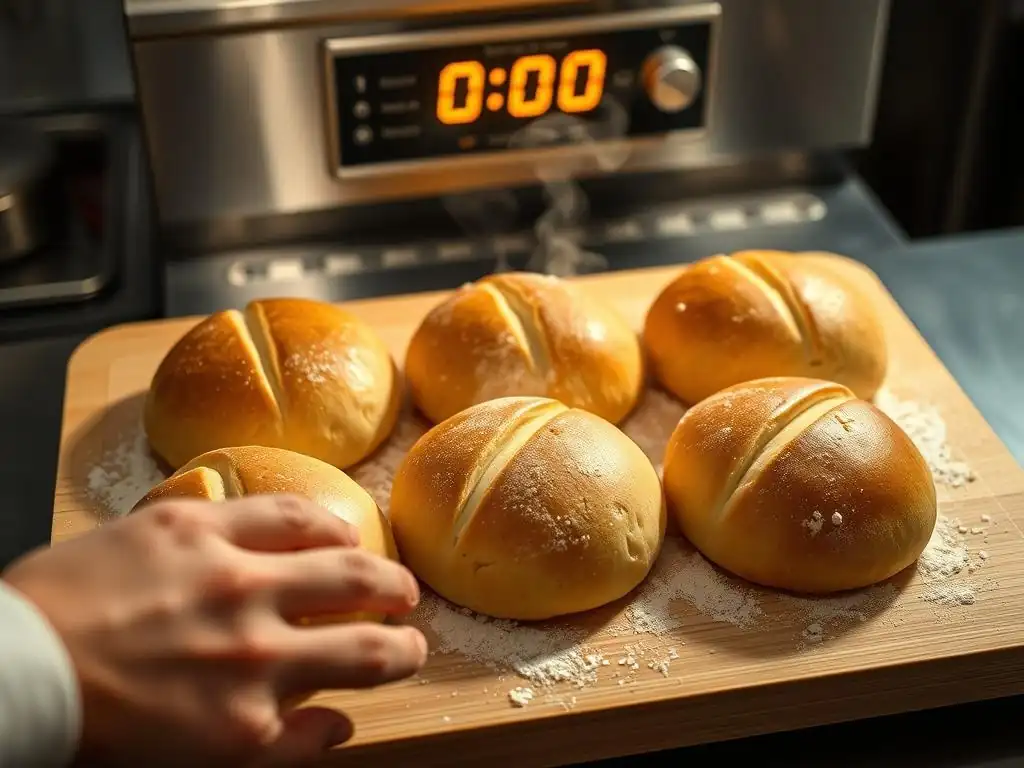
Once your bread rolls have achieved perfect bread roll proofing and passed the finger dent test, scoring is often the final step before they hit the hot oven. Scoring involves making shallow cuts on the surface of the dough with a sharp blade (like a razor blade or lame). These cuts serve a crucial purpose: they provide weak points on the dough's surface, directing the expansion during oven spring.
During the first few minutes in a hot oven, the yeast gets a final burst of activity, and trapped gases expand rapidly. Without scoring, the crust would set quickly, and the expanding dough would find the weakest point to break through, resulting in uncontrolled splits and tears. Scoring allows the dough to expand predictably and beautifully, helping achieve maximum volume and contributing to the final shape and appearance of your perfect bread roll proofing. Common patterns include a single slash, an "X" shape, or multiple parallel cuts, depending on the roll's shape and desired aesthetic.
Oven Temperature and Baking Time for Perfect Bread Rolls
Baking temperature and time are critical for transforming your perfectly proofed dough into golden, delicious bread rolls. Most bread rolls bake at relatively high temperatures, typically between 375°F and 400°F (190°C-205°C). The high initial heat promotes rapid oven spring, where the dough expands quickly before the crust sets, contributing to a good rise and open crumb.
Baking time varies depending on the size and type of roll, but generally ranges from 15 to 25 minutes. Smaller rolls like dinner rolls might take 15-20 minutes, while larger buns could take 20-25 minutes. Rolls are done when they are golden brown on the surface, sound hollow when tapped on the bottom, and have an internal temperature of around 190°F-200°F (88°C-93°C) measured with an instant-read thermometer. Baking to the correct internal temperature ensures the crumb is fully cooked and set.
Achieving a Golden-Brown Crust: Steaming and Egg Washes
A beautiful golden-brown crust is the hallmark of well-baked bread rolls, enhancing both appearance and flavor. Several techniques can help achieve this after perfect bread roll proofing. Creating steam in the oven during the initial baking phase is highly effective.
Steam keeps the surface of the dough moist and pliable longer, allowing for maximum oven spring before the crust hardens. This also contributes to a thinner, crispier crust. You can create steam by placing a pan of water on the bottom rack of the oven when you preheat it or by adding ice cubes to a hot pan just as you load the rolls.
Alternatively, applying a wash to the surface of the rolls just before baking can yield different crust characteristics. An egg wash (beaten egg with a little water or milk) produces a shiny, deep golden-brown crust. A milk wash gives a softer, matte brown crust. A simple water wash can encourage a slightly crispier crust without much shine. Choose the wash based on the desired final look and texture of your perfect bread roll proofing.
Cooling Your Bread Rolls: Preventing Soggy Bottoms
The step often overlooked but crucial for perfect bread roll proofing is the cooling process. As soon as your rolls come out of the oven, they are still undergoing internal changes. The steam within the crumb needs to escape, and the structure needs to set fully. Placing hot rolls directly onto a flat surface will trap steam underneath, leading to soggy bottoms.
Always transfer baked bread rolls immediately from the baking sheet to a wire cooling rack. The rack allows air to circulate freely around the entire surface of the rolls, permitting steam to escape and the crust to cool and crisp up evenly. Allow the rolls to cool for at least 15-20 minutes, or ideally until they are just warm to the touch, before slicing or eating. Cutting into hot bread can compress the crumb and result in a gummy texture. Patience during cooling is rewarded with the best possible texture from your perfect bread roll proofing efforts.
Tips and Tricks for Consistently Perfect Bread Rolls
The Importance of Accurate Measurements
Precision in measuring ingredients is a foundational element for consistently achieving perfect bread roll proofing and successful baking. While some home bakers might eyeball quantities, especially for flour, even slight variations can significantly impact dough hydration and the balance of the recipe. Too much flour can result in a stiff dough that struggles to rise, while too little can create an overly wet dough that spreads rather than proofs upwards.
Using a digital kitchen scale to measure flour and other dry ingredients by weight (grams or ounces) is the most accurate method and highly recommended. Volume measurements (cups) can vary widely depending on how the flour is scooped and leveled. Measuring liquids in a clear liquid measuring cup at eye level is also important. Accurate measurements ensure that the dough has the correct hydration and ingredient ratios specified by the recipe, leading to more predictable and perfect bread roll proofing results batch after batch.
Maintaining a Clean and Organized Baking Space
A clean and organized workspace contributes significantly to stress-free baking and better results, including perfect bread roll proofing. Before you begin, clear your counters, gather all your ingredients, and measure them out (mise en place). This prevents frantic searching mid-recipe and reduces the chance of forgetting an ingredient. Wipe down surfaces to remove any residual flour or debris that could interfere with kneading or shaping.
During the proofing stages, keep your workspace tidy. Have your proofing containers ready and clean. Ensure your thermometer is accessible for checking dough temperature. A clean environment also minimizes the risk of introducing unwanted bacteria or foreign particles into your dough. An organized approach allows you to focus on the nuances of the process, like dough feel and proofing progression, which are key to achieving perfect bread roll proofing.
Documenting Your Proofing Process for Future Success
Become a detective in your own kitchen by documenting your bread roll proofing process. This is invaluable for learning and consistently achieving perfect bread roll proofing, especially as you try new recipes or encounter varying environmental conditions. Keep a simple notebook or digital log where you record key details for each bake.
Note the recipe used, the type of flour and yeast, water temperature, ambient kitchen temperature, dough temperature throughout proofing, the start and end times for both the first and second proofs, and how the dough looked and felt at each stage (e.g., "doubled in 1.5 hours," "finger dent test perfect after 45 mins"). Also, record the baking temperature and time and the final outcome (texture, rise, flavor).
Reviewing these notes helps you understand what works best in your kitchen environment and allows you to troubleshoot effectively when things don't go as planned, guiding you towards consistent perfect bread roll proofing.
Adjusting Recipes Based on Environmental Conditions
As highlighted earlier, temperature and humidity significantly impact yeast activity and dough hydration, directly affecting perfect bread roll proofing. A recipe's stated proofing times are often guidelines based on average room temperatures. If your kitchen is warmer or cooler, you will need to adjust. In a warm environment, reduce proofing times; in a cool environment, extend them. Always rely on visual cues (size increase) and the finger dent test rather than adhering strictly to the clock.
Humidity also plays a role. In very dry conditions, your dough might dry out faster, even when covered. You might need to use a slightly wetter dough or ensure your covering method provides ample humidity. In very humid conditions, the dough might feel sticker. Learning to read the dough itself and adjusting proofing time and environment based on your specific conditions is a sign of a developing baker and essential for consistent perfect bread roll proofing.
Experimenting with Different Proofing Techniques
Once you've mastered the basics of perfect bread roll proofing, don't be afraid to experiment with different techniques to see how they affect your results. Try a longer, colder bulk fermentation in the refrigerator (retarding) after a short initial warm proof. This method slows down the yeast but allows more time for enzymes to break down starches into sugars, resulting in more complex flavors and often a better crust.
Experiment with different proofing temperatures within the recommended range (75-85°F). See how a proof at the lower end affects flavor versus one at the higher end. You could also try different proofing containers or covering methods. Each variation can subtly change the final texture, flavor, and appearance of your rolls. Keep notes on your experiments to learn what techniques you prefer for achieving your ideal perfect bread roll proofing.
Enjoying Your Homemade Bread Rolls
Serving Suggestions for Freshly Baked Bread Rolls
There's nothing quite like the aroma and taste of freshly baked bread rolls straight from the oven after achieving perfect bread roll proofing. Serve them warm with a generous slathering of butter – it's a simple pleasure that highlights the rolls' texture and flavor. Perfect for accompanying soups, stews, or salads, they can also be the star of the meal.
Consider serving them alongside a cheese board with various cheeses, cured meats, and pickles. Their soft interior makes them ideal for dipping into olive oil or balsamic vinegar. For a sweet touch, rolls made from enriched dough are wonderful with jam, honey, or a sprinkle of cinnamon sugar. Don't hesitate to use them as mini sandwich buns, filling them with your favorite meats, cheeses, or vegetables.
Storing Bread Rolls to Maintain Freshness
To keep your perfect bread roll proofing creations fresh for as long as possible, proper storage is key. Once completely cooled on a wire rack, store them at room temperature in an airtight container or a sealed plastic bag. This prevents them from drying out and becoming stale too quickly. Avoid storing them in the refrigerator, as this can actually accelerate the staling process due to starch retrogradation.
For longer storage, bread rolls freeze exceptionally well. Once completely cooled, place them in a single layer in a freezer-safe bag or container, squeezing out as much air as possible. Frozen rolls can maintain quality for up to 2-3 months. To enjoy, simply thaw them at room temperature or warm them gently in a preheated oven (around 300°F or 150°C) for 5-10 minutes until soft and warm throughout.
Recipes to Use Your Perfect Bread Rolls
Your perfectly proofed and baked bread rolls are incredibly versatile! Beyond serving them simply with butter, they are the foundation for numerous delicious uses. Transform them into gourmet sliders or mini sandwiches filled with pulled pork, chicken salad, or roasted vegetables.
Cut them in half and use them as bases for mini pizzas or bruschetta. Leftover or slightly stale rolls make excellent breadcrumbs for coating cutlets or topping casseroles. They can also be cubed and toasted to make croutons for salads or soups. For a sweet treat, tear them into pieces and use them in a bread pudding. The possibilities are vast, ensuring that your efforts in achieving perfect bread roll proofing are rewarded in many delicious ways.
Frequently Asked Questions
How do I know when my bread rolls are properly proofed?
Properly proofed rolls should be noticeably larger than their original size, typically doubled. Gently poke the dough; if it slowly springs back, it's ready. A dough that doesn't spring back at all may be over-proofed.
What's the ideal temperature for bread roll proofing?
The ideal temperature for proofing is generally between 75-85°F (24-29°C). This warm environment encourages yeast activity for optimal rise. Avoid drafts or extreme temperatures.
Can I over-proof my bread rolls? What happens?
Yes, over-proofing can occur. The dough will collapse during baking, resulting in flat, dense rolls with a sour taste. Watch your dough carefully!
What's the difference between proofing and rising?
While often used interchangeably, rising usually refers to the first rise after kneading, while proofing refers to the final rise after shaping the dough into rolls. Both involve yeast activity.
What if my bread rolls aren't rising during proofing?
Several factors can inhibit rising, including old yeast, a too-cold environment, or insufficient kneading. Ensure your yeast is fresh, the temperature is warm enough, and you kneaded the dough properly.
Final Reflection: The Transformative Power of a Perfect Proof
The seemingly simple act of proofing bread rolls holds the key to unlocking unparalleled flavor and texture. Mastering this crucial step isn't just about achieving a visually appealing rise; it's about understanding the delicate dance between yeast, flour, and time, resulting in bread rolls that are light, airy, and utterly irresistible. This knowledge, once acquired, transforms the entire baking experience.
The journey of perfecting the bread roll proof is a microcosm of life itself – requiring patience, attention to detail, and a willingness to learn from both successes and failures. The subtle nuances of temperature, humidity, and timing are mirrored in the complexities of life's endeavors. As the dough rises, so too does our understanding and appreciation for the process. The best things in life are worth waiting for,
and this couldn't be truer when it comes to achieving that perfect, pillowy rise.
Now, consider your own baking journey, and perhaps even your life's journey. What seemingly small details, like the perfect proof, hold the key to unlocking greater success and satisfaction? Take the time to observe, to learn, and to refine your process. Don't be afraid to experiment, to adjust, and to embrace the imperfections along the way. The reward – that perfect, golden-brown roll, warm from the oven – is a testament to your dedication and a delicious taste of triumph. Go forth and proof!
Unlock Your Perfect Roll: Take Your Baking to the Next Level!
Thanks for taking the time to learn about mastering the art of bread roll proofing! We hope you now feel confident in achieving that perfect rise every time. Ready to put your new knowledge into practice?
- Bake a batch of rolls today! Use your newfound expertise to create fluffy, delicious rolls – the aroma alone will be worth it.
- Share your baking journey! Post a picture of your perfectly proofed rolls on social media and tag us – we'd love to see your success!
- Experiment with different flours and techniques. What exciting variations will you try next?
Ready to rise to the occasion? What's your favorite bread roll recipe you're eager to perfect?