
Focaccia Art: Simple Ways to Decorate Your Bread

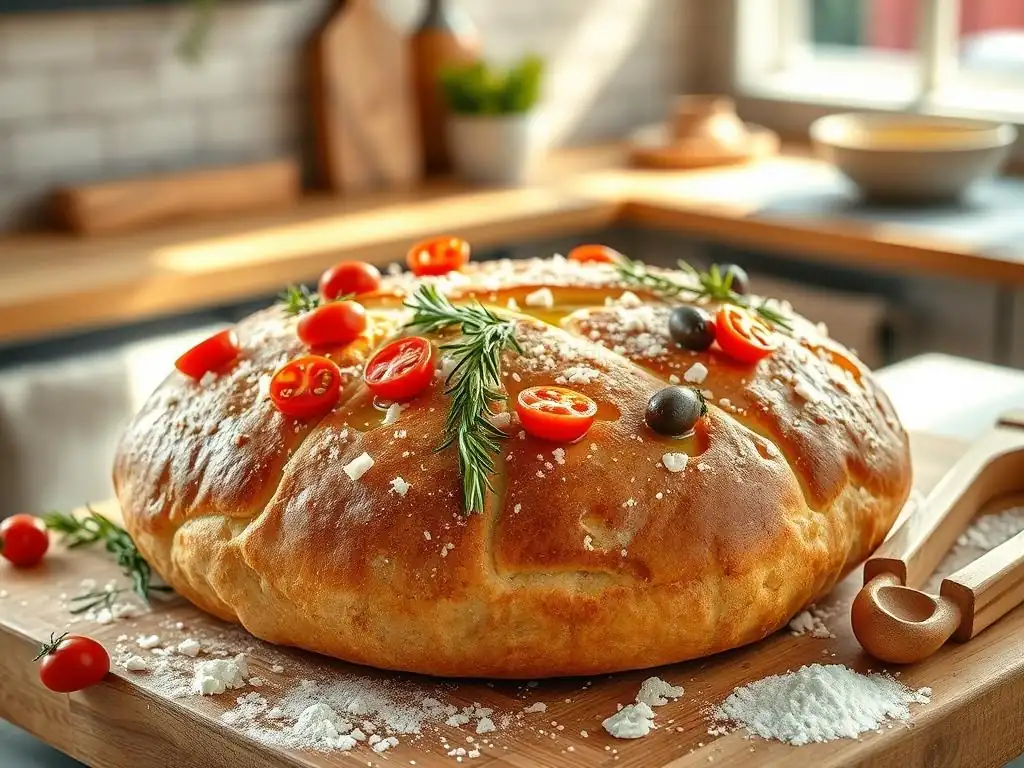
Welcome to BakeWithEase, your culinary companion on a delicious journey through the world of baking! Ever dreamt of transforming a simple loaf into a work of art? Prepare to unleash your inner artist! This week, we’re diving into easy focaccia decorating ideas that will elevate your bread from basic to breathtaking. Get ready to be inspired and turn your next bake into a stunning masterpiece – because who knew bread could be this beautiful and delicious?
- Introduction to Focaccia Art: Elevate Your Baking with Easy Designs
- Understanding the Basics for Beautiful Focaccia
- Easy Focaccia Decorating Ideas for Beginners
- Step-by-Step Guide to Focaccia Art: Tuscan Herb Garden
- Advanced Focaccia Decorating Techniques: Taking Your Art to the Next Level
- Tips and Tricks for Focaccia Art Success
- Focaccia Art Inspiration: Design Ideas to Spark Your Imagination
- Conclusion: Unleash Your Inner Artist with Easy Focaccia Decorating Ideas
- Frequently Asked Questions
- Final Reflection: The Flourishing Art of Simple Focaccia
- Unleash Your Inner Artisan: Elevate Your Focaccia Game!
Introduction to Focaccia Art: Elevate Your Baking with Easy Designs
Focaccia, with its dimpled surface and rustic charm, is already a beloved bread. But did you know it can also be a canvas for edible art? Focaccia art transforms your bake into a visually stunning piece, using fresh ingredients like vegetables, herbs, and seeds to create beautiful patterns and scenes before baking. It's a delightful way to add a personal touch and extra flavor to this classic Italian flatbread.
Embracing focaccia art is surprisingly accessible, even for novice bakers. You don't need to be a professional artist; many beautiful designs can be achieved with simple arrangements and common kitchen tools. This guide will walk you through easy focaccia decorating ideas, showing you how enjoyable and rewarding it is to turn your next focaccia into a delicious masterpiece. It’s a perfect activity for adding a creative flourish to home baking.
Understanding the Basics for Beautiful Focaccia
What is Focaccia Art and Why Try It?
Focaccia art involves arranging fresh ingredients like vegetables, herbs, and sometimes even fruit or cheese onto the surface of focaccia dough before baking. These ingredients are pressed lightly into the dough, creating patterns, landscapes, or abstract designs. The dough's surface acts as the background, and the toppings become the edible "paint" or "sculpture."
Trying focaccia art adds a layer of fun and creativity to the baking process. Beyond the visual appeal, the ingredients used for decoration infuse the bread with additional flavors as it bakes. It’s an excellent way to personalize a loaf for a special occasion, use up small amounts of leftover produce, or simply explore your artistic side in the kitchen. Plus, it's a fantastic conversation starter when serving!
Essential Tools and Ingredients for Focaccia Decoration
You won't need a specialized art studio for focaccia decorating. Most of the tools are likely already in your kitchen. A sharp knife or vegetable peeler is crucial for preparing thin slices of vegetables. Small cookie cutters can be useful for creating uniform shapes like flowers or stars. Tweezers can help with precise placement of small herbs or seeds. A pastry brush is essential for applying olive oil, which helps ingredients adhere and prevents burning.
The star ingredients for easy focaccia decorating ideas are fresh vegetables and herbs. Think cherry tomatoes (halved or whole), thinly sliced bell peppers, red onion rings, olives, asparagus spears, fresh rosemary sprigs, thyme, chives, and leafy greens like spinach or kale. Seeds like sesame or poppy seeds, and spices like paprika or chili flakes, can add texture and color. Ensure your ingredients are washed and thoroughly dried to prevent excess moisture from affecting the dough.
Preparing Your Focaccia Dough for Art: The Perfect Canvas
The key to a beautiful focaccia art piece is starting with well-prepared dough. After its final rise in the pan, the dough should be gently dimpled with your fingertips. This creates the characteristic focaccia texture and provides small pockets for olive oil and toppings. Avoid pressing too hard, which can deflate the dough.
Before adding decorations, generously drizzle the dough surface with good quality olive oil. This not only adds flavor but also helps the decorative elements stick and prevents them from drying out or burning during baking. Arrange your chosen ingredients lightly on the oiled surface, pressing them down just enough so they are nestled slightly into the dimples, but not so deep that they disappear into the dough.
Easy Focaccia Decorating Ideas for Beginners
Simple Vegetable Arrangements: Creating Stunning Landscapes
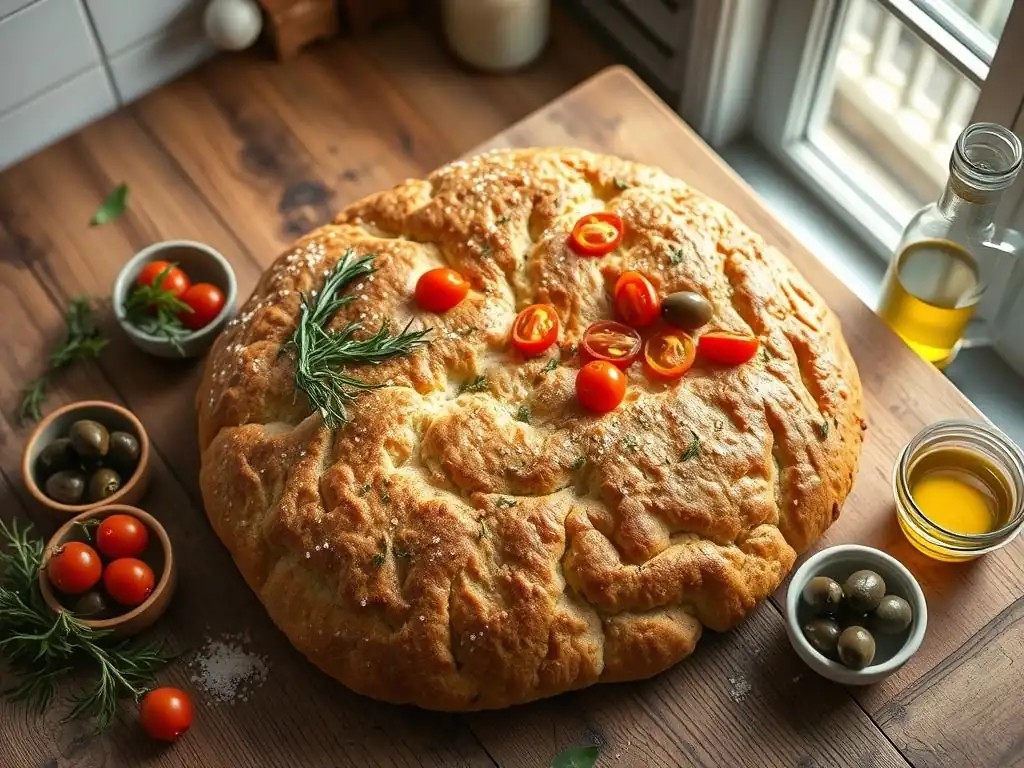
One of the most straightforward ways to begin with easy focaccia decorating ideas is by using simple vegetable arrangements to create natural scenes like gardens or landscapes. Think of the dough as a patch of earth ready for planting. Using a variety of colors and shapes adds visual interest without requiring complex techniques.
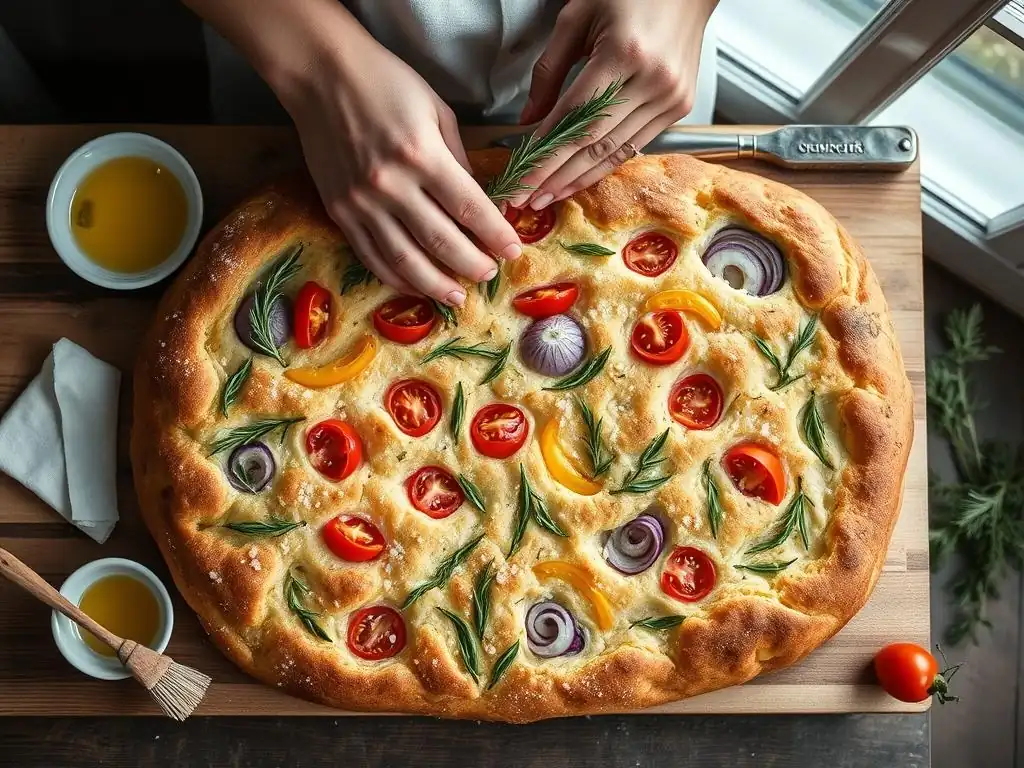
For example, you can create "flower stems" using thin strips of green bell pepper or asparagus, and "leaves" with spinach or basil leaves. Cherry tomatoes, especially vibrant red or yellow ones, make perfect "flowers" when placed at the end of stems. Slices of red onion can form rings or semicircles for larger floral elements. This method is forgiving and allows for free-form creativity.
Using Herbs and Cherry Tomatoes for a Rustic Look
Combining fresh herbs like rosemary and thyme with cherry tomatoes is a classic and incredibly simple way to decorate focaccia. Rosemary sprigs can represent branches or stems, while thyme adds delicate foliage. Cherry tomatoes, either left whole or halved, serve as colorful berries or flowers.
To create a rustic herb garden look, arrange rosemary sprigs in flowing lines across the dough. Scatter small bunches of thyme around the base of the rosemary. Place halved cherry tomatoes cut-side up or whole tomatoes scattered among the herbs. Drizzle with more olive oil and a sprinkle of flaky sea salt before baking. This approach is low-fuss yet yields a beautiful, aromatic result.
Bell Peppers and Olives: Adding Color and Dimension
Bell peppers offer a wide range of colors—red, yellow, green, orange—making them ideal for adding vibrancy. Thinly sliced bell peppers can be cut into strips, rings, or small shapes. Olives, particularly black Kalamata or green Castelvetrano olives, provide deep, contrasting colors and irregular shapes that add visual depth.
Try creating geometric patterns by arranging alternating colors of bell pepper strips in lines or grids. Use olive halves to fill in spaces or create borders. For a more organic look, scatter olive halves and bell pepper rings randomly across the surface, ensuring even distribution of color. The combination of soft peppers and firm olives also adds interesting texture after baking.
Mastering Floral Designs on Focaccia
Creating floral patterns is a popular and visually rewarding type of focaccia art. While some designs can be intricate, many beautiful flower shapes are achievable with simple cutting and arrangement techniques, making them great easy focaccia decorating ideas.
Consider using concentric rings of vegetables to form petals. Thin slices of zucchini, eggplant, or even potatoes (blanched briefly if using potato) can be layered to build larger flowers. Smaller vegetables like radishes or carrots (thinly sliced) can create delicate petals for smaller blooms. The key is thin, uniform slices that will cook evenly.
Creating Sunflower Patterns with Thinly Sliced Vegetables
A sunflower is a surprisingly easy design to recreate on focaccia. You'll need thinly sliced yellow bell pepper or yellow squash for the petals and black olives or poppy seeds for the center. Cut the yellow vegetable slices into petal shapes or simply arrange overlapping slices in a circular pattern around a central point.
For the center, densely pack chopped black olives or sprinkle a thick layer of poppy or sesame seeds within the circle of petals. You can use a small ring cutter or even a bottle cap to mark the area for the center before adding the seeds or olives. This design is instantly recognizable and cheerful, perfect for summer baking.
Using Rosemary and Edible Flowers for Delicate Touches
For a truly elegant and simple floral design, combine fresh rosemary with edible flowers. Rosemary sprigs again serve as stems and leaves, providing a lovely green base. Edible flowers like pansies, violas, or nasturtiums (ensure they are culinary grade and pesticide-free) add pops of vibrant color.
Arrange rosemary sprigs to form a branching pattern. Gently place edible flowers among the rosemary, pressing them lightly into the dough. Be mindful that some edible flowers are delicate and may change color or crisp up significantly during baking. Placing them towards the end of the baking time or using varieties known to hold up well under heat is recommended. This technique results in a refined and beautiful loaf.
Abstract Focaccia Art: Unleashing Your Creativity
Abstract focaccia art frees you from representational designs, allowing you to play with color, texture, and form in a non-literal way. This approach is particularly good for easy focaccia decorating ideas as there are no "right" or "wrong" ways to arrange ingredients.
Think about creating patterns using lines, dots, or swaths of color. Sprinkling different seeds in distinct areas, drizzling sauces (like pesto or tomato purée) in swirls, or arranging vegetable pieces in geometric or random clusters can create visually interesting effects. This style encourages experimentation and personal expression.
Working with Different Colored Doughs for a Marbled Effect
While most focaccia art is done on the surface, you can also incorporate color into the dough itself for a unique effect. This typically involves dividing the dough, coloring one portion with a natural food coloring agent (like beetroot powder for red, spinach powder for green, or activated charcoal for black), and then swirling the colored dough with the plain dough before the final rise.
After swirling the doughs together, the surface will have a marbled or tie-dye effect. You can then proceed to add surface decorations, but the base itself provides a beautiful abstract pattern. This technique requires a bit more effort than simple surface decoration but results in a truly distinctive loaf.
Sprinkling Seeds and Spices for Texture and Flavor
Seeds and spices are excellent for adding fine detail, texture, and bursts of flavor. Sesame seeds, poppy seeds, nigella seeds, flax seeds, and pumpkin seeds can be sprinkled in patterns or used to fill areas. Spices like paprika, chili flakes, dried oregano, or even curry powder can add color and a spicy or aromatic kick.
Try creating stripes or checkerboards using different types of seeds. Outline shapes with seeds before filling them with vegetables. Sprinkle paprika lightly over certain areas to add a reddish hue. Be mindful that some spices can darken significantly during baking. This method is very simple and allows for quick, effective decoration.
Step-by-Step Guide to Focaccia Art: Tuscan Herb Garden
Let's create a simple and beautiful Tuscan Herb Garden design, perfect for beginners looking for easy focaccia decorating ideas. This design uses fresh herbs and cherry tomatoes to evoke the feel of an Italian garden.
Step 1: Preparing the Dough and Base
Ensure your focaccia dough has completed its final rise in the baking pan. Drizzle the entire surface generously with extra virgin olive oil, using about 2-3 tablespoons for a standard 9x13 inch pan. Gently dimple the dough all over with your fingertips, pressing down to create indentations without deflating the dough entirely.
Step 2: Creating the Rosemary Stems
Take several sprigs of fresh rosemary. Trim any excess stem and arrange them on the dough to look like branches or stems of plants growing upwards or across the surface. Press them lightly into the dimples so they are secure but not submerged. Aim for a natural, slightly asymmetrical arrangement, perhaps focusing the "garden" in one corner or along one edge.
Step 3: Adding Cherry Tomato Flowers
Halve several cherry tomatoes (red, yellow, or a mix). Place the tomato halves cut-side up at the ends of the rosemary sprigs or scattered among them to represent flowers or berries. You can also arrange four or five halves together to form larger floral shapes. Press them gently into the dough as well. Add a few small thyme sprigs around the base of the rosemary for added texture.
Step 4: Baking Your Masterpiece to Golden Perfection
Once your garden is arranged, sprinkle the entire surface with flaky sea salt. Bake the focaccia in a preheated oven according to your recipe instructions, typically around 400-425°F (200-220°C) for 20-30 minutes, or until golden brown and cooked through. Keep an eye on the vegetables and herbs; if they start to look like they might burn, you can loosely tent the focaccia with foil. The herbs will crisp up, and the tomatoes will soften, creating a fragrant and beautiful loaf.
Advanced Focaccia Decorating Techniques: Taking Your Art to the Next Level
Once you're comfortable with easy focaccia decorating ideas, you might want to explore more complex techniques. These methods often require more precision, different tools, or additional preparation steps for the ingredients.
Intricate Patterns and Detailed Designs
Moving beyond simple arrangements, you can create detailed scenes or intricate geometric patterns. This might involve using very thin slices of multiple vegetables cut into specific shapes, like tiny leaves from bell pepper or flower petals from radish slices. Using a sharp paring knife to freehand cut shapes or using various sizes of cookie cutters allows for more complex compositions.
Creating portraits or highly realistic scenes falls into this category. This requires careful planning and often involves layering different ingredients to create depth and shading. For example, using finely chopped olives or dark spices for shadows and lighter vegetables or seeds for highlights. Patience and a steady hand are key here.
Using Stencils for Precise Shapes
For clean, repeatable shapes, stencils can be a valuable tool. You can buy food-safe stencils or create your own by cutting designs out of parchment paper. Place the stencil on the dough surface (lightly oiled), then fill the cut-out areas with fine ingredients like seeds, chopped herbs, or spices. Carefully lift the stencil to reveal the precise pattern.
This technique works best with ingredients that are small and uniform in size, like poppy seeds for outlining or finely minced chives for filling areas. It allows you to create logos, text, or complex geometric designs with sharp edges that would be difficult to achieve freehand.
Incorporating Cheese and Other Ingredients for Added Flavor and Visual Appeal
While vegetables and herbs are standard, incorporating cheese or other ingredients can add new dimensions to your focaccia art. Grated or crumbled cheese (like mozzarella, parmesan, or feta) can be used to create white or yellowish areas in a design, representing clouds, snow, or abstract shapes. However, cheese melts and spreads, so it's best used for broader areas rather than fine detail.
Other ingredients like pesto (drizzled or spread), tomato paste (thinned slightly), or even thinly sliced cured meats (like pepperoni cut into shapes) can be incorporated. Be mindful of ingredients that release a lot of moisture or fat during baking, as this can affect the dough's texture and the clarity of your design. Testing small areas first can be helpful.
Tips and Tricks for Focaccia Art Success
Achieving beautiful focaccia art consistently involves a few practical considerations. Paying attention to ingredient preparation and baking conditions is crucial for the best results.
Preventing Vegetables from Burning During Baking
Thinly sliced vegetables, especially delicate ones like bell peppers or onions, can burn before the bread is fully cooked. To prevent this, ensure vegetables are pressed firmly enough into the dough to be slightly protected by the surrounding bread and olive oil. You can also brush the vegetables themselves lightly with olive oil.
If you notice certain elements browning too quickly during baking, you can loosely tent the focaccia with aluminum foil. This deflects direct heat from the top, allowing the bread to finish baking without scorching the decorations. Using vegetables with higher water content, like tomatoes or zucchini, can also help them withstand the heat better than drier ingredients.
Achieving the Perfect Crust and Texture
The base focaccia recipe is paramount. Ensure your dough is properly hydrated and has had sufficient time to rise, as this contributes to a light, airy interior and a good crust. Generous use of olive oil before baking is key to the characteristic crispy bottom and edges.
The placement of toppings can affect the crust. Avoid overcrowding the surface, which can trap steam and prevent the top from crisping. Distribute ingredients relatively evenly, allowing some of the dough surface to remain exposed to develop that lovely golden-brown crust.
Storing and Serving Your Decorated Focaccia
Decorated focaccia, like regular focaccia, is best enjoyed fresh from the oven when the crust is crisp and the flavors are most vibrant. If you have leftovers, store them at room temperature, loosely covered with a clean kitchen towel or in a paper bag for a day or two. Avoid airtight containers, which can make the crust soft.
To reheat, place slices directly on an oven rack or baking sheet in a preheated oven (around 350°F or 175°C) for a few minutes until warmed through and the crust crisps up again. Serving your decorated focaccia whole before slicing allows everyone to admire the art before it's divided.
Focaccia Art Inspiration: Design Ideas to Spark Your Imagination
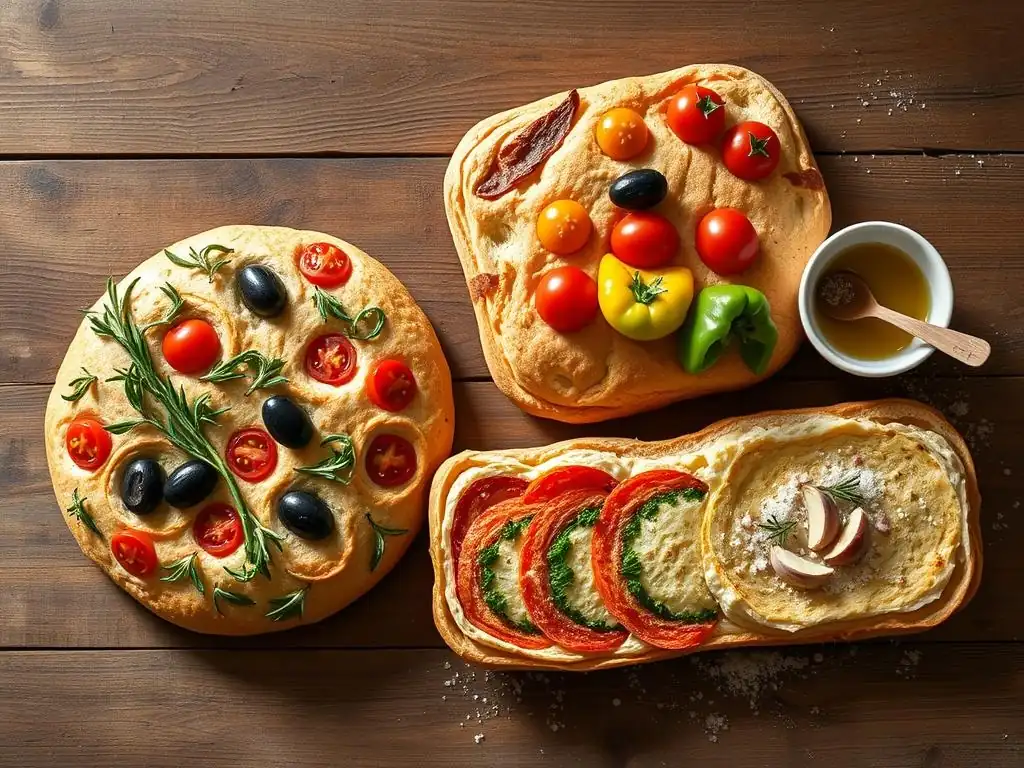
Looking for more easy focaccia decorating ideas or ways to challenge yourself? Inspiration is everywhere! Think about themes, famous art, or even patterns you see in everyday life.
Themed Focaccia Art: Autumn Harvest Designs
Seasonal themes offer a wealth of inspiration. For autumn, create designs using ingredients like thinly sliced sweet potato or carrots cut into leaf shapes, red onion rings for flowers, and pumpkin or sesame seeds scattered like fallen seeds. Use herbs like sage or thyme to represent dried foliage. The warm colors of fall vegetables lend themselves beautifully to a harvest theme.
For a winter theme, use white onion rings or cheese for snowdrifts, rosemary sprigs for evergreen branches, and cranberry halves for berries. Springtime could feature designs with asparagus spears, pea pods, and edible flowers. Summer invites vibrant gardens with bell peppers, tomatoes, and basil.
Recreating Famous Art on Focaccia
For a fun challenge, try recreating simplified versions of famous artworks on your focaccia. Van Gogh's Starry Night could be interpreted using swirls of different colored seeds or spices for the sky and curved lines of vegetables for the landscape. Klimt's The Kiss could inspire patterns using layered shapes and colors.
While achieving perfect replicas is difficult, the process of translating a painting into edible ingredients is a creative exercise. Focus on capturing the essence of the piece through color, texture, and arrangement. This is definitely a more advanced technique but incredibly rewarding.
Community Showcase: Sharing Your Focaccia Art Creations
Sharing your creations is part of the fun! Many online baking communities and social media platforms are vibrant hubs for showcasing focaccia art. Seeing what others have created can provide endless inspiration and allow you to connect with fellow baking enthusiasts.
Look for hashtags like #focacciaart, #focacciagarden, or #easyfocacciadecoratingideas to find examples and share your own. Participating in online challenges or galleries can also motivate you to try new designs and techniques.
Conclusion: Unleash Your Inner Artist with Easy Focaccia Decorating Ideas
Focaccia art is a wonderful way to combine the joy of baking with creative expression. It’s a versatile medium that welcomes both simple, rustic designs and complex, intricate patterns. With just a few basic tools and fresh ingredients, you can transform a humble loaf of bread into a stunning, edible work of art.
Whether you start with easy focaccia decorating ideas like simple herb and tomato arrangements or eventually explore advanced techniques like stenciling or recreating famous art, the process is rewarding and the results are delicious. So grab your ingredients, prepare your dough, and start creating your own beautiful focaccia masterpieces. Happy baking and decorating!
Frequently Asked Questions
What are some easy focaccia decorating ideas for beginners?
Beginners can start with simple designs using vegetables like cherry tomatoes, olives, and herbs. Arranging them in basic patterns such as rows or spirals is a great starting point.
What kind of ingredients can I use for focaccia art?
You can use a wide variety of ingredients! Popular choices include vegetables like bell peppers, onions, and zucchini, as well as herbs, olives, and cheeses. Get creative and use what you have!
How can I ensure my focaccia art stays in place during baking?
Press the ingredients firmly into the dough before baking. Using a light brush of olive oil can help them adhere better and prevent them from drying out.
Can I use sweet ingredients for focaccia art?
While less common, you can experiment with sweet focaccia art. Consider using fruits like figs or berries but be mindful of their moisture content and baking time to avoid burning.
Where can I find more detailed step-by-step guides for focaccia decorating?
BakeWithEase.com offers detailed guides and recipes specifically for focaccia, including decorating techniques. You can also find inspiration and tutorials on our social media channels.
Final Reflection: The Flourishing Art of Simple Focaccia
The humble focaccia, once a simple peasant bread, has blossomed into a vibrant canvas for creativity. Its accessibility and forgiving nature make it the perfect medium for expressing oneself, even for the most novice baker. This isn't just about pretty pictures on Instagram; it's about reclaiming the joy of baking and finding beauty in the everyday.
The impact of focaccia art extends beyond the kitchen table; it's a testament to the power of simple pleasures and the beauty found in imperfection. It's a reminder that even the most basic ingredients can be transformed into something extraordinary with a little imagination and care. The greatest pleasure in life is doing what people say you cannot do.
This quote, though not directly about baking, perfectly encapsulates the spirit of focaccia art – pushing boundaries and defying expectations with accessible techniques.
Now, I invite you to take this inspiration and run with it. Don't be afraid to experiment, to get your hands messy, and to let your creativity flow. The next time you're faced with a blank sheet of dough (or a plain focaccia! ), remember the possibilities. Let your focaccia become a reflection of your own unique style, a delicious testament to the joy of simple, beautiful things. Go forth and create your masterpiece!
Unleash Your Inner Artisan: Elevate Your Focaccia Game!
Thanks for joining us on this focaccia journey! We hope you’ve discovered the simple joy of transforming a loaf of bread into a beautiful work of art. Now it's time to put your new skills to the test.
- Craft your masterpiece: Try one of the designs we showcased, or let your imagination run wild and create your own unique focaccia pattern! Don't be afraid to experiment with different herbs, vegetables, and even edible flowers.
- Share your creation: Post a picture of your stunning focaccia on social media and tag us – we'd love to see your culinary creativity! Use #BakeWithEaseFocaccia to join the community.
- Explore new flavors: Try incorporating different types of olive oil, cheeses, or seasonings into your dough for an even more personalized focaccia experience.
Ready to turn your kitchen into a focaccia studio? What unique ingredient will you feature in your next artistic loaf?