
Understanding Dough Hydration for Ciabatta & Rustic Breads

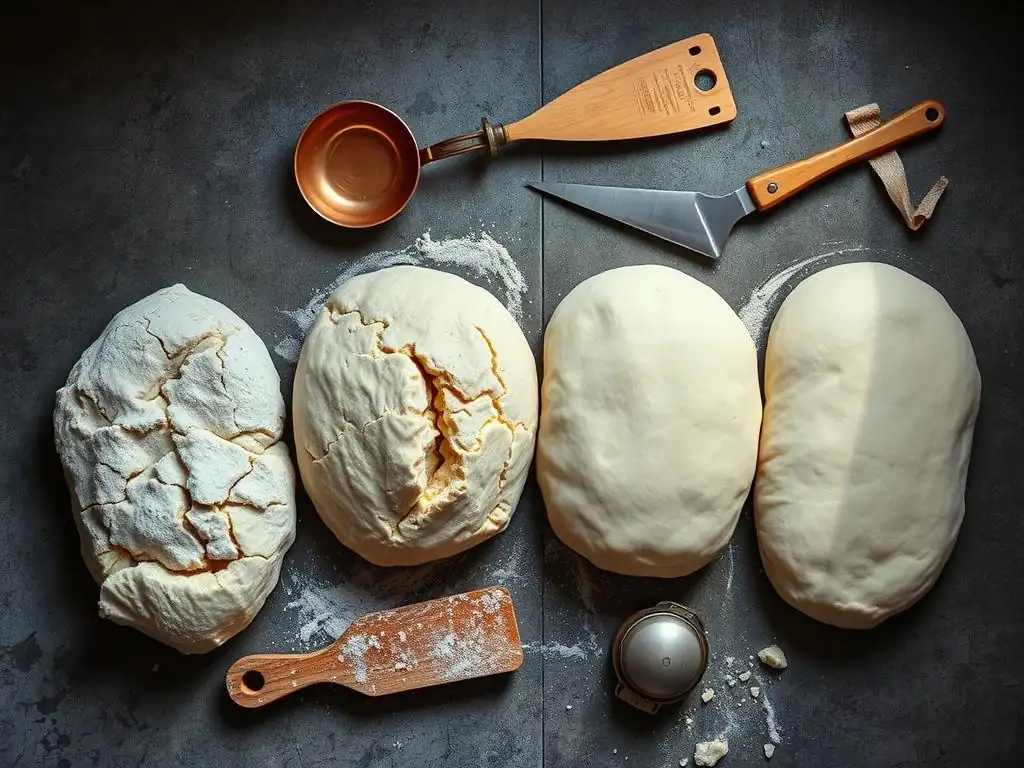
Welcome to BakeWithEase, your guide to baking brilliance!
Ever wondered how to achieve that perfect open crumb and airy texture in your ciabatta? This week, we're diving deep into the secrets of Ciabatta dough hydration levels. Unlocking the ideal hydration is the key to transforming simple ingredients into bakery-worthy rustic breads. Curious to learn the precise techniques and ratios that will elevate your baking? Let's get started and discover the art of perfectly hydrated dough!
- Mastering Dough Hydration for Artisan Breads: A Baker's Guide
- Introduction to Dough Hydration
- Defining Dough Hydration: A Baker's Perspective
- Achieving Open Crumb and Enhanced Flavor through High Hydration
- Optimal Hydration Levels for Different Artisan Breads
- Working with High Hydration Dough: Techniques and Tips
- Troubleshooting High Hydration Dough: Common Issues and Solutions
- Flour Selection and its Influence on Hydration
- Baking High Hydration Breads: Oven Techniques for Success
- Expanding Your Skills: Applying High Hydration to Various Breads
- Conclusion: Key Principles for Successful High Hydration Baking
-
Frequently Asked Questions
- What does "dough hydration" mean in the context of Ciabatta bread making?
- Why are high hydration levels important for Ciabatta dough specifically?
- How do different hydration levels affect the final Ciabatta bread product?
- What is a typical hydration percentage for Ciabatta dough, and how is it calculated?
- What are some common challenges when working with high-hydration Ciabatta dough and how can I overcome them?
- Final Reflection: The Transformative Power of Hydration in Bread Baking
- Unlock Your Inner Artisan: Master Ciabatta & Rustic Breads
Mastering Dough Hydration for Artisan Breads: A Baker's Guide
Introduction to Dough Hydration
Why Hydration Matters in Artisan Bread Baking
Dough hydration is arguably one of the most critical factors influencing the final texture, crumb structure, and overall quality of artisan breads. It refers to the ratio of water to flour in your dough, typically expressed as a percentage of the flour weight. A higher hydration level, common in rustic breads like Ciabatta, often leads to a more open, airy crumb structure and a thinner, crispier crust.
Understanding and controlling hydration allows bakers to move beyond basic recipes and truly craft breads with specific, desired characteristics. It's the difference between a dense loaf and a light, airy one with beautiful, irregular holes.
Achieving the right hydration is especially important when targeting specific bread styles, such as the characteristic open crumb of Ciabatta. While a standard sandwich loaf might have a hydration of 60-65%, Ciabatta dough hydration levels typically range much higher, often from 75% to 90% or even more. This significant difference in water content profoundly impacts how the dough behaves during mixing, fermentation, and baking, presenting unique challenges but also rewarding results in terms of flavor development and texture. Mastering hydration is a key step in elevating your bread baking skills.
The Role of Water in Gluten Development and Fermentation
Water is not just an ingredient; it's a catalyst in bread dough. Its primary role is to activate the proteins in flour, specifically glutenin and gliadin, which then combine to form gluten. Gluten creates the elastic network that gives bread its structure, allowing it to trap the carbon dioxide gas produced during fermentation. Without sufficient water, gluten development is inhibited, resulting in a dense, heavy loaf. Think of kneading: water allows the gluten strands to align and strengthen, building the dough's framework.
Furthermore, water is essential for yeast activity. Yeast consumes sugars in the flour and produces CO2 and alcohol, which causes the dough to rise and contributes to flavor. Yeast requires water to metabolize these sugars effectively. Higher hydration doughs often ferment more rapidly due to the increased availability of water for the yeast and enzymes. This faster fermentation, coupled with the extensible gluten network, contributes significantly to the open crumb structure desired in many artisan loaves, including those with high Ciabatta dough hydration levels.
Defining Dough Hydration: A Baker's Perspective
Understanding Hydration Percentage: Formula and Calculation
Dough hydration is calculated as the weight of water divided by the weight of flour, multiplied by 100. The formula is simple: (Weight of Water / Weight of Flour) * 100 = Hydration Percentage. For example, if a recipe calls for 500 grams of flour and 350 grams of water, the hydration is (350g / 500g) * 100 = 70%. This means the dough is 70% hydrated. This calculation is crucial because it provides a standardized way to discuss and adjust recipes regardless of the batch size.
When working with recipes, especially those for high hydration breads like Ciabatta, understanding this percentage is key. A recipe might specify a hydration level rather than just ingredient weights, allowing you to scale the recipe up or down while maintaining the intended dough consistency. For instance, if you see a recipe for Ciabatta at 80% hydration using 1000g of flour, you know you'll need 800g of water. This simple calculation is the foundation for controlling and experimenting with dough hydration.
Impact of Hydration on Dough Properties
The hydration percentage profoundly affects the dough's physical properties. Lower hydration doughs (e.g., 55-65%) are stiffer, easier to handle, and hold their shape well, making them suitable for shaped loaves like bagels or pretzels. They typically produce a tighter crumb structure. As hydration increases (e.g., 70-75%), the dough becomes softer and slightly stickier, requiring more careful handling but offering the potential for a more open crumb.
At high hydration levels (75% and above), such as those typical for Ciabatta dough hydration levels, the dough becomes quite wet, sticky, and slack. It may resemble a thick batter more than a traditional dough. This high water content makes the dough more extensible and allows for significant gas expansion, leading to the characteristic large, irregular holes (open crumb) and thin, crisp crust associated with breads like Ciabatta and Focaccia. While challenging to work with initially, mastering high hydration techniques unlocks a new level of bread quality.
Achieving Open Crumb and Enhanced Flavor through High Hydration
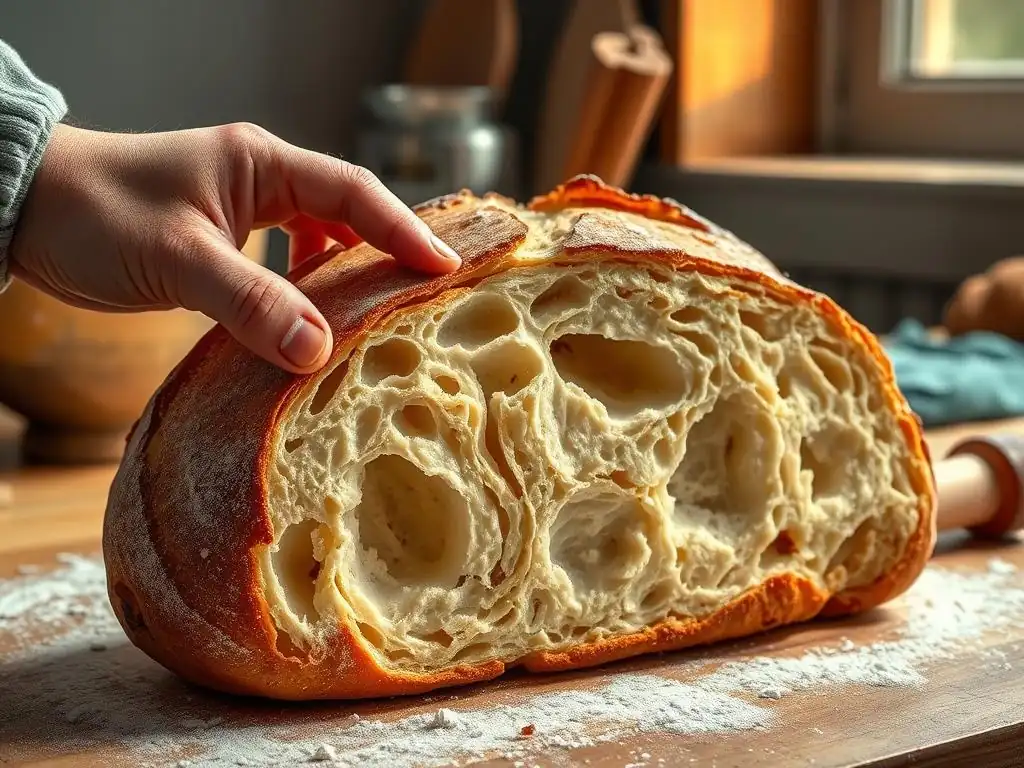
Open Crumb Structure and its Relationship to Hydration
The coveted open crumb structure, characterized by large, irregular air pockets, is a hallmark of many artisan breads, including well-made Ciabatta. This structure is largely a direct result of high dough hydration levels combined with proper gluten development and fermentation. The high water content allows the gluten network to be very extensible, stretching easily to accommodate the expanding gases produced by the yeast. Unlike lower hydration doughs where gas pockets are smaller and more uniformly distributed, the slackness of high hydration dough allows gas bubbles to coalesce into larger voids.
Achieving this open crumb isn't solely dependent on hydration, but it's a prerequisite. Techniques like gentle handling, minimal kneading (or gentle folding), and a long, slow fermentation further contribute by preserving the delicate gas structure within the dough. The higher Ciabatta dough hydration levels, often 80% or more, are specifically chosen to promote this type of airy, irregular interior texture.
Flavor Development in High Hydration Doughs
High hydration doughs often exhibit more complex and nuanced flavors compared to their lower hydration counterparts. This is partly due to the extended fermentation periods they often undergo. The increased water activity and slower fermentation rate (when using methods like cold proofing) allow enzymes in the flour more time to break down starches into simpler sugars. These sugars are then consumed by yeast and lactic acid bacteria (if using a sourdough starter or poolish), producing a wider range of flavorful compounds, including organic acids like lactic and acetic acid.
For instance, a Ciabatta made with an 80% hydration poolish (a pre-fermented dough that is also high hydration) and a long fermentation will develop significantly more depth of flavor than a quickly mixed 65% hydration dough. The higher water content also affects the crust, allowing it to gelatinize more effectively during baking, leading to a thinner, crispier crust that contributes pleasing textural and flavor contrasts to the soft, open interior. The interplay between high Ciabatta dough hydration levels, fermentation time, and crust development is key to the rich flavor profile.
Optimal Hydration Levels for Different Artisan Breads
Recommended Hydration Ranges for Various Bread Types
The ideal hydration level varies significantly depending on the type of bread you aim to bake. Here are some general ranges:
- Bagels & Pretzels: Typically low hydration, around 50-55%. The stiff dough is necessary for shaping and boiling.
- Standard Sandwich Loaf: Medium hydration, usually 60-65%. This dough is easy to handle and produces a relatively uniform crumb.
- Rustic Baguettes: Often 68-75% hydration. This allows for a slightly more open crumb and a crisp crust.
- Ciabatta & Focaccia: High hydration, frequently 75% to 90%+. These levels are crucial for the characteristic open crumb and chewy texture. Ciabatta dough hydration levels are a prime example of pushing the boundaries for texture.
- No-Knead Breads: Can range from 75% up to 100% or more, relying on long fermentation rather than kneading for gluten development.
These ranges are guidelines, not strict rules. Bakers often experiment within these ranges to achieve specific results. For example, some bakers prefer their Ciabatta dough hydration levels closer to 80% for easier handling, while others push towards 90% for maximum openness.
Factors Influencing Hydration: Flour Type, Climate, and Technique
Several factors beyond the recipe influence how a specific hydration percentage translates into dough consistency. The type of flour is paramount; different flours absorb water differently. High-protein bread flours absorb more water than lower-protein all-purpose flour. Whole wheat flour, with its bran and germ content, absorbs significantly more water than white flour. A recipe calling for 70% hydration with white bread flour might feel like 75% hydration if using whole wheat.
Environmental conditions also play a role. In dry climates or seasons, flour might be drier and require slightly more water. Conversely, in humid conditions, you might need slightly less. Your mixing technique also matters; machine mixing can often handle slightly higher hydration than hand mixing. Finally, the desired outcome dictates hydration; if you want a very open Ciabatta crumb, you'll aim for higher Ciabatta dough hydration levels than if you preferred a slightly tighter, more manageable dough. Always be prepared to make small adjustments based on how the dough feels.
Working with High Hydration Dough: Techniques and Tips
Handling Sticky Dough: Essential Techniques for Success
Working with high hydration dough, like that used for Ciabatta, can be challenging initially due to its stickiness. The key is to minimize direct contact with dry hands and surfaces. Keep your hands slightly wet or oiled when handling the dough. Instead of flouring your work surface heavily (which can tighten the dough and affect hydration), use a small amount of water or oil, or work directly in the mixing bowl or a lightly oiled container.
Tools can be your friend. A bench scraper is indispensable for moving and portioning sticky dough. Silicone spatulas or dough whisks can help during the initial mixing phase. Resist the urge to add excessive flour to the dough itself, as this will lower the hydration and change the intended texture. Embrace the stickiness; it's a sign you're on the right track for that open crumb. Managing high Ciabatta dough hydration levels requires patience and practice.
Developing Strength and Structure: Folding and Shaping Methods
Since kneading a very wet dough is difficult, strength is typically developed through a series of folds over an extended period. After the initial mix, let the dough rest (autolyse) for 20-30 minutes to allow the flour to fully hydrate. Then, perform "stretch and folds" or "coil folds" every 30-60 minutes during the bulk fermentation.
For a stretch and fold, wet your hands, grab one edge of the dough, stretch it upwards gently, and fold it over the rest of the dough. Rotate the bowl and repeat 3-4 times. Coil folds involve lifting the center of the dough with wet hands and letting the ends fold underneath, then rotating and repeating.
These gentle movements align the gluten strands without tearing them, building structure and tension in the dough. For shaping high hydration doughs like Ciabatta, minimal handling is best. Often, it's simply a matter of gently coaxing the dough into a rough rectangle or square on a floured surface (or using ample flour on the surface if the recipe calls for it, like for classic Ciabatta), then cutting it into individual loaves. Avoid degassing the dough too much during shaping to preserve the airy structure developed by the high Ciabatta dough hydration levels and fermentation.
Proofing High Hydration Dough: Achieving Optimal Rise and Texture
Proofing high hydration dough requires careful attention. Due to the higher water content, these doughs can ferment more quickly, especially at warmer temperatures. Bulk fermentation (the first rise) is crucial for developing flavor and structure through multiple folds. Watch the dough, not the clock; it should become bubbly and increase significantly in volume, often doubling or more, depending on the recipe and yeast activity.
Final proofing (after shaping) is often shorter for high hydration doughs. Overproofing is a common issue, leading to a dough that collapses in the oven. Because the dough is slack, it often needs support during proofing.
Proofing baskets (bannetons) lined with flour are excellent, or you can proof shaped loaves on a floured couche (linen cloth) or parchment paper. Pay attention to the dough's feel; it should be airy and expanded but still have some resilience. A gentle poke test can help, but visual cues and experience are often the best guides for highly hydrated doughs like those aiming for specific Ciabatta dough hydration levels.
Troubleshooting High Hydration Dough: Common Issues and Solutions
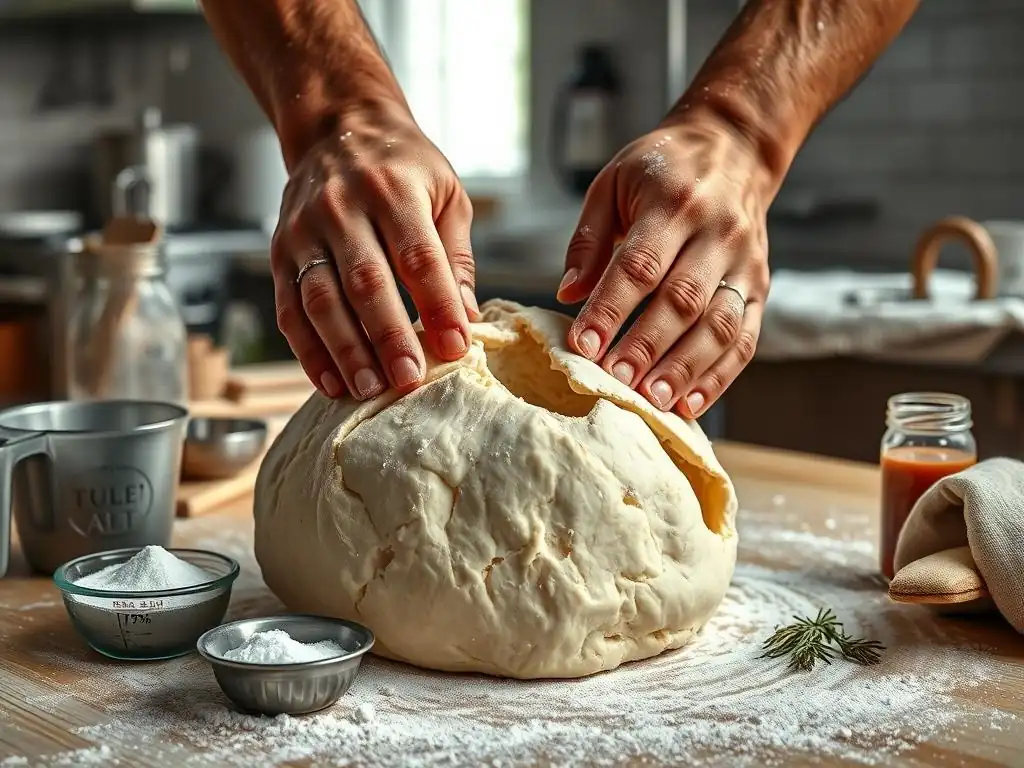
Managing a Too-Sticky Dough: Adjustments and Techniques
If your high hydration dough feels excessively sticky and unmanageable, even with wet hands or tools, a few factors might be at play. It could be slightly too high hydration for the flour used, or the flour needs more time to absorb the water.
- Adjustment: If you're still in the initial mixing phase, you can add a tiny amount of flour (a tablespoon at a time) and mix it in completely until the dough becomes slightly more workable, but be mindful that this lowers the hydration percentage.
- Technique: During bulk fermentation, ensure you are performing enough sets of stretch and folds or coil folds. These actions build the necessary structure to make the dough less chaotic and more manageable over time. Working on a lightly wet or oiled surface rather than a floured one can also help prevent the dough from sticking aggressively. Allowing a sufficient autolyse period (flour and water mixed, rested before adding salt/yeast) gives the flour time to fully absorb the water, which can make the dough less sticky from the start.
Strengthening a Slack Dough: Improving Dough Structure
A dough that remains very slack, runny, and doesn't hold any tension even after several folds indicates insufficient gluten development or possibly over-hydration.
- Improving Structure: Ensure you are performing your stretch and folds or coil folds effectively. You should feel the dough developing tension with each set. Don't be afraid to give it a good stretch upwards before folding. Increase the frequency or number of folds if necessary during the first hour or two of bulk fermentation.
- Addressing Hydration: If you suspect the hydration is simply too high for your flour or skill level, make a note to reduce the water slightly in your next batch. Remember that factors like flour protein content and ambient humidity affect how dough feels at a given hydration percentage. A dough with high Ciabatta dough hydration levels will always be slack compared to a baguette dough, but it shouldn't be a liquid puddle.
Addressing Uneven Crumb: Troubleshooting Proofing and Baking
An uneven crumb, where you have some large holes but also dense, tight areas, can stem from various issues related to handling, proofing, or baking.
- Handling: Over-handling the dough during shaping can degas it unevenly, collapsing some bubbles while leaving others. Be gentle and efficient during pre-shaping and final shaping. Insufficient gluten development from inadequate folds or using low-protein flour can also lead to a weak structure unable to support an open crumb.
- Proofing: Uneven temperatures during proofing can cause some parts of the dough to rise faster than others. Overproofing is a common culprit; an overproofed dough may expand rapidly but then collapse slightly, leading to dense spots, particularly around the base. Underproofing results in a tight, dense crumb overall.
- Baking: Insufficient steam in the oven can prevent the crust from setting quickly enough, restricting oven spring and leading to a less open crumb. Ensure your oven setup (Dutch oven, baking stone with steam) is effective for creating a steamy environment during the initial phase of baking.
Flour Selection and its Influence on Hydration
Understanding Flour Absorption Capacity
Not all flours are created equal when it comes to absorbing water. This property, known as flour absorption capacity, is primarily influenced by the protein content and the presence of bran and germ. Higher protein flours, like bread flour (typically 12-14% protein), have a greater capacity to absorb water and form a strong gluten network than lower protein flours like all-purpose flour (10-12% protein). The gluten-forming proteins (glutenin and gliadin) bind with water to create the dough's structure.
Whole wheat flour, despite sometimes having similar protein levels to white bread flour, absorbs significantly more water due to the inclusion of the bran and germ. These components are highly absorbent fibers. For example, if a white bread flour absorbs roughly 60% of its weight in water for a standard dough consistency, a whole wheat flour might require 70-75% or more to reach a similar feel. Understanding your flour's absorption is crucial when adjusting hydration levels, especially when aiming for specific textures like those associated with high Ciabatta dough hydration levels.
Best Flour Types for High Hydration Breads
For high hydration breads like Ciabatta, baguettes, and no-knead loaves, a strong bread flour is generally recommended. The higher protein content (12-14%) provides the necessary gluten structure to support the large amount of water and trap the gases needed for an open crumb. While you can make high hydration doughs with all-purpose flour, they tend to be slacker and harder to handle, and the resulting crumb might not be as open or structured.
Some recipes for Ciabatta or rustic loaves might incorporate a small percentage (10-20%) of whole wheat or rye flour for flavor. When doing so, remember to slightly increase the overall hydration to compensate for the higher absorption of these flours. Using a blend of strong white bread flour with a smaller amount of a more absorbent grain is a common approach to balance structure, flavor, and texture in artisan breads. Specific Ciabatta recipes often call for Italian Type 00 flour or a strong bread flour blend.
Adjusting Hydration Based on Flour Characteristics
Given the variability in flour absorption, blindly following a hydration percentage from a recipe without considering the specific flour you are using can lead to unexpected results. It's often necessary to make slight adjustments. If you switch from a standard bread flour to a very high-gluten flour, you might need to increase the hydration by 1-3% to achieve the same dough consistency. Conversely, using a weaker flour might require a slight reduction in water.
Experience is your best guide here. As you bake more, you'll learn how a dough at a certain hydration should feel with your preferred flour. Don't be afraid to hold back a small amount of water initially (e.g., 5-10% of the total water) and add it gradually during mixing until the dough feels right. This is particularly helpful when tackling high Ciabatta dough hydration levels, as the difference between 80% and 85% can significantly impact handling.
Baking High Hydration Breads: Oven Techniques for Success
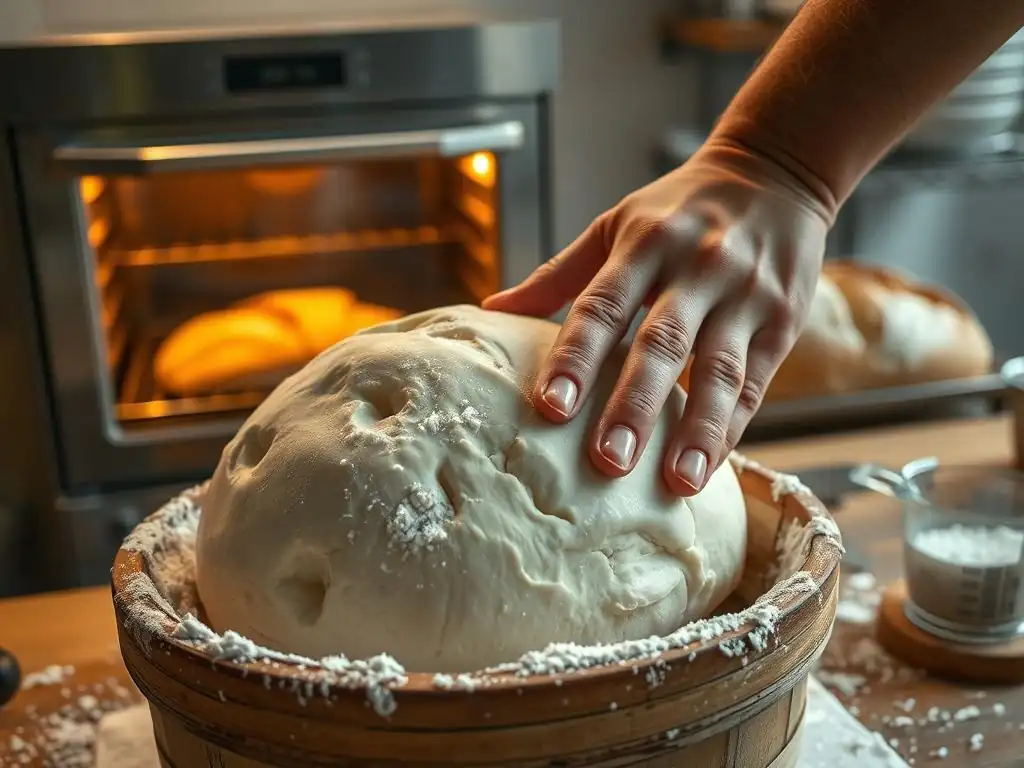
Creating a Crisp Crust: Steam Injection and Oven Environment
A defining characteristic of many artisan breads, including Ciabatta, is a thin, crisp crust. Achieving this requires a steamy environment in the oven during the initial phase of baking (the first 15-20 minutes). Steam delays the formation of the crust, allowing the dough to expand fully (oven spring) before the exterior hardens. It also gelatinizes the starch on the surface, contributing to a thin, shiny, and crisp crust.
Home bakers can create steam using various methods: baking in a preheated Dutch oven (the lid traps the dough's own steam), using a baking stone or steel and placing a tray of hot water or ice cubes on a rack below it, or spraying the oven walls with water. Commercial deck ovens often have built-in steam injection systems. Without adequate steam, high hydration doughs will develop a thicker, duller crust and may not achieve maximum oven spring. This step is just as crucial as managing Ciabatta dough hydration levels for the final result.
Optimal Baking Temperatures for Different Bread Types
Baking temperatures vary depending on the size and type of loaf. Generally, artisan breads are baked at high temperatures, typically ranging from 425°F (220°C) to 500°F (260°C). The high initial heat promotes vigorous oven spring and helps set the crust quickly once steaming is complete.
Smaller loaves or rolls might bake at the higher end of this range for a shorter time, while larger loaves or those with add-ins might bake at a slightly lower temperature for a longer duration to ensure the interior is fully cooked without burning the crust. Ciabatta, with its relatively flat shape and high hydration, is often baked at temperatures between 450°F (230°C) and 475°F (245°C). The high heat and steam work together to create its signature crisp, thin crust and airy interior, showcasing the results of specific Ciabatta dough hydration levels.
Determining Doneness: Visual Cues and Internal Temperature
Knowing when your high hydration bread is perfectly baked is key. Relying solely on the baking time specified in a recipe can be misleading, as oven calibration and loaf size vary. Visual cues are important: the crust should be deeply golden brown to dark brown, depending on the style. Lighter crusts often indicate underbaking.
For a more precise measure, use an instant-read thermometer. The internal temperature of a fully baked loaf should be between 200°F (93°C) and 210°F (99°C). Insert the thermometer into the center of the loaf, avoiding any large air pockets. Baking to the correct internal temperature ensures the crumb is set and not gummy. A loaf that sounds hollow when tapped on the bottom is another traditional, though less reliable, indicator of doneness. For breads with high Ciabatta dough hydration levels, ensuring the interior is fully cooked is vital for texture.
Expanding Your Skills: Applying High Hydration to Various Breads
Exploring High Hydration in Different Bread Styles
Once you've become comfortable working with high hydration doughs through baking breads like Ciabatta, you can start exploring its application in other bread styles. Many rustic loaves, pain de campagne, and even some enriched doughs can benefit from increased hydration. For instance, a sourdough loaf baked at 75% or 80% hydration will have a more open crumb and tangier flavor than one baked at 65%.
You can also apply high hydration techniques to whole wheat or mixed-grain breads. While these flours absorb more water, pushing their hydration higher than a standard recipe can result in surprisingly light textures despite the presence of denser grains. Experimenting with different flours and hydration levels within the principles you've learned from mastering Ciabatta dough hydration levels opens up a vast world of bread possibilities.
Experimenting with Hydration Levels in Your Recipes
Don't be afraid to adjust the hydration in your favorite recipes slightly. If a recipe calls for 65% hydration and you want a slightly airier crumb, try increasing the water by 2-3% in your next bake. Observe how the dough feels and how the final loaf turns out. Keep detailed notes on your adjustments, the dough's behavior, and the final results.
Conversely, if a high hydration recipe feels too difficult to handle, try reducing the water by a few percentage points. This will make the dough more manageable while still allowing you to practice the techniques. Gradually increase the hydration as your confidence and skill grow. Mastering the art of baking involves understanding the principles, like Ciabatta dough hydration levels, and then adapting them to your preferences and environment.
Conclusion: Key Principles for Successful High Hydration Baking
Essential Takeaways for High Hydration Bread Making
Mastering high hydration baking, especially for breads like Ciabatta, hinges on a few core principles. First, understand that high water content is fundamental to achieving an open, airy crumb and crisp crust. Calculate and measure your ingredients accurately using percentages, paying close attention to the hydration formula. Second, recognize that high hydration doughs require different handling techniques; embrace the stickiness and rely on stretch and folds or coil folds to develop gluten structure over time.
Third, factor in the influence of flour type, climate, and even your mixing method, and be prepared to make small adjustments to the water quantity based on how the dough feels rather than strictly adhering to a number. Finally, proper proofing (avoiding overproofing) and creating a steamy oven environment are critical steps that complement the high hydration to ensure a successful bake with excellent texture and flavor. Ciabatta dough hydration levels are a great starting point for this journey.
Further Learning and Resources
The journey into high hydration baking is rewarding and continuous. To deepen your understanding, consider exploring resources that delve further into the science of bread making, the specifics of flour types, and advanced techniques like using preferments (poolish, biga, sourdough starter), which inherently involve high hydration principles and significantly impact flavor and texture.
Look for detailed guides on specific bread types like authentic Ciabatta, which often uses a high hydration preferment and very high final dough hydration. Practice working with different flours and observe how they behave. Many online communities and baking books offer detailed troubleshooting guides and insights from experienced bakers. Keep practicing, keep experimenting, and enjoy the delicious results of mastering dough hydration!
Frequently Asked Questions
What does "dough hydration" mean in the context of Ciabatta bread making?
Dough hydration refers to the ratio of water to flour in a dough. In Ciabatta, a high hydration level is crucial for its characteristic open crumb and airy texture.
Why are high hydration levels important for Ciabatta dough specifically?
High hydration creates a wetter, stickier dough that develops large air pockets during fermentation. This results in the open, airy texture that defines a good Ciabatta.
How do different hydration levels affect the final Ciabatta bread product?
Lower hydration results in a denser, chewier bread. Higher hydration yields a lighter bread with large holes. Experimenting with different levels affects the crumb structure.
What is a typical hydration percentage for Ciabatta dough, and how is it calculated?
Ciabatta often uses hydration levels around 75-85%. It's calculated as (weight of water / weight of flour) * 100. Precise measurements are key.
What are some common challenges when working with high-hydration Ciabatta dough and how can I overcome them?
The dough can be very sticky and difficult to handle. Use plenty of flour when shaping, and consider using dough scrapers to help with manipulation.
Final Reflection: The Transformative Power of Hydration in Bread Baking
Understanding dough hydration is not merely a technical detail; it's the key that unlocks the soul of a truly exceptional ciabatta or rustic loaf. Mastering hydration levels allows bakers to move beyond simply producing edible bread and into the realm of crafting artisanal masterpieces, each with its unique texture and character. The seemingly small variations in water percentage yield dramatically different results, showcasing the artistry inherent in this seemingly simple process.
The journey of exploring hydration's impact on ciabatta has been a profound one, revealing the delicate balance between structure and texture. It's a testament to the enduring power of tradition, yet also a constant invitation to experiment and innovate. The subtle shifts in crumb, the variations in crust, the very essence of the finished product – all are dictated by this single, crucial element. As the renowned baker, Chad Robertson, once said: Bread baking is a journey of discovery, a constant refinement of technique and understanding.
This rings especially true when considering the nuanced world of dough hydration.
Now, consider your own baking journey. What will you create next? Will you dare to push the boundaries of hydration, experimenting with slightly higher percentages to achieve an even airier crumb? Or perhaps you'll explore the firmer textures possible with lower hydration levels. The possibilities are endless, and the rewards – the satisfaction of crafting a truly exceptional loaf of bread – are immeasurable. Embrace the challenge, experiment with confidence, and discover the transformative power of hydration for yourself.
Unlock Your Inner Artisan: Master Ciabatta & Rustic Breads
Thanks for taking the time to explore the world of dough hydration! You've now got the knowledge to elevate your bread baking to the next level. Ready to put your new skills to the test?
- Bake your dream ciabatta: Try the recipe variations suggested in the article, adjusting the hydration based on your flour and environment. Note the difference in texture and flavor!
- Share your baking journey: Post a picture of your masterpiece on social media and tag #BakeWithEaseCiabatta – let's inspire each other!
- Dive deeper into sourdough: Explore our other articles on sourdough starters and techniques for an even more rewarding baking experience.
What unique flavor profile will you create with your newfound hydration mastery?