
Why Your Sourdough Rye Isn't Rising (And How to Fix It)

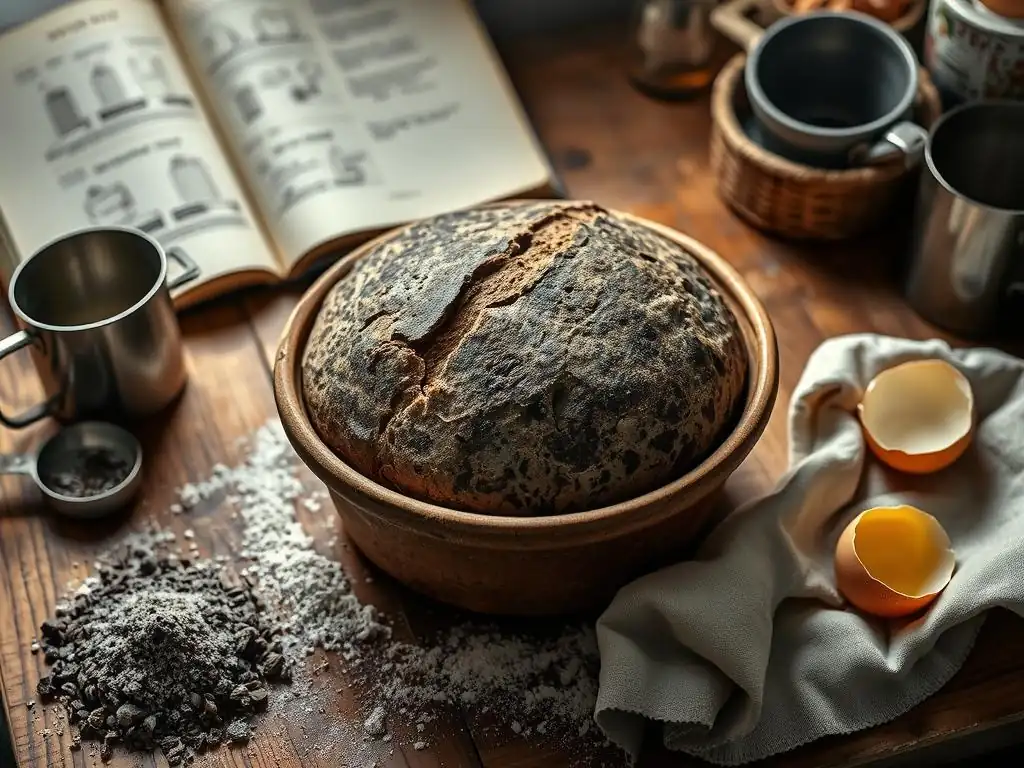
Welcome to BakeWithEase, your trusted guide to baking brilliance! Ever wondered why your sourdough rye loaf stubbornly refuses to rise? You're not alone! This article dives deep into the common culprits and offers practical solutions to ensure your next rye bake is a resounding success. Get ready to unlock the secrets to a perfectly proofed and beautifully risen sourdough rye – the journey to baking perfection starts now!
The Specifics of Rye Baking: Beyond Wheat Flour Techniques
Baking with rye flour presents a fascinating set of challenges and rewards that differ significantly from working solely with wheat flour. While wheat relies heavily on gluten development to create structure and trap gases produced during fermentation, rye has very low gluten-forming proteins. This fundamental difference means that the techniques you've mastered for a light, airy wheat loaf won't necessarily translate directly to a dense, flavorful rye bread. Understanding rye's unique properties is the first step in troubleshooting why your sourdough rye isn't rising as expected.
The structure in rye bread is primarily built by starches and pentosans (complex carbohydrates), not gluten. When rye flour is hydrated, these components swell and form a gel-like matrix. This matrix provides some structure, but it's much weaker and less elastic than a developed gluten network. This is why rye doughs are often stickier and harder to handle than wheat doughs, and why achieving significant oven spring – the final dramatic rise in the oven – is more challenging with high percentages of rye. Successfully baking sourdough rye requires adapting your methods to work with these different structural elements.
How Rye Flour Differs from Wheat Flour in Dough Behavior
Rye flour behaves uniquely in dough due to its composition. As mentioned, its low gluten content is a major factor, leading to doughs that are less elastic and more prone to spreading rather than holding their shape. However, rye also contains a significant amount of enzymes called amylases, which break down starch into sugars.
While some amylase activity is necessary for fermentation (providing food for the yeast and bacteria in your starter), rye has much higher levels than wheat. If not controlled, these enzymes can excessively break down the starch structure, leading to a gummy texture and contributing to a flat sourdough rye.
Another critical difference lies in the high concentration of pentosans in rye flour. These fibers absorb a large amount of water – often more than wheat flour – and contribute significantly to the dough's stickiness and density. The pentosans also interfere with the limited gluten development that does occur. Managing the hydration levels is therefore crucial, but finding the right balance is tricky; too little water results in a dense, tight crumb, while too much exacerbates the stickiness and can hinder structure, contributing to sourdough rye not rising effectively.
- The Specifics of Rye Baking: Beyond Wheat Flour Techniques
- How Rye Flour Differs from Wheat Flour in Dough Behavior
- 1. Weak or Inactive Starter: The Foundation for Proper Rise
- 2. Incorrect Flour Type: Selecting the Right Rye
- 3. Hydration Imbalance: Achieving Optimal Moisture Levels
- 4. Gluten Development Issues: Enhancing Dough Strength
- 5. Temperature Fluctuations During Bulk Fermentation
- 6. Proofing Errors: Recognizing Over and Under-Proofing
- Step 1: Evaluate Starter Activity and Adjust Feeding Schedule
- Step 2: Modify Hydration Based on Flour Type and Dough Feel
- Step 3: Apply Techniques to Strengthen Dough & Improve Structure
- Step 4: Maintain Consistent Temperature During Fermentation
- Step 5: Accurately Assess Proofing for Optimal Oven Spring
- Why is my sourdough rye not rising properly during bulk fermentation?
- Is my rye sourdough starter weak if it doesn't double in size?
- What type of rye flour is best for a sourdough that rises well?
- How does temperature affect rye sourdough rising?
- How long should I proof my rye sourdough before baking if it's not rising much?
Common Causes of Flat Sourdough Rye Bread
1. Weak or Inactive Starter: The Foundation for Proper Rise
The power behind any sourdough loaf, including rye, is a vigorous, active starter. If your starter isn't strong, it simply won't produce enough carbon dioxide gas to leaven the dough and give you that desired rise. A weak starter is perhaps the most common reason for sourdough rye bread not rising. It might look bubbly on the surface but lack the internal strength and activity necessary to lift a heavy, dense rye dough.
Several factors can contribute to a weak starter, including inconsistent feeding schedules, incorrect feeding ratios, or unfavorable temperatures. An underfed starter will quickly consume its food and become dormant, while a starter kept at too cold a temperature will have sluggish microbial activity. Recognizing the signs of a healthy, active rye starter is paramount before you even mix your dough.
Assessing Rye Starter Strength: Float Test & Visual Cues
Assessing the strength of your rye starter requires a few observations. Visually, a healthy, active starter should double or triple in volume within 4-8 hours after feeding, depending on the temperature and feeding ratio. It should have a domed top, lots of visible bubbles throughout the jar (not just on the surface), and a pleasant, slightly tangy aroma, not overly acidic or yeasty. A starter that consistently fails to show significant volume increase or smells strongly of acetone is likely weak.
A classic test for starter readiness is the float test. Gently take a small spoonful of your starter at its peak activity (when it's most bubbly and expanded) and drop it into a glass of water. If the starter floats, it contains enough trapped gas to potentially leaven your dough. If it sinks, it may not be active enough, indicating a potential reason why your sourdough rye isn't rising. However, the float test isn't foolproof, especially with very wet rye starters, so combine it with visual cues.
Reviving a Weak Starter: Feeding Ratios & Temperature Control
Reviving a weak rye starter often involves more frequent, consistent feeding and optimizing its environment. Try feeding your starter 1:1:1 (by weight – 1 part starter, 1 part water, 1 part rye flour) once or twice a day. This provides ample food for the microbes to multiply and become more active. Ensure you are using unchlorinated water, as chlorine can inhibit microbial growth.
Temperature plays a significant role in starter activity. Aim to keep your starter in a warm spot, ideally between 75-80°F (24-27°C). This temperature range is optimal for the yeast and bacteria to thrive. If your kitchen is cool, consider using a proofing box, an oven with the light on (check the temperature first! ), or placing the starter in a warm spot near an appliance. Consistent warmth and regular feeding will help build the microbial population and strength needed to prevent your sourdough rye from being flat.
2. Incorrect Flour Type: Selecting the Right Rye
Not all rye flour is created equal, and the type you choose significantly impacts your dough's structure and rise. Using the wrong type of rye flour for a recipe can be a primary cause of your sourdough rye not rising properly. Different grinds and extractions behave differently, affecting hydration, dough handling, and the final crumb structure.
Understanding the characteristics of various rye flour types is essential for successful rye baking. Switching from a light rye to a dark rye without adjusting the recipe can lead to vastly different results due to variations in protein, starch, and pentosan content. Choosing the appropriate flour type is a critical step in troubleshooting flat sourdough rye.
Light, Medium, and Dark Rye: Impact on Dough Structure & Flavor
Rye flour is categorized by its extraction rate, which refers to how much of the rye grain is used.
- Light Rye Flour: Milled from the inner part of the rye berry, similar to white wheat flour. It has the lowest amount of bran and germ, leading to less intense flavor and color. It also has slightly less protein and pentosans than darker flours. Doughs made with light rye are generally easier to handle and can achieve a slightly better rise compared to darker varieties, though still less than wheat.
- Medium Rye Flour: Contains more of the bran and germ than light rye, resulting in a stronger flavor and darker color. It has higher levels of pentosans and enzymes, making doughs stickier and potentially more challenging to manage hydration.
- Dark Rye Flour: Milled from the whole rye berry, including most of the bran and germ. This is the most flavorful and nutrient-rich rye flour. It has the highest concentration of pentosans and enzymes, leading to very sticky doughs that absorb a lot of water but yield dense loaves. Baking with 100% dark rye sourdough often results in a loaf that is flavorful and moist but significantly flatter and denser than a wheat loaf.
The higher the extraction rate (darker the flour), the more challenging it is to achieve significant volume and prevent your sourdough rye from being flat.
Amylase Activity in Rye Flour: Understanding Its Role
Rye flour naturally contains high levels of amylase enzymes. These enzymes break down starch into sugars, which is beneficial for feeding the starter and providing some sweetness and crust browning. However, excessive amylase activity, especially at certain temperatures, can be detrimental to the dough structure.
If the dough temperature is too high during bulk fermentation (above 85°F or 30°C), or if the dough is fermented for too long, these enzymes can become overactive. They break down the starch network that provides structure in rye dough, leading to a gummy, sticky, or even soupy dough that cannot hold its shape and results in a dense, wet crumb. This enzymatic degradation is a significant factor contributing to why sourdough rye isn't rising properly. Acidification from the sourdough starter helps control amylase activity, which is one reason rye is often baked with sourdough rather than commercial yeast.
3. Hydration Imbalance: Achieving Optimal Moisture Levels
Rye flour is notoriously thirsty and requires a high hydration level compared to wheat flour due to its high pentosan content. However, finding the right hydration is crucial. Too little water results in a stiff, dense dough that restricts expansion, leading to a loaf where the sourdough rye is not rising to its potential. Too much water makes the dough excessively sticky and difficult to handle, and the weak rye structure may not be able to support the high moisture content, leading to collapse.
Achieving optimal moisture levels is a delicate balance that depends on the specific type of rye flour used and even environmental factors like humidity. Getting the hydration wrong is a frequent culprit behind flat sourdough rye loaves.
The Stickiness Factor: Managing Rye Dough's Hydration
Rye dough is inherently stickier than wheat dough, even at lower hydration levels than you might use for a wheat loaf. This stickiness comes primarily from the pentosans absorbing water and forming a gel. This can be off-putting for bakers used to working with elastic, manageable wheat dough. However, resisting the urge to add excessive amounts of flour to reduce stickiness is vital. Adding too much flour will lower the hydration below optimal levels, resulting in a dense, heavy loaf.
Managing the stickiness involves using techniques like wet hands or a dough scraper when handling the dough, rather than relying on flour. Embracing the stickiness as a characteristic of rye dough, rather than a fault, is part of mastering it. Proper hydration allows the starches and pentosans to swell fully, contributing to a moist crumb, but requires careful handling to maintain structure.
Adjusting Hydration for Different Rye Flour Varieties
The optimal hydration level varies significantly depending on whether you are using light, medium, or dark rye flour. Darker rye flours, with their higher bran, germ, and pentosan content, typically require more water than lighter rye flours to achieve a similar dough consistency. A recipe designed for light rye might be too dry if you substitute dark rye one-for-one, while a recipe for dark rye might be too wet for light rye.
As a general guideline, 100% rye doughs often have hydration levels ranging from 75% to over 90% of the flour weight. For doughs with a mix of wheat and rye, the hydration will fall somewhere in between, influenced heavily by the percentage of rye.
Start with a hydration level appropriate for the type of rye flour specified in your recipe (or around 75-80% for pure rye as a starting point) and be prepared to make small adjustments based on how the dough feels. It should be very moist and sticky, but still have some cohesive structure when handled with wet hands.
4. Gluten Development Issues: Enhancing Dough Strength
Unlike wheat bread, where extensive kneading develops a strong gluten network to trap gas and provide structure, sourdough rye relies on different mechanisms for its rise. Rye flour's low gluten content means you cannot rely on traditional gluten development techniques to create an open, airy crumb. If you treat rye dough like wheat dough, expecting gluten to do the heavy lifting, your sourdough rye will likely end up flat and dense.
Understanding the limitations of rye's structure and employing techniques that enhance its inherent characteristics are key to achieving a good rise. The focus shifts from building elasticity to supporting the dough's natural (and weaker) structure.
Lower Gluten Content in Rye: Implications for Structure
Rye flour contains proteins (secalins and secalin-like proteins) that are similar to wheat's glutenin and gliadin, but they form a much weaker and less elastic network when hydrated. This is the primary reason why rye doughs don't stretch and hold gas as effectively as wheat doughs. The pentosans also interfere with the limited gluten formation that occurs.
This means that vigorous kneading, which is crucial for developing gluten in wheat dough, is not only less effective for rye but can actually damage the fragile starch and pentosan structure. Over-kneading rye dough can break down the network that does exist, leading to a sticky, slumping dough that cannot hold its shape or trap fermentation gases, resulting in a flat sourdough rye loaf.
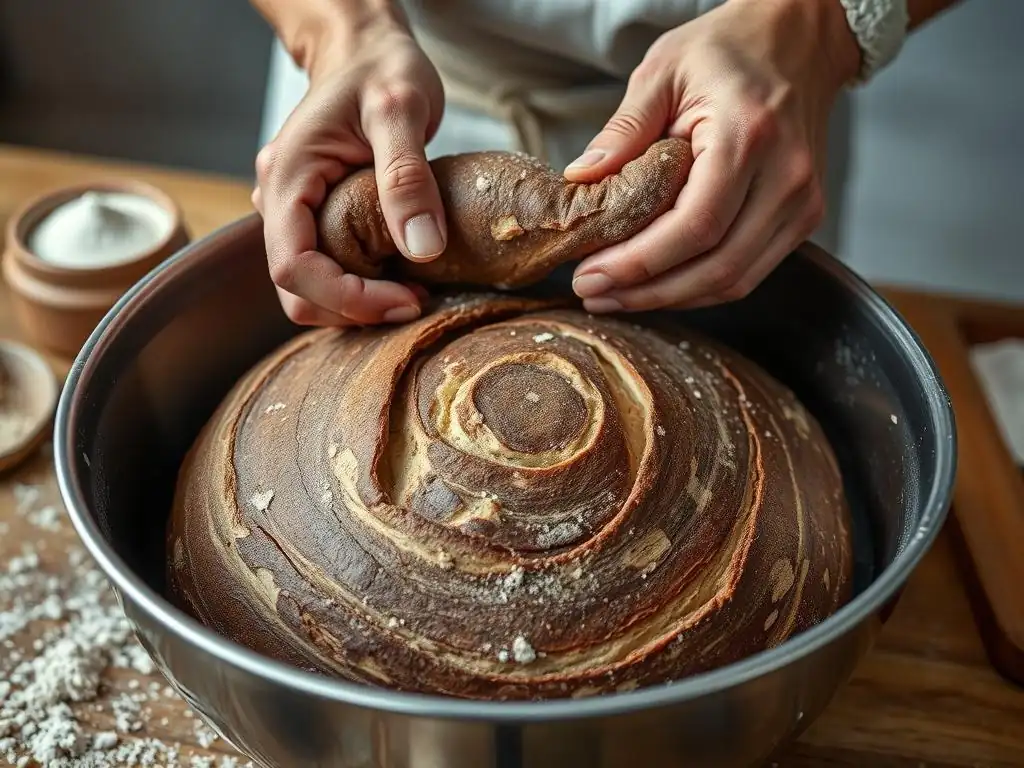
Improving Rye Dough Structure: Autolyse & Dough Folding
While you can't develop a strong gluten network in rye, you can employ techniques that help the dough build some internal structure and strength.
- Autolyse: Mixing the flour and water and letting it rest for 20-60 minutes before adding the starter and salt allows the flour to fully hydrate and the limited gluten proteins to start aligning. This simple step can improve the dough's extensibility and manageability.
- Dough Folding: Instead of vigorous kneading, periodic gentle dough folds during the bulk fermentation can help build tension and structure in rye dough. Techniques like stretch and folds (if the dough is manageable) or coil folds, performed gently with wet hands or a scraper, help align the protein and starch matrix without tearing it. Even simple bowl folds can add strength. Performing 2-4 sets of folds over the first couple of hours of bulk fermentation can make a noticeable difference in the dough's ability to hold its shape and contribute to preventing your sourdough rye from being flat.
5. Temperature Fluctuations During Bulk Fermentation
Temperature is a critical factor in the fermentation process for any sourdough, but it's particularly important for rye sourdough due to the flour's high enzyme activity. Inconsistent or incorrect temperatures during bulk fermentation can dramatically affect the rate of gas production and the dough's structural integrity, often resulting in flat sourdough rye.
Maintaining a stable, optimal temperature ensures that the starter microbes are working efficiently and that the enzymes in the rye flour are acting beneficially, not detrimentally. Fluctuating temperatures can lead to unpredictable fermentation and poor results.
Ideal Temperature Range for Rye Sourdough Fermentation
The ideal temperature range for bulk fermentation of rye sourdough is typically slightly lower than for pure wheat sourdough. A range of 72-78°F (22-26°C) is often recommended. This temperature range encourages yeast and bacterial activity for gas production and flavor development while helping to keep the amylase enzymes in check.
Fermenting rye dough at temperatures significantly higher than this range (e.g., above 85°F/30°C) can accelerate enzymatic breakdown, leading to a gummy, structureless dough. Conversely, temperatures too low (below 70°F/21°C) will slow down fermentation considerably, potentially resulting in an under-fermented dough that lacks sufficient gas production to rise properly.
Temperature's Effect on Enzyme Activity & Fermentation
Temperature directly influences both the metabolic rate of your sourdough starter's microbes and the activity of the enzymes in the rye flour. Yeast activity increases with temperature up to a point, producing more CO2 gas. Bacterial activity, which produces lactic and acetic acids, also increases, contributing to flavor and lowering the dough's pH.
Lowering the pH through acidification is particularly important in rye dough because it helps to inhibit the excessive activity of amylase enzymes. Fermenting rye sourdough at a suitable temperature range encourages sufficient acid production to protect the starch structure from being completely broken down by amylases. If the temperature is too high, the enzymes can work too fast before enough acid is produced, leading to structural collapse and explaining why your sourdough rye isn't rising as much as you'd like. Maintaining consistent temperature is key to balancing these processes.
6. Proofing Errors: Recognizing Over and Under-Proofing
Proofing is the final rise of the shaped dough before baking, and getting it right is crucial for achieving good oven spring and crumb structure. Both over-proofing and under-proofing can lead to flat sourdough rye. Rye dough, with its weaker structure, is particularly susceptible to collapsing if over-proofed, and it won't expand fully if under-proofed.
Recognizing the signs of properly proofed rye dough is different from recognizing proofed wheat dough. Rye dough won't expand as dramatically, and the poke test behaves differently. Learning to read your rye dough is essential for preventing proofing errors that result in flat sourdough rye bread.
Signs of Over-Proofed Rye Dough: Collapse & Sourness
Over-proofing occurs when the dough has fermented for too long before baking. The yeast and bacteria have consumed most of the available sugars, and the gluten/starch structure that holds the gas has begun to degrade. For rye dough, with its already weaker structure, this degradation happens relatively quickly once peak proof is reached.
Signs of over-proofed rye dough include:
- The dough may appear to have spread rather than risen vertically in its proofing basket.
- A poke test (gently pressing the dough with a wet finger) results in the indentation remaining completely without springing back at all.
- The surface may show small bubbles that have burst.
- The dough might smell excessively sour or alcoholic.
- In extreme cases, the dough may have visibly started to deflate or collapse.
Baking an over-proofed rye loaf will almost certainly result in a dense, flat loaf with a poor crumb structure because the dough no longer has the strength to expand in the oven.
Identifying Under-Proofed Rye: Density & Lack of Expansion
Under-proofing means the dough hasn't fermented long enough before baking. The yeast hasn't produced enough gas, and the dough hasn't relaxed sufficiently to expand properly in the oven. While rye dough won't have the dramatic oven spring of wheat, it still needs adequate proofing time to achieve its potential volume and open crumb structure.
Signs of under-proofed rye dough include:
- The dough still feels very dense and tight.
- A poke test results in the indentation springing back immediately and completely.
- When baked, the loaf might crack aggressively in uncontrolled places (if not scored deeply enough) and have a very dense, tight crumb with few bubbles.
- The crust might be thick and hard, and the flavor less developed.
Baking under-proofed dough leads to a loaf where the sourdough rye is not rising because it simply hasn't generated enough internal pressure or relaxed enough to expand during baking. It needs more time to develop gas and structure.
Troubleshooting Flat Rye: Step-by-Step Solutions
If your sourdough rye isn't rising, systematically evaluating the process is key. Don't change everything at once. Follow these steps to diagnose and fix the most common issues.
Step 1: Evaluate Starter Activity and Adjust Feeding Schedule
The very first step is to look at your starter. Is it consistently doubling or tripling within a predictable timeframe after feeding? Does it pass the float test at its peak?
- Task: Observe your starter's activity over a few feeding cycles.
- Task: If it seems sluggish or doesn't show significant rise, switch to a consistent 1:1:1 feeding ratio using the same type of rye flour you plan to bake with.
- Task: Find a warm spot (75-80°F / 24-27°C) for your starter and keep it there.
- Task: Feed every 12 hours for several days until its activity is vigorous and predictable.
- Task: Only bake when your starter is consistently active and passes the float test at its peak.
Step 2: Modify Hydration Based on Flour Type and Dough Feel
Rye flour hydration is tricky. Your recipe's hydration might be wrong for your specific flour.
- Task: Identify the specific type of rye flour you are using (light, medium, dark).
- Task: Research typical hydration ranges for that type of rye flour (e.g., 75-85% for medium rye).
- Task: When mixing your next dough, start with a hydration level within that range.
- Task: Add water gradually. The dough should be very sticky but cohesive enough to handle with wet hands or a scraper. Avoid adding extra flour.
- Task: If your previous loaf was dense and cracked, consider slightly increasing hydration (1-2%). If it was a sticky, flat puddle, slightly decrease hydration (1-2%).
Step 3: Apply Techniques to Strengthen Dough & Improve Structure
Since rye doesn't develop gluten like wheat, focus on techniques that support its unique structure.
- Task: Implement an autolyse step: Mix flour and water, rest 30-60 minutes before adding starter and salt.
- Task: During bulk fermentation, perform gentle dough folds (like coil folds or bowl folds) every 30-45 minutes for the first 2-3 hours. Aim for 3-4 sets of folds.
- Task: Use a dough scraper and wet hands for handling to avoid adding excess flour.
- Task: Ensure the dough has built some tension and can hold a rough shape by the end of bulk fermentation.
Step 4: Maintain Consistent Temperature During Fermentation

Wild temperature swings are detrimental to rye dough.
- Task: Find a location for bulk fermentation where the temperature stays consistently between 72-78°F (22-26°C).
- Task: Use a digital thermometer to monitor the ambient temperature near your dough.
- Task: If needed, use a proofing box, oven with the light on, or another warm spot to maintain this temperature range.
- Task: Be patient; fermentation time is highly dependent on temperature. Don't rush the bulk fermentation.
Step 5: Accurately Assess Proofing for Optimal Oven Spring
Properly proofed rye dough is key to preventing a flat loaf.
- Task: Use a proofing basket dusted generously with rice flour (rye sticks! ).
- Task: Monitor the dough's appearance and feel, not just the clock.
- Task: Learn to interpret the poke test specifically for rye dough (it will spring back slower and less completely than wheat). A slight indentation that slowly fills back halfway is often a good sign.
- Task: Watch for visual cues like slight expansion and a surface that appears somewhat relaxed but not deflated.
- Task: Err slightly on the side of under-proofing rather than over-proofing with rye, as over-proofed rye collapses easily in the oven.
- Task: Consider a cold retard (refrigeration) after a shorter room-temperature proof. This slows fermentation and firms up the dough, making it easier to score and potentially improving oven spring.
Pro Tips for Baking Exceptional Sourdough Rye
Beyond troubleshooting specific issues like why your sourdough rye isn't rising, incorporating certain techniques can elevate your rye baking results. These pro tips focus on handling and baking the dough to maximize its potential structure and crust development.
Using a Banneton: Shaping and Structural Support
A banneton (proofing basket) is invaluable when baking with rye dough. Because rye dough is often very soft and lacks the strong gluten structure of wheat, it tends to spread rather than hold its shape during proofing. Proofing the dough seam-side up in a well-floured banneton allows gravity to help the dough develop tension on the surface, which will become the bottom crust during baking.
Using a banneton provides essential structural support during the final proof, preventing the dough from spreading outwards into a flat disk. This encourages the dough to rise upwards, preserving the shape and helping it maintain some height going into the oven. Generously dusting the banneton with rice flour is crucial, as sticky rye dough is particularly prone to sticking.
Scoring Techniques: Controlling Expansion & Preventing Cracks
Scoring rye dough requires a different approach than scoring wheat. Because rye dough has limited oven spring and a less elastic surface, complex or deep scoring patterns often don't open up significantly. Instead, scoring rye serves two main purposes: to provide a controlled escape route for steam and gas, preventing the crust from cracking randomly, and sometimes for aesthetic appeal.
A single, decisive score along the length of the loaf or a simple cross pattern is often sufficient for rye. Use a very sharp blade (like a razor blade or 'lame') and make the score relatively shallow compared to wheat bread scoring. Deep scores can sometimes cause the weaker rye structure to collapse. Scoring just before baking is essential.
Baking with Steam: Achieving a Crispy Crust & Open Crumb
Creating a steamy environment in your oven during the initial phase of baking is beneficial for most sourdough breads, and sourdough rye is no exception. Steam keeps the surface of the dough moist and pliable, allowing it to expand fully before the crust sets. Without adequate steam, the crust forms too quickly and rigidly, restricting oven spring and potentially leading to dense spots or cracks.
Methods for creating steam include baking in a Dutch oven or cloche (which traps the dough's own steam), placing a tray of hot water or ice cubes on the bottom rack of your oven, or using a steam oven. The steam is most critical for the first 15-20 minutes of baking. This steamy environment helps achieve a thinner, crispier crust and supports the dough's final push upwards, contributing to a better rise for your sourdough rye.
Recipe Adjustments for Improved Rise: 40% Rye Sourdough
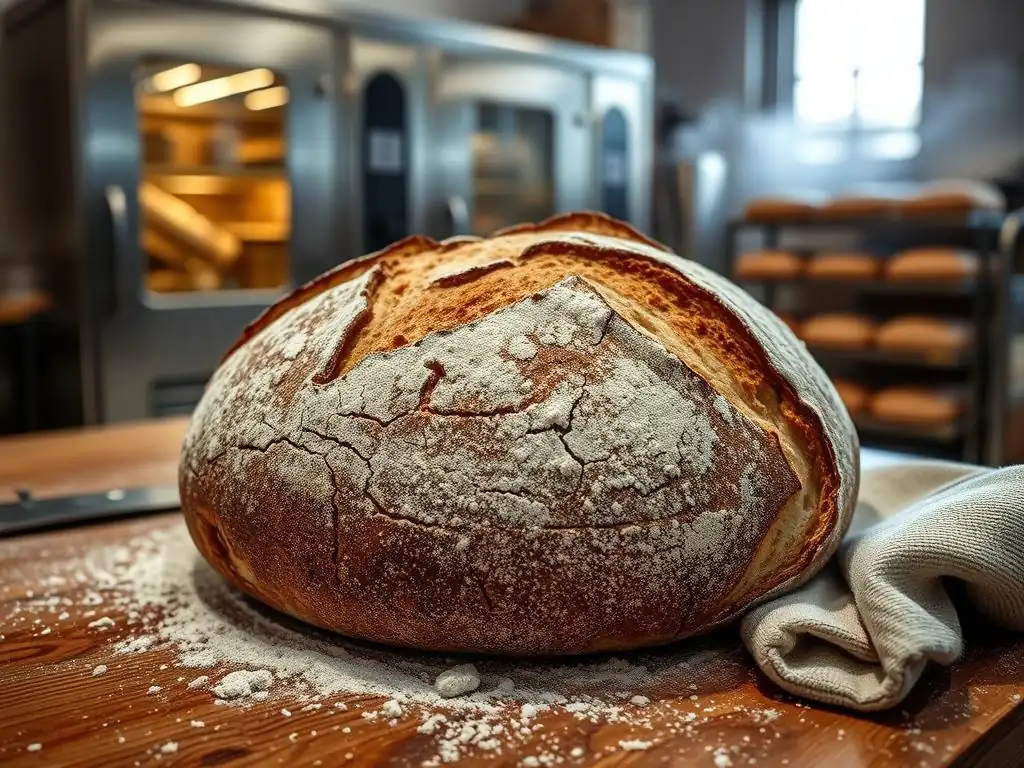
When troubleshooting why your sourdough rye isn't rising, sometimes adjusting the recipe itself is necessary, especially if you're aiming for a loaf that's not 100% rye but still features its distinct flavor. A common approach is to bake a loaf with a significant percentage of rye, balanced with higher-gluten wheat flour like bread flour. A 40% rye sourdough is a popular choice that offers a good balance of rye flavor and a more manageable structure and rise than a pure rye loaf.
Adjusting hydration and fermentation times are key when incorporating wheat flour. The wheat gluten will provide much-needed structure, allowing for more oven spring than a pure rye loaf. This section outlines typical adjustments for a 40% rye sourdough recipe to improve rise.
Revised Recipe: 40% Light Rye Sourdough with Caraway
Let's consider a typical adjustment for a loaf using 40% light rye and 60% strong bread flour. The presence of bread flour significantly changes the dough dynamics compared to a 100% rye loaf. Hydration levels can often be slightly higher than a pure rye loaf while still being manageable, perhaps in the range of 70-75% total hydration relative to total flour weight. The inclusion of caraway seeds is classic in rye bread and adds wonderful flavor.
A sample flour blend might be 400g light rye flour and 600g strong bread flour (total 1000g flour). Water might be around 700-750g (70-75% hydration). Salt would be 20g (2%). Active sourdough starter (rye or wheat) around 200g (20%). Caraway seeds (optional) 10-20g. This blend allows for better gluten development from the bread flour while still showcasing the rye.
Detailed Instructions & Optimized Baking Schedule
For a 40% rye sourdough, the process blends techniques for both wheat and rye.
- Mix: Combine flours, water, and caraway seeds. Autolyse for 30-60 minutes.
- Add Starter & Salt: Incorporate active starter and salt. Mix until combined.
- Bulk Fermentation (Approx. 4-5 hours at 75°F/24°C): This is longer than pure rye, leveraging the wheat gluten. Perform 3-4 sets of stretch and folds or coil folds during the first 2 hours to build strength. The dough will be sticky but should develop some elasticity and tension. Monitor the dough's increase in volume (aim for 30-50% increase) and look for signs of fermentation like bubbles.
- Shape: Gently pre-shape into a ball, rest 20 minutes, then final shape. Place seam-side up in a well-floured banneton.
- Proofing (Cold Retard is Recommended): Proof at room temperature for 1-2 hours, then transfer to the refrigerator (38-40°F/3-4°C) for 8-16 hours. Cold proofing develops flavor and makes the dough easier to handle and score, helping prevent flat sourdough rye due to handling issues.
- Bake: Preheat oven with Dutch oven or baking stone to 475°F (245°C). Score the loaf. Bake covered (in Dutch oven) or with steam for 20 minutes. Remove lid/steam source, reduce temperature to 425°F (220°C), and bake for another 25-30 minutes until deep golden brown and internal temperature reaches 205-210°F (96-99°C).
This schedule allows sufficient time for both yeast activity and gluten development from the wheat flour, while the cold retard helps manage the rye's characteristics, leading to a better rise than often achieved with higher rye percentages.
Conclusion: Mastering Sourdough Rye Bread Baking
Baking sourdough rye bread can be a deeply rewarding experience, offering unique flavors and textures distinct from wheat loaves. While facing a flat sourdough rye can be frustrating, it's a common hurdle on the path to mastering this challenging flour. By understanding the fundamental differences between rye and wheat, particularly concerning gluten, starches, and enzyme activity, you gain insight into why your sourdough rye isn't rising as expected.
Troubleshooting flat rye involves a systematic approach: ensuring your starter is vigorous, selecting the correct rye flour type, managing hydration carefully, supporting the dough's structure with appropriate techniques, controlling fermentation temperatures, and accurately assessing proofing. Each of these elements plays a critical role. Don't be discouraged by early attempts that result in flat sourdough rye; each loaf is a learning opportunity. With patience, observation, and practice, you can adapt your skills and consistently bake delicious, well-risen sourdough rye loaves that you'll be proud to share.
Frequently Asked Questions
Why is my sourdough rye not rising properly during bulk fermentation?
A sourdough rye loaf failing to rise during bulk fermentation often stems from insufficient gluten development due to rye's low gluten content or a weak starter. Temperature fluctuations can also severely impact the fermentation process.
Is my rye sourdough starter weak if it doesn't double in size?
Not necessarily. Rye starters often exhibit less volume increase than wheat-based starters. The key is looking for other signs of activity like bubbles and a sour aroma, indicating fermentation.
What type of rye flour is best for a sourdough that rises well?
Using a combination of rye flour and high-protein bread flour is recommended. The bread flour provides the necessary gluten structure for a better rise, while the rye contributes flavor.
How does temperature affect rye sourdough rising?
Temperature greatly impacts yeast activity. Too cold slows fermentation, leading to a flat loaf. Aim for a warm (but not hot) environment, around 75-80°F (24-27°C) for optimal rise.
How long should I proof my rye sourdough before baking if it's not rising much?
Rye sourdough generally needs longer proofing times than wheat sourdough, especially if it's not rising significantly. Monitor the dough for signs of slight expansion and a slightly puffed texture before baking, even if it hasn't doubled.
Final Reflection: The Humble Rise of Sourdough Rye
The persistent struggle with a stubbornly uncooperative sourdough rye starter is a common lament among bakers, but understanding the nuances of this complex bread unlocks a world of flavour and satisfaction. This isn't just about achieving a perfect loaf; it's about mastering a process that connects us to centuries of baking tradition and the fascinating world of fermentation.
The journey of perfecting a sourdough rye, with its unique challenges stemming from the rye flour's low gluten content and the demanding nature of the starter, is a testament to patience and perseverance. It's a journey that mirrors life itself – requiring careful attention to detail, adaptation to unexpected circumstances, and the unwavering belief that even the most recalcitrant dough can eventually rise to the occasion. The best bread is made with love, patience, and a little bit of flour on your apron.
– Unknown. This quote perfectly encapsulates the spirit of sourdough baking, highlighting the emotional investment and the rewarding outcome.
Now, consider your own "dough." What challenges in your life require the same dedication, the same careful nurturing, the same unwavering belief in the eventual outcome? Perhaps it's a personal project, a relationship, or even a long-held dream. Remember the lessons learned from your sourdough rye: patience, attention to detail, and a willingness to adapt will lead you to your own "perfect rise." Don't be discouraged by setbacks; embrace the process, learn from your mistakes, and enjoy the journey. The reward, like a perfectly risen sourdough rye, will be well worth the effort.
Unlock Your Rye's Potential: Baking Success Awaits!
Thanks for taking the time to explore the secrets of perfect sourdough rye! We hope you gained valuable insights into troubleshooting those pesky rising issues. Now it's time to put your newfound knowledge into practice.
Here's how you can take the next step:
- Bake that Rye! Put your learning to the test – try baking a loaf using the tips we shared, and see the difference! This is your chance to achieve that beautiful, airy crumb you've always dreamed of.
- Share Your Success (or Challenges!): Connect with our vibrant baking community on social media and share your rye baking journey – both the triumphs and the (delicious) learning curves! We’d love to see your results!
- Explore More Rye Recipes: Dive deeper into the world of rye bread with our extensive recipe collection – from classic to innovative!
Ready to achieve rye perfection? What specific aspect of the baking process are you most excited (or nervous!) to tackle next?