
Troubleshooting Common Vegan Bread Baking Problems

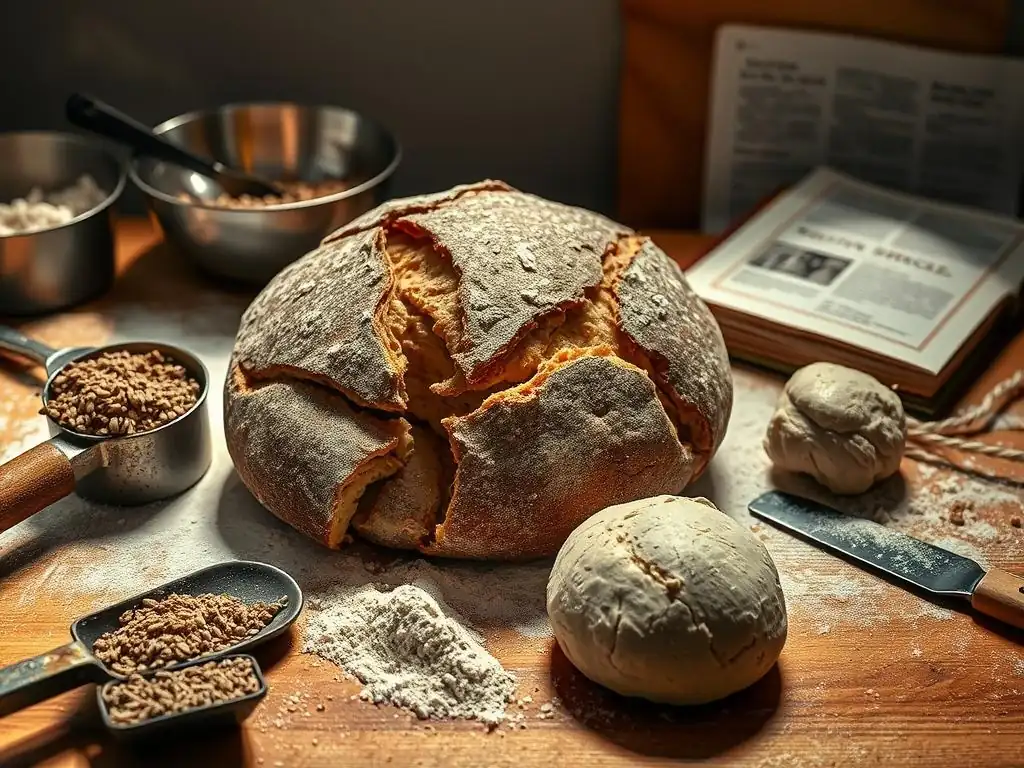
Welcome to BakeWithEase, your baking sanctuary! Struggling with your vegan bread? You're not alone. This article dives deep into the common pitfalls of vegan bread baking problems, offering practical solutions and expert tips to ensure your next loaf rises to perfection. Let's unlock the secrets to deliciously successful vegan bread together!
- Troubleshooting Common Vegan Bread Baking Problems: BakeWithEase Guide
- Introduction: Mastering Vegan Bread Baking
- Understanding the Challenges of Vegan Bread
- Problem 1: Dense and Heavy Vegan Bread
- Problem 2: Vegan Bread Not Rising Properly
- Problem 3: Gummy or Sticky Vegan Bread Texture
- Problem 4: Dry and Crumbly Vegan Bread
- Problem 5: Vegan Bread Lacking Flavor
- Problem 6: Vegan Bread Crust Too Hard or Too Soft
- Conclusion: Achieving Vegan Bread Baking Success
- Frequently Asked Questions
- Final Reflection: The Joy (and Triumph) of Vegan Bread Baking
- Unlock Your Vegan Baking Potential!
Troubleshooting Common Vegan Bread Baking Problems: BakeWithEase Guide
Introduction: Mastering Vegan Bread Baking
Embarking on the journey of vegan bread baking can be incredibly rewarding. Imagine the smell of freshly baked loaves filling your kitchen, ready to be sliced and enjoyed. However, transitioning from traditional baking, which often relies on ingredients like eggs and dairy, presents unique challenges. These differences can sometimes lead to frustrating results, such as loaves that are dense, fail to rise, or have an unappealing texture. Understanding these common vegan bread baking problems is the first step to overcoming them and achieving consistently delicious results.
This guide from BakeWithEase is designed to help you navigate the specific quirks of baking bread without animal products. We'll explore the reasons behind common issues like flat loaves, gummy interiors, or dry crumbs, and provide practical, friendly solutions. Whether you're a beginner just starting out or looking to perfect your technique, troubleshooting these vegan bread baking problems will empower you to bake with confidence and ease, creating beautiful, flavorful loaves every time. Let's dive in and turn those baking frustrations into successes!
Understanding the Challenges of Vegan Bread
Why Vegan Bread Baking Differs from Traditional Bread Baking
Vegan bread baking presents distinct challenges primarily because it omits key ingredients found in traditional recipes: eggs and dairy. Eggs typically provide structure, richness, and act as a binder, helping to hold the dough together and contribute to a tender crumb. Dairy, such as milk or butter, adds fat and protein, enhancing flavor, promoting browning, and keeping the bread soft and moist.
Without these components, bakers must rely on plant-based alternatives that behave differently, requiring adjustments in technique and ingredient ratios. For instance, replacing eggs often necessitates the use of binders like flax eggs or psyllium husk, which provide structure but don't offer the same level of richness or leavening support that eggs might in some enriched doughs.
Furthermore, the absence of dairy fats can affect dough handling and the final texture. Butter in traditional brioche, for example, contributes significantly to its softness and layered structure. Vegan alternatives, while useful, may have different melting points or emulsifying properties, which can impact gluten development and crumb structure.
A standard white bread recipe with milk might have a slightly softer crust and crumb compared to a vegan version using only water, unless specific fats or sweeteners are added to compensate. Navigating these differences requires understanding the function of each ingredient and how plant-based substitutes perform, often involving experimentation to find the perfect balance for your specific recipe and desired outcome.
Key Ingredients in Vegan Bread and Their Role
Flour is the structural backbone of most bread, and its protein content (specifically gluten potential) dictates how much water it can absorb and how well it can trap gases produced during fermentation. All-purpose flour, typically containing 10-12% protein, is versatile, while bread flour with 12-14% protein is excellent for chewier loaves due to higher gluten development.
Liquids, such as water or plant-based milk (like soy, almond, or oat milk), hydrate the flour, allowing gluten to form and yeast to become active. The amount of liquid used, known as hydration percentage relative to flour weight, significantly impacts dough consistency and the final crumb structure – higher hydration (e.g., 70-80%) generally results in a more open crumb but a stickier dough to handle.
Yeast is the primary leavening agent in most breads, consuming sugars and producing carbon dioxide gas, which causes the dough to rise. Active dry yeast needs to be proofed in warm liquid (around 105-115°F or 40-46°C) before use, while instant yeast can often be mixed directly with dry ingredients.
Fat sources like olive oil, melted vegan butter, or even applesauce contribute to tenderness and moisture, preventing the bread from becoming dry and extending its shelf life. Salt is crucial for flavor enhancement and also plays a role in controlling yeast activity and strengthening the gluten network.
Plant-based binders, such as ground flaxseed mixed with water (a "flax egg," typically 1 tbsp flax + 3 tbsp water) or psyllium husk (often used at a ratio of 1-2% of flour weight), are vital in vegan baking to replace the binding function of eggs, helping to create a cohesive dough and improve crumb structure.
Problem 1: Dense and Heavy Vegan Bread
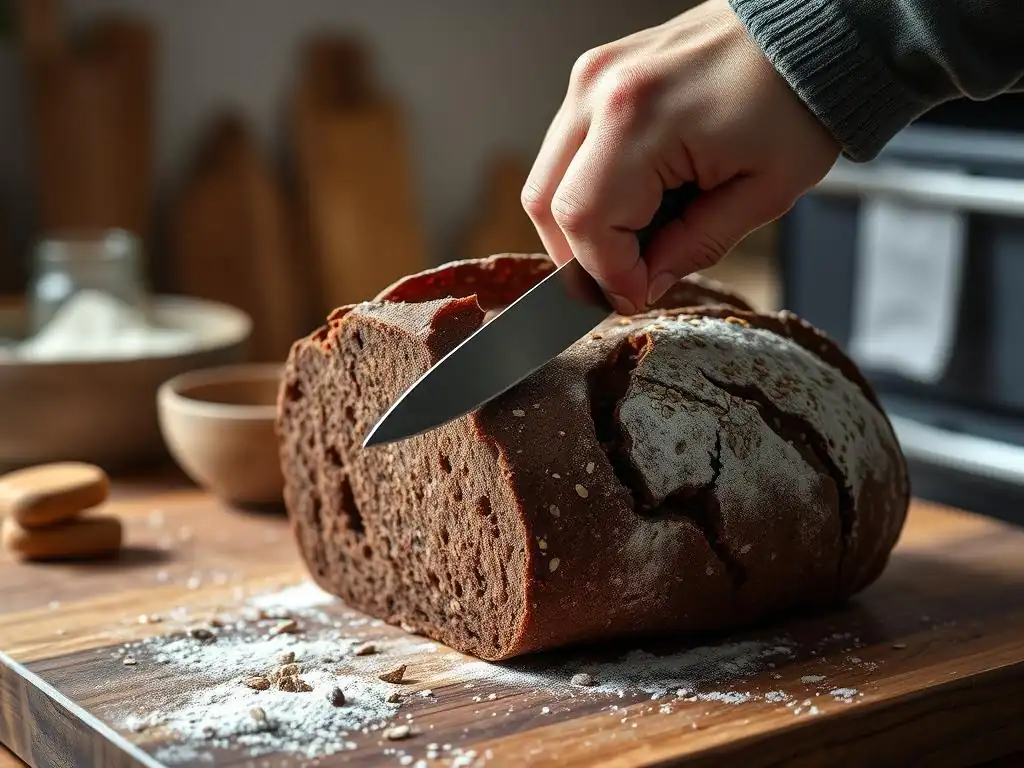
Common Causes of Dense Vegan Bread
Insufficient Gluten Development in Vegan Bread
One of the most frequent vegan bread baking problems is insufficient gluten development, leading to a dense, brick-like loaf. Gluten is the protein network formed when water is combined with flour and the dough is kneaded. This network provides the elasticity and structure needed to trap the carbon dioxide gas produced by yeast, allowing the bread to rise and create an airy crumb.
In vegan doughs, especially those using alternative flours or significant amounts of added binders like psyllium or flax, gluten development can be inhibited if not properly handled. If the dough isn't kneaded for long enough, or if the kneading isn't vigorous enough, the gluten strands won't form a strong, interconnected mesh capable of supporting the rise.
A lack of proper gluten structure means the dough cannot hold its shape or trap gas effectively during proofing and baking. This results in the gas escaping, leading to minimal expansion and a tight, heavy crumb. For instance, a dough kneaded for only 5 minutes by hand might not have developed enough gluten compared to one kneaded for 10-12 minutes or 6-8 minutes in a stand mixer.
Similarly, doughs with very high hydration might require specific folding techniques over time (like stretch and folds) rather than just aggressive kneading to build strength without becoming a sticky mess. Recognizing the signs of underdeveloped dough – it might tear easily when stretched rather than forming a thin membrane (the "windowpane test") – is key to diagnosing this issue.
Over-Mixing or Under-Mixing Vegan Bread Dough
Both under-mixing and over-mixing can contribute to dense vegan bread, albeit for different reasons. Under-mixing, as discussed, fails to develop the necessary gluten network. The ingredients might not be fully incorporated, resulting in pockets of dry flour or uneven distribution of yeast and salt, leading to poor structure and inconsistent rising. The dough will feel shaggy and weak, lacking elasticity. Attempting to bake such a dough will almost certainly result in a dense loaf because the structure isn't there to support the rise.
Conversely, over-mixing can also be a problem, particularly in high-speed mixers or with certain types of flour. While kneading develops gluten, excessive kneading can actually break down the gluten strands after they've reached their peak strength. This is less common with hand kneading but can happen in stand mixers.
Over-mixed dough often becomes very sticky, loses its elasticity, and may even appear wet or soupy because the broken-down gluten can no longer hold the water effectively. Baking an over-mixed dough results in a loaf that might initially rise but then collapses or bakes into a dense, gummy texture because the structural integrity has been destroyed. Finding the sweet spot in mixing – where the dough is smooth, elastic, and passes the windowpane test – is crucial.
Incorrect Hydration Levels in Vegan Bread Dough
The amount of liquid relative to flour (hydration) is critical in bread baking, and incorrect levels are a common cause of dense vegan bread. If the dough is too dry (low hydration), it will be stiff, difficult to knead, and the gluten network will struggle to form properly because there isn't enough water to hydrate the protein. Dry dough also makes it harder for yeast to move and produce gas efficiently.
A typical loaf of white bread might use around 60-65% hydration, but variations exist. If a recipe intended for 65% hydration is made with only 55%, the resulting dough will be significantly tighter and likely produce a denser loaf with a tighter crumb.
Conversely, while high hydration can lead to an open, airy crumb in well-developed doughs, too much hydration in a dough that isn't designed for it, or if the gluten isn't sufficiently strong to handle the extra water, can also lead to problems. An overly wet dough can be difficult to shape, spread excessively during proofing, and collapse in the oven because the weak gluten structure cannot support the weight of the water and the trapped gas.
While not strictly "dense" in the same way a dry dough is, it can bake into a heavy, sometimes gummy loaf lacking the desired airy structure. Achieving the correct hydration, often requiring slight adjustments based on flour type and even ambient humidity, is vital for optimal dough consistency and a light, airy crumb.
Solutions for Dense Vegan Bread
Kneading Techniques for Vegan Bread Dough
To combat insufficient gluten development and avoid dense vegan bread, mastering proper kneading techniques is essential. The goal is to stretch and fold the dough repeatedly to align the gluten proteins and build a strong, elastic network.
For many standard vegan bread doughs, kneading by hand for 10-12 minutes or using a stand mixer with a dough hook on medium speed for 6-8 minutes is a good starting point. You'll know the dough is adequately kneaded when it becomes smooth, supple, less sticky (though some stickiness is normal, especially with higher hydration), and passes the windowpane test – you should be able to gently stretch a small piece of dough into a thin membrane without it tearing.
If you are working with a very wet or sticky dough, traditional kneading might be challenging. In such cases, techniques like stretch and folds performed at intervals during the bulk fermentation can build strength effectively. For example, performing 3-4 sets of stretch and folds at 20-30 minute intervals over a 1-2 hour period can develop gluten in high-hydration doughs like ciabatta or focaccia without requiring extensive traditional kneading.
These methods help align the gluten network without the mess of handling a very wet dough constantly. Patience is key; allow the dough time to rest between folds, as this helps the gluten relax and makes the next set of stretches easier.
Adjusting Hydration for Lighter Vegan Bread
Correcting hydration levels is a primary way to address both excessively dry and overly wet doughs that lead to density. If your dough feels too dry and stiff during mixing, add liquid sparingly, perhaps a tablespoon at a time, allowing it to be absorbed before adding more. Aim for a dough that is soft and pliable but not overly sticky.
The exact amount of water needed can vary based on the flour's absorption rate, which might differ slightly from batch to batch or between brands. Pay attention to how the dough feels rather than strictly adhering to a recipe's hydration percentage if it seems significantly off.
For doughs that are too wet and difficult to handle, you can add a small amount of flour, a tablespoon at a time, until the desired consistency is reached. However, be cautious not to add too much flour, as this can also lead to a dry loaf. A good rule of thumb is to start with the recipe's specified liquid amount and adjust during the initial mixing and kneading phase based on the dough's feel.
Experienced bakers often talk about the dough feeling "just right" – elastic, slightly tacky but not sticking aggressively to your hands or the bowl. Learning to judge dough consistency by touch is a skill that improves with practice and is crucial for preventing many vegan bread baking problems.
Using Gluten-Boosting Ingredients in Vegan Bread
For vegan bread recipes that inherently lack the strong structure provided by eggs, incorporating gluten-boosting ingredients can significantly improve texture and prevent density. Vital wheat gluten is a concentrated protein extracted from wheat flour, containing about 75-80% protein compared to the 10-14% in bread flour.
Adding just 1-2 tablespoons of vital wheat gluten per cup of flour in your recipe can dramatically enhance the dough's elasticity and strength, allowing it to trap more gas and achieve a higher rise and lighter crumb. This is particularly helpful when using lower-protein flours or recipes with a high proportion of add-ins like seeds or whole grains which can interfere with gluten development.
Another approach is to use binders that contribute to structure, even if they don't contain gluten themselves. Psyllium husk, for instance, is an excellent binder that absorbs a large amount of water, creating a gel-like consistency. When added to dough (typically 1-2% of the flour weight), it helps create a more cohesive and pliable dough structure, mimicking some of the binding properties of eggs.
This can be especially useful in gluten-free vegan bread recipes, but it can also improve the texture of wheat-based vegan loaves by providing additional structural support. Experimenting with small amounts of vital wheat gluten or psyllium husk can often transform a potentially dense vegan bread recipe into a light and airy one.
Problem 2: Vegan Bread Not Rising Properly
Identifying the Reasons for Poor Rise in Vegan Bread
Inactive Yeast in Vegan Bread Recipes
A common culprit behind vegan bread not rising is inactive or dead yeast. Yeast is a living organism that feeds on sugars in the dough and produces carbon dioxide gas, which makes the bread rise. If the yeast is old, improperly stored, or exposed to extreme temperatures, it can lose its viability.
Using inactive yeast means the dough won't produce enough gas to expand, resulting in a flat, dense loaf. Yeast typically has an expiration date printed on the package, and it's best to use it before then. Once opened, yeast should be stored in an airtight container in the refrigerator or freezer to maintain its potency.
The temperature of the liquid used to activate the yeast is also critical. Water that is too cold (below 70°F or 21°C) will not activate the yeast effectively, leading to a slow or non-existent rise. Conversely, water that is too hot (above 130°F or 54°C) will kill the yeast, rendering it useless.
The ideal temperature range for activating most active dry yeast is between 105°F and 115°F (40-46°C). A simple test is to proof the yeast: dissolve it in warm water (with a pinch of sugar) within this temperature range. If it's active, it should become foamy and bubbly within 5-10 minutes, indicating that the yeast is alive and ready to work.
Incorrect Proofing Temperatures for Vegan Bread
Even with active yeast, the dough won't rise properly if the proofing environment is too cold or too hot. Proofing is the process where the dough rests and rises in a warm place. Yeast activity is highly dependent on temperature.
The optimal temperature range for proofing most bread doughs is between 75°F and 85°F (24-29°C). In temperatures significantly below this range, yeast activity slows down considerably, leading to a very long or insufficient rise time. For instance, dough left to proof in a cold kitchen (e.g., 60°F or 15°C) might take many hours longer than expected to double in size, or it might not reach its full potential rise.
Conversely, temperatures that are too high can cause the yeast to become overactive initially, potentially leading to over-proofing before the dough has developed enough structure. More critically, very high temperatures (above 95°F or 35°C) can produce off-flavors due to rapid fermentation or even kill the yeast. Finding a consistently warm spot is key.
Options include placing the dough in a slightly warm oven (turned off, perhaps with the light on), on top of a warm appliance, or in a proofing box if you have one. Ensuring the dough is covered to prevent drying out is also important during this crucial rising phase.
Lack of Sugar for Yeast Activation in Vegan Bread
While yeast feeds on various sugars present in flour, adding a small amount of readily available sugar to the dough, especially during the initial activation phase, gives the yeast a quick energy source to get started. This is particularly important for active dry yeast proofed in water. Recipes that omit sugar entirely or rely solely on complex carbohydrates in flour might experience a slower or less vigorous initial rise. Even a small amount, like 1-2 teaspoons of sugar per standard loaf recipe, can significantly boost yeast activity and ensure a good start to the fermentation process.
Natural sweeteners like maple syrup, agave nectar, or granulated sugar all work effectively as yeast food. Some recipes might call for malt extract, which not only feeds the yeast but also contributes to crust color and flavor. Without sufficient accessible sugar, the yeast's metabolic activity can be sluggish, resulting in inadequate gas production and a poor rise. While too much sugar can actually inhibit yeast activity (due to osmotic pressure), a modest amount is beneficial for ensuring a healthy and active fermentation, preventing one of the common vegan bread baking problems related to poor rise.
Fixing Vegan Bread Rising Issues
Testing and Activating Yeast for Vegan Bread
To avoid the frustrating problem of inactive yeast causing flat vegan bread, always test your yeast before using it, especially if you're unsure of its age or storage. This is a simple and effective step. Pour the amount of warm water called for in your recipe (or about 1/2 cup) into a small bowl. Ensure the temperature is between 105°F and 115°F (40-46°C) – hotter water can kill the yeast. Stir in the yeast and a pinch of sugar (optional but recommended to give the yeast food). Let it sit for 5-10 minutes.
If the yeast is active, the mixture will become foamy and bubbly, expanding significantly. This foam indicates that the yeast is alive and producing carbon dioxide. If there is little to no activity, the yeast is likely dead or inactive, and you should discard it and use a fresh batch. This quick test saves you the time and ingredients of making a whole batch of dough that won't rise. Using fresh, properly tested yeast is fundamental to successful vegan bread baking.
Optimizing Proofing Conditions for Vegan Bread
Creating the right environment for your vegan bread dough to rise is crucial for a good loaf. The ideal temperature range is typically 75-85°F (24-29°C). If your kitchen is cooler than this, find a warmer spot. One common method is to use your oven: turn it on to the lowest setting for just a minute or two, then turn it off. The residual warmth creates a perfect proofing environment. Alternatively, you can simply turn on the oven light; the heat from the bulb is often enough to raise the temperature inside the oven to a suitable level.
Another technique is to place the covered dough in a microwave (turned off) with a cup of hot water beside it. The steam from the water creates a warm, humid environment. Remember to cover your dough bowl tightly with plastic wrap or a damp kitchen towel to prevent the surface from drying out and forming a crust, which would inhibit the rise. Monitor the dough; proofing time is less about the clock and more about the dough doubling in size, which will vary depending on the temperature and yeast activity.
Adding Natural Sweeteners to Enhance Rising
While yeast can ferment sugars in flour, providing a readily available source of sugar gives it a boost, leading to a more reliable and vigorous rise. Most vegan bread recipes include a small amount of sugar for this purpose, typically 1-2 teaspoons per loaf. If a recipe omits sugar and you're experiencing poor rise, consider adding a small amount. Granulated sugar, brown sugar, maple syrup, or agave nectar are all effective options.
Adding this small amount of sweetener during the initial mixing phase, especially when proofing active dry yeast, helps kickstart fermentation. It provides immediate food for the yeast, encouraging rapid reproduction and gas production. Be careful not to add too much sugar (e.g., more than 5-10% of the flour weight), as high sugar concentrations can actually draw water out of the yeast cells and slow down or inhibit fermentation. A little sugar goes a long way in ensuring your vegan bread dough rises beautifully, addressing a common vegan bread baking problem.
Problem 3: Gummy or Sticky Vegan Bread Texture
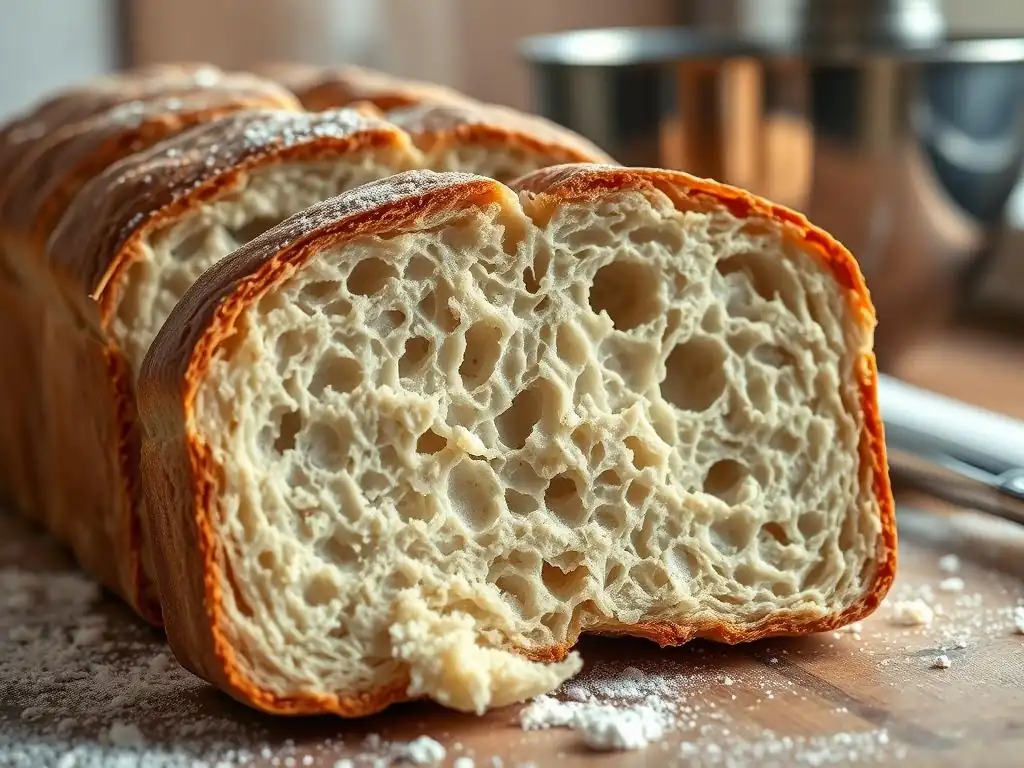
Understanding the Causes of Gummy Vegan Bread
Underbaked Vegan Bread
One of the most common reasons for a gummy or sticky texture in vegan bread is simply underbaking. When bread bakes, the heat causes starches in the flour to gelatinize, absorbing moisture and firming up the structure. It also evaporates excess water and sets the gluten network. If the bread is removed from the oven too soon, the interior may not have reached the necessary temperature for these processes to complete. The starches remain partially hydrated and unset, resulting in a dense, moist, and often gummy crumb that sticks to your teeth.
The internal temperature is the most reliable indicator of doneness. For most standard lean bread loaves (like baguettes or rustic loaves), an internal temperature of 190-200°F (88-93°C) indicates they are fully baked. Enriched breads, which may contain more fat or sugar, often need to reach a slightly higher temperature, around 200-210°F (93-99°C). Using an instant-read thermometer is the best way to check. If you slice open a loaf and the interior looks damp, compressed, or feels heavy and sticky, it was likely underbaked.
Excess Moisture in Vegan Bread
While proper hydration is essential for a good crumb, excessive moisture in the dough or insufficient evaporation during baking can lead to a gummy texture. This can happen if the initial hydration percentage was too high for the specific flour used, or if the dough didn't spend enough time in the oven for the excess water to bake off. Vegan recipes sometimes use binders like psyllium husk or flaxseed, which absorb significant amounts of water; if the hydration isn't adjusted correctly to account for this, the dough might retain too much moisture.
Baking conditions also play a role. If the oven temperature is too low, or if the loaf is covered for too long (like in a Dutch oven), moisture might not evaporate efficiently from the crust, trapping steam inside and preventing the interior from drying out and setting properly.
For example, baking a loaf at 350°F (175°C) for the same duration as one baked at 400°F (200°C) will likely result in a moister interior, potentially leading to gumminess if not baked for a longer time. Balancing hydration with adequate baking time and temperature is key to achieving a set, non-gummy crumb.
Incorrect Starch Gelatinization in Vegan Bread
Starch gelatinization is a critical process during baking where starch granules absorb water and swell when heated, eventually bursting and releasing starch molecules that form a gel. As the bread cools, this gel sets, contributing to the crumb structure. If this process is incomplete or goes awry, it can result in a gummy texture.
This is closely related to underbaking but can also be influenced by the type of flour used or the presence of certain enzymes. Some flours, or conditions that promote excessive enzyme activity, can lead to the breakdown of starches before they can properly gelatinize and set, resulting in a sticky, sometimes slimy crumb.
For instance, using flour with very high amylase enzyme activity (which breaks down starch) combined with a long, cool fermentation might lead to excessive starch breakdown. During baking, there aren't enough intact starch granules left to properly gelatinize and form a stable gel structure, resulting in a gummy layer, often near the crust.
While this is less common in standard home baking with commercial flours, it can be a factor. Ensuring the dough reaches the correct internal temperature and that the baking process allows starches to fully hydrate and set is crucial for avoiding this specific vegan bread baking problem.
Solutions for Gummy Vegan Bread Texture
Baking Vegan Bread to the Correct Internal Temperature
The most reliable way to prevent gummy vegan bread is to ensure it is baked to the correct internal temperature. As mentioned, for most lean vegan loaves, this is typically between 190-200°F (88-93°C). For enriched loaves (containing fats or sugars), aim for 200-210°F (93-99°C). Using an instant-read digital thermometer is highly recommended. Insert the probe into the thickest part of the loaf, avoiding the crust. The reading should stabilize quickly.
If your loaf reaches the target internal temperature but the crust isn't as dark as you'd like, you can continue baking for a few more minutes, or increase the oven temperature slightly, watching carefully to prevent burning. Conversely, if the crust is browning too quickly before the interior is done, you can loosely tent the loaf with foil. Trusting the thermometer over visual cues or recipe times alone is key to ensuring the interior is fully cooked and set, preventing that unpleasant gummy texture that plagues many vegan bread baking problems.
Adjusting Baking Time and Temperature for Vegan Bread
If you consistently get gummy vegan bread despite hitting the target internal temperature, you might need to adjust your baking time and temperature strategy. Sometimes, a slightly longer baking time at a slightly lower temperature after the initial burst of heat can help dry out the interior more effectively without burning the crust.
For example, if a recipe calls for 40 minutes at 400°F (200°C), you might try baking for 30 minutes at 400°F, then reducing the temperature to 375°F (190°C) and baking for an additional 15-20 minutes until the internal temperature is reached and the crust is golden brown.
Conversely, starting with a higher temperature (e.g., 450°F or 230°C) for the first 10-15 minutes can help set the crust quickly and provide a good oven spring, then reducing the temperature to finish baking can work well, especially if you are using steam. The goal is to ensure sufficient time for moisture evaporation from the interior while achieving the desired crust development. Pay attention to how your specific oven performs, as temperatures can vary; an oven thermometer can help you calibrate. Adjusting these parameters based on your results will help you solve this common vegan bread baking problem.
Using Starch-Modifying Ingredients in Vegan Bread
While primarily a solution for gluten-free baking, certain ingredients can help manage moisture and improve starch structure in wheat-based vegan loaves, potentially reducing gumminess. Psyllium husk, for instance, absorbs a significant amount of water and forms a gel. When incorporated into the dough, it helps to bind moisture more effectively during mixing and fermentation.
During baking, this bound moisture can contribute to a softer crumb initially, but if the bread is fully baked, the resulting structure is less likely to be overtly gummy compared to doughs with excess free water. Using psyllium at around 1-2% of the flour weight is a typical starting point.
Other ingredients sometimes used in baking, like potato flour or tapioca starch, can also influence starch gelatinization and water absorption. However, for standard wheat-based vegan bread, ensuring proper hydration, sufficient kneading, and, most importantly, baking thoroughly to the correct internal temperature are the most impactful solutions for preventing a gummy texture. These foundational techniques address the root causes of underbaked or excessively moist interiors, which are the primary drivers of this particular vegan bread baking problem.
Problem 4: Dry and Crumbly Vegan Bread
Identifying the Reasons for Dry Vegan Bread
Overbaking Vegan Bread
Just as underbaking leads to a gummy texture, overbaking is a primary cause of dry and crumbly vegan bread. When bread bakes, moisture gradually evaporates from the loaf. Baking for too long, or at too high a temperature for the duration, causes excessive moisture loss. The starches and gluten structure, which rely on a certain amount of moisture to remain pliable, become dry and brittle.
This results in a loaf that might sound hollow when tapped on the bottom (a common test for doneness, but not as reliable as temperature), but when sliced, the crumb feels dry to the touch and crumbles apart easily rather than holding together. The crust is often excessively thick and hard. While an internal temperature of 190-210°F is the target range, baking significantly beyond this range will continue to dry out the loaf. For instance, a loaf baked to 220°F (104°C) internally will inevitably be much drier than one baked to 200°F (93°C).
Insufficient Fat or Moisture in Vegan Bread Dough
Vegan bread, especially lean varieties made only with flour, water, yeast, and salt, can be prone to dryness if not formulated correctly. Fat contributes to tenderness and moisture retention in bread. In traditional baking, butter or eggs add fat; in vegan baking, incorporating healthy fats like oil or vegan butter is often necessary to achieve a soft crumb and prevent dryness. A recipe might simply not include enough fat to compensate for the lack of animal products, leading to a dry result.
Similarly, insufficient hydration (too little water relative to flour) can result in a dry dough initially, which then bakes into a dry loaf. While high hydration requires skill to handle, low hydration doughs are inherently less moist. Some flours, particularly whole wheat or those with high fiber content, absorb more water than white flour.
If a recipe doesn't increase the liquid to account for this, the resulting dough and bread will be dry. For example, a whole wheat loaf typically requires 5-10% more water than a white flour loaf to achieve a similar dough consistency and moisture level in the final bread.
Using the Wrong Type of Flour for Vegan Bread
The type of flour used significantly impacts the final texture and moisture level of vegan bread. Different flours have varying protein and starch content, as well as different water absorption rates. Using a flour that is not well-suited to the recipe or desired outcome can contribute to dryness and crumbliness. For instance, using a low-protein cake flour (around 7-9% protein) in a recipe designed for high-protein bread flour will result in a dough with weak gluten development and a crumb that is less structured and more likely to crumble.
Furthermore, substituting flours without adjusting the liquid can lead to problems. Gluten-free flours, for example, often require different hydration levels and binders compared to wheat flour. Even within wheat flours, whole wheat flour absorbs more water than white flour due to the bran and germ content. Using a recipe developed for white flour with an equal weight of whole wheat flour without increasing the liquid will likely result in a dry dough and a dry, dense, and crumbly loaf. Understanding the properties of different flours and their impact on hydration is crucial for preventing dry vegan bread.
Fixing Dry and Crumbly Vegan Bread
Reducing Baking Time to Prevent Dryness
If you're consistently getting dry and crumbly vegan bread, the most straightforward solution is often to reduce the baking time. Pay close attention to the loaf as it bakes and start checking for doneness earlier than the recipe suggests, especially if your oven runs hot or you're using a dark pan (which absorbs more heat). Use an instant-read thermometer to check the internal temperature, aiming for the lower end of the target range (e.g., 190°F or 88°C for lean loaves) if dryness is an issue.
Visual cues can also help; the crust should be golden brown, not dark brown or black in spots unless the recipe specifically calls for it. The loaf should sound hollow when tapped on the bottom, but don't rely solely on this. If the internal temperature is met and the crust looks good, take it out. Even a few extra minutes in the oven can make a significant difference in moisture loss. Over time, you'll learn to recognize the signs of a perfectly baked loaf in your specific oven, helping you avoid this common vegan bread baking problem.
Incorporating Healthy Fats into Vegan Bread Recipes
To improve moisture retention and tenderness in vegan bread, consider incorporating healthy fats into your recipes. Many standard loaf recipes benefit from the addition of 1-2 tablespoons of liquid fat per loaf, such as olive oil, melted coconut oil, or neutral vegetable oil. These fats interfere with gluten development slightly, resulting in a more tender crumb, and they help the bread retain moisture, preventing it from drying out quickly.
For enriched vegan breads, replacing dairy butter with a high-quality vegan butter alternative (often made from a blend of plant oils) can add richness and contribute to a softer texture. Mashed banana, applesauce, or pumpkin puree can also add moisture and tenderness, although they will also add flavor and potentially affect the crumb structure, making them better suited for specific types of loaves like quick breads or enriched yeast breads. Experimenting with adding a small amount of healthy fat can significantly improve the texture and shelf life of your vegan bread.
Choosing the Right Flour for Vegan Bread Texture
Selecting the appropriate flour and understanding how it behaves is key to preventing dry and crumbly vegan bread. For a classic, chewy yeast bread, a good quality bread flour with a protein content of 12-14% is ideal as it develops strong gluten, leading to a good structure that holds moisture well. If using all-purpose flour (10-12% protein), you might get a slightly softer crumb, but it can still work well for many recipes.
If you're using whole wheat flour or other whole grain flours, remember that they absorb more water than white flour. You'll need to increase the hydration accordingly – often by 5-10% or more – to achieve a dough that isn't dry and stiff. Pay attention to the dough's feel during mixing and add liquid as needed.
For gluten-free vegan bread, using a balanced blend of different flours and starches, along with appropriate binders like psyllium husk or xanthan gum, is crucial for achieving a cohesive, moist texture that doesn't crumble apart. Understanding flour properties is a fundamental step in solving many vegan bread baking problems.
Problem 5: Vegan Bread Lacking Flavor
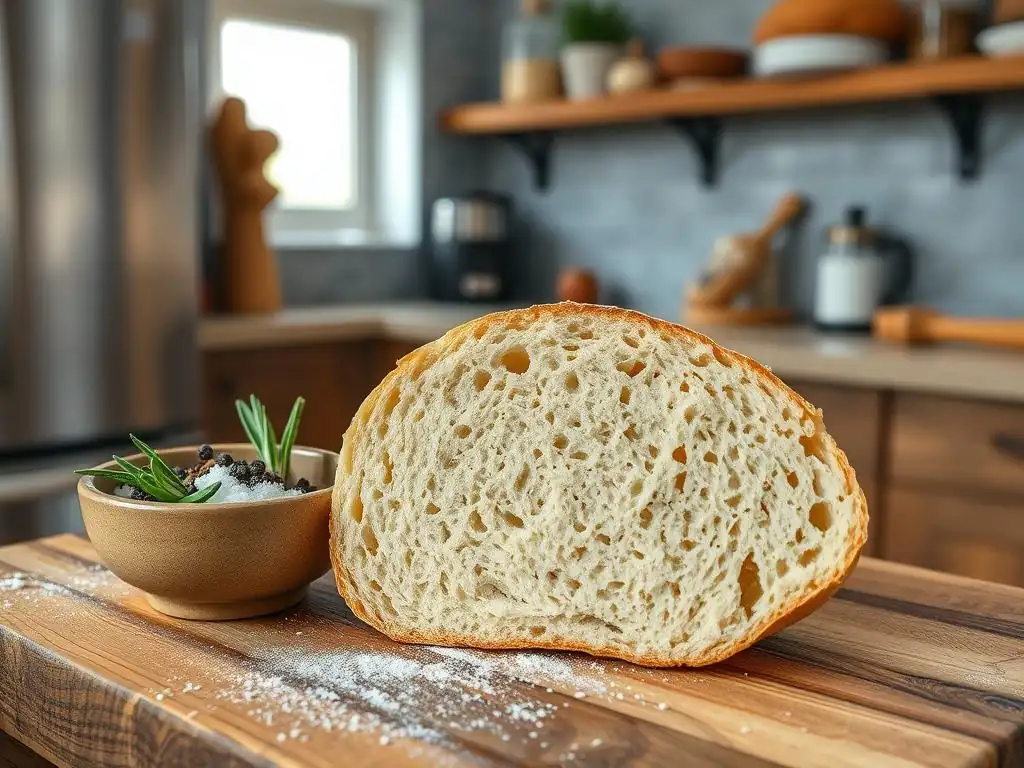
Understanding Flavor Development in Vegan Bread
Importance of Salt in Vegan Bread Flavor
Salt is arguably the most critical ingredient for flavor development in bread, including vegan bread. It doesn't just make the bread taste "salty"; it enhances and balances all the other flavors present, making the taste of the flour, fermentation, and any added ingredients truly shine. Without sufficient salt, bread tastes bland, flat, and uninteresting. Salt also plays a role in the dough's structure by tightening the gluten network, and it helps control yeast activity, slowing down fermentation slightly to allow for better flavor development.
The typical salt percentage in bread dough is between 1.5% and 2% of the total flour weight. For example, in a recipe using 500 grams of flour, you would usually add between 7.5 and 10 grams of salt. Using too little salt (below 1.5%) is a common reason for bland bread. While reducing salt might seem healthier, using significantly less than 1.5% will noticeably diminish the flavor profile of the finished loaf. Ensuring accurate salt measurement is vital for delicious vegan bread.
Role of Fermentation in Enhancing Vegan Bread Taste
Fermentation is a transformative process in bread baking, responsible for both leavening and the development of complex flavors and aromas. As yeast (and potentially wild bacteria in sourdough) consumes sugars, it produces carbon dioxide and alcohol, but also a host of other compounds, including organic acids (like lactic and acetic acid) and esters. These byproducts contribute significantly to the bread's characteristic taste and smell.
The length and temperature of fermentation greatly influence the flavor profile. A short, warm fermentation might produce a quick rise but results in simpler flavors.
A longer, cooler fermentation (like a cold proof in the refrigerator for 12-24 hours) slows down yeast activity and encourages the development of more complex and nuanced flavors by allowing enzymes more time to break down starches into sugars and giving organic acids time to accumulate. This slow development is key to the rich flavor of sourdough and many artisan breads, and it's equally important for developing depth of flavor in yeasted vegan loaves, helping to overcome potential blandness which is a common vegan bread baking problem.
Using Aromatic Ingredients in Vegan Bread
Beyond the basic ingredients, incorporating aromatic ingredients is an excellent way to enhance the flavor of vegan bread and make it more exciting. These additions can provide layers of taste that complement the natural flavors developed during fermentation. Simple additions like herbs (rosemary, thyme, dill), spices (garlic powder, onion powder, cumin, cinnamon), or seeds (sesame, poppy, sunflower, pumpkin) can significantly elevate the flavor profile.
Even ingredients like toasted nuts, dried fruits, or olives can add bursts of flavor and texture. For example, adding 1-2 teaspoons of garlic powder and a tablespoon of dried rosemary to a savory loaf dough can transform a simple bread into something much more flavorful. Similarly, incorporating a quarter cup of toasted sesame seeds into the dough and sprinkling some on top adds a nutty depth. These additions work in conjunction with proper salt levels and fermentation to create a truly delicious vegan bread that is far from bland.
Enhancing the Flavor of Your Vegan Bread
Adjusting Salt Content for Optimal Flavor
If your vegan bread tastes bland, the first thing to check is the salt content. Many recipes specify salt by volume (e.g., teaspoons), but measuring by weight is far more accurate. Aim for a salt level of 1.5% to 2% of the flour weight. For instance, if your recipe uses 500g of flour, use between 7.5g and 10g of salt. If you've been using less, gradually increase the amount in your next few bakes until you find the level that tastes best to you.
Remember to use non-iodized salt if possible, as iodine can sometimes interfere with yeast activity, although this is usually minimal with standard amounts. Fine sea salt or table salt are common choices. Ensure the salt is evenly distributed throughout the dough during mixing; adding it too early or too late relative to the yeast can impact fermentation. Proper salt levels are foundational to solving the vegan bread baking problem of blandness.
Experimenting with Different Fermentation Techniques for Vegan Bread
To develop deeper, more complex flavors in your vegan bread, experiment with extending the fermentation time, particularly using cold proofing. After the initial bulk fermentation (the first rise), instead of shaping and doing a final proof at room temperature, shape the dough, place it in a covered container or proofing basket, and refrigerate it for 12 to 24 hours.
This slow, cold fermentation allows enzymes more time to break down starches into sugars, providing more food for the yeast and beneficial bacteria (if using sourdough or a pre-ferment). It also encourages the production of organic acids, contributing a pleasant tang and complexity to the flavor. While it requires planning ahead, a cold proof is one of the most effective ways to enhance the taste of your vegan bread and move beyond simple yeast flavors, addressing a key aspect of vegan bread baking problems related to flavor.
Incorporating Herbs, Spices, and Seeds for Added Flavor
Beyond adjusting salt and fermentation, actively adding flavorful ingredients can significantly boost the taste of your vegan bread. Think about the type of bread you're making and what flavors would complement it. For a savory loaf, consider incorporating dried herbs like rosemary, thyme, or oregano (typically 1-2 tablespoons per loaf), or spices like garlic powder, onion powder, or a pinch of black pepper (1-2 teaspoons). Seeds such as sesame, poppy, sunflower, or pumpkin seeds can be added to the dough (up to 1/4 cup per loaf) and sprinkled on top for nutty flavor and crunch.
Mix these ingredients into the dough during the kneading phase to ensure even distribution. Toasting seeds or nuts lightly before adding them can further enhance their flavor. For a sweeter loaf, consider adding cinnamon, cardamom, or even small amounts of dried fruit (though be mindful that dried fruit can affect hydration). These additions not only contribute flavor but can also add visual appeal and texture, making your vegan bread more interesting and delicious.
Problem 6: Vegan Bread Crust Too Hard or Too Soft
Understanding Crust Development in Vegan Bread
Influence of Baking Temperature on Vegan Bread Crust
The temperature at which bread is baked has a profound impact on crust development. High initial temperatures (e.g., 450-500°F or 230-260°C) are crucial for creating a thick, crispy crust. When the dough hits a very hot oven, the surface dries rapidly and the starches on the exterior gelatinize and then dextrinize, forming a hard shell. This quick setting of the outer layer also contributes to oven spring, allowing the loaf to expand before the crust becomes too rigid. If the oven temperature is too low, the crust develops slowly, resulting in a thinner, often softer crust.
Baking at a consistently low temperature (e.g., 350°F or 175°C) will result in a loaf that browns slowly and loses moisture gradually, leading to a softer, less substantial crust. While this might be desirable for sandwich bread, it's not ideal for rustic loaves where a hearty, crispy crust is desired. The temperature gradient from the hot oven exterior to the cooler dough interior drives moisture outwards, contributing to crust dryness and thickness. Mastering oven temperature is fundamental to controlling the texture of your vegan bread crust.
Impact of Steam on Vegan Bread Crust
Steam in the oven during the initial phase of baking is vital for developing a thin, crispy, and beautifully colored crust, particularly in lean breads. When steam is present, it keeps the surface of the dough moist for longer. This delays the formation of the crust, allowing the loaf to achieve maximum oven spring before the outer layer hardens. Without sufficient steam, the crust forms too quickly, restricting expansion and potentially leading to cracks or a thick, dull crust.
Steam also facilitates the gelatinization of starches on the surface, contributing to a glossy finish and promoting the Maillard reaction and caramelization, which are responsible for the desirable golden-brown color and complex flavors of the crust. Methods for creating steam include baking in a preheated Dutch oven (which traps the dough's own steam), placing a tray of hot water in the bottom of the oven, or spraying the oven walls with water. Maintaining a steamy environment for the first 10-20 minutes of baking is key to achieving an ideal vegan bread crust.
Role of Sugar in Crust Color and Texture
Sugar, even in small amounts, plays a significant role in the color and texture of the vegan bread crust. Sugars in the dough participate in two key chemical reactions during baking: the Maillard reaction and caramelization. The Maillard reaction occurs between amino acids and reducing sugars at temperatures above 300°F (150°C), creating hundreds of flavor compounds and contributing to the brown color of the crust. Caramelization occurs when sugars are heated to high temperatures (above 320°F or 160°C), resulting in sweet, nutty flavors and a deep brown color.
Lean doughs with little or no added sugar rely on the sugars produced by enzymatic breakdown of starch during fermentation for these reactions. Adding a small amount of sugar (like 1-2% of flour weight) or using malt extract provides more readily available sugars, leading to faster and more pronounced browning and a sweeter crust flavor. This is why enriched vegan breads, which often contain more sugar and fat, tend to develop a softer, more evenly browned crust compared to lean, unsweetened loaves. Adjusting sugar levels can help you achieve the desired crust color and flavor profile.
Achieving the Perfect Vegan Bread Crust
Adjusting Baking Temperature for Desired Crust Texture
To control the texture of your vegan bread crust, manipulate the oven temperature during baking. For a thick, crispy crust typical of rustic loaves, preheat your oven to a high temperature, such as 450-500°F (230-260°C), and bake at this temperature for the first 15-20 minutes, ideally with steam. This initial high heat promotes maximum oven spring and sets a strong crust. After this period, reduce the temperature to 400-425°F (200-220°C) to allow the interior to finish baking without the crust becoming too dark or hard.
If you prefer a softer crust, bake at a consistent, moderate temperature, such as 375-400°F (190-200°C), for the entire baking time. Avoiding steam or reducing the amount of steam used will also result in a softer crust. For sandwich loaves baked in pans, the pan sides help create a softer crust on the sides and bottom. Experimenting with initial high heat vs. consistent moderate heat will help you achieve the crust texture you desire for different types of vegan bread.
Creating Steam During Baking for a Crispy Crust
To get that desirable thin, crispy, and glossy crust on your vegan bread, especially lean loaves, creating steam in your oven during the first part of the bake is essential. One of the most effective methods for home bakers is using a Dutch oven. Preheat the Dutch oven with the lid on at a high temperature (like 450-475°F or 230-245°C).
Carefully transfer the shaped dough into the hot Dutch oven, score it, place the lid back on, and bake for 15-20 minutes. The trapped moisture from the dough creates a steamy environment. After this initial period, remove the lid and continue baking at a slightly lower temperature to allow the crust to brown and crisp up.
If you don't have a Dutch oven, you can place a cast iron skillet or oven-safe tray on the bottom rack of your oven while it preheats. Just before loading your bread, carefully pour about a cup of hot water into the hot pan to create a burst of steam (be cautious of the steam). Bake the bread on a stone or baking sheet on a rack above the steam pan.
Another method is to spray the oven walls with water using a clean spray bottle every few minutes during the first 10-15 minutes of baking. Using steam correctly is a game-changer for achieving a professional-looking and delicious vegan bread crust.
Using Natural Sugars for Enhanced Crust Color
While lean vegan bread crusts can develop beautiful color from the Maillard reaction involving starches, adding a small amount of natural sugar can enhance browning and flavor. Ingredients like maple syrup, agave nectar, or a small amount of granulated sugar (1-2% of flour weight) added to the dough provide readily available sugars for caramelization and the Maillard reaction. This results in a crust that browns more easily and develops a richer, slightly sweeter flavor profile.
For a pronounced effect, you can also brush the surface of the shaped dough with a liquid glaze before baking. Options include a simple water wash (for a thin, crisp crust), a plant-based milk wash (for softer browning), or a wash made from dissolved sugar or maple syrup in water (for darker, sweeter browning). Experimenting with these techniques, alongside controlling temperature and steam, will help you achieve the perfect vegan bread crust that is both visually appealing and delicious, overcoming common vegan bread baking problems related to crust texture.
Conclusion: Achieving Vegan Bread Baking Success
Troubleshooting common vegan bread baking problems is a journey of understanding ingredients, mastering techniques, and paying attention to the subtle cues your dough provides. We've explored issues from dense loaves and poor rise to gummy textures, dry crumbs, bland flavor, and crust imperfections. Each problem has specific causes rooted in the unique properties of vegan ingredients and the science of baking. By addressing factors like gluten development, yeast activity, hydration levels, baking temperatures, and the role of salt and sugar, you can significantly improve your results.
Remember that successful vegan bread baking often requires patience and practice. Don't be discouraged by a less-than-perfect loaf; view it as a learning opportunity. By applying the solutions discussed – from properly kneading and proofing to using a thermometer for doneness and incorporating flavorful ingredients – you can overcome these challenges. With BakeWithEase, you have the tools and knowledge to turn potential vegan bread baking problems into consistent successes, creating delicious, beautiful, and satisfying loaves that everyone can enjoy. Happy baking!
Frequently Asked Questions
What are some common problems encountered when baking vegan bread?
Common problems include dense bread, poor rising, and lack of flavor. These issues often stem from the absence of eggs and dairy, which contribute to gluten development and richness.
How can I improve the rise of my vegan bread?
To improve rising, ensure your yeast is active and use vital wheat gluten to enhance the dough's structure. Also, consider adding an acid, like lemon juice, to help activate the baking soda.
Why is my vegan bread so dense?
Dense vegan bread is often caused by insufficient gluten development or over-kneading. Using high-protein flour and avoiding over-kneading are crucial for a lighter texture.
What are good substitutes for eggs and dairy in vegan bread baking?
For eggs, consider using applesauce, flaxseed meal mixed with water, or mashed banana. For dairy, plant-based milks like almond or soy milk work well, as does vegan butter.
How can I add more flavor to my vegan bread?
Boost flavor by adding seeds, herbs, or spices to the dough. You can also incorporate roasted vegetables or use a tangzhong method for increased moisture and flavor.
Final Reflection: The Joy (and Triumph) of Vegan Bread Baking
The quest for the perfect vegan loaf is a journey shared by many, a testament to the growing popularity of plant-based diets and the enduring appeal of homemade bread. It's more than just avoiding animal products; it's about mastering a craft, understanding the nuances of gluten-free flours, and embracing the challenges that lead to incredible rewards. This journey, as explored in this article, highlights the common pitfalls and offers solutions to help you achieve that golden, crusty perfection.
The impact of vegan baking extends beyond the kitchen table. It represents a shift in culinary consciousness, a conscious effort to create delicious food while aligning with ethical and environmental values. It's about finding creative solutions, experimenting with ingredients, and ultimately, connecting with the process of food creation on a deeper level. The best bread is made with love, and that love transcends ingredients.
This sentiment, while not explicitly vegan, perfectly captures the heart of what makes vegan baking so rewarding – the dedication and passion poured into each loaf.
Now, it's your turn. Take the knowledge gained from this article, experiment with different flours and techniques, and don't be discouraged by initial setbacks. Each failed loaf brings you closer to understanding the intricacies of vegan bread baking, ultimately leading to the satisfaction of creating something truly delicious and meaningful. Embrace the challenge, celebrate the successes, and most importantly, enjoy the journey of transforming simple ingredients into a masterpiece.
Unlock Your Vegan Baking Potential!
Thanks for taking the time to explore the world of vegan bread baking with us! We hope you gained valuable insights and newfound confidence in tackling those tricky doughs. Ready to put your new knowledge into practice?
- Bake your dream loaf: Try out one of the recipes mentioned in the article, or experiment with your own vegan bread creation, using the troubleshooting tips as your guide. This is your chance to truly master the art!
- Share your success (or challenges!): Post a picture of your vegan bread masterpiece (or even your baking mishaps!) on social media and tag us – we'd love to see your results.
- Join our baking community: Head over to our forum to connect with fellow vegan bakers, share tips, and ask questions. We are a supportive group eager to help you succeed!
What unique ingredient will you try in your next vegan bread adventure? Let's discuss in the comments below!