
Shaping Rye Bread Like a Pro: Simple Techniques

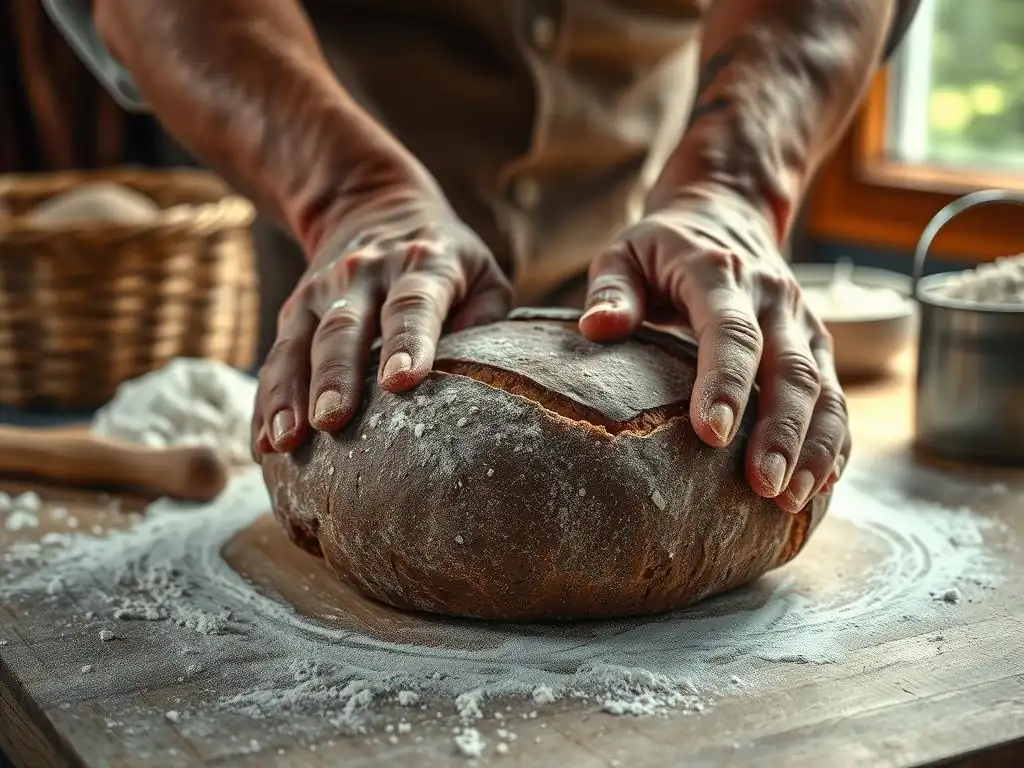
Welcome to BakeWithEase, your companion on the baking journey! Ever wondered how to achieve that perfect, rustic look for your rye bread? This guide dives deep into essential rye bread shaping techniques, revealing secrets that will elevate your loaves from ordinary to extraordinary. Discover the simple steps that unlock professional-looking results and prepare to impress with your newfound skills. Ready to master the art of the rye? Let's begin!
- Mastering Rye Bread Shaping: Techniques for a Perfect Loaf
- Introduction to Rye Bread Shaping: Achieving Artisan Quality
- Essential Rye Bread Shaping Techniques: Step-by-Step Instructions
- Advanced Rye Bread Shaping Tips
- Rye Bread Shaping Tools
- Troubleshooting Rye Bread Shaping Issues
- Perfecting Rye Bread Shaping: Consistent Practice
- Conclusion: Enjoy Your Artisan Rye Bread
-
Frequently Asked Questions
- What makes shaping rye bread different from shaping other types of bread?
- What are some essential tools for shaping rye bread?
- What is the "envelope fold" technique, and why is it useful for rye bread?
- How do I prevent rye bread dough from sticking to my hands and the work surface?
- What are some common mistakes to avoid when shaping rye bread?
- Final Reflection: The Art and Soul of Rye Bread Shaping
- Unleash Your Inner Baker: Master Rye Bread Shaping!
Mastering Rye Bread Shaping: Techniques for a Perfect Loaf
Introduction to Rye Bread Shaping: Achieving Artisan Quality
Baking rye bread offers a unique and rewarding experience. Unlike wheat dough, rye dough behaves differently due to its lower gluten content and higher proportion of soluble fiber. This means mastering rye bread shaping techniques requires a slightly different approach, focusing on gentle handling and leveraging the dough's natural stickiness and tendency to spread. Learning effective shaping methods is key to achieving not only a beautiful loaf with artisan appeal but also a consistent texture and structure in your final bake.
This guide will walk you through essential rye bread shaping techniques, from classic shapes like the boule and batard to the distinctive torpedo. We'll explore why proper shaping is crucial for rye dough, delve into the properties that make it unique, and provide step-by-step instructions to help you confidently shape your next rye loaf. Whether you're working with a 100% rye recipe or a blend, understanding these techniques will elevate your baking skills and ensure delicious results every time.
Why Master Rye Bread Shaping? Aesthetics and Texture
Mastering rye bread shaping techniques is about more than just making your loaf look pretty; it directly impacts the final texture and structure of the bread. A well-shaped loaf has proper surface tension, which helps it hold its form during proofing and baking, preventing it from spreading too much. This tension also contributes to a better oven spring, resulting in a taller, more appealing loaf.
Furthermore, effective shaping helps distribute gases produced during fermentation evenly throughout the dough. This leads to a more consistent crumb structure. Without adequate shaping, a rye loaf can become dense or unevenly textured, especially in higher-hydration recipes. Learning these rye bread shaping techniques ensures your efforts in mixing and fermenting pay off with a loaf that is as delightful to eat as it is to behold.
Understanding Rye Dough: Hydration and Gluten Development
Rye dough typically has a higher hydration level compared to many wheat doughs. This is because rye flour absorbs more water. A common hydration for a medium rye loaf might range from 75% to 85% of the flour weight, sometimes even higher for very wet doughs. This high hydration contributes to the dough's stickiness and slackness, making traditional vigorous kneading and shaping techniques challenging.
Crucially, rye flour contains less active gluten-forming proteins than wheat flour. The pentosans present in rye also interfere with gluten development. This means rye dough doesn't develop the same strong, elastic network as wheat dough. Instead, it relies more on the structure provided by these pentosans and the careful handling during shaping. Understanding this fundamental difference is vital for successful rye bread shaping techniques; you must work with the dough's characteristics, not against them, using gentle folds and minimal handling to build just enough structure without tearing the delicate network.
Essential Rye Bread Shaping Techniques: Step-by-Step Instructions
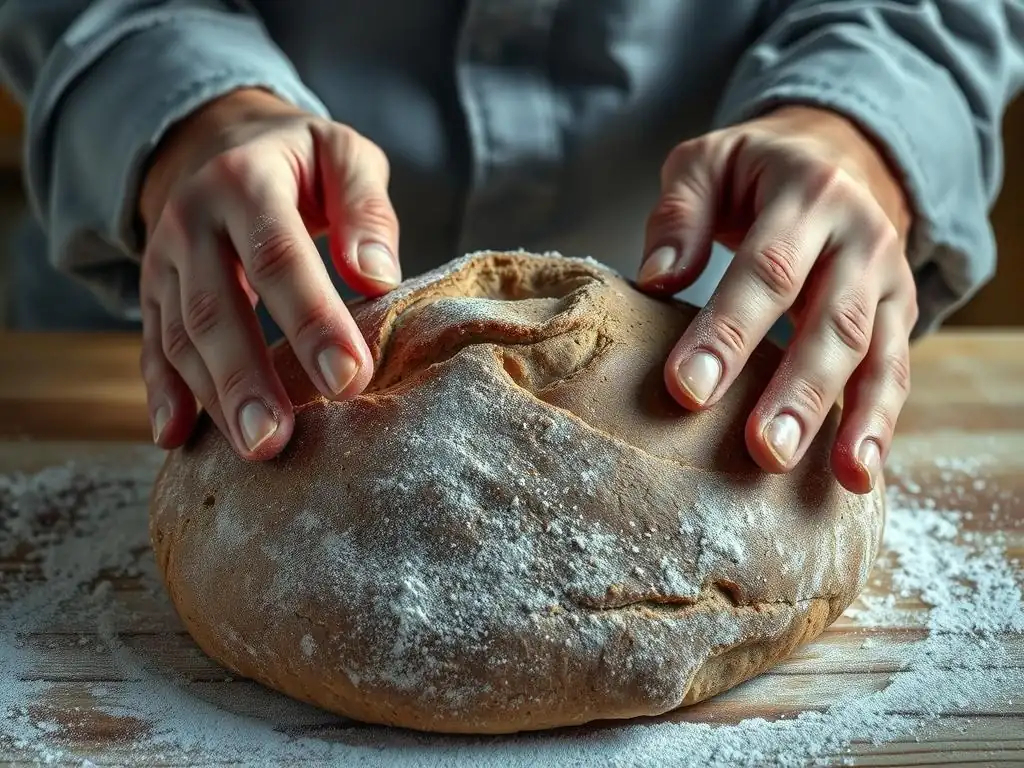
Technique 1: The Round Loaf (Boule) - A Classic Shape
The round loaf, or boule, is perhaps the most classic bread shape and a great starting point for mastering rye bread shaping techniques. Its symmetrical form allows for even heat distribution during baking.
Preparing Your Dough for Round Shaping: Pre-Shaping and Resting
Before attempting the final round shape, it's beneficial to pre-shape your rye dough. After its bulk fermentation, gently turn the dough out onto a lightly floured or wet surface (depending on stickiness). Instead of aggressive degassing, gently coax the dough into a rough round or square shape. This initial shaping step helps to gather the dough and build a little preliminary tension.
Once pre-shaped, allow the dough to rest for 15-30 minutes, covered. This resting period, often called the "bench rest," allows the gluten (or the rye's structural network) to relax. This relaxation is crucial because it makes the dough more pliable and easier to handle for the final shaping without tearing or becoming resistant. For a typical 80% hydration rye dough weighing 700g, a 20-minute rest at room temperature (around 72°F) is usually sufficient before the final shaping begins.
Shaping the Round: Creating Surface Tension
The goal of shaping a round rye loaf is to create a smooth, taut surface on top, which is achieved by building tension on the underside. Gently flatten the rested dough into a rough circle. Imagine the center of the dough as the anchor point. Fold the edges of the circle towards the center, working your way around, much like gathering the corners of a handkerchief.
After folding the edges to the center, flip the dough over so the seam is underneath. Then, using slightly cupped hands, gently rotate the dough on your work surface while applying a slight downward pressure and sweeping motion, pulling the dough towards you slightly as you rotate. This action "tucks" the dough underneath itself and creates surface tension on the top. Repeat this motion a few times until the top surface feels smooth and taut. Avoid overworking the dough; a few gentle passes are often enough for rye.
Proofing Your Round Rye Loaf: In a Banneton or Bowl
Proofing a round rye loaf is best done in a proofing basket (banneton) or a bowl lined with a floured cloth. Dust the basket or cloth generously with flour, preferably rice flour, which is less likely to stick to wet rye dough. Place the shaped dough into the basket seam-side up. This way, when you invert it onto your baking surface, the taut, smooth side will be facing up.
The proofing time for rye bread depends heavily on the recipe, room temperature, and dough hydration, but it's generally shorter than for wheat bread due to the different fermentation characteristics. It could range from 45 minutes to 2 hours at room temperature (around 70-75°F), or longer in the refrigerator for a cold proof (8-12 hours). The dough should increase noticeably in size, feel puffy, but still hold its shape when gently poked. Over-proofing is a common issue with rye, leading to a collapsed loaf, so monitoring is key.
Technique 2: Shaping the Batard - An Elegant Elongated Loaf
The batard is an oval or elongated loaf, offering a different aesthetic and crust-to-crumb ratio than a boule. Mastering this shape expands your repertoire of rye bread shaping techniques.
Preparing Your Dough for Batard Shaping: Degassing and Stretching
For a batard, after bulk fermentation, gently turn the dough out onto your surface. Unlike a boule where minimal degassing is needed, shaping a batard often benefits from a gentle initial flattening to encourage an even shape. Carefully press down on the dough to release some of the larger gas bubbles, forming a rough rectangle or oval. Avoid being too rough; you don't want to eliminate all the gas, just create a more uniform starting point.
Allow the dough to rest for a shorter period than a boule, perhaps 10-15 minutes, covered. This brief rest helps the dough relax just enough to be stretched and folded into the batard shape without resistance. For a 600g mixed rye loaf with 70% hydration, a 12-minute rest is typically sufficient before proceeding to the final shaping steps.
The Batard Shaping Process: Folding and Sealing
Shaping a batard involves a series of folds to create tension and the elongated form. After the short rest, gently stretch the dough into a rectangle. Fold the top third of the rectangle down towards the center, pressing gently to seal. Then, fold the bottom third up and over the folded top section, again pressing gently to seal the seam running across the dough.
Next, orient the dough so the seam is horizontal. Fold one end (e.g., the left end) towards the center, covering about a third of the length, and press to seal. Then, fold the other end (the right end) over the first folded section, sealing the final seam along the bottom length of the loaf. Gently roll the loaf back and forth a couple of times to even out the shape and create a smooth top surface, ensuring the final seam is well sealed underneath. This sequence of folds builds significant tension, crucial for the batard shape.
Proofing Your Batard Rye Loaf: Using a Couche or Banneton
Proofing a batard requires support to maintain its elongated shape. The traditional method uses a baker's couche, which is a piece of linen cloth. Dust the couche generously with rice flour, then create folds in the cloth to cradle each shaped loaf. Place the shaped batard, seam-side up, into the trough created by a fold in the couche.
Alternatively, you can use an oval-shaped proofing basket (banneton), preparing it with flour as you would for a boule. The proofing time will be similar to that of a round loaf, depending on temperature and hydration, typically 1-2 hours at room temperature. Monitor the dough carefully; it should be puffy but still hold its form. Using a couche allows you to proof multiple loaves side-by-side while keeping them from spreading into each other.
Technique 3: The Torpedo - A Distinctive Shape
The torpedo shape, also known as ficelle if very thin, is an even more elongated loaf than the batard, tapering at the ends. This technique requires confident handling but results in a loaf with excellent crust development.
Mastering Basic Shaping: Pre-Shape and Rest
As with other shapes, starting with a pre-shape helps manage the dough. After bulk fermentation, gently turn the dough out and form it into a rough log or cylinder. This initial shaping helps align the dough's structure in the direction you want the final loaf to take. Avoid forcing the shape; just gently encourage it.
Allow the pre-shaped dough to rest, covered, for about 15-20 minutes. This rest is vital for the dough to relax after handling, making it much easier to stretch and taper into the long torpedo shape without tearing. For a typical 500g loaf of 100% rye sourdough, a 15-minute rest is usually sufficient before the final shaping begins.
Creating the Torpedo Shape: Tapering the Ends
After the rest, gently stretch the dough into a longer, thinner log than your pre-shape. Begin to taper the ends by gently rolling them between your palms and the work surface, applying slightly more pressure towards the ends than the middle. Think of rolling out a thick rope and making the ends thinner.
Continue stretching and tapering until the loaf is the desired length and thickness, with distinctly pointed ends. This requires a gentle touch to avoid degassing the loaf completely. The final shape should resemble a cylinder with pointed ends, perhaps 12-16 inches long for a standard loaf size. Maintain a consistent thickness throughout the body of the loaf, with a gradual taper towards the tips.
Proofing and Baking Your Torpedo: Maintaining the Shape
Proofing a torpedo loaf is similar to a batard, requiring support to maintain its length. A baker's couche is ideal for this shape. Generously flour a section of the couche and carefully transfer the shaped torpedo onto it. Create a firm fold in the couche to support one side of the loaf, preventing it from spreading sideways. If proofing multiple torpedoes, create folds between each loaf.
Proofing time will be similar to other rye shapes, typically 1-2 hours at room temperature or longer in the fridge. Due to its thinner profile, a torpedo might proof slightly faster than a very thick boule. When ready to bake, gently transfer the loaf from the couche to your baking surface using a peel or baking sheet, being careful not to distort the shape. The distinct torpedo shape highlights the effectiveness of careful rye bread shaping techniques.
Advanced Rye Bread Shaping Tips
Working with High-Hydration Dough: Utilizing a Bench Scraper
High-hydration rye dough (often 80% or more) can be very sticky and challenging to handle directly with hands. A bench scraper becomes an invaluable tool for these wet doughs. Use a metal bench scraper to help lift, fold, and manipulate the dough on your work surface.
Instead of trying to shape the dough entirely by hand, use the bench scraper to gather the dough, perform folds by lifting and tucking, and even help create tension by pushing the dough against the surface. For example, when shaping a high-hydration boule, you can use the scraper to gently push and rotate the dough on the surface, helping to tuck the edges underneath and build tension without the dough sticking excessively to your hands. Keeping the scraper blade clean and occasionally wetting it slightly can also help prevent sticking.
Achieving Optimal Dough Strength: Kneading Techniques
While rye doesn't develop gluten like wheat, it still benefits from techniques that build some structure. For rye dough, this typically involves gentle folding rather than aggressive kneading. During the initial mixing or bulk fermentation, perform a series of "stretch and folds" or "coil folds."
For stretch and folds, wet your hands, grab one side of the dough, gently stretch it up, and fold it over the rest of the dough. Repeat this from 3-4 sides of the bowl or container. For coil folds, lift the dough from the center with wet hands, letting the ends fall underneath, then gently lower it back into the container.
Perform these folds every 30-60 minutes during the first few hours of bulk fermentation (e.g., 3 sets of folds over 2 hours). This gentle handling encourages the rye's structure to align and strengthen without tearing it, leading to better results from your rye bread shaping techniques.
Preventing Splits During Baking: Scoring and Steam
Proper scoring (slashing the top of the loaf) and using steam in the oven are crucial for preventing uncontrolled splits in your rye bread during baking and achieving a professional look. Scoring provides weak points where the dough can expand predictably in the hot oven. Without scoring, the loaf might burst open unevenly.
Use a sharp blade (like a lame or razor blade) to make clean, quick cuts just before placing the loaf in the oven. For a boule, a simple cross or a few parallel slashes work well. For batards or torpedoes, one or more lengthwise slashes are common. The depth and pattern of the score influence how the crust opens.
Simultaneously, steam in the oven keeps the crust soft initially, allowing the loaf to expand fully before the crust hardens. This can be achieved by baking in a Dutch oven or by placing a tray of hot water on the bottom rack of your oven. These steps, combined with solid rye bread shaping techniques, ensure your loaf rises beautifully.
Rye Bread Shaping Tools
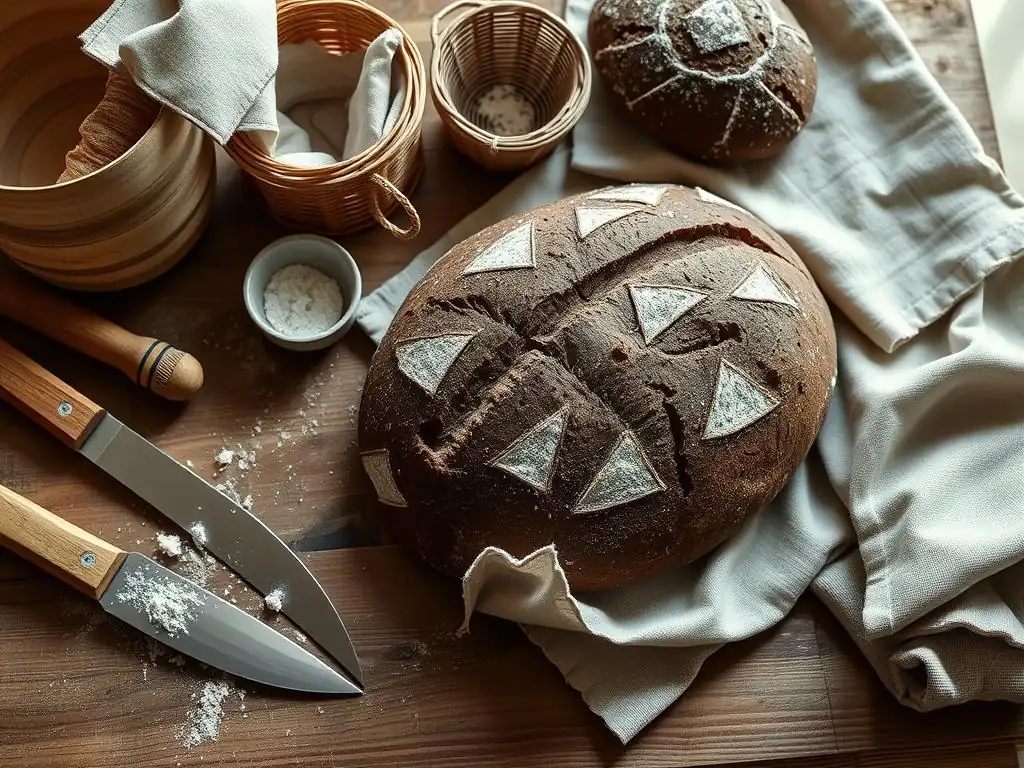
Having the right tools can significantly improve your rye bread shaping experience.
Essential Tools: Bench Scraper, Proofing Basket, Spray Bottle
- Bench Scraper: As mentioned, indispensable for handling sticky rye dough. A metal one is sturdy and easy to clean.
- Proofing Basket (Banneton): Provides support for the dough during proofing and imparts a nice pattern to the crust. Available in round and oval shapes.
- Spray Bottle with Water: Useful for wetting your hands or the bench scraper when working with very sticky dough, reducing the need for excessive flour.
Optional Tools: Lame, Linen Cloth
- Lame: A specialized tool with a razor blade for scoring dough. Provides cleaner cuts than a knife, leading to better oven spring and appearance.
- Linen Cloth (Couche): Ideal for proofing multiple loaves or elongated shapes like batards and torpedoes, preventing them from sticking together and providing firm support.
Troubleshooting Rye Bread Shaping Issues
Even with careful practice, you might encounter challenges when mastering rye bread shaping techniques. Here are some common issues and how to address them.
Dough Sticking: Using Rice Flour
Rye dough is notoriously sticky. If your dough is sticking excessively to your hands, the work surface, or your proofing basket, switch from wheat flour to rice flour for dusting. Rice flour does not contain gluten and is less likely to be absorbed by the wet rye dough, acting as a more effective non-stick barrier. Keep your hands slightly wet or use a bench scraper when possible to minimize direct contact. For proofing baskets, generously dusting with rice flour is often the best defense against sticking.
Uneven Shape: Adjusting Hand Pressure
If your shaped loaf is lopsided or uneven, it's likely due to inconsistent pressure during the shaping process. When shaping a round, ensure you are applying even pressure as you rotate the dough. For a batard or torpedo, make sure your folds are centered and the pressure applied when sealing seams is uniform along the length. Practice helps build muscle memory for applying consistent pressure. Sometimes, unevenness can also stem from uneven gas distribution during bulk fermentation, so ensure your gentle folds during that stage are effective.
Collapsed Loaf: Controlling Proofing Time
A loaf that collapses before or during baking is often a sign of over-proofing. Rye dough ferments relatively quickly, and its weaker structure is less forgiving than wheat when over-proofed. The dough expands too much, and the fragile network cannot support its weight.
To avoid this, pay close attention to the dough's feel and appearance during proofing. It should be puffy but still have some resistance. A gentle poke test can help: if the indentation springs back very slowly or not at all, it might be over-proofed. If it springs back quickly, it needs more time. Err on the side of slightly under-proofing rye bread if unsure. Adjust proofing time based on ambient temperature; warmer conditions require shorter proofing.
Perfecting Rye Bread Shaping: Consistent Practice
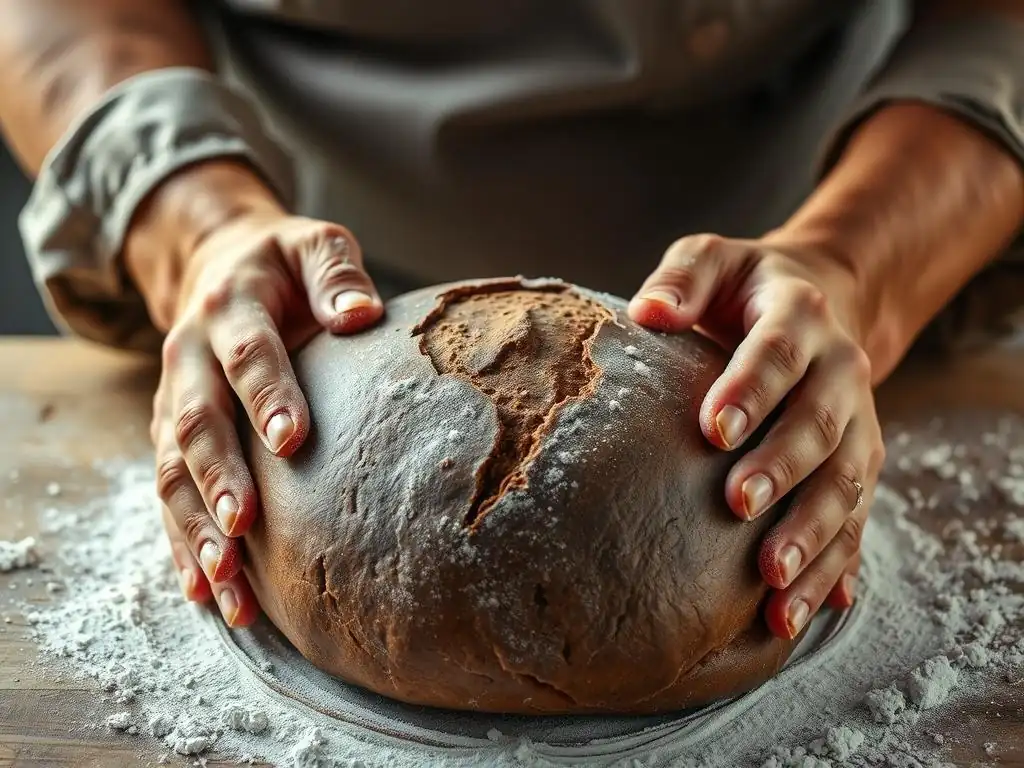
Like any skill, mastering rye bread shaping techniques requires consistent practice. Don't be discouraged if your first few loaves aren't perfect. Each bake is a learning opportunity.
Start with Simple Shapes: Focusing on Fundamentals
Begin with the basic round shape (boule). This allows you to focus on developing surface tension and handling sticky dough without the added complexity of forming an elongated loaf. Master the feel of the dough and how it responds to your touch in this simpler form before moving on to batards or torpedoes. Understanding how to create a taut surface and seal seams effectively in a round is fundamental to all rye bread shaping techniques.
Experiment with Techniques: Discovering Personal Preferences
Once you're comfortable with the basics, experiment with different rye bread shaping techniques and variations. Try different hydration levels in your dough and see how it affects shaping. Explore alternative folding methods during the shaping process. You might find that slightly wetting your hands works better for you than using flour, or that a specific folding sequence yields the best results for your particular recipe. Baking is personal, and finding what works best in your kitchen is part of the fun.
Document Progress: Refining the Process
Keep notes on your baking sessions. Record the recipe used, dough hydration, bulk fermentation time and temperature, proofing time and temperature, and notes on the shaping process (how the dough felt, any issues encountered). Also, note the results after baking (shape, oven spring, crumb structure). Reviewing these notes helps you identify what worked well and what didn't, allowing you to refine your rye bread shaping techniques over time and consistently improve your results.
Conclusion: Enjoy Your Artisan Rye Bread
Mastering rye bread shaping techniques is a rewarding journey that transforms simple ingredients into beautiful, delicious loaves. By understanding the unique properties of rye dough, practicing fundamental shaping methods like the boule, batard, and torpedo, and utilizing helpful tools and tips, you can consistently achieve artisan-quality rye bread right in your own kitchen.
There's immense satisfaction in slicing into a perfectly shaped loaf of rye bread you've baked yourself. Share your creations with friends and family, or simply enjoy them yourself. The journey of perfecting your rye bread shaping techniques is ongoing, and each loaf baked is a step towards becoming a more confident and skilled baker. Keep practicing, keep learning, and most importantly, keep baking and enjoying the wonderful world of rye bread.
Frequently Asked Questions
What makes shaping rye bread different from shaping other types of bread?
Rye dough typically has less gluten than wheat dough, making it stickier and more challenging to handle. Therefore, gentle techniques and a floured surface are crucial for success.
What are some essential tools for shaping rye bread?
A bench scraper is incredibly helpful for handling sticky dough. Additionally, having ample flour for dusting and a proofing basket (banneton) are essential for shaping and supporting the loaf.
What is the "envelope fold" technique, and why is it useful for rye bread?
The envelope fold involves folding the dough over itself multiple times, creating tension and structure. This technique is beneficial for rye bread because it helps strengthen the dough and improve its rise, despite the lower gluten content.
How do I prevent rye bread dough from sticking to my hands and the work surface?
The key is to use plenty of flour on your hands, the bench scraper, and the work surface. Don't be afraid to re-flour as needed during the shaping process.
What are some common mistakes to avoid when shaping rye bread?
Overworking the dough can make it tough. Avoid excessive kneading or handling. Also, ensure you have adequate surface flour to prevent sticking and tearing.
Final Reflection: The Art and Soul of Rye Bread Shaping
The seemingly simple act of shaping rye bread is far more than just a culinary technique; it's a direct connection to the history and artistry of baking. Mastering these techniques, as explored throughout this article, isn't merely about achieving a visually appealing loaf; it's about understanding the very essence of the dough and unlocking its potential for flavor and texture. The rise in popularity of sourdough and artisan breads highlights a growing appreciation for this hands-on process, a desire to connect with food on a deeper level.
The journey of shaping rye bread, from the initial gentle folds to the final flourish, is a meditative process. It's a testament to the patience and care required to create something truly special. Bread making is a metaphor for life; you put in the work, you nurture it, and you reap the rewards.
This quote, though not specifically about rye bread, perfectly captures the essence of the dedication involved. The subtle differences in shaping techniques, as discussed, directly impact the final crumb structure and overall eating experience, reflecting the profound impact of seemingly small actions.
Now, consider your own baking journey. What have you learned from exploring these techniques? Don't be afraid to experiment! Each loaf is an opportunity to refine your skills, to understand the nuances of your dough, and to create a bread that reflects your unique touch. Embrace the imperfections, learn from each bake, and most importantly, enjoy the process of transforming simple ingredients into something truly nourishing and beautiful. The art of shaping rye bread awaits your exploration.
Unleash Your Inner Baker: Master Rye Bread Shaping!
Thanks for joining us on this rye bread journey! You've now unlocked the secrets to shaping perfect loaves – and we know you're ready to put your new skills to the test. Let's get those ovens fired up!
- Bake your own masterpiece today! Use your newfound knowledge to craft a beautiful, flavourful rye loaf. Experiment with different shaping techniques and share your results!
- Share your baking journey! Post pictures of your creations on social media using #BakeWithEaseRye. Let's inspire each other!
- Consider trying a new rye flour blend next time – you might discover your new favorite!
What unique twist will you add to your next rye bread creation?