
Why Your NoKnead Bread Isn't Working (and How to Fix It)


Welcome to BakeWithEase, your haven for baking brilliance! Are you struggling to unlock the magic of no-knead bread? Many bakers face frustrating hurdles. This article dives deep into common no-knead bread problems, revealing the secrets to achieving that perfectly crusty loaf you've always dreamed of. Discover the troubleshooting tips and tricks that will transform your baking experience and ensure success, every single time. Let's unravel the mysteries and get baking!
- Why Your Sourdough Starter Isn't Working (and How to Fix It)
- Understanding Sourdough Starters: A BakeWithEase.com Guide
- Common Sourdough Starter Problems and Their Solutions
- Problem 1: Starter Not Rising
- Problem 2: Starter Smells Unpleasant
- Problem 3: Mold Growth on Starter
- Problem 4: Starter Consistency Too Thin or Too Thick
- Problem 5: Slow or Inconsistent Fermentation
- Problem 6: Lack of Flavor in Sourdough Bread
- Problem 7: Starter Not Doubling in Size
- Mastering Sourdough Starter: Preventing Future Problems
- Conclusion: Enjoying Perfect Sourdough Bread Every Time.
-
Frequently Asked Questions
- Why is my no-knead bread so dense and gummy?
- My no-knead bread didn't rise at all. What went wrong?
- My no-knead bread is flat and spread out instead of having a nice shape. Why?
- The crust on my no-knead bread is too hard. How can I prevent this?
- My no-knead bread stuck to the bottom of the Dutch oven. What should I do differently next time?
- Final Reflection: The Humble Loaf and the Triumph of Patience
- Unlock Your Perfect No-Knead Loaf!
Why Your Sourdough Starter Isn't Working (and How to Fix It)
Understanding Sourdough Starters: A BakeWithEase.com Guide
A sourdough starter is a living culture, a mix of flour and water that ferments over time, capturing wild yeasts and beneficial bacteria from the environment. Think of it as the heart of your sourdough bread, providing both the leavening power and the signature tangy flavor. Building and maintaining a healthy starter is fundamental to successful sourdough baking.
It requires patience, observation, and regular feeding, typically with a ratio of starter, flour, and water (like 1:1:1 by weight or volume). This consistent care ensures the microbial community thrives, producing the gases needed for your bread to rise and the organic acids that develop its complex taste.
Understanding the lifecycle of your sourdough starter is key to troubleshooting sourdough starter problems. After feeding, the starter becomes active, bubbling and increasing significantly in volume as the yeasts consume sugars and produce carbon dioxide. This activity peaks, and then the starter begins to fall as the food source is depleted.
The time this cycle takes varies greatly depending on factors like temperature, hydration level, and the type of flour used. Recognizing the peak activity is crucial, as this is often the best time to use the starter for baking or feeding it again. Observing these changes daily helps you identify if your starter is behaving as expected or if it's experiencing common sourdough starter issues.
Common Sourdough Starter Problems and Their Solutions
Embarking on the sourdough journey is exciting, but it can sometimes feel like navigating a maze when your starter doesn't behave as anticipated. Many bakers encounter similar sourdough starter problems, from a lack of activity to unwelcome smells or textures. The good news is that most of these issues are solvable with simple adjustments and consistent care. Don't get discouraged if your starter isn't a bubbly powerhouse overnight; building a robust culture takes time and attention.
Addressing sourdough starter issues often involves a bit of detective work. Is it the temperature? The water quality? The feeding schedule? By systematically examining the common culprits behind sourdough starter problems, you can pinpoint what's going wrong and implement the right fix. This section will walk you through the most frequent challenges and provide practical, step-by-step solutions to get your starter back on track and ready to bake delicious bread.
Troubleshooting Common Sourdough Starter Issues: A Quick Overview
Many sourdough starter problems stem from imbalances in feeding, temperature fluctuations, or the quality of ingredients. A common issue is slow activity, often due to feeding too infrequently or keeping the starter too cold. Unpleasant smells can indicate an imbalance in bacteria or yeast populations, while mold is a sign of contamination, usually from airborne spores or unclean equipment. Consistency problems (too thin or thick) are typically hydration issues, easily fixed by adjusting the water or flour ratio during feeding.
Effective troubleshooting sourdough starter issues involves observing your starter closely. Note its behavior after feeding: How quickly does it rise? Does it double? What does it smell like at different stages? Keeping a log can be incredibly helpful. Simple adjustments like increasing feeding frequency, moving the starter to a warmer spot, or changing the flour type can often resolve many sourdough starter problems. Remember, consistency in your routine is one of the best defenses against future issues.
Problem 1: Starter Not Rising
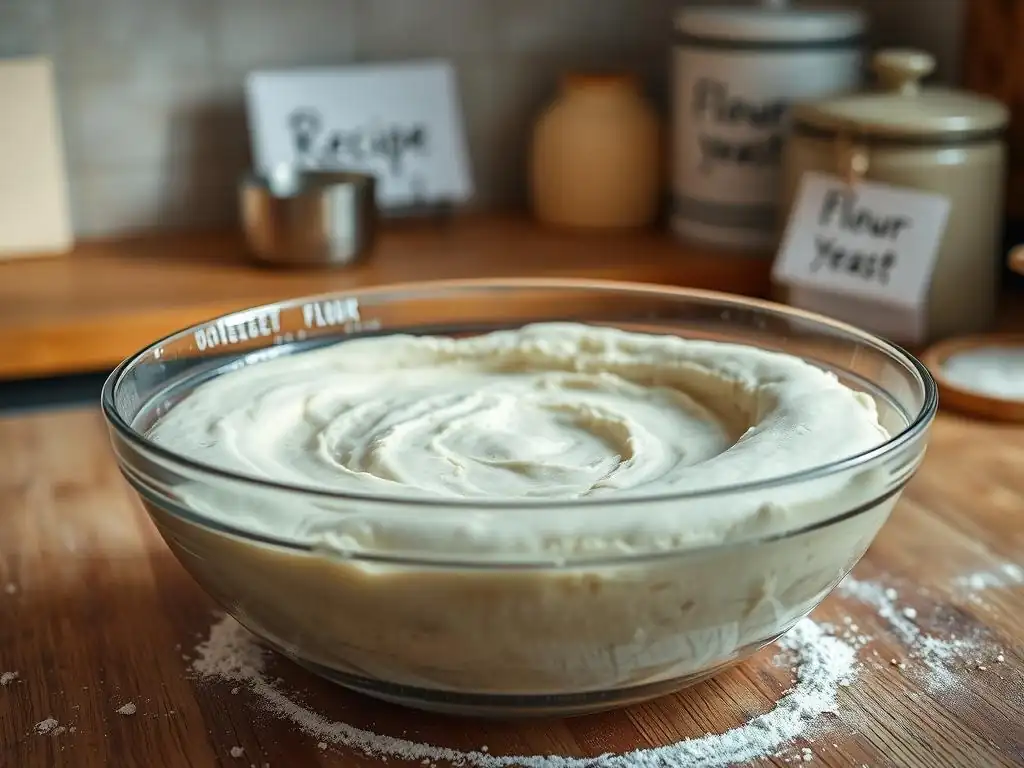
Identifying a Healthy and Active Sourdough Starter
A healthy and active sourdough starter is one that consistently rises predictably after being fed. Within a few hours (the exact time varies depending on temperature and feeding ratio, but often 4-8 hours at room temperature, around 70-75°F or 21-24°C), it should show significant growth, ideally doubling or even tripling in volume before slowly deflating. You'll see numerous bubbles throughout the starter, not just on the surface, indicating active fermentation. The texture should be light and airy at its peak.
Beyond visual cues, a healthy starter will have a pleasant, slightly tangy aroma, reminiscent of yogurt or ripe fruit, especially when active. When you stir it, you should feel a spongy resistance from the trapped gas. A simple "float test" can also indicate readiness for baking: drop a small spoonful into a glass of water; if it floats, it's typically active enough to leaven bread. These signs confirm your starter's microbial community is thriving and capable of tackling sourdough starter problems like poor rise.
Fixing a Starter That Isn't Rising: Adjusting Feeding Ratios
One of the most common reasons for a starter not rising is an incorrect feeding ratio, leading to the microorganisms running out of food too quickly or being too diluted. A standard feeding ratio is 1:1:1 by weight (e.g., 50g starter, 50g flour, 50g water). If your starter is sluggish, try increasing the food supply by using a higher ratio, such as 1:2:2 (50g starter, 100g flour, 100g water) or even 1:3:3. This provides more "food" for the yeast and bacteria, allowing them to multiply and produce gas for a longer period and potentially reach a stronger peak.
When adjusting ratios to fix sourdough starter problems like poor rise, be consistent for several days. If you switch to a 1:2:2 ratio, maintain that for at least 3-5 consecutive feedings, discarding the excess starter each time before feeding. This gives the microbial population time to adjust and strengthen. Ensure you are measuring accurately, preferably by weight using a kitchen scale, as volume measurements can be less precise, especially for flour. Patience is key; it might take a few days of consistent, higher-ratio feeding to see a significant improvement in rise.
Temperature's Role: Ensuring Optimal Fermentation Conditions
Temperature is a critical factor influencing the activity level of your sourdough starter. Wild yeasts and bacteria are most active within specific temperature ranges. For most starters, a temperature between 70°F and 80°F (21°C to 27°C) is ideal for robust fermentation and rising. Temperatures much cooler than this will significantly slow down activity, leading to a sluggish or seemingly inactive starter. Conversely, excessively high temperatures can stress the microorganisms or favor less desirable microbes.
If your starter isn't rising well, consider where you are storing it. Is your kitchen cool? Try finding a warmer spot, perhaps on top of the refrigerator, near a warm appliance (but not too close! ), or in an oven with just the light on (check the temperature first!). Using a proofing box or even a cooler with a warm water bottle can also help maintain a consistent, optimal temperature. Ensuring the right environment is crucial for overcoming many sourdough starter problems related to activity.
The Impact of Flour Type on Starter Activity
The type of flour you use to feed your starter can significantly impact its activity and rise. Different flours contain varying levels of nutrients (sugars and proteins) that the yeast and bacteria feed on. Unbleached all-purpose flour or bread flour are common choices and usually provide a good balance of nutrients for steady activity. However, switching to or incorporating whole grain flours like whole wheat or rye can often give a sluggish starter a significant boost.
Whole grain flours contain more nutrients and enzymes than refined flours, providing a richer food source for the microorganisms. Feeding your starter exclusively or partially with rye or whole wheat flour for a few days can sometimes "wake up" a lazy starter experiencing sourdough starter problems. For example, try feeding with a mix of 50% white flour and 50% whole wheat or rye. Once your starter becomes more active, you can gradually transition back to your preferred flour type if desired, but many bakers maintain a percentage of whole grain flour for flavor and activity.
Problem 2: Starter Smells Unpleasant
Achieving the Right Sourdough Aroma: Avoiding Unpleasant Smells
A healthy sourdough starter should have a pleasant, tangy, slightly yeasty, or even fruity aroma, especially when it's active and recently fed. This desirable smell comes from the balanced activity of lactic acid bacteria and yeasts. As the starter ferments, it produces various volatile compounds, many of which contribute to the characteristic sourdough scent. Avoiding unpleasant smells is key to knowing your starter is healthy and free from undesirable microbial growth.
Unpleasant smells, such as strong acetone (nail polish remover), cheesy, or even rotten odors, are often signs of imbalance or distress in the starter. Acetone smell typically indicates the starter is hungry and producing alcohol as a byproduct of fermentation before converting it to acetone; it's usually harmless but means the starter needs more frequent feeding. Cheesy or rotten smells can signal the presence of unwanted bacteria. Regular feeding and maintaining a clean environment are the best ways to cultivate the right aroma and prevent these sourdough starter problems.
Understanding the Different Smells of Sourdough Fermentation
The smell of your sourdough starter evolves throughout its feeding cycle. Immediately after feeding, it might smell mostly of flour and water. As fermentation begins, a mild, sweet aroma might develop. At its peak activity, the tangy, slightly alcoholic, or fruity notes become more prominent. As the starter consumes its food and becomes hungry, it might develop a stronger acidic smell or even the distinct acetone/nail polish remover scent (often referred to as hooch smell when accompanied by a liquid layer).
Recognizing these stages and their associated smells helps you understand your starter's health and feeding needs. While a faint hooch smell or a mild acetone note when the starter is past its peak is usually normal and simply indicates hunger, persistently strong, foul, or cheesy odors are red flags. These are the types of sourdough starter problems related to smell that require immediate attention to prevent spoilage or contamination.
Identifying and Addressing Harmful Bacteria in Your Starter
While a sourdough starter is primarily composed of beneficial lactic acid bacteria and yeasts, it can occasionally harbor unwanted microorganisms, especially if not properly maintained. Strong, off-putting smells like cheesy, putrid, or rancid odors can be indicators of harmful bacteria like Bacillus species. These bacteria can produce toxins and are not part of a healthy sourdough culture.
If your starter develops a truly foul smell that is not the typical hungry hooch or overly acidic aroma, it's best to be cautious. While some minor off-smells can be corrected with rigorous feeding (often called "rehabilitating" the starter), persistently bad odors, especially cheesy or rotten ones, might mean the starter is compromised. In such cases, discarding the starter and starting fresh with clean equipment and ingredients is often the safest approach to avoid these types of sourdough starter problems.
Correcting an Off-Smelling Starter: Refreshing and Cleaning
For an off-smelling starter that isn't overtly moldy or rotten (like a strong hooch or overly acidic smell), the best course of action is usually rigorous feeding and cleaning. Discard a large portion of the starter, leaving only a small amount (e.g., 10-20g). Feed this small amount with fresh flour and water, perhaps using a slightly higher ratio like 1:2:2 or 1:3:3 to give the desirable microbes a better chance to outcompete any unwanted ones.
Repeat this rigorous feeding schedule frequently, perhaps every 12 hours, for a couple of days. Ensure you are using clean jars and utensils each time; washing with hot, soapy water is sufficient, but make sure to rinse thoroughly to remove all soap residue. This process effectively dilutes the population of problematic microorganisms and provides ample food for the beneficial ones to multiply and re-establish dominance, correcting sourdough starter problems related to smell.
Problem 3: Mold Growth on Starter
Preventing Mold: Maintaining a Clean and Healthy Starter
Mold is one of the most concerning sourdough starter problems, as it can render the starter unsafe to use. Mold spores are ubiquitous in the environment, and they thrive in moist, nutrient-rich conditions like a sourdough starter, especially if the starter is inactive or has an imbalance in its microbial population. The best defense against mold is prevention through cleanliness and maintaining a vigorous, healthy starter.
Always use clean jars and utensils when feeding or handling your starter. Wash the jar thoroughly between feedings, or at least every few feedings, to remove any dried starter residue where mold could potentially start. Keep the rim and sides of the jar clean. Store your starter covered, but allow some airflow (a loose lid or cloth cover secured with a band) to prevent condensation buildup, which mold loves. A healthy, active starter with a proper pH level is naturally more resistant to mold growth than a sluggish one.
Identifying Different Types of Mold on Sourdough Starter
Mold on sourdough starter can appear in various colors, including fuzzy green, blue, black, white, or even pink/orange spots. Any visible fuzzy or colored growth on the surface or sides of your starter is likely mold. Don't confuse mold with hooch, the dark liquid that can accumulate on top of a hungry starter, which is typically brown or gray and not fuzzy. Also, sometimes a new starter can develop a dry, crusty layer on top; this isn't mold but dried starter, which can be removed.
If you see any fuzzy growth, regardless of color, it is mold. Even a tiny spot is a problem because the mold has hyphae (root-like threads) that extend throughout the starter, even if you can't see them. Unlike mold on hard cheese, which can sometimes be cut away, mold on a liquid or semi-liquid culture like a sourdough starter is indicative of widespread contamination. Addressing sourdough starter problems like mold requires careful identification.
Discarding vs. Saving a Moldy Starter: A Safety Guide
When it comes to mold on your sourdough starter, safety is paramount. As a general rule, if you see any sign of mold – fuzzy spots of any color – it is highly recommended to discard the entire starter. While some sources might suggest trying to scrape off mold from a very stiff starter or hooch, the consensus among many experienced bakers and food safety experts is that the risk isn't worth it. Mold can produce mycotoxins that are not visible and cannot be removed by scraping or baking.
Do not attempt to feed or "rehabilitate" a moldy starter. The mold spores and their hyphae are likely distributed throughout the culture. Discard the contaminated starter responsibly, thoroughly clean the jar and any utensils that came into contact with it using hot, soapy water, and then start a new starter from scratch. While it's frustrating to discard your starter, it's the safest way to avoid incorporating potentially harmful substances into your bread. This is one of the sourdough starter problems where caution is crucial.
Best Practices for Starter Storage to Prevent Mold
Proper storage is vital in preventing mold and other sourdough starter problems. If you bake frequently (daily or every few days), keeping your starter at room temperature and feeding it regularly (typically every 12 or 24 hours, depending on temperature and activity) is best. Ensure it's covered loosely to allow gases to escape but prevent contaminants from entering.
If you bake less frequently, storing your starter in the refrigerator is an excellent way to slow down its activity and reduce the risk of mold growth. In the fridge, the starter goes into a semi-dormant state and only needs feeding about once a week. Before using or feeding, let it come to room temperature and feed it a couple of times to reactivate it. Always ensure the storage container is clean before adding the starter. These practices significantly reduce the likelihood of encountering sourdough starter problems like mold.
Problem 4: Starter Consistency Too Thin or Too Thick

Achieving the Perfect Sourdough Starter Consistency
The consistency of your sourdough starter, also known as its hydration level, affects its activity and handling. While there's no single "perfect" consistency for all starters (some bakers prefer a very liquid starter, others very stiff), a common and easy-to-manage consistency is a 100% hydration starter, where the flour and water are added in equal weights (e.g., 50g flour, 50g water). This typically results in a thick, paste-like consistency similar to a thick batter or peanut butter.
This medium consistency is often recommended for beginner bakers as it's easy to mix, observe activity (bubbles are visible), and manage. It allows for a good balance of yeast and bacterial activity. Understanding and controlling your starter's hydration is key to troubleshooting sourdough starter problems related to texture and activity. Consistency impacts how quickly the starter ferments and how it behaves when you try to use it in a recipe.
Adjusting Hydration for Optimal Starter Activity
The hydration level influences the mobility of yeast and bacteria and the availability of water for enzymatic activity. A thinner (higher hydration) starter allows microbes to move and access food more easily, potentially leading to faster initial fermentation. However, it can also peak and become hungry more quickly. A thicker (lower hydration) starter ferments more slowly and can be more stable, but might appear less visibly active (fewer large bubbles).
Adjusting hydration is a simple way to influence your starter's behavior or fix sourdough starter problems with consistency. If you want a faster, more active starter, slightly increase the water percentage relative to the flour (e.g., feed with 110% hydration). If you prefer a slower, more stable starter, slightly decrease the water (e.g., feed with 90% hydration). Always measure by weight for accuracy when adjusting hydration.
Troubleshooting Thin Starter: Adding More Flour
If your sourdough starter is consistently too thin and watery, it means your hydration level is too high for your preference or potentially affecting its performance. This is one of the straightforward sourdough starter problems to fix. To thicken it, simply adjust your feeding ratio by adding proportionally more flour than water during the next few feedings.
For example, if you were feeding 1:1:1 (e.g., 50g starter, 50g flour, 50g water) and it's too thin, try feeding 50g starter with 60g flour and 50g water (a hydration of ~83%). Or, maintain equal weights but increase the amount of flour relative to the water you add (e.g., 50g starter, 75g flour, 50g water - a 67% hydration relative to the added flour). Continue this adjustment until you reach your desired consistency. Remember to mix thoroughly to ensure no dry pockets of flour remain.
Correcting Thick Starter: Adding More Water
Conversely, if your sourdough starter is too thick, stiff, or difficult to mix, your hydration level is likely too low. This can also sometimes slow down activity as the microbes have less mobility. To thin it out and correct this sourdough starter problem, you need to add proportionally more water than flour during feeding.
Using the 1:1:1 example again (50g starter, 50g flour, 50g water), if it's too thick, try feeding 50g starter with 50g flour and 60g water (a hydration of 120%). Or, maintain equal weights but increase the amount of water relative to the flour you add (e.g., 50g starter, 50g flour, 75g water - 150% hydration relative to the added flour). Mix well until smooth. Adjust gradually over a few feedings until you achieve the desired consistency.
Problem 5: Slow or Inconsistent Fermentation
Achieving Consistent Fermentation: Understanding Starter Activity
Consistent fermentation is key to predictable sourdough baking results. A starter with consistent activity will reliably rise and fall within a similar timeframe after each feeding under similar conditions. Understanding what "consistent" means for your starter is important. Does it typically peak in 6 hours at 75°F? Does it take 10 hours at 70°F? Knowing its usual behavior helps you identify when fermentation is slow or inconsistent, indicating sourdough starter problems.
Factors influencing consistency include the stability of your environment (temperature), the quality and consistency of your ingredients (flour and water), and the regularity of your feeding schedule. Sudden changes in any of these can lead to unpredictable activity. Aim for consistency in your routine as much as possible to encourage consistent fermentation from your starter.
Adjusting Feeding Schedules for Consistent Results
An inconsistent feeding schedule is a major contributor to slow or erratic fermentation. If you feed your starter at random times, or let it go too long between feedings, the microbial population experiences boom-and-bust cycles, leading to less stable activity. For a starter kept at room temperature, feeding every 24 hours is a common schedule that promotes consistency. If your kitchen is warmer, you might need to feed every 12 hours.
If you're experiencing sourdough starter problems with inconsistent activity, try implementing a strict feeding schedule for a week. Feed at the same time each day (or twice a day). This regular influx of fresh food helps maintain a stable, active population of yeast and bacteria, leading to more predictable fermentation cycles.
The Impact of Water Quality on Starter Fermentation
The quality of the water you use can also affect your starter's fermentation. Tap water often contains chlorine or chloramines, which are added to kill bacteria in the water supply. While usually not strong enough to instantly kill your starter, these chemicals can inhibit or slow down the activity of the beneficial microorganisms over time, contributing to slow or inconsistent fermentation.
If you suspect your tap water might be an issue causing sourdough starter problems, switch to using filtered or bottled water. Alternatively, you can fill a container with tap water and let it sit uncovered for 24 hours; this allows the chlorine to dissipate. If your water supply uses chloramines (which do not dissipate easily), filtered water is the better option. Using the same source of water consistently also helps maintain stable starter activity.
Maintaining a Consistent Temperature for Reliable Fermentation
As mentioned earlier, temperature is perhaps the most significant factor affecting fermentation speed. Fluctuations in temperature from day to day or even throughout the day can lead to slow or inconsistent fermentation. If your starter is in a spot that experiences drafts, is near an oven that's turned on intermittently, or is subject to wide room temperature swings, its activity will reflect those changes.
To achieve reliable fermentation and fix sourdough starter problems related to inconsistency, find a location with a stable temperature, ideally between 70-80°F (21-27°C). Use a thermometer to check the temperature of the starter itself or its environment. If your home temperature varies significantly, consider using a dedicated proofing box, an oven with the light on, or a warm spot like on top of the fridge to provide a more consistent climate for your starter.
Problem 6: Lack of Flavor in Sourdough Bread
Enhancing Sourdough Flavor: Tips for a Tangier Loaf
One of the most rewarding aspects of sourdough baking is the complex flavor profile, characterized by its distinct tang. This flavor is primarily developed by the lactic acid bacteria in your starter during fermentation. If your sourdough bread lacks that signature tang, it could be related to the activity and feeding of your starter, as well as your bread-making process.
To enhance flavor and address sourdough starter problems related to mild taste, consider promoting longer and cooler fermentation periods, both for your starter and your dough. Cooler temperatures (e.g., proofing dough in the refrigerator overnight) slow down yeast activity (responsible for rise) more than bacterial activity (responsible for acid/flavor development), allowing the bacteria more time to produce flavorful organic acids like lactic and acetic acid.
Using Different Flours for Flavor Development: Whole Wheat, Rye, Spelt
The type of flour used in your starter and your bread dough significantly impacts the final flavor of your sourdough. Different flours contribute different nutrients and enzymes that influence microbial activity and the production of flavor compounds. While white bread flour works well, incorporating whole grains can add depth and complexity.
Using a percentage of whole wheat or rye flour in your starter or dough is a fantastic way to boost flavor. These flours are richer in nutrients, which can encourage the production of more acetic acid, contributing a sharper tang. Experiment with feeding your starter with 20-50% whole wheat or rye flour, or include these flours in your bread dough recipe. For example, replacing 10-20% of the white flour in your dough with whole wheat or rye can dramatically enhance the flavor profile.
The Impact of Long Fermentation on Sourdough Flavor
The length of fermentation, both for your starter between feedings and for your bread dough during proofing, directly correlates with flavor development. Shorter, warmer fermentations tend to produce milder flavors, while longer, cooler fermentations allow more time for the bacteria to produce a wider range of flavorful acids and compounds.
If your bread is lacking flavor, consider extending the fermentation time. For your starter, letting it go a bit longer between feedings (without letting it get moldy or severely neglected) can increase acidity. For your dough, incorporating a long, cold proof in the refrigerator (12-48 hours) is one of the most effective ways to deepen the sourdough flavor. This slow, cool process allows the bacteria to work their magic, transforming a mild loaf into a tangy masterpiece.
Adjusting Acidity Levels for Desired Tang
The tang in sourdough comes primarily from lactic acid and acetic acid. Lactic acid provides a milder, yogurt-like tang, while acetic acid contributes a sharper, vinegar-like bite. You can influence the balance of these acids through temperature and hydration. Warmer temperatures (above 75°F/24°C) tend to favor lactic acid production, resulting in a milder tang. Cooler temperatures (below 70°F/21°C) and stiffer starters (lower hydration) tend to favor acetic acid production, leading to a more pronounced tang.
If your bread isn't tangy enough, try feeding your starter with slightly less water (e.g., 90% hydration instead of 100%) or fermenting your starter and dough at slightly cooler temperatures. Conversely, if your bread is too sour, use a higher hydration starter and ferment at slightly warmer temperatures. Experimenting with these variables helps you dial in the exact level of tang you prefer, addressing sourdough starter problems related to flavor.
Problem 7: Starter Not Doubling in Size
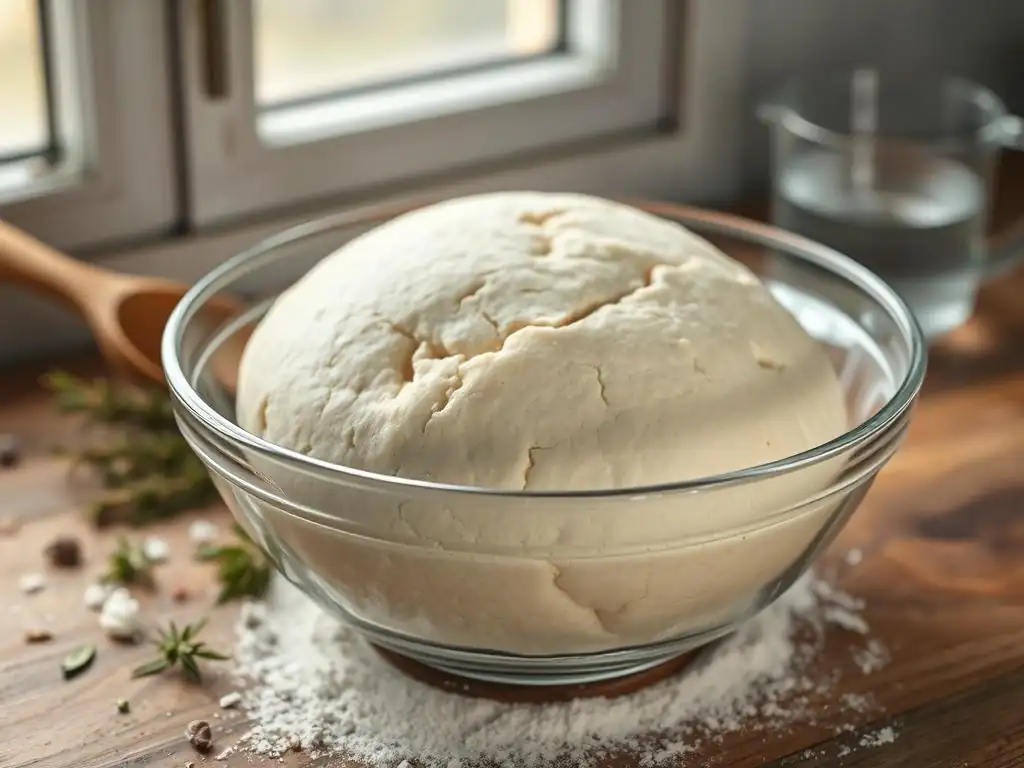
Troubleshooting a Starter That Isn't Doubling
A starter that isn't doubling in size after feeding is a common sign of low activity. While it might still be alive and producing some bubbles, it lacks the vigor required for robust leavening in bread. This is a specific instance of sourdough starter problems related to overall health and activity. Troubleshooting involves examining the same factors that cause a starter not to rise at all, but often points to a need for strengthening rather than resuscitation.
Common culprits include insufficient feeding (too little food for the microbes to reach peak population size), suboptimal temperature (too cold), or a starter that is still young and hasn't developed a strong microbial community yet. Inconsistent feeding or using poor quality ingredients can also hinder its ability to double reliably.
Understanding the Doubling Time of a Healthy Starter
A truly healthy and vigorous sourdough starter, when fed optimally and kept at a favorable temperature (e.g., 70-75°F or 21-24°C), should typically double or even triple in size within 4 to 8 hours after being fed. The exact time can vary based on the feeding ratio (higher ratios take longer to peak) and temperature (warmer is faster). Doubling within this timeframe is a good benchmark for readiness to bake and indicates a strong, active culture.
If your starter consistently takes much longer than 8-12 hours to double, or never quite reaches double its original volume, it indicates that its microbial population isn't robust enough. This doesn't mean it's dead, but it's likely too weak to reliably leaven a loaf of bread. Addressing this sourdough starter problem focuses on boosting its activity.
Adjusting Feeding Ratios to Improve Doubling Time
If your starter isn't doubling, increasing the feeding ratio is often the most effective fix. Feeding with a 1:1:1 ratio (equal parts starter, flour, water by weight) is standard, but for a sluggish starter, this might not provide enough food for the population to grow significantly. Switching to a higher ratio like 1:2:2 or 1:3:3 (starter:flour:water) gives the yeast and bacteria a much larger food source, allowing them to multiply more extensively and produce more gas, leading to a better rise and doubling.
Implement the higher feeding ratio consistently for several days (e.g., 3-5 feedings). Discard most of the starter before feeding, keeping only the small amount needed for the ratio (e.g., keep 20g starter, feed with 40g flour and 40g water for 1:2:2). This ensures you're always feeding the most active portion and providing ample new food. Combined with an optimal temperature, this should significantly improve your starter's doubling time and fix this type of sourdough starter problem.
Using a Starter Jar with Measurement Markings
While not a fix for the problem itself, using a jar with clear measurement markings can greatly help you identify if your starter is doubling and track its progress accurately. Many jars designed for sourdough starters have lines or volume markings on the side. Before feeding, note the level of your starter. After feeding, you can see exactly how much it has risen relative to its starting point.
Alternatively, you can use a rubber band or a piece of tape around a straight-sided jar to mark the initial level immediately after feeding. Check back periodically to see if it has reached double that height. This visual tracking is invaluable for monitoring activity, understanding your starter's typical doubling time, and quickly recognizing when you have sourdough starter problems related to insufficient rise.
Mastering Sourdough Starter: Preventing Future Problems
Tips for Consistent Sourdough Starter Success
Achieving consistent sourdough starter success boils down to understanding its needs and providing a stable environment. Regular feeding with good quality ingredients (unbleached flour, filtered water) is paramount. Maintain a consistent feeding schedule and ratio based on whether you store it at room temperature or in the fridge.
Temperature control is also critical; aim for a stable temperature range that promotes healthy microbial activity (70-80°F for room temperature storage). Keep your starter jar and tools clean to prevent contamination. Observe your starter daily – look for bubbles, note the rise and fall, and pay attention to the smell. These simple practices are the best defense against common sourdough starter problems.
Keeping a Starter Log: Tracking Your Results
A starter log is an incredibly useful tool for preventing and troubleshooting sourdough starter problems. In a small notebook or spreadsheet, record details each time you feed your starter. Note the date and time, the amount of starter you kept, the amount and type of flour and water you added (by weight), the temperature of the room or the starter itself, and your observations (smell, consistency, initial level).
Recording this information allows you to track your starter's behavior over time. You can see how different temperatures or flour types affect its activity, identify patterns, and quickly pinpoint what might have changed if you encounter sourdough starter problems. For example, if your starter suddenly becomes sluggish, checking your log might reveal that the room temperature dropped significantly or you accidentally used a different flour.
Understanding the Science of Sourdough Fermentation
A deeper understanding of the science behind sourdough fermentation can demystify many sourdough starter problems. It involves a symbiotic relationship between wild yeasts (primarily Saccharomyces cerevisiae, though others are present) and lactic acid bacteria (LAB, including genera like Lactobacillus and Pediococcus). Yeasts consume sugars in the flour and produce carbon dioxide (for rise) and ethanol. LAB consume sugars and produce lactic acid and acetic acid (for flavor and preservation), lowering the pH and creating the characteristic tangy environment.
The balance between yeast and bacteria is influenced by temperature, hydration, and feeding frequency. Warmer temperatures favor LAB growth, while cooler temperatures favor yeast. Higher hydration favors lactic acid, lower hydration favors acetic acid. Frequent feeding at peak activity maintains a vigorous population ready to leaven bread. Knowing these principles helps you anticipate how changes in your routine will affect your starter and provides insight into fixing sourdough starter problems effectively.
Conclusion: Enjoying Perfect Sourdough Bread Every Time.
Frequently Asked Questions
Why is my no-knead bread so dense and gummy?
This is often due to too much flour or not enough hydration. Make sure to measure your ingredients accurately and use the correct water ratio.
My no-knead bread didn't rise at all. What went wrong?
The most likely culprit is old or inactive yeast. Ensure your yeast is fresh and properly proofed before using it.
My no-knead bread is flat and spread out instead of having a nice shape. Why?
This could be from over-proofing the dough or using too much water. Reduce proofing time or slightly decrease the water content.
The crust on my no-knead bread is too hard. How can I prevent this?
Ensure your Dutch oven is properly preheated but not too hot. You can also try adding a small amount of water to the Dutch oven during the initial baking phase to create steam.
My no-knead bread stuck to the bottom of the Dutch oven. What should I do differently next time?
Always use plenty of parchment paper to line the Dutch oven. You can also lightly oil the bottom of the parchment paper for extra insurance.
Final Reflection: The Humble Loaf and the Triumph of Patience
The seemingly simple act of baking no-knead bread reveals a profound truth about the process of creation: even the most straightforward recipes require understanding, attention, and a willingness to adapt. The frustration of a collapsed loaf, a gummy interior, or a stubbornly dense crust is a common experience, highlighting the delicate balance between ingredients, technique, and environment. This isn't a failure of the recipe, but an opportunity for deeper learning.
The journey of perfecting no-knead bread mirrors life's own challenges; it's a testament to the power of perseverance and the beauty found in embracing imperfection. The subtle nuances of flour hydration, the precise timing of fermentation, the careful management of oven temperature – these are all lessons that extend far beyond the kitchen. As the renowned baker, Jim Lahey, once said, Baking is a science, but it's also an art. It's about understanding the ingredients and trusting your instincts.
This sentiment perfectly encapsulates the spirit of this exploration into the often-tricky world of no-knead baking.
Now, consider your own "no-knead" endeavors – those projects, goals, or relationships that seem deceptively simple at first glance. What adjustments do you need to make to achieve your desired outcome? Are you paying close enough attention to the details, or are you rushing the process? Take a moment to reflect on the lessons learned here, and apply them to your own life. Embrace the challenges, learn from the setbacks, and savor the sweet reward of success, however imperfectly achieved. The perfect loaf, like the perfect life, is a journey, not a destination.
Unlock Your Perfect No-Knead Loaf!
Thanks for taking the time to explore the secrets of perfect no-knead bread! We hope you gained valuable insights into troubleshooting those pesky baking issues. Now it's time to put your newfound knowledge into action.
- Bake your best loaf yet! Try the revised recipe and techniques from the article, paying close attention to the temperature and hydration levels. Note your results – what worked, what didn't?
- Share your baking journey! Tell us about your experiences (both successes and failures!) in the comments below. Let's learn from each other!
- Challenge a friend to bake alongside you. Friendly competition can make all the difference!
What surprising ingredient or technique will you experiment with next to elevate your no-knead baking?