
Troubleshooting Common Bread Roll Baking Mistakes

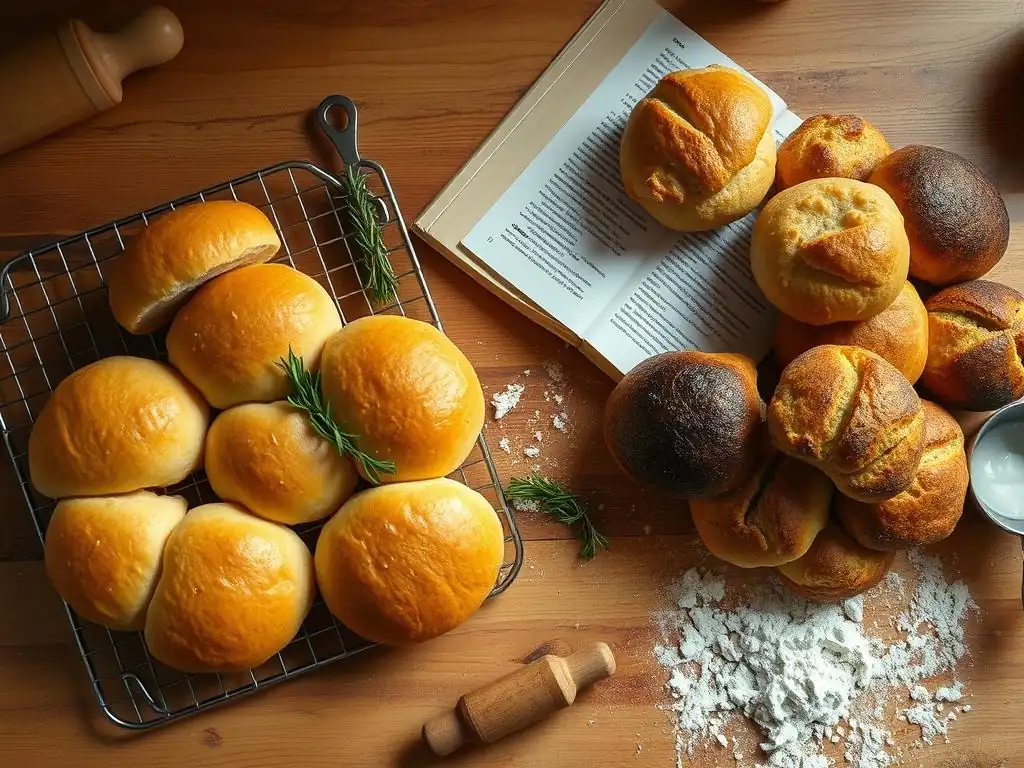
Welcome to BakeWithEase, your trusted guide to baking bliss! Ever wondered why your bread rolls aren't quite rising to the occasion? Delve into our article on Troubleshooting Common Bread Roll Baking Mistakes and discover easy bread roll baking fixes that will transform your doughy dreams into delicious realities. Uncover the secrets to perfectly golden, fluffy rolls and say goodbye to baking frustrations. Your journey to bread-baking mastery starts now!
- Troubleshooting Common Bread Roll Baking Mistakes: Easy Baking Fixes
- Introduction: Achieve Baking Success with Easy Bread Roll Fixes
- Problem 1: Bread Rolls Are Too Dense and Heavy
- Problem 2: Bread Rolls Are Flat and Lack Volume
- Problem 3: Bread Rolls Are Dry and Crumbly
- Problem 4: Bread Rolls Are Too Hard
- Problem 5: Unevenly Baked Bread Rolls
- Conclusion: Mastering Bread Roll Baking with These Easy Fixes
-
Frequently Asked Questions
- What are some common reasons why bread rolls might come out too dense?
- My bread rolls are flat and spread out during baking. What can I do to prevent this?
- Why are my bread rolls hard and crusty, even right after baking?
- My bread rolls taste bland. How can I improve their flavor?
- How can I ensure my bread rolls have a soft, golden brown crust?
- Final Reflection: The Joy of Perfectly Baked Bread Rolls
- Unleash Your Inner Baker: Perfect Bread Rolls Await!
Troubleshooting Common Bread Roll Baking Mistakes: Easy Baking Fixes
Introduction: Achieve Baking Success with Easy Bread Roll Fixes
BakeWithEase' Guide to Perfect Bread Rolls
Baking bread rolls from scratch is a rewarding experience, filling your home with an irresistible aroma and providing delicious, warm treats. However, even experienced bakers encounter challenges. Sometimes rolls turn out dense, flat, dry, or hard, which can be frustrating. But don't worry!
Most common issues have simple, easy bread roll baking fixes. This guide from BakeWithEase is designed to help you troubleshoot these problems step-by-step, turning baking frustrations into baking triumphs. We'll walk through identifying the root causes of these common bread roll woes and provide practical, easy baking solutions to ensure your next batch is light, fluffy, and perfectly baked.
Mastering the art of bread rolls involves understanding the science behind the ingredients and techniques. With a few key adjustments and a bit of patience, you can overcome common hurdles and achieve consistently great results. Whether you're dealing with a batch that didn't rise or rolls that are too hard, the easy bread roll baking fixes we'll discuss will empower you to bake with confidence and ease. Let's dive into identifying the problems and applying the simple fixes for bread rolls that everyone will love.
Problem 1: Bread Rolls Are Too Dense and Heavy
Identifying the Cause of Dense Bread Rolls
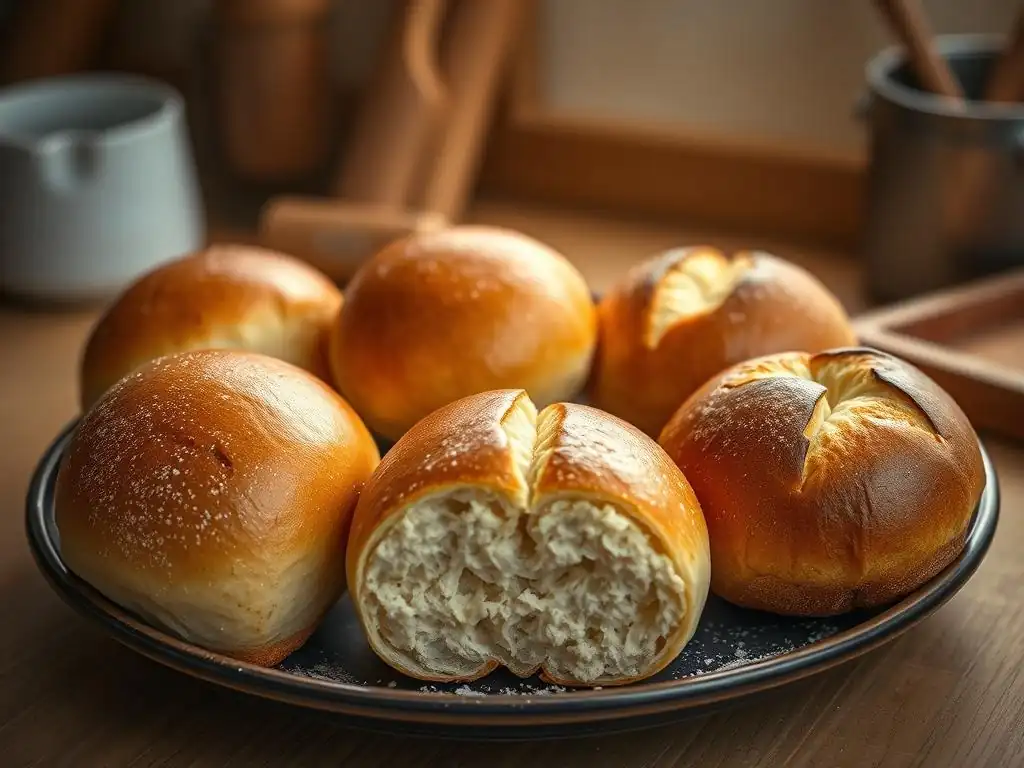
Dense and heavy bread rolls are a common disappointment, often lacking that desirable light, airy texture. This issue typically stems from problems related to ingredient measurement, yeast activity, or insufficient dough development. When ingredients, particularly flour, are not measured accurately, the hydration balance of the dough can be thrown off significantly.
Too much flour, for instance, creates a stiff dough that is difficult for yeast to lift. Similarly, if your yeast isn't active, it won't produce enough carbon dioxide gas to make the dough rise properly, resulting in a compact structure. Finally, inadequate kneading prevents the gluten network from forming, which is essential for trapping those gases and giving the roll structure and lightness.
Understanding the relationship between these factors is key to implementing effective easy bread roll baking fixes. A dough that feels heavy and stiff early on, or that doesn't double in size during the first rise, are strong indicators that you're on the path to dense rolls. Pay close attention to the recipe's hydration level and the dough's feel throughout the process. Addressing the cause early makes finding simple fixes for bread rolls much more straightforward.
Solution 1: Ensure Accurate Measurements for Light and Airy Rolls
Weighing Ingredients for Consistent Bread Roll Results
One of the most impactful easy bread roll baking fixes is simply measuring your ingredients accurately, especially flour. Volume measurements (using cups) can be highly inconsistent; a cup of flour can weigh anywhere from 120 to 150 grams depending on how packed it is. Using a kitchen scale to weigh ingredients provides much greater precision.
For example, if a recipe calls for 500g of flour, weighing it ensures you use that exact amount every time, regardless of how you scoop it. This consistency in measurement directly translates to consistency in your dough's hydration and texture, preventing the common issue of adding too much flour and ending up with a dense, heavy roll.
Investing in a simple digital scale is one of the best easy baking solutions for rolls and all your baking endeavors. It eliminates guesswork and significantly improves the reliability of your recipes. When measuring flour by volume without a scale, the recommended method is to gently spoon flour into the measuring cup and level it off with a straight edge, without packing it down.
However, weighing remains the gold standard for achieving light and airy bread rolls consistently. Aim for the weight specified in the recipe; if only volume is given, consider looking up the approximate weight conversion (e.g., 1 cup all-purpose flour is typically around 120-125 grams).
Solution 2: Activate Yeast Properly for Optimal Rise
Testing Yeast Activity Before Baking Bread Rolls
Yeast is a living organism, and its activity is crucial for a good rise. Using inactive or dead yeast is a guaranteed way to end up with dense, flat rolls. A simple and essential easy bread roll baking fix is to test your yeast before adding it to the rest of the ingredients, especially if you're unsure of its freshness or if it's been sitting in your pantry for a while.
To test active dry or instant yeast, mix it with a small amount of warm liquid (usually water or milk, around 105-115°F or 40-46°C) and a pinch of sugar from your recipe's ingredients. Within 5 to 10 minutes, the mixture should become foamy and bubbly, indicating the yeast is alive and active.
If your yeast mixture doesn't show significant bubbling or foaming after 10 minutes, your yeast is likely dead or inactive, and you should discard it and use fresh yeast. This simple test takes only a few minutes but can save you from the disappointment of a failed batch of bread rolls. It's a quick and effective easy baking solution for rolls that ensures your primary leavening agent is ready to perform its job, providing the necessary lift for a light and airy texture. Always store yeast properly (usually in the refrigerator or freezer) to maintain its viability.
Solution 3: Kneading Dough Adequately for Gluten Development
The Importance of Kneading Time for Soft Bread Rolls
Kneading is the process of working the dough to develop gluten, the protein network that gives bread its structure and elasticity. Insufficient kneading is a common reason for dense bread rolls, as a weak gluten network cannot trap the gases produced by the yeast effectively.
The dough needs to be kneaded until it is smooth, elastic, and passes the "windowpane test" – where a small piece of dough can be stretched thinly enough to see light through it without tearing. This usually takes about 8-12 minutes of kneading by hand or 6-8 minutes in a stand mixer with a dough hook, though times can vary based on dough hydration and flour type.
Properly developed gluten allows the dough to stretch and expand as it proofs and bakes, resulting in a light, airy crumb structure. If your dough feels shaggy, tears easily when stretched, or springs back immediately, it likely needs more kneading. Don't be afraid to knead for the recommended time or slightly longer until the dough feels right. This easy bread roll baking fix focusing on technique is vital for achieving soft, chewy, yet light bread rolls. Over-kneading is less common, but can also occur, resulting in a tough dough; however, under-kneading is the more frequent culprit for density.
Problem 2: Bread Rolls Are Flat and Lack Volume
Understanding Why Bread Rolls Don't Rise
Flat bread rolls that lack volume are often a symptom of issues during the proofing stage – the period where the shaped dough rises before baking. The primary reasons for a poor rise are related to temperature, proofing time, and ingredient freshness. Yeast activity is highly dependent on temperature; if the environment is too cold, the yeast works very slowly or not at all.
Conversely, if the dough is allowed to proof for too long or in too warm an environment, it can over-proof. Over-proofing causes the gluten structure to weaken and collapse, leading to flat rolls. Finally, as mentioned earlier, using inactive yeast or old flour can also hinder the rise, as the necessary gas production or structural support isn't there.
Identifying whether the issue is under-proofing (not enough rise) or over-proofing (rose too much and collapsed) is crucial for applying the correct easy bread roll baking fixes. Under-proofed rolls will be dense and may crack on the surface during baking, while over-proofed rolls often look spread out, sometimes wrinkly, and might even deflate slightly when moved. Paying attention to the dough's appearance and feel during proofing is key to troubleshooting bread rolls easily.
Solution 1: Provide a Warm Environment for Proofing Dough
Creating the Ideal Proofing Conditions for Bread Rolls
Yeast thrives in warm, slightly humid environments. A common cause of poor rise is proofing dough in a location that is too cool. For most bread doughs, an ideal proofing temperature is between 75-85°F (24-30°C).
Temperatures significantly below this range will drastically slow down yeast activity, potentially leading to under-proofed, dense rolls. If your kitchen is cool, you'll need to create a warmer spot. Easy baking solutions for rolls include placing the covered dough in a turned-off oven with the light on (the light generates enough warmth), or placing the bowl in a warm water bath (ensure water isn't too hot, below 115°F/46°C).
Another simple fix for bread rolls that aren't rising is to use a proofing box if you have one, or improvise one. You can place the dough in a covered bowl inside a microwave or oven (turned off!) alongside a cup of hot water.
The steam from the water creates a warm, humid environment perfect for yeast activity. Aim for the dough to roughly double in size during the first proof, which might take anywhere from 1 to 2 hours depending on the temperature. Providing the right environment is a fundamental easy bread roll baking fix that directly impacts volume.
Solution 2: Avoid Over-Proofing Dough
Recognizing Over-Proofed Dough in Bread Roll Baking
While under-proofing leads to dense rolls, over-proofing results in dough that rises initially but then weakens and collapses, yielding flat rolls with a poor crumb structure. Over-proofing happens when the yeast consumes all available sugars and produces too much gas, stretching the gluten network beyond its capacity to hold. The dough might look very large and airy, but it lacks the underlying strength. A key sign of over-proofed dough is the "poke test": gently press your finger into the dough about a half-inch deep.
If the indentation springs back completely and immediately, it's likely under-proofed. If the indentation remains and doesn't spring back at all, it's likely over-proofed. The ideal dough will have an indentation that slowly springs back only partially.
If you suspect your dough is over-proofed before shaping, you can sometimes gently punch it down and reshape it, allowing a shorter second proof. However, if the rolls are already shaped and visibly over-proofed (very puffy, perhaps starting to spread or look wrinkly), there's less you can do other than handle them very gently and bake them carefully.
To avoid over-proofing, pay attention to the visual cues (doubled in size, passes the poke test) rather than strictly relying on the clock, as proofing time varies with temperature and yeast activity. Reducing the proofing time slightly, especially in a warm kitchen, is a simple fix for bread rolls prone to over-proofing.
Solution 3: Use Fresh and Active Ingredients
The Role of Fresh Yeast in Bread Roll Volume
The volume of your bread rolls is directly tied to the amount of carbon dioxide gas the yeast produces. Using fresh, active yeast is non-negotiable for a good rise. Yeast that is past its expiration date or improperly stored (exposure to heat, moisture, or air can kill it) will not perform adequately, leading to minimal or no rise and consequently, flat rolls. As mentioned in the section on dense rolls, testing your yeast before baking is a crucial easy bread roll baking fix. If the yeast doesn't foam, it's dead.
Beyond yeast, the freshness of your flour also plays a subtle role. While not as critical as yeast for the initial rise, old flour can sometimes affect gluten development and dough structure. For optimal results and the best possible volume, use flour that hasn't been sitting in your pantry for years. Using fresh ingredients is one of the most fundamental easy baking solutions for rolls, ensuring that all components are working together efficiently to create light and airy volume. Always check expiration dates and store ingredients properly in airtight containers.
Problem 3: Bread Rolls Are Dry and Crumbly

Addressing Dryness in Homemade Bread Rolls
Dry and crumbly bread rolls are unpleasant to eat, lacking the desirable soft, moist crumb. This issue often stems from a dough that is too dry to begin with, over-baking, or improper storage after baking. If the initial dough doesn't have enough hydration (liquid), the baked rolls will naturally be dry. Over-baking in the oven evaporates too much moisture from the rolls, leading to a dry, sometimes hard, texture. Lastly, even perfectly baked rolls can become dry and stale quickly if not stored correctly, allowing their moisture to escape into the air.
Recognizing the signs of a dry dough early on (it feels stiff and difficult to work with) or noticing that your rolls brown too quickly in the oven can help you pinpoint the cause. Addressing dryness requires attention to the recipe's hydration, baking time, and post-baking care. These easy bread roll baking fixes focus on retaining moisture throughout the process.
Solution 1: Add Moisture to the Dough
Incorporating Fat for Moist Bread Rolls
One effective easy bread roll baking fix for dryness is to ensure your dough has adequate moisture content. This isn't just about the amount of water or milk; incorporating fats like butter, oil, or even egg yolks can significantly improve the moisture and tenderness of the final rolls. Fats coat the gluten strands, shortening them and preventing the development of a tough, dry crumb.
A recipe for soft, moist rolls often includes a generous amount of fat, perhaps 10-15% of the flour weight in butter or oil. For example, in a recipe using 500g of flour, adding 50-75g (roughly 4-6 tablespoons) of softened butter or oil will make a noticeable difference in moisture.
If you find a basic recipe consistently yields dry results, consider slightly increasing the liquid (water or milk) by a tablespoon or two, or adding a small amount of fat if the recipe doesn't include any. The dough should feel soft and slightly tacky, but not overly sticky, after kneading. Adjusting the dough's hydration is a key easy baking solution for rolls that ensures they start with enough moisture to stay tender after baking. Enriched doughs (those with fat, sugar, and eggs) are naturally softer and more moist than lean doughs.
Solution 2: Avoid Over-Baking Bread Rolls
Checking for Doneness to Prevent Dry Bread Rolls
Baking bread rolls for too long or at too high a temperature is a surefire way to dry them out. The goal is to bake them just until they are cooked through and have achieved a pleasant golden-brown color, but before all the internal moisture evaporates. Most standard-sized bread rolls bake relatively quickly, often in 15-25 minutes, depending on their size and the oven temperature (typically 375-400°F or 190-200°C).
To check for doneness, you can tap the bottom of a roll; it should sound hollow. A more precise method is to use an instant-read thermometer inserted into the center of a roll; it should register an internal temperature of around 190-200°F (88-93°C) for soft rolls.
If your rolls are browning too quickly on top before they are cooked through, you can loosely tent them with aluminum foil. This is a simple fix for bread rolls that prevents the crust from getting too dark and hard while allowing the inside to finish baking. Always rely on visual cues and internal temperature rather than just the timer, as oven temperatures can vary. Preventing over-baking is a critical easy bread roll baking fix for achieving a moist and tender crumb.
Solution 3: Proper Storage Techniques for Bread Rolls
Keeping Bread Rolls Fresh After Baking
Even perfectly baked, moist bread rolls can become dry and stale quickly if not stored properly. Exposure to air is the enemy of freshness for most baked goods. Once your rolls have cooled completely on a wire rack (cooling is important; storing warm rolls traps steam and can make them soggy), store them in an airtight container or a resealable plastic bag. For best results, especially if you won't eat them within a day or two, consider freezing them. Freezing is an excellent easy baking solution for rolls that preserves their freshness for much longer.
To freeze, place cooled rolls in a single layer on a baking sheet until frozen solid, then transfer them to a freezer-safe bag or container, squeezing out as much air as possible. They can be frozen for up to 2-3 months. To thaw, simply leave them at room temperature or gently reheat them in a warm oven. Proper storage is a simple fix for bread rolls that ensures your hard work in baking results in delicious, moist rolls for days, not just hours.
Problem 4: Bread Rolls Are Too Hard
Softening Hard Bread Rolls: Common Baking Problems
Hard bread rolls, especially those with a tough, thick crust, can be disappointing. While some rolls are intended to have a chewier texture (like bagels or some artisan rolls), most standard dinner rolls or sandwich buns should be soft. Hardness can result from several factors, including baking at too high a temperature, using a lean dough recipe (low in fat and sugar), or baking without sufficient moisture in the oven environment. These issues lead to excessive drying of the dough and the formation of a hard crust before the interior is fully cooked and soft.
Troubleshooting bread rolls that are too hard involves looking at the baking process and the dough composition. Are you using a recipe meant for soft rolls? Is your oven temperature accurate? Are the rolls exposed to dry heat for the entire baking time? Addressing these points provides easy bread roll baking fixes to achieve that coveted soft texture.
Solution 1: Adjust Oven Temperature
Preventing Over-Browning and Hardening of Bread Rolls
Baking rolls at too high a temperature can cause the crust to set and harden rapidly before the interior has a chance to fully bake and soften. While a hot oven is necessary for a good initial rise (oven spring), excessively high temperatures can be detrimental to softness. Most recipes for soft rolls call for temperatures between 375°F and 400°F (190-200°C). If your rolls consistently come out hard, try reducing your oven temperature by 25°F (around 15°C) and extending the baking time slightly. This allows the rolls to bake more gently, promoting a softer crust.
Using an oven thermometer to check the accuracy of your oven is also an important easy bread roll baking fix. Many home ovens are off by 25-50°F (15-30°C), which can significantly impact baking results. If your oven runs hot, calibrating it or simply adjusting the dial based on the thermometer reading will help prevent your rolls from becoming too hard due to excessive heat exposure. Slower, gentler baking often leads to a softer crust and crumb.
Solution 2: Use a Dough Enriched with Fat and Sugar
The Role of Fat and Sugar in Softening Bread Rolls
As mentioned regarding dryness, the composition of your dough plays a significant role in the softness of the final bread rolls. Lean doughs, made primarily of flour, water, yeast, and salt, typically result in chewier rolls with a firmer crust (think French bread or pizza dough). Enriched doughs, which include ingredients like butter, oil, eggs, milk, and sugar, produce softer, more tender rolls. Fat coats gluten strands, making the crumb more tender, while sugar attracts and holds moisture, contributing to softness and extending shelf life.
If your current recipe yields hard rolls and is a lean dough, consider trying a recipe specifically designed for soft rolls, which will likely include a higher proportion of fat and sugar. For example, a brioche or challah dough will inherently produce softer rolls than a simple lean roll recipe.
If you want to modify a lean recipe, you can experiment by adding a tablespoon or two of softened butter or oil, or a teaspoon or two of sugar per cup of flour. This simple fix for bread rolls can dramatically improve their softness and tenderness, making them much more enjoyable.
Solution 3: Steam Baking for a Softer Crust
Creating a Steamy Environment for Bread Roll Baking
Creating a steamy environment in your oven during the initial part of baking helps keep the surface of the dough moist, allowing it to expand fully before the crust sets. This results in a thinner, softer crust and a better rise. While professional ovens have steam injection, you can easily create steam in a home oven.
One common method is to place a heatproof pan (like a metal or cast iron pan) on the bottom rack of your oven while it preheats. Just before putting the rolls in, carefully pour a cup of hot water into the hot pan (be cautious of the steam!). Close the oven door quickly to trap the steam.
Alternatively, you can place a broiler pan with lava rocks or nuts and bolts on the bottom rack and pour hot water over them. Bake the rolls with the steam for the first 10-15 minutes, then remove the steam pan for the remainder of the baking time to allow the crust to brown. This easy bread roll baking fix using steam is particularly effective for rolls where a soft crust is desired, helping to prevent them from becoming hard and crusty too quickly.
Problem 5: Unevenly Baked Bread Rolls
Achieving Uniform Baking Results for Bread Rolls
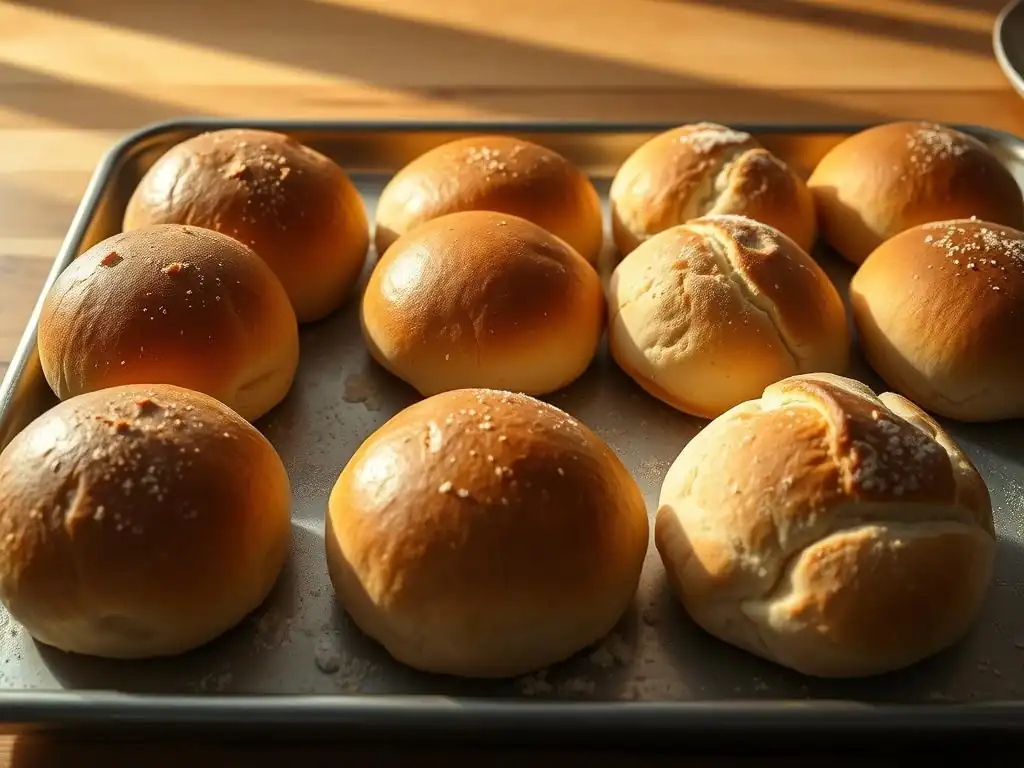
Unevenly baked bread rolls – some perfectly golden, others pale or overly dark – are a sign that heat distribution in your oven isn't uniform. This can lead to some rolls being undercooked and doughy while others are dry or burnt. Factors contributing to uneven baking include inconsistent roll size and shape, hot spots in the oven, and not rotating the baking sheet during baking. Achieving uniform baking results is key to ensuring every roll in the batch is just as delicious as the last.
Addressing uneven baking requires attention to consistency in dough handling and oven management. Simple adjustments can make a big difference in troubleshooting bread rolls that bake inconsistently. Implementing these easy baking solutions for rolls will help you get a batch of uniformly beautiful and perfectly baked rolls every time.
Solution 1: Ensure Consistent Size and Shape
The Importance of Uniformity in Bread Roll Baking
One of the most basic easy bread roll baking fixes for uneven baking is ensuring that all your rolls are the same size and shape. Rolls of different sizes will bake at different rates; smaller rolls will cook faster than larger ones. To achieve uniformity, use a kitchen scale to weigh your dough after the first rise and divide it into equal portions.
For example, if you want 12 rolls from a recipe that yields 720g of dough, divide it into 12 pieces of 60g each. Shaping the rolls consistently also helps them bake evenly. Try to make them roughly the same height and density.
Using a scale to portion your dough is one of the most effective easy baking solutions for rolls, guaranteeing that each roll has the same starting point for baking. Practicing shaping techniques will also help create uniform shapes. While perfect uniformity might take practice, aiming for pieces within a few grams of each other (e.g., all between 58g and 62g) and similar shapes will dramatically improve the consistency of your baked rolls.
Solution 2: Rotate Baking Sheets During Baking
Promoting Even Baking in Bread Rolls
Even the best ovens have hot spots. Areas closer to the back, sides, or heating element might be hotter than others. To compensate for this and promote even baking, rotate your baking sheet halfway through the baking time. For example, if the rolls are baking for 20 minutes, rotate the sheet 180 degrees after 10 minutes. This ensures that the rolls originally at the front are moved to the back and vice versa, exposing all rolls to the different temperature zones in the oven for an equal amount of time.
This simple fix for bread rolls requires no special equipment and is incredibly effective. It's a standard practice in professional baking for a reason. Just set a timer for half the estimated baking time as a reminder to rotate the pan. This easy bread roll baking fix helps achieve that beautiful, consistent golden-brown color across the entire batch.
Solution 3: Calibrate Your Oven Temperature
Ensuring Accurate Oven Temperature for Perfect Bread Rolls
As mentioned earlier, inaccurate oven temperatures are a common issue that can lead to various problems, including uneven baking. If your oven runs consistently hotter or cooler than the setting indicates, it will affect how your rolls bake. An oven that runs hot might cause the rolls closest to the heating element to brown too quickly, while those in cooler spots lag behind. An oven that runs cool might result in rolls that are under-baked in some areas. Using an inexpensive oven thermometer placed in the center of your oven will show you the true temperature.
If you find your oven is consistently off (e.g., reads 350°F when set to 375°F), you can adjust your oven setting accordingly (e.g., set it to 400°F to achieve 375°F). Some modern ovens can be calibrated. Checking and adjusting for accurate oven temperature is a foundational easy baking solution for rolls and all your baking, ensuring that the environment you're baking in matches the recipe's requirements, leading to more predictable and uniform results.
Conclusion: Mastering Bread Roll Baking with These Easy Fixes
BakeWithEase' Top Tips for Perfect Bread Rolls Every Time
Baking perfect bread rolls might seem daunting when things go wrong, but as you've seen, most common issues have straightforward, easy bread roll baking fixes. From dense and heavy to flat and dry, understanding the underlying causes – whether it's inaccurate measurements, inactive yeast, improper kneading, incorrect proofing, or oven issues – is the first step to success. By applying these simple fixes for bread rolls, you can troubleshoot problems as they arise and consistently achieve delicious results. Remember that baking is a skill that improves with practice, and every batch, even one with imperfections, is a learning opportunity.
Here are BakeWithEase' top tips to keep in mind for perfect bread rolls every time, summarizing the easy baking solutions for rolls we've discussed:
- Measure Accurately: Whenever possible, weigh your ingredients, especially flour, for consistent hydration.
- Check Your Yeast: Always test your yeast for activity before you start mixing your dough.
- Knead Enough: Develop that gluten network until the dough is smooth and elastic for a good structure.
- Proof Wisely: Provide a warm environment but avoid over-proofing by watching the dough, not just the clock.
- Add Moisture/Fat: Incorporate fat or ensure adequate hydration in your dough for tenderness and moisture.
- Don't Over-Bake: Use visual cues and internal temperature to know when your rolls are done.
- Store Properly: Cool rolls completely and store them in airtight containers to maintain freshness.
- Control Oven Heat: Use an oven thermometer and rotate your pan for even baking.
- Be Consistent: Portion your dough evenly for uniform baking results.
Mastering these easy bread roll baking fixes will significantly improve your baking success rate. Don't be discouraged by mistakes; embrace them as part of the learning process. With these simple adjustments and a little practice, you'll be baking light, fluffy, and delicious bread rolls with ease!
Frequently Asked Questions
What are some common reasons why bread rolls might come out too dense?
Dense bread rolls are often caused by insufficient gluten development or not enough rising time. Make sure to knead the dough adequately and allow it to proof in a warm place.
My bread rolls are flat and spread out during baking. What can I do to prevent this?
This typically indicates the dough is too wet or over-proofed. Reduce the liquid slightly in your recipe and ensure you don't let the dough rise for too long.
Why are my bread rolls hard and crusty, even right after baking?
Overbaking or baking at too high a temperature can lead to hard, crusty rolls. Try reducing the oven temperature by 25 degrees and checking for doneness earlier.
My bread rolls taste bland. How can I improve their flavor?
Flavor can be enhanced by using higher quality ingredients, adding herbs or spices to the dough, or incorporating a preferment like a poolish or biga for a more complex taste.
How can I ensure my bread rolls have a soft, golden brown crust?
Brushing the rolls with egg wash or milk before baking helps achieve a soft, golden crust. You can also try adding a pan of water to the oven to create steam.
Final Reflection: The Joy of Perfectly Baked Bread Rolls
The seemingly simple act of baking bread rolls holds a surprising depth of complexity, and mastering the craft requires understanding and addressing common pitfalls. A perfectly risen, golden-brown roll, bursting with warmth and flavor, is a testament to patience and precision, a reward well worth the effort. But even experienced bakers encounter challenges.
This article explored some of the most frequent frustrations faced by home bakers, from dough that's too sticky or too dry to rolls that are underbaked or over-browned. The journey of perfecting a bread roll recipe is a deeply personal one; each batch represents a learning experience, a chance to refine technique and understand the subtle interplay of ingredients and timing. The best bread is made with love, and a little bit of science.
- Unknown. This quote perfectly encapsulates the process; it's not just about following instructions, but about understanding the why behind each step. The more we understand, the more confident and successful we become.
Now, it's your turn. Don't be discouraged by a less-than-perfect batch. Embrace the imperfections, learn from your mistakes, and experiment with different techniques. The next time you knead dough, remember the lessons learned here, and approach the process with a renewed sense of confidence and curiosity. The reward? The pure, simple pleasure of biting into a warm, homemade bread roll, a testament to your own baking prowess.
Unleash Your Inner Baker: Perfect Bread Rolls Await!
Thanks for joining us on this bread roll baking adventure! We hope you gained valuable insights and newfound confidence in tackling those pesky baking challenges. Now it's time to put your knowledge into practice.
- Bake your perfect batch: Try out the tips and tricks we shared today – experiment with different flours, timings, and techniques to discover your ideal bread roll. This is your chance to master the art!
- Share your success (or even your stumbles!): We'd love to see your creations and hear about your baking journey. Post a picture on social media and tag us!
- Explore our other baking guides: Discover more delicious recipes and expert advice on BakeWithEase.com – we've got a whole world of baking inspiration waiting for you.
What's your next bread baking challenge, and how will you conquer it?