
Foolproof Savory Tart Crust

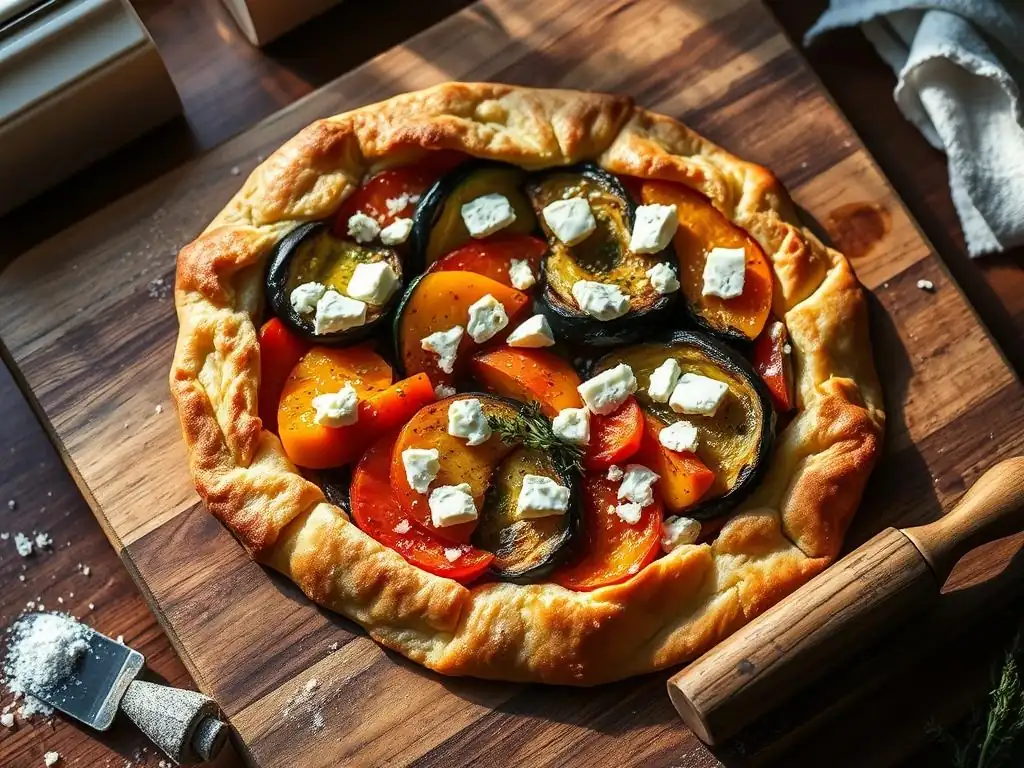
Welcome to BakeWithEase, your trusted companion on your baking journey! Ever dreamed of creating impressive savory tarts but felt intimidated by the crust? Fear not! This week, we're demystifying the process with our guide to an easy savory tart crust – so simple, even beginners can achieve flaky, delicious results. Discover the secrets to perfect textures and unforgettable flavors, and prepare to impress with your newfound skills. Ready to unlock the art of the perfect tart? Let's get baking!
- Mastering Pâte Brisée: A Guide to Savory Tart Crusts
- Introduction to Savory Tart Crust Baking
- Ingredients for the Ideal Pâte Brisée
- Step-by-Step Guide to Making Pâte Brisée
- Tips for a Perfect Pâte Brisée
- Savory Tart Crust Variations and Flavor Ideas
- Troubleshooting Common Pâte Brisée Problems
- Using Your Savory Tart Crust: Recipe Ideas
- Storing Your Savory Tart Crust
- Conclusion: Enjoying Delicious Savory Tarts
-
Frequently Asked Questions
- What makes this savory tart crust considered "foolproof"?
- Can I substitute any of the ingredients in this savory tart crust recipe?
- How long can I store the uncooked savory tart crust dough?
- What are some savory filling suggestions for this tart crust?
- Why is it important to keep the ingredients cold when making this crust?
- Final Reflection: Embracing Simplicity in Culinary Creations
- Unleash Your Inner Pastry Chef!
Mastering Pâte Brisée: A Guide to Savory Tart Crusts
Introduction to Savory Tart Crust Baking
Embarking on the journey of baking a savory tart can feel daunting, but at its heart lies the crust – the foundation that holds all your delicious fillings together. Pâte brisée, a classic French shortcrust pastry, is the ideal choice for savory applications. It's relatively simple to master, yielding a tender, flaky base that perfectly complements a wide range of fillings, from creamy quiches to hearty vegetable tarts. Learning this fundamental recipe opens up a world of culinary possibilities.
Creating an easy savory tart crust doesn't require advanced techniques. It relies on understanding the basic principles of pastry making: keeping ingredients cold, handling the dough minimally, and giving it time to rest. This guide will break down each step, making it approachable for even the most novice baker. By focusing on these core concepts, you can consistently achieve a reliable and delicious crust every time, setting the stage for spectacular savory dishes.
Why Master a Savory Tart Crust?
Mastering the art of crafting a simple savory tart crust is incredibly rewarding, offering a level of control and quality often missing from store-bought options. A homemade crust provides superior flavor and texture – think delicate flakiness and a rich, buttery taste that enhances any filling. Furthermore, knowing how to make your own crust allows you to control the ingredients, avoiding preservatives and unnecessary additives often found in pre-made versions.
Beyond taste and quality, becoming proficient in making an easy savory tart crust empowers you to customize your baking. You can adjust the salt level, incorporate herbs or spices directly into the dough, or even experiment with different flours to tailor the crust specifically to your tart's filling. This skill is not just about baking; it's about building confidence in the kitchen and creating truly personalized, memorable dishes for yourself and others.
Achieving a Perfect Crust: A Reliable Recipe
Achieving a perfect, easy savory tart crust hinges on a few critical factors, primarily the temperature of your ingredients and minimal handling of the dough. This recipe, based on the classic pâte brisée method, simplifies the process by focusing on these key elements. Using very cold butter and ice water is paramount; the cold fat creates steam during baking, separating the layers of dough to produce that coveted flaky texture.
The technique involves cutting the cold butter into the flour until it resembles coarse crumbs with some pea-sized pieces remaining. This ensures pockets of butter melt in the oven, creating flakiness. Adding just enough ice water brings the dough together without developing too much gluten, which would result in a tough crust. Resting the dough in the refrigerator is also crucial, allowing the gluten to relax and the fat to firm up, making it easier to roll and preventing shrinkage during baking. This straightforward approach makes an easy savory tart crust accessible to anyone.
Ingredients for the Ideal Pâte Brisée
Crafting a superb savory tart crust begins with selecting the right ingredients and understanding their role. Pâte brisée is characterized by its simplicity, typically requiring only four basic components: flour, butter, ice water, and salt. Each ingredient plays a vital part in achieving the desired flaky, tender texture and rich flavor. The quality of these few ingredients directly impacts the final outcome of your easy savory tart crust.
Using cold ingredients is non-negotiable for this type of pastry. The cold butter, in particular, is essential for creating the flaky layers that define a great tart crust. While the ingredient list is short, paying attention to the details – like the type of flour, the temperature of the butter, and the amount of water – makes all the difference between a good crust and a truly exceptional one. This section delves into the specifics of each component.
All-Purpose Flour: The Foundation of a Crisp Crust
All-purpose flour is the standard choice for an easy savory tart crust due to its moderate protein content (typically around 10-12%). This level of protein allows for some gluten development, providing structure, but not so much that the crust becomes tough. Using bleached or unbleached all-purpose flour works well, though some bakers prefer unbleached for its slightly higher protein and perceived better structure.
When measuring flour, it's best to use a kitchen scale for accuracy. A standard cup of all-purpose flour weighs approximately 120-125 grams. Using too much flour can lead to a dry, crumbly dough that's difficult to roll out and results in a tough crust. Sifting the flour isn't strictly necessary for pâte brisée, but ensuring it's not compacted in the measuring cup is crucial if using volume measurements.
Butter: The Key to Flakiness and Flavor
High-quality, unsalted butter is the cornerstone of a flaky and flavorful easy savory tart crust. Butter contains fat (around 80-82%), water (around 16-18%), and milk solids. When cold butter is cut into the flour and then heated in the oven, the water turns to steam, pushing apart the layers of dough and creating flakiness. The fat coats the flour particles, inhibiting gluten development, which contributes to tenderness.
It is absolutely critical that the butter is very cold, straight from the refrigerator. Some bakers even recommend freezing the butter for 10-15 minutes before cutting it in. Using softened or melted butter will result in a dense, cookie-like crust rather than a light, flaky one. Unsalted butter is preferred as it gives you control over the salt level in the dough; different brands of salted butter vary in their salt content.
Ice Water: For a Tender, Not Tough, Dough
Ice water is the binding agent that brings the flour and fat together to form a dough. Using ice water, rather than just cold water, helps keep the butter pieces firm and cold during the mixing process. This prevents the butter from melting into the flour prematurely, which is essential for developing those flaky layers during baking.
The amount of water needed can vary slightly depending on the humidity and the flour used, but typically ranges from 4 to 6 tablespoons for a standard recipe using 250g (about 2 cups) of flour. It's crucial to add the water gradually, one tablespoon at a time, mixing just until the dough just comes together. Adding too much water will develop excess gluten, resulting in a tough, hard crust. You want the dough to be moist enough to hold together but not sticky.
Salt: Enhancing Flavor and Structure
Salt plays a dual role in an easy savory tart crust: it enhances the overall flavor and contributes to the dough's structure. Flavor-wise, salt balances the richness of the butter and prevents the crust from tasting bland, especially when paired with savory fillings. A typical recipe using 250g of flour might call for about 1 teaspoon of fine salt.
Structurally, salt tightens the gluten network in the dough. While we want to minimize gluten development for tenderness, a small amount of salt helps create a slightly stronger structure, which is beneficial for rolling out the dough and preventing excessive shrinkage during baking. Ensure the salt is finely ground or dissolved in the ice water to distribute it evenly throughout the dough.
Step-by-Step Guide to Making Pâte Brisée
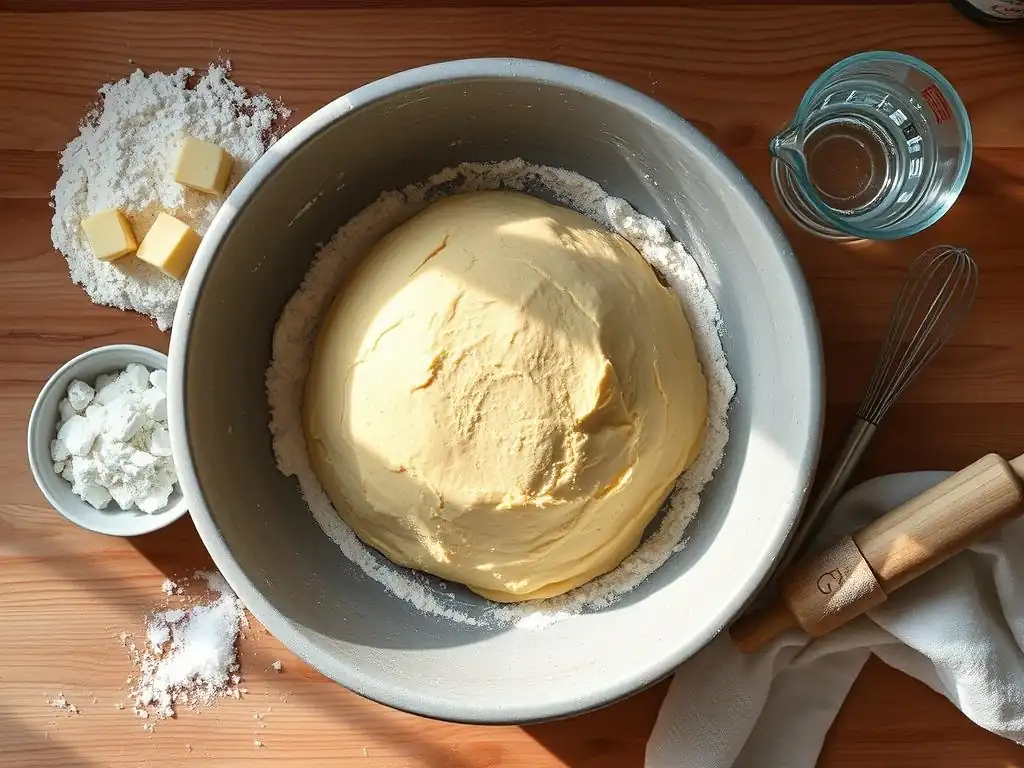
Creating a perfect, easy savory tart crust is a process that involves several distinct steps, each contributing to the final texture and quality. Following these steps carefully, particularly regarding temperature and handling, will set you up for success. This guide outlines the standard method for making pâte brisée, designed to be straightforward and achievable for beginners.
Remember that practice makes perfect. Don't be discouraged if your first attempt isn't absolutely flawless. Pay attention to how the dough feels at each stage – this tactile understanding is key to mastering pastry. This step-by-step breakdown aims to demystify the process and make achieving a beautiful, easy savory tart crust a reality.
Step 1: Combining Dry Ingredients
Begin by whisking together the all-purpose flour and salt in a large mixing bowl. This ensures the salt is evenly distributed throughout the flour, which is important for both flavor and structure. For a standard recipe using 250g of flour, you would typically add about 1 teaspoon of fine salt.
Using a whisk or a fork helps to aerate the flour slightly and break up any clumps. If you are adding any dry flavorings to your easy savory tart crust, such as dried herbs or spices (like a pinch of cayenne pepper), this is the stage to whisk them into the flour and salt mixture. Ensure everything is well combined before moving on to the next step.
Step 2: Cutting in the Cold Butter
This is perhaps the most critical step for achieving flakiness. Take your very cold butter, cut into small cubes (about 1 cm or ½ inch), and add it to the flour mixture. The goal is to break down the butter into smaller pieces within the flour, creating pockets of fat.
You can use a pastry blender, two forks, or even your fingertips to "cut" the butter into the flour. Work quickly to prevent the butter from warming up. Continue until the mixture resembles coarse crumbs, with some pieces of butter still visible, ranging in size from small peas to lentils. These larger pieces are essential for flakiness. Avoid overworking the mixture into a uniform, fine meal.
Step 3: Adding Ice Water and Forming the Dough
Now, gradually add the ice water, one tablespoon at a time, sprinkling it over the flour-butter mixture. Use a fork or your hands to gently bring the mixture together after each addition. The amount of water needed will vary, but start with about 4 tablespoons for 250g of flour and add more only if necessary.
Mix just until the dough comes together in a shaggy mass. It should be moist enough to hold together when squeezed but not sticky or wet. Avoid kneading the dough, as this develops gluten and will make the crust tough. Once the dough just holds together, turn it out onto a lightly floured surface.
Step 4: Chilling the Dough: Relaxing the Gluten
Gather the shaggy dough into a ball, then flatten it into a disc about 1-2 cm (½-¾ inch) thick. This disc shape makes it easier to roll out later. Wrap the disc tightly in plastic wrap.
Chilling the dough is absolutely essential. It allows the gluten, which may have developed slightly during mixing, to relax. More importantly, it firms up the butter pieces, making the dough easier to roll and ensuring those crucial pockets of fat remain intact until baking. Refrigerate the dough for at least 1 hour, but preferably 2 hours, or even up to 2-3 days. This resting period greatly contributes to a tender, easy savory tart crust.
Step 5: Rolling Out the Dough
Once the dough is well-chilled, unwrap it and place it on a lightly floured surface. You can also roll it out between two sheets of parchment paper, which minimizes the need for extra flour and makes transferring the dough easier. Using too much flour during rolling can make the crust dry.
Using a rolling pin, start from the center and roll outwards, rotating the dough occasionally to ensure an even thickness (about 3-4 mm or ⅛ inch) and a roughly circular shape large enough to fit your tart pan with some overhang. If the dough cracks at the edges, you can gently press it back together. Work relatively quickly to keep the dough cold.
Step 6: Fitting the Crust into the Tart Pan
Carefully transfer the rolled-out dough into your tart pan (typically 23-25 cm or 9-10 inches in diameter). If you rolled it on parchment, you can simply lift the parchment and invert the dough into the pan. If not, gently drape the dough over your rolling pin and unroll it over the pan.
Ease the dough into the pan, pressing it gently into the bottom and up the sides, ensuring it fits snugly into the fluted edges. Be careful not to stretch the dough, as this can cause it to shrink back significantly during baking. Trim any excess dough, leaving about a 1-2 cm (½-¾ inch) overhang. You can use the excess to patch any small tears or cracks. Prick the bottom of the crust all over with a fork (this is called docking) to allow steam to escape and prevent puffing during baking.
Step 7: Pre-Baking (Blind Baking) the Tart Crust
For most savory tarts, especially those with wet fillings like quiches, pre-baking or "blind baking" the crust is a crucial step. This partially or fully bakes the crust before adding the filling, ensuring the bottom doesn't become soggy. This step is key to achieving a truly perfect, easy savory tart crust.
After fitting the dough and docking it, chill the lined tart pan again for at least 30 minutes. This helps the crust hold its shape during baking. Preheat your oven to a relatively hot temperature, often around 190°C (375°F).
Why Blind Baking is Essential
Blind baking is essential for savory tarts, particularly those with liquid or moist fillings. Without pre-baking, the moisture from the filling can soak into the raw dough at the bottom, preventing it from cooking through and resulting in a pale, gummy, and unpleasant texture. This phenomenon is often referred to as a "soggy bottom."
By blind baking, you give the crust a head start, allowing it to set and crisp up before the filling is added. For fillings that require longer baking times, you might only partially blind bake the crust until it's set but not yet golden. For fillings that are added cold or require minimal baking, you would fully blind bake the crust until it is golden brown and cooked through.
Achieving Even Baking with Weights
To prevent the crust from puffing up or shrinking away from the sides during blind baking, you need to use baking weights. Line the chilled, docked crust with parchment paper or aluminum foil, pressing it gently against the sides and bottom. Fill the lined crust with pie weights, dried beans, or uncooked rice, distributing them evenly to cover the bottom and extend slightly up the sides. For a 23cm tart pan, you might need around 500g to 1kg (about 1-2 pounds) of weights.
Bake for 15-20 minutes with the weights, until the edges look set and slightly dry. Carefully remove the weights and the parchment/foil. If the recipe calls for a partial bake, you can stop here or bake for another 5-10 minutes until the bottom looks drier. For a full bake, continue baking for another 10-15 minutes, or until the crust is golden brown all over. This ensures a sturdy base for your easy savory tart crust.
Tips for a Perfect Pâte Brisée
Beyond the basic steps, a few expert tips can elevate your easy savory tart crust from good to absolutely perfect. These insights address common challenges and help you achieve that ideal balance of flakiness, tenderness, and structure. Mastering these nuances will make your pastry baking even more consistent and enjoyable.
Paying attention to the details, like dough temperature and pan material, can make a significant difference in the final result. Baking is often a science, and understanding the 'why' behind these tips will help you troubleshoot and refine your technique over time.
Preventing Shrinkage During Baking
Shrinkage is a common frustration when baking tart crusts. It often occurs because the gluten in the dough is tense from handling or insufficient chilling, causing it to pull back in the heat of the oven. Overstretching the dough when fitting it into the pan is another major culprit.
To prevent shrinkage, ensure your dough is well-chilled (at least 1-2 hours) before rolling. When fitting it into the pan, gently ease it in without stretching. Leave a slight overhang (about 1-2 cm) of dough around the edge before chilling again for 30 minutes prior to blind baking. This extra chilling step is very effective. During blind baking, using sufficient weights pressed against the sides of the pan helps hold the dough in place as it bakes.
Achieving a Golden-Brown Crust
A beautiful golden-brown crust isn't just about appearance; it indicates that the crust is fully cooked, ensuring optimal flavor and texture. A pale crust is often underbaked and can taste raw or doughy, especially on the bottom. Achieving that perfect color usually happens during the final stages of blind baking after the weights have been removed.
Ensure your oven is accurately preheated to the correct temperature, typically around 190°C (375°F). After removing the baking weights, continue baking the crust directly for an additional 10-15 minutes, or until the bottom and sides are evenly golden. Keep a close eye on it, as crusts can go from golden to burnt quickly. If the edges brown too fast, you can shield them loosely with strips of aluminum foil while the center finishes baking.
Choosing the Right Tart Pan Material
The material of your tart pan can influence how evenly and quickly the crust bakes, particularly the bottom crust. Metal pans, especially those made of aluminum or steel, conduct heat very efficiently. This promotes even browning on the bottom and sides, which is crucial for an easy savory tart crust that isn't soggy.
Dark-colored metal pans absorb and radiate heat more intensely than light-colored ones, which can lead to faster browning. While this can be beneficial for ensuring a crisp bottom, it also increases the risk of over-browning or burning if you're not careful. Ceramic or glass tart dishes are beautiful for serving but are poorer heat conductors, sometimes resulting in a less crisp bottom crust unless blind baked thoroughly at a sufficient temperature. For reliable results, a metal tart pan with a removable bottom is often recommended.
Savory Tart Crust Variations and Flavor Ideas
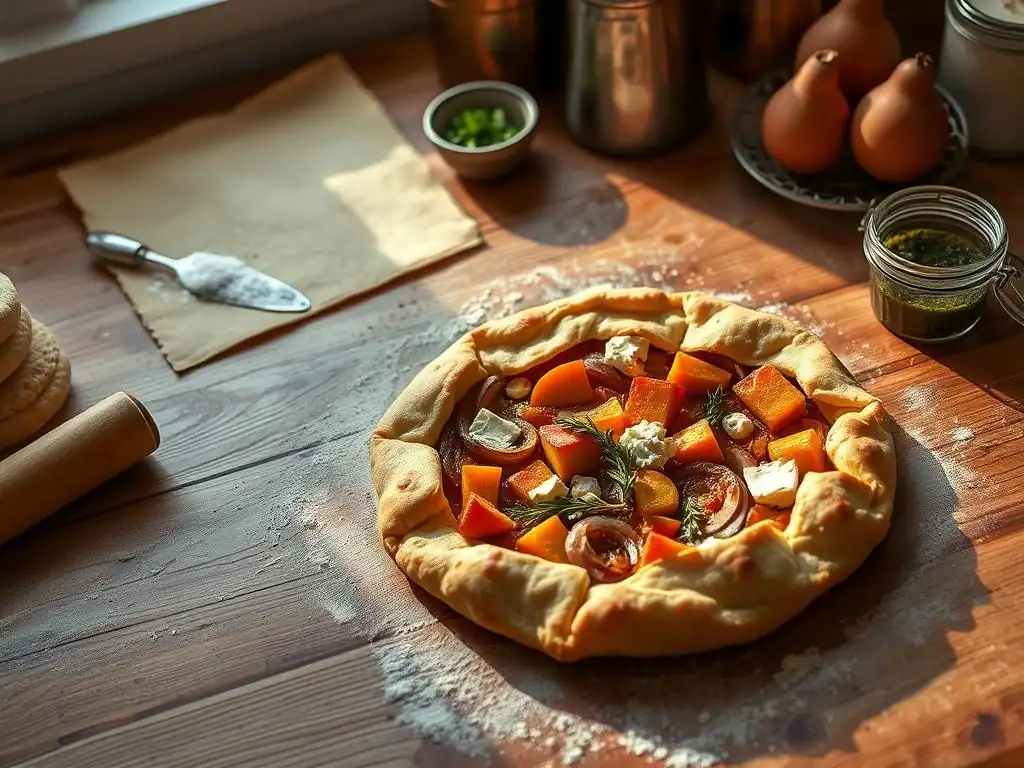
While the basic pâte brisée recipe is a fantastic starting point for an easy savory tart crust, incorporating additional ingredients into the dough can add exciting layers of flavor that complement your fillings. These variations are simple to execute and can transform a standard crust into something truly special.
Experimenting with herbs, spices, or even cheese can elevate your savory tart game. The key is to add these ingredients at the dry ingredient stage (Step 1), ensuring they are evenly distributed before cutting in the butter. Here are a few popular variations to try.
Parmesan and Black Pepper Tart Crust
Adding finely grated Parmesan cheese and freshly ground black pepper to your easy savory tart crust dough creates a wonderfully flavorful base, perfect for fillings like spinach and ricotta or roasted vegetables. The nutty, salty notes of the Parmesan pair beautifully with the sharp bite of black pepper.
For a standard recipe using 250g of flour, whisk in about 30-50g (¼ to ½ cup) of finely grated hard cheese, such as Parmesan or Gruyere, and 1-2 teaspoons of freshly ground black pepper with the flour and salt. Use a microplane or the fine side of a box grater for the cheese to ensure it distributes evenly and melts nicely into the dough.
Rosemary and Garlic Tart Crust
Infusing your savory tart crust with aromatic herbs like rosemary and garlic adds a rustic, fragrant dimension. This variation is particularly well-suited for tarts featuring potatoes, mushrooms, or strong cheeses like goat cheese. The earthy notes of rosemary and the pungent warmth of garlic create a delightful sensory experience.
Finely chop about 1-2 tablespoons of fresh rosemary and mince 1-2 cloves of garlic. Add these to the dry ingredients (flour and salt) in Step 1 and whisk to distribute. Be sure the herbs are very finely chopped to prevent them from tearing the dough during rolling. Alternatively, you can use about half the amount of dried herbs.
Gluten-Free Almond Flour Tart Crust
For those seeking a gluten-free option, a savory tart crust can be made using almond flour. While the texture will differ slightly from traditional pâte brisée – often more tender and less flaky – it can still create a delicious and sturdy base. This variation is naturally richer due to the fat content in almond flour.
A common approach is to use a blend, or primarily almond flour combined with a binder like psyllium husk or a small amount of gluten-free all-purpose blend. For example, you might use 150g almond flour, 50g gluten-free oat flour, and 1 tablespoon psyllium husk, along with the cold butter, salt, and ice water. The method remains similar: cut in cold butter, add ice water, chill, and roll. Note that gluten-free doughs can sometimes be more delicate to handle.
Troubleshooting Common Pâte Brisée Problems
Even when following a recipe for an easy savory tart crust, you might encounter issues. Understanding how to troubleshoot common problems like dough consistency, cracking, or sticking can save your bake and help you learn from the experience. Most issues stem from temperature or handling.
Don't be discouraged if things aren't perfect on your first try. Baking is a skill that improves with practice. These tips address some of the most frequent challenges faced when making homemade tart crusts.
Dough Too Dry or Too Wet
A dough that is too dry will be crumbly and won't come together easily. It will be difficult to roll out without cracking excessively. This usually means you didn't add enough ice water in Step 3. To fix this, sprinkle an additional teaspoon of ice water over the dry spots and gently work it in until the dough just holds together. Add more water sparingly, only a teaspoon at a time, mixing until incorporated.
A dough that is too wet will be sticky and difficult to handle. It likely means you added too much water. To fix this, gently work in a tablespoon or two of extra flour until the dough is no longer sticky but still soft. Be careful not to overmix, as this can develop gluten. Ensuring you add water gradually and stop as soon as the dough comes together is the best way to avoid this issue initially.
Crust Cracking or Breaking
Cracking dough during rolling (Step 5) is often a sign that the dough is too cold, too dry, or has been overworked. If the dough is too cold, let it sit at room temperature for 5-10 minutes to soften slightly before rolling. If it's too dry, you can try gently working in a tiny bit more ice water, but this is harder to do once the dough is a disc.
If the crust cracks when you're fitting it into the pan (Step 6), don't panic! Pâte brisée is quite forgiving. You can easily patch cracks using the excess dough trimmed from the edges. Simply press a piece of dough onto the crack and smooth it gently with your fingers, perhaps dampened slightly with water. Ensure the dough is cold when you're patching.
Crust Sticking to the Pan
A savory tart crust sticking to the pan after baking can be frustrating, especially with pans that don't have a removable bottom. This can happen if the pan wasn't properly greased (though many recipes skip greasing metal tart pans as the butter in the dough prevents sticking) or if the crust wasn't baked thoroughly enough.
Using a metal tart pan with a removable bottom is highly recommended for easy release. Ensure the crust is fully blind baked until golden brown and crisp, as this helps it contract slightly from the pan edges. If you suspect sticking, you can run a thin, sharp knife around the edge before attempting to remove the ring. For pans without removable bottoms, ensure the crust is cooked completely, as an underbaked crust is more likely to stick.
Using Your Savory Tart Crust: Recipe Ideas
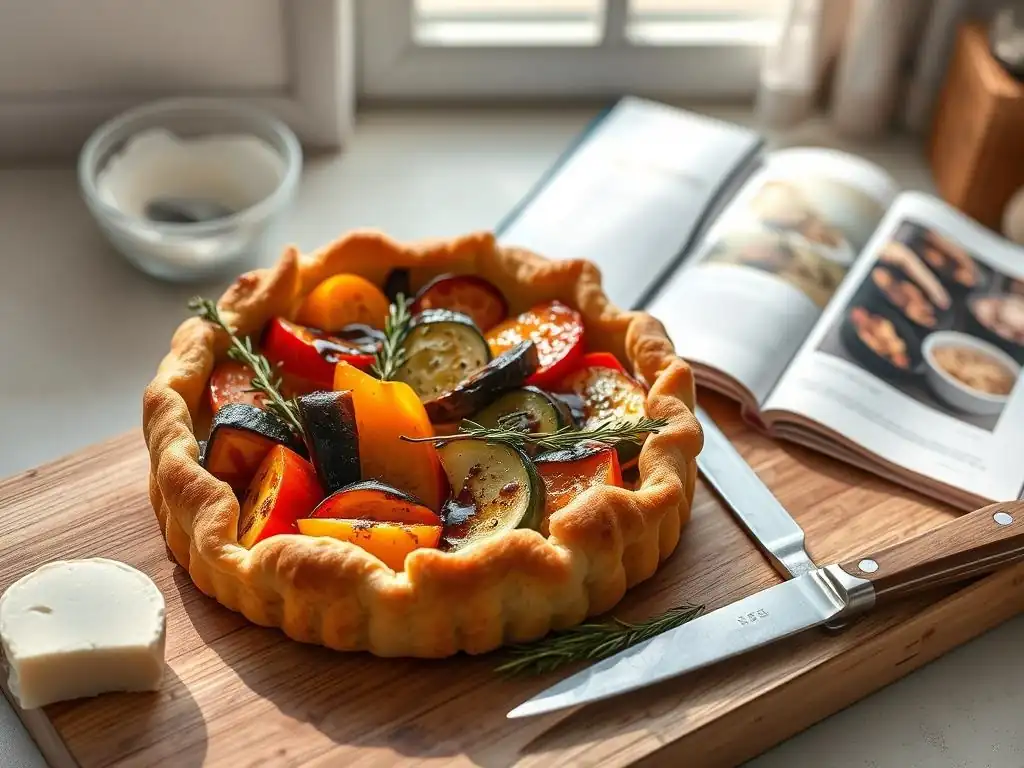
Once you've mastered making an easy savory tart crust, a world of delicious possibilities opens up. This versatile base is perfect for countless fillings, suitable for everything from elegant appetizers to substantial main courses. Here are a few classic and popular ideas to inspire your next bake.
These examples showcase the range of fillings that pair well with a buttery, flaky pâte brisée. They are relatively straightforward recipes, perfect for utilizing your newly acquired crust-making skills.
Caramelized Onion and Gruyere Tart
This classic combination is a favorite for a reason. Sweet, slow-cooked caramelized onions paired with nutty, melted Gruyere cheese creates a rich and deeply flavorful filling. It's an excellent demonstration of how a simple savory tart crust can elevate humble ingredients.
Typically, you would blind bake your savory tart crust fully until golden brown. While the crust bakes, slowly caramelize thinly sliced onions in butter over low heat until they are deeply golden and sweet (this can take 30-60 minutes). Spread the caramelized onions over the baked crust, top with grated Gruyere cheese (about 150-200g for a 23cm tart), and bake until the cheese is melted and bubbly, about 10-15 minutes.
Spinach and Feta Quiche
Quiche is perhaps the most iconic use of a savory tart crust. A simple spinach and feta quiche is a popular and delicious choice. The creamy egg custard provides a soft contrast to the crisp crust, while the spinach and salty feta offer vibrant flavor.
Blind bake your easy savory tart crust until it's partially baked (set but not golden). While it bakes, sauté fresh spinach until wilted, squeeze out excess moisture, and chop it. Whisk together eggs (typically 3-4 large eggs for a 23cm tart), milk or cream (about 200-250ml), salt, pepper, and a pinch of nutmeg. Stir in the spinach and crumbled feta cheese (about 100-150g). Pour the mixture into the partially baked crust and bake at a lower temperature (around 175°C or 350°F) for 30-40 minutes, or until the center is set and the top is golden.
Tomato and Goat Cheese Tart
Highlighting fresh, seasonal ingredients, a tomato and goat cheese tart is a bright and flavorful option, especially in the summer. The tanginess of the goat cheese and the sweetness of ripe tomatoes are wonderful against a buttery crust.
Blind bake your savory tart crust fully. Spread a layer of soft goat cheese (about 100-150g) on the bottom of the baked crust. Arrange sliced ripe tomatoes (about 3-4 medium tomatoes) over the cheese. Drizzle with olive oil, season with salt, pepper, and perhaps some fresh herbs like basil or thyme. Bake for 15-20 minutes, or until the tomatoes are slightly softened and the cheese is warm.
Storing Your Savory Tart Crust
Knowing how to properly store your homemade easy savory tart crust, whether baked or unbaked, allows for convenient meal prep and reduces waste. Pâte brisée can be made ahead of time, saving precious minutes when you're ready to assemble a tart.
Proper storage ensures the quality and texture of the dough are maintained. Both the refrigerator and freezer are viable options, depending on how soon you plan to use the crust.
Short-Term Storage (Refrigerated)
Unbaked pâte brisée dough can be stored in the refrigerator for 2-3 days. Ensure the dough disc is tightly wrapped in plastic wrap to prevent it from drying out or absorbing odors from the fridge. When you're ready to use it, you may need to let it sit at room temperature for 10-20 minutes to soften slightly before rolling, as it will be quite firm.
A blind-baked tart crust can also be stored at room temperature for up to 24 hours, loosely covered. For longer storage up to 2-3 days, it's best to store the cooled, blind-baked crust in the refrigerator, wrapped loosely or placed in an airtight container to protect it from moisture.
Long-Term Storage (Freezing)
For longer storage, both unbaked dough and blind-baked crusts freeze exceptionally well. This is a great strategy for having an easy savory tart crust ready whenever inspiration strikes.
To freeze unbaked dough, wrap the chilled disc tightly in plastic wrap, then place it in a freezer-safe bag or wrap it again in aluminum foil. It can be frozen for up to 3 months. Thaw overnight in the refrigerator before rolling. To freeze a blind-baked crust, let it cool completely, then wrap it carefully in plastic wrap and then aluminum foil or place it in a rigid container to protect it from breakage. Freeze for up to 3 months. Thaw at room temperature for an hour or two before filling.
Conclusion: Enjoying Delicious Savory Tarts
Mastering the easy savory tart crust, or pâte brisée, is a fundamental skill that unlocks a world of culinary creativity. By focusing on cold ingredients, minimal handling, and proper chilling, you can consistently produce a tender, flaky base that is infinitely superior to store-bought options. The process, while requiring attention to detail, is straightforward and rewarding.
From classic quiches to innovative vegetable tarts, your perfect homemade crust provides the ideal canvas. The versatility of pâte brisée means you'll find endless opportunities to use this skill, whether for a casual weeknight dinner or an impressive dish for entertaining. Embrace the process, experiment with fillings, and most importantly, enjoy the delicious results of your baking efforts.
The Versatility of Pâte Brisée
The beauty of an easy savory tart crust made from pâte brisée lies in its incredible versatility. Its neutral yet rich, buttery flavor profile complements a vast array of savory ingredients. It can serve as the base for creamy egg custards, roasted or sautéed vegetables, cheeses, meats, and seafood.
Think beyond the traditional quiche. Use your crust for tarts filled with asparagus and gruyere, mushrooms and thyme, leeks and bacon, or even smoked salmon and dill. The sturdy structure of the blind-baked crust holds up well to moist fillings, while its flakiness adds a delightful textural contrast. Once you have this reliable recipe in your repertoire, the possibilities for creating delicious savory tarts are nearly limitless.
Frequently Asked Questions
What makes this savory tart crust considered "foolproof"?
The "foolproof" aspect comes from the simple recipe and easy-to-follow instructions, minimizing the chances of common crust-making errors. It also relies on cold ingredients and gentle handling.
Can I substitute any of the ingredients in this savory tart crust recipe?
While some substitutions are possible, it's best to stick to the recipe for optimal results. Substituting flour or fat types can significantly affect the final texture and flavor.
How long can I store the uncooked savory tart crust dough?
You can store the uncooked dough, tightly wrapped in plastic wrap, in the refrigerator for up to 3 days or in the freezer for up to 2 months.
What are some savory filling suggestions for this tart crust?
Popular savory fillings include quiche Lorraine, spinach and feta, or roasted vegetable medleys. The crust is versatile and complements many flavors.
Why is it important to keep the ingredients cold when making this crust?
Cold ingredients, especially the butter, prevent the gluten from overdeveloping, resulting in a flaky and tender tart crust instead of a tough one. Cold also helps the butter stay in small pieces when baking.
Final Reflection: Embracing Simplicity in Culinary Creations
The art of creating an easy savory tart crust is more relevant today than ever, as home cooks seek simplicity without sacrificing flavor. In a world where convenience often trumps quality, the ability to whip up a delicious tart crust with minimal effort is a game-changer. This straightforward approach not only empowers individuals to explore their culinary skills but also fosters a deeper appreciation for homemade meals.
The influence of easy savory tart crusts extends beyond the kitchen, shaping our social interactions and cultural experiences. As we gather around the table to share meals, these tarts become a canvas for creativity and connection, allowing us to express ourselves through food. Cooking is like love. It should be entered into with abandon or not at all.
This sentiment resonates deeply as we embrace the joy of cooking and the bonds it creates, reminding us that the simplest dishes can bring the most satisfaction.
As you reflect on the lessons from this article, consider how you can incorporate the spirit of easy savory tart crusts into your own life. Take a moment to experiment in your kitchen, invite friends over for a cooking session, or simply enjoy the process of creating something delicious. Let this be an opportunity to celebrate the beauty of simplicity and the joy of sharing good food with those you love.
Unleash Your Inner Pastry Chef!
Thanks for joining us on this savory tart crust adventure! We hope you now feel confident in creating a flawlessly crisp and flavorful base for your culinary masterpieces. Ready to put your new skills to the test?
- Bake your dream tart: Try out the recipe today! Experiment with different fillings and impress your friends and family with your newfound expertise. This is your chance to shine!
- Share your creations: Post a picture of your delicious tart on social media using #BakeWithEaseSavoryTart and tag us – we’d love to see your culinary triumphs!
- Discover more: Explore our other easy-to-follow recipes on BakeWithEase.com for even more baking inspiration.
What unique and delicious filling will you create with your perfectly flaky crust?