
Troubleshooting SliceandBake Cookies: Easy Fixes for Beginners


Welcome to BakeWithEase, your trusted guide to confident baking! Ever wondered why your perfectly chilled dough turned into a sloppy slice and bake disaster? Don't despair! We're diving into the most common slice-and-bake cookie conundrums and offering simple solutions that will have you whipping up flawless cookies in no time. Get ready to transform baking mishaps into masterful creations – let's get baking!
Welcome to BakeWithEase, where we make baking simple and fun! Slice-and-bake cookies are a favorite for their convenience, but sometimes, even these easy treats can present challenges. Don't worry, we've all faced moments when our dough is a bit too soft, leading to frustratingly sloppy slice and bake attempts. This guide is designed specifically for beginners to help you understand and fix common issues, turning those potential baking blunders into perfect cookie batches.
- BakeWithEase' Guide to Perfect Slice-and-Bake Cookies
- Understanding Slice-and-Bake Cookie Dough Issues
- Fixing Common Slice-and-Bake Cookie Problems: A Beginner's Guide
- Advanced Tips for Perfect Slice-and-Bake Cookies
- Preventing Slice-and-Bake Disasters: Proactive Measures
- Troubleshooting Chart: Quick Fixes for Common Slice-and-Bake Issues
- Mastering the Art of Slice-and-Bake: Final Thoughts and Resources
-
Frequently Asked Questions
- What causes slice-and-bake cookies to crumble after baking?
- Why are my slice-and-bake cookies spreading too thin during baking?
- How can I prevent my slice-and-bake cookie dough from being too sticky to slice?
- My slice-and-bake cookies are browning too quickly on the bottom. What am I doing wrong?
- How long can I store slice-and-bake cookie dough in the refrigerator?
- Final Reflection: The Sweet Science of Perfect Slice-and-Bake Cookies
- Unlock Perfectly Baked Slice-and-Bake Cookies!
Mastering slice-and-bake cookies is a rewarding step for any new baker. The core idea is straightforward: prepare a firm dough, shape it into a log, chill it until solid, slice, and bake. Simple, right? Yet, variables like ingredient temperature, mixing time, and chilling duration can drastically affect the outcome. Our goal here is to equip you with the knowledge to anticipate potential problems and confidently handle them, ensuring your cookies come out beautifully every time.
Understanding the science behind why dough behaves a certain way is key. For instance, butter temperature significantly impacts dough consistency and spread. Overworking the dough can lead to tough cookies, while insufficient chilling results in that dreaded sloppy slice and bake scenario. By breaking down the common issues and providing clear, actionable solutions, we aim to make your slice-and-bake experience consistently successful and enjoyable.

Before we dive into fixes, let's understand what can go wrong with slice-and-bake dough. The ideal dough should be firm enough to hold its shape when rolled into a log and become hard enough in the refrigerator to be sliced cleanly without crumbling or squishing. When the dough is too soft or improperly prepared, it can lead to a variety of problems both before and during baking.
Common issues often stem from the dough's temperature and consistency. If the dough is too warm or has too much fat relative to flour, it will be inherently soft and difficult to handle. This can manifest as dough that won't form a tight log or, worse, dough that becomes sloppy slice and bake material the moment you try to cut it. Recognizing these signs early is the first step to correcting them before they ruin your batch.
One of the most frequent complaints from beginners is dough that's too sticky or soft to roll into a log. This often happens when butter is too warm or not enough flour is used. Another issue is dough that is firm enough to log but becomes crumbly when sliced, indicating it might be too cold or dry.
During baking, the most visible problems include cookies spreading too much and losing their shape, resulting in thin, fragile discs instead of perfectly formed rounds. Uneven baking, where some cookies are done while others are still pale, is also a common frustration. All these issues can often be traced back to the initial dough preparation and chilling process.
Excessive spreading is a classic sign of a sloppy slice and bake dough that wasn't properly chilled or had an incorrect ingredient balance. When butter is warm, it melts quickly in the oven, causing the cookie to flatten out rapidly before the structure (flour and egg) has a chance to set. This is particularly true if the dough log wasn't sufficiently firmed up in the refrigerator.
Another major culprit is the ratio of ingredients, specifically butter and sugar relative to flour. Recipes with a higher proportion of butter and sugar tend to spread more. Using softened or melted butter instead of properly creamed, room-temperature butter can also introduce too much air or moisture, contributing to excessive spread. For example, a recipe calling for 1 cup (2 sticks) of butter and 2 cups of flour might spread significantly more if the butter is melted compared to if it's properly creamed with sugar.
Don't despair if your dough isn't cooperating! Most common slice-and-bake issues have simple fixes. The key is often patience and understanding how temperature affects your ingredients.
Problem 1: Dough Too Soft - Solutions for Soft Dough
A dough that's too soft is the primary reason for a sloppy slice and bake mess. It's challenging to roll into a log and impossible to slice cleanly.
Chilling the Dough: The Key to Firm Slice-and-Bake Cookies
Insufficient chilling is the number one cause of soft, unmanageable dough. Slice-and-bake dough needs significant time in the refrigerator for the fat (butter) to firm up completely. A minimum of 1-2 hours is usually required, but for a truly firm log that slices without resistance, 3-4 hours or even overnight is often better.
During chilling, the butter solidifies, binding the dough together and making it rigid enough to hold its shape when sliced. This process also allows the flour to hydrate properly, improving the cookie's texture. If your dough feels too soft after an hour, wrap it tightly in plastic wrap, ensuring no air pockets, and return it to the fridge. You'll know it's ready when the log feels solid, almost like a block of cold clay, and doesn't easily indent when pressed.
Adding More Flour: A Careful Adjustment for Soft Dough
If your dough is excessively soft right after mixing, it might need a slight adjustment to the dry ingredients. This could be due to variations in flour absorption or humidity. However, adding too much flour can result in dry, crumbly cookies.
Start by adding just a tablespoon or two of flour at a time. Gently mix it in until the dough is less sticky and easier to handle. Avoid the temptation to dump in a lot of flour at once.
Kneading the dough extensively after adding flour can develop gluten, leading to tough cookies. The goal is just to achieve a manageable consistency for rolling into a log, not to make it stiff. A good rule of thumb: if the dough still feels sloppy slice and bake after adding a couple of tablespoons of flour and mixing lightly, chilling is the next, and often more effective, step.
Even if you manage to slice the dough, excessive spreading in the oven is another common issue that results in thin, crispy (and not always in a good way) cookies.
Baking Sheet Preparation: Preventing Cookie Spread
The surface you bake on can influence spread. Using a non-greased baking sheet or one lined with parchment paper or a silicone baking mat is generally recommended for slice-and-bake cookies. Greasing the pan can sometimes cause the cookies to spread more because the melted fat from the cookie has a slippery surface to spread onto.
Parchment paper or silicone mats provide a slight grip that helps the cookie maintain its shape initially as the butter melts. Also, ensure your baking sheets are cool before placing dough slices on them. Placing cold dough on a warm sheet will cause the edges to melt prematurely, leading to increased spread before the cookie enters the hot oven.
Oven Temperature Calibration for Even Baking
An oven that isn't calibrated correctly can lead to cookies spreading too much or baking unevenly. If your oven temperature is lower than what the recipe calls for, the cookies will take longer to set, giving the butter more time to melt and spread before the structure is baked firm.
Using an oven thermometer is a simple way to check if your oven is running true to temperature. Many home ovens can be off by as much as 25-50 degrees Fahrenheit. If your oven runs cool, you might need to increase the temperature slightly (e.g., from 350°F to 375°F) to ensure the cookies set quickly enough. Conversely, if the oven is too hot, the edges might burn before the center is cooked through.
Problem 3: Uneven Baking - Achieving Consistent Results
Sometimes, even with a perfect dough and ideal spread, you end up with a tray of cookies where some are golden brown and others are still pale.
Rotating Baking Sheets for Uniform Cookie Baking
Most ovens have hot spots, meaning the temperature is not uniform throughout the cavity. This is a primary reason for uneven baking. A simple fix is to rotate your baking sheet halfway through the baking time.
For example, if your cookies bake for 10-12 minutes, rotate the sheet 180 degrees after 5-6 minutes. If you're baking multiple sheets at once, swap their positions (top rack to bottom rack, and vice versa) while also rotating each sheet. This ensures that all cookies are exposed to similar temperature conditions, leading to more uniform browning and doneness.
Cookie Thickness: Ensuring Consistent Slices
Inconsistent cookie thickness is another major contributor to uneven baking. Thinner slices will bake faster than thicker ones. If your sloppy slice and bake attempts resulted in varying thicknesses, some cookies will inevitably be overdone while others are underbaked on the same sheet.
Aim for slices that are as uniform as possible, typically between 1/4 inch and 1/2 inch thick, depending on the recipe. A sharp knife and a properly chilled, firm dough log are essential for achieving consistent slices. If your log is too soft, it's nearly impossible to cut even slices, reinforcing the importance of sufficient chilling time.

Once you've mastered the basics of troubleshooting, consider these tips to elevate your slice-and-bake game.
Freezing Slice-and-Bake Dough for Later Use
One of the best features of slice-and-bake dough is its freezer-friendliness. Properly freezing the dough log allows you to bake just a few cookies at a time whenever a craving strikes.
After shaping and chilling the log until firm (at least 2-3 hours), wrap it tightly in plastic wrap, then in aluminum foil or place it in a freezer-safe bag. Frozen dough logs can last for up to 2-3 months. When ready to bake, you can usually slice the log directly from frozen, though some prefer to let it sit at room temperature for 5-10 minutes to make slicing slightly easier. Frozen cookies may require a few extra minutes of baking time compared to refrigerated ones.
Adding Mix-Ins: Maintaining Dough Integrity
Adding chocolate chips, nuts, sprinkles, or other mix-ins can make your slice-and-bake cookies even more delicious. However, they can sometimes make the dough harder to form into a log or slice cleanly, potentially contributing to a sloppy slice and bake outcome if not handled correctly.
When adding mix-ins, ensure they are evenly distributed throughout the dough. Try not to overmix, as this can develop gluten and make the dough tough. If adding large or numerous mix-ins, the log might be bumpier, making slicing tricky. A very sharp knife is crucial here. You might also find it helpful to gently reshape the log slightly after slicing each cookie to maintain its round form if mix-ins are causing it to distort.
Slight modifications to a standard slice-and-bake recipe can alter the final cookie texture. For a chewier cookie, you might slightly increase the brown sugar ratio compared to white sugar, as brown sugar contains more moisture. Using melted butter instead of creamed butter tends to result in denser, chewier cookies, though it also increases spread.
For a crispier cookie, you might slightly increase the amount of white sugar or decrease the moisture (e.g., slightly less egg). Baking the cookies for a minute or two longer until they are more golden brown will also yield a crispier result. Experimenting with small batch sizes can help you find your preferred texture without committing to a full batch that might not turn out as desired.
Preventing Slice-and-Bake Disasters: Proactive Measures
Prevention is always easier than fixing a sloppy slice and bake situation. By paying attention to a few key steps during the dough preparation phase, you can significantly reduce the likelihood of problems later on.
Selecting the Right Ingredients for Slice-and-Bake Success
The quality and temperature of your ingredients play a huge role. Use fresh butter and eggs. Ensure your butter is at the correct temperature as specified by the recipe – usually softened but still cool to the touch for creaming, or very cold and cut into cubes for certain types of dough.
Accurate measurement is also critical. Using too much flour or too little butter, or vice versa, can throw off the delicate balance needed for a perfect slice-and-bake dough that slices cleanly and bakes beautifully without excessive spread or becoming a sloppy slice and bake mess. Weighing ingredients, especially flour, is often more accurate than using volume measurements.
Proper Mixing Techniques for Slice-and-Bake Dough
Don't overmix the dough once the flour is added. Creaming the butter and sugar until light and fluffy incorporates air, which helps with leavening and texture, but developing too much gluten after adding flour will result in tough cookies.
Mix the dry ingredients into the wet ingredients just until they are combined and no dry streaks of flour remain. The dough should come together but still be soft enough to handle and form into a log. If using a stand mixer, switch to a lower speed once flour is added or finish mixing by hand. Proper mixing ensures a tender crumb and prevents issues that could lead to a sloppy slice and bake dough.
Troubleshooting Chart: Quick Fixes for Common Slice-and-Bake Issues
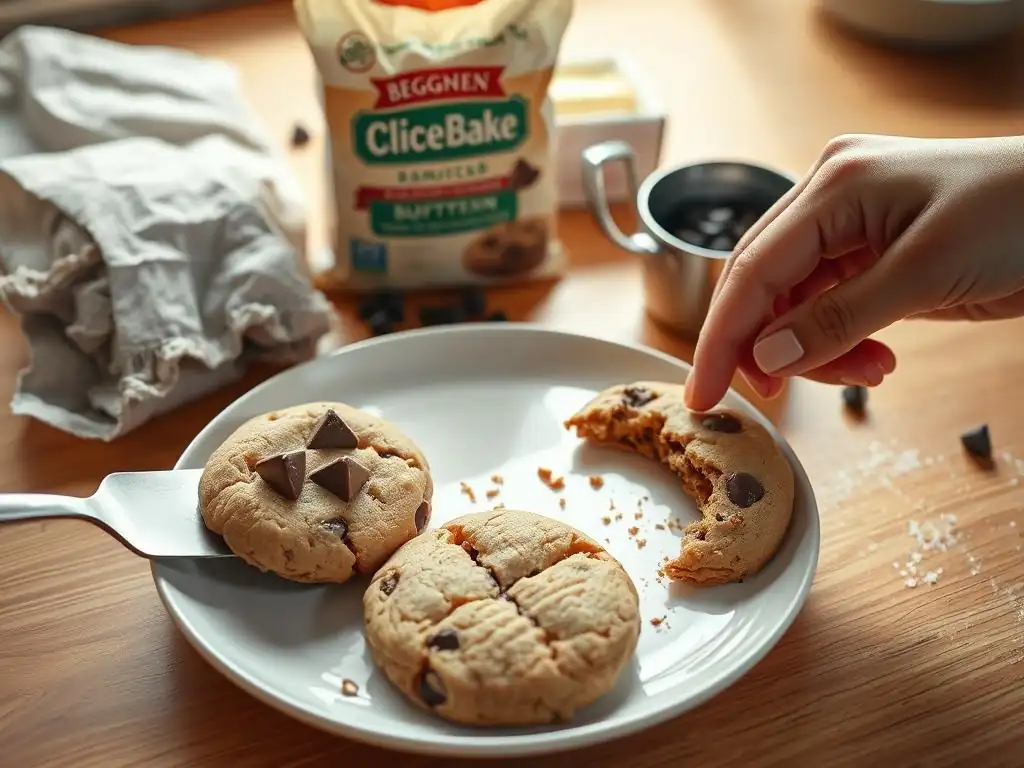
Here's a quick reference guide for those moments when you need a fast solution.
- [ ] Dough Too Soft/Sloppy:
- [ ] Chill longer (minimum 2-4 hours, or until very firm).
- [ ] If excessively soft after chilling, mix in 1-2 tbsp flour lightly.
- [ ] Ensure butter was not melted or too soft initially.
- [ ] Dough Crumbly:
- [ ] Let log warm up slightly at room temp (5-10 min) before slicing.
- [ ] Use a very sharp knife.
- [ ] Dough might be too dry - check recipe ratios for next time.
- [ ] Cookies Spreading Too Much:
- [ ] Ensure dough log was very cold before slicing/baking.
- [ ] Bake on parchment paper or silicone mat, not a greased sheet.
- [ ] Check oven temperature with a thermometer; increase if running cool.
- [ ] Ensure baking sheets are cool before placing dough on them.
- [ ] Uneven Baking:
- [ ] Rotate baking sheets halfway through baking time.
- [ ] Ensure cookie slices are uniform in thickness.
- [ ] Check oven for hot spots with an oven thermometer.
- [ ] Difficulty Slicing:
- [ ] Dough log needs more chilling time.
- [ ] Use a very sharp knife.
- [ ] Gently rotate the log as you slice.
Mastering the Art of Slice-and-Bake: Final Thoughts and Resources
Troubleshooting is a natural part of the baking journey, especially when you're just starting out. Don't let a few batches of sloppy slice and bake cookies discourage you! Each attempt is a learning opportunity. By understanding the common pitfalls – primarily related to dough temperature, chilling, and ingredient balance – you can confidently tackle these issues and achieve consistently delicious results.
Remember that baking is also about experimentation and finding what works best with your ingredients and equipment. Keep this guide handy, pay attention to your dough, and soon you'll be slicing and baking perfect cookies with ease!
Ready to try again or practice your new troubleshooting skills? Explore our collection of beginner-friendly slice-and-bake cookie recipes designed for success.
- Classic Vanilla Slice-and-Bake
- Chocolate Chip Slice-and-Bake (Tips for adding chips!)
- Holiday Spice Slice-and-Bake
# Example ingredient ratio note (not actual code)
# A common ratio for less spread might be:
# 1 part butter : 2 parts flour by weight
# A typical recipe might use ~450g flour for 225g butter.
Frequently Asked Questions
Crumbling is often due to too little moisture or too much flour in the dough. Ensure accurate measurements and use softened butter for a better texture.
Over-spreading can result from using warm butter instead of softened, or from the dough being too warm before baking. Chill the dough thoroughly before slicing and baking.
A sticky dough indicates insufficient chilling time. Allow the dough to chill in the refrigerator for at least 2 hours, or even overnight.
This likely means your oven temperature is too high or your baking sheet is too dark. Try lowering the oven temperature by 25 degrees or using a lighter-colored baking sheet.
Properly wrapped, slice-and-bake cookie dough can typically be stored in the refrigerator for up to 3-5 days. For longer storage, consider freezing the dough.
The seemingly simple act of making slice-and-bake cookies hides a world of potential pitfalls, but mastering these techniques unlocks a level of baking satisfaction that's truly rewarding. From overly soft edges to crumbly disasters, the challenges are real, but the solutions are surprisingly straightforward. This article has explored these common issues, providing practical, easy-to-implement fixes for even the most novice baker.
The frustration of a "sloppy" batch of slice-and-bake cookies is a universal experience, one that resonates deeply with the joy of baking itself. The delicate balance of ingredients, the precise chilling time, the subtle art of slicing – these are all elements that contribute to the final product. Baking is at once child's play and adult joy. And cooking is all that and a whole lot more.
- Alma Flor Ada. This quote perfectly captures the emotional investment in baking, and the triumph of overcoming challenges to achieve a delicious result.
So, the next time you find yourself facing a less-than-perfect batch of slice-and-bake cookies, remember the lessons learned here. Don't be discouraged! Embrace the process, experiment with the solutions provided, and most importantly, enjoy the journey. The perfect cookie is within your reach, and the satisfaction of creating something delicious with your own hands is a reward far greater than any perfectly shaped treat. Now, go forth and bake!
Thanks for joining us on this baking adventure! We hope you learned some valuable tips for conquering those tricky slice-and-bake cookies. Now it's time to put your newfound knowledge into practice.
- Bake a batch of your favorite slice-and-bake cookies using your newly acquired skills. Challenge yourself to perfect that crumbly texture or achieve the ideal golden-brown color. This is your chance to shine!
- Share your baking triumph (or even your learning experience!) on social media using #BakeWithEaseSliceAndBake. Let's inspire other bakers!
- Try a new slice-and-bake recipe using different flavors or techniques. Expand your baking horizons and discover new favorites!
Ready to transform your baking game? What's the first new flavor combination you're going to try?