
Chilling Cream Pies for Perfect, Clean Slices


Welcome to BakeWithEase, your kitchen companion on the journey to baking brilliance! Ever struggled with messy, collapsing slices of cream pie? Dive into our latest guide and unlock the secrets to achieving those perfect cream pie slicing tips you've always dreamed of. Prepare to elevate your pastry game and impress everyone with flawlessly presented desserts! Get ready to slice with confidence!
- Achieving Perfect Cream Pie Slices: A Comprehensive Guide
- Introduction: Mastering the Art of Clean Cream Pie Slices
- The Importance of Chilling: Ensuring Stability and Clean Cuts
- Optimizing Chilling: Temperature and Duration for Best Results
- Essential Tools for Clean and Efficient Cream Pie Slicing
-
Step-by-Step Guide: Chilling and Slicing Cream Pies Like a Pastry Chef
- Step 1: Pre-Chilling Preparation: Preventing Soggy Crusts
- Step 2: The Chilling Process: Achieving Uniform Cooling
- Step 3: Knife Preparation: Ensuring a Clean and Effective Cut
- Step 4: The Slicing Technique: Mastering the Cut and Lift
- Step 5: Serving and Presentation: Maintaining Slice Integrity and Appeal
- Troubleshooting Common Cream Pie Slicing Issues and Solutions
- Advanced Techniques for Elevating Your Cream Pie Slicing Skills
- Cream Pie Recipes That Benefit from Precise Chilling and Slicing
- Conclusion: Savoring Beautifully Sliced Cream Pies with Confidence
-
Frequently Asked Questions
- How does chilling a cream pie help with slicing?
- What is the ideal temperature and duration for chilling a cream pie before slicing?
- What type of knife is best for slicing cream pies?
- What can I do if my cream pie is still too soft to slice cleanly after chilling?
- Are there any other tips besides chilling that can help achieve perfect cream pie slices?
- Final Reflection: The Art and Science of the Perfect Cream Pie Slice
- Unlock Perfectly Sliced Cream Pie Magic!
Achieving Perfect Cream Pie Slices: A Comprehensive Guide
Introduction: Mastering the Art of Clean Cream Pie Slices
Cream pies, with their luscious fillings and delicate crusts, are a delightful dessert. However, slicing into one often presents a challenge. Achieving clean, picture-perfect slices that hold their shape can feel like a pastry chef's secret. Many home bakers struggle with messy cuts, runny fillings, and crumbling crusts, which can detract from the overall enjoyment of the pie. Mastering the technique of slicing is just as crucial as perfecting the recipe itself, ensuring that the beautiful pie you've created is presented flawlessly.
This guide dives deep into the essential steps and techniques required to get those enviable, clean slices every time. We'll explore the science behind why chilling is paramount, the ideal temperatures and times, the best tools for the job, and a step-by-step method used by professionals. Whether you're tackling a classic banana cream pie or a rich chocolate version, these perfect cream pie slicing tips will elevate your dessert presentation and make serving a breeze. Let's unlock the secrets to slicing success!
The Importance of Chilling: Ensuring Stability and Clean Cuts
Cream pies are inherently delicate due to their soft, often gelatin- or cornstarch-thickened fillings and crumbly crusts. Without proper chilling, the filling remains too soft, the crust can be fragile, and the layers lack cohesion. Attempting to slice a warm or insufficiently chilled cream pie almost guarantees a messy outcome. The filling will ooze, the crust will likely break apart, and the slice will collapse under its own weight or during transfer.
Chilling transforms the pie's structure. As the pie cools, fats in the crust solidify, making it firmer and less prone to crumbling. More importantly, the thickeners in the filling (like cornstarch, gelatin, or eggs) set properly, turning the liquid or semi-liquid mixture into a stable, sliceable consistency. This firming process is the cornerstone of achieving those coveted perfect cream pie slicing tips, allowing the knife to pass through cleanly without dragging or smushing the layers together.
Understanding Cream Pie Composition and Its Impact on Slicing
Cream pies typically consist of a baked crust (often graham cracker or pastry), a creamy filling (made with dairy, sugar, eggs/starch, and flavorings), and sometimes a topping like whipped cream or meringue. The filling's primary thickener is key. Fillings thickened with cornstarch or flour rely on the starch granules swelling and creating a gel structure as they cool.
This requires adequate time at low temperatures to fully set. Gelatin-based fillings, common in mousses or lighter cream pies, need refrigeration to activate the gelatin's gelling properties, forming a stable network that holds the liquid. Egg-thickened fillings (like in a proper pastry cream) set as the egg proteins coagulate during cooking, but chilling further solidifies their structure and reduces fluidity.
The crust type also influences slicing ease. A well-baked pastry crust can be flaky but firm, offering good support. A graham cracker or cookie crumb crust relies on melted butter as a binder; chilling solidifies this butter, making the crust rigid and less likely to crumble excessively when cut. Understanding how these components behave at different temperatures highlights why chilling isn't just a suggestion but a critical step for anyone aiming for perfect cream pie slicing tips. A properly chilled pie presents a unified, firm structure that resists deformation during the slicing process.
How Chilling Affects Texture, Flavor, and Sliceability
Beyond just structure, chilling significantly impacts the overall sensory experience of a cream pie. Texture is refined as the filling sets to a smooth, creamy consistency rather than a gloopy or runny one. The crust achieves its intended crispness or firm crumb. Flavor also benefits; chilling allows the various ingredients to meld together, often intensifying the sweetness and richness while muting any raw or harsh notes. For example, vanilla notes become more pronounced, and fruit flavors in fillings like banana or key lime become brighter.
Crucially for our goal, chilling directly enhances sliceability. A cold filling offers resistance to the knife, allowing for a clean pass-through without the filling sticking excessively or being pushed around. The chilled crust provides a stable base, preventing the slice from breaking apart as it's lifted. Think of trying to slice warm butter versus cold butter – the cold butter cuts cleanly, while warm butter smears. Similarly, a well-chilled pie facilitates precise cuts. This cold state is fundamental to executing perfect cream pie slicing tips, ensuring each slice is a neat, appealing portion ready for serving.
Optimizing Chilling: Temperature and Duration for Best Results
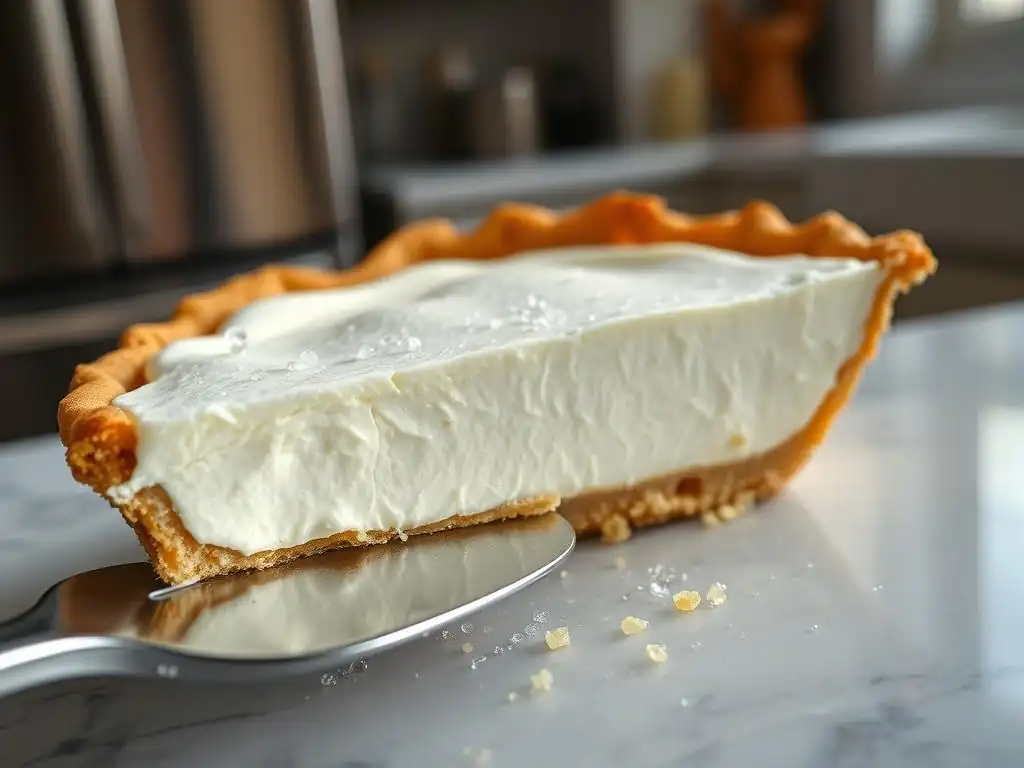
To achieve optimal sliceability, merely putting the pie in the refrigerator isn't enough; temperature and time matter. The goal is to chill the pie thoroughly, ensuring the filling is set firm throughout, not just around the edges. This requires patience and understanding of how cold affects different types of pies and fillings. Insufficient chilling is the most common culprit behind messy slices, even if other techniques are followed correctly.
The ideal chilling environment is a standard refrigerator set to approximately 35-40°F (1.7-4.4°C). This temperature range is cold enough to set fillings and firm up crusts effectively without freezing the pie (unless partial freezing is intentionally desired). The duration of chilling depends on the pie's size and the filling type, but generally, longer is better within reason. Proper chilling is the foundation for implementing perfect cream pie slicing tips successfully.
Ideal Chilling Temperature for Various Cream Pie Fillings
While a standard refrigerator temperature of 35-40°F (1.7-4.4°C) is suitable for most cream pies, understanding how different thickeners respond can refine your approach.
- Cornstarch/Flour-based fillings: These rely on a gel structure that strengthens significantly as it cools. They benefit most from being held at the lower end of the chilling range, closer to 35°F (1.7°C), for an extended period. This ensures the starch fully retrogrades and sets firmly.
- Gelatin-based fillings: Gelatin sets reliably below 50°F (10°C), but a colder temperature (35-40°F / 1.7-4.4°C) ensures rapid and complete gelling. They typically set faster than starch fillings but still require ample time to firm throughout the entire pie.
- Egg-thickened fillings (Pastry Cream): These fillings set primarily through protein coagulation during cooking, but chilling solidifies the fats and reduces fluidity. Standard refrigeration temperatures are perfect for these, allowing them to become dense and sliceable.
Regardless of the specific thickener, consistency is key. Avoid placing warm pies directly into a refrigerator packed with other items, as this can slow down cooling and lead to uneven setting. Ensure air can circulate around the pie for efficient chilling.
Recommended Chilling Times Based on Pie Type and Size
The chilling time is crucial for achieving those perfect cream pie slicing tips. A general rule of thumb is a minimum of 4 hours, but many cream pies benefit significantly from longer chilling.
- Standard 9-inch pie: A minimum of 4-6 hours is required for most cream pies with cornstarch or egg-based fillings. For gelatin-based fillings, 3-4 hours might suffice, but longer is safer.
- Deep-dish or larger pies: These require substantially longer chilling times due to the increased volume of filling. Plan for at least 6-8 hours, or even overnight, to ensure the center is as firm as the edges.
- Individual tartlets or mini pies: These will chill much faster, often being ready in 2-3 hours due to their smaller size and surface area ratio.
For optimal results and the best chance at perfect cream pie slicing tips, chilling the pie overnight (8-12 hours) is often recommended, especially for larger pies or those with particularly soft fillings. This guarantees the filling is fully set and the crust is firm, providing the best possible structure for slicing.
Preventing Over-Chilling: Maintaining Texture and Flavor
While sufficient chilling is vital, it is possible to over-chill certain types of pies, although this is less common with standard cream pies than with custard pies which can crack. For most cream pies, prolonged chilling (beyond 24-36 hours) primarily risks the crust becoming dry or stale, particularly if it's uncovered. Some delicate flavors can also become slightly muted over extended refrigeration.
More critically, if the pie becomes too cold, almost approaching freezing, the texture of the filling can become excessively hard or even slightly icy, depending on the ingredients. This can make slicing difficult, potentially causing the knife to drag or break the crust. The ideal state is firmly cold and set, but not rock hard. Storing the pie properly wrapped after the initial chilling period helps maintain quality and prevent the crust from drying out, ensuring that when you're ready to apply your perfect cream pie slicing tips, the pie is in its prime condition.
Essential Tools for Clean and Efficient Cream Pie Slicing
Having the right tools is just as important as proper chilling when it comes to achieving clean, beautiful slices of cream pie. While a basic kitchen knife might work in a pinch, using tools designed or adapted for pie slicing can make a significant difference in ease and outcome. The goal is to minimize drag and resistance as the knife passes through the pie, preserving the integrity of both the filling and the crust.
Investing in or simply selecting the most appropriate tools from your existing collection will greatly enhance your ability to execute perfect cream pie slicing tips. These tools, combined with technique, are the final puzzle pieces for slicing success.
Knife Selection: Serrated, Straight, and Specialty Pie Knives
The choice of knife is perhaps the most critical tool decision.
- Serrated Knives: A long, thin serrated knife (like a bread knife or tomato knife) is often recommended for pies with delicate crusts, especially flaky pastry. The gentle sawing motion of the serrations helps cut through the crust without crushing it. However, if the filling is very soft, serrations can sometimes tear or drag the filling.
- Straight-Edge Knives: A sharp, thin-bladed chef's knife or slicing knife can work well, particularly for pies with firmer fillings or crumb crusts. The key here is sharpness; a dull straight edge will simply push and smush the pie layers. A thin blade is preferable to a thick one, as it creates less resistance.
- Specialty Pie Knives: Some knives are designed specifically for pies, often featuring a curved blade and a wide server-like tip. While not essential, these can be effective, especially if kept very sharp.
Many bakers find a long, sharp, thin-bladed straight knife, often warmed, provides the cleanest cut for cream pies, as it glides through the filling smoothly after breaking the crust. Experimenting with both a sharp straight edge and a serrated knife on different pies can help you discover which works best for your specific pie and your personal technique, contributing to your perfect cream pie slicing tips repertoire.
Pie Servers and Spatulas: Choosing the Right Implement for Serving
Once a slice is cut, removing it from the pie plate and transferring it to a serving plate without it falling apart is the next challenge. This is where a good pie server or spatula comes in.
- Traditional Pie Server: These wedge-shaped servers are designed to slide under a slice of pie. Look for one that is relatively thin and has a slightly angled edge to make it easier to slip under the crust. A server with a bit of flexibility can also be helpful.
- Offset Spatula: A wide offset spatula can be very effective, particularly for larger or more delicate slices. The offset handle keeps your hand clear of the pie, and the wide, flat surface provides ample support for the entire slice as you lift and transfer it.
- Cake Server/Lifter: Some large, flat cake lifters can also double as excellent pie servers, offering maximum support for wide slices.
The key characteristic for any serving tool is a wide, flat surface that can support the entire base of the slice evenly. Trying to lift a slice with a small, narrow spatula is a recipe for disaster. A steady hand and the right server are indispensable companions to your perfect cream pie slicing tips.
Warm Water Technique: Enhancing Knife Glide for Smooth Cuts
One of the most widely recommended and effective techniques for achieving super clean slices, especially with creamy or sticky fillings, is the warm water method. This involves dipping your knife in hot (but not boiling) water, wiping it clean and dry, and then making a cut. The warmth from the blade slightly melts the fats and sugars it comes into contact with, allowing it to glide through the pie layers with significantly less resistance.
After each cut, the knife should be re-dipped in the hot water and wiped clean and dry before the next cut. This ensures that residual filling doesn't build up on the blade, which can cause drag and mess up subsequent slices. Using a tall container or pitcher filled with hot water makes the dipping process easy. This simple step dramatically improves the cleanliness of your cuts and is a hallmark of perfect cream pie slicing tips used by professionals.
Step-by-Step Guide: Chilling and Slicing Cream Pies Like a Pastry Chef
Achieving those pristine, bakery-quality cream pie slices is a process that involves careful steps both before and during the actual cutting. It's not just about the moment the knife hits the crust; it's about preparation, proper chilling, and a refined technique. By following this step-by-step guide, you can replicate the methods used by pastry chefs to ensure every slice is as beautiful as the whole pie.
This systematic approach minimizes common pitfalls and maximizes your chances of success, turning the often-dreaded task of slicing into a satisfying part of the baking process. Mastering these steps is key to consistently applying perfect cream pie slicing tips.
Step 1: Pre-Chilling Preparation: Preventing Soggy Crusts
Before the pie even goes into the refrigerator, a crucial step is to ensure the crust remains crisp and doesn't become soggy from the moisture in the filling. This is particularly important for pastry crusts. One effective method is blind baking the crust fully before adding the filling. This pre-cooks the dough, creating a barrier against moisture. For crumb crusts, ensuring the butter is well-distributed and the crust is pressed firmly into the pan helps create a solid base.
Another technique, especially for pastry crusts, is to brush the bottom and sides of the baked crust with a thin layer of melted chocolate or a simple egg wash (baked until set) before adding the filling. This creates a waterproof layer. Allow this protective layer to set completely before pouring in the cooled filling. These preparatory steps ensure that when the pie is perfectly chilled and ready for slicing, the crust remains firm and supportive, contributing significantly to achieving perfect cream pie slicing tips.
Step 2: The Chilling Process: Achieving Uniform Cooling
Once the filling has been added to the prepared crust and any topping (like meringue, if applicable, which should be baked first) has been applied and cooled slightly, the pie is ready for chilling. Place the pie, uncovered initially, on a level shelf in the refrigerator. Leaving it uncovered for the first hour or two allows the surface to cool and set without condensation forming.
After the initial surface setting, loosely cover the pie with plastic wrap or aluminum foil. Avoid pressing the wrap directly onto the filling, especially if there's a delicate topping. Using toothpicks inserted into the edge of the crust to tent the wrap can help. Ensure the refrigerator is set to the optimal temperature (35-40°F / 1.7-4.4°C) and allow the pie to chill for the recommended duration (minimum 4-6 hours, preferably overnight for a 9-inch pie). Uniform cooling ensures the center is as set as the edges, vital for consistent slicing.
Step 3: Knife Preparation: Ensuring a Clean and Effective Cut
Before making the first cut, prepare your knife. Select the sharpest, thin-bladed knife you have, preferably a straight edge for minimal drag. The warm water technique is highly recommended here. Fill a tall container with hot tap water. Dip the knife blade into the hot water for 15-20 seconds.
Carefully remove the knife from the water and immediately wipe the entire blade clean and completely dry with a clean kitchen towel. A wet blade will stick and drag. The heat from the blade will help it slice through the cold pie more smoothly. This simple preparation step is a cornerstone of achieving perfect cream pie slicing tips and should be repeated before each individual cut.
Step 4: The Slicing Technique: Mastering the Cut and Lift
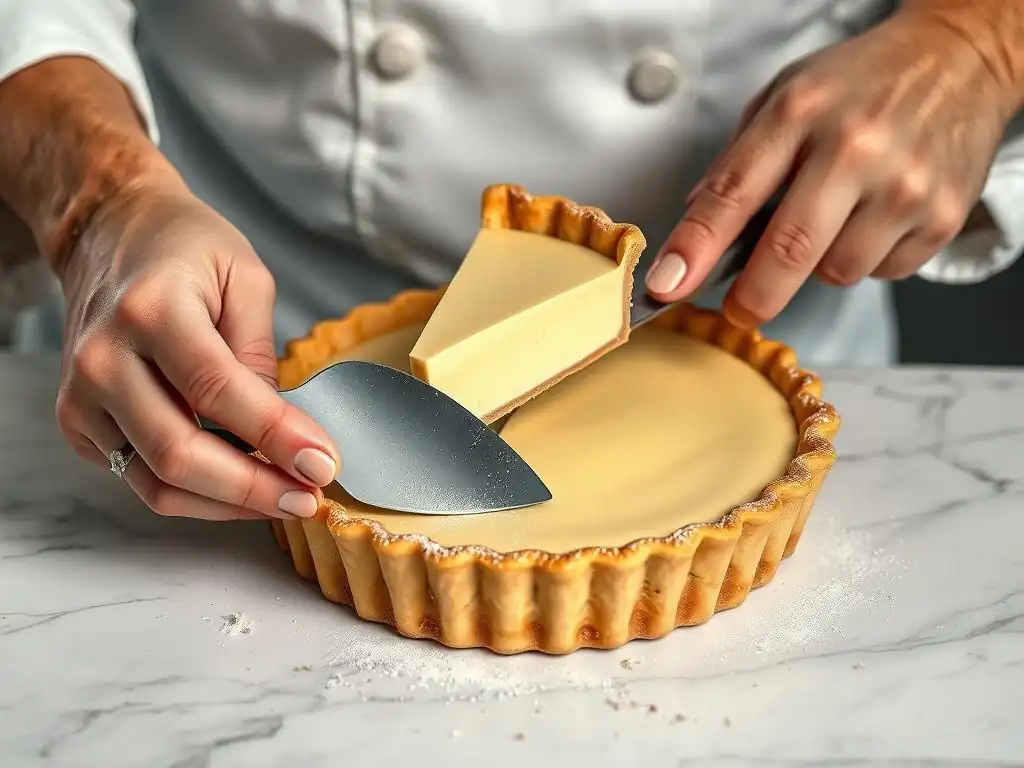
With your perfectly chilled pie and warmed, dry knife ready, it's time to slice.
- Initial Cut: Place the tip of the warm knife gently on the center of the pie. With a steady, single downward motion, press the knife straight down through the filling and crust to the bottom of the pie plate. Avoid a sawing motion initially if using a straight blade; a decisive press works best. If using a serrated knife on a flaky crust, a gentle sawing motion is appropriate for the crust, followed by a press through the filling.
- Complete the Cut: Once the blade is through, rock it slightly if needed to ensure the cut goes all the way to the edge of the crust. Lift the knife straight up and out of the pie.
- Repeat and Clean: Re-dip the knife in hot water, wipe it clean and dry, and make the next cut from the center to the edge. Continue this process for each slice.
- Make the Wedge: To create a sliceable wedge, make two cuts from the center to the edge, approximately 60 degrees apart for six slices, or 45 degrees for eight.
- Loosen the Slice: Before lifting, gently run the tip of a thin knife or offset spatula along the edge of the crust where it meets the pie plate to ensure the slice isn't stuck.
Step 5: Serving and Presentation: Maintaining Slice Integrity and Appeal
Once the wedge is cut, the final challenge is getting it out cleanly. Insert your chosen pie server or wide offset spatula under the entire base of the slice, starting from the tip and sliding it towards the crust edge. Ensure the server is fully underneath the slice before attempting to lift.
With the slice fully supported, lift it gently and steadily from the pie plate. Avoid tilting or jiggling. Transfer the slice directly to the serving plate. If the slice has a delicate topping like whipped cream, you might need to add extra whipped cream or garnishes after the slice is on the plate to refresh its appearance. Cleaning up any stray crumbs or filling on the serving plate before presenting completes the professional look. These steps are vital for ensuring your perfect cream pie slicing tips result in a beautiful presentation.
Troubleshooting Common Cream Pie Slicing Issues and Solutions
Even with the best intentions and techniques, sometimes things don't go perfectly. Messy cream pie slices are a common source of frustration for home bakers. Understanding the root causes of typical slicing problems and knowing how to address them can save your dessert presentation and your sanity. Most issues stem from either insufficient chilling, an improper crust, or poor slicing technique.
Identifying the specific problem – be it a soggy bottom, runny filling, or a torn slice – is the first step towards finding a solution. These troubleshooting tips will help you refine your process and consistently achieve perfect cream pie slicing tips.
Preventing Soggy Crust: Techniques for a Crisp and Stable Base
A soggy crust is a major obstacle to clean slices, as it offers no structural support and crumbles or tears easily. As mentioned earlier, the primary cause is moisture from the filling seeping into the baked crust.
- Solution 1: Blind Baking: Fully bake your pastry crust until golden brown and firm before adding the filling. This creates a solid, less porous structure. For a 9-inch pastry crust, this typically involves baking with pie weights at 375°F (190°C) for 15-20 minutes, then removing weights and baking for another 10-15 minutes until golden.
- Solution 2: Moisture Barrier: Apply a thin layer of melted and cooled chocolate (white or dark, depending on the pie's flavor profile) or a quickly baked egg wash to the inside of the blind-baked crust. Let this barrier set completely before adding the filling. This creates a waterproof seal.
- Solution 3: Chill Time: Ensure the pie is adequately chilled. While not a direct crust preventative, proper chilling sets the filling faster, reducing the time moisture is in contact with the crust.
- Solution 4: Proper Storage: Store leftovers loosely covered in the refrigerator. Tightly covering the pie can trap condensation, which can make the crust soggy over time.
Addressing Runny Filling: Strategies for Achieving Optimal Set
A runny filling is another common cause of messy slices; it simply won't hold its shape when cut. This usually indicates the thickening agent didn't set properly, often due to insufficient cooking or inadequate chilling.
- Solution 1: Cook Filling Properly: Ensure fillings thickened with cornstarch or flour come to a full boil and are cooked for the recommended time (often 1-2 minutes) after boiling. This activates the starch's thickening power. Egg-thickened fillings must reach a specific temperature (around 160°F / 71°C) to set the proteins, without scrambling.
- Solution 2: Sufficient Chilling: This is paramount. The setting process for most thickeners continues as the pie cools. Ensure the pie is chilled for the minimum recommended time, preferably overnight for best results. A 9-inch pie might require 6-8 hours at 38°F (3.3°C) to fully set the center of a starch-thickened filling.
- Solution 3: Accurate Measurements: Ensure you are using the correct amount of thickener as specified in the recipe. Using too little will result in a softer set.
- Solution 4: Avoid Adding Acid Too Soon: If your filling contains acidic ingredients (like lemon juice in a key lime pie), ensure the starch or egg base is fully thickened before adding the acid, as acid can sometimes weaken the thickening power of starches or curdle eggs.
Eliminating Knife Drag and Tearing: Ensuring Smooth, Clean Slices
Knife drag leaves a messy, smeared cut surface, while tearing pulls the filling or crust apart. These issues are often related to the knife itself, its temperature, or the slicing technique.
- Solution 1: Warm Water Technique: As detailed previously, dipping the knife in hot water and wiping it dry before each cut is highly effective at reducing drag, especially with sticky or creamy fillings. The warmth helps the blade slice through cleanly.
- Solution 2: Use a Sharp Knife: A dull knife will push and tear rather than slice. Ensure your knife is properly sharpened.
- Solution 3: Use a Thin Blade: Thicker blades create more resistance. A thin slicing knife or chef's knife is preferable to a thick-spined utility knife.
- Solution 4: Decisive Cutting Motion: For straight blades, aim for a clean, single press straight down through the pie rather than a back-and-forth sawing motion (unless dealing with a particularly tough crust). For serrated knives, use a gentle sawing motion through the crust, then press down.
- Solution 5: Clean the Knife Between Cuts: This is non-negotiable. Residual filling on the blade is a primary cause of drag and messy subsequent slices. Re-dip and wipe the knife every time before making a new cut.
Advanced Techniques for Elevating Your Cream Pie Slicing Skills
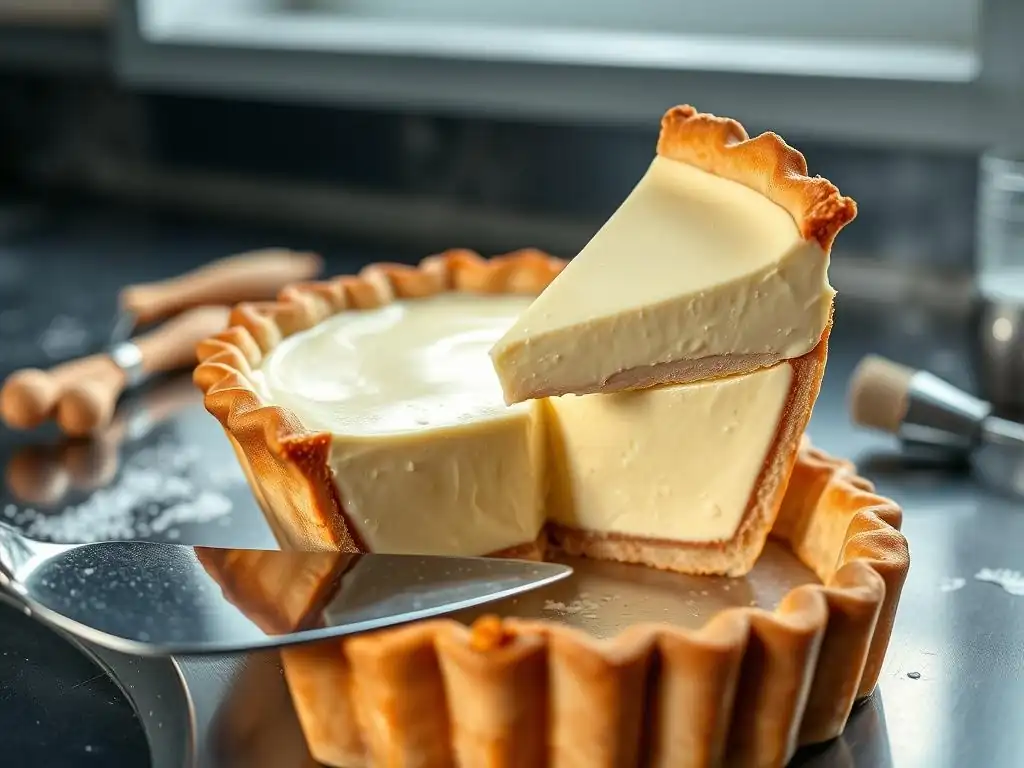
Once you've mastered the basics of chilling and using the warm water method, you can explore some more advanced techniques that can further improve sliceability and presentation. These methods offer additional control and can be particularly helpful for pies with very delicate structures or when aiming for a truly professional look. Incorporating these into your routine can refine your perfect cream pie slicing tips even further.
These techniques move beyond just cutting the pie and consider factors like pre-treatment and post-cut handling to ensure the slice remains pristine from plate to fork.
Partial Freezing: Preparing Pies for Easier Slicing and Clean Removal
For some cream pies, particularly those with very soft fillings or delicate layers, a short period of partial freezing can make slicing significantly easier. This technique firms the pie up more intensely than refrigeration alone, providing a very stable structure for cutting.
- How to do it: After the pie has been fully chilled in the refrigerator (at least 4-6 hours), transfer it to the freezer for 30-60 minutes. The exact time will depend on the size of the pie and the temperature of your freezer. The goal is for the pie to be very firm but not frozen solid throughout.
- Benefits: The firmer structure allows the knife to cut through all layers – crust, filling, and any toppings – with minimal resistance and tearing. It also makes the slices more rigid, making them easier to lift and transfer without breaking.
- Considerations: Do not leave it in the freezer for too long, as this can affect the texture of the filling and crust once thawed. The pie should still be sliceable, not rock-hard. This technique is particularly useful when preparing a large number of slices or for pies that are notoriously difficult to cut cleanly.
Utilizing Parchment Paper: Aiding in Lifting and Presentation
This technique is less about the cut itself and more about the successful transfer of the slice. It's especially useful for pies with crumb crusts that might be prone to breaking or for ensuring perfectly clean edges on the serving plate.
- How to do it: Before assembling the pie (specifically for crumb crusts), line the pie plate with parchment paper, leaving an overhang. Press the crumb crust firmly over the parchment. Add the filling and chill as usual.
- For Slicing: After cutting a slice using the warmed knife method, you can gently use the parchment overhang associated with that slice (if you were able to cut through it, or lift the slice slightly to separate from the main parchment) to help lift the slice.
- Alternative Method: Cut squares or strips of parchment paper and gently slide one under each cut slice before attempting to lift it with a server. The parchment provides a stable base for lifting and transferring. You can even serve the slice on the parchment square for a rustic look, or carefully slide the slice off the parchment onto the plate. This method provides excellent support and prevents the bottom of the slice from sticking or breaking, improving your perfect cream pie slicing tips execution.
Creative Presentation: Decorating Slices for a Professional Touch
Once you have a beautifully sliced piece of cream pie, presentation on the plate can further enhance its appeal. Pastry chefs often add finishing touches to individual slices.
- Whipped Cream: Add a fresh dollop or swirl of whipped cream to the top of the slice. Use a piping bag and decorative tip for a professional flourish.
- Garnishes: Sprinkle toasted nuts, chocolate shavings, cocoa powder, or fresh fruit (like banana slices for a banana cream pie, or lime zest for key lime) over the whipped cream or plate.
- Sauces: Drizzle a complementary sauce, such as chocolate sauce, caramel sauce, or a fruit coulis, onto the plate next to the slice (not usually directly on a cream pie slice unless intended).
- Clean Plate: Always wipe the serving plate clean of any stray crumbs, drips, or fingerprints before presenting. A clean plate makes the slice stand out.
These final touches elevate a simple slice of pie into a dessert statement. They show attention to detail and make the most of your perfectly sliced cream pie, reinforcing the value of those perfect cream pie slicing tips.
Cream Pie Recipes That Benefit from Precise Chilling and Slicing
While the principles of proper chilling and slicing apply to virtually all cream pies, some types particularly highlight the importance of these techniques due to their specific textures and compositions. Practicing your perfect cream pie slicing tips on these popular varieties will yield impressive results.
Here are a few classic examples where mastering the slice is key to enjoying the pie at its best:
Classic Banana Cream Pie: Achieving Neat Slices with Delicate Fruit
Banana cream pie is beloved for its creamy filling and soft banana slices. However, the softness of the bananas combined with the creamy texture of the filling can make it notoriously difficult to slice cleanly. The bananas can smear, and the filling can squeeze out.
- Why chilling is crucial: Thorough chilling (preferably overnight) is essential to firm up both the pastry cream base and the banana slices themselves. The cold temperature makes the banana slices less prone to smushing during the cut.
- Slicing tips: Use a very sharp, warm, dry knife. Slice with a single, decisive downward motion if possible. Lift gently with a wide server. Consider adding banana slices to the top of the pie after chilling rather than layering them within the filling if slicing is a major challenge, or slice the bananas very thinly and distribute them evenly.
Rich Chocolate Peanut Butter Cream Pie: Managing a Dense Filling
This indulgent pie often features a thick, dense filling combining chocolate and peanut butter elements, often set in a crumb crust. While denser fillings can be easier to slice than very soft ones, their richness means they can stick to the knife.
- Why chilling is crucial: Adequate chilling solidifies the fats in the chocolate and peanut butter, ensuring the filling is firm enough to hold its shape and doesn't ooze.
- Slicing tips: The warm water technique is exceptionally effective here. The heat helps the knife glide through the rich, potentially sticky filling cleanly. A sturdy, thin-bladed straight knife is often best for this type of pie. Ensure the crumb crust is well-compacted and chilled to prevent excessive crumbling.
Tangy Key Lime Cream Pie: Slicing Through a Tart and Creamy Delight
Key lime pie typically has a filling thickened with egg yolks and often sweetened condensed milk, set with the acidity of lime juice. It results in a filling that should be firm yet incredibly smooth and creamy. It's usually set in a graham cracker crust and often topped with whipped cream.
- Why chilling is crucial: The acidity of the lime juice plays a role in setting the egg yolks, but thorough chilling is still necessary to achieve the ideal firm-yet-creamy consistency that slices well. It also firms up the graham cracker crust.
- Slicing tips: Use a warm, dry knife to cut through the firm filling and the crumb crust cleanly. The smooth texture of the filling benefits greatly from the clean glide provided by a warm blade. Ensure the graham cracker crust is pressed firmly into the pan and adequately chilled to prevent it from falling apart when cut.
Conclusion: Savoring Beautifully Sliced Cream Pies with Confidence
Achieving perfect cream pie slicing tips is a skill that transforms a potentially messy dessert into an elegant presentation. It's a culmination of understanding the pie's composition, respecting the science of chilling, utilizing the right tools, and employing careful technique. From the crucial initial chilling period to the final flourish of garnish, each step plays a vital role.
No longer will you dread cutting into that beautiful cream pie you spent time creating. By prioritizing thorough chilling, mastering the warm water knife technique, and using a suitable server, you can confidently slice and serve picture-perfect portions every time. These perfect cream pie slicing tips are your key to impressing guests and, more importantly, fully enjoying the fruits (or creams!) of your labor. So go forth, bake, chill, slice, and savor every clean, delicious bite!
Frequently Asked Questions
How does chilling a cream pie help with slicing?
Chilling the pie thoroughly allows the cream filling to firm up, making it easier to cut through cleanly. This prevents the filling from squishing out and ruining the slice's appearance.
What is the ideal temperature and duration for chilling a cream pie before slicing?
Ideally, chill your cream pie in the refrigerator for at least 2-4 hours, or even overnight. The temperature should be around 40°F (4°C) to ensure a firm filling.
What type of knife is best for slicing cream pies?
A thin, sharp knife is crucial. A warm knife can also help slice through the crust and filling smoothly. Run the knife under hot water and dry it between each slice.
What can I do if my cream pie is still too soft to slice cleanly after chilling?
If the pie is still too soft, try placing it in the freezer for 30-60 minutes before slicing. However, be careful not to freeze it solid.
Are there any other tips besides chilling that can help achieve perfect cream pie slices?
Yes! Consider using a pie server to lift each slice carefully. Wiping the knife clean between cuts also helps prevent the filling from dragging and tearing.
Final Reflection: The Art and Science of the Perfect Cream Pie Slice
The pursuit of the perfect cream pie slice is more than just a culinary quest; it's a testament to the enduring power of simple pleasures and the meticulous attention to detail that elevates the ordinary to the extraordinary. We've explored the nuances of chilling, the importance of sharp knives, and the subtle art of the controlled cut, all in the name of achieving that pristine, picture-perfect slice. These techniques aren't just about aesthetics; they ensure each guest receives a generous portion of creamy goodness, free from the dreaded crumbling mess.
The impact of a flawlessly sliced cream pie extends far beyond the individual experience. It's a symbol of hospitality, a demonstration of care and consideration, a small act that can brighten someone's day. A perfect pie is a love letter to the soul.
This sentiment, though not directly about slicing, encapsulates the spirit of our exploration. The act of carefully crafting each slice reflects a deeper appreciation for the ingredients, the process, and the joy of sharing a delicious treat with others. It's a small detail that speaks volumes about the effort and thoughtfulness put into creating a memorable experience.
Now, consider your own approach to the seemingly simple task of slicing a cream pie. Will you continue to approach it with a casual hand, or will you embrace the techniques discussed here to elevate your pie-serving game? I invite you to experiment, to practice, and to discover the satisfaction of achieving that perfect, clean slice.
The next time you present a cream pie, let it be a testament to your dedication to detail and a celebration of the simple joys in life. The reward? Happy faces, satisfied guests, and the quiet pride of knowing you've mastered the art of the perfect slice.
Here's a Call to Action (CTA) tailored for the article "Chilling Cream Pies for Perfect, Clean Slices" on BakeWithEase.com:
Unlock Perfectly Sliced Cream Pie Magic!
Thanks for joining us on this creamy journey! You've now got the secret to achieving flawlessly sliced cream pies – no more messy disasters! Ready to put your new skills to the test?
- Master the chill: Try chilling your pie for the recommended time next time you bake – you'll be amazed at the difference!
- Share your success: Snap a picture of your perfectly sliced pie and share it on social media using #BakeWithEasePerfectSlices – let's inspire others!
- Explore our other pie recipes: Dive into our extensive collection for even more delicious baking inspiration.
What’s your go-to tip for serving a perfectly portioned pie? Let's chat in the comments!