
Essential Tips for Transporting Cream Pies and Tarts Safely


Welcome to BakeWithEase, your haven for effortless baking! Ever wondered how to transport that delicate cream pie without a single wobble or smudge? Uncover the secrets to safely transporting cream pies and tarts with our essential guide. We'll walk you through proven techniques and clever hacks to ensure your pastry masterpiece arrives in perfect condition, ready to impress. Intrigued? Let's dive in!
- Essential Tips for Transporting Cheesecakes and Fruit Tarts Safely
- Introduction: Safely Transporting Delicate Cheesecakes and Fruit Tarts
- Preparing Your Cheesecake or Fruit Tart for Transport: Key Steps
- Packing Your Cheesecake or Fruit Tart for Safe Transit
- Best Practices for Transporting Cheesecakes and Fruit Tarts
- Handling Your Cheesecake or Fruit Tart Upon Arrival
- Troubleshooting Common Cheesecake and Fruit Tart Transport Problems
- Advanced Tips for Long-Distance Cheesecake and Fruit Tart Transport
- Conclusion: Enjoy Your Perfectly Transported Cheesecake or Fruit Tart
-
Frequently Asked Questions
- How can I prevent my cream pie from sliding around during transport?
- What's the best way to keep my cream pie cold while transporting it?
- What type of container is best for transporting a cream pie?
- How can I prevent the whipped cream topping from melting or collapsing during transport?
- What's a good strategy for transporting a cream pie if I don't have a cooler?
- Final Reflection: The Sweet Success of Safe Pie Transport
- Ready to Transport Your Pies with Confidence?
Essential Tips for Transporting Cheesecakes and Fruit Tarts Safely
Introduction: Safely Transporting Delicate Cheesecakes and Fruit Tarts
Baking a beautiful cheesecake or a vibrant fruit tart is a labor of love, filled with careful measurements, precise techniques, and patient waiting. But the journey isn't over when it comes out of the oven or off the cooling rack. Often, these delicate desserts need to travel, whether it's to a potluck, a party, or a family gathering.
This is where the challenge begins – how to get your masterpiece from point A to point B without it becoming a crumbly, cracked, or melted mess. Mastering the art of transporting cheesecakes and fruit tarts safely easily is a skill every baker needs.
Transporting cheesecakes and fruit tarts safely and easily requires more than just placing them in a box. It involves strategic preparation, careful packing, and smart handling during transit. The goal is to preserve the dessert's structural integrity, maintain its optimal texture and flavor, and keep its visual appeal intact. A little planning goes a long way in ensuring your delicious creation arrives looking just as good as it tasted when it was finished, making the effort of transporting cheesecakes and fruit tarts safely easily a worthwhile endeavor.
Why Safe Cheesecake and Fruit Tart Transport Matters: Preserving Flavor and Presentation
The presentation of a cheesecake or fruit tart is often as important as its taste. A perfectly smooth cheesecake top or a beautifully arranged array of fresh fruit on a tart shell can be instantly ruined by a jolt or a sudden temperature change during transport.
Imagine spending two hours crafting a layered fruit tart, only for the berries to slide off or the pastry cream to ooze out because the box shifted. Or think of a classic New York-style cheesecake developing a large crack across its surface or becoming a warm, gloopy mess from being transported in a hot car.
Beyond aesthetics, improper transport can significantly impact the dessert's quality. Warm temperatures can cause fillings to soften or melt, affecting texture and potentially fostering bacterial growth if left out too long. Condensation can turn a crisp tart crust into a soggy disaster, ruining the contrast of textures that makes these desserts so enjoyable. Ensuring safe transport is not just about avoiding visual damage; it's critical for maintaining the intended flavor profile and ensuring the dessert is safe and pleasant to eat upon arrival.
Preparing Your Cheesecake or Fruit Tart for Transport: Key Steps
Cooling Completely: Preventing Melting and Soggy Crusts
One of the most critical steps before transporting cheesecakes and fruit tarts safely easily is ensuring they are completely and thoroughly cooled. For cheesecakes, this means letting them cool gradually at room temperature for an hour or two after baking (often in the turned-off oven with the door ajar for the first hour to prevent cracking) before transferring them to the refrigerator.
A standard 9-inch cheesecake needs at least 4-6 hours of refrigeration to set properly, with overnight being ideal. Attempting to move a cheesecake before it's fully chilled is a recipe for disaster, as the warm, soft structure is highly susceptible to cracking and collapsing.
Fruit tarts also require significant chilling time, especially if they contain pastry cream, curd, or gelatin-based fillings. After assembly, a fruit tart should be refrigerated for a minimum of 2-3 hours, or until the filling is completely set and firm.
This chilling process solidifies fats in the crust and filling, making the dessert much more stable and less likely to shift or melt during transit. Proper cooling also minimizes the risk of condensation forming on the dessert when it's moved from a cold environment (like your fridge) to a warmer one (like a car or outside air), which can lead to a soggy crust.
Setting the Filling: Using Proper Baking Techniques and Refrigeration for Best Results
The stability of your cheesecake or fruit tart filling is paramount for successful transport. For cheesecakes, achieving a perfectly set but creamy texture is key. This is often accomplished using a water bath during baking, which provides gentle, even heat and prevents the edges from overcooking before the center sets. Baking at a lower temperature, around 300-325°F (150-160°C), also helps achieve a smooth, crack-free, and uniformly set filling. Following the baking time precisely and allowing the cheesecake to cool properly in the oven before refrigerating ensures the filling is firm enough to withstand movement.
For fruit tarts, the filling might be a cooked fruit mixture, a pastry cream, a curd, or even a no-bake filling like a mousse or ganache. Cooked fruit fillings often rely on thickeners like cornstarch, pectin, or gelatin; using the correct amount is vital for a firm set. Pastry creams and curds must be cooked until visibly thickened and then refrigerated thoroughly until they are completely cold and firm, which can take several hours.
For no-bake fillings, sufficient chilling time (often 4+ hours) is necessary for gelatin, cream cheese, or chocolate to set properly. A well-set filling is far less likely to slosh, bulge, or cause the tart shell to become waterlogged during transport.
Choosing the Right Carrier: Boxes and Containers for Safe Travel
Selecting an appropriate container is fundamental to transporting cheesecakes and fruit tarts safely and easily. The ideal carrier should be sturdy, have a secure lid, and be slightly larger than the dessert itself. Standard cake boxes, often available at grocery stores, bakeries, or online in sizes like 9x9 or 10x10 inches, work well for most standard-sized cheesecakes and tarts. These cardboard boxes provide structure and protection from bumps and stacking.
Alternatively, dedicated plastic cake carriers with locking lids offer excellent protection and are reusable. Look for carriers that have a flat base and sufficient height to accommodate any toppings or decorations without crushing them. The goal is a container that prevents external damage while also minimizing internal movement. A box or carrier that is too large will allow the dessert to slide around, increasing the risk of damage, while one that is too small can press against the sides or top, ruining the presentation.
Packing Your Cheesecake or Fruit Tart for Safe Transit
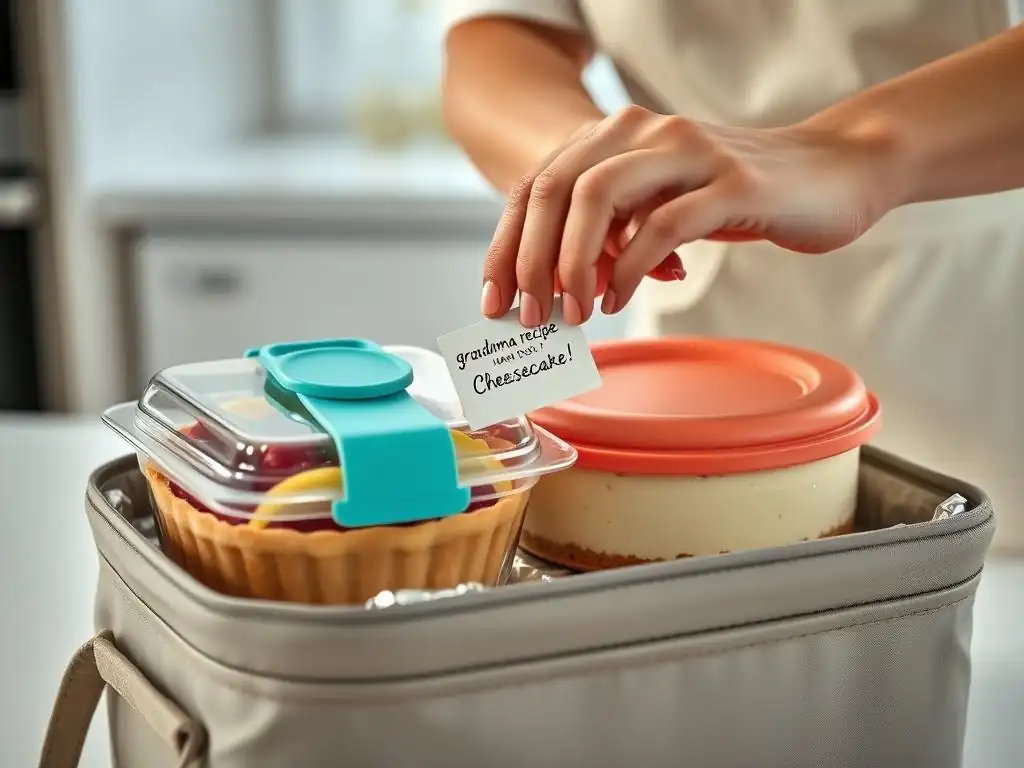
Protecting the Crust: Techniques to Avoid Damage During Transport
The crust, whether it's a graham cracker base on a cheesecake or a delicate pastry shell for a tart, is often the most vulnerable part of the dessert during transport. For cheesecakes, ensuring the crust is firmly pressed into the pan before baking helps create a solid foundation. Once baked and cooled, placing the cheesecake (still on its cake board or pan base) into a sturdy box is the primary protection. Avoid boxes that are too shallow, as the sides can press against the crust.
For fruit tarts with delicate pastry crusts, handling is key. Always lift the tart by its base or cake board. Inside the transport box, consider placing a non-slip mat or a piece of parchment paper lightly secured to the box bottom to prevent the cake board from sliding. Ensure nothing heavy is placed on top of the box, as even slight pressure can cause the crust to crack or crumble, compromising both structure and appearance.
Stabilizing the Dessert: Using Supports and Wedges to Prevent Sliding
Preventing the dessert from shifting within its container is crucial for successful transport. Even in a well-fitting box, some movement is possible, especially during turns or stops. To stabilize the cake board or base, you can secure it to the bottom of the box. A small dollop of frosting or melted chocolate placed underneath the cake board before setting it in the box can act as a gentle adhesive.
For added security, especially for longer journeys or less-than-perfect roads, use supports or wedges around the cake board inside the box. Crumpled parchment paper, paper towels, or even custom-cut pieces of cardboard can be packed snugly around the sides of the cake board. These wedges fill the empty space and prevent the dessert from sliding sideways or forward/backward within the box, significantly reducing the risk of damage when transporting cheesecakes and fruit tarts safely easily.
Preventing Condensation: Moisture Control Strategies for Freshness
Condensation is a common enemy when transporting chilled desserts, as it can make crusts soggy and affect the texture of toppings. It occurs when a cold item is exposed to warmer, more humid air. The best way to prevent condensation is to keep the dessert as cold as possible until the moment of transport and to minimize the temperature difference. Avoid letting the cheesecake or fruit tart sit out at room temperature before packing.
If transporting from a very cold refrigerator to a potentially warm environment, you can loosely cover the top of the fully chilled dessert with plastic wrap or parchment paper before placing it in the box. Be careful not to touch delicate toppings. This barrier can help absorb some initial condensation. However, the most effective strategy is maintaining a cool temperature during transit, as discussed in the next section, which directly addresses the cause of condensation rather than just managing its effects.
Best Practices for Transporting Cheesecakes and Fruit Tarts
Driving Safely: Avoiding Sudden Stops and Bumps
Once your cheesecake or fruit tart is perfectly prepared and securely packed, how you handle it during the actual journey is paramount. The way you drive can make or break your dessert. Smooth acceleration, gentle braking, and careful cornering are essential. Treat your precious cargo like a fragile passenger. Avoid sudden stops or sharp turns, which can cause the dessert to slide or decorations to topple.
Choose a flat, stable surface in your vehicle for placement. The floor of the passenger side, secured against the seat, or the trunk floor are often better options than a tilted car seat. Ensure the box is wedged in place so it cannot slide around. You might use grocery bags, blankets, or even other luggage to create a secure spot for the dessert box, preventing it from moving during the drive.
Maintaining Cool Temperatures: Using Ice Packs and Insulated Bags
Maintaining a cool temperature is vital for preserving the quality and structure of cheesecakes and fruit tarts, especially those with creamy or perishable fillings. An insulated carrier bag or a cooler is indispensable for transporting cheesecakes and fruit tarts safely easily, particularly on trips longer than 30-60 minutes. Place the boxed dessert inside the insulated carrier.
Surround the dessert box with ice packs or gel packs. Do not place the ice packs directly on top of or touching the dessert box itself, as this can cause excessive chilling or condensation spots. Position them around the sides and potentially underneath the box within the insulated bag or cooler. This creates a cold environment that can keep the dessert properly chilled for several hours, depending on the external temperature and the quality of the insulation.
Transporting in Warm Weather: Extra Precautions for Hot Days
Transporting cheesecakes and fruit tarts safely easily becomes significantly more challenging when the weather is warm or hot. High temperatures can quickly cause fillings to soften, melt, and potentially spoil. On hot days (e.g., above 75°F / 24°C), extra precautions are non-negotiable. Use a high-quality insulated cooler and pack it with a generous amount of ice packs – perhaps more than you think you need. Gel packs that freeze solid and stay cold longer are particularly effective.
Keep the transport time as short as possible. If driving, run the car's air conditioning before placing the dessert inside to pre-cool the vehicle. Keep the AC running throughout the journey. Never leave the dessert sitting in a parked car, even for a few minutes, as internal temperatures can skyrocket rapidly. Aim to transport the dessert directly from refrigeration to its final destination's refrigeration with minimal time in between.
Handling Your Cheesecake or Fruit Tart Upon Arrival
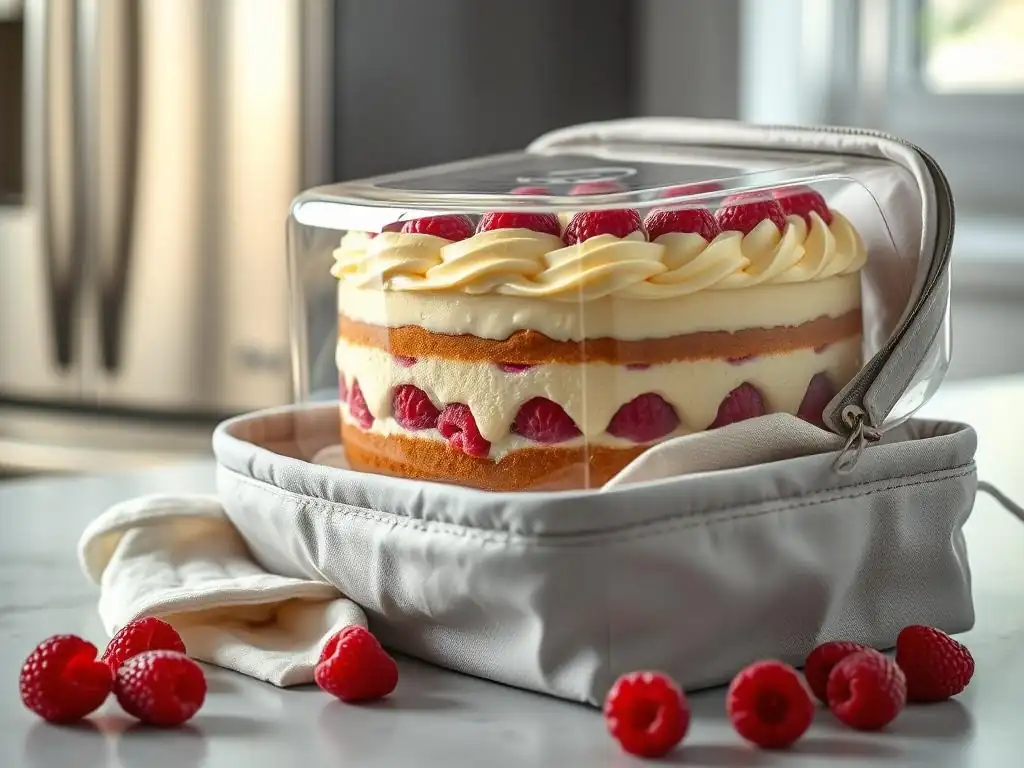
Gentle Unpacking: Removing the Dessert Safely from the Carrier
The final step in successfully transporting cheesecakes and fruit tarts safely easily is the arrival and unpacking process. Just as you were careful packing it, be equally gentle when removing it from the carrier and box. Find a stable, flat surface to place the carrier or box before opening it. Carefully lift the lid or open the flaps.
If you used wedges or supports inside the box, gently remove them first to free the cake board. Then, lift the cheesecake or fruit tart straight up and out of the box, supporting it from underneath with the cake board or pan base. Avoid tilting the dessert, as this could cause toppings to shift or the structure to be compromised after its journey. Have a clear spot ready for it, ideally in the refrigerator, as soon as it's out of the box.
Inspecting for Damage: Assessing the Dessert's Condition After Transport
Once unpacked, take a moment to inspect your cheesecake or fruit tart. Look for any signs of damage that might have occurred during transport. Check the surface of the cheesecake for cracks, look at the fruit arrangement on the tart to see if anything has shifted or been bruised, and feel the crust to ensure it hasn't become soggy.
Minor imperfections are often easily fixable, as discussed in the troubleshooting section. The inspection is primarily to understand the dessert's condition and determine if any immediate action is needed before serving or refrigerating. Often, if proper preparation and packing steps were followed, you'll find your dessert arrived in excellent condition.
Refrigerating Immediately: Maintaining Freshness Until Serving
After successfully transporting your cheesecake or fruit tart, the very next step should be to place it in the refrigerator. This is crucial for maintaining its quality, texture, and safety, especially if it contains dairy or fruit. Even if the journey was short and you used ice packs, getting the dessert back into a consistently cold environment (ideally 34-40°F / 1-4°C) is the best way to ensure it remains fresh until it's time to serve.
If the dessert is still on its cake board, you can place the entire board in the fridge. If space is tight, you might slide it onto a flat plate or serving platter. Loosely cover the dessert with plastic wrap or aluminum foil to prevent it from drying out or absorbing odors from other items in the refrigerator. This final chilling period helps the dessert recover from any minor temperature fluctuations during transit and ensures it's perfectly chilled and set for serving.
Troubleshooting Common Cheesecake and Fruit Tart Transport Problems
Addressing a Cracked Cheesecake Top: Quick Fixes and Prevention
A cracked cheesecake top is a common issue, often related more to baking and cooling than transport, but cracks can sometimes worsen during movement. Prevention is key: bake in a water bath, don't overbake, and cool slowly in the oven before refrigerating. However, if you arrive and find your cheesecake has developed a crack, don't despair! There are several quick fixes.
The easiest solution is to cover the top with a delicious topping. Whipped cream, sour cream topping, fruit compote, chocolate ganache, or a layer of fresh berries can completely hide surface imperfections and often enhance the flavor. For minor cracks, you might gently smooth them with an offset spatula dipped in hot water, but this is most effective when the cheesecake is still slightly warm, which is unlikely after transport. Embrace the topping as a beautiful disguise.
Dealing with Soft Fruit: Maintaining Freshness and Preventing Bruising
Fresh fruit on tarts is beautiful but delicate. Bruising or softening can occur during transport if the fruit shifts or is handled roughly. Using a fruit glaze (like melted apricot jam or a commercial fruit glaze) brushed over the fruit after arranging it can help protect the fruit, give it a lovely shine, and act as a gentle "glue" to keep pieces in place.
When packing, ensure the box is tall enough that the lid doesn't press against the fruit. If some fruit pieces have shifted or look bruised upon arrival, gently rearrange them if possible. If specific pieces look unappealing, and you have extra fruit on hand, you can carefully replace the damaged pieces using tweezers for precision. Sticking to less delicate fruits or ones covered by glaze can also help prevent issues.
Repairing Minor Damage: Reattaching Loose Fruit or Decorations
Sometimes, despite best efforts, a piece of fruit might fall off a tart, or a decorative element like a chocolate curl or nut might become detached from a cheesecake. These minor damages are usually easy to repair. For fruit or lighter decorations, a tiny dab of frosting, melted chocolate, corn syrup, or even a bit of the tart's glaze can act as an edible adhesive.
Use a small spatula, knife, or even tweezers to apply the "glue" and gently reattach the piece to the dessert. Work slowly and carefully to avoid causing further damage. For slightly heavier decorations, you might need a bit more adhesive and support the piece for a moment until it holds. Most minor transport mishaps can be corrected discreetly, allowing your dessert to look its best for serving.
Advanced Tips for Long-Distance Cheesecake and Fruit Tart Transport
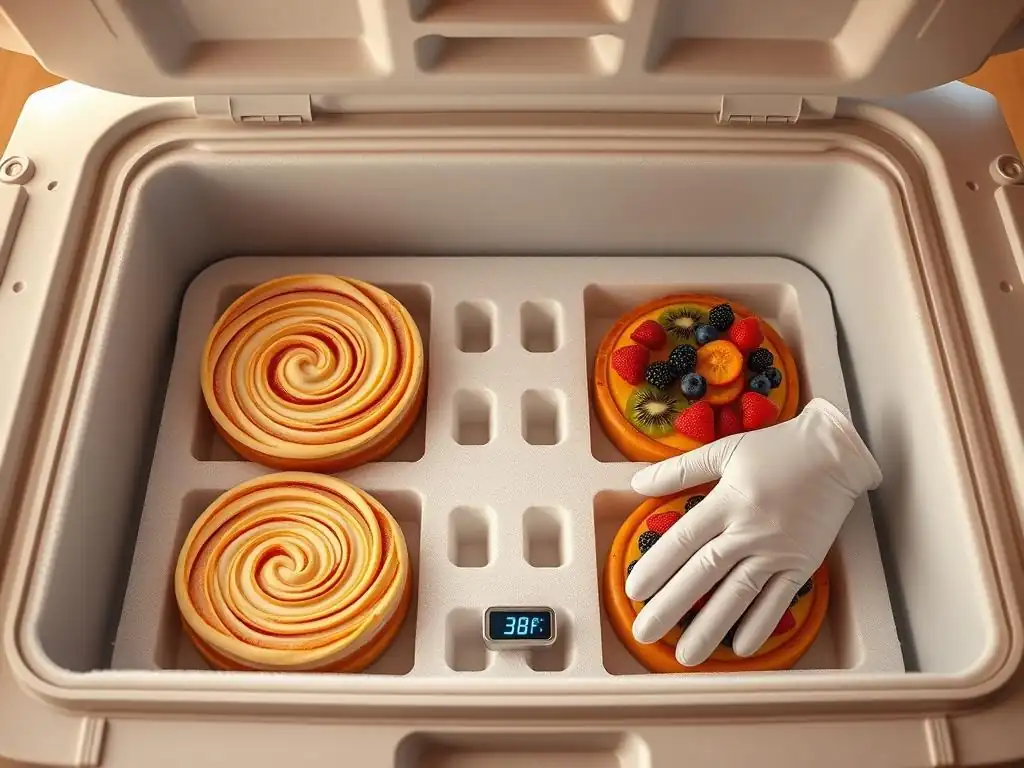
Freezing for Extended Travel: When and How to Freeze Properly
For very long journeys, especially those exceeding 4-6 hours without access to refrigeration, freezing the dessert beforehand can be a viable option. Cheesecakes generally freeze very well, maintaining their texture upon thawing. Fruit tarts can be more unpredictable, as some fruits become mushy after freezing and thawing (berries with high water content, for example). Consider freezing only the tart shell and filling separately and assembling at the destination, or testing how your specific fruit mixture handles freezing.
To freeze a cheesecake or tart effectively for transport, ensure it is completely cooled first. Freeze the dessert unwrapped on a flat surface until it is solid (this prevents wrapping from sticking and damaging the surface). Once frozen solid, wrap it tightly in at least two layers of plastic wrap, followed by a layer of aluminum foil.
This protects against freezer burn. For transport, keep it frozen for as long as possible and use robust insulation like a styrofoam cooler packed with dry ice or gel packs. Thaw slowly in the refrigerator upon arrival (a standard cheesecake can take 24 hours to thaw).
Shipping Cheesecakes and Fruit Tarts: Considerations for Secure Packaging and Temperature Control
Shipping cheesecakes and fruit tarts requires a more professional approach to packaging and temperature control to ensure they arrive safely and unspoiled. The dessert must be frozen solid and wrapped meticulously as described for extended travel. The shipping box should be sturdy, preferably a double-walled corrugated box.
Inside the shipping box, the frozen, wrapped dessert needs to be placed within an insulated container, such as a pre-formed styrofoam cooler or an insulated liner bag. The remaining space within the insulated container must be filled with sufficient coolant – either gel packs or dry ice. For dry ice, use about 2.5 to 5 pounds per 24 hours of transit for a standard-sized dessert, ensuring proper ventilation holes are poked in the outer box (dry ice off-gasses carbon dioxide).
Gel packs require more volume but are easier to handle. The goal is to maintain a consistently cold or frozen temperature throughout the entire transit time.
Selecting a Reliable Courier: Factors to Consider for Temperature-Sensitive Deliveries
When shipping temperature-sensitive desserts like cheesecakes and fruit tarts, the choice of courier is critical. You need a service that offers expedited shipping options to minimize the time the dessert spends in transit. Look for services like overnight or express shipping (e.g., FedEx Overnight, UPS Next Day Air). The faster the delivery, the less chance there is for temperature fluctuations to cause damage or spoilage.
Check the courier's specific guidelines and requirements for shipping perishables, frozen items, and items packed with dry ice or gel packs, as rules can vary. Ensure they offer reliable tracking so you and the recipient can monitor the package's progress. Consider purchasing shipping insurance, especially for valuable or elaborately decorated desserts. Communicating the expected delivery time to the recipient is also essential so they can receive the package promptly and place the dessert in refrigeration immediately upon arrival.
Conclusion: Enjoy Your Perfectly Transported Cheesecake or Fruit Tart
Successfully transporting cheesecakes and fruit tarts safely easily is entirely achievable with careful planning and execution. From ensuring your dessert is perfectly chilled and set before it leaves your kitchen to choosing the right container, packing it securely, and maintaining a cool environment during transit, each step plays a vital role. Even when faced with potential challenges like warm weather or long distances, employing strategies like using ample ice packs or freezing for extended travel can safeguard your delicious creation.
By following these essential tips, you can significantly reduce the stress and risk involved in moving delicate desserts. The effort invested in careful preparation and transport means your beautiful, flavorful cheesecake or fruit tart will arrive at its destination in pristine condition, ready to be enjoyed. So, the next time you need to take your baked masterpiece on the road, remember these guidelines and confidently embark on transporting cheesecakes and fruit tarts safely easily, ensuring your delicious efforts are rewarded with happy faces and satisfied palates.
Frequently Asked Questions
How can I prevent my cream pie from sliding around during transport?
The key is stabilization. Use a non-slip mat under the pie plate or secure the pie to the box with rolled-up kitchen towels.
What's the best way to keep my cream pie cold while transporting it?
Use an insulated cooler with ice packs. Place the pie inside the cooler, ensuring the ice packs don't directly touch the pie to prevent freezing.
What type of container is best for transporting a cream pie?
A sturdy cardboard box that is slightly larger than the pie is ideal. Make sure the box has a lid or flaps to protect the pie's topping.
How can I prevent the whipped cream topping from melting or collapsing during transport?
Besides keeping it cold, consider adding a stabilizer to the whipped cream like gelatin or cream cheese. Avoid prolonged exposure to warm environments.
What's a good strategy for transporting a cream pie if I don't have a cooler?
Transport the pie during the coolest part of the day. Ensure your car's AC is on and avoid leaving the pie in a hot car for any amount of time.
Final Reflection: The Sweet Success of Safe Pie Transport
The delicate dance of transporting cream pies and tarts remains a culinary challenge, but mastering the art ensures sweet success and delighted recipients. A seemingly simple task, the safe transport of these delectable treats requires more than just a sturdy box; it demands careful planning and execution to prevent a disastrous dessert disaster. This article has explored the crucial elements, from proper cooling and packaging to the importance of temperature control and mindful driving.
The impact of successfully transporting a cream pie extends far beyond the immediate enjoyment of the dessert. It's about sharing a piece of yourself, a gesture of care and celebration. It's about the joy on a loved one's face when they receive a perfectly intact, creamy masterpiece. The best things in life are the people we love, the places we've been, and the memories we've made along the way.
This sentiment holds true for the carefully transported pie, a symbol of connection and shared experience. The effort invested in safe transport elevates the simple act of gifting into a meaningful expression of thoughtfulness.
Now, consider your next pie-transporting adventure. Will you approach it with the same level of casualness as before, or will you embrace the knowledge gained here? Remember the tips and techniques discussed, and visualize the happy faces awaiting your delicious creation. This isn't just about preventing a messy spill; it's about ensuring the successful delivery of joy, one perfectly transported pie at a time. Let the sweet success of your efforts be a testament to your care and consideration.
Ready to Transport Your Pies with Confidence?
Thanks for spending time with us and learning how to keep your delicious cream pies and tarts safe during transport! You've gained valuable knowledge to avoid those disastrous spills and ensure your creations arrive perfectly intact. Now it's time to put your new skills into action.
- Master the art of the perfect pie transport: Practice your newly acquired techniques with your next baking project. Imagine the smiles when you arrive with a flawless pie!
- Share your pie-transporting wisdom: Tell your friends and fellow bakers about your newfound expertise. You can even share this article with them!
- Challenge yourself with a longer journey: Test your skills by transporting a pie to a more distant location – a family gathering or a bake sale across town.
Ready to bake and transport your most impressive pie yet? What unique challenges have you faced with transporting delicate baked goods?