
Mastering Brioche: Rich Dough, Delicious Results for Intermediate Bakers

Welcome to BakeWithEase!
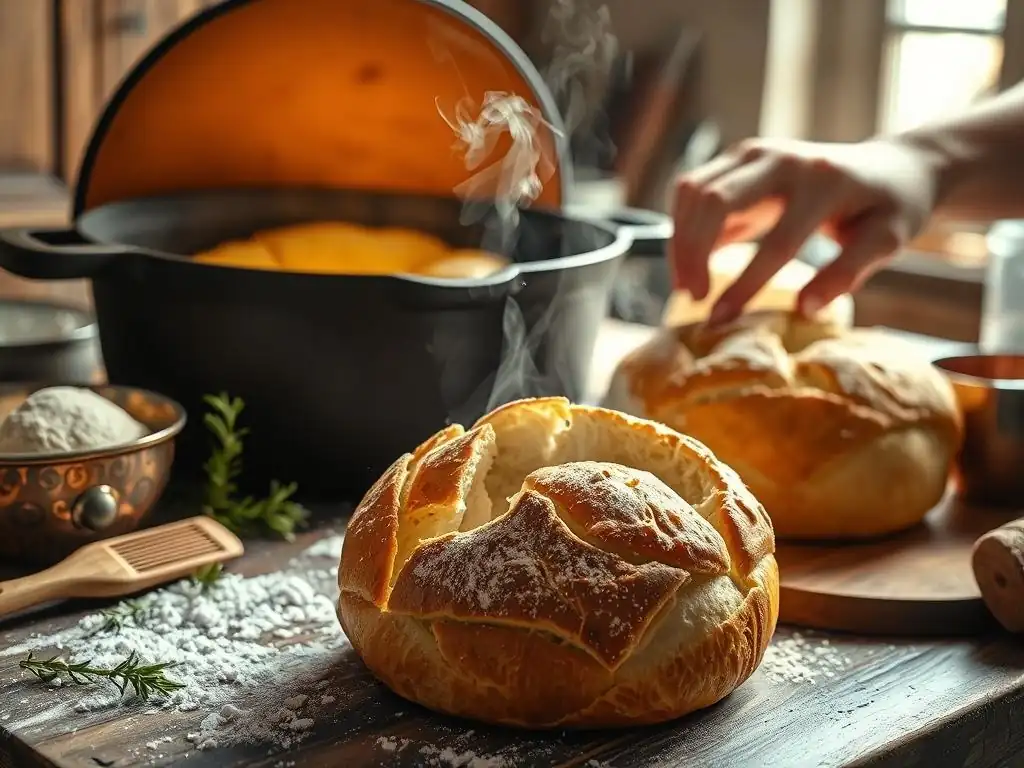
Ready to elevate your baking game? Dive into the world of rich, buttery goodness with our guide to mastering Brioche dough. This isn't your average bread; it's a culinary adventure waiting to happen. Discover our Brioche dough recipe for beginner bakers and unlock the secrets to creating impressive pastries and breads that will delight your taste buds. Intrigued? Let's get baking!
- Introduction to Brioche Baking
- Understanding the Brioche Dough Recipe
- Step-by-Step Guide to Making Brioche Dough
- Shaping Brioche: Techniques for Stunning Results
- Baking Brioche: Achieving Golden Perfection
- Troubleshooting Common Brioche Baking Problems
- Brioche Variations and Flavor Combinations
- Storing and Serving Brioche
- Conclusion: Elevating Your Baking Skills with Brioche
- Frequently Asked Questions
- Final Reflection: The Enduring Allure of Brioche
- Unlock Your Inner Brioche Baker!
Introduction to Brioche Baking
What is Brioche and Why Bake It?
Brioche is a classic French pastry, often described as a bread of sorts, but with a much richer composition than standard loaves. Unlike typical bread dough, a brioche dough recipe incorporates a significant amount of butter and eggs, giving it a tender, flaky, and almost cake-like crumb. This high fat content results in a luxurious texture and a distinctive golden crust. Baking brioche is a rewarding experience that elevates your skills beyond basic bread making, offering a delightful challenge for those looking to expand their repertoire.
The appeal of brioche lies not just in its rich flavor but also in its versatility. It can be enjoyed simply sliced and toasted, used for decadent French toast, or formed into various shapes like rolls, loaves, or even used as a base for sweet and savory fillings. Mastering a brioche dough recipe opens up a world of delicious possibilities, making it a valuable addition to any intermediate baker's skill set. It's a step up from a simple brioche dough recipe beginner might attempt, involving more intricate techniques like butter incorporation and shaping.
Why Brioche is Perfect for Intermediate Bakers
For bakers who have moved beyond simple quick breads and yeast doughs like pizza or basic sandwich bread, tackling a brioche dough recipe presents an ideal next step. It requires a good understanding of yeast behavior, dough development through kneading, and the proper handling of a high-fat dough, which can be stickier and more challenging than leaner doughs. The process of incorporating a large amount of butter, often gradually, demands patience and technique that intermediate bakers are ready to refine.
Working with brioche also teaches valuable lessons in temperature control – from activating yeast at the right temperature (around 105-115°F or 40-46°C) to managing the dough's temperature during kneading and proofing to prevent the butter from melting. Successfully executing a brioche dough recipe builds confidence in handling temperamental doughs and provides a solid foundation for attempting other enriched doughs like challah or babka. It's a significant step up from a basic brioche dough recipe beginner might find, offering more complex techniques and richer results.
Understanding the Brioche Dough Recipe
Demystifying the Brioche Dough Recipe: Key Ingredients and Their Roles
At its heart, a classic brioche dough recipe includes flour, yeast, eggs, butter, sugar, and salt. Each ingredient plays a crucial role in achieving the desired texture and flavor. Flour provides the structure through gluten development. Yeast is the leavening agent, producing carbon dioxide that makes the dough rise. Eggs add richness, color, and help bind the dough while contributing to its tender crumb. Sugar feeds the yeast and adds sweetness, promoting browning during baking. Salt balances the flavors and helps control yeast activity.
The most distinctive elements are the high proportion of eggs and butter. A typical brioche dough recipe might use 6-8 eggs per kilogram of flour and butter quantities that can range from 40% to as high as 80% of the flour weight. This level of enrichment sets brioche apart from most other breads and requires specific techniques, particularly for butter incorporation, to develop a strong gluten structure despite the fat interfering with gluten formation. Understanding these roles is key to mastering this rich brioche dough recipe.
Brioche Dough Ingredients: A Detailed Breakdown
Let's look closer at the key components that make a brioche dough recipe so special. Getting the right type and handling of these ingredients is critical for success. This detailed breakdown is essential for anyone moving beyond a simple brioche dough recipe beginner might use.
High-Protein Flour for Brioche: Achieving the Right Structure
Using a high-protein flour, such as bread flour (typically 12-14% protein), is essential for a successful brioche dough recipe. The abundance of eggs and butter in brioche weighs the dough down and interferes with gluten development. A higher protein content in the flour provides the necessary strength and elasticity to support the rich ingredients and create the characteristic light, airy crumb despite the dough's richness.
Without sufficient gluten strength from a high-protein flour, the dough would struggle to rise properly and result in a dense, heavy loaf. While an all-purpose flour could be used in a beginner brioche dough recipe with less enrichment, for a classic, rich brioche, bread flour is highly recommended. Aim for a flour with at least 12% protein for optimal structure.
Yeast in Brioche: Activation and Fermentation Tips
Yeast is the engine that makes brioche rise. Both active dry yeast and instant yeast can be used in a brioche dough recipe, though they require slightly different handling. Active dry yeast usually needs to be proofed (activated) in warm liquid (around 105-115°F or 40-46°C) before being added to the dry ingredients. Instant yeast can often be mixed directly with the dry ingredients, as it activates upon contact with liquid and warmth.
Proper fermentation is crucial for flavor development and rise. Brioche dough often benefits from a long, slow fermentation, sometimes including an overnight rest in the refrigerator. This cold fermentation not only deepens the flavor but also firms up the butter, making the dough easier to handle and shape. Ensure your yeast is fresh; expired yeast is a common reason for a brioche dough recipe failing to rise.
Eggs and Butter: The Secret to Brioche's Richness
Eggs are integral to a brioche dough recipe, providing moisture, richness, color, and protein that contributes to the structure. They also help tenderize the crumb. Using large eggs is standard; a typical recipe for a medium-sized loaf might call for 3-4 large eggs (roughly 150-200g). The yolks contribute most of the fat and richness, while the whites add protein for structure.
Butter is the defining ingredient of brioche, contributing its luxurious texture and flavor. The amount of butter is what differentiates a standard enriched dough from a true brioche. High-quality butter will significantly impact the final taste. It's usually added gradually to the dough after the gluten has started to develop, which is a key technique separating this from a simpler brioche dough recipe beginner might follow. This gradual addition allows the gluten network to form first before being coated by fat.
Essential Equipment for Baking Brioche
Having the right tools can make the process of mastering a brioche dough recipe much smoother, especially given the sticky nature of the dough. While brioche can be made by hand, it requires significant kneading and can be quite challenging.
- Stand Mixer with Dough Hook: This is highly recommended for a brioche dough recipe. The vigorous kneading required to develop gluten in a high-fat dough is efficiently handled by a stand mixer. Kneading by hand is possible but will be much more labor-intensive and messy.
- Kitchen Scale: Accurate measurements are critical in baking, especially with a precise recipe like brioche. Measuring ingredients by weight (grams or ounces) rather than volume (cups) ensures consistency.
- Dough Scraper: Useful for handling the sticky dough, dividing it, and cleaning surfaces.
- Proofing Containers: Clear containers with volume markings are helpful for monitoring the dough's rise during proofing.
- Thermometer: An instant-read thermometer is useful for checking liquid temperature for yeast activation and the internal temperature of the baked brioche for doneness.
- Brioche Molds or Loaf Pans: Specific fluted brioche molds (like for brioche à tête) or standard loaf pans are needed for shaping and baking. Muffin tins can also be used for brioche rolls.
Step-by-Step Guide to Making Brioche Dough
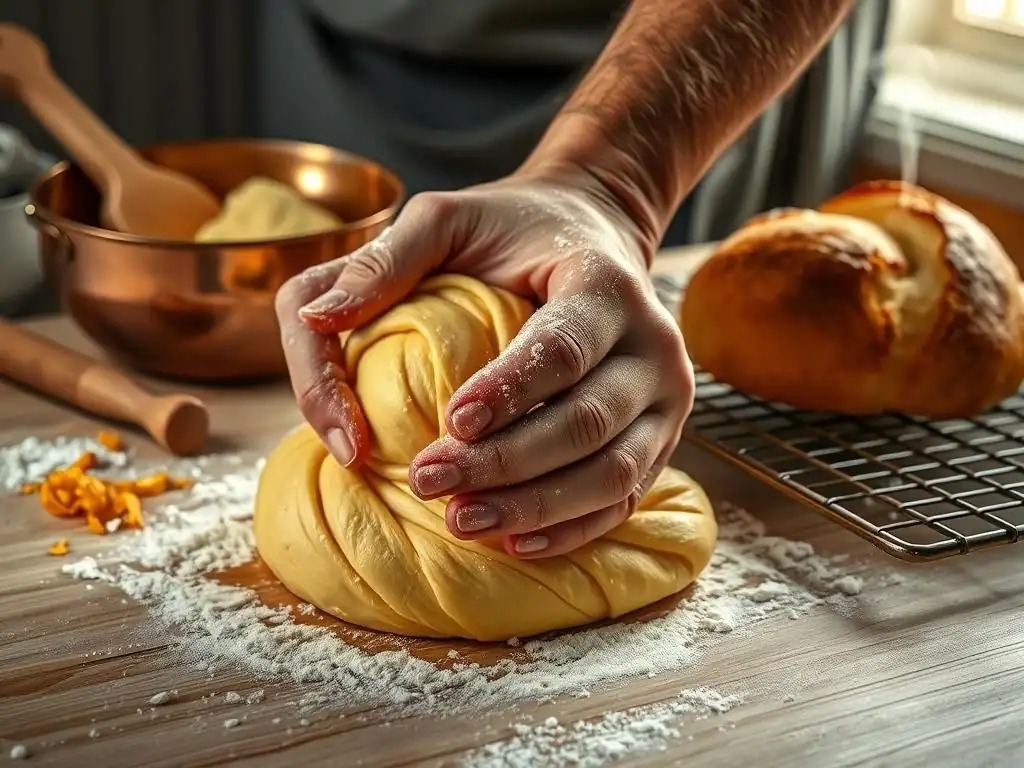
Making brioche involves several distinct stages, from mixing the ingredients to the crucial proofing steps. Following this structured process is key to a successful brioche dough recipe.
Step 1: Activating the Yeast
If using active dry yeast in your brioche dough recipe, you'll need to activate it first. Warm a portion of the liquid called for in your recipe (milk or water, typically around 1/4 to 1/2 cup) to the ideal temperature range of 105-115°F (40-46°C). Stir in the yeast and a pinch of sugar (taken from the recipe's total sugar).
Let it sit for 5-10 minutes until it becomes foamy and bubbly. This confirms the yeast is alive and active. If it doesn't foam, your yeast may be expired or the liquid wasn't the right temperature, and you'll need to start this step over.
If using instant yeast, this activation step is often skipped, and the yeast is mixed directly with the dry ingredients. However, proofing a small amount first can still be a good way to verify the yeast's viability before committing all your ingredients. This initial step is similar whether you're tackling a complex brioche dough recipe or a simpler brioche dough recipe beginner version.
Step 2: Combining Dry Ingredients
In the bowl of your stand mixer (or a large mixing bowl if kneading by hand), whisk together the high-protein flour, the remaining sugar, and the salt. Ensure these are evenly distributed. The salt should ideally not come into direct contact with the yeast at this stage, as it can hinder its activity. Creating a small well in the center of the flour mixture before adding wet ingredients can help keep them separate initially.
Using a kitchen scale for precise measurements of flour, sugar, and salt is strongly advised. For example, a typical brioche dough recipe might call for 500g of bread flour, 50-75g of sugar, and 10g of salt. Accuracy here lays the foundation for the correct dough consistency later on.
Step 3: Incorporating Eggs
Add the activated yeast mixture (if using active dry) or the instant yeast directly to the dry ingredients. Then, add the eggs, one at a time, to the bowl while mixing on a low speed with the dough hook. Allow each egg to be fully incorporated into the dough before adding the next. This process helps develop the gluten structure early on.
The dough will be very wet and sticky at this stage due to the high egg content. Don't be tempted to add more flour unless the recipe specifically calls for it later. The initial sticky consistency is normal for a rich brioche dough recipe. Continue mixing until the dough starts to come together, pulling away from the sides of the bowl, though it will still likely stick to the bottom. This mixing phase typically takes 5-10 minutes in a stand mixer.
Step 4: The Butter Incorporation Method
This is arguably the most critical and challenging step in a brioche dough recipe. Once the dough has developed some initial gluten structure (it should look somewhat smooth and elastic, even if sticky), begin adding the softened or cold butter. The method of adding butter varies slightly between recipes, but gradual incorporation is key. Add the butter in small pieces (about 1 tablespoon at a time) with the mixer running on medium speed. Allow each piece to be fully incorporated before adding the next.
This process is slow and requires patience. It can take 15-30 minutes or even longer to incorporate a large amount of butter (e.g., 250-400g for 500g flour). The dough will likely break apart and look messy initially, but keep mixing. Eventually, it will come back together, become very smooth, elastic, and shiny. It should pass the "windowpane test," meaning you can stretch a small piece thinly enough to see light through it without tearing. This extensive kneading develops the robust gluten network needed to support the rich butter.
Cold Butter vs. Room Temperature Butter
Some brioche dough recipes call for softened, room-temperature butter, while others recommend cold, cubed butter. Using softened butter (around 60-65°F or 15-18°C) is more common as it incorporates into the dough more easily and quickly. The dough will become very soft and perhaps quite warm during the long mixing process required to incorporate it.
Using cold, cubed butter requires longer mixing initially as the butter pieces are beaten into the dough, but it helps keep the dough cooler. This can be beneficial, especially in warm environments, as it prevents the butter from melting too soon. Regardless of the temperature, the key is to add the butter gradually and continue mixing until the dough is smooth, elastic, and passes the windowpane test. Many find softened butter easier for a first attempt at this brioche dough recipe.
Step 5: First Proofing
After the butter is fully incorporated and the dough is smooth and elastic, transfer it to a lightly oiled bowl. Cover the bowl tightly with plastic wrap. The first proofing allows the yeast to work and the dough to rise. Brioche dough, being rich, often proofs slower than leaner doughs.
A typical first proof might be at room temperature (around 70-75°F or 21-24°C) for 1.5 to 2.5 hours, or until the dough has roughly doubled in size. Alternatively, and often preferred for better flavor development and easier handling, is a cold proof in the refrigerator for 8-12 hours, or even up to 24 hours. The cold slows down the yeast activity significantly but allows complex flavors to develop. The dough will still rise, albeit much slower. This cold proofing step is a hallmark of many classic brioche dough recipes and makes shaping much easier.
Shaping Brioche: Techniques for Stunning Results
Once the first proof is complete (especially after a cold proof), the dough should be firm and much easier to handle. Shaping is where you turn your beautiful brioche dough recipe into its final form before the second proof and baking.
Classic Brioche Shapes: A Visual Guide
Brioche can be shaped in many ways, each offering a unique presentation. Mastering a few classic shapes adds to the satisfaction of baking this rich dough.
Brioche à Tête
This is the iconic "Parisian" brioche, characterized by a large base and a smaller ball ("tête" or head) perched on top. To shape: form the dough into balls. For the "tête," pinch off a small piece from the top of a ball, roll it into a smaller ball, and create an indentation in the center of the larger ball with your finger. Place the smaller ball into the indentation. This shape is traditionally baked in fluted brioche molds.
Brioche Nanterre
Named after a Parisian suburb, this shape consists of several small balls of dough placed side-by-side in a loaf pan. As the dough proofs and bakes, the balls expand and fuse together, creating a pull-apart loaf. To shape: divide the dough into equal pieces (e.g., 8-10 pieces for a standard loaf pan), roll each piece into a smooth ball, and arrange them in rows in the prepared pan. This is a straightforward shape, making it good for practicing your brioche dough recipe skills.
Brioche Buns
Simple and versatile, brioche buns are perfect for sandwiches, sliders, or just eating plain. To shape: divide the dough into equal portions (e.g., 60-100g each) and roll each portion into a tight, smooth ball. Place the balls on a baking sheet lined with parchment paper, leaving space for them to expand. This shape works well for a brioche dough recipe beginner aiming for individual servings.
Mastering the Art of Shaping: Tips and Tricks
Working with enriched dough like brioche requires a gentle touch and a few techniques to prevent sticking and maintain the dough's structure.
- Keep the Dough Cold: If you did a cold proof, shaping is much easier as the butter is firm. If the dough becomes too soft or sticky during shaping, return it to the refrigerator for 15-20 minutes to firm up.
- Use Minimal Flour: Avoid using too much flour on your work surface, as this can make the dough tough. A lightly floured surface or even a lightly oiled surface is better.
- Be Gentle: Don't manhandle the dough. Shape it gently to avoid deflating the air pockets created during proofing.
- Create Surface Tension: When rolling balls for any shape, use your hand to cup the dough against the work surface and roll it in a circular motion. This creates surface tension, resulting in a smooth top and a tight structure that helps the dough rise evenly.
Baking Brioche: Achieving Golden Perfection
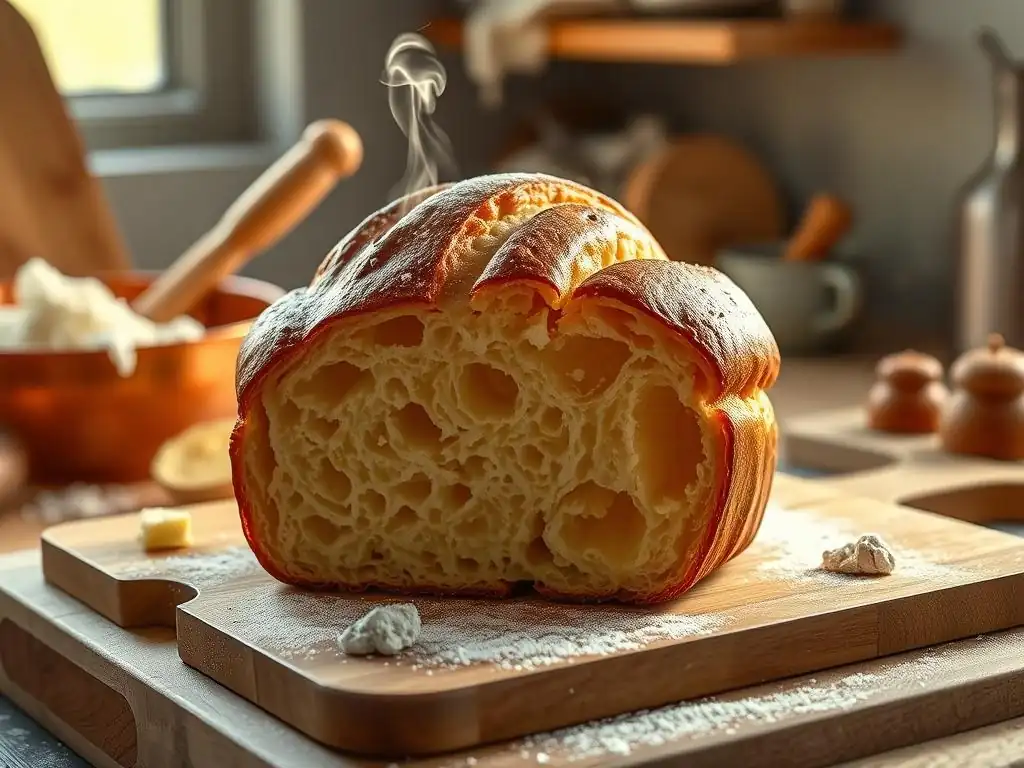
After shaping, the brioche needs a second proof before baking. This proof allows the dough to expand again in its final form. Place the shaped brioche in its pan or on a baking sheet, cover it loosely with plastic wrap, and let it proof in a warm, draft-free place until it looks puffy and has increased significantly in size (this could take 1-2 hours at room temperature, or longer if the dough is cold). It should look visibly larger but not fully doubled, as it will rise more in the oven.
Setting the Right Oven Temperature
Baking brioche requires careful temperature control to ensure a golden crust and a fully cooked interior without burning the rich dough. A common baking temperature range is 350-375°F (175-190°C). Baking at too high a temperature can cause the crust to darken too quickly before the inside is cooked, while too low a temperature might result in a pale crust and a dense texture.
Preheating your oven thoroughly is essential. Use an oven thermometer to verify the actual temperature inside your oven, as they can often fluctuate. Baking brioche in a moderately hot oven helps it achieve a good oven spring and a beautiful, golden-brown crust.
Baking Time and Doneness
The baking time for brioche varies depending on the size and shape. A large loaf or brioche à tête might take 30-45 minutes, while smaller buns could take 15-25 minutes. The brioche is done when it is deeply golden brown on the outside and sounds hollow when tapped on the bottom.
For ultimate certainty, especially with a rich dough that can appear done on the outside but still be doughy inside, use an instant-read thermometer. The internal temperature of baked brioche should register between 190-200°F (88-93°C). If the crust is browning too quickly, you can loosely tent the brioche with aluminum foil for the remaining baking time.
The Importance of an Egg Wash
Applying an egg wash before baking is crucial for achieving brioche's signature shiny, golden-brown crust. A standard egg wash is made by whisking one egg with a tablespoon or two of milk or water. Gently brush the surface of the proofed brioche, taking care not to deflate it.
For an extra-glossy finish, you can use an egg yolk wash (just the yolk mixed with a little liquid) or apply two thin coats of egg wash, allowing the first to dry slightly before applying the second. The protein in the egg wash helps promote browning, while the fat contributes to the shine. It makes the difference between a pale, dull crust and a beautiful, appetizing finish for your brioche dough recipe creation.
Troubleshooting Common Brioche Baking Problems
Even with a great brioche dough recipe, challenges can arise. Here are some common issues and how to address them.
Dough That Won't Rise
If your brioche dough isn't rising properly, several factors could be at play. The most common culprit is inactive yeast. Ensure your yeast is fresh and that your liquid for activation (if using active dry) was at the correct temperature (105-115°F). Temperatures too hot will kill the yeast, while temperatures too cold won't activate it.
Another reason could be a cold environment during proofing. Brioche dough proofs best in a warm, draft-free place. If your kitchen is cool, try proofing in a slightly warm oven (turned off, with just the light on) or near a warm appliance. Insufficient kneading can also hinder the rise; the gluten structure needs to be well-developed to trap the gases produced by the yeast. Ensure you kneaded long enough, especially after adding the butter.
Brioche That's Too Dense
A dense brioche can be disappointing after putting in the effort on a brioche dough recipe. This often happens if the dough didn't rise sufficiently during proofing. It might have been under-proofed, meaning it didn't develop enough air pockets before baking. Ensure you allowed adequate time for both the first and second proofs, and that the dough significantly increased in volume.
Overworking the dough after the first proof or during shaping can also lead to a dense crumb. Be gentle when handling the dough. Finally, insufficient kneading during the initial mixing and butter incorporation phase can result in poor gluten development, leaving the dough without the structure needed to support a light, airy crumb. Ensure your dough passes the windowpane test.
Preventing a Burnt Crust
Achieving a beautiful golden crust without burning the top or sides can be tricky with rich doughs. If your brioche is browning too quickly before it's cooked through, your oven temperature might be too high, or the brioche might be placed too close to the heating element.
Try reducing the oven temperature slightly (e.g., from 375°F to 350°F) or moving the baking rack lower in the oven. If the top is browning rapidly while the rest needs more time, loosely tent the brioche with aluminum foil for the remainder of the baking period. Using a proper egg wash helps achieve even browning, but monitoring is key.
Brioche Variations and Flavor Combinations
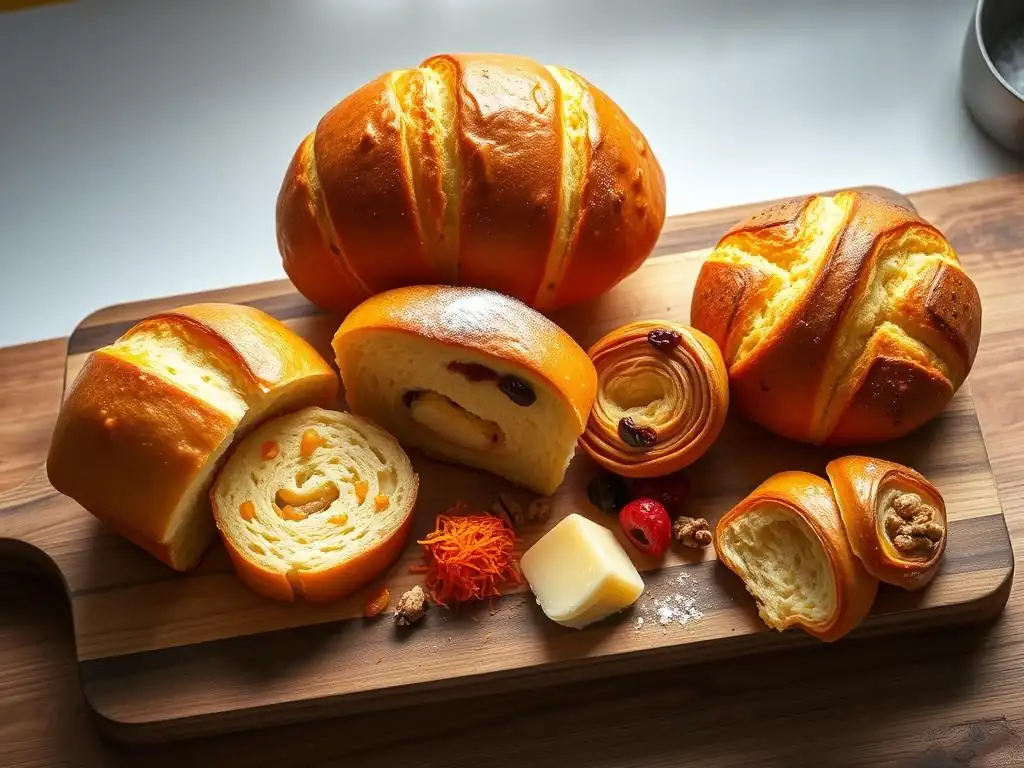
Once you've mastered the basic brioche dough recipe, you can explore delicious variations by adding flavorings or inclusions.
Adding Chocolate Chips, Dried Fruits, or Nuts
Sweet brioche is a perfect canvas for additions like chocolate chips, dried cranberries, raisins, or chopped nuts (pecans, walnuts, almonds). These inclusions should be added towards the end of the kneading process, after the butter is fully incorporated. This prevents them from being broken down too much by the mixer.
For a standard brioche dough recipe using 500g flour, you might add 100-150g of chocolate chips or dried fruit. Gently mix them in on low speed until evenly distributed. Be mindful that adding too many inclusions can weigh the dough down and affect the rise.
Exploring Savory Brioche: Herbs, Cheese, and More
Brioche doesn't have to be sweet! A savory brioche dough recipe is wonderful for sandwiches or as an accompaniment to meals. You can incorporate fresh or dried herbs (rosemary, thyme, chives), grated cheese (Gruyère, Parmesan, cheddar), or even finely chopped cooked bacon or caramelized onions.
Add savory inclusions at the same stage as sweet ones – towards the end of kneading. For cheese, about 75-100g per 500g flour is a good starting point, depending on the cheese's strength. Herbs can be added to taste. Savory brioche can be shaped into loaves, buns, or even braided.
Chocolate Chip Brioche Recipe
Here's a simplified outline for adding chocolate chips to your base brioche dough recipe:
- Prepare brioche dough through the butter incorporation step as described above.
- Once the dough is smooth and elastic, add 100-150g of high-quality chocolate chips to the mixer bowl.
- Mix on low speed with the dough hook just until the chips are evenly distributed throughout the dough. Avoid overmixing.
- Proceed with the first proofing, shaping, second proofing, egg wash, and baking as per the standard instructions.
Herb and Cheese Brioche Recipe
To make a savory herb and cheese brioche:
- Prepare brioche dough through the butter incorporation step. You might slightly reduce the sugar amount in the initial recipe, though some sweetness balances the savory flavors nicely.
- Add 75-100g grated cheese (e.g., Gruyère or sharp cheddar) and 1-2 tablespoons chopped fresh herbs (e.g., rosemary and thyme) to the mixer bowl.
- Mix on low speed until the cheese and herbs are evenly distributed.
- Proceed with proofing, shaping (loaves or buns work well), egg wash, and baking. Consider topping with extra cheese or herbs before baking for extra flavor and visual appeal.
Storing and Serving Brioche
Once your beautiful brioche is out of the oven and has cooled slightly, knowing how to store and serve it will ensure you enjoy its deliciousness to the fullest.
Best Practices for Storing Freshly Baked Brioche
Brioche is best enjoyed fresh, ideally within 1-2 days of baking. Store cooled brioche at room temperature, wrapped tightly in plastic wrap or placed in an airtight container. This helps prevent it from drying out.
For longer storage, brioche freezes exceptionally well. Once completely cooled, wrap the loaf or individual rolls tightly in plastic wrap, then wrap again in aluminum foil or place in a freezer-safe bag. Frozen brioche can last for up to 2-3 months. Thaw at room temperature before serving or reheating.
Reheating Brioche
Reheating brioche can bring back some of its fresh-baked softness. To reheat a whole loaf or large pieces, wrap loosely in foil and warm in a preheated oven at 300-325°F (150-160°C) for 10-15 minutes, or until warmed through.
Individual slices or rolls can be quickly warmed in a toaster, toaster oven, or even a microwave (though the microwave can sometimes make it slightly chewy). A quick reheat is perfect for enjoying brioche with breakfast or as a snack.
Delicious Ways to Serve Brioche
Brioche's rich flavor and tender texture make it incredibly versatile.
- Classic: Slice and enjoy plain, with butter, jam, or honey.
- Breakfast: Use thick slices for the most decadent French toast you've ever had. It's also perfect for egg sandwiches or simply toasted alongside eggs.
- Savory: Use savory brioche buns for gourmet burgers or sandwiches. A slice of savory brioche is also wonderful with cheese and charcuterie.
- Dessert: Use brioche in bread pudding or slice it thin, toast until crisp, and use as a base for fruit and cream.
The possibilities are nearly endless once you have a successful brioche dough recipe.
Conclusion: Elevating Your Baking Skills with Brioche
Mastering Brioche: A Rewarding Baking Journey.
Tackling a brioche dough recipe is a significant step for an intermediate baker, moving beyond simpler doughs to engage with a richer, more complex creation. While perhaps more involved than a basic brioche dough recipe beginner might start with, the techniques learned – from precise butter incorporation to handling a high-fat dough – are invaluable. The result of your efforts is a loaf or roll with unparalleled richness, tenderness, and flavor, a true testament to your growing skills.
Every step, from activating the yeast correctly to achieving that perfect golden crust, contributes to the final masterpiece. Don't be discouraged if your first attempt isn't absolutely perfect; baking is a journey of practice and learning. With this detailed guide and a commitment to the process, you are well on your way to mastering the art of brioche, adding a truly impressive bake to your repertoire and delighting everyone who gets to taste it. Keep experimenting with this brioche dough recipe, and enjoy the delicious rewards!
Frequently Asked Questions
What makes brioche dough different from other bread doughs?
Brioche dough is distinguished by its high butter and egg content, which creates a richer, more tender crumb than typical bread. This enriched dough results in a softer, almost cake-like texture.
Is the brioche dough recipe beginner-friendly?
While BakeWithEase offers resources for all levels, this "Mastering Brioche" recipe is targeted toward intermediate bakers. Beginners may find it challenging due to the specific techniques required.
What are some common mistakes to avoid when making brioche dough?
Overmixing can lead to a tough dough, while undermixing prevents proper gluten development. Also, ensuring the butter is cold is crucial for creating the desired flaky layers.
Can I use a stand mixer to make brioche dough?
Yes, a stand mixer is highly recommended for this recipe. It makes kneading easier and ensures the ingredients are properly incorporated, resulting in a smooth and elastic dough.
How can I tell if my brioche dough has risen enough?
The dough should roughly double in size during the proofing process. Gently pressing your finger into the dough should leave a slight indentation that slowly springs back.
Final Reflection: The Enduring Allure of Brioche
Mastering brioche isn't just about achieving a perfectly golden crust; it's about unlocking a deeper understanding of baking itself. The seemingly simple act of combining flour, butter, eggs, and sugar transforms into a journey of patience, precision, and ultimately, immense satisfaction. This journey, accessible even to beginner bakers, opens doors to a world of culinary creativity.
The rich history and enduring popularity of brioche speak volumes about its appeal. It's more than just a bread; it's a symbol of celebration, comfort, and the artistry of baking. The best things in life are simple, but not easy.
This quote perfectly encapsulates the brioche-making experience. The process requires dedication, but the reward – that melt-in-your-mouth texture and unparalleled flavor – is truly unforgettable. The impact of mastering this technique extends beyond the kitchen; it fosters a sense of accomplishment and encourages further exploration of baking's endless possibilities.
Now, it's your turn. Don't be intimidated by the seemingly complex process. Take the leap, embrace the challenge, and experience the joy of creating your own perfect brioche. The rich aroma filling your kitchen, the satisfying kneading, and the final golden-brown loaf will be a testament to your dedication and a delicious reward for your efforts. Remember, even the most accomplished bakers started somewhere, and your brioche journey is just beginning.
Unlock Your Inner Brioche Baker!
Thanks for joining us on this delicious journey into the world of brioche! We hope you now feel confident tackling this rich and rewarding bread. Ready to take your baking skills to the next level?
- Bake your own masterpiece: Put your newfound knowledge into practice! Try making the recipe from the article – and don't forget to experiment with different flavors and fillings!
- Share your success: Show off your beautiful brioche creations on social media using #BakeWithEaseBrioche – we'd love to see them!
- Challenge a friend: See who can create the most impressive brioche – it's a fun, delicious competition!
What unique twist will you add to your next brioche creation?