
Your Guide to Baking Easy, Seeded Bread


Welcome to BakeWithEase!
Ready to unlock the secret to perfectly baked bread? Dive into our easy seeded bread recipe and discover how simple it is to create a delicious, nutritious loaf at home. We'll explore the key ingredients that make this bread so special, providing you with insights that elevate your baking game. Curious to learn more about the art of baking with seeds? Let's get started!
- Baking a Delicious and Nutritious Whole Wheat Seeded Bread at Home
- Introduction to Whole Wheat Seeded Bread Baking
-
A Simple Whole Wheat Seeded Bread Recipe: A Step-by-Step Guide
- Gathering Your Baking Equipment and Ingredients
- Step 1: Preparing the Dough for Your Whole Wheat Seeded Bread
- Step 2: Kneading and Proofing the Seeded Bread Dough
- Step 3: Shaping and Adding Seeds to Your Bread
- Step 4: Baking Your Whole Wheat Seeded Bread
- Step 5: Cooling and Slicing Your Freshly Baked Seeded Bread
- Seeded Bread Variations: Exploring Different Seed Combinations
- Tips and Tricks for Baking the Best Whole Wheat Seeded Bread
- Serving Suggestions: Enjoying Your Homemade Seeded Bread
- Frequently Asked Questions
- Final Reflection: The Simple Joy of Seeded Bread
- Unleash Your Inner Baker: Craft Your Perfect Loaf!
Baking a Delicious and Nutritious Whole Wheat Seeded Bread at Home
Introduction to Whole Wheat Seeded Bread Baking
Why Bake Your Own Whole Wheat Seeded Bread? The Benefits
Baking your own whole wheat seeded bread at home is a deeply rewarding experience, offering numerous benefits beyond just the delicious aroma filling your kitchen. One significant advantage is the control you gain over the ingredients. You can select high-quality whole wheat flour, fresh seeds, and avoid preservatives often found in commercially produced breads.
This means you can tailor the bread to your dietary needs or preferences, ensuring a healthier loaf packed with fiber, healthy fats, and essential nutrients from the seeds. Studies show that whole grains like whole wheat, combined with seeds, contribute significantly to daily fiber intake, which is crucial for digestive health. A typical slice of homemade seeded whole wheat bread might contain roughly 3-4 grams of fiber, compared to perhaps 1-2 grams in a slice of white bread.
Furthermore, baking an easy seeded bread recipe yourself can be surprisingly cost-effective in the long run. While initial ingredient costs might seem comparable to a single store-bought loaf, buying in bulk (like flour and yeast) and reusing equipment quickly reduces the per-loaf cost. Consider that a 1kg bag of whole wheat flour, enough for 2-3 loaves, might cost around $3-5, while a single artisan seeded loaf from a bakery could easily cost $5-7 or more.
Plus, there's the immense satisfaction of creating something wholesome and delicious with your own hands, a simple pleasure that store-bought bread simply cannot replicate. It's a wonderful activity for stress relief and connecting with traditional culinary practices.
Understanding the Ingredients for a Nutritious Whole Wheat Seeded Bread
Crafting a nutritious whole wheat seeded bread starts with understanding the role of each ingredient. Whole wheat flour is the base, providing complex carbohydrates, fiber, and nutrients like B vitamins and iron, unlike refined white flour which has much of the bran and germ removed. The percentage of whole wheat flour can vary; a recipe might use 100% whole wheat, or a blend with white bread flour for a lighter texture, perhaps a 70/30 whole wheat to white ratio.
Active dry yeast or instant yeast acts as the leavening agent, producing carbon dioxide gas that makes the bread rise, resulting in a light and airy crumb. Typically, about 1-2 teaspoons of active dry yeast are needed per 500 grams of flour.
Seeds are the star addition, boosting both nutrition and flavor. Common seeds include sunflower, pumpkin, sesame, poppy, and flax seeds. Each type contributes unique benefits; for example, flax seeds are rich in Omega-3 fatty acids, while sunflower seeds provide Vitamin E. Seeds also add wonderful texture and a nutty depth.
Salt is crucial not just for flavor but also for controlling yeast activity and strengthening the gluten structure in the dough. Water or milk (or a combination) hydrates the flour, allowing gluten to develop, and dissolves the yeast and salt. The temperature of the liquid is important for activating yeast, often recommended between 105°F and 115°F (40°C-46°C) for active dry yeast.
A Simple Whole Wheat Seeded Bread Recipe: A Step-by-Step Guide

Gathering Your Baking Equipment and Ingredients
Before you begin your easy seeded bread recipe adventure, ensure you have the necessary tools and ingredients ready. Essential equipment includes a large mixing bowl, a measuring cup and spoons, a kitchen scale (highly recommended for accuracy, especially with flour), a clean kitchen towel or plastic wrap for covering dough, and a loaf pan (a standard 9x5 inch pan is common). You might also want a wire cooling rack. Having everything measured and laid out before you start, a practice known as mise en place, makes the baking process much smoother and reduces the chance of forgetting an ingredient.
For a basic whole wheat seeded bread recipe, you will typically need:
- Whole wheat flour
- Active dry or instant yeast
- Salt
- Warm water or milk
- A mix of your favorite seeds (e.g., sunflower, pumpkin, flax, sesame)
- A little oil or butter for greasing the pan
Having quality ingredients makes a noticeable difference in the final product. Fresh yeast that hasn't expired is critical for a good rise.
Step 1: Preparing the Dough for Your Whole Wheat Seeded Bread
Activating the Yeast: Ensuring a Good Rise
The first crucial step in many bread recipes, especially when using active dry yeast, is activating the yeast. This process confirms the yeast is alive and ready to work. In a small bowl, combine the specified amount of warm water (usually around 105°F-115°F or 40°C-46°C – think warm bathwater, not hot) with a pinch of sugar (optional, but it gives the yeast a quick food source) and the yeast.
Stir gently and let it sit for 5-10 minutes. You should see a foamy layer develop on the surface; this 'bloom' indicates the yeast is active. If it doesn't foam, your water might have been too hot or cold, or the yeast might be expired, and you'll need to start with fresh yeast.
Instant yeast, on the other hand, usually doesn't require pre-activation and can often be mixed directly with the dry ingredients. However, activating it separately as described above is still a good way to verify its potency before committing to the whole batch of dough. Always check the yeast package instructions, as different brands can have slight variations in recommended usage.
Combining the Dry and Wet Ingredients
Once your yeast is active (if using active dry), you'll combine the dry ingredients in a large mixing bowl. This typically includes the whole wheat flour, salt, and any seeds you want incorporated within the dough (save some for the outside). Whisk them together briefly to ensure even distribution. In a separate bowl or jug, combine the wet ingredients, usually the activated yeast mixture and any additional liquid or fat (like oil or melted butter) the recipe calls for.
Make a well in the center of the dry ingredients and pour the wet ingredients into the well. Using a sturdy spoon or a stand mixer with a dough hook, begin mixing from the center outwards, gradually incorporating the flour into the liquid. Continue mixing until a shaggy dough forms and pulls away from the sides of the bowl. At this point, the dough will likely be quite sticky, which is normal for whole wheat dough due to the high fiber content.
Step 2: Kneading and Proofing the Seeded Bread Dough
The Importance of Kneading for Texture
Kneading is a vital step in developing the gluten network within the dough. Gluten, formed when proteins in flour combine with water, provides the structure that traps the gases produced by the yeast, allowing the bread to rise and giving it its characteristic texture. Kneading transforms the shaggy, sticky mass into a smooth, elastic dough. You can knead by hand on a lightly floured surface, folding the dough over itself and pushing it away with the heel of your hand, rotating and repeating. This usually takes about 8-10 minutes for whole wheat dough by hand.
Alternatively, a stand mixer with a dough hook can do the work in about 5-7 minutes on a medium speed. The dough is sufficiently kneaded when it feels smooth and elastic, springs back slowly when gently poked, and can be stretched thinly without tearing easily (the "windowpane test"). Proper kneading is key to avoiding a dense loaf, especially with a whole wheat easy seeded bread recipe.
First Proofing: Letting the Dough Rise
After kneading, the dough needs time to rise, a process called bulk fermentation or the first proofing. Lightly oil a clean large bowl. Place the kneaded dough in the bowl, turning it to coat all sides with oil. Cover the bowl tightly with plastic wrap or a damp kitchen towel to prevent the dough from drying out. Place the bowl in a warm, draft-free place. The ideal temperature for rising is often around 75°F-80°F (24°C-27°C).
During this time, the yeast ferments the sugars in the dough, producing carbon dioxide and alcohol. The dough should double in size, which typically takes 1 to 1.5 hours, but can vary significantly depending on the room temperature and yeast activity. A good indicator is the "poke test": gently poke the dough with a floured finger; if the indentation remains, the dough is ready. If it springs back quickly, it needs more time.
Step 3: Shaping and Adding Seeds to Your Bread
Shaping Techniques for a Perfect Loaf
Once the dough has doubled in size, gently punch it down to release the gases. Turn the dough out onto a lightly floured surface. The goal now is to shape the dough into a loaf that fits your prepared pan and will bake evenly. For a standard loaf pan, you can shape the dough into a rectangle roughly the width of your pan.
Fold the top edge down to the center, then the bottom edge up over the top fold, pressing gently to seal the seam. Then, fold the dough in half lengthwise and pinch the seam closed firmly. This creates tension on the surface, which helps the loaf hold its shape and rise nicely in the oven.
Alternatively, you can roll the dough into a log shape. Ensure the seam is on the bottom. The key is to create a smooth, taut surface on top of the loaf. Avoid using too much flour during shaping, as this can create dry spots in the crust and prevent the seams from sealing properly.
Seed Selection and Application: Inside and Out
Seeds can be incorporated into your easy seeded bread recipe in two main ways: mixed into the dough and applied to the exterior. Mixing seeds into the dough (as mentioned in Step 1) distributes their flavor and texture throughout the loaf. Common seeds like flax, chia, or finely ground seeds work well mixed in. For a typical loaf using 500g flour, you might mix in 2-4 tablespoons of seeds.
To add seeds to the exterior, which provides visual appeal and a delightful crunch, you can brush the shaped loaf with water, milk, or an egg wash (egg whisked with a little water). Then, roll or sprinkle the loaf generously with your chosen seeds. A popular combination for the exterior includes sunflower, pumpkin, and sesame seeds. Using a mix of sizes and colors adds visual interest. Ensure the seeds are pressed gently into the dough so they adhere during baking.
Step 4: Baking Your Whole Wheat Seeded Bread
Oven Temperature and Baking Time
Preheating your oven correctly is essential for successful bread baking. For most standard loaf pan breads, a temperature between 375°F and 400°F (190°C-200°C) is common. Preheat your oven for at least 15-20 minutes after it indicates it's reached the target temperature to ensure the heat is evenly distributed throughout the oven cavity. Placing a baking stone or steel in the oven during preheating can help create a more consistent temperature and better bottom crust, though it's not strictly necessary for an easy seeded bread recipe.
The baking time for a standard 9x5 inch loaf of whole wheat seeded bread is typically between 30 and 45 minutes. The exact time will depend on your oven, the size of the loaf, and its thickness. It's better to rely on internal temperature than just visual cues.
Achieving a Golden-Brown Crust
A well-baked loaf will have a beautiful golden-brown crust. This color develops through the Maillard reaction and caramelization of sugars on the surface. To check for doneness, the internal temperature of the bread should reach 190°F-200°F (88°C-93°C) when measured with an instant-read thermometer inserted into the center of the loaf.
Another reliable test is to tap the bottom of the loaf; it should sound hollow. If the crust is browning too quickly before the inside is cooked, you can tent the loaf loosely with aluminum foil for the remaining baking time. Some bakers also add a pan of water to the bottom rack of the oven during the first part of baking to create steam, which helps the crust stay pliable initially, allowing for better oven spring, and contributes to a thinner, crispier crust.
Step 5: Cooling and Slicing Your Freshly Baked Seeded Bread
The Importance of Cooling Before Slicing
Resist the urge to slice into your warm, freshly baked easy seeded bread immediately! Cooling is a critical, often overlooked, step. As the bread cools, the internal structure sets, and moisture redistributes throughout the loaf. Slicing too early can result in a gummy texture inside and a loaf that is difficult to slice cleanly. The steam trapped inside needs time to dissipate gradually.
Remove the bread from the loaf pan immediately after taking it out of the oven and place it on a wire cooling rack. This allows air to circulate around the entire loaf, preventing the bottom from becoming soggy. A standard loaf should cool for at least 1-2 hours, or until it is completely cooled to room temperature, before slicing.
Tips for Slicing Your Bread Evenly
Once your seeded bread has cooled completely, you can slice it. Using a serrated bread knife is key to getting clean, even slices without crushing the loaf. A good serrated knife glides through the crust and crumb easily. For best results, use a gentle sawing motion rather than pressing down hard.
Some people find it helpful to use a bread slicing guide, a wooden or plastic jig with slots that help maintain uniform slice thickness. If you plan to freeze the bread, it's best to slice the entire loaf first and then wrap the slices individually or in small portions. This makes it easy to grab just a few slices from the freezer as needed.
Seeded Bread Variations: Exploring Different Seed Combinations
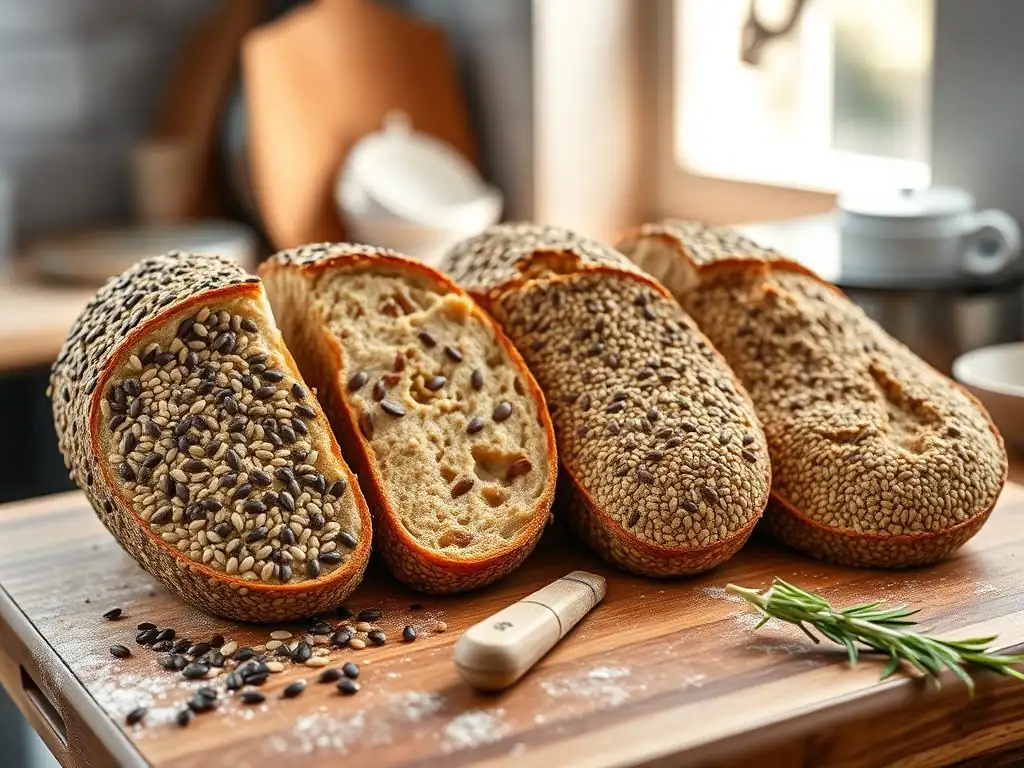
Sunflower Seed Bread: A Nutty Delight
Sunflower seeds are a fantastic addition to any easy seeded bread recipe, lending a delightful nutty flavor and a satisfying crunch. They can be added generously both inside the dough and pressed onto the exterior crust. When included in the dough, sunflower seeds soften slightly during baking but still retain some texture. On the crust, they toast beautifully, enhancing their nutty profile. For a standard loaf using 500g flour, you might use 1/4 to 1/3 cup of sunflower seeds total, split between the interior and exterior.
Beyond their taste and texture, sunflower seeds are a good source of Vitamin E, magnesium, and selenium. Baking a loaf rich in sunflower seeds not only tastes great but also provides a nutritional boost. Toasting the seeds lightly in a dry pan before adding them to the dough or crust can further intensify their flavor.
Poppy Seed Bread: A Classic Choice
Poppy seeds, small and subtly flavored, are a classic ingredient in many bread recipes, including an easy seeded bread recipe. They add a unique, slightly earthy flavor and a distinctive visual appeal, especially when sprinkled liberally on the crust. While they don't offer the same substantial crunch as larger seeds, their sheer number creates a pleasant texture contrast. About 2-3 tablespoons are usually sufficient for coating the top of a standard loaf.
Nutritionally, poppy seeds contain calcium, iron, and zinc, although you'd need to consume a significant quantity to get a substantial amount of these minerals. Their primary contribution is flavor, texture, and aesthetics. They pair particularly well with slightly sweeter or enriched doughs, but are also lovely on a rustic whole wheat loaf.
Sesame Seed Bread: Simple and Flavorful
Sesame seeds, both white and black, are a staple in seeded breads due to their simple, yet distinct nutty flavor that becomes more pronounced when toasted. They are versatile and work well both mixed into the dough and used as a topping. White sesame seeds are the most common, providing a classic look, while black sesame seeds offer a striking contrast. For a loaf, you might use 2-3 tablespoons for the exterior.
Sesame seeds are a good source of healthy fats, protein, B vitamins, and minerals like copper and manganese. Toasting sesame seeds lightly in a dry pan before using them is highly recommended to unlock their full flavor potential, making your easy seeded bread recipe even more delicious.
Pumpkin Seed Bread: Adds a Subtle Sweetness
Pumpkin seeds (pepitas) add a lovely visual element with their green color and a subtle, slightly sweet, and nutty flavor to seeded bread. They provide a satisfying chewiness when baked into the dough and a pleasant crunch when used as a crust topping. They are larger than other common seeds, so less quantity is needed compared to sesame or poppy seeds; perhaps 1/4 cup total for a loaf.
Rich in magnesium, zinc, and healthy fats, pumpkin seeds contribute positively to the nutritional profile of your homemade bread. Their mild sweetness complements the earthy notes of whole wheat flour beautifully. Using a mix of whole and roughly chopped pumpkin seeds can add varying textures to the loaf.
Tips and Tricks for Baking the Best Whole Wheat Seeded Bread
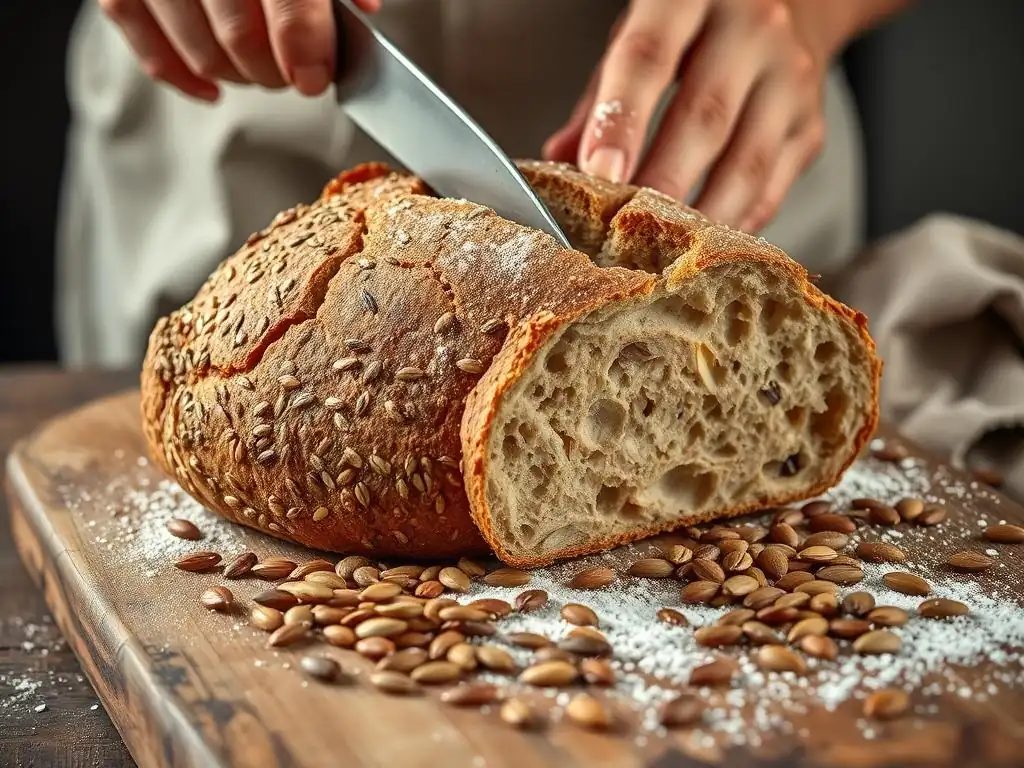
Achieving the Perfect Crust: Secrets Revealed
A perfect crust on your easy seeded bread recipe is the crowning glory. Achieving a beautiful golden-brown and slightly crisp crust involves a few techniques. Ensuring your oven is fully preheated to the correct temperature is crucial; placing the loaf in a hot oven allows for rapid expansion (oven spring) and quick crust formation. Baking on a preheated baking stone or steel can transfer heat efficiently to the bottom of the loaf, resulting in a better bottom crust.
Introducing steam into the oven during the initial phase of baking (the first 10-15 minutes) can also significantly improve the crust. Steam keeps the surface of the dough moist, allowing it to expand fully before the crust hardens. This leads to a more voluminous loaf and a thinner, crispier crust. You can create steam by placing a shallow pan of hot water on the bottom rack of your oven when you preheat it, or by spraying the oven walls with water (carefully!) a few times during the first few minutes of baking.
Troubleshooting Common Seeded Bread Baking Problems
Even with an easy seeded bread recipe, you might encounter issues. One common problem is a dense loaf. This is often caused by insufficient kneading (poor gluten development) or inadequate proofing (yeast didn't produce enough gas). Ensure you knead until the dough is elastic and let it rise until it has at least doubled in size. Another issue is bread that doesn't rise well; this is usually due to inactive or expired yeast, or using water that is too hot or cold when activating it. Always check your yeast's expiration date and water temperature.
A crust that is too hard or thick can result from overbaking or not using steam. If the seeds on the crust burn, you might need to reduce the oven temperature slightly or cover the loaf with foil towards the end of baking. If the bread sticks to the pan, ensure you've greased it thoroughly, perhaps using butter or oil and dusting with flour or seeds.
Storing Your Seeded Bread for Maximum Freshness
Proper storage is key to keeping your homemade easy seeded bread fresh for as long as possible. Once the loaf has cooled completely, store it at room temperature. Avoid refrigerating bread, as this can actually cause it to go stale faster due to a process called starch retrogradation. The best way to store it depends on how quickly you'll eat it.
For consumption within a few days, store the loaf in a bread box, a paper bag, or a linen bread bag. These allow some airflow, which helps keep the crust from becoming soggy. If you need to store it longer, freezing is the best option. Slice the cooled loaf, then wrap individual slices or the whole sliced loaf tightly in plastic wrap and then place in a freezer bag or aluminum foil. Frozen bread can last for up to 2-3 months. Thaw slices as needed at room temperature or toast directly from frozen.
Serving Suggestions: Enjoying Your Homemade Seeded Bread
Perfect Pairings: What to Serve with Seeded Bread
Your freshly baked easy seeded bread is incredibly versatile and pairs wonderfully with a variety of foods. Its hearty texture and nutty flavor make it an excellent base for sandwiches, especially with fillings like roasted vegetables, hummus, or avocado. Toasting a slice brings out the seed flavors even more and creates a delightful crunch, perfect for serving alongside soups or salads. A thick slice toasted and topped with butter and a sprinkle of sea salt is a simple luxury.
Consider pairing it with soft cheeses like cream cheese, ricotta, or goat cheese, perhaps drizzled with honey. It's also fantastic served with savory spreads like pâté or olive tapenade. For a breakfast treat, toast a slice and top with nut butter and sliced banana or berries. The possibilities are nearly endless, limited only by your imagination.
Seeded Bread Recipes Beyond the Loaf: Toasted Sandwiches
While delicious on its own or as part of a meal, your easy seeded bread can also be the star ingredient in simple recipes. Toasted sandwiches are a perfect example. The sturdy crumb and flavorful crust hold up well to grilling or pressing in a panini maker. A classic grilled cheese sandwich reaches new heights when made with seeded bread, offering extra texture and depth of flavor.
For a more substantial meal, try a turkey and swiss melt, a tuna melt, or a vegetarian option loaded with grilled peppers, zucchini, and provolone. The seeds on the exterior get extra toasty and flavorful when grilled. Simply butter the outside of the slices, fill with your desired ingredients, and cook in a skillet or press until golden brown and the cheese is melted and gooey.
Frequently Asked Questions
What makes this seeded bread recipe "easy"?
The recipe focuses on simple ingredients and straightforward instructions, minimizing complex techniques typically found in artisan bread baking. We aim to make baking accessible for everyone.
What types of seeds can I use in this easy seeded bread recipe?
You can use a variety of seeds! Popular choices include sunflower seeds, pumpkin seeds (pepitas), flax seeds, sesame seeds, and poppy seeds. Experiment with different combinations to find your favorite flavor.
How long does it take to bake this easy seeded bread?
The baking time is approximately 30-35 minutes, but this can vary depending on your oven. The bread is done when it's golden brown and a toothpick inserted into the center comes out clean.
Can I substitute any ingredients in the easy seeded bread recipe?
Yes, some substitutions are possible. For example, you can use different types of flour (whole wheat, rye) and honey or maple syrup instead of sugar. However, significant changes might affect the texture and rise.
How should I store the easy seeded bread after baking?
To keep it fresh, store the cooled bread in an airtight container at room temperature. You can also freeze slices for longer storage, wrapping them well to prevent freezer burn.
Final Reflection: The Simple Joy of Seeded Bread
The humble loaf of seeded bread, once a niche item, has become a staple in kitchens worldwide, a testament to the enduring appeal of simple, wholesome food. Its rise in popularity reflects a growing desire for homemade goodness and a deeper appreciation for the craft of baking. This isn't just about a recipe; it's about connecting with a tradition, finding solace in the process, and enjoying the delicious rewards.
Baking seeded bread has profoundly impacted my own life, transforming a sometimes-intimidating process into a relaxing and rewarding ritual. It's a tangible connection to the past, a reminder of simpler times and the satisfaction of creating something beautiful and nourishing from scratch. The best things in life are simple,
a phrase often repeated, rings truer than ever when considering the pure pleasure of a warm, crusty loaf of seeded bread. The aroma alone is enough to transport you to a cozy kitchen, filled with warmth and the promise of sharing.
Now, I invite you to embark on your own seeded bread journey. Don't be intimidated by the seemingly complex process; embrace the simplicity and allow yourself to be captivated by the magic of transforming flour, water, and seeds into something truly special. The satisfaction of creating your own loaf, the aroma filling your home, and the joy of sharing it with loved ones – these are the enduring rewards that await. So, gather your ingredients, preheat your oven, and discover the simple joy of seeded bread for yourself.
Unleash Your Inner Baker: Craft Your Perfect Loaf!
Thanks for joining us on this baking journey! We hope you've gained the confidence to tackle seeded bread with ease. Now it's time to put your newfound skills to the test.
- Bake your own masterpiece! Use the recipe and tips from this article to create a delicious, seeded loaf. Share a picture of your creation on social media using #BakeWithEase – we'd love to see it!
- Experiment with different seeds and grains! Explore the endless flavor possibilities by substituting your favorite seeds into the recipe. What exciting combinations will you discover?
- Join our community forum (link removed as per instructions) and share your baking experiences – tips, tricks, or even your bread fails! Let's learn and grow together.
Ready to transform your kitchen into a bread-baking haven? What unique seed combination will you try first?