
Easy Flaky Pie Crust for Beginners

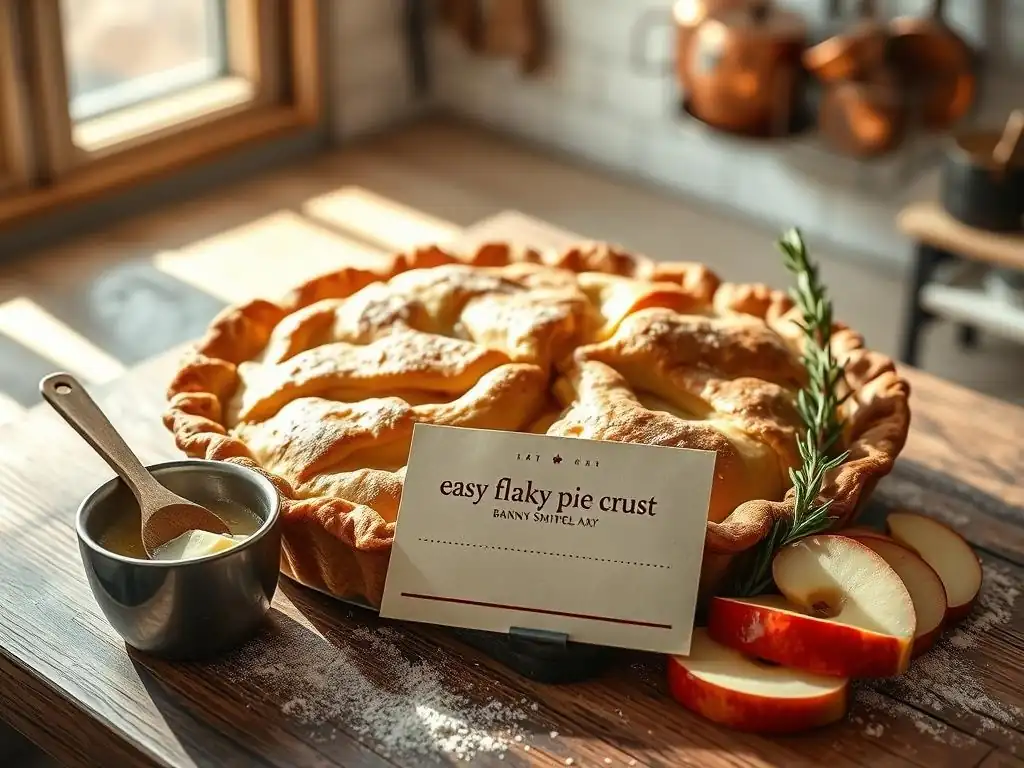
Welcome to BakeWithEase, your kitchen companion on your baking journey! Ever dreamt of creating that perfect, flaky pie crust that melts in your mouth? You're in the right place. Unlock the secrets to our easy flaky pie crust recipe designed even for beginners. Get ready to impress with a pie that's as beautiful as it is delicious – let's get baking!
- Classic All-Butter Pie Crust: A Step-by-Step Guide
- Introduction to Perfect Pie Crust: Your All-Butter Pie Crust Recipe
- Ingredients for Your All-Butter Pie Crust
-
Step-by-Step Guide: Making the Best All-Butter Pie Crust
- Step 1: Combining Dry Ingredients – Setting the Foundation
- Step 2: Cutting in the Butter – Achieving Flakiness with Cold Fat
- Step 3: Adding Ice Water – Hydrating the Dough for Structure
- Step 4: Forming and Chilling the Dough – Developing Gluten and Relaxing
- Step 5: Rolling Out the Dough – Techniques for Even Thickness
- Step 6: Transferring to the Pie Plate – Gentle Handling is Key
- Step 7: Crimping the Edges – Decorative and Functional Sealing
- Baking Your All-Butter Pie Crust to Golden Perfection
- Troubleshooting Common Pie Crust Problems
- Tips and Tricks for the Best All-Butter Pie Crust
- Variations on the All-Butter Pie Crust Recipe
- All-Butter Pie Crust Recipe: Frequently Asked Questions
- Enjoy Your Homemade Pie: Recipes to Use Your Crust
- Conclusion: Mastering the Art of All-Butter Pie Crust
- Frequently Asked Questions
- Final Reflection: Mastering the Flaky, the Simple, the Delicious
- Unleash Your Inner Baker: Make Perfect Pie Crust Today!
Classic All-Butter Pie Crust: A Step-by-Step Guide
Introduction to Perfect Pie Crust: Your All-Butter Pie Crust Recipe
Why This All-Butter Pie Crust Recipe is a Great Choice
Crafting a truly memorable pie begins with a fantastic crust, and an all-butter recipe is often considered the gold standard for achieving incredible flavor and a wonderfully flaky texture. Unlike crusts made with shortening or a mix of fats, an all-butter crust boasts a rich, pure taste that perfectly complements sweet and savory fillings alike.
This particular easy flaky pie crust recipe is designed with beginners in mind, simplifying the process without compromising on quality. It focuses on core techniques that are fundamental to successful pie making, making it an ideal starting point for anyone looking to master the art of homemade pie crust.
Choosing this easy flaky pie crust recipe means you're opting for simplicity and delicious results. It relies on readily available ingredients and straightforward steps, breaking down what might seem intimidating into manageable parts. The goal is to empower you to create a beautiful, flaky crust that rivals those from professional bakeries, building your confidence in the kitchen. By understanding the 'why' behind each step, you'll not only follow the recipe but also develop an intuition for working with dough, setting you up for success in future baking adventures.
What Makes an All-Butter Pie Crust Flaky? The Science
The secret to an all-butter pie crust's flakiness lies in the way the cold butter interacts with the flour and water during mixing and baking. When you cut cold butter into the flour, you're not fully incorporating it; instead, you're creating small, flat pockets or layers of butter coated in flour. A common target size for these butter pieces is often described as pea-sized or even slightly larger, around 1/2 inch thick for some methods, ensuring distinct layers.
As the crust bakes in a hot oven, the water within the butter quickly turns to steam. This steam expands rapidly, pushing apart the layers of dough created by the butter pockets.
As the steam lifts and separates the dough layers, the fat from the melted butter coats these layers, preventing them from sticking back together. This process is what creates those characteristic, ethereal flakes that shatter beautifully when you cut into a slice of pie.
The residual fat from the melted butter also contributes to the crust's tenderness and rich flavor. Maintaining the butter's cold temperature throughout the mixing process is absolutely crucial for this steam-driven flaking action; if the butter is too warm, it melts into the flour too early, resulting in a more cookie-like, dense texture rather than the desired flaky structure.
Ingredients for Your All-Butter Pie Crust
Essential Ingredients for a Delicious Pie Crust
To make a classic all-butter pie crust, you only need a few basic ingredients: all-purpose flour, unsalted butter, salt, and ice water. All-purpose flour provides the necessary structure, containing a moderate protein level (typically 10-12%) that develops just enough gluten to hold the crust together without making it tough. Unsalted butter is preferred because it allows you to control the salt level in your dough, ensuring a balanced flavor; it also provides the fat essential for flakiness and richness. The butter must be very cold, ideally straight from the refrigerator and cut into small pieces.
Salt is a flavor enhancer, balancing the richness of the butter and complementing both sweet and savory fillings. Don't skip it, even in a sweet pie! Finally, ice water is the binder that brings the dough together.
Using ice water helps keep the butter cold during mixing, which, as we discussed, is critical for achieving a flaky texture. You'll only need a few tablespoons, added gradually, just enough to hydrate the flour and form a cohesive dough. The exact amount can vary slightly depending on the humidity and your flour, so it's best to add it one tablespoon at a time.
Ingredient Quality and Impact on Flavor
The quality of your ingredients significantly impacts the final taste and texture of your easy flaky pie crust recipe. Using a good quality all-purpose flour, while standard, can make a difference; some bakers prefer unbleached flour for slightly better flavor. The most impactful ingredient, however, is the butter.
High-quality unsalted butter, especially those with a higher fat content (sometimes labeled "European-style" butter, which can have 82% fat compared to the standard 80%), can yield a richer flavor and potentially even better flakiness due to less water content. While not strictly necessary for a beginner's recipe, it's a difference you might notice as you bake more.
Using fresh ingredients is also key. Flour that has been sitting in the pantry for a very long time can absorb off-flavors and may not perform as expected. Butter should be fresh and free from any refrigerator odors. Even the water quality can play a minor role, though less so than the other ingredients. Think of your ingredients as the building blocks; using high-quality materials ensures a stronger, more delicious final product. This easy flaky pie crust recipe shines when made with fresh, good-tasting butter and flour.
Step-by-Step Guide: Making the Best All-Butter Pie Crust
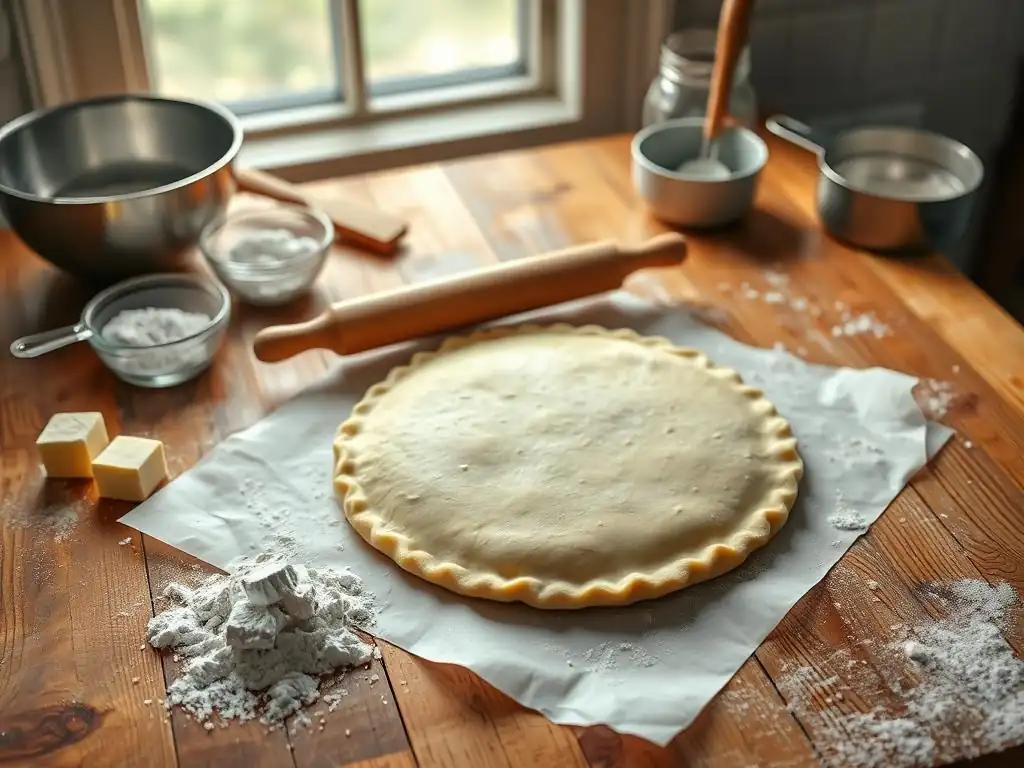
Step 1: Combining Dry Ingredients – Setting the Foundation
The very first step in making this easy flaky pie crust recipe is to combine your dry ingredients: the all-purpose flour and salt. This ensures that the salt is evenly distributed throughout the dough, so you don't end up with pockets of intense saltiness. You can do this in a large mixing bowl using a whisk or a fork, simply stirring them together until they are well combined. Some recipes might suggest sifting the flour, but for a standard all-purpose flour and this easy method, a simple whisking is usually sufficient to aerate it slightly and distribute the salt.
Using a large bowl gives you plenty of space to work in the subsequent steps, especially when cutting in the butter. Make sure your bowl is dry before adding the flour. This initial step is straightforward but important for the overall consistency and flavor of your homemade pie crust. An even distribution of salt is crucial for balancing the richness of the butter and enhancing the flavor profile of the final baked crust, whether it's for a sweet apple pie or a savory quiche.
Step 2: Cutting in the Butter – Achieving Flakiness with Cold Fat
This is arguably the most critical step for achieving a flaky texture in your easy flaky pie crust recipe. You need to incorporate the very cold butter into the flour mixture without melting it. The goal is to break the butter into small pieces, ranging in size from tiny crumbs to small peas (or even up to hazelnut size for extra large flakes).
You can do this using a pastry blender, two forks, or even your fingertips. If using your hands, work quickly to avoid melting the butter with your body heat. The mixture should resemble coarse crumbs with some larger, visible pieces of butter throughout.
The cold butter pieces are what create the steam pockets during baking, leading to flakiness. If the butter gets too warm and fully incorporates with the flour, you'll end up with a more uniform, less flaky dough. A good sign that you've done this step correctly is that the mixture looks like a sandy texture with distinct, flat flakes of butter visible throughout.
This texture is what will transform into those beautiful layers in your baked flaky pie crust. Some bakers even return the flour-butter mixture to the refrigerator for 10-15 minutes after this step if their kitchen is warm.
Step 3: Adding Ice Water – Hydrating the Dough for Structure
Now it's time to bring the dough together by adding ice water. This is the binding agent for your easy flaky pie crust recipe. It's crucial to use ice water to maintain the cold temperature of the butter. Fill a glass with water and ice cubes, then measure the water you need from that source. You'll typically need between 4 to 6 tablespoons of ice water for a single crust recipe (adjusting slightly for a double crust). It's essential to add the water gradually, usually one tablespoon at a time, sprinkling it over the flour-butter mixture.
After adding each tablespoon of water, gently mix the dough with a fork or your hands until just combined. The goal is to add just enough water for the dough to come together when gently squeezed – it should be moist enough to hold its shape but not sticky or wet. Adding too much water can lead to a tough crust because it develops too much gluten. Stop adding water as soon as the dough holds together. You might notice some dry bits at the bottom of the bowl, which is fine; they will hydrate as the dough rests.
Step 4: Forming and Chilling the Dough – Developing Gluten and Relaxing
Once the dough has just come together, turn it out onto a clean surface. Gently gather the dough and form it into a flattened disk or a rough square if making a double crust (dividing it into two disks). Avoid kneading the dough extensively; overworking the dough develops gluten, which results in a tough rather than flaky pie crust. The goal is simply to bring the shaggy mixture together into a cohesive mass. Pat it gently into shape.
Wrap the disk(s) tightly in plastic wrap. Flattening the disk to about 1 inch thick helps it chill faster and makes it easier to roll out later. This chilling step is non-negotiable for a truly easy flaky pie crust recipe. The dough needs to chill in the refrigerator for at least 30 minutes, but preferably 1 to 2 hours, or even longer. Chilling allows the gluten developed during mixing to relax, preventing shrinkage during baking, and it re-chills the butter, which is essential for flakiness. A well-chilled dough is much easier to roll out and handle.
Step 5: Rolling Out the Dough – Techniques for Even Thickness
After the dough has chilled sufficiently, unwrap one disk and place it on a lightly floured surface. Lightly flour your rolling pin as well. Start rolling from the center outwards, turning the dough occasionally and adding just a touch more flour underneath or on top if it starts to stick. Aim to roll the dough into a circle about 1/8 to 1/4 inch thick and about 12 inches in diameter for a standard 9-inch pie plate. Rolling too thin can make the crust fragile and difficult to handle, while rolling too thick can result in a doughy crust.
Keep your movements smooth and even to maintain a consistent thickness across the entire circle. If the dough becomes too soft or sticky as you roll, or if the butter starts to seep out, carefully slide it onto a baking sheet and pop it back into the refrigerator for 10-15 minutes to firm up. Patience here prevents frustration. A well-rolled crust is the foundation for a beautiful finished pie. Some find it helpful to roll the dough between two sheets of parchment paper to prevent sticking and make transfer easier.
Step 6: Transferring to the Pie Plate – Gentle Handling is Key
Once your dough is rolled to the desired size and thickness, it's time to transfer it to your pie plate. There are a couple of easy methods for this. One common technique is to gently roll the dough circle around your rolling pin, then unroll it carefully over the pie plate. Another method is to fold the dough circle in half or quarters, lift it into the pie plate, and then unfold it, easing it into the contours of the plate. Whichever method you choose, handle the dough gently to avoid stretching it.
Press the dough lightly into the bottom and up the sides of the pie plate, making sure there are no air pockets underneath. If you stretched the dough while transferring, gently ease it back into place rather than pulling it. Any stretching can cause the crust to shrink significantly during baking. Trim any excess dough from the edges, leaving about a 1-inch overhang if you plan to crimp the edges. This overhang gives you material to work with for shaping the rim.
Step 7: Crimping the Edges – Decorative and Functional Sealing
Crimping the edges of your pie crust isn't just for decoration; it also helps seal the filling inside the pie and provides a sturdy edge. With the 1-inch overhang you left, you can create various decorative edges.
A simple and classic crimp involves folding the overhang under itself so it sits flush with the rim of the pie plate, creating a slightly thicker edge. Then, use your thumb and forefinger on one hand to pinch the edge from the inside, while using the index finger of your other hand to push against the outside of the pinched section, creating a wavy pattern.
Alternatively, you can use a fork to press down all around the edge for a simple, rustic look. Ensure the crimping is firm enough to hold its shape during baking. If making a double-crust pie, you'll place the top crust over the filling, trim the edges, and then crimp the top and bottom crusts together to seal the pie completely.
For a single crust that will be blind-baked, a simple crimp or fork-prick is sufficient. After crimping, it's highly recommended to chill the pie crust again for at least 15-30 minutes before baking. This helps the edges hold their shape in the hot oven.
Baking Your All-Butter Pie Crust to Golden Perfection
Blind Baking: Pre-Baking for Custard and Cream Pies
Blind baking, or pre-baking the pie crust, is essential for pies with wet fillings, such as custard, quiche, or cream pies. These fillings don't bake long enough to fully cook the crust, especially the bottom, which can result in a dreaded "soggy bottom." To blind bake, first, make sure your chilled, crimped pie shell is ready.
Line the unbaked crust with parchment paper or foil, pressing it gently against the sides and bottom, leaving some overhang to easily lift it out later. Fill the lined crust with pie weights, dried beans, or rice, filling it right up to the edges. This holds the crust shape and prevents the sides from collapsing or the bottom from puffing up.
Bake the weighted crust in a preheated oven, typically at a relatively high temperature like 375°F to 400°F (190°C to 200°C), for about 15-20 minutes, or until the edges are set and lightly golden. Carefully remove the weights and the parchment/foil.
If the recipe calls for a fully baked crust (like for a no-bake filling), return the crust to the oven for another 10-15 minutes, or until the bottom is golden brown and appears dry. If the recipe calls for a partially baked crust (like for a quiche that will bake further with the filling), bake for just another 5-10 minutes after removing the weights until the bottom looks dry but not fully browned.
Baking with Filling: Achieving a Fully Cooked Crust
When baking a pie with a filling that requires significant oven time, like fruit pies, you typically place the unbaked or partially blind-baked crust directly into the oven with the filling already added. For pies like apple or cherry, which bake for 45-60 minutes or even longer, the crust will cook alongside the filling. The temperature is usually around 375°F to 425°F (190°C to 220°C), sometimes starting higher and then reducing. Ensure your oven is fully preheated to the correct temperature before placing the pie inside.
The key to a perfectly baked crust with filling is ensuring the bottom crust cooks through. This can be tricky with very wet fillings. Placing the pie on a preheated baking sheet in the oven can help conduct heat quickly to the bottom crust. Monitor the crust's color during baking; if the edges start browning too quickly before the rest of the crust is ready, use a pie shield or strips of aluminum foil to protect them. The crust is done when it's deeply golden brown and the filling is bubbling (for fruit pies) or set (for other types).
Using a Pie Shield to Prevent Over-Browning
One common challenge when baking pie is that the edges of the crust tend to brown much faster than the rest of the pie, especially the bottom crust. This is because the edges are thinner and more exposed to the oven's heat. To prevent this, a pie shield is an invaluable tool. A pie shield is a flexible ring, usually made of silicone or aluminum, that you place over the edges of the pie crust about halfway through the baking time, once the edges have reached the desired golden color.
If you don't have a dedicated pie shield, you can easily make one using aluminum foil. Tear off a long strip of foil, about 18-24 inches, and fold it lengthwise into a band about 2-3 inches wide. Wrap this band around the edges of the pie crust, crimping it gently to secure it around the rim.
This foil shield reflects heat away from the edges, allowing the rest of the crust and the filling to continue baking without the edges burning. Remove the shield for the last 10-15 minutes of baking if you want the edges to deepen in color slightly, or leave it on for the entire remaining bake time if they are already perfect.
Troubleshooting Common Pie Crust Problems
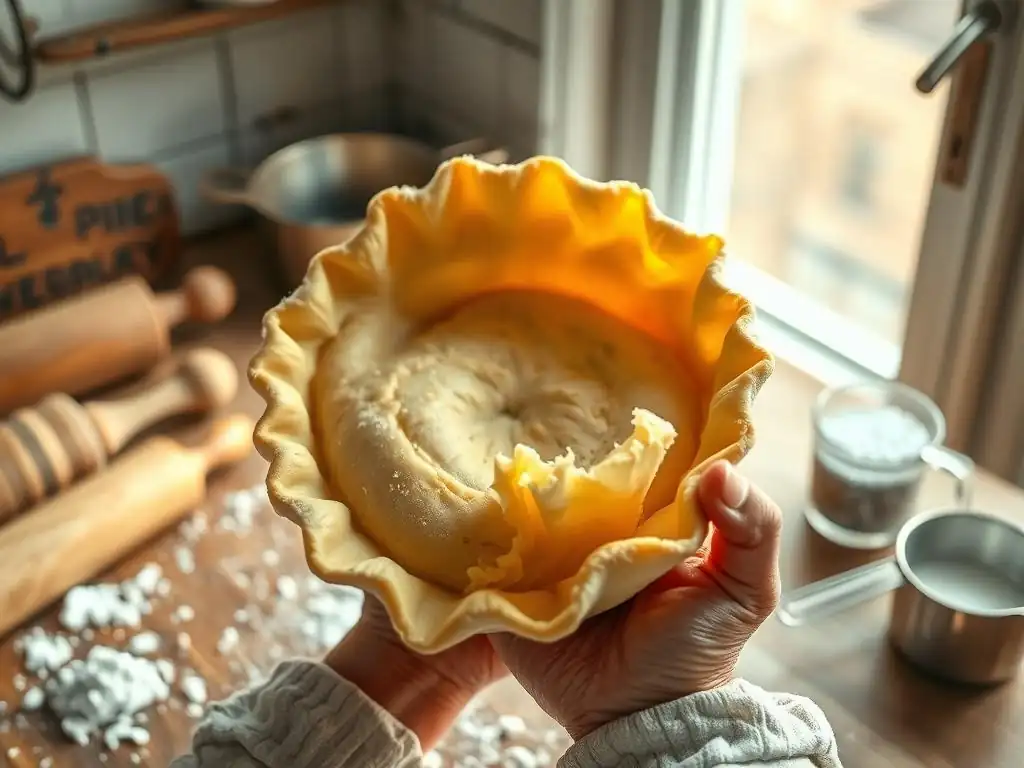
My Pie Crust Shrank: Understanding Gluten Development
Shrinkage is a common frustration when making an easy flaky pie crust recipe. The primary culprit is often gluten development. When flour is mixed with water, gluten proteins begin to form a network. If the dough is overworked (mixed too much) or stretched excessively during rolling and transferring to the pie plate, this gluten network becomes tight and elastic. As the crust bakes, this elastic network contracts, causing the dough to pull away from the sides of the pie plate and shrink.
To minimize shrinkage, handle the dough as little as possible after adding the water. Mix only until it just comes together. Avoid kneading. When rolling, use smooth, even pressure and turn the dough frequently rather than stretching it. Most importantly, ensure the dough is adequately chilled before rolling and again after placing it in the pie plate (for at least 30 minutes). Chilling allows the gluten to relax, making the dough less elastic and prone to shrinking when exposed to heat. Using ice water also helps control gluten development initially.
My Pie Crust is Dense: Avoiding Overworking the Dough
A dense, tough pie crust is usually a sign of overworking the dough or adding too much water. Similar to shrinkage, excessive mixing or kneading develops too much gluten. While some gluten is needed for structure, too much creates a tough, bread-like texture rather than a tender, flaky one. The goal for a flaky pie crust is to minimize gluten development as much as possible while still forming a cohesive dough.
When making your easy flaky pie crust recipe, stop mixing as soon as the dough barely holds together. It should look slightly shaggy with visible pieces of butter. When adding water, add it only one tablespoon at a time and mix just until absorbed before adding the next. Use just enough water for the dough to come together when gently squeezed. Also, ensure your butter is cold and in visible pieces; if the butter is too soft and fully incorporated, it creates a more uniform, less layered dough structure, contributing to density rather than flakiness.
My Pie Crust is Pale: Achieving a Golden-Brown Color
A pale pie crust isn't necessarily undercooked (though it can be), but it lacks the desirable flavor and texture that comes with proper browning. Browning is a result of the Maillard reaction and caramelization, which develop complex flavors. If your crust is pale, it might not have been baked long enough, or the oven temperature might have been too low. Most pie crusts bake best at temperatures between 375°F and 425°F (190°C to 220°C). Ensure your oven thermometer is accurate, as oven temperatures can vary significantly.
To achieve a beautiful golden-brown color, make sure you're baking the pie for the full recommended time, or until the crust reaches the desired shade. Don't be afraid to let it get quite golden; a pale crust often tastes raw or pasty. If the filling is done but the crust isn't brown enough, you can sometimes carefully tent the filling with foil and let the crust bake for a few extra minutes.
For blind baking, ensure you bake the crust long enough after removing the weights to get a golden bottom. Brushing the top crust with an egg wash (egg mixed with a little water or milk) or milk before baking can also promote browning and add a slight sheen.
Tips and Tricks for the Best All-Butter Pie Crust
Keeping Ingredients Cold for Optimal Flakiness
We've touched upon this, but it's worth emphasizing: keeping your ingredients, especially the butter and water, very cold is paramount to success with this easy flaky pie crust recipe. Cold butter creates those crucial pockets that steam and separate the layers during baking. If the butter melts into the flour before baking, you lose the potential for flakiness. Start with butter straight from the refrigerator, cut into pieces. Some bakers even cube the butter and then pop it into the freezer for 10-15 minutes before cutting it into the flour.
Use ice water, not just cold tap water. The colder the water, the better it is at keeping the butter firm and preventing gluten development. If your kitchen is warm, consider chilling your flour and mixing bowl in the refrigerator for 30 minutes before starting. Work quickly when cutting in the butter and adding the water to minimize the time the ingredients spend at room temperature. If at any point the dough feels warm or sticky, stop and chill it in the refrigerator for 15-30 minutes before continuing.
The Importance of Dough Rest for Relaxation
Allowing your pie dough to rest and chill is a critical step that many beginners might be tempted to skip, but it's essential for a manageable and successful easy flaky pie crust recipe. The initial rest after forming the disk (at least 30 minutes, ideally 1-2 hours in the refrigerator) allows the gluten that developed during mixing to relax. This makes the dough much easier to roll out smoothly without it snapping back constantly. It also gives the flour a chance to fully hydrate from the water, resulting in a more uniform dough.
Additionally, the rest re-chills the butter, which is vital for achieving flakiness. If you skip or shorten the rest, the dough will be difficult to roll, prone to shrinking during baking, and the butter might melt too early, leading to a less flaky crust. A shorter rest of 15-30 minutes after rolling out and placing the dough in the pie plate (especially after crimping) is also highly recommended. This final chill helps the shaped crust hold its form better in the hot oven, preventing slumping and shrinkage of the edges. Patience during these chilling periods pays off immensely.
Freezing Pie Crust Dough for Future Use
One of the great advantages of making your own easy flaky pie crust recipe is that you can easily make it ahead of time and freeze it for later use. This makes spontaneous pie-making much more convenient. After forming the dough into a disk(s) and wrapping tightly in plastic wrap as described in Step 4, you can place the wrapped disk(s) into a freezer-safe bag or wrap them in an additional layer of foil to prevent freezer burn. Label the package with the date.
Pie dough can be stored in the freezer for up to 3-4 months. When you're ready to use it, transfer the frozen dough disk to the refrigerator and let it thaw completely. This usually takes about 24 hours.
Avoid thawing at room temperature, which can cause the butter to warm up too quickly. Once thawed, let the dough sit at room temperature for about 10-15 minutes before rolling, just until it's pliable enough to work with but still very cold. You can then proceed with rolling and baking as usual for a delicious, homemade pie crust with minimal effort on the day of baking.
Variations on the All-Butter Pie Crust Recipe
Whole Wheat Pie Crust Variation
Adding whole wheat flour can bring a nutty flavor and a slightly different texture to your easy flaky pie crust recipe. While using 100% whole wheat flour can result in a dense crust due to its higher protein content and presence of bran, substituting a portion of the all-purpose flour with whole wheat flour works beautifully. A common ratio is to replace about one-third to one-half of the all-purpose flour with whole wheat flour. For example, if the recipe calls for 1.5 cups of all-purpose flour, you could use 1 cup of all-purpose and 0.5 cups of whole wheat.
When using whole wheat flour, you might find you need a tiny bit more water, as whole wheat absorbs more liquid than refined flour. Add the ice water gradually, just until the dough comes together. The process for cutting in butter, chilling, and rolling remains the same. The resulting crust will have a lovely rustic appearance and a wholesome flavor that pairs particularly well with fruit fillings like apple or pear. It's a simple way to add a nutritional boost and a different dimension to your homemade pie crust.
Chocolate Pie Crust Variation
For a decadent twist on the classic, you can transform your easy flaky pie crust recipe into a chocolate version, perfect for cream pies, tarts, or even a unique savory application with certain fillings. To make a chocolate crust, replace a small portion of the all-purpose flour with unsweetened cocoa powder. A good starting point is to substitute about 1/4 cup of cocoa powder for every 1.5 cups of flour. Use high-quality natural or Dutch-process cocoa powder for the best flavor.
Sift the cocoa powder together with the flour and salt before cutting in the cold butter. The process for making the dough remains the same: cut in the butter until pea-sized pieces remain, then add ice water until the dough just comes together. Be aware that cocoa powder can make the dough slightly more fragile, so handle it gently when rolling and transferring. This variation yields a dark, rich crust with a subtle chocolate flavor that is simply divine with fillings like chocolate pudding, peanut butter cream, or even a tart raspberry filling.
Nut-Based Pie Crust Variation
While not a direct substitution within the all-butter method in the same way as flour variations, you can create a delightful nut-based "crust" or add nuts to the traditional dough for extra flavor and texture. For a pure nut crust (often used for no-bake pies), you typically combine finely ground nuts (like pecans, walnuts, or almonds) with melted butter and a sweetener, then press the mixture into the pie plate and chill or bake briefly. However, you can also incorporate finely ground nuts into your traditional easy flaky pie crust recipe.
To do this, replace a small amount of the all-purpose flour, perhaps 1/4 to 1/2 cup per 1.5 cups of flour, with finely ground nuts or nut flour (like almond flour). Toss the ground nuts with the flour and salt before cutting in the butter. The nuts add flavor and tenderness. Be mindful that nuts contain fat, so the dough might feel slightly different. This variation works wonderfully with fillings like pecan pie, pumpkin pie, or fruit tarts, adding an extra layer of flavor and a hint of crunch within the flaky layers.
All-Butter Pie Crust Recipe: Frequently Asked Questions
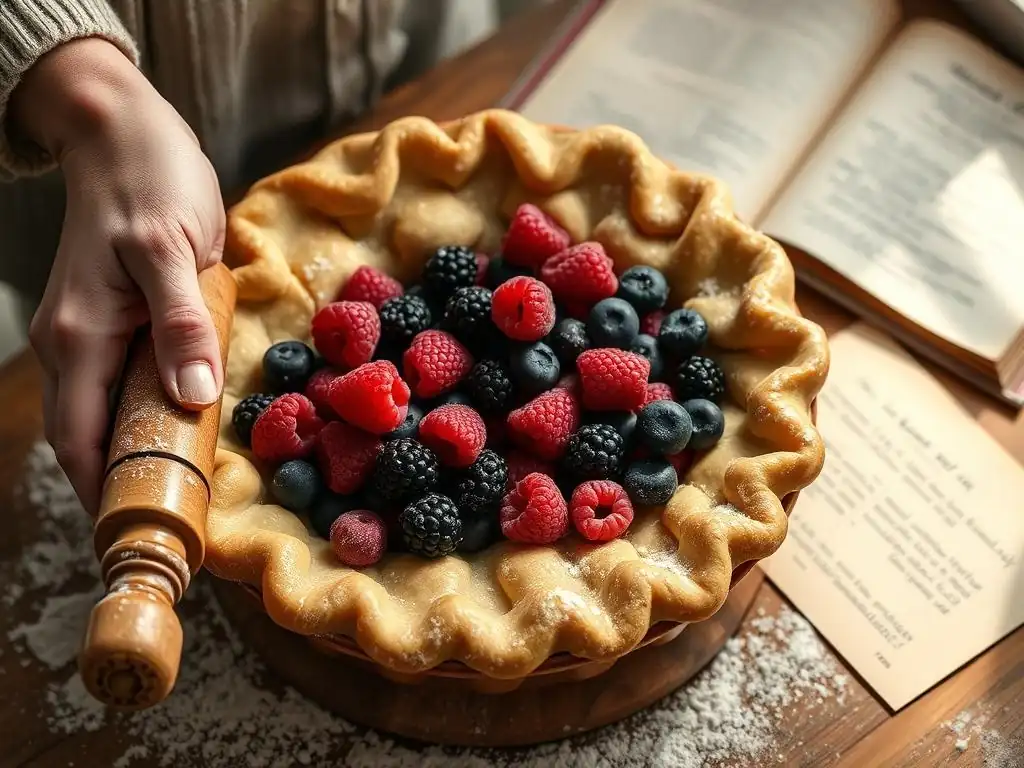
Can I Use a Food Processor?
Yes, you absolutely can use a food processor to make this easy flaky pie crust recipe, and many bakers find it quicker and easier than using a pastry blender or hands. Using a food processor helps keep the ingredients cold and ensures the butter is cut into uniform pieces quickly. To use a food processor, add the flour and salt to the bowl and pulse once or twice to combine. Add the cold, cubed butter and pulse in short bursts (usually 6-10 pulses) until the mixture resembles coarse crumbs with some pea-sized pieces of butter still visible.
Then, with the food processor running, drizzle in the ice water through the feed tube, one tablespoon at a time. Stop adding water as soon as the dough starts to clump together. Be careful not to overprocess; the dough can come together very quickly in a food processor. Once it clumps, turn it out onto a surface, gather gently, form into a disk, wrap, and chill as usual. The key is to use short pulses and stop as soon as the dough forms.
How Do I Prevent a Soggy Bottom Crust?
Preventing a soggy bottom crust is a common challenge, especially with wet fillings. The most effective method is blind baking (pre-baking) the crust, as discussed earlier. For custard, quiche, or cream pies, blind baking is almost always necessary. For fruit pies, which bake for a long time, a soggy bottom is less likely, but can still happen if the filling is particularly juicy.
Strategies to prevent a soggy bottom include: 1) Blind baking the crust partially or fully depending on the filling. 2) Ensuring the pie is baked at a high enough temperature (often starting around 400-425°F) to set the bottom crust quickly. 3) Placing the pie on a preheated baking sheet in the oven to help conduct heat to the bottom.
4) Adding a thin layer of a moisture barrier to the bottom of a blind-baked crust before adding the filling, such as a light dusting of flour, fine breadcrumbs, melted chocolate (for sweet pies), or a thin layer of egg wash brushed on the bottom and baked for a few extra minutes after removing weights. 5) Allowing fruit fillings to macerate and draining off excess juice before filling the pie.
What is the Best Butter to Use?
For a classic all-butter pie crust, using unsalted butter is generally recommended. This gives you control over the salt level in your dough. As for the type of unsalted butter, standard unsalted butter (around 80% fat) works perfectly well for a delicious and easy flaky pie crust recipe. However, some bakers prefer to use higher-fat, "European-style" unsalted butter (typically 82% fat or higher).
The slightly higher fat content and lower water content in European-style butter can potentially lead to a slightly richer flavor and perhaps a touch more flakiness, as there is less water to develop gluten and more fat to create steam pockets. That said, the difference is often subtle, and excellent results can be achieved with standard unsalted butter. The most important factor is that the butter is cold and of good quality, regardless of whether it's standard or high-fat. Avoid using whipped or spreadable butter, as these have added air or oils that won't work for this recipe.
Enjoy Your Homemade Pie: Recipes to Use Your Crust
Apple Pie Recipe
Your beautiful, easy flaky pie crust recipe is the perfect foundation for a classic Apple Pie. Typically, you'll use a double crust – one for the bottom and one for the top (either a solid top or a lattice).
A standard filling uses about 6-8 cups of sliced apples (like a mix of Granny Smith for tartness and Fuji or Honeycrisp for sweetness and texture), mixed with sugar (around 1/2 to 3/4 cup depending on sweetness preference), cinnamon (1-2 tsp), a pinch of nutmeg, a tablespoon or two of flour or cornstarch as a thickener, and a squeeze of lemon juice.
Fill the bottom crust with the apple mixture, dot with a tablespoon or two of butter, top with the second crust, crimp the edges, and cut vents in the top. Bake at around 400°F (200°C) for 15-20 minutes, then reduce the temperature to 375°F (190°C) and bake for another 35-45 minutes, or until the crust is golden brown and the filling is bubbling. A perfect pairing for your homemade pie crust.
Pumpkin Pie Recipe
A smooth and creamy Pumpkin Pie filling is wonderfully complemented by your easy flaky pie crust recipe. This is a classic case where blind baking the bottom crust is highly recommended to prevent a soggy bottom, especially since the filling is quite wet and bakes at a moderate temperature. A typical pumpkin pie filling combines about 15 oz of pumpkin puree (not pie filling), 1-2 large eggs, sweetened condensed milk or evaporated milk mixed with sugar (around 3/4 cup total sweetener), and warm spices like cinnamon (1-2 tsp), ginger (1 tsp), nutmeg (1/2 tsp), and cloves (1/4 tsp).
Pour the filling into your partially or fully blind-baked pie shell. Bake at 350°F (175°C) for 45-60 minutes, or until the center is just set (it might still be slightly wobbly in the very center). Let the pie cool completely on a wire rack before slicing, which allows the filling to set fully. The tender, buttery flakes of the crust are a delightful contrast to the smooth, spiced pumpkin filling.
Pecan Pie Recipe
Pecan Pie, with its rich, sweet, and slightly gooey filling packed with nuts, is another fantastic candidate for your easy flaky pie crust recipe. Like pumpkin pie, the filling is wet and heavy, so blind baking the bottom crust for about 10-15 minutes before adding the filling can help ensure a crisp bottom. A standard pecan pie filling includes eggs (2-3), corn syrup (light or dark, about 1 cup), sugar (white or brown, about 1/2 cup), melted butter (1/4 cup), vanilla extract (1 tsp), and about 1.5 to 2 cups of pecans.
Pour the mixture into your prepared crust and arrange extra pecan halves decoratively on top if desired. Bake at 350°F (175°C) for 40-50 minutes, or until the center is set (it shouldn't jiggle excessively when gently shaken). The flaky, buttery crust provides a lovely counterpoint to the intense sweetness and crunchy texture of the pecan filling. Remember to protect the crust edges with a pie shield if they start to brown too quickly.
Quiche Lorraine Recipe
Your easy flaky pie crust recipe isn't just for desserts! It makes an excellent base for savory pies like Quiche Lorraine. This classic quiche features a rich custard filling with bacon and cheese. For a Quiche Lorraine, you'll definitely want to blind bake the crust until it is fully cooked and golden brown, as the quiche filling bakes gently and won't cook the bottom crust adequately.
A typical filling for a 9-inch quiche includes cooked and crumbled bacon (about 6-8 strips), shredded cheese (like Gruyère or Swiss, about 1-1.5 cups), eggs (3-4), heavy cream or a mix of milk and cream (about 1.5-2 cups), salt, pepper, and a pinch of nutmeg. Sprinkle the bacon and cheese into the bottom of your fully blind-baked crust, then whisk together the eggs, cream, and seasonings and pour carefully over the bacon and cheese.
Bake at 375°F (190°C) for 35-45 minutes, or until the center is set and the top is lightly golden. The buttery flakiness of the crust holds up beautifully to the creamy, savory filling.
Conclusion: Mastering the Art of All-Butter Pie Crust
Mastering the art of making an easy flaky pie crust recipe is a fundamental skill for any home baker, opening the door to countless delicious sweet and savory creations. While it may seem daunting at first, following this step-by-step guide, understanding the role of cold ingredients and proper technique, and practicing patience during chilling periods will set you up for success. The pure flavor and exquisite flakiness of an all-butter crust are truly unmatched and well worth the effort.
Remember the key principles: keep everything cold, handle the dough gently to avoid overworking, use just enough ice water to bring the dough together, and allow ample time for chilling. Don't be discouraged if your first attempt isn't absolutely perfect; pie crust takes a little practice to get a feel for the dough. Each time you make this easy flaky pie crust recipe, you'll gain more confidence and intuition. Soon, you'll be creating consistently flaky, delicious homemade pie crusts that will impress everyone lucky enough to try your pies. Happy baking!
Frequently Asked Questions
What makes this pie crust recipe "easy" for beginners?
This recipe emphasizes simple ingredients and clear, step-by-step instructions, minimizing complex techniques that can overwhelm new bakers. It's designed for success!
What is the key to achieving a flaky pie crust?
The secret lies in using cold ingredients, especially the butter, and preventing gluten development by minimally mixing the dough. This creates distinct layers of fat that melt during baking.
Can I use a food processor instead of mixing by hand?
Yes, but be careful not to over-process the dough. Pulse the ingredients until they resemble coarse crumbs, then gently combine with water until just combined.
What type of fat is best for a flaky pie crust?
Cold unsalted butter is the traditional choice, offering the best flavor and flakiness. Shortening can also be used, or a combination of both, for a different texture.
How long can I store the pie crust dough before baking?
You can store the dough in the refrigerator for up to 3 days or in the freezer for up to 3 months. Wrap it tightly in plastic wrap to prevent drying out.
Final Reflection: Mastering the Flaky, the Simple, the Delicious
The pursuit of the perfect pie crust, once a culinary Everest for many, is now within everyone's reach. This article has demonstrated that creating a flawlessly flaky pie crust isn't about secret ingredients or years of experience, but rather a careful understanding of basic techniques and a willingness to experiment. The simplicity of the recipe presented here empowers even the most intimidated beginner to confidently tackle this classic pastry.
The joy of baking, and specifically the satisfaction of creating something beautiful and delicious from scratch, is a powerful and deeply personal experience. It's a connection to generations past, a tangible link to traditions that have been passed down through families for centuries. As Julia Child so wisely said, Find something you're passionate about and keep tremendously interested in it.
For many, that passion lies in the art of baking, and the flaky pie crust serves as a perfect gateway to this rewarding world. The impact of a homemade pie, whether it's a simple apple pie or a more elaborate creation, extends far beyond the simple act of eating; it's about sharing, connection, and the creation of lasting memories.
Now, it's your turn. Don't be afraid to roll up your sleeves, gather your ingredients, and embrace the challenge. The journey to mastering the perfect flaky pie crust is a rewarding one, filled with the aroma of warm butter and the sweet satisfaction of a job well done. Remember the tips and techniques shared in this article, and most importantly, have fun! The delicious results will be well worth the effort, and the pride you'll feel in creating something so beautiful and tasty from scratch is truly immeasurable.
Unleash Your Inner Baker: Make Perfect Pie Crust Today!
Thanks for joining us on this flaky pie crust adventure! You've just learned a simple technique to elevate your baking game. Now it's time to put your newfound skills to the test.
- Bake your dream pie: Grab your ingredients and try the recipe—we're confident you'll be amazed by how easy it is!
- Share your success: Post a picture of your masterpiece on social media and tag us – we love seeing your creations! Use #BakeWithEasePieCrust.
- Challenge a friend: Nominate a baking buddy to tackle this recipe and share their results. Let the pie-making competition begin!
Ready to experience the joy of a perfectly flaky crust? What's your favorite pie filling to use?