
Your First Scones: Easy & Rewarding Recipe


Welcome to BakeWithEase, where creating delicious treats is simpler than you think! Ever dreamed of effortlessly whipping up a batch of warm, buttery scones? Then you're in the right place. Dive into our Easy Beginner Scone Recipe and discover how to bake perfect scones, even on your very first attempt. What secret ingredient makes them so fluffy and light? Keep reading to find out, and unlock a world of baking possibilities!
- Classic Buttermilk Scones: A Simple & Delicious Recipe
- Introduction to Scone Baking
- The Buttermilk Scone Recipe: Ingredients You'll Need
- Step-by-Step Guide to Baking Buttermilk Scones
- Tips & Tricks for Baking Perfect Scones
- Variations on the Classic Scone Recipe
- Serving and Enjoying Your Homemade Scones
- Conclusion: Enjoy Your Homemade Buttermilk Scones!
- Frequently Asked Questions
- Final Reflection: The Simple Joy of Baking, and the Scones That Started It All
- Unleash Your Inner Baker: Scone Success Awaits!
Classic Buttermilk Scones: A Simple & Delicious Recipe
Introduction to Scone Baking
Welcome to the wonderful world of baking! If you're just starting out on your culinary journey, finding a recipe that's both forgiving and incredibly rewarding can be a game-changer. Scones fit this description perfectly. They require minimal specialized equipment and use ingredients you likely already have in your pantry. Unlike complex pastries or breads that demand precise timing and technique, scones offer a relatively quick path to delicious results, making them an ideal first project for anyone new to baking.
Baking scones is not just about following steps; it's about understanding a few simple principles, like keeping ingredients cold and handling the dough gently. Once you master an easy beginner scone recipe like this one, you unlock a versatile treat that can be enjoyed at any time of day. From a simple breakfast pastry to an elegant afternoon tea accompaniment, homemade scones are a delightful addition to your baking repertoire. This classic buttermilk scone recipe is designed specifically with beginners in mind, stripping away complexity while guaranteeing fantastic flavor and texture.
Why This Buttermilk Scone Recipe is Perfect for Beginners
This buttermilk scone recipe stands out as an exceptionally easy beginner scone recipe because it simplifies the traditional method without compromising on taste or texture. We focus on clear, concise steps that minimize potential pitfalls, such as overworking the dough or using ingredients at the wrong temperature. The key techniques involved – cutting in butter and gentle mixing – are fundamental skills that will serve you well in many other baking endeavors, from pie crusts to biscuits. By starting with this straightforward recipe, you build confidence and gain practical experience with essential baking processes.
Furthermore, the ingredient list for this easy beginner scone recipe is incredibly accessible. You won't need obscure flours or specialty leavening agents. Standard all-purpose flour, cold butter, buttermilk, sugar, and baking powder are the main players. The magic happens with how these simple components interact when properly handled. The relatively short baking time, typically between 12 to 15 minutes depending on your oven, means you get to enjoy your warm, fresh scones very quickly after starting, providing near-instant gratification that's highly motivating for new bakers.
The Buttermilk Scone Recipe: Ingredients You'll Need
Gathering your ingredients before you start is a crucial first step in any baking process, and it's particularly helpful when you're learning. For this easy beginner scone recipe, having everything measured and ready ensures a smooth workflow. This recipe yields approximately 8-10 scones, perfect for a small batch to enjoy fresh. Ensure your butter and buttermilk are kept cold until you are ready to use them – this is key to achieving that light, flaky texture.
You'll also want to preheat your oven and prepare your baking sheet while you gather your ingredients. This recipe doesn't require any fancy equipment; a large mixing bowl, a pastry blender or fork (or even just your fingertips! ), and a baking sheet are usually sufficient. Having everything organized from the start makes this easy beginner scone recipe even more stress-free and enjoyable, allowing you to focus on the simple technique rather than scrambling for supplies.
Essential Ingredients for Homemade Buttermilk Scones
For this classic easy beginner scone recipe, you will need:
- 2 cups (approximately 240g) all-purpose flour
- 1/4 cup (approximately 50g) granulated sugar
- 2 teaspoons baking powder
- 1/4 teaspoon baking soda
- 1/4 teaspoon salt
- 1/2 cup (1 stick or 113g) unsalted butter, very cold and cut into small cubes
- 3/4 cup (approximately 180ml) cold buttermilk
- 1 large egg, lightly beaten (for egg wash, optional)
These ingredients are standard pantry staples, making this an accessible easy beginner scone recipe. The combination of baking powder and baking soda, activated by the acidity of the buttermilk, provides excellent lift, resulting in light and airy scones. Using cold butter is non-negotiable; it creates steam pockets during baking, contributing to the desired flaky layers. Don't be tempted to use softened butter!
Step-by-Step Guide to Baking Buttermilk Scones
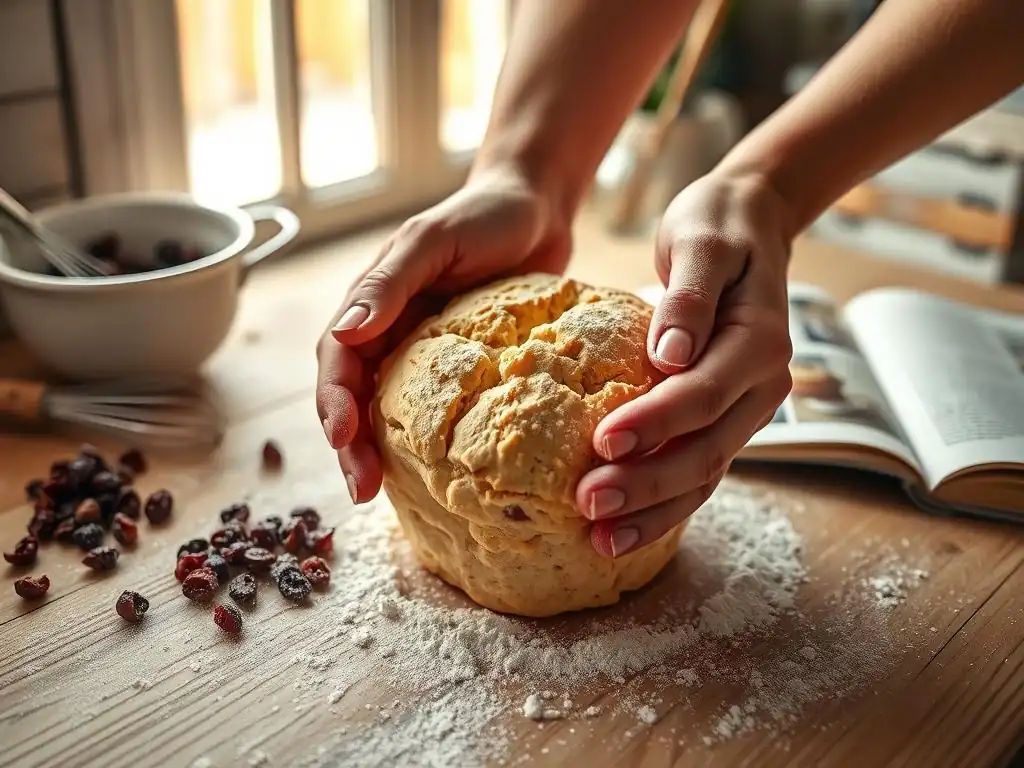
Follow these steps carefully for a successful batch of delicious, fluffy scones. This easy beginner scone recipe breaks down the process into simple, manageable stages, perfect for building confidence in the kitchen. Remember to work gently and quickly, especially when handling the dough after adding the liquid.
Taking your time with each step, particularly the butter incorporation, is important for achieving the right texture. While this is an easy beginner scone recipe, paying attention to details like keeping ingredients cold makes a significant difference in the final outcome. Don't worry if they don't look perfectly uniform on your first try – the taste will still be fantastic!
Preparing Your Baking Station
Before you even start mixing, take a moment to prepare your workspace. Preheat your oven to 400°F (200°C). While the oven heats, line a baking sheet with parchment paper. This prevents sticking and makes cleanup a breeze. Having the oven preheated correctly is vital for the scones to rise properly and bake through evenly.
Also, gather all your measured ingredients and necessary tools. Having everything ready on your counter saves time and reduces stress during the mixing process. Ensure your butter and buttermilk are straight from the refrigerator. A well-prepared station makes following this easy beginner scone recipe simple and efficient.
Step 1: Combining the Dry Ingredients
In a large mixing bowl, whisk together the 2 cups of all-purpose flour, 1/4 cup of granulated sugar, 2 teaspoons of baking powder, 1/4 teaspoon of baking soda, and 1/4 teaspoon of salt. Use a whisk to ensure that the leavening agents and salt are evenly distributed throughout the flour. This step is quick but important for consistent rising.
Properly combining the dry ingredients ensures that every scone gets the right amount of leavening, which is crucial for achieving a light texture. Don't skip the whisking step, as simply stirring with a spoon might leave clumps of baking powder. This simple start sets the stage for a successful easy beginner scone recipe.
Step 2: Cutting in the Butter
Add the 1/2 cup of very cold butter cubes to the dry ingredients in the bowl. Now, using a pastry blender, two forks, or your fingertips, work the butter into the flour mixture until it resembles coarse crumbs, with some pea-sized pieces of butter remaining. The goal is to coat the butter pieces with flour while keeping them cold.
This step is perhaps the most critical for scone texture. The cold butter pieces will melt in the hot oven, creating steam that pushes the layers of dough apart, resulting in flakiness. Avoid overworking the mixture until it's a fine powder; leaving some small chunks of butter is key for this easy beginner scone recipe's success.
Step 3: Adding the Buttermilk
Pour the 3/4 cup of cold buttermilk into the dry ingredients/butter mixture. Use a fork or spatula to gently mix everything together until just combined. The dough will be shaggy and appear quite wet in places – this is exactly what you want. Do not overmix at this stage!
Overmixing develops the gluten in the flour, leading to tough scones instead of tender ones. Just mix until there are no dry pockets of flour visible. Buttermilk not only adds flavor and tenderness but also reacts with the leavening agents for a good rise, making it perfect for this easy beginner scone recipe.
Step 4: Shaping and Cutting the Scones
Turn the dough out onto a lightly floured surface. Gently pat the dough into a circle or rectangle about 3/4 to 1 inch thick. Avoid kneading the dough; you just want to bring it together gently. If the dough is too sticky, lightly flour your hands and the surface, but use as little extra flour as possible.
Using a sharp knife or a biscuit cutter (about 2-2.5 inches in diameter), cut out the scones. For a classic wedge shape, cut the round into 8 triangles. If using a cutter, press straight down without twisting to ensure clean edges, which helps the scones rise evenly. Place the cut scones onto your prepared baking sheet, leaving about an inch between them.
Step 5: Baking the Scones to Golden Perfection
If desired, brush the tops of the scones lightly with the beaten egg wash for a golden, shiny finish. This is optional but adds a lovely color. Place the baking sheet in the preheated 400°F (200°C) oven.
Bake for 12 to 15 minutes, or until the scones are golden brown on top and a toothpick inserted into the center comes out clean. Baking time can vary slightly depending on your oven, so start checking around the 12-minute mark. The high initial temperature helps the scones rise quickly before the outer crust sets, contributing to their light texture.
Tips & Tricks for Baking Perfect Scones

Even with an easy beginner scone recipe, a few simple tips can elevate your results from good to great. Understanding the 'why' behind certain steps helps you avoid common mistakes and consistently bake delicious scones. These pointers are gathered from years of baking experience and are particularly helpful for those just starting out.
Focusing on temperature and gentle handling are the two most important aspects. These tips will help you achieve that desirable light and fluffy interior with a slightly crisp exterior that defines a perfect scone. Don't be discouraged if your first batch isn't absolutely perfect; baking is a skill that improves with practice!
Achieving the Perfect Scone Texture
The secret to light, flaky scones lies primarily in two things: cold ingredients and minimal handling. Ensure your butter and buttermilk are straight from the refrigerator. The cold butter creates steam pockets during baking, which is essential for flakiness. When mixing and shaping the dough, work quickly and gently.
Overworking the dough develops gluten, which can result in tough, dense scones. Think of it more as gathering the ingredients together rather than kneading them like bread dough. The less you handle the dough after adding the liquid, the more tender your scones will be. This is a key principle for any easy beginner scone recipe aiming for a delicate crumb.
Preventing Common Scone Baking Mistakes
One common mistake is using butter that isn't cold enough. Softened or melted butter won't create the necessary steam for flakiness; it will just blend into the dough. Another pitfall is overmixing the dough after adding the liquid. Mix only until the dry ingredients are just incorporated – a shaggy dough is good!
Also, avoid twisting the biscuit cutter when cutting scones, as this seals the edges and can prevent a good rise. Simply press straight down. Finally, ensure your oven is fully preheated to the correct temperature. Baking scones in an oven that isn't hot enough will result in flat, heavy scones. Following these simple warnings makes this easy beginner scone recipe much more foolproof.
How to Store Freshly Baked Scones
Scones are best enjoyed fresh, warm from the oven. However, if you have leftovers, allow them to cool completely on a wire rack before storing. Store cooled scones in an airtight container at room temperature for up to 1-2 days. To reheat, place them in a moderate oven (around 300°F or 150°C) for 5-10 minutes until warmed through.
For longer storage, scones freeze beautifully. Once completely cooled, wrap individual scones tightly in plastic wrap, then place them in a freezer-safe bag or container. They can be frozen for up to 2-3 months. Thaw frozen scones at room temperature or reheat directly from frozen in a low oven (around 300°F or 150°C) for about 15-20 minutes.
Variations on the Classic Scone Recipe
Once you've mastered the basic easy beginner scone recipe, you can start experimenting with flavors! The beauty of a simple scone base is how well it adapts to various additions, both sweet and savory. Introducing new ingredients is a great way to customize your scones and keep baking exciting.
These variations use the same fundamental techniques as the classic recipe, so you can confidently add them to your repertoire. Starting with small amounts of additions is recommended until you get a feel for how they impact the dough consistency.
Adding Fruits and Flavors to Your Scones
Adding fruits is a popular variation. For sweet scones, try incorporating about 1/2 cup of fresh or frozen berries (like blueberries or raspberries) or chopped dried fruit (like currants or cranberries) into the dry ingredients before adding the butter. This helps coat the fruit and distribute it evenly. Other delicious additions include:
- Lemon zest: Add the zest of one large lemon to the dry ingredients for a bright flavor.
- Chocolate chips: Mix in about 1/3 to 1/2 cup of chocolate chips.
- Spices: Add 1/2 teaspoon of cinnamon or nutmeg to the dry ingredients for warm, spiced scones.
Remember to still work gently when mixing in additions to avoid overworking the dough.
Savory Scone Recipe Ideas
Scones aren't just for sweet treats! The basic dough can be easily adapted into a savory version by slightly reducing the sugar (to about 1 tablespoon) and adding savory mix-ins. Some popular savory variations include:
- Cheddar and Chive: Add 1/2 cup grated sharp cheddar cheese and 2 tablespoons chopped fresh chives to the dry ingredients before adding the butter.
- Parmesan and Black Pepper: Mix in 1/4 cup grated Parmesan cheese and 1/2 teaspoon freshly ground black pepper.
- Herb Scones: Add 1-2 tablespoons of chopped fresh herbs like rosemary, thyme, or dill.
Savory scones are wonderful served with soup or alongside a meal.
Serving and Enjoying Your Homemade Scones

The best part about baking scones is, of course, eating them! Serve your warm, freshly baked scones with your favorite toppings and accompaniments. There's no single "right" way to enjoy a scone; it's all about personal preference.
Whether you prefer a traditional approach or something a bit more creative, these simple suggestions will help you make the most of your delicious homemade treats. Sharing them is also a great way to spread the joy of your successful easy beginner scone recipe!
Delicious Ways to Serve Your Scones
For a truly classic experience, serve your buttermilk scones split in half and generously topped with clotted cream and a dollop of jam (strawberry or raspberry is traditional). This combination is incredibly rich and satisfying.
Other simple yet delicious ways to serve include:
- Just butter: A warm scone with melting butter is pure comfort.
- Honey or maple syrup: A sweet drizzle is perfect, especially for breakfast.
- Lemon curd: A tangy alternative to jam.
- Whipped cream: A lighter option than clotted cream.
Savory scones are fantastic with butter, cream cheese, or even served alongside scrambled eggs or a stew.
Pairing Suggestions for Scones
Scones are a perfect partner for various beverages. A pot of hot tea is the quintessential pairing, especially for sweet scones. The warmth and flavor of the tea complement the richness of the scone and its toppings beautifully.
Other excellent beverage pairings include:
- Coffee: A classic breakfast pairing.
- Hot chocolate: A comforting match on a cold day.
- A glass of milk: Simple and satisfying.
- Sparkling wine or prosecco: For a special occasion or brunch.
Consider the flavor profile of your scone when choosing a pairing. A rich, buttery scone stands up well to a robust tea or coffee, while a fruit scone might pair nicely with a lighter brew.
Conclusion: Enjoy Your Homemade Buttermilk Scones!
Congratulations! You've successfully baked a batch of delicious, classic buttermilk scones using a simple and reliable easy beginner scone recipe. Take a moment to appreciate the lovely aroma filling your kitchen and the golden-brown perfection of your creations. Baking your first scones is a rewarding achievement and a fantastic starting point for exploring more baking adventures.
Remember the key principles you used today: cold ingredients, gentle handling, and a hot oven. These techniques are fundamental and will serve you well as you continue to bake. Don't hesitate to make this easy beginner scone recipe a regular part of your baking rotation – practice makes perfect, and every batch is a chance to refine your skills.
Next Steps: Expanding Your Baking Skills
Now that you've mastered this easy beginner scone recipe, you might be wondering what to bake next! The skills you've gained, particularly working with dough and understanding the role of cold fats, are transferable to many other recipes. Consider trying another simple recipe that builds on these techniques.
Perhaps you'd like to try an easy biscuit recipe, which uses a similar method but results in a flakier texture. Or maybe explore other types of quick breads, like muffins or soda bread, which are also very beginner-friendly. Our website has plenty of other easy recipes waiting for you to discover, from simple cookies to beginner-friendly cakes. Keep baking, keep learning, and most importantly, keep enjoying the delicious results!
Frequently Asked Questions
What makes this scone recipe "easy" for beginners?
This recipe focuses on simple ingredients and straightforward instructions, minimizing complex techniques. It also emphasizes visual cues to help beginners understand when each step is done correctly.
What are the key ingredients I absolutely need for this scone recipe?
You'll need all-purpose flour, baking powder (crucial for rise!), sugar, salt, cold butter, and milk or cream. Fresh, cold ingredients are key for the best results.
Can I substitute ingredients in the "Easy Beginner Scone Recipe"?
While some substitutions are possible, altering the core ingredients like flour or butter can drastically change the outcome. It's best to follow the recipe closely for your first attempt.
How do I prevent my scones from becoming dry?
Avoid overmixing the dough. Gently combine the ingredients until just combined. Also, don't overbake them. Watch for a light golden-brown color on top.
What's the best way to store leftover scones?
Store leftover scones in an airtight container at room temperature for up to two days. For longer storage, you can freeze them. Reheat gently to restore their texture.
Final Reflection: The Simple Joy of Baking, and the Scones That Started It All
The seemingly simple act of baking a scone, as detailed in this recipe, transcends mere culinary creation; it's a gateway to a world of culinary confidence and self-sufficiency. Mastering this foundational recipe empowers you to tackle more complex baking projects with newfound ease and a sense of accomplishment. The satisfaction of biting into a perfectly golden, crumbly scone, made entirely by your own hands, is a reward in itself.
The influence of baking, and specifically the joy of creating something delicious from scratch, is profoundly underestimated in our fast-paced world. It's a connection to a simpler time, a tangible reminder of the power of patience and precision. Baking is at once child's play and adult joy. And love, of course.
This quote perfectly encapsulates the feeling of creating these scones – a simple pleasure that brings immense satisfaction. It's a skill that can be shared, passed down, and enjoyed for a lifetime, fostering connection and creating lasting memories.
Now, I invite you to roll up your sleeves, gather your ingredients, and embark on your own scone-baking adventure. Don't be intimidated by the seemingly simple instructions; embrace the process, savor the aroma, and relish the delicious results. Remember the feeling of accomplishment, the pride in your creation, and the joy of sharing your freshly baked scones with loved ones. This isn't just about a recipe; it's about unlocking a new level of confidence in the kitchen and discovering the simple joys that await.
Unleash Your Inner Baker: Scone Success Awaits!
Thanks for joining us on this baking adventure! We hope you've gained the confidence to tackle those delicious scones. Now it's time to put your newfound skills to the test!
- Bake your first batch of scones today! Use our recipe as a springboard – experiment with different add-ins and share your creations with us. This is your chance to truly own this recipe.
- Share your scone journey on social media using #BakeWithEaseScones – let's inspire other bakers! We'd love to see your pictures.
- Consider gifting a batch of your homemade scones to a friend or family member. The joy of sharing your baking is unbeatable!
What unexpected flavor combination will you try in your next batch of scones? Let us know in the comments below!