
Melting Chocolate Without Disaster: A Beginner's Foolproof Guide

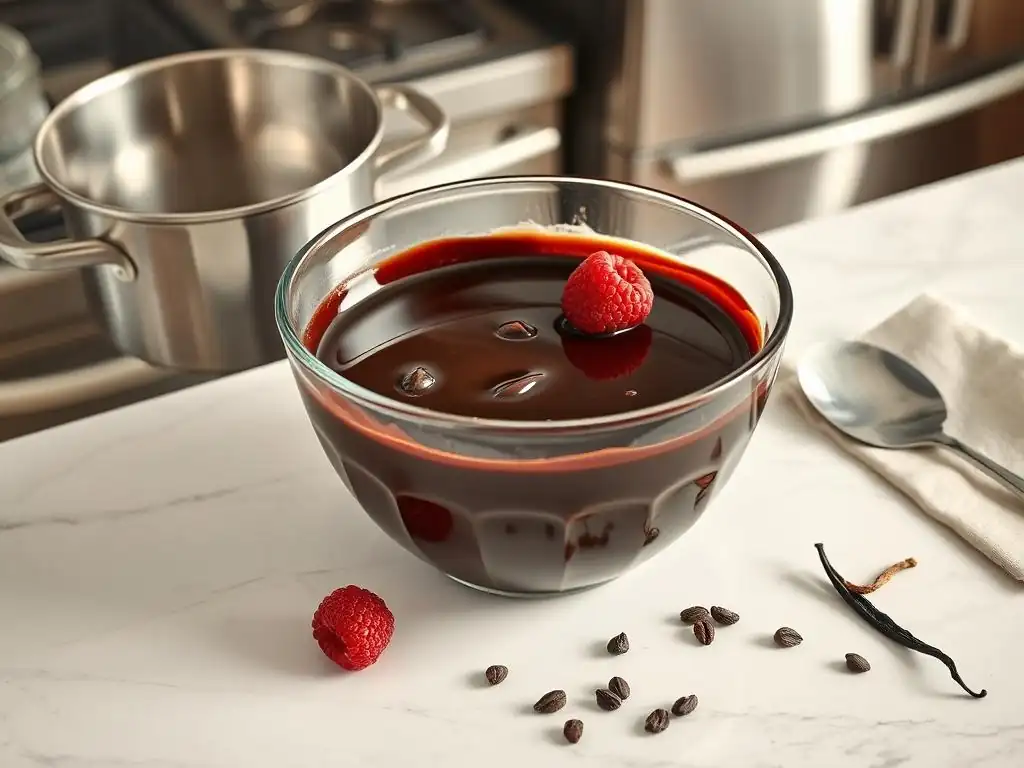
Welcome to BakeWithEase, your haven for effortless baking! Are you ready to conquer the sometimes-tricky world of chocolate? Then you're in the right place. Ever wondered how to achieve perfectly smooth, glossy melted chocolate without a single disaster? Uncover our foolproof guide to easy chocolate melting techniques and unlock a world of decadent possibilities. Get ready to transform your desserts, one perfectly melted square at a time. What are you waiting for? Let's get started!
- Introduction to Chocolate Tempering Techniques
- Selecting the Right Chocolate for Tempering
- Tempering Methods: Step-by-Step Guides
- Troubleshooting Tempering Issues
- Tips for Perfect Tempering
- Applications of Tempered Chocolate
- Conclusion: The Art of Perfect Temper
-
Frequently Asked Questions
- What are the most common mistakes people make when melting chocolate?
- What are the best methods for melting chocolate, especially for beginners?
- What type of chocolate is easiest to melt and work with?
- How do I prevent my chocolate from seizing during the melting process?
- How can I tell if my melted chocolate is ready to use?
- Final Reflection: The Enduring Allure of Perfectly Melted Chocolate
- Unleash Your Inner Chocolatier: Master the Art of Melting Chocolate!
Introduction to Chocolate Tempering Techniques
Tempering chocolate might sound intimidating, but it's a fundamental skill that transforms melted chocolate from dull and soft to glossy, snappy, and smooth. Achieving a perfect temper is essential for professional-looking confections like dipped strawberries, chocolate bark, or molded figures. It's not just about aesthetics; properly tempered chocolate sets firmly at room temperature, resists melting in your hands, and prevents unsightly greyish streaks known as bloom. Mastering easy chocolate melting techniques, specifically tempering, is a game-changer for any home baker looking to elevate their chocolate work.
Understanding the science behind tempering chocolate is key to achieving consistent results. Chocolate contains cocoa butter crystals, which can solidify in several different forms. Tempering involves heating, cooling, and reheating chocolate to encourage the formation of the most stable crystal structure, known as Beta V. This specific crystal form is responsible for the desirable snap, shine, and smooth texture. Without tempering, the cocoa butter crystals solidify randomly, resulting in a crumbly texture and a dull, streaky surface. Therefore, learning simple chocolate melting techniques that incorporate tempering is crucial for beautiful, stable chocolate treats.
Why Tempering Chocolate is Essential for Professional Results
Achieving that signature snap and beautiful sheen on chocolate isn't magic; it's the result of proper tempering. When chocolate is melted and then allowed to cool and solidify without controlled tempering, the cocoa butter crystals form haphazardly. This leads to a finished product that is soft, melts too easily at room temperature, and develops a dull, often greyish or streaky appearance over time. Think of dipping a pretzel in untempered chocolate – it might taste fine, but it lacks that satisfying crunch and glossy finish you see on store-bought chocolate.
Tempering stabilizes the cocoa butter, ensuring it crystallizes into the desired form (Beta V). This stable structure provides several benefits: a firm set at room temperature, a satisfying snap when broken, a smooth, non-sticky texture, a beautiful, lasting shine, and resistance to fat bloom. For anyone making molded chocolates, chocolate decorations, or enrobing candies, mastering easy chocolate melting techniques that include tempering is non-negotiable for achieving a professional-quality product that looks and performs perfectly.
Common Tempering Mistakes and How to Avoid Them
Many beginners encounter pitfalls when learning easy chocolate melting techniques, particularly during the tempering process. One of the most frequent errors is overheating the chocolate. Heating chocolate too much destroys all the cocoa butter crystals, both stable and unstable, making it impossible to temper properly without reintroducing stable crystals (as in the seeding method) or allowing new ones to form under controlled conditions. Always use gentle heat and a thermometer to monitor the temperature carefully, never letting it exceed the recommended melting point for your type of chocolate.
Another common mistake is introducing moisture or steam into the chocolate. Even a single drop of water can cause melted chocolate to seize, turning it into a thick, grainy paste that is unusable for tempering and molding. Ensure all your equipment is completely dry before you start.
Furthermore, insufficient cooling during the tempering process is a problem. If the chocolate doesn't cool down to the correct temperature range, the stable Beta V crystals won't form properly, resulting in a poor temper. Using an accurate thermometer and allowing sufficient time for the chocolate to cool while agitating it is vital for successful beginner chocolate melting.
Selecting the Right Chocolate for Tempering
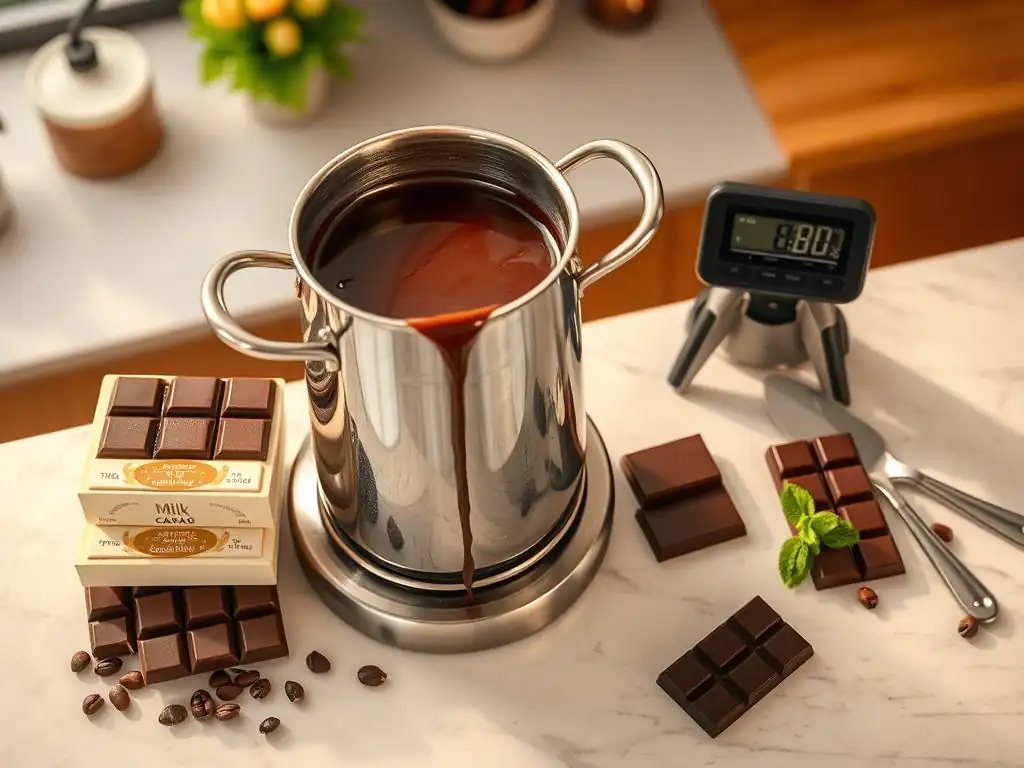
Not all chocolate is created equal when it comes to tempering. For successful results, you need to use real chocolate that contains cocoa butter as its primary fat. Chocolate labeled as "compound coating" or "candy melts" is made with vegetable oils (like palm kernel oil) instead of cocoa butter. While these are designed to melt easily and set firmly without tempering, they lack the flavor, texture, and melting properties of real chocolate and are not suitable for tempering techniques aimed at developing cocoa butter crystals.
Choosing high-quality chocolate is also important. Chocolates with a higher percentage of cocoa solids often contain more cocoa butter, which can sometimes make tempering slightly easier, though precise temperatures still matter. Look for couverture chocolate, which is specifically formulated with a high percentage of cocoa butter (typically 32-39%) to be ideal for tempering and coating. However, you can achieve excellent results with good quality bar chocolate or baking chocolate, provided it lists cocoa butter among the ingredients.
Understanding Chocolate Composition: Cocoa Butter and Sugar Content
The composition of chocolate, particularly its cocoa butter and sugar content, plays a crucial role in how it melts and tempers. Cocoa butter is the key ingredient responsible for chocolate's unique melting properties and its ability to be tempered. It's a polymorphic fat, meaning its molecules can crystallize in different forms, each with a different melting point. Tempering is the process of manipulating temperature to encourage the formation of the most stable crystal form (Beta V), which melts sharply just below body temperature, creating that desirable melt-in-your-mouth sensation.
Dark chocolate typically has a higher percentage of cocoa solids and cocoa butter and a lower sugar content compared to milk or white chocolate. This difference in composition means dark chocolate requires slightly higher temperatures for melting and tempering compared to milk and white chocolate, which have more sugar and milk solids and less cocoa butter. Understanding these basic compositional differences helps explain why the specific temperature ranges for melting chocolate successfully differ between types.
Choosing High-Quality Chocolate for Optimal Tempering
The quality of the chocolate you start with significantly impacts the final tempered product. High-quality chocolate not only tastes better but often has a more consistent composition, making the tempering process more predictable. As mentioned, look for chocolate that contains real cocoa butter. Avoid products with vegetable oils or artificial ingredients if your goal is to achieve a true temper with snap and shine.
For the best results when learning easy chocolate melting techniques for dipping or molding, many professionals recommend using couverture chocolate. This type of chocolate is specifically engineered with a higher cocoa butter content to melt smoothly and set with a beautiful gloss and snap. While you can successfully temper good quality baking bars or chocolate chips (though chips contain stabilizers that can sometimes affect temper), using a chocolate specifically designed for tempering will often yield the most reliable and stunning results for beginners.
Tempering Methods: Step-by-Step Guides
Mastering easy chocolate melting techniques involves understanding the different methods for tempering. Each method achieves the same goal – forming stable Beta V cocoa butter crystals – but uses a slightly different approach. We'll cover three popular methods: Seeding, Tabliering (Slab Tempering), and using a Tempering Machine. While the machine offers automation, the Seeding and Tabliering methods are accessible to anyone with basic kitchen tools and an accurate thermometer.
Regardless of the method chosen, the fundamental principle remains the same: melt the chocolate completely, cool it down to a specific temperature range while agitating to encourage stable crystal formation, and then gently rewarm it slightly to the working temperature, melting any unstable crystals while leaving the stable ones intact. An accurate digital thermometer is your best friend throughout any of these processes.
Method 1: Seeding Method - A Reliable Technique
The seeding method is arguably the most popular and accessible tempering technique for home bakers. It relies on using a small amount of already-tempered chocolate (the "seed") to introduce stable Beta V crystals into a batch of melted, untempered chocolate. As the melted chocolate cools down, these seed crystals act as templates, encouraging the surrounding cocoa butter to solidify into the desired form. This is one of the most straightforward easy chocolate melting techniques for beginners to try.
This method is particularly effective because it doesn't require specialized equipment like a marble slab, just a heatproof bowl, a double boiler or microwave, a rubber spatula, and an accurate thermometer. It's also relatively forgiving compared to the tabliering method. By carefully controlling the temperatures and adding the seed chocolate at the right moment, you can guide the melted chocolate into a perfectly tempered state, ready for dipping, molding, or coating.
Step 1: Preparing the Chocolate for Seeding
Start by finely chopping about 70% of the total chocolate you plan to temper. Chopping it into small, uniform pieces helps it melt quickly and evenly. Place this chopped chocolate in a dry, heatproof bowl. The remaining 30% of the chocolate should also be chopped and set aside; this will be your "seed" chocolate. Ensure the bowl and any utensils are completely dry, as moisture is the enemy of melting chocolate.
Gently melt the 70% portion of the chocolate. You can do this over a double boiler (a bowl set over a pot of simmering, not boiling, water, ensuring the bowl doesn't touch the water) or carefully in a microwave at 30-second intervals, stirring thoroughly after each interval until almost fully melted. Remove from the heat source just before the last few pieces are melted and stir until smooth. Heat the chocolate until it reaches its initial melting point: around 45-50°C (113-122°F) for dark, 40-45°C (104-113°F) for milk, and 35-40°C (95-104°F) for white chocolate. This ensures all original cocoa butter crystals are melted.
Step 2: Adding Seed Chocolate: Temperature and Ratios
Once the chocolate has reached its initial melting temperature and is smooth, remove it from the heat. Now, begin adding the reserved 30% chopped "seed" chocolate to the melted batch. Stir continuously with a rubber spatula. The goal here is twofold: first, to cool the melted chocolate down, and second, to introduce stable Beta V crystals from the seed chocolate. The continuous stirring helps distribute the seed crystals evenly and promotes cooling.
Continue adding seed chocolate and stirring until the temperature drops to the target cooling range: approximately 28-29°C (82-84°F) for dark, 26-27°C (79-81°F) for milk, and 25-26°C (77-79°F) for white chocolate. You might not need all the seed chocolate; stop adding it once the target temperature is reached and there are still some unmelted seed pieces remaining. Stir until these last pieces are melted by the residual heat of the chocolate, ensuring the temperature doesn't drop below the target cooling range.
Step 3: Testing for Proper Temper: Snap and Shine
After the chocolate has cooled and been agitated with the seed chocolate, it needs a slight rewarming to reach the working temperature. Gently heat the chocolate again, either over the double boiler for just a few seconds or with a heat gun or hairdryer on a low setting, stirring constantly, until it reaches its working temperature: around 31-32°C (88-90°F) for dark, 29-30°C (84-86°F) for milk, and 28-29°C (82-84°F) for white chocolate. Be very careful not to exceed this temperature range, or you will melt the stable crystals you just formed.
To test if the chocolate is properly tempered, dip the tip of a knife, spoon, or a piece of parchment paper into the chocolate. Scrape off any excess chocolate and let the sample sit at room temperature (ideally around 20-22°C or 68-72°F). Properly tempered chocolate should set within 3-5 minutes and appear smooth, glossy, and free of streaks. Once set, it should have a firm texture and break with a distinct snap. If it sets slowly, is dull, or soft, it's not tempered correctly and needs to be remelted and tempered again.
Method 2: Tabliering (Slab Tempering) - The Traditional Approach
Tabliering, also known as slab tempering, is a classic method often used by professional chocolatiers. It involves pouring melted chocolate onto a cool surface, typically a marble or granite slab, and working it with spatulas to cool it down rapidly and encourage crystal formation. While it requires a suitable surface and some practice with handling the chocolate, it's an effective way to achieve a perfect temper and another valuable technique for learning easy chocolate melting.
This method allows for rapid cooling and constant agitation, which helps promote the formation of stable Beta V crystals. The large surface area of the slab dissipates heat quickly. It's a more physical method than seeding and requires confidence in handling the melted chocolate, but with practice, it can yield beautiful results. Ensure your workspace is cool and free from drafts or high humidity, as these can interfere with the tempering process.
Step 1: Preparing the Marble Slab
Before starting, ensure your marble or granite slab is perfectly clean and dry. The surface should be cool, ideally around 20-22°C (68-72°F). If your slab is warmer than the ambient room temperature, you can cool it down slightly with a damp cloth and then dry it completely. Gather your tools: a heatproof bowl for melting the chocolate, a flexible bowl scraper or spatula, and a bench scraper or stiff spatula for working the chocolate on the slab.
Melt about two-thirds of your chocolate using a double boiler or microwave, following the same initial melting temperatures as in the seeding method (e.g., 45-50°C for dark). Once melted and smooth, remove from the heat. The remaining one-third of the chocolate will not be used as seed but can be kept warm in a separate bowl over the double boiler (turned off) or added back to the tempered batch later if it cools too much.
Step 2: Cooling and Working the Chocolate on the Slab
Pour about two-thirds of the melted chocolate onto the center of the cool marble slab. Immediately begin working the chocolate using your bench scraper and spatula. Spread the chocolate out thinly across the surface, then gather it back into the center, repeating this motion continuously. The goal is to cool the chocolate rapidly while keeping it in motion to promote the formation of stable Beta V crystals.
As you work the chocolate, its texture will change. It will start to thicken slightly and may become slightly cloudy as crystals begin to form. Keep working it until it reaches the target cooling temperature range: approximately 28-29°C (82-84°F) for dark, 26-27°C (79-81°F) for milk, and 25-26°C (77-79°F) for white chocolate. This typically takes several minutes of continuous working on the cold surface.
Step 3: Checking for Temper and Adjusting as Needed
Once the chocolate on the slab has reached the correct cooling temperature and thickened slightly, scrape it back into the bowl with the remaining one-third of the melted chocolate. Stir thoroughly to combine the cooled, partially crystallized chocolate with the warmer melted chocolate. The warmer chocolate will gently rewarm the cooled chocolate, bringing the entire batch to the working temperature range: around 31-32°C (88-90°F) for dark, 29-30°C (84-86°F) for milk, and 28-29°C (82-84°F) for white chocolate. This step melts any unstable crystals that may have formed during cooling, leaving only the stable ones.
Perform the same temper test as described in the seeding method: dip a clean knife or piece of parchment into the chocolate and let it set at room temperature. It should set within 3-5 minutes with a glossy finish and a good snap. If the chocolate becomes too thick while working, you can gently rewarm it slightly over the double boiler (turned off) or with a heat gun, stirring constantly, being careful not to exceed the working temperature. If the temper test fails, you'll need to remelt the chocolate and repeat the process.
Method 3: Using a Chocolate Tempering Machine - Automated Precision
For those who frequently work with chocolate or want the utmost precision and convenience, a chocolate tempering machine is an excellent investment. These machines automate the heating, cooling, and holding phases of tempering, taking much of the guesswork out of the process. While they represent a higher upfront cost, they offer consistent results and allow you to maintain chocolate at working temperature for extended periods, which is ideal for larger projects or continuous dipping.
Tempering machines use controlled heating and cooling elements, often combined with agitation, to guide the chocolate through the necessary temperature curve automatically. Some machines require you to pre-melt the chocolate, while others can melt solid chocolate directly. They are designed to hold the chocolate precisely at the optimal working temperature, ensuring it remains in temper as long as the machine is on and properly set up. This makes easy chocolate melting techniques virtually effortless once the machine is calibrated.
Step 1: Setting Up and Calibrating the Tempering Machine
Follow the manufacturer's instructions for setting up your specific tempering machine. This typically involves assembling the bowl and any stirring mechanisms. Most machines require you to set the target temperature for the type of chocolate you are using (dark, milk, white). Some advanced machines have pre-programmed settings, while others require manual input of the melting, cooling, and working temperatures. Ensure the machine is on a stable, level surface away from drafts or direct heat sources.
Add your chocolate to the machine's bowl. If the machine has a melting function, add solid or roughly chopped chocolate. If it requires pre-melted chocolate, melt it gently first using a separate method (like a microwave) to the initial melting temperature before adding it to the machine. Calibrate the machine's thermometer if necessary, following the manual, to ensure accurate temperature readings, which are critical for successful tempering.
Step 2: Monitoring the Chocolate Temperature During Tempering
Once the chocolate is in the machine and the settings are programmed, the machine will take over the process. It will heat the chocolate to the initial melting temperature, then cool it down to the crystallization temperature while usually providing gentle agitation. Finally, it will bring the chocolate up slightly to the working temperature and hold it there. Your role is primarily to monitor the process and ensure the machine is functioning correctly.
While the machine handles the temperature control, it's still a good idea to periodically check the chocolate's temperature with an external, calibrated thermometer to confirm the machine's accuracy. Ensure the chocolate is flowing smoothly and the agitator (if present) is keeping the chocolate in motion. This automated approach simplifies easy chocolate melting techniques significantly, allowing you to focus on the creative aspects of your chocolate work.
Step 3: Maintaining Temper and Working Time
One of the biggest advantages of using a tempering machine is its ability to hold the chocolate at the precise working temperature for extended periods. This means you can dip, mold, or decorate at your own pace without worrying about the chocolate falling out of temper. The machine continuously monitors and adjusts the temperature, keeping the stable Beta V crystals in the correct state.
As you use the chocolate, the level in the machine will drop. You can typically add more solid or pre-melted chocolate to the machine, and it will incorporate it into the tempered batch, maintaining the temper. This allows for continuous production. Even with a machine, it's wise to perform the standard temper test (dipping a knife or parchment) occasionally, especially if you've added more chocolate, just to confirm that the machine is successfully maintaining the temper.
Troubleshooting Tempering Issues
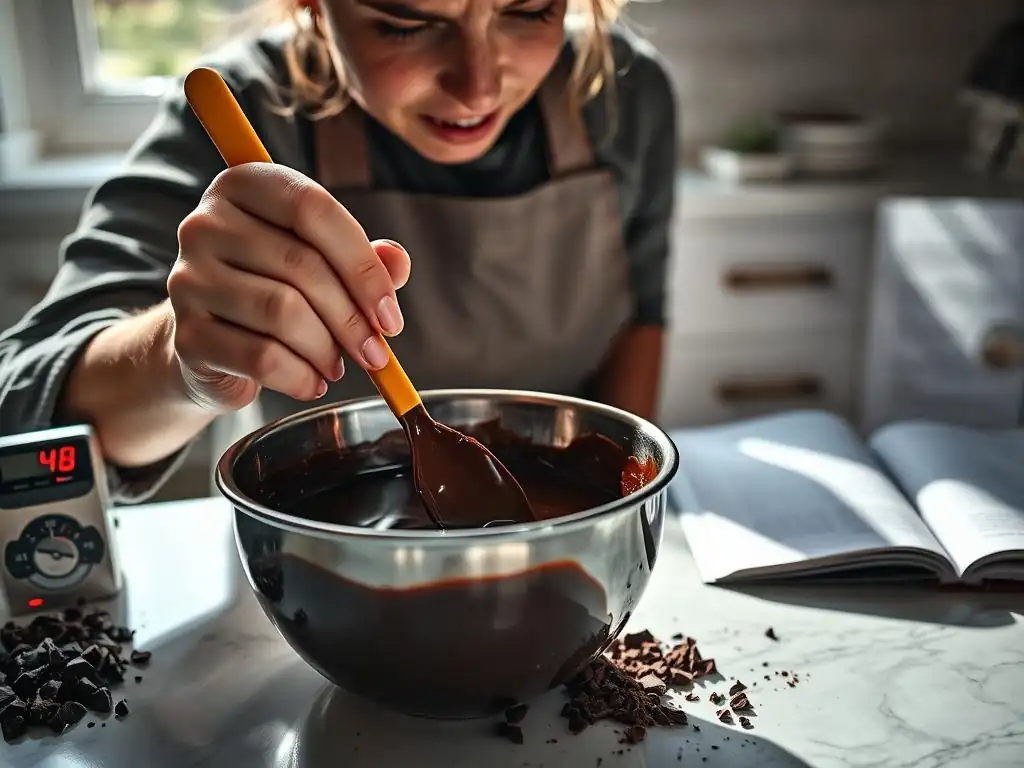
Even with careful attention to temperature and method, things can sometimes go wrong when learning easy chocolate melting techniques like tempering. Recognizing common issues and knowing how to fix them is part of the learning process. Don't get discouraged if your first attempt isn't perfect; chocolate tempering is a skill that improves with practice.
The most visible signs of tempering failure are often related to bloom or improper setting. Understanding why these issues occur is the first step to preventing them in the future and correcting them when they happen. Patience and precision are key when troubleshooting chocolate problems.
Chocolate Blooms: Identifying and Preventing Fat Bloom and Sugar Bloom
Chocolate bloom is the appearance of greyish or white streaks or patches on the surface of chocolate. There are two main types: fat bloom and sugar bloom.
- Fat Bloom: This is the most common type and occurs when the cocoa butter separates from the cocoa solids and recrystallizes on the surface. It's typically caused by improper tempering (where unstable cocoa butter crystals form), storage at inconsistent or warm temperatures, or rapid temperature changes. Fat bloom looks like hazy streaks or a dull, greasy film.
- Sugar Bloom: This occurs when moisture comes into contact with the chocolate's surface. The moisture dissolves the sugar, and as the moisture evaporates, the sugar recrystallizes on the surface, creating a white, grainy texture. This is often caused by storing chocolate in a humid environment or moving cold chocolate directly into a warm, humid room, causing condensation.
Preventing bloom starts with proper tempering and correct storage. Always temper your chocolate correctly using one of the reliable methods. Store finished chocolate products in a cool, dry place with a stable temperature, ideally between 15-18°C (59-64°F). Avoid refrigerating chocolate unless absolutely necessary, and if you do, wrap it tightly and allow it to come to room temperature slowly in its wrapping to prevent condensation. If your chocolate develops bloom, it's still safe to eat, but the texture may be affected. You can often salvage bloomed chocolate by remelting and retempering it properly.
Over-Tempered Chocolate: Recognizing and Correcting
Over-tempered chocolate occurs when too many stable Beta V crystals form during the cooling process, or when the chocolate cools too much before reaching the working temperature. This results in chocolate that is too thick and pasty to work with effectively for dipping or molding. It might set too quickly or unevenly. The texture will be heavy and difficult to pour or spread thinly.
If your chocolate becomes too thick and starts to set while you're working with it, it's likely either over-tempered or has cooled below its working temperature. To correct this, you need to gently rewarm the chocolate slightly. Place the bowl back over a very gently simmering double boiler (turned off) or use a heat gun on a low setting, stirring constantly, until the chocolate smooths out and reaches the correct working temperature range (e.g., 31-32°C for dark). Be very careful not to exceed the working temperature, or you'll melt the stable crystals and have to start the tempering process over. Constant stirring is key to distributing the heat evenly.
Sticky Chocolate: Causes and Solutions
Sticky chocolate, particularly after it has set, is another sign of improper tempering. If chocolate remains soft, melts easily to the touch, or feels sticky rather than firm and smooth after cooling, it indicates that the cocoa butter did not crystallize into the stable Beta V form. This usually happens because the chocolate was not cooled sufficiently during the tempering process, or it was overheated after cooling, melting the stable crystals.
The primary cause of sticky chocolate is an incomplete or failed temper. The solution is to remelt the chocolate completely and repeat the tempering process from the beginning, paying close attention to the temperature ranges and ensuring adequate cooling and agitation. Using an accurate thermometer and following the steps precisely are critical to achieving a proper temper that sets firmly and isn't sticky. Ensure your working environment is also cool and dry, as high temperatures and humidity can hinder proper setting.
Tips for Perfect Tempering
Achieving a perfect temper consistently requires attention to detail and understanding the factors that influence the process. Beyond just following the steps of a chosen method, there are several tips that can help improve your success rate with easy chocolate melting techniques.
Patience, accurate tools, and a suitable environment are your allies in chocolate tempering. Don't rush the process, especially the cooling and stirring phases. Using a reliable digital thermometer is non-negotiable, as even a few degrees can make the difference between success and failure.
The Importance of Accurate Temperature Control
We've mentioned it repeatedly, but it bears emphasizing: accurate temperature control is the single most critical factor in successful chocolate tempering. Cocoa butter crystals are sensitive to temperature changes, and hitting the precise ranges for melting, cooling, and rewarming is essential for forming the stable Beta V crystals. Using an inexpensive or unreliable thermometer can lead to frustration and failed temper.
Invest in a good quality digital thermometer that can accurately measure temperatures within a degree or two, especially in the lower ranges required for cooling and working temperatures. Regularly check your thermometer's calibration if possible. Monitoring the temperature constantly throughout the process, from initial melting through the cooling and rewarming stages, gives you the control needed to guide the chocolate into temper successfully. Precision with temperature makes easy chocolate melting techniques truly achievable.
Factors Affecting Temper: Humidity and Ambient Temperature
Beyond the chocolate's temperature itself, the temperature and humidity of your working environment can significantly impact tempering. High humidity is particularly problematic because moisture can cause chocolate to seize. It can also interfere with the setting process and contribute to sugar bloom. Ideally, temper chocolate in a room with low humidity, preferably below 50%.
The ambient room temperature also matters. Working in a cool room, ideally between 20-22°C (68-72°F), helps the chocolate cool down efficiently during the tempering process and set properly afterward. If your room is too warm, the chocolate may take too long to cool, making it difficult to achieve temper using methods like seeding or tabliering, and it will take longer to set. Conversely, a room that is too cold or drafty can cause the chocolate to set too quickly on the slab or in the bowl, leading to over-tempering. Find a stable, controlled environment if possible.
Working with Colored Cocoa Butters
Once you've mastered basic chocolate tempering, you might want to experiment with colored cocoa butters to add vibrant finishes to your creations. Colored cocoa butter is essentially tempered cocoa butter mixed with fat-soluble food coloring. It is used as a decorative coating or applied to molds before filling them with chocolate.
Working with colored cocoa butter also requires tempering, but the process is often simpler because you are working with cocoa butter directly rather than chocolate (cocoa butter + solids + sugar). Colored cocoa butter typically needs to be heated gently to melt (around 30-31°C or 86-88°F), used within a specific temperature range (often slightly lower than chocolate, around 28-30°C or 82-86°F), and kept agitated. It will set relatively quickly. Always follow the manufacturer's instructions for specific temperature guidelines, as they can vary.
Applications of Tempered Chocolate
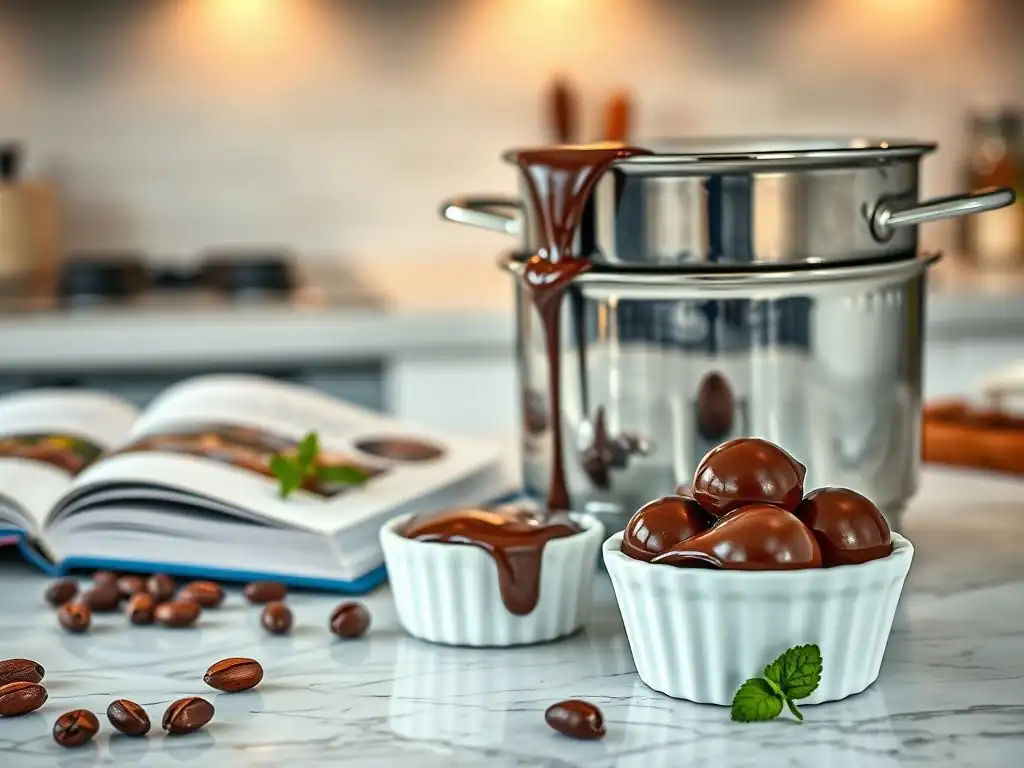
Once you've successfully tempered chocolate using one of the easy chocolate melting techniques, a world of possibilities opens up! Tempered chocolate is essential for creating a wide range of professional-looking confections that have that desirable snap, shine, and smooth finish.
From simple chocolate bark and dipped treats to intricate molded figures and enrobed candies, tempered chocolate provides the structural integrity and appealing appearance that elevates homemade sweets. Its ability to set firmly at room temperature makes it ideal for items that need to hold their shape and resist melting easily.
Creating Chocolate Decorations: Molds, Transfers, and Sculptures
Tempered chocolate is the foundation for creating beautiful and stable chocolate decorations. Plastic or polycarbonate molds, when filled with tempered chocolate, will produce shiny, perfectly shaped figures, bonbons, or bars that release easily from the mold once set. The snap of a well-tempered molded chocolate is incredibly satisfying.
You can also use tempered chocolate with chocolate transfer sheets, which are sheets printed with designs using colored cocoa butter. When tempered chocolate is spread thinly over these sheets and allowed to set, the design transfers onto the chocolate, creating elegant patterns for garnishes or chocolate bark. For more advanced work, tempered chocolate can be used for sculpting intricate figures or creating delicate chocolate curls and shards that hold their shape at room temperature.
Enrobing Confections: Achieving a Smooth, Professional Finish
Enrobing, or coating candies like truffles, caramels, or nougats in chocolate, requires properly tempered chocolate to achieve a thin, even, and glossy shell that sets firmly. Untempered chocolate would result in a thick, messy coating that wouldn't set properly and would likely bloom.
When enrobing, the tempered chocolate should be held at the correct working temperature and kept agitated. The centers being dipped should be slightly cooler than the chocolate but not cold, as this can cause shock and poor adhesion. Dipping tools help achieve a smooth finish, allowing excess chocolate to drip off before the piece is placed on parchment paper to set. The result is a confection with a crisp chocolate shell and a smooth, professional appearance, a direct benefit of mastering easy chocolate melting techniques for coating.
Making Chocolate Bars and Truffles
Crafting your own chocolate bars or truffles from scratch often involves tempering. For chocolate bars, tempered chocolate is poured into molds, inclusions like nuts or dried fruit are added, and it's allowed to set. The temper ensures the bar sets hard, has a clean break, and a glossy surface, just like a commercial chocolate bar.
For truffles, after the ganache centers are made and chilled, they are typically rolled or shaped and then dipped or rolled in tempered chocolate or cocoa powder. If dipping in chocolate, using tempered chocolate creates that classic thin, snappy shell around the creamy ganache center. Without tempering, the chocolate coating would be soft and prone to melting and bloom.
Conclusion: The Art of Perfect Temper
Mastering easy chocolate melting techniques, particularly the art of tempering, is a rewarding skill for any baker or confectioner. While it might seem daunting at first, with a basic understanding of cocoa butter crystallization, accurate temperature control, and a little practice, you can achieve consistently beautiful and stable chocolate creations. Whether you prefer the accessible seeding method, the traditional tabliering, or the convenience of a machine, the principles remain the same.
Don't be discouraged by initial failures; learning to temper chocolate is a process. Each attempt provides valuable experience. Pay attention to the feel and flow of the chocolate, monitor your temperatures diligently, and ensure your workspace is cool and dry. The effort is well worth it when you bite into a piece of chocolate you've tempered yourself and experience that satisfying snap and smooth, melt-in-your-mouth texture.
Achieving Consistent Results with Practice
Consistency in tempering chocolate comes with practice and developing a feel for the process. While thermometers provide critical data, observing how the chocolate changes in texture and appearance at different temperatures also becomes intuitive over time. Start with small batches of good quality chocolate to minimize waste as you learn.
Keep notes on your attempts – the type of chocolate used, the temperatures you hit, the method, and the outcome. This helps you identify what works and what doesn't. Remember that slight variations in chocolate brands or even ambient conditions can require minor adjustments. The more you practice these easy chocolate melting techniques, the more confident and successful you will become, making perfect temper a regular part of your baking repertoire.
Further Resources for Chocolate Work
Expanding your knowledge of chocolate work can take your skills to the next level. While this guide covers the essential easy chocolate melting techniques for beginners, there are many avenues to explore further. Consider experimenting with different types and brands of chocolate to understand how they behave during tempering.
You can also delve into more complex techniques like making your own ganaches, caramels, or other centers for enrobed candies. Exploring the use of chocolate molds, transfer sheets, and other decorative elements can add flair to your finished products. The world of chocolate is vast and delicious, and mastering tempering is your key to unlocking many exciting confectionery possibilities.
Frequently Asked Questions
What are the most common mistakes people make when melting chocolate?
The most common mistakes include burning the chocolate due to too high heat, seizing caused by even a tiny bit of water, and uneven melting when not stirring properly.
What are the best methods for melting chocolate, especially for beginners?
For beginners, the double boiler method is recommended because it provides gentle, indirect heat. Alternatively, microwave melting in short intervals with stirring is another easy option.
What type of chocolate is easiest to melt and work with?
Generally, chocolate chips or chopped chocolate designed for baking melt more easily due to their higher fat content and smaller size. Avoid using chocolate with added ingredients that may affect melting.
How do I prevent my chocolate from seizing during the melting process?
The most important thing is to avoid any contact with water or steam. Ensure your bowls and utensils are completely dry and that no steam escapes from the pot beneath the double boiler.
How can I tell if my melted chocolate is ready to use?
The chocolate should be completely smooth and glossy, with no lumps or unmelted pieces remaining. It should flow easily off a spoon or spatula when stirred.
Final Reflection: The Enduring Allure of Perfectly Melted Chocolate
The ability to melt chocolate flawlessly isn't just a culinary skill; it's a gateway to countless sweet creations, from decadent desserts to whimsical decorations. In a world increasingly focused on instant gratification, mastering this seemingly simple technique offers a profound sense of accomplishment and control over the outcome of your baking endeavors. The ease with which you can transform humble chocolate into something extraordinary is truly empowering.
The impact of perfectly melted chocolate extends far beyond the individual kitchen. It's a cornerstone of countless cherished recipes passed down through generations, a symbol of comfort and celebration. The simplest things are often the most beautiful,
a sentiment that rings especially true when considering the transformative power of melted chocolate. From childhood memories of homemade treats to sophisticated patisserie creations, the smooth, rich texture and delightful aroma evoke powerful emotions and connect us to shared experiences.
Now, armed with the foolproof techniques outlined in this guide, you are ready to embark on your own chocolate melting adventures. Don't be afraid to experiment, to embrace the occasional mishap as a learning opportunity, and to savor the joy of creating something delicious with your own two hands. Remember the power you hold – the power to transform simple ingredients into moments of pure indulgence. Go forth and melt!
Unleash Your Inner Chocolatier: Master the Art of Melting Chocolate!
Thanks for joining us on this delicious journey into the world of perfectly melted chocolate! We hope you now feel confident tackling even the trickiest chocolate-melting challenges. Ready to put your newfound skills to the test?
- Dive into your next chocolate creation: Think decadent brownies, luscious ganache, or dreamy truffles – the possibilities are endless! What will you make first?
- Share your chocolate masterpieces: Show off your skills and inspire others by posting photos of your creations on social media – use #BakeWithEaseChocolate for a chance to be featured!
- Join the BakeWithEase community forum to share your melting tips and tricks (and ask questions if you get stuck! ).
What exciting chocolate adventure will you embark on next?