
Peak Performance: Recognizing When Your Starter is Most Active


Welcome to BakeWithEase, where baking becomes a joy, not a chore! Ever wondered if your sourdough starter is truly ready to elevate your bread to the next level? Unlock the secrets to active sourdough starter feeding tips and learn to identify that crucial peak performance window. Discover the transformative power of a perfectly fed starter and prepare to bake bread that rivals the best artisan bakeries!
- Peak Performance: Recognizing When Your Sourdough Starter is Most Active for Baking Success
- Understanding Sourdough Starter Activity: A Crucial Step for Baking
- Active Sourdough Starter Feeding Tips: Optimizing Your Starter's Schedule
- Identifying Peak Activity: The Sweet Spot for Baking
- Factors Influencing Sourdough Starter Activity
- Troubleshooting Inactive or Slow Starters
- Baking with an Active Starter: Achieving Optimal Results
- Advanced Techniques for Maintaining Starter Health
- Conclusion: Mastering the Art of Active Sourdough Starter Management
-
Frequently Asked Questions
- What is an active sourdough starter and why is it important for baking?
- How do I recognize when my sourdough starter is at its peak activity?
- What happens if I use my sourdough starter before it reaches its peak?
- What are some active sourdough starter feeding tips to ensure optimal activity?
- Can I still use my sourdough starter if it has already passed its peak?
- Final Reflection: Cultivating the Flourishing Life of Your Starter
- Unleash Your Inner Baking Pro: Get Started Today!
Peak Performance: Recognizing When Your Sourdough Starter is Most Active for Baking Success
Understanding the lifecycle of your sourdough starter is perhaps the most critical skill for consistently successful sourdough baking. An active starter is the powerhouse that provides the lift, flavor, and texture we all crave in our homemade loaves. Without recognizing its peak performance, you might bake with a starter that's too young, too old, or simply not ready, leading to dense loaves or inconsistent results. This guide will walk you through the signs, timing, and care needed to ensure your starter is always ready for its starring role.
This involves observing its behavior, understanding its feeding cycle, and learning how to interpret its visual cues. By becoming attuned to your starter's rhythm, you unlock the secret to reliably light and airy sourdough bread, pastries, and more. It's a journey of observation and patience, but one that pays off immensely in the quality of your baked goods.
A Baker's Guide to Identifying Peak Starter Activity
Identifying when your sourdough starter is at its peak activity is like knowing when a fruit is perfectly ripe – it's the moment it offers the most potential. This peak typically occurs when the starter has doubled, tripled, or even quadrupled in volume after a feeding, before it begins to deflate. It's a brief window where the yeast and bacteria are most vigorous, having consumed their fresh food and produced a maximum amount of carbon dioxide gas.
This optimal state is characterized by a bubbly, airy structure throughout the starter, not just on the surface. It will often have a slightly domed top and a pleasant, tangy aroma. Using your starter at this specific point ensures maximum leavening power, crucial for achieving a good rise and open crumb structure in your bread. Miss this window, and the starter's strength wanes, potentially leading to a flatter loaf.
Understanding Sourdough Starter Activity: A Crucial Step for Baking
The activity level of your sourdough starter is the direct result of the fermentation process carried out by the wild yeasts and lactic acid bacteria living within it. When you feed your starter with flour and water, you provide them with carbohydrates to consume. As they metabolize these sugars, they produce carbon dioxide gas (which makes the starter bubble and rise) and various organic acids (which contribute to the signature tangy flavor of sourdough).
A highly active starter means these microorganisms are thriving and working efficiently. This vigor is essential for leavening dough. A starter that isn't sufficiently active won't produce enough gas to make your bread rise properly, regardless of how perfect your dough hydration or shaping techniques are. Therefore, understanding and maintaining starter activity is foundational to consistent sourdough baking success.
Why Starter Activity Matters for Sourdough Bread
The primary function of an active sourdough starter in bread making is leavening. The carbon dioxide gas produced by the yeast gets trapped within the gluten network of the dough, causing it to expand during fermentation and baking. A weak or inactive starter simply won't produce enough gas to achieve adequate rise, resulting in a dense, heavy loaf. Think of it like trying to inflate a balloon with a slow leak – you won't get much lift.
Beyond leavening, the metabolic activity of the bacteria contributes significantly to the flavor profile and texture of the bread. They produce lactic and acetic acids, which impart the characteristic sourdough tang and also help break down components of the flour, potentially improving digestibility and extending shelf life. Using your starter at its peak ensures you get the full benefit of both its leavening power and its complex flavor contributions.
Visual Cues of an Active Sourdough Starter
Observing your starter is the most straightforward way to gauge its activity. A healthy, active starter undergoes predictable changes after feeding. Initially, it will be a smooth, thick mixture. Over several hours, depending on temperature and feeding ratio, it will begin to show signs of fermentation.
These signs include the formation of bubbles, an increase in volume, and a change in texture and aroma. Learning to read these visual cues is a fundamental part of maintaining and using an active sourdough starter. It's a dynamic process, and consistent observation helps you understand your specific starter's unique rhythm and characteristics.
Signs of a Healthy and Bubbly Sourdough Starter
A truly active sourdough starter will exhibit numerous signs of life. The most obvious is the presence of bubbles throughout the mixture, not just a few on the surface. These bubbles indicate that the yeast is actively producing carbon dioxide gas. As the activity increases, the starter will expand significantly in its container, often doubling or tripling in volume. The texture will become light and airy, almost like a mousse or sponge, rather than a thick paste.
You might also notice streaks or tunnels running through the starter when you look at the side of the jar, which are pathways created by rising gas bubbles. The top surface, especially at its peak, might appear slightly domed or rounded before eventually starting to flatten and then concave as it begins to deflate. A pleasant, tangy, slightly acidic aroma, sometimes with hints of fruitiness, is also a good indicator of healthy fermentation. A strong, unpleasant, or alcoholic smell might indicate it's hungry or needs a discard and fresh feed.
The Float Test: Does Your Starter Float?
A classic test to determine if your sourdough starter is at peak activity and ready for baking is the "float test." This simple method relies on the principle that a starter full of trapped carbon dioxide gas will be less dense than water. To perform the test, gently take a small spoonful (about a teaspoon) of your starter from the peak of its rise and drop it into a glass of room-temperature water.
If the starter floats on the surface of the water, it is considered ready for baking. This indicates it has enough internal gas structure to provide significant lift to your dough. If it sinks to the bottom, it likely means the starter is either not yet at its peak (hasn't produced enough gas) or has passed its peak and begun to deflate (lost some of its trapped gas). While not foolproof, the float test is a helpful quick check, especially when combined with visual cues.
Active Sourdough Starter Feeding Tips: Optimizing Your Starter's Schedule
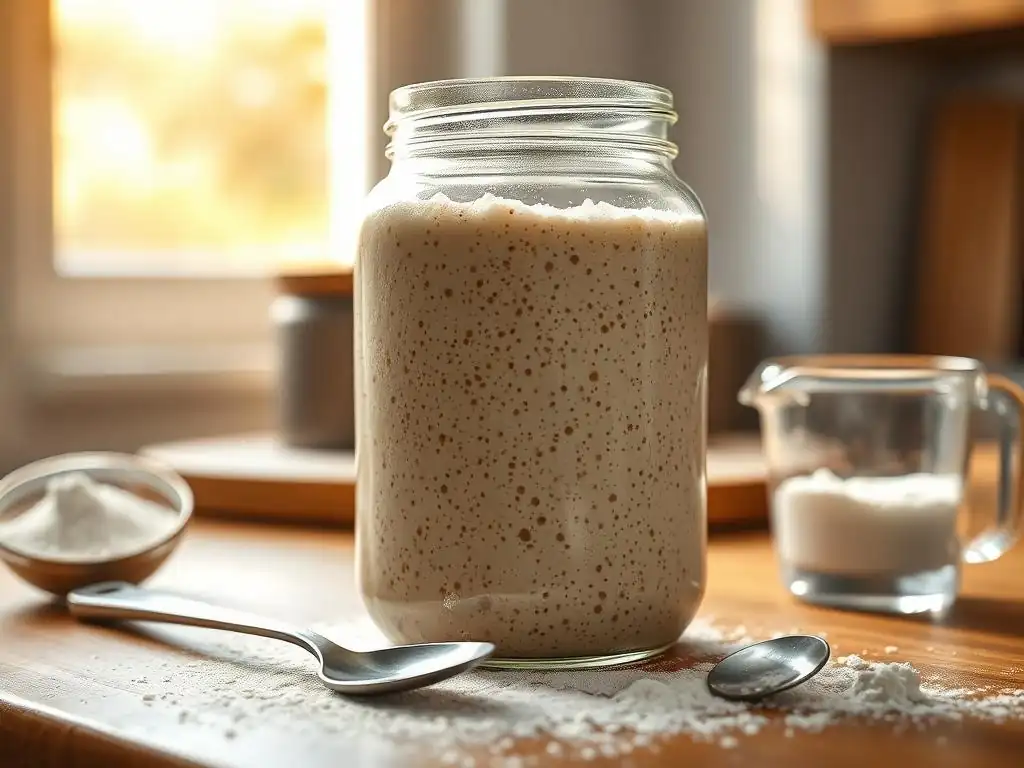
Effective feeding is the cornerstone of maintaining an active sourdough starter. The ratio of starter, flour, and water you use, as well as the timing of your feeds, directly impacts the activity level. A common maintenance ratio is 1:1:1 by weight (e.g., 25g starter, 25g flour, 25g water), but ratios can be adjusted based on desired activity speed and storage method (refrigerated starters are often fed at higher ratios like 1:2:2 or 1:3:3).
The frequency of feeding depends heavily on how you store your starter. A starter kept at room temperature typically needs daily feeding, sometimes even twice a day in warmer conditions, to remain vibrant. A refrigerated starter, however, goes dormant and only needs feeding about once a week. Mastering active sourdough starter feeding tips involves understanding these dynamics and finding a schedule that fits your baking routine and the environmental conditions.
Feeding Schedule and Its Impact on Starter Activity
The feeding schedule dictates how frequently you replenish your starter's food source. A consistent schedule helps maintain a stable, active microbial population. For a starter kept at room temperature, daily feeding at roughly the same time ensures the microorganisms always have fresh food before they completely consume the previous meal and become overly acidic or hungry. This regular replenishment keeps them vigorous and ready for baking on demand.
Skipping feeds or feeding too infrequently can lead to a sluggish starter. The microorganisms deplete their food supply, and the acidic environment becomes less hospitable, causing their activity to slow down. Conversely, feeding too often might not allow the starter enough time to develop peak activity and flavor before being diluted with fresh flour and water. Finding the right balance through consistent active sourdough starter feeding tips is key to reliability.
Recognizing the Optimal Time for Feeding
The optimal time to feed a room-temperature sourdough starter is typically when it has peaked and just started to show signs of deflating. Visually, this means it has reached its maximum volume and the top surface is beginning to flatten or even form a slight dip. This indicates that the microorganisms have consumed most of the available food and are ready for a fresh supply.
Feeding at this stage prevents the starter from becoming too acidic or "hungry," which can weaken the culture over time. If you bake frequently, feeding when the starter is at its peak or just past it allows you to use a portion for baking and then immediately replenish the rest, ensuring a continuous cycle of activity. This timing is one of the crucial active sourdough starter feeding tips for maintaining a strong culture.
Adjusting Your Feeding Schedule Based on Environmental Factors
Environmental factors, particularly temperature, play a significant role in fermentation speed and thus impact your active sourdough starter feeding tips. Warmer temperatures accelerate microbial activity, meaning your starter will peak and become hungry faster. In the summer or a warm kitchen (say, 75-80°F or 24-27°C), a starter might peak in 4-6 hours and require feeding twice a day to stay vigorous.
Conversely, cooler temperatures slow down fermentation. In a cooler room (65-70°F or 18-21°C), your starter might take 8-12 hours to peak and may only need feeding once a day. Observing how quickly your starter rises and falls at your ambient temperature is essential. You must adjust your feeding frequency accordingly to ensure you are feeding when it's truly ready, not just by the clock. This adaptability is vital for consistent starter health.
Identifying Peak Activity: The Sweet Spot for Baking
The "sweet spot" for using your sourdough starter for baking is when it is at its absolute peak of activity. This is the point where it has produced the maximum amount of carbon dioxide gas and its structure is the most robust. Using the starter at this moment provides the most leavening power and contributes optimal flavor development to your dough.
Identifying this peak requires careful observation over several feeding cycles. It's not a fixed time for every starter, as it depends on temperature, hydration, flour type, and feeding ratio. However, by consistently feeding and watching, you'll learn your starter's specific pattern – how long it takes to double or triple, when the bubbles are most prominent, and when it starts to show signs of deflating.
Measuring Starter Volume: A Key Indicator of Activity
Measuring the volume of your starter after feeding is one of the most reliable ways to track its activity and identify its peak. Using a clear, straight-sided jar and marking the initial level of the starter immediately after feeding allows you to easily observe its rise. Many bakers use a rubber band around the jar to mark the starting point.
As the starter ferments, you can watch the level climb. An active starter should at least double in volume, but many healthy starters will triple or even quadruple. The peak is reached when the starter stops rising and before it begins to shrink. Consistently tracking this rise over several feeds helps you predict when your starter will be ready for baking.
The Importance of Consistent Rise and Fall
Observing the full cycle of rise and fall is crucial for understanding your starter's health and timing its use. A healthy, active starter will show a predictable pattern: a period of rising volume as gas is produced, reaching a clear peak, and then gradually falling as the gas escapes and the structure weakens.
If your starter rises but then collapses quickly, it might be peaking very fast, possibly due to warm temperatures or a high feeding ratio. If it rises only slightly or not at all, it indicates low activity. A consistent, vigorous rise followed by a gradual fall is the hallmark of a strong culture. Documenting the time it takes for your starter to peak under different conditions is a valuable active sourdough starter feeding tip.
Peak Activity: 4-6 Hours Post-Feed at Room Temperature
While individual starter behavior varies, a common benchmark for peak activity for a healthy, room-temperature starter fed at a 1:1:1 ratio is typically within 4 to 6 hours after feeding. This timeframe assumes a comfortable room temperature, roughly between 70-75°F (21-24°C). During this window, the starter should have significantly increased in volume (at least doubled) and be full of bubbles.
This 4-6 hour window is often considered the prime time for mixing your dough. Using the starter within this period ensures you are harnessing its maximum leavening power. If your starter consistently peaks faster or slower, you may need to adjust your feeding ratio, the temperature at which you store it, or the time you plan to mix your dough relative to its feeding schedule.
Factors Influencing Sourdough Starter Activity
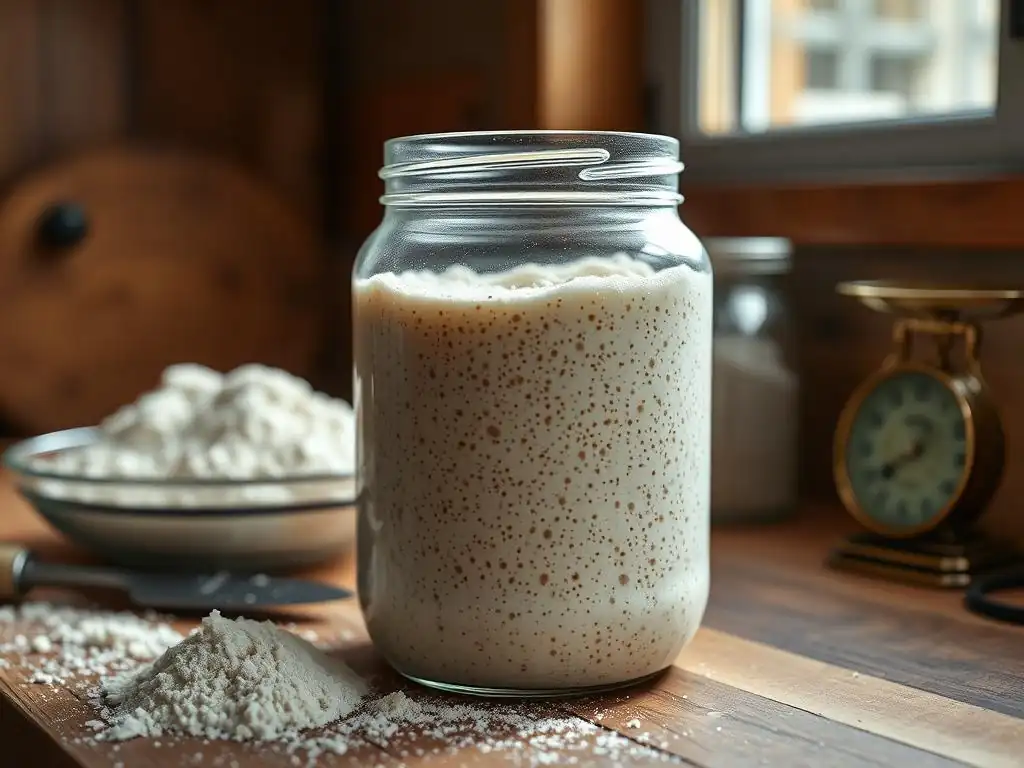
Several factors influence the speed and vigor of your sourdough starter's activity. Understanding these elements allows you to better control your starter and predict its behavior. These include the ambient temperature of your kitchen, the type of flour you use for feeding, and the hydration level (the ratio of water to flour) of your starter.
Manipulating these factors is part of mastering active sourdough starter feeding tips. For example, you can speed up activity by moving your starter to a warmer spot or slow it down by using cooler water or a thicker consistency. Becoming aware of how each factor affects your starter empowers you to keep it consistently active and predictable.
Temperature's Role in Fermentation
Temperature is arguably the most significant factor affecting sourdough starter activity. Like most microbial processes, fermentation proceeds much faster in warmer conditions. The wild yeasts and bacteria in your starter are most active within a temperature range of approximately 70-80°F (21-27°C).
Keeping your starter in this range will result in faster rising and peaking times, often within the 4-6 hour window mentioned earlier. Temperatures below 70°F (21°C) will slow down activity, potentially doubling or tripling the time it takes to peak. Temperatures above 80°F (27°C) can accelerate activity dramatically but can also favor certain bacteria that produce more acetic acid, leading to a sharper, sometimes unpleasant, smell and taste. Extremely high temperatures can even kill the culture.
Flour Type and its Effect on Starter Performance
The type of flour you use to feed your starter also impacts its activity and health. Different flours contain varying amounts of carbohydrates and nutrients that the microorganisms feed on. Unbleached all-purpose flour or bread flour are common and reliable choices for feeding, as they provide a good balance of nutrients.
Using whole grain flours like whole wheat or rye can significantly boost starter activity. These flours contain more nutrients, including enzymes that help break down starches into simpler sugars, making food more readily available for the yeast and bacteria. Many bakers keep a small amount of rye flour on hand specifically for giving a sluggish starter a boost. However, using 100% whole grain flour can lead to a very fast peak and collapse, so a mix is often preferred for regular feeding.
Hydration Levels: Finding the Right Balance
The hydration level of your starter, defined as the ratio of water to flour by weight, affects its consistency and the speed of fermentation. A common hydration level is 100%, meaning equal weights of flour and water (e.g., 50g flour and 50g water). This results in a thick, pourable batter-like consistency.
Higher hydration starters (e.g., 125% or more) tend to ferment faster because the microorganisms have easier access to the food dispersed in the more liquid environment. They also tend to show bubble activity more readily. Lower hydration starters (e.g., 75% or less) are stiffer and ferment more slowly. While any hydration can work, maintaining a consistent hydration level for your starter helps you predict its behavior and feeding schedule more accurately. Most bakers find a 100% hydration starter easy to manage and observe.
Troubleshooting Inactive or Slow Starters
It's not uncommon for a sourdough starter to become sluggish or seem inactive at times. This can be frustrating, especially when you're ready to bake. However, most issues with starter activity can be resolved by identifying the underlying cause and making adjustments to your feeding routine and environment. Patience is key during this process.
A slow starter doesn't necessarily mean it's dead; it might just be dormant, hungry, or out of balance. Understanding the common reasons for inactivity allows you to apply targeted active sourdough starter feeding tips and techniques to revive its vigor and get it back to peak performance for your baking needs.
Common Reasons for a Sluggish Starter
Several factors can cause a sourdough starter to become sluggish. The most frequent culprit is insufficient or infrequent feeding. If you don't feed your starter regularly, especially at room temperature, the microorganisms run out of food, and their activity slows dramatically. Using too little flour or water relative to the amount of starter ("underfeeding") can have a similar effect.
Other reasons include cold temperatures, which significantly slow down microbial activity; using chlorinated tap water (chlorine can inhibit microorganisms, though letting water sit out for 24 hours usually dissipates it); or simply using a starter that is very young and hasn't yet developed a robust microbial community. Sometimes, using bleached flour can also contribute to slower activity compared to unbleached options.
Reviving a Weak Sourdough Starter: Step-by-Step Guide
If your starter is sluggish, you can often revive it with consistent, proper feeding and attention to temperature. Here’s a step-by-step approach:
- Assess the Situation: Is it just slow, or showing signs of mold or a truly foul smell? If it's moldy or smells putrid, it might be best to start fresh. If it's just slow or has a hooch layer, it's likely revivable.
- Discard and Feed: Discard most of the starter, leaving only a small amount (e.g., 10-20 grams). Feed this small amount with a generous ratio of fresh flour and water, such as 1:3:3 (10g starter, 30g flour, 30g water). This provides abundant fresh food for the remaining culture.
- Use Warm Water: Use water that is comfortably warm to the touch, around 80-85°F (27-29°C). This provides an immediate boost to microbial activity.
- Place in a Warm Spot: Find the warmest consistent spot in your kitchen, ideally between 75-80°F (24-27°C). This could be on top of the refrigerator, inside a turned-off oven with the light on (check temperature first! ), or in a proofing box.
- Repeat Feeding: Repeat the discard and feed process with the generous ratio (1:3:3 or even 1:4:4) every 12 hours. Use warm water and keep it in the warm spot.
- Observe and Adjust: Watch for signs of activity – bubbles, rise, peak. It might take a few days of consistent feeding at the warm temperature to see significant improvement. Once it is doubling within 6-8 hours consistently, you can switch back to your regular feeding ratio and temperature.
By applying these active sourdough starter feeding tips, you provide the ideal environment and nutrition for your starter to regain its strength and become a reliable leavening agent again.
Baking with an Active Starter: Achieving Optimal Results

Using your sourdough starter at its peak activity is the single most impactful factor for achieving the desired rise, crumb structure, and flavor in your sourdough bread. A starter at its peak is full of vigorous yeast ready to produce maximum carbon dioxide, and the bacteria have developed the ideal balance of acids for flavor.
Timing your dough mixing to coincide with your starter's peak ensures that you are harnessing its full potential. This is where understanding your starter's cycle, as learned from consistent active sourdough starter feeding tips and observation, truly pays off in the final loaf.
How Peak Activity Translates to Better Bread
When you use a starter at its peak, you introduce a large, active population of yeast and bacteria into your dough. The abundant yeast immediately gets to work, producing gas that creates the open, airy structure characteristic of good sourdough. This leads to a higher rise during bulk fermentation, shaping, and oven spring.
Furthermore, the metabolic byproducts from the peak-activity bacteria contribute complex flavors and aromas to the dough. The acids produced help condition the gluten, making the dough easier to handle and contributing to a more tender crumb. Using a peak starter means less reliance on long fermentation times just to get some rise; you get robust activity from the start, leading to more predictable and superior results.
Adjusting Your Recipe Based on Starter Strength
While using a peak-activity starter is ideal, sometimes life happens, and you might need to use a starter that is slightly past its peak or not quite there yet. Understanding your starter's strength allows you to make minor adjustments to your recipe or process to compensate.
If your starter is slightly past peak and starting to deflate, it still has leavening power, but it might be less vigorous. You might extend the bulk fermentation time slightly, or give your dough a bit more time during proofing. If your starter is very young or slow, it's generally best to wait until it is more active. However, if you must use it, be prepared for a longer fermentation time and potentially a denser crumb. Knowing your starter's typical behavior from applying active sourdough starter feeding tips helps you anticipate these needs.
Advanced Techniques for Maintaining Starter Health
Once you've mastered the basics of feeding and recognizing peak activity, you might explore more advanced techniques for managing your sourdough starter, especially if you don't bake daily. These methods help maintain starter health and activity over longer periods between bakes.
These techniques, such as refrigerating your starter or even freezing it, require adjustments to your active sourdough starter feeding tips and revival routines. They offer convenience while still preserving the viability and vigor of your culture for future baking projects.
Using a Starter Hotel for Long-Term Storage
A "starter hotel" is simply the refrigerator. Storing your starter in the fridge puts it into a state of dormancy, significantly slowing down microbial activity. This allows you to go longer periods between feedings, typically one week, sometimes up to two.
To put your starter in the fridge, feed it as usual, let it sit at room temperature for 1-2 hours to start fermentation, and then place it in the refrigerator. When you're ready to bake, take it out, discard most of it, and feed it 1-2 times at room temperature until it shows peak activity again. This method is a popular active sourdough starter feeding tip for bakers who don't bake daily but want to keep a healthy starter ready.
Cryo-Activation: Reviving Frozen Starter
For even longer-term storage, you can freeze your sourdough starter. This is useful if you're going away for an extended period or want a backup. To freeze, simply spread a thin layer of active starter onto parchment paper, let it dry slightly, then break it into pieces and store in a freezer bag or airtight container. Alternatively, freeze small portions directly in ice cube trays or small containers.
To revive frozen starter (sometimes called cryo-activation), take a frozen piece, place it in a jar, and add a small amount of warm water to thaw. Once thawed, add a small amount of flour to create a thick paste. Place it in a warm spot and feed it every 12-24 hours with a generous ratio of flour and water, discarding most before each feed, until it becomes active and reliably peaks again. This can take several days, so plan ahead if you use this method.
Conclusion: Mastering the Art of Active Sourdough Starter Management
Understanding and recognizing the peak activity of your sourdough starter is a fundamental skill that transforms inconsistent baking into reliable success. By observing visual cues, using simple tests like the float test, and mastering active sourdough starter feeding tips, you gain control over this living ingredient. Factors like temperature, flour type, and hydration all play a role, and learning how to adjust for them ensures your starter is always ready.
Whether you're troubleshooting a slow starter or using advanced storage techniques, consistent care and observation are key. With practice, you'll effortlessly identify that sweet spot, leading to perfectly risen, flavorful sourdough loaves every time you bake.
Frequently Asked Questions
What is an active sourdough starter and why is it important for baking?
An active sourdough starter is a fermented mixture of flour and water teeming with wild yeasts and bacteria. It's crucial because it provides the leavening power and characteristic flavor to sourdough bread.
How do I recognize when my sourdough starter is at its peak activity?
Peak activity is usually indicated by a significant rise in volume (often doubling), a bubbly texture, and a slightly tangy aroma. This is the prime time to use it for baking.
What happens if I use my sourdough starter before it reaches its peak?
Using a starter before its peak may result in a less pronounced rise in your bread, a denser crumb, and a less tangy flavor. It might also take longer for the dough to proof.
What are some active sourdough starter feeding tips to ensure optimal activity?
Consistent feeding with the right ratio of flour and water, maintaining a warm and stable temperature, and using high-quality flour are key to promoting a healthy and active starter.
Can I still use my sourdough starter if it has already passed its peak?
Yes, but it may require adjustments to your recipe. You can revive it with another feeding or use it for recipes where a strong rise isn't critical, like pancakes or crackers.
Final Reflection: Cultivating the Flourishing Life of Your Starter
The consistent care and attention required to nurture a thriving sourdough starter mirrors the dedication needed to achieve peak performance in any area of life. Understanding the rhythms of your starter – its periods of intense activity and quieter phases – provides a powerful metaphor for managing our own energy and productivity. This knowledge isn't just about baking; it's about harnessing our own potential.
The journey of cultivating a sourdough starter, with its highs and lows, its moments of explosive growth and periods of seemingly dormant rest, has profoundly impacted my understanding of personal productivity. It's taught me the importance of attentive observation and responsive action, mirroring the need to recognize our own peak performance windows and adjust our schedules accordingly. The key is not to prioritize what's on your schedule, but to schedule your priorities.
– Stephen Covey. This quote resonates deeply, as it highlights the necessity of aligning our actions with our most energetic states, just as we carefully time the feeding of our starters for optimal results.
Now, consider your own "starter." What are your peak performance periods? What rituals or practices nurture your own growth and creativity? Take a moment to reflect on your energy levels throughout the day and week.
Experiment with adjusting your schedule to align with your most active periods. By understanding and nurturing your own rhythms, you too can unlock a level of productivity and fulfillment that will leave you feeling truly empowered and inspired. The journey to peak performance, much like the journey of a sourdough starter, is a continuous process of learning, adapting, and celebrating the fruits of your labor.
Unleash Your Inner Baking Pro: Get Started Today!
Thanks for diving into the world of peak starter performance! You've now got the knowledge to unlock consistently amazing bread. Ready to put your new skills to the test?
- Bake your best loaf yet! Use what you've learned to perfect your next bread recipe. Note the timing, and keep track of your starter's activity for even better results next time.
- Share your baking journey! Let us know about your baking successes (or even your challenges!) in the comments below. We love hearing from our baking community!
- Explore our other resources on sourdough baking—discover even more tips and tricks to elevate your baking game!
What amazing bread will you create with your perfectly active starter?