
Chelsea Buns: Sticky, Sweet, and Swirled Perfection

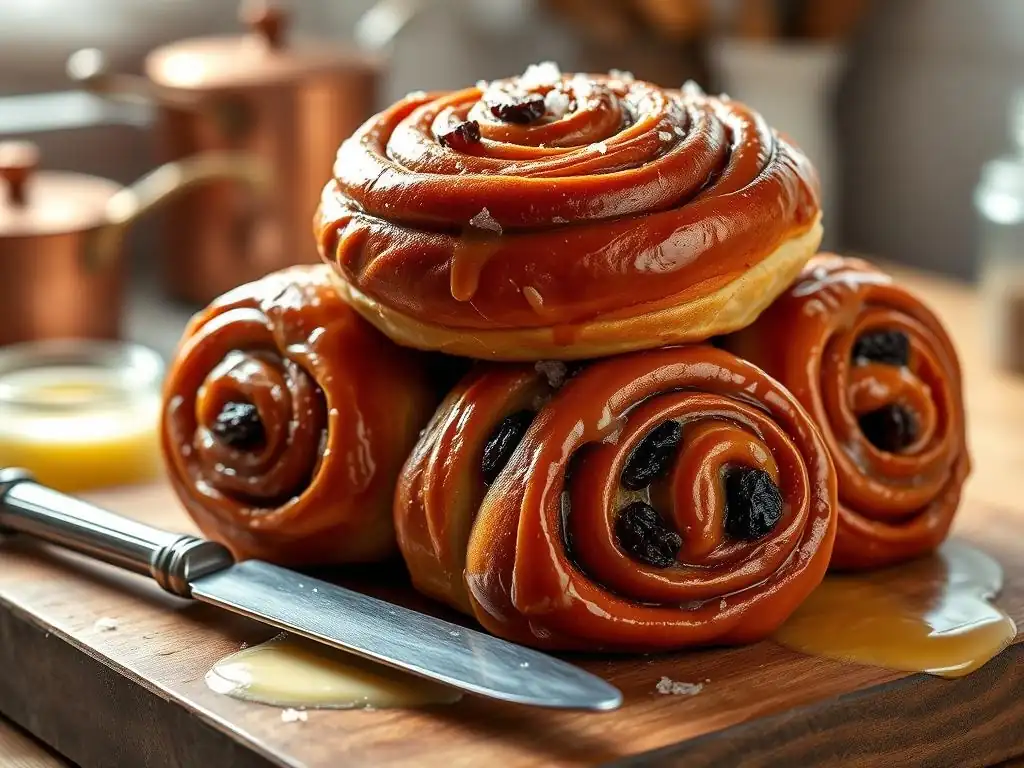
Welcome to BakeWithEase, your guide to unlocking the delicious world of baking! Ever dreamt of creating those perfectly sticky, sweet, and swirled treats you see in bakeries? Look no further. We're diving headfirst into a Chelsea buns recipe easy enough for any home baker to master. But what makes these buns so uniquely irresistible? Keep reading to discover the secrets behind this beloved British classic and learn how to bake your own batch of absolute perfection.
- Introduction to Easy Chelsea Buns Recipe
- What are Chelsea Buns? A British Baking Favorite
- Easy Chelsea Buns Recipe: Step-by-Step Guide
- Tips and Tricks for Perfect Chelsea Buns Every Time
- Troubleshooting Common Chelsea Bun Baking Issues
- Enjoy Your Homemade Chelsea Buns!
- Frequently Asked Questions
- Final Reflection: The Enduring Allure of the Chelsea Bun
- Unleash Your Inner Baker: Master the Art of the Chelsea Bun!
Introduction to Easy Chelsea Buns Recipe
Discover the Delight of Homemade Chelsea Buns
There's a special kind of comfort found in classic British baking, and Chelsea buns hold a cherished spot in that tradition. These delightful swirls of sweet dough, filled with dried fruit and spices, and finished with a sticky glaze, are a true treat. While they might look intricate, mastering an easy Chelsea buns recipe is absolutely within reach for home bakers of all skill levels. Imagine the aroma filling your kitchen as these beauties bake – it's an experience that's hard to beat.
Taking on the challenge of baking Chelsea buns at home allows you to control the quality of ingredients and tailor the sweetness and spice to your preference. Forget dry, lackluster store-bought versions; a homemade Chelsea bun, warm from the oven, is a revelation. This guide is designed to walk you through each step, ensuring your journey to creating perfect, sticky, sweet, and swirled buns is both simple and rewarding. Let's unlock the secrets to this beloved pastry together.
BakeWithEase's Guide to Perfect Chelsea Buns
Here at BakeWithEase, our goal is to make baking accessible and enjoyable for everyone. Our approach to the easy Chelsea buns recipe focuses on clear instructions, helpful tips, and demystifying the process. We break down the steps, from activating your yeast to achieving that signature sticky glaze, ensuring you feel confident at every stage. Whether you're a complete novice or looking to perfect your technique, this guide is crafted with you in mind.
We'll cover everything from selecting the right flour to understanding the nuances of proofing dough. Our aim is not just to give you a recipe, but to equip you with the knowledge to bake these delicious buns successfully time and time again. By following our detailed instructions, you'll soon be pulling warm, fragrant, and utterly delicious Chelsea buns from your oven, ready to share (or not!) with friends and family. Get ready to add this classic to your baking repertoire!
What are Chelsea Buns? A British Baking Favorite
The History and Origins of Chelsea Buns
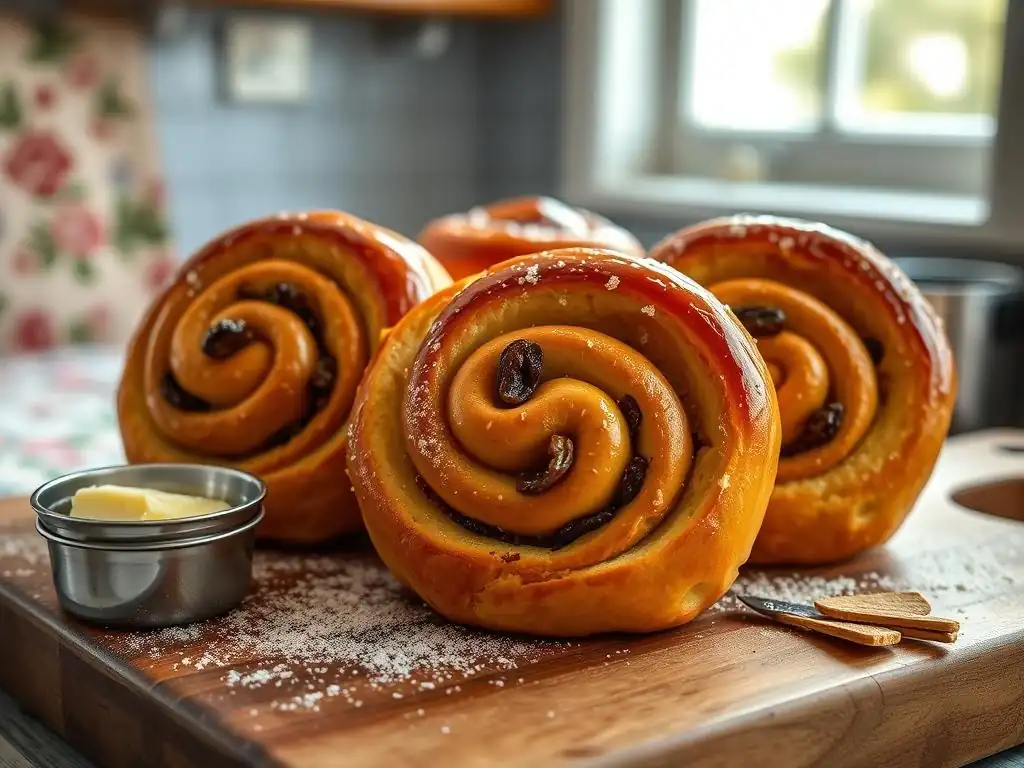
Chelsea buns boast a history stretching back several centuries, originating in the heart of London. They are said to have first been sold at the Old Chelsea Bun House, a famous bakery established in 18th-century Chelsea. This establishment was renowned for its buns and attracted large crowds, including royalty and celebrities of the time. On Good Friday, the demand was so high that people reportedly queued for hours, with thousands of buns being sold in a single day.
The Old Chelsea Bun House eventually closed its doors in 1839, but the popularity of the bun it made famous endured. The recipe and style spread, becoming a staple in bakeries across Britain. While the exact original recipe might be lost to time, the core concept of a sweet, enriched dough rolled with a spiced fruit filling and glazed remains the defining characteristic of this beloved pastry. Its longevity is a testament to its simple yet satisfying deliciousness.
Key Characteristics of Authentic Chelsea Buns
An authentic Chelsea bun is instantly recognizable by its distinctive swirl shape, created by rolling the filled dough into a log and slicing it into individual portions before baking. The dough itself is typically an enriched dough, similar to brioche or challah, containing butter, eggs, and milk, which gives it a tender, soft texture. This richness is crucial for achieving that light, fluffy crumb.
The filling is traditionally a mix of dried fruits, most commonly currants and sometimes sultanas or raisins, combined with sugar and warming spices like cinnamon and mixed spice. This sweet, slightly spiced filling contrasts beautifully with the soft dough. Finally, the signature sticky glaze, often a simple sugar syrup or icing, is applied generously while the buns are still warm, creating that irresistible glossy finish that makes them so appealing and, yes, wonderfully sticky.
Easy Chelsea Buns Recipe: Step-by-Step Guide
Ingredients for the Best Homemade Chelsea Buns
Getting the right ingredients is the first step towards baking perfect homemade Chelsea buns. Quality matters, especially for something as comforting and classic as this. Don't worry, the list is straightforward, and most items are pantry staples.
Dough Ingredients for Light and Fluffy Buns
For the dough, you'll need:
- Strong white bread flour: About 500 grams. Using bread flour provides structure.
- Caster sugar: Approximately 75 grams. For sweetness in the dough.
- Salt: A pinch, around 5 grams. Balances the sweetness.
- Fast-action dried yeast: About 10 grams (or 2 sachets). Ensures a good rise.
- Unsalted butter: Around 75 grams, softened. Adds richness and tenderness.
- Whole milk: Roughly 250-300 ml, warmed slightly. Activates the yeast and hydrates the dough.
- Large egg: 1, beaten. Enriches the dough and helps with binding.
These quantities should yield approximately 12 standard-sized buns, perfect for sharing. Ensure your butter is truly softened – not melted – for easier incorporation into the dough. Warming the milk to a lukewarm temperature (around 35-40°C or 95-105°F) is vital for the yeast.
Filling Ingredients for a Sweet and Fruity Center
The heart of the Chelsea bun lies in its sweet, spiced filling:
- Dried currants: About 150 grams. The traditional choice.
- Caster sugar: Around 50 grams. Adds sweetness to the filling.
- Mixed spice: About 2 teaspoons. A classic British blend, often containing cinnamon, ginger, nutmeg, and cloves.
- Ground cinnamon: 1 teaspoon (in addition to mixed spice). Enhances the warmth.
- Unsalted butter: Roughly 25 grams, melted. Helps bind the filling and spread it.
You can substitute some or all of the currants with sultanas or raisins if you prefer, maintaining the total dried fruit weight. Using melted butter makes it easier to spread the filling evenly across the dough rectangle. Don't skimp on the spices; they are key to the classic flavor profile of an easy Chelsea buns recipe.
Glaze Ingredients for that Sticky, Sweet Finish
The signature sticky glaze is simple yet essential:
- Caster sugar: Approximately 100 grams.
- Water: About 50 ml.
Alternatively, for a slightly thicker, more opaque glaze, you can use icing sugar (confectioners' sugar) mixed with a little milk or lemon juice. A simple sugar syrup, however, provides that traditional sticky sheen. The key is to apply it while the buns are hot out of the oven so they absorb the sweetness and develop that characteristic sticky top.
Making the Dough: A Beginner-Friendly Approach
Making enriched dough might sound intimidating, but it's quite manageable, especially with an easy Chelsea buns recipe. Patience is your best friend here.
Proofing the Yeast: Ensuring a Good Rise
Start by activating your yeast. In a small bowl, combine the warm milk (ensure it's not too hot, or it will kill the yeast), a pinch of the caster sugar from the dough ingredients, and the dried yeast. Give it a gentle stir. Let this mixture stand for 5-10 minutes.
You should see a frothy layer develop on the surface; this indicates your yeast is active and ready to work its magic. If it doesn't froth, your milk might have been too hot or cold, or your yeast might be old, and you should start again with fresh yeast. An active yeast is crucial for light and fluffy buns.
Once the yeast is bubbly, you're ready to combine your ingredients. In a large mixing bowl (or the bowl of a stand mixer), whisk together the flour, remaining sugar, and salt. Make a well in the center. Pour in the activated yeast mixture, the beaten egg, and add the softened butter in pieces. This combination of wet and dry ingredients is the foundation for your delicious dough.
Kneading the Dough: Achieving the Right Texture
Kneading develops the gluten in the flour, which gives the dough its structure and elasticity, essential for trapping the gases produced by the yeast and creating a light texture. If using a stand mixer with a dough hook, knead on a medium speed for about 8-10 minutes. The dough should become smooth, elastic, and pull away from the sides of the bowl.
If kneading by hand, turn the dough out onto a lightly floured surface. Push the dough away from you with the heel of your hand, then fold it back towards you. Repeat this motion, rotating the dough as you go, for about 10-15 minutes. The dough is properly kneaded when it feels smooth, springy, and passes the 'windowpane test' – you can stretch a small piece thinly enough to see light through it without it tearing. Don't be tempted to add too much extra flour during kneading; a slightly sticky dough is better than a dry one.
First Rise: Allowing the Dough to Double
After kneading, shape the dough into a ball. Lightly grease a clean bowl with a little oil or melted butter. Place the dough ball in the bowl and turn it to coat. Cover the bowl tightly with plastic wrap or a clean damp tea towel. Place the bowl in a warm place, free from drafts. A slightly warm oven (turned off) or a warm spot near a radiator works well.
Allow the dough to rise until it has doubled in size. This first rise, also known as the bulk fermentation, can take anywhere from 1 to 2 hours, depending on the warmth of your environment. Be patient; a slow, steady rise results in better flavor and texture. Once doubled, gently punch down the dough to release the air, ready for the next steps of your easy Chelsea buns recipe.
Preparing the Filling: Sweetness and Spice
The filling is straightforward but essential for that classic Chelsea bun flavor.
Combining the Dried Fruit and Spices
In a medium bowl, combine the dried currants (or your chosen dried fruit mix), caster sugar, mixed spice, and ground cinnamon. Give it a good stir to ensure the spices and sugar are evenly distributed amongst the fruit. This simple step ensures every bite of your Chelsea bun is packed with flavor.
Next, add the melted butter to the fruit and spice mixture. Stir again until all the fruit is coated in the buttery spice mix. The melted butter helps the filling stick to the dough and prevents it from scattering when you roll and slice the buns. This mixture is now ready to be spread onto your prepared dough.
Spreading the Filling Evenly on the Dough
Turn the punched-down dough out onto a lightly floured surface. Roll the dough into a large rectangle, aiming for a size of approximately 40 cm x 30 cm (about 16 inches x 12 inches) and a thickness of about 5mm (about 1/4 inch). Try to get the edges as straight as possible, as this will make rolling easier and result in more uniform buns.
Once you have your rectangle, spread the prepared filling evenly over the entire surface of the dough, leaving a small border (about 1 cm or 1/2 inch) along one of the longer edges. This border will help seal the roll later. Ensure the fruit and spice mix is spread right up to the other three edges.
Shaping and Baking Your Chelsea Buns
This is where the magic happens and your dough transforms into recognizable Chelsea buns.
Rolling and Cutting the Dough into Swirls
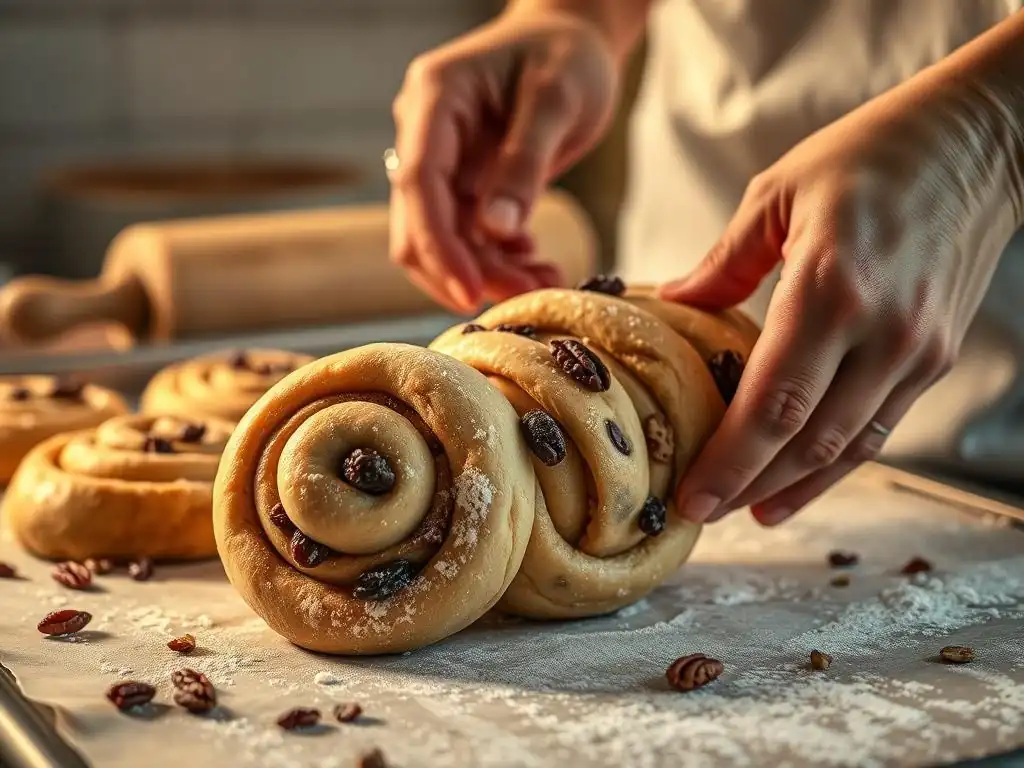
Starting from the long edge opposite the border you left unfilled, carefully and tightly roll the dough into a log. Try to keep the roll as even as possible along its length. Pinch the seam gently along the unfilled border to seal the log. This tight roll is key to getting those beautiful, defined swirls in your finished buns.
Once rolled, you need to cut the log into individual buns. Using a sharp knife or, preferably, a length of dental floss (unwaxed and unflavored works best), slice the log into roughly 12 equal pieces, each about 3-4 cm (about 1.5 inches) thick. Cutting with dental floss helps maintain the shape of the swirls without squishing the dough. Simply slide a length of floss under the roll, bring the ends up and cross them over the top, and pull gently to slice through the dough.
Arranging the Buns in a Baking Dish
Arrange the sliced buns, spiral side up, in a prepared baking dish. You can use a large rectangular or square baking pan (around 23cm x 33cm or 9x13 inches is common for 12 buns), or two smaller pans. Lightly grease the dish with butter or line it with parchment paper. Place the buns relatively close together, leaving a small gap (about 1-2 cm or 1/2-1 inch) between them. They will expand during the second rise and baking, filling the pan and creating lovely soft sides, a hallmark of traditional Chelsea buns.
Ensuring they are spaced correctly allows them to rise into each other, creating that desirable pull-apart texture. Don't crowd them too much, or they won't have space to expand properly. A standard 9x13 inch pan comfortably fits 12 buns in three rows of four.
Second Rise: Achieving Maximum Fluffiness
Cover the baking dish loosely with plastic wrap or a clean tea towel. Place the dish back in a warm, draft-free place for the second rise (also called the proofing). This rise is usually shorter than the first, typically taking 30-45 minutes. The buns should increase in size and swell to fill the gaps in the pan, looking puffy and soft.
Preheat your oven towards the end of the second rise. A common temperature for baking enriched doughs like this is around 180°C (160°C fan/350°F). Getting the oven to the correct temperature before the buns go in is important for achieving a good oven spring – the final burst of rising that happens in the first few minutes of baking.
Baking to Golden Perfection: Time and Temperature
Bake the Chelsea buns in the preheated oven for 20-30 minutes. The exact time will vary depending on your oven and the size of your buns. They are ready when they are golden brown on top and feel firm to the touch. If you're unsure, you can gently lift one bun from the middle of the pan; the bottom should also be golden brown and cooked through.
To prevent the tops from browning too quickly, you can loosely tent the pan with foil halfway through the baking time if needed. Baking at the correct temperature ensures the dough cooks through without the outside becoming too dark. A perfectly baked Chelsea bun is soft and slightly moist inside.
Glazing Your Chelsea Buns: The Finishing Touch
The glaze is what elevates these buns from delicious to truly irresistible.
Making the Sticky Sweet Glaze
While the buns are baking, prepare the simple sugar syrup glaze. In a small saucepan, combine the caster sugar and water. Heat gently over a low heat, stirring constantly until the sugar has completely dissolved. Once dissolved, increase the heat slightly and let the syrup simmer for just 1-2 minutes without stirring. You want a thin, clear syrup, not a thick caramel.
Keep the glaze warm until the buns come out of the oven. The warmth helps the buns absorb the glaze more effectively, creating that lovely sticky surface. This simple syrup is the secret to the classic, glossy finish of an easy Chelsea buns recipe.
Applying the Glaze for a Perfect Shine
As soon as the Chelsea buns are out of the oven, while they are still piping hot, generously brush or spoon the warm sugar syrup over the tops of the buns. Ensure you get an even coating on each bun. The heat of the buns will help absorb the syrup, creating that signature sticky, shiny surface.
Allow the buns to cool slightly in the pan for about 10-15 minutes before attempting to remove them. This cooling time allows the glaze to set a little and makes the buns easier to handle. They are best enjoyed warm, when the glaze is still slightly gooey and the buns are soft and fragrant.
Tips and Tricks for Perfect Chelsea Buns Every Time
Baking is a science and an art. Here are some tips to perfect your easy Chelsea buns recipe.
Achieving a Light and Fluffy Texture
The key to light and fluffy buns lies in proper kneading and proofing. Ensure your yeast is active (the frothy test!). Knead the dough sufficiently to develop the gluten; this elasticity is what allows the dough to stretch and hold the air produced by the yeast. Avoid adding too much flour during kneading, which can result in a dense bun.
Crucially, don't rush the rising times. Allow the dough to double in size during the first rise and become visibly puffy during the second rise. Warmth encourages yeast activity, but avoid excessive heat, which can kill the yeast. A slow, steady rise builds flavor and contributes to a tender crumb. For example, a dough that takes 90 minutes to double at 22°C (72°F) will generally have a better texture than one forced to rise in 30 minutes at 40°C (104°F).
Preventing Dryness: Maintaining Moisture
Dry Chelsea buns are disappointing! Several factors contribute to moisture. Using an enriched dough with butter, eggs, and milk adds richness and keeps the crumb tender. Ensure you don't overbake the buns; bake until golden and cooked through, but no longer. Overbaking is a primary cause of dryness.
Applying the glaze while the buns are hot also helps lock in moisture and adds external moisture. Storing the buns correctly (see below) is also vital for maintaining freshness. If you find your buns consistently dry, try reducing the baking time slightly, perhaps by 2-3 minutes, and rely on visual cues (golden brown, firm top) rather than strictly adhering to a timer that might be calibrated differently in your oven.
Variations on the Classic Chelsea Bun
While the traditional currant and spice filling is divine, feel free to experiment!
Adding Citrus Zest for Extra Flavor
A popular variation is to add the zest of one orange or lemon to the dried fruit and spice filling. Citrus zest pairs wonderfully with dried fruit and warming spices, adding a bright, fragrant note that lifts the overall flavor. Simply grate the zest directly into the bowl with the fruit and spices before adding the melted butter. This small addition can make a big difference in the complexity of your homemade Chelsea buns.
Consider using organic citrus if possible, and wash the fruit thoroughly before zesting. Only use the colored part of the peel, avoiding the bitter white pith underneath.
Incorporating Nuts for Added Texture
For those who enjoy a bit of crunch, chopped nuts can be added to the filling. Pecans, walnuts, or almonds, roughly chopped, work particularly well. Add about 50-75 grams of chopped nuts to the dried fruit and spice mixture.
The nuts provide a delightful textural contrast to the soft dough and chewy fruit. Toasting the nuts lightly in a dry pan before adding them to the filling can enhance their flavor. This simple modification transforms the texture profile of your easy Chelsea buns recipe.
Storing and Reheating Your Chelsea Buns
If by some miracle you have leftovers, here's how to keep them at their best.
Keeping Your Buns Fresh for Longer
Allow the buns to cool completely before storing. Store them in an airtight container at room temperature. They will stay fresh and soft for 2-3 days. Avoid refrigerating, as this can cause the dough to dry out more quickly.
For longer storage, Chelsea buns freeze exceptionally well. Once completely cooled, wrap individual buns or the entire batch (if cooled in the pan) tightly in plastic wrap, then place them in a freezer-safe bag or container. They can be frozen for up to 2-3 months. Ensure they are well wrapped to prevent freezer burn.
Reheating for a Warm and Gooey Treat
Chelsea buns are truly best served warm. To reheat, place a bun on a microwave-safe plate and heat for 15-30 seconds, or until warm and soft. Be careful not to overheat, which can make them tough.
Alternatively, you can reheat them in a conventional oven or toaster oven at a low temperature (around 150°C or 300°F) for 5-10 minutes, or until warmed through. If reheating from frozen, allow them to thaw at room temperature first, then reheat as above. Reheating revives the soft texture and melts the glaze slightly, bringing them close to their fresh-baked glory.
Troubleshooting Common Chelsea Bun Baking Issues
Even with an easy Chelsea buns recipe, sometimes things don't go exactly as planned.
Dough Not Rising: Identifying the Problem
If your dough isn't rising, the most common culprits are inactive yeast, incorrect liquid temperature, or a cold environment.
- Inactive Yeast: Did your yeast mixture froth initially? If not, the yeast was likely dead or dormant. Ensure you're using active dry yeast that hasn't expired.
- Incorrect Temperature: Milk that is too hot (above 50°C/120°F) will kill the yeast. Milk that is too cold (below 25°C/75°F) will make the yeast sluggish. Aim for lukewarm, around body temperature.
- Cold Environment: Yeast needs warmth to thrive. Ensure your proofing spot is warm and draft-free. If your kitchen is cold (below 20°C/68°F), it will significantly slow down or halt the rise. Try placing the covered bowl in a turned-off oven with just the light on, which often provides enough gentle warmth.
If your dough hasn't risen at all after the expected time, it's likely the yeast is inactive. Unfortunately, there's no fixing dead yeast; you'll need to start again with fresh yeast and ensure your liquid temperature is correct. If it's risen slightly but not doubled, your environment might be too cold; move it to a warmer spot and give it more time.
Buns Too Dry: Solving the Dryness Issue
Dryness can stem from several factors, including over-measurement of flour, under-kneading, insufficient fat, or overbaking.
- Flour Measurement: Weighing flour is more accurate than using volume measures. Too much flour creates a dry dough.
- Under-Kneading: Insufficient gluten development can lead to a crumbly, dry texture. Ensure you knead until the dough is smooth and elastic.
- Insufficient Fat: The butter in the dough is crucial for tenderness and moisture. Ensure you include the specified amount.
- Overbaking: This is a very common cause. Ovens vary, so rely on visual cues (golden brown) and perhaps a gentle poke to check if they are firm but not hard. Baking for 20-25 minutes is typical for a 180°C oven, but check them early.
If your buns turned out dry, try reducing the baking time by a few minutes next time. Ensure your oven temperature is accurate (an oven thermometer can help). Also, double-check your flour measurement; using slightly less flour can sometimes help, especially if measuring by volume. Applying a generous glaze while hot also helps mitigate some dryness.
Filling Leaking Out: Preventing Filling Leaks
If your filling is leaking out during baking, it's usually due to the roll not being tight enough or the seam not being properly sealed.
- Loose Roll: When rolling the rectangle of dough into a log, try to roll it as tightly as possible. A tight roll keeps the filling contained within the layers of dough.
- Poor Sealing: Ensure you firmly pinch the seam along the edge where you finished rolling. This helps prevent the log from unrolling during the second rise and baking.
If you find the filling is still prone to leaking, you can slightly reduce the amount of melted butter in the filling or ensure the dried fruit mixture is pressed down firmly onto the dough before rolling. Using dental floss to cut the slices also helps maintain the shape and prevents the filling from being squeezed out during cutting.
Enjoy Your Homemade Chelsea Buns!
Serving Suggestions and Pairing Ideas
Your warm, sticky homemade Chelsea buns are ready! They are absolutely perfect enjoyed on their own, perhaps with a cup of tea or coffee. The richness of the bun and the sweetness of the glaze make them a delightful treat any time of day.
For an extra touch of indulgence, you could serve them with a dollop of clotted cream or a spread of butter. Some people also enjoy them with a light dusting of icing sugar, although the sticky glaze provides plenty of sweetness and visual appeal. They are best enjoyed warm, so if they've cooled, a quick reheat (as described above) is highly recommended to bring back that soft, gooey texture.
We hope you've enjoyed making this easy Chelsea buns recipe! There's immense satisfaction in baking a classic pastry from scratch. Share the joy (and the buns!) with friends and family. Baking is often a communal activity, and these delicious swirls are sure to be a hit.
We love seeing what you bake! Share photos of your beautiful, sticky, sweet, and swirled creations. Let us know how your homemade Chelsea buns turned out and if you tried any variations. Happy baking from the BakeWithEase team!
Frequently Asked Questions
What makes this Chelsea buns recipe "easy"?
This recipe focuses on simplified steps and readily available ingredients, making it accessible even for beginner bakers. We avoid complicated techniques and provide clear, concise instructions.
Can I substitute any ingredients in this Chelsea buns recipe?
While following the recipe closely is recommended for best results, you can make some substitutions. For example, you might substitute milk for a dairy-free alternative or brown sugar for granulated sugar in the filling.
How long do Chelsea buns stay fresh?
Chelsea buns are best enjoyed fresh, ideally within 1-2 days. To maintain freshness, store them in an airtight container at room temperature or freeze for longer storage.
What if my dough doesn't rise properly?
Several factors can affect dough rising, including the temperature of your kitchen and the age of your yeast. Ensure your yeast is active and proof your dough in a warm, draft-free location.
Can I add other fillings to my Chelsea buns?
Absolutely! While the classic recipe is delicious, feel free to experiment with other fillings. Consider adding chopped nuts, dried fruit, or even a chocolate spread for a unique twist.
Final Reflection: The Enduring Allure of the Chelsea Bun
The humble Chelsea bun, a seemingly simple pastry, holds a surprising power to connect us to tradition while satisfying our modern cravings for comfort and ease. Its enduring popularity, evidenced by countless online searches for "Chelsea bun recipe easy," speaks volumes about its timeless appeal. This isn't just about a sweet treat; it's about the comforting ritual of baking, the joy of sharing, and the satisfaction of creating something delicious from scratch.
The Chelsea bun's influence extends beyond the kitchen table; it's a symbol of British baking heritage, a testament to the enduring power of simple ingredients transformed into something extraordinary. Its swirls of cinnamon and sugar represent a comforting familiarity, a taste of home for many. As the great culinary writer M.F.K. Fisher once said, First we eat. Then we do everything else.
The Chelsea bun, in its simplicity and deliciousness, embodies this perfectly; it's a foundation upon which memories and connections are built.
So, what will you bake today? Consider the Chelsea bun not just as a recipe, but as a gateway to creativity, connection, and the simple pleasures of life. Don't be intimidated by the seemingly complex swirls; embrace the process, enjoy the aroma filling your kitchen, and savor the sweet reward of your labor. The journey of baking a Chelsea bun, from mixing the dough to the final golden-brown bake, is as rewarding as the delicious result itself. Let the warmth of the oven and the sweetness of the bun inspire you to create your own moments of delicious connection.
Unleash Your Inner Baker: Master the Art of the Chelsea Bun!
Thanks for joining us on this delicious journey into the world of Chelsea buns! We hope you've gained the confidence to tackle this classic treat. Ready to take your baking skills to the next level?
- Bake a batch today! Use the recipe from the article as your guide and surprise yourself (and your loved ones!) with these delightful buns.
- Share your creation! Post a picture of your Chelsea buns on social media using #BakeWithEaseChelseaBuns and inspire others.
- Explore more sweet treats: Discover other tempting recipes on BakeWithEase.com, designed for bakers of all skill levels.
So, what unique twist will you add to your perfect Chelsea bun? Let's hear your ideas in the comments below!