
Using a Baking Stone for Authentic European Crusts

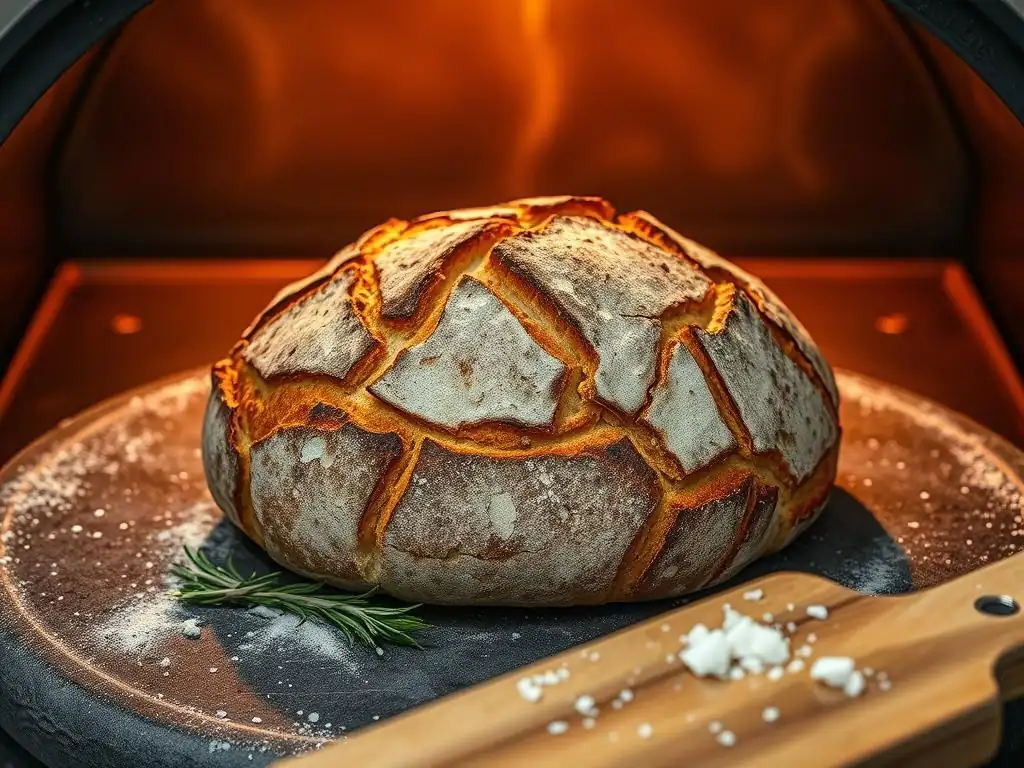
Welcome to BakeWithEase, where the aroma of freshly baked bread fills the air! Ever dreamt of achieving that perfectly crisp, authentically European crust right in your own oven? This article delves into the secrets of baking stone crusts recipes tips, unlocking the key to artisan-quality loaves. Discover how this simple tool can transform your bread baking, creating a texture and flavor you won't believe you made yourself. Ready to elevate your bread game? Let's get started!
- Baking Pizza at Home with a Pizza Stone
- Bake Authentic Pizza at Home with a Pizza Stone
- Understanding Pizza Stones: Types and Materials
- Preparing Your Pizza Stone for Baking
- Baking Pizza: Recipes and Techniques for Pizza Stone Use
- Tips for Pizza Stone Success: Troubleshooting Common Issues
- Cleaning and Maintaining Your Pizza Stone for Longevity
- Exploring Pizza Crust Variations with a Pizza Stone
- Advanced Pizza Stone Techniques
- Pizza Stone Recipes: A Collection of Pizza Favorites
- Mastering the Art of Pizza Stone Crusts: Next Steps
- Frequently Asked Questions
- Final Reflection: The Transformative Power of a Simple Stone
- Unleash Your Inner Pizzaiolo: Craft Authentic European Crusts!
Baking Pizza at Home with a Pizza Stone
Bake Authentic Pizza at Home with a Pizza Stone
Achieve Perfect Crusts: The Pizza Stone Advantage
Using a pizza stone is perhaps the single most impactful upgrade you can make to your home pizza baking setup. Unlike a standard metal baking sheet, which heats up quickly but also loses heat rapidly, a pizza stone is made from porous material that excels at absorbing and retaining heat.
When a pizza is launched onto a preheated stone, this stored heat is transferred directly to the dough's bottom, providing an intense burst of thermal energy. This rapid heat transfer is crucial for mimicking the floor of a professional pizza oven, causing the dough to immediately spring up and develop a crisp, golden-brown crust from the bottom.
Furthermore, the porous nature of materials like cordierite or ceramic allows the stone to absorb moisture released from the dough as it bakes. This wicking action helps prevent the bottom crust from becoming soggy, a common issue when baking on metal pans. The result is a significantly improved texture – a bottom crust that is uniformly crisp and often shows attractive charring or "leopard spotting," mirroring the qualities found in high-quality, oven-baked pizzas. Mastering baking stone crusts recipes tips starts with understanding this fundamental advantage.
Understanding Pizza Stones: Types and Materials
Different Types of Pizza Stones: Cordierite, Ceramic, and Steel
Pizza stones are primarily made from a few key materials, each offering distinct properties. Traditional pizza stones are often made from ceramic, a material known for its excellent heat retention and ability to distribute heat evenly. However, ceramic can be susceptible to thermal shock, meaning rapid temperature changes (like placing a frozen pizza on a hot stone) can cause it to crack. Ceramic stones require careful handling and gradual heating and cooling.
A popular alternative is cordierite, a mineral known for its durability and resistance to thermal shock. Cordierite stones can withstand higher temperatures and are less likely to break from sudden temperature changes compared to traditional ceramic. They still offer good heat retention and moisture absorption, making them a reliable choice for achieving fantastic baking stone crusts. More recently, pizza steels have gained popularity. Made from highly conductive steel, these are significantly more durable and transfer heat much faster than stone, resulting in an incredibly crispy bottom crust in a shorter time.
Choosing the Right Pizza Stone Material: Heat Retention and Durability
The choice of material for your pizza stone significantly impacts both performance and longevity. Steel offers the highest heat conductivity and retention, meaning it gets hot faster and stays hot longer than stone. This intense, rapid heat transfer is ideal for achieving a very crispy or charred crust quickly, often preferred for styles like Neapolitan pizza baked at maximum oven temperatures (e.g., 500°F or higher). Steel is also virtually indestructible, resistant to drops and thermal shock.
Ceramic and cordierite stones provide a more gradual and even heat distribution compared to steel. Cordierite, being more resistant to thermal shock than standard ceramic, offers a good balance of durability and performance for general pizza baking. While they may take longer to preheat than steel (often 45-60 minutes versus 30-45 minutes for steel), they are excellent at wicking moisture and producing a beautifully crisp yet slightly less aggressively charred crust than steel might. When considering baking stone crusts recipes tips, the material choice plays a key role in the final outcome.
Preparing Your Pizza Stone for Baking
Seasoning and Preheating Your Pizza Stone: Key Steps
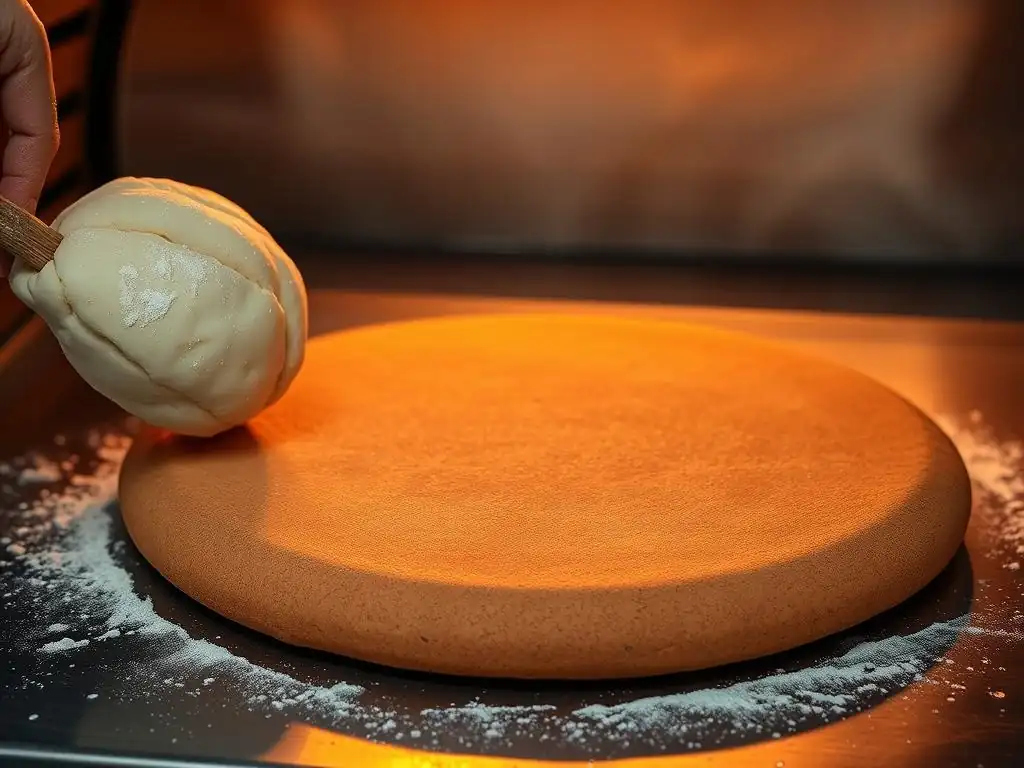
Most traditional ceramic or cordierite pizza stones do not require seasoning before use. They are naturally porous and designed to be used as is. However, some newer stones or those made from different blends might benefit from a light seasoning according to manufacturer instructions. Pizza steels, on the other hand, often require seasoning similar to cast iron to prevent rust and create a non-stick surface. This typically involves applying a thin layer of high-smoke-point oil and baking it onto the steel multiple times. Always check the specific product instructions for seasoning recommendations.
The most critical step before baking any pizza on a stone is thorough preheating. Place the stone or steel in a cold oven before turning it on. This prevents thermal shock, especially with ceramic stones. Preheat your oven to the desired high temperature for pizza, usually between 450°F and 550°F (or even higher if your oven allows). Allow the stone to heat up with the oven for at least 30-60 minutes after the oven indicates it has reached temperature. This ensures the stone has fully absorbed enough heat to provide that crucial thermal boost to the pizza dough.
How Long to Preheat a Pizza Stone: Optimal Crust Formation?
The duration of the preheat is paramount for achieving optimal crust formation when using a baking stone for pizza. Simply waiting for your oven's preheat light to turn off is not enough. A pizza stone, due to its mass and material properties, takes significantly longer than the oven's air temperature to reach and store the necessary heat. For most home ovens set to 500°F (260°C) or higher, a minimum preheat time of 45-60 minutes after the oven reaches temperature is recommended for a ceramic or cordierite stone.
For a pizza steel, which conducts heat more efficiently, a preheat time of 30-45 minutes at the maximum oven temperature might suffice, though longer is never harmful. This extended preheating time ensures that the stone or steel has absorbed enough thermal energy to instantly crisp the bottom of the pizza dough upon contact. Insufficient preheating is a common reason for a pale, undercooked bottom crust, even if the toppings look done. Proper preheating is a core tip for achieving perfect baking stone crusts.
Baking Pizza: Recipes and Techniques for Pizza Stone Use
Neapolitan Pizza on a Pizza Stone: Achieving a Charred Crust
Baking Neapolitan pizza on a pizza stone (or steel) at home aims to replicate the intense heat of a wood-fired oven, typically exceeding 800°F. While home ovens rarely reach this temperature, using a stone preheated at the maximum possible temperature (often 500-550°F or higher) is the best way to approximate it. Use a simple dough recipe with high hydration (often 60-65% water to flour or more) made from 00 flour. Stretch the dough gently, add minimal toppings (crushed San Marzano tomatoes, fresh mozzarella, basil, olive oil), and launch it onto the preheated stone using a floured peel.
The high heat from the stone cooks the bottom crust almost instantly, causing the edges (cornicione) to puff dramatically and develop characteristic charred spots or "leopard spotting" within just 2-5 minutes, depending on your oven's temperature. Rotate the pizza halfway through baking if necessary for even cooking. This quick, high-heat bake on a stone is essential for the soft, airy, yet slightly chewy texture of authentic Neapolitan baking stone crusts.
New York Style Pizza on a Pizza Stone: Mastering the Classic Crust
Achieving the classic foldable yet crispy New York style crust with a baking stone involves a slightly different approach than Neapolitan. This style typically uses a dough with slightly lower hydration (around 58-62%) and often includes a touch of oil or sugar for a more tender crumb and better browning. Preheat your pizza stone to a temperature between 450°F and 500°F (230-260°C). Stretch the dough thinner than Neapolitan, aiming for a larger diameter pizza that fits comfortably on your stone. Top with a cooked tomato sauce and low-moisture shredded mozzarella cheese.
Launch the pizza onto the preheated stone and bake for a longer duration than Neapolitan, typically 8-15 minutes, depending on thickness and toppings. The goal is a crust that is crispy on the bottom but remains pliable enough to fold, with a satisfying chew. The stone provides the necessary direct heat for the crispy base, while the moderate oven temperature ensures the toppings cook through and the cheese melts perfectly before the crust overcooks. This technique is key among baking stone crusts recipes tips for this regional favorite.
Detroit Style Pizza on a Pizza Stone: Replicating Authentic Flavors
Detroit style pizza is traditionally baked in seasoned rectangular steel pans, often originally automotive drip pans. While not baked directly on a stone, a pizza stone can still play a vital role in replicating the intense bottom heat required for its signature crispy, cheesy crust edge. Place a pizza stone or steel on the lowest rack of your oven and preheat it thoroughly at a high temperature (around 450-500°F or 230-260°C) for at least 45-60 minutes.
Prepare your high-hydration, often oily dough and press it into a well-oiled rectangular steel pan, allowing it to proof in the pan. Layer brick cheese (or a blend of mozzarella and Monterey Jack) all the way to the edges of the pan, which creates the caramelized, crispy cheese crust. Add toppings, then stripes of sauce on top of the cheese. Place the pan directly onto the preheated pizza stone in the oven. The stone's intense heat transferred through the pan ensures the bottom crust and the cheese edges get incredibly crispy and caramelized, authentic to the Detroit style.
Tips for Pizza Stone Success: Troubleshooting Common Issues
Preventing Sticking: Ensuring Easy Removal of Your Pizza
Sticking is a frustrating issue when baking pizza on a stone. One primary cause is insufficient preheating of the stone; a stone that isn't hot enough won't instantly set the dough, allowing it to glue itself to the surface. Always ensure your stone is preheated for the recommended 45-60 minutes at high temperature. Another key is using an adequate amount of a low-moisture agent on your pizza peel before transferring the pizza.
Semolina flour, cornmeal, or even regular all-purpose flour can be used on the peel to help the pizza slide off smoothly. Use just enough to create a slippery surface, but not so much that it ends up in large clumps under the pizza, which can burn and create an unpleasant texture. Practice the launching motion to be quick and confident; hesitation can cause the dough to stick to the peel before it even hits the stone. Proper preparation of both the stone and the peel are vital baking stone crusts tips.
Avoiding Cracks: Proper Pizza Stone Care and Usage
Cracking is a common issue with ceramic or cordierite pizza stones, primarily due to thermal shock. To prevent this, always place the stone in a cold oven before turning it on to preheat. This allows the stone to heat up gradually with the oven, minimizing stress caused by rapid temperature changes. Similarly, after baking, leave the stone in the oven to cool down completely with the oven. Never attempt to clean a hot or even warm stone with cold water.
Avoid placing frozen pizzas directly onto a hot stone, as the sudden temperature difference can cause it to shatter. If baking multiple pizzas, allow the stone a few minutes to recover its heat between launches, especially if you notice the crust quality diminishing. Handle the stone carefully outside the oven, as dropping it or hitting it against hard surfaces can also lead to cracks. Following these simple care instructions ensures the longevity of your baking stone for many future baking stone crusts recipes.
Cleaning and Maintaining Your Pizza Stone for Longevity
Best Practices for Cleaning a Pizza Stone: Removing Burnt Residue
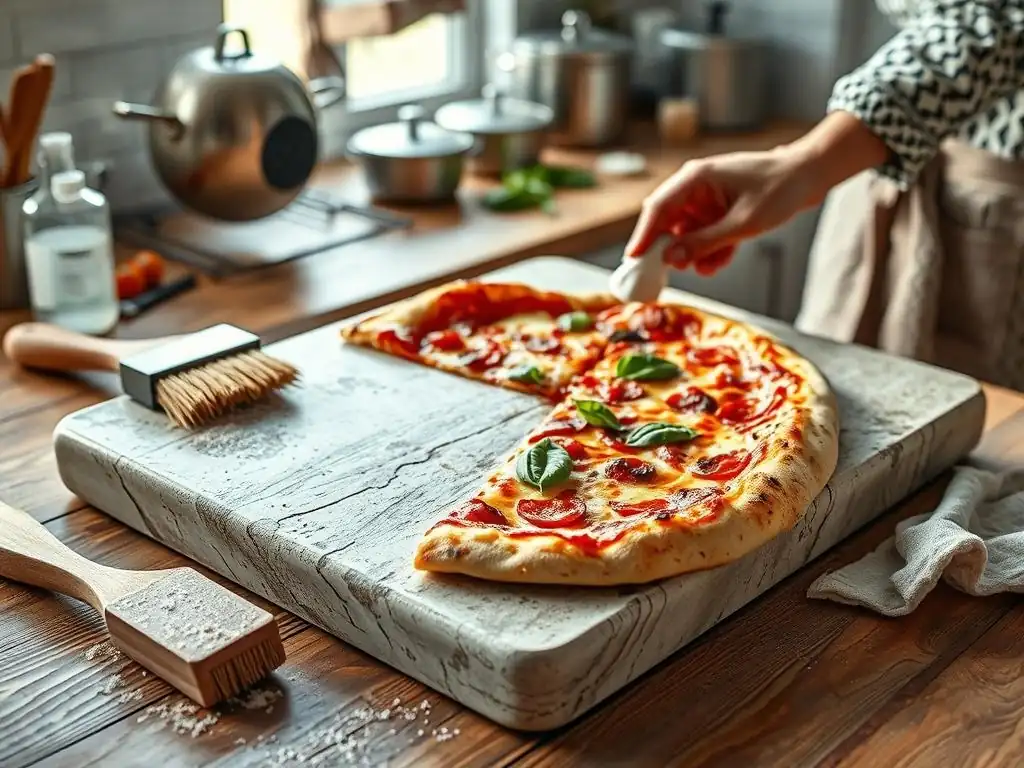
Cleaning a pizza stone requires a different approach than cleaning metal bakeware. Because most pizza stones are porous, using soap or detergent is strongly discouraged. The soap can soak into the pores and impart an unpleasant taste or smell to future pizzas. For most routine cleaning, simply allow the stone to cool completely, then use a stiff brush or a metal spatula/scraper to scrape off any burnt-on food residue.
For stubborn, heavily burnt spots, you can try gently rubbing the area with a coarse salt paste and a damp cloth (ensure the stone is cool!). Some very dirty stones can be placed in a self-cleaning oven during a high-heat cycle, provided the manufacturer specifies that the stone is safe for this. The intense heat will carbonize most residues, which can then be brushed away after cooling. Remember that discoloration and stains are normal and do not affect the stone's performance; a well-used stone will look seasoned.
Storing Your Pizza Stone: Protecting It from Damage
Proper storage is key to protecting your pizza stone from accidental damage, especially if you have a ceramic or cordierite stone which is more fragile than steel. Once completely cooled and cleaned, the ideal place to store your pizza stone is often right inside your oven. Storing it on a rack in the oven keeps it out of the way and ready for its next use. It can even help with heat distribution for other baking tasks, acting as a heat sink.
If you need to remove it from the oven for storage, find a safe, flat surface where it won't be easily bumped or knocked over. Avoid leaning it against a wall where it could slide down. Store it away from sink edges or countertops where it could be accidentally dropped. Some people store them vertically in sturdy racks, ensuring they are well-supported. Protecting your stone from impacts and thermal shock ensures you can continue to bake delicious baking stone crusts for years.
Exploring Pizza Crust Variations with a Pizza Stone
Achieving Different Crust Textures: From Thin and Crispy to Thick and Chewy
A pizza stone is versatile enough to help achieve a wide range of crust textures, depending on your dough recipe, oven temperature, and baking time. For a thin and crispy crust, use a lower hydration dough, stretch it very thin, preheat your stone to a high temperature (475-550°F), and bake for a shorter time until golden and crisp (often 6-10 minutes). The stone's direct heat ensures a crispy bottom.
For a thicker, chewier crust, use a higher hydration dough, stretch it less thinly, and potentially use a slightly lower oven temperature (425-475°F) for a longer bake time (10-18 minutes). The longer bake allows the interior of the thicker dough to cook through while the stone still provides enough heat for a satisfyingly crisp base. Experimenting with dough thickness and bake parameters on your stone is part of mastering baking stone crusts recipes tips.
Experimenting with Flour Types for Unique Crust Characteristics: 00 Flour, Bread Flour
The type of flour used in your pizza dough significantly impacts the final crust texture, especially when baked on a hot stone. 00 flour, traditionally used for Neapolitan pizza, is very finely milled and typically has a moderate protein content (though variations exist). Dough made with 00 flour results in a tender, airy crust with a light chew, perfect for the quick, high-heat bake on a stone that creates those desirable charred spots.
Bread flour, with its higher protein content (around 12-14%), develops more gluten during mixing and kneading. This increased gluten structure results in a chewier crust with more structure and 'bite'. Using bread flour on a pizza stone can create a robust, satisfying crust, ideal for styles like New York or for those who prefer a chewier texture. Blending different flours is also an option to find your perfect balance of crispness, chew, and tenderness when perfecting baking stone crusts.
Advanced Pizza Stone Techniques
Using Steam with a Pizza Stone: Enhancing Crust Development
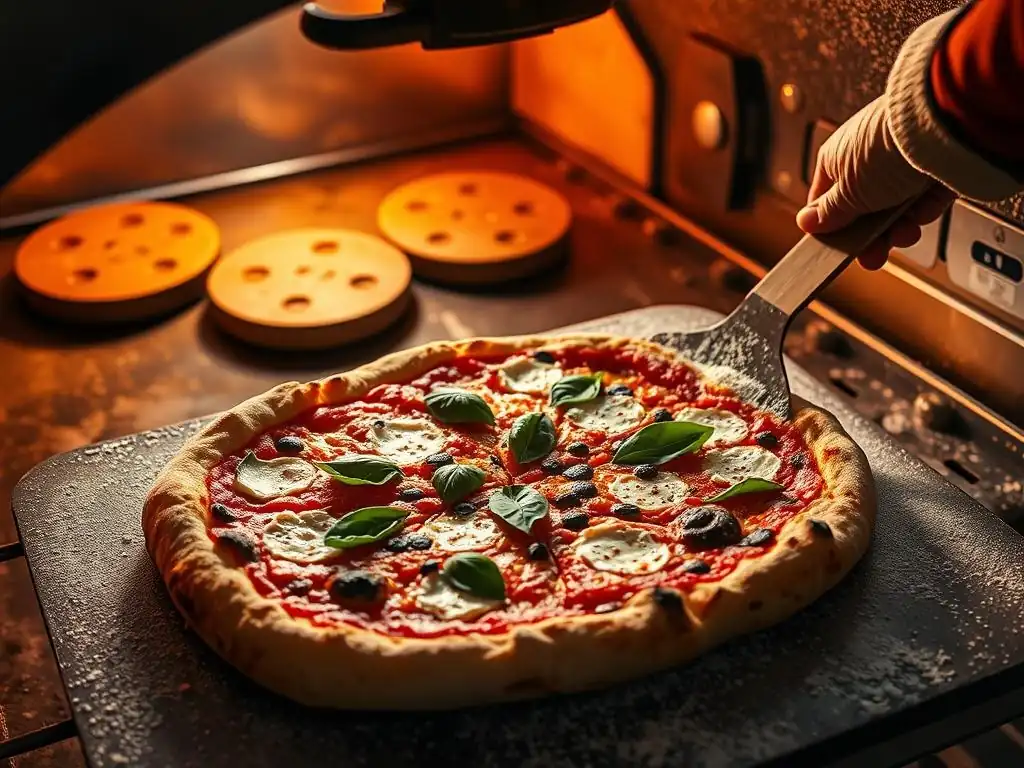
While more commonly associated with bread baking, introducing steam into your oven can sometimes benefit pizza crust development, particularly the edge (cornicione). Steam helps keep the surface of the dough moist in the initial stages of baking, allowing it to expand more fully before the crust sets. This can lead to a lighter, airier edge with better oven spring.
To create steam in a home oven with a pizza stone, place a separate oven-safe pan (like a cast iron skillet or a metal tray) on a rack below the pizza stone while preheating. Just before launching the pizza, carefully pour about a cup of hot water or toss a handful of ice cubes into the empty hot pan. Close the oven door quickly to trap the steam. The steam dissipates relatively fast, but it can make a noticeable difference in the crust's texture and rise during the first few minutes of baking on the stone.
Pizza Stone Placement in Your Oven: Optimizing Heat Distribution
The placement of your pizza stone within the oven can influence how your pizza bakes. For maximum bottom heat and to best replicate the effect of a pizza oven hearth, place the stone on the lowest oven rack. This position benefits from the heating element at the bottom of the oven, providing intense direct heat transfer to the stone. This is often preferred for Neapolitan or New York styles where a very crispy or charred bottom is desired.
Alternatively, placing the stone on a middle or upper rack can provide more balanced heat distribution, potentially leading to more even cooking between the bottom crust and the toppings. This might be suitable for thicker pizzas or if your oven tends to burn the bottom on the lowest rack. Experiment with different rack positions in your specific oven to see what yields the best baking stone crusts for your preferred pizza style.
Pizza Stone Recipes: A Collection of Pizza Favorites
Recipe: Neapolitan Margherita Pizza with a Perfect Pizza Stone Crust
- Yields: 1 (approx. 10-12 inch) pizza
- Prep time: 2-3 days (for dough) + 30 mins
- Bake time: 2-5 minutes
Ingredients:
- 250g high-hydration pizza dough (made with 00 flour, approx. 62-65% hydration)
- Approx. 80g crushed San Marzano tomatoes (drained slightly)
- Approx. 80g fresh mozzarella cheese, torn into small pieces
- Fresh basil leaves
- Extra virgin olive oil
- Pinch of salt
Instructions:
- Place pizza stone on the lowest rack in your oven. Preheat oven to maximum temperature (500-550°F or higher) for at least 60 minutes.
- Gently stretch dough into a 10-12 inch round. Avoid pressing out the edge.
- Transfer dough to a pizza peel dusted with semolina or flour.
- Top with crushed tomatoes, then mozzarella, salt, and a drizzle of olive oil. Add basil leaves just before baking or after.
- Carefully slide pizza onto the preheated stone.
- Bake for 2-5 minutes, rotating once if needed, until crust is puffed, charred in spots, and cheese is melted and bubbly.
- Remove from oven, add fresh basil if desired, slice, and serve immediately. This is a prime example of baking stone crusts recipes focusing on speed and heat.
Recipe: Crispy New York Style Pizza Baked on a Pizza Stone
- Yields: 1 (approx. 14-16 inch) pizza
- Prep time: 1-2 days (for dough) + 30 mins
- Bake time: 8-15 minutes
Ingredients:
- 300g pizza dough (made with bread flour, approx. 58-62% hydration, maybe a little oil/sugar)
- Approx. 120g cooked pizza sauce
- Approx. 150g low-moisture shredded mozzarella cheese
- Toppings of choice (pepperoni, mushrooms, etc.)
- Semolina or flour for peel
Instructions:
- Place pizza stone on a middle or lower rack. Preheat oven to 450-500°F (230-260°C) for at least 60 minutes.
- Stretch dough into a 14-16 inch round, aiming for uniform thickness with a small edge.
- Transfer dough to a pizza peel dusted with semolina or flour.
- Spread sauce evenly, leaving a small border. Sprinkle with cheese and add toppings.
- Carefully slide pizza onto the preheated stone.
- Bake for 8-15 minutes, rotating once if needed, until crust is golden brown, bottom is crispy, and cheese is melted and slightly browned.
- Remove from oven, let cool slightly on a wire rack, slice into large wedges, and serve. This method highlights baking stone crusts recipes for classic American styles.
Recipe: Detroit Style Pizza with a Pizza Stone Crust
- Yields: 1 (approx. 8x10 inch) rectangular pizza
- Prep time: 4-6 hours (for dough/proofing) + 20 mins
- Bake time: 15-20 minutes
Ingredients:
- 350g high-hydration dough (approx. 70-75% hydration, often with oil)
- Approx. 200g brick cheese, cubed or sliced (or blend of mozzarella/Monterey Jack)
- Approx. 100g cooked pizza sauce
- Toppings (pepperoni is classic)
- Butter or oil for pan
Instructions:
- Place pizza stone or steel on the lowest oven rack. Preheat oven to 450-500°F (230-260°C) for at least 60 minutes.
- Generously butter or oil an 8x10 inch rectangular steel pan.
- Place dough in the pan, gently pressing it towards the edges. Let rest 10-15 mins, then press again to fill the pan. Let proof in the pan for 2-4 hours until puffy.
- Place cheese cubes/slices all the way to the edges of the pan, ensuring cheese touches the sides. Add toppings.
- Carefully place the pan directly onto the preheated pizza stone in the oven.
- Bake for 15-20 minutes, until the crust is golden brown and the cheese around the edges is dark golden and crispy.
- Remove pan from oven. Stripe warm pizza sauce over the top. Let cool in the pan for a few minutes before carefully removing to slice and serve. The stone aids in developing that crucial crispy bottom on this unique baking stone crusts recipe.
Mastering the Art of Pizza Stone Crusts: Next Steps
Resources for Further Learning: Books and Online Communities
Embarking on the journey to master baking stone crusts opens up a world of possibilities in home pizza making. To deepen your understanding of dough science, fermentation, and advanced techniques, exploring dedicated pizza cookbooks can be incredibly beneficial. Look for titles that delve into the nuances of dough hydration, different flour types, and the specific mechanics of high-temperature home baking.
Joining online baking communities or forums focused on pizza making can also provide invaluable insights. These platforms are often filled with passionate home bakers sharing their experiences, troubleshooting tips, and variations on baking stone crusts recipes. You can ask questions, learn from others' successes and failures, and discover new techniques for using your pizza stone to its fullest potential.
The best way to solidify your learning and continue improving your baking stone crusts is to keep practicing! Don't be discouraged by initial attempts that aren't perfect. Every pizza baked on your stone is a learning opportunity. Pay attention to how the dough behaves, how the crust browns, and how adjustments to temperature, time, or ingredients affect the outcome.
Once you've achieved a pizza crust you're proud of, share your creations! Whether with friends and family or in online baking groups, sharing your results is a great way to celebrate your progress and get feedback. Keep experimenting with different baking stone crusts recipes and techniques, and enjoy the delicious rewards of homemade pizza perfected with your trusty pizza stone. Happy baking!
Frequently Asked Questions
What is a baking stone, and why is it useful for baking crusts?
A baking stone is a thick slab of ceramic or stone used in baking. It's useful because it retains heat exceptionally well, providing a hot surface for even cooking and a crisp, authentic crust.
What types of dough work best with a baking stone?
Doughs that benefit most from a baking stone include breads, pizzas, and certain pastries requiring a crisp bottom crust. These are generally doughs with higher hydration levels.
How do I properly preheat a baking stone?
Preheat the baking stone in your oven for at least 30-60 minutes at the desired baking temperature. This ensures the stone is thoroughly heated and ready to transfer heat to the dough.
What's the best way to transfer dough onto a hot baking stone?
Use a pizza peel dusted with cornmeal or flour to slide the dough onto the hot stone. Alternatively, parchment paper can be used, though it may affect crust crispness slightly.
How do I clean and maintain my baking stone?
Allow the stone to cool completely. Scrape off any debris with a spatula. Avoid using soap and water, as the stone is porous. For stubborn stains, bake off any residue at high heat or gently scrape with a stone-safe tool. Minimal cleaning is best to maintain the stone's seasoning.
Final Reflection: The Transformative Power of a Simple Stone
The pursuit of the perfect crust, that crisp, golden-brown exterior yielding to a tender, airy interior, is a quest shared by bakers worldwide. And while countless recipes exist, the humble baking stone often remains the unsung hero, elevating even the simplest dough into something truly exceptional. Its ability to transfer heat efficiently and evenly creates a crust unlike any other, a testament to the power of simple tools wielded with understanding.
The impact of the baking stone extends beyond mere technical improvement; it's a connection to tradition, a tangible link to the centuries-old methods that have shaped our culinary heritage. The satisfying crackle of the crust as it hits the hot stone evokes a sense of history, a whisper of generations past perfecting their craft. Bread is the staff of life,
they say, and with a baking stone, that staff becomes a masterpiece. This isn't just about baking; it's about experiencing the artistry and the connection to the food we create.
Now, consider your own baking journey. What techniques have you mastered? What challenges still await? I encourage you to experiment, to embrace the possibilities that a simple baking stone unlocks. Don't be afraid to try new recipes, to adjust temperatures, to feel the heat and understand the subtle nuances of this ancient tool. The perfect crust isn't just a goal; it's a journey of discovery, and with a little patience and the right equipment, the rewards are truly unforgettable.
Unleash Your Inner Pizzaiolo: Craft Authentic European Crusts!
Thanks for joining us on this delicious journey into the world of baking stones! We hope you've gained valuable insights into achieving that perfect, crispy crust. Ready to take your baking to the next level?
- Master the art of the perfect crust: Practice your new baking stone techniques with your favorite pizza recipe – the results will speak for themselves!
- Share your baking triumphs (and maybe even your challenges!) with our community on social media using #BakeWithEaseStone. Let's inspire each other!
- Explore different stone types and experiment with various dough recipes to find your ideal combination.
What unique flavor combinations will you create with your newfound baking stone expertise?