
Creative Variations for Your Next Ciabatta or Rustic Bread Bake

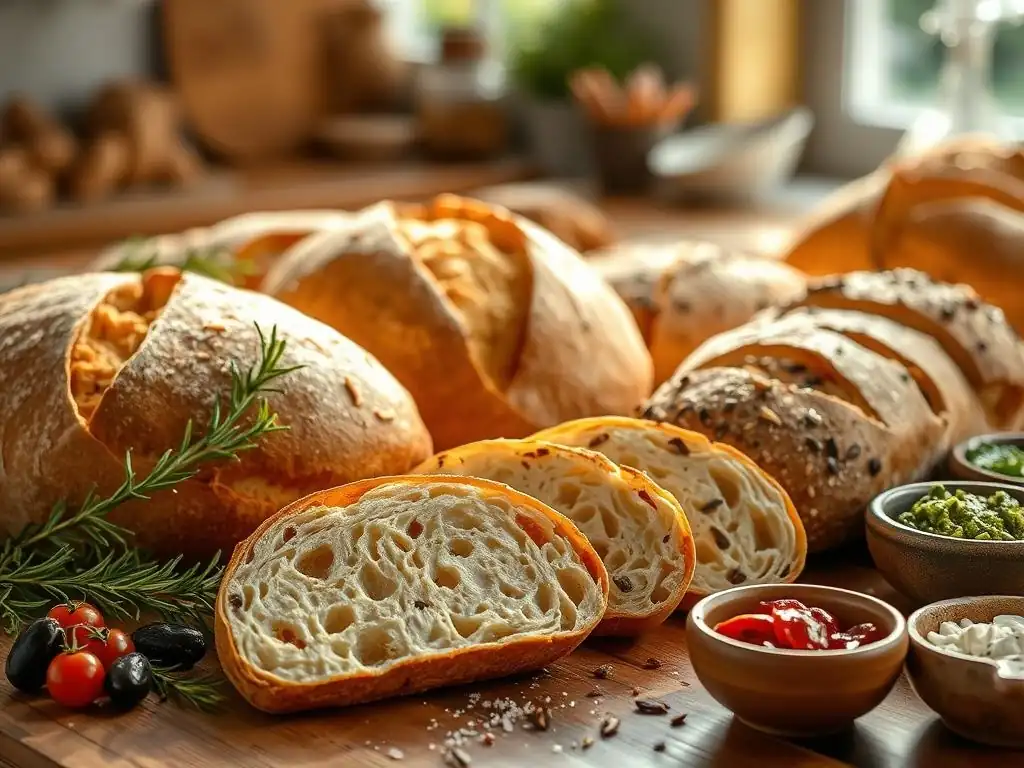
Welcome to BakeWithEase, your haven for all things baking! Ever wondered how to elevate your baking game beyond the basics? We're here to unlock the secrets. Dive into our latest exploration of Ciabatta bread recipe variations and discover how simple tweaks can transform a classic into something truly extraordinary. Ready to bake a loaf that's uniquely yours? Let's get started!
- Introduction to Ciabatta Bread Baking and Creative Variations
- Mastering the Basic Ciabatta Bread Recipe
- Flavorful Ciabatta Bread Recipe Variations: Beyond the Basic
- Texture and Appearance Ciabatta Bread Variations
- Advanced Techniques for Ciabatta Bread Recipe Variations
- Serving and Enjoying Your Ciabatta Bread Variations
- Troubleshooting Common Ciabatta Baking Issues
- Conclusion: Unleash Your Creativity with Ciabatta Bread Recipes
-
Frequently Asked Questions
- What are some simple variations I can make to my basic ciabatta bread recipe?
- I'm a beginner baker; is ciabatta bread difficult to make with variations?
- Can I add inclusions like cheese or olives to my ciabatta dough?
- What kind of flour works best for ciabatta bread and its variations?
- How do variations affect the baking time and temperature of my ciabatta?
- Final Reflection: The Enduring Allure of the Ciabatta, Reimagined
- Unleash Your Inner Baker: Elevate Your Bread Game!
Introduction to Ciabatta Bread Baking and Creative Variations
Why Explore Ciabatta Bread Recipe Variations?
Exploring ciabatta bread recipe variations opens up a world of flavor and texture possibilities beyond the classic airy loaf. While the basic ciabatta is a masterpiece in itself, introducing different ingredients or techniques can transform it into something entirely new, catering to diverse palates and culinary applications. Think of the sheer satisfaction of pulling a warm, herb-infused ciabatta from your oven, knowing you've put your unique stamp on a traditional recipe.
There are potentially hundreds of ingredient combinations – from roasted garlic and rosemary to sun-dried tomatoes and olives – each offering a distinct aroma and taste profile. Mastering the art of adding inclusions or adjusting flour types not only enhances your baking skills but also allows you to tailor bread specifically for a meal, whether it's a robust soup needing a hearty accompaniment or a delicate salad requiring a subtle herby note.
Furthermore, delving into ciabatta bread recipe variations challenges you to understand the fundamental science behind bread making. A simple change, like swapping 20% of your bread flour for whole wheat, necessitates adjustments in hydration and fermentation time, teaching you about flour absorption rates and gluten development. Adding wet ingredients like olives or sun-dried tomatoes impacts the dough's structure, requiring slight modifications to handling and shaping.
This iterative process of experimentation and adjustment is incredibly rewarding, building confidence and intuition in the kitchen. It transforms baking from following instructions to truly understanding and manipulating the ingredients to achieve desired outcomes, making every bake an exciting learning experience.
BakeWithEase: Your Guide to Rustic Bread Perfection
At BakeWithEase, our mission is to demystify the world of bread baking, making it accessible and enjoyable for everyone, regardless of experience level. We believe that baking rustic breads, like ciabatta, should be a source of joy, not frustration. Our guides and recipes are designed with clarity and simplicity in mind, breaking down complex processes into manageable steps.
We cover everything from understanding the role of each ingredient – the protein content in flour, the activity of yeast, the function of salt – to mastering essential techniques like stretching and folding, proofing, and achieving that coveted open crumb structure. We provide practical tips for common challenges, such as dealing with sticky dough or troubleshooting a dense loaf, ensuring you have the support you need throughout your baking journey.
Our focus on ciabatta and other rustic bread variations stems from our passion for these simple yet profound loaves. The beauty of ciabatta lies in its minimal ingredients and technique-driven process, which allows for incredible versatility. We offer detailed basic ciabatta bread recipes as a solid foundation, then build upon them with creative ciabatta bread recipe variations, encouraging you to experiment and find your favourites.
Whether you're aiming for a classic airy crumb, a rustic loaf studded with olives, or a healthier version with whole grains, BakeWithEase provides the knowledge and inspiration. We share insights into ingredient sourcing, equipment recommendations, and even tips for serving and storing your homemade bread, ensuring that your rustic bread baking adventures are always successful and delicious.
Mastering the Basic Ciabatta Bread Recipe
Essential Ingredients for Authentic Ciabatta
Crafting authentic ciabatta begins with understanding its core ingredients, which are surprisingly few but crucial in quality. The foundation is typically a high-protein bread flour, often containing 12-14% protein, which is essential for developing the strong gluten network needed to capture the large air bubbles characteristic of ciabatta's open crumb. While all-purpose flour can be used, it generally results in a less airy texture due to lower protein content (around 10-12%).
The hydration level is key, with ciabatta dough notoriously wet, often ranging from 70% to as high as 85% or even 90% hydration relative to the flour weight. For example, using 500g of flour at 80% hydration requires 400g of water. This high water content is what contributes to the dough's slackness and the bread's signature irregular holes.
Yeast is the leavening agent, and a small amount is typically used for a long, slow fermentation, which develops complex flavors. Instant or active dry yeast works well, usually in amounts ranging from 0.5% to 1% of the flour weight (e.g., 2.5g to 5g for 500g flour). Salt is vital not just for flavor but also for controlling the yeast activity and strengthening the gluten structure; it's usually added at around 2% of the flour weight (e.g., 10g for 500g flour).
Some recipes might include a tiny amount of olive oil (perhaps 1-2%) for a slightly softer crumb and added flavor, though traditional recipes often omit it. The quality of water also matters; filtered water is often preferred to avoid chlorine which can inhibit yeast activity. These basic ingredients, combined with proper technique, form the canvas for all the exciting ciabatta bread recipe variations you might explore.
Step-by-Step Guide to Baking Perfect Ciabatta Bread
Baking perfect ciabatta, while seemingly simple ingredient-wise, relies heavily on technique, particularly managing the very wet dough. The process typically starts with mixing the flour, water (most of it, reserving a little), and yeast, often allowing it to rest for 20-30 minutes (autolyse) before adding the salt and any reserved water.
This initial rest helps the flour absorb water and gluten development to begin with minimal effort. After adding salt, the dough is mixed, often in a stand mixer with a dough hook for 10-15 minutes on medium speed, or by hand using techniques like the stretch and fold method, until it becomes somewhat smooth and elastic, though it will remain very sticky.
Following mixing, the dough undergoes a bulk fermentation period, usually 2-4 hours at room temperature (around 70-75°F or 21-24°C), during which several sets of gentle stretch and folds are performed at intervals (e.g., every 30-45 minutes for the first 1.5-2 hours). These folds build strength in the dough without degassing it. The dough should significantly increase in volume and become airy.
After bulk fermentation, the dough is gently tipped onto a well-floured surface, divided carefully to avoid deflating it, and shaped into rustic loaf shapes, often by gently stretching and folding the edges underneath. A relatively short final proof follows, typically 1-1.5 hours, allowing the shaped loaves to relax and gain a little volume.
Baking is done in a very hot oven, usually preheated to 450-500°F (230-260°C), often with steam introduced at the beginning of the bake (e.g., by placing a pan of hot water on the oven floor or using a Dutch oven) to promote a beautiful crust. The bread bakes for 20-30 minutes until golden brown and cooked through, reaching an internal temperature of around 205-210°F (96-99°C).
Flavorful Ciabatta Bread Recipe Variations: Beyond the Basic
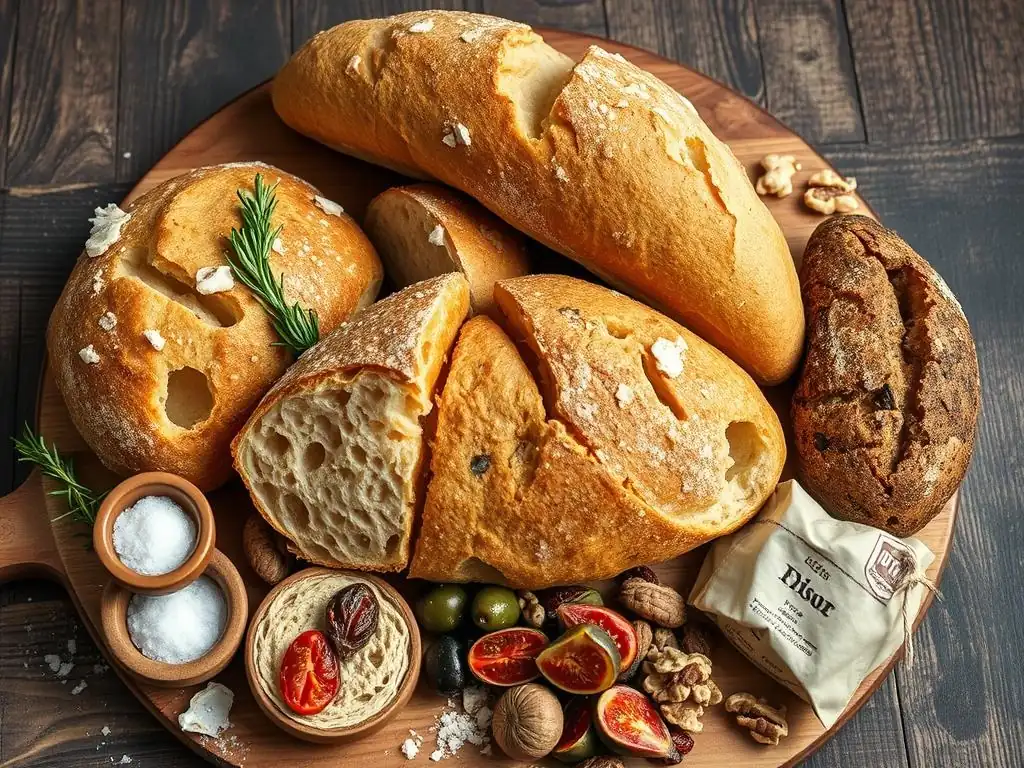
Olive and Herb Ciabatta: A Mediterranean Delight
Olive and herb ciabatta is a classic example of ciabatta bread recipe variations, transporting you directly to the Mediterranean coast with each bite. The combination of briny olives and fragrant herbs infuses the airy crumb with layers of savory flavor. To create this variation, you'll typically add chopped olives and fresh or dried herbs to the dough during the final stages of mixing or during the first few sets of stretch and folds.
The amount of inclusions can vary, but a good starting point is around 1/2 cup (about 75-100g) of chopped olives and 2-3 tablespoons of fresh chopped herbs or 1-2 tablespoons of dried herbs per 500g of flour. It's important not to overload the dough, as excessive additions can weaken the gluten structure and prevent the development of that signature open crumb.
The key to a successful olive and herb ciabatta lies in the quality and preparation of your additions. Olives should be pitted and roughly chopped; rinsing brine-cured olives can help reduce excessive saltiness. Excess moisture from wet ingredients like olives can affect the dough's hydration, so be prepared for a slightly stickier dough or consider slightly reducing the initial water amount if using very moist additions. Herbs like rosemary, thyme, oregano, and basil work wonderfully.
Fresh herbs offer a vibrant, pungent flavor, while dried herbs provide a more concentrated, earthy note. Integrating them gently ensures even distribution throughout the loaf without tearing the delicate dough structure. This ciabatta bread variation is perfect for serving with cheese, charcuterie, or simply dipping in olive oil.
Choosing the Right Olives and Herbs for Ciabatta
Selecting the appropriate olives and herbs is crucial for achieving the desired flavor profile in your ciabatta bread recipe variations. For olives, varieties like Kalamata, Castelvetrano, Niçoise, or even basic black olives work well, each bringing a different level of brininess, sweetness, and texture. Kalamata olives, with their deep purple color and rich, tangy flavor, are a popular choice, offering a robust taste that stands up well to baking.
Castelvetrano olives are milder and buttery, providing a more subtle flavor. Consider using a mix of different olive types for added complexity. Ensure the olives are pitted before chopping; leaving pits in is a major safety hazard!
When it comes to herbs, Mediterranean staples are your best friends. Fresh rosemary is wonderfully aromatic and pairs beautifully with olives, its piney notes complementing the savory brine. Thyme adds a delicate, earthy flavor, while oregano brings a classic Italian zest. A combination of rosemary and thyme is particularly harmonious.
If using fresh herbs, chop them relatively finely. Dried herbs are more potent, so use them sparingly; dried oregano and dried rosemary (crushed slightly) are excellent choices. Adding a pinch of red pepper flakes can introduce a subtle warmth. Experimenting with different combinations, like black olives with oregano and thyme, or green olives with rosemary and a hint of lemon zest, allows you to create truly unique ciabatta bread recipe variations.
Recipe Adjustments for Olive and Herb Ciabatta
Incorporating olives and herbs into your basic ciabatta recipe requires minimal but important adjustments to ensure the best outcome. The primary consideration is the potential impact of the additions on the dough's hydration and handling. Olives, especially those packed in brine or oil, can introduce extra moisture and fat into the dough.
While a small amount of moisture can be beneficial for hydration, excessive liquid or oil might make the dough overly slack and difficult to handle, potentially hindering gluten development. As a general guideline, if adding more than 10-15% of the flour weight in moist inclusions like olives, you might consider slightly reducing the initial water in your recipe by perhaps 5-10g per 500g flour. However, often, the standard hydration works fine, and you simply need to adjust your handling technique, relying more on floured hands and bench scrapers.
Another factor is the weight and distribution of the inclusions. Too many heavy additions clustered together can cause the dough to tear or collapse during shaping and proofing. Aim for even distribution by scattering the chopped olives and herbs over the dough surface during the first or second stretch and fold. Gently folding them in ensures they are incorporated without damaging the gluten structure you've worked hard to develop.
Baking time might also be slightly affected; loaves with additions can sometimes take a minute or two longer to achieve a deep golden crust and internal temperature due to the cooler inclusions within the dough. Always check for an internal temperature of around 205-210°F (96-99°C) to ensure it's fully baked. These minor adjustments help guarantee your olive and herb ciabatta variations bake up beautifully.
Sun-Dried Tomato and Basil Ciabatta: Bursting with Summer Flavors
Sun-dried tomato and basil ciabatta is a vibrant and flavorful ciabatta bread recipe variation that evokes the taste of summer. The sweet, intense flavor of sun-dried tomatoes combined with the aromatic punch of fresh basil creates a delightful contrast within the airy, rustic bread. This variation is perfect for sandwiches, dipping in balsamic glaze, or serving alongside fresh mozzarella.
To make it, you'll incorporate chopped sun-dried tomatoes and torn or chopped fresh basil into your ciabatta dough. The amount of sun-dried tomatoes can range from 1/4 cup to 1/2 cup (about 30-60g) per 500g of flour, depending on how intensely you want the flavor. Basil is best added towards the end of the mixing or during the final stretch and fold to preserve its vibrant color and aroma, using about 1/4 cup of lightly packed chopped leaves.
The preparation of the sun-dried tomatoes is key. If using oil-packed sun-dried tomatoes, drain them well and pat them dry before chopping to avoid introducing excess oil into your dough, which can interfere with gluten development. Water-packed or dry sun-dried tomatoes should be rehydrated in hot water for about 10-15 minutes until softened, then drained and patted dry.
This prevents them from absorbing moisture from your dough during fermentation. Tearing or roughly chopping the basil leaves helps release their essential oils and distributes them nicely throughout the bread. This sun-dried tomato and basil ciabatta variation offers a wonderful balance of sweetness from the tomatoes and freshness from the basil, making it a truly exceptional rustic bread.
Preparing Sun-Dried Tomatoes for Ciabatta
Proper preparation of sun-dried tomatoes is essential when creating these delicious ciabatta bread recipe variations. Sun-dried tomatoes are available in several forms: dry, packed in oil, or sometimes packed in water. Each requires slightly different handling before being added to your dough. Dry sun-dried tomatoes are the most concentrated in flavor and require rehydration.
To rehydrate, place the desired amount in a bowl and cover them with hot water or even hot broth (for extra flavor) for about 10-15 minutes, or until they are pliable and softened. Drain them thoroughly afterwards and pat them very dry with paper towels to remove excess moisture. This step is crucial because any residual water will affect the dough's hydration balance and potentially make it too wet.
Oil-packed sun-dried tomatoes are already soft but contain a significant amount of oil. While some oil can be beneficial, too much will weaken the dough's gluten structure and result in a less airy crumb. Drain the oil-packed tomatoes very well using a sieve, then spread them on paper towels and pat them dry to absorb as much residual oil as possible. You might even give them a quick rinse under warm water and then dry them thoroughly if they seem excessively oily.
Once drained and dried, chop the sun-dried tomatoes into small, consistent pieces (e.g., 1/4 to 1/2 inch pieces). This ensures they are evenly distributed throughout the dough and don't create large pockets that could hinder the development of the open crumb. Proper preparation ensures the tomatoes add flavor without negatively impacting the ciabatta's texture.
Basil Infusion Techniques for Rustic Bread
Infusing basil flavor into rustic bread like ciabatta requires careful timing and technique to maximize its aromatic impact. Fresh basil is highly volatile, meaning its flavor and aroma can diminish quickly when exposed to heat or excessive handling. Therefore, it's generally best to add fresh basil towards the later stages of the dough development process.
Adding torn or chopped fresh basil during the last set of stretch and folds, or even just before gently shaping the loaves, allows the herb to be incorporated without being overly worked into the dough. This preserves its bright green color and fresh, slightly peppery notes. Avoid adding basil at the very beginning of mixing, as the prolonged mixing and fermentation can break down the delicate leaves and dissipate much of their flavor.
Another technique is to use basil oil, either infused olive oil or by finely mincing basil and mixing it with a small amount of olive oil before adding it to the dough. While this can distribute flavor well, it also adds fat, which needs to be accounted for in your recipe's hydration and potentially handled differently. For sun-dried tomato and basil ciabatta variations, combining the chopped, dried tomatoes with the basil just before incorporating them into the dough can help the flavors meld slightly.
If using dried basil instead of fresh, remember that it is more concentrated. Add dried basil earlier in the mixing process, perhaps with the flour and water, as it needs time to hydrate and release its flavor.
About 1 teaspoon of dried basil per 500g flour is usually sufficient. Experimenting with these techniques will help you find the best way to capture the essence of basil in your ciabatta.
Cheese and Onion Ciabatta: A Savory Sensation
Cheese and onion ciabatta is a wonderfully savory ciabatta bread recipe variation, perfect for pairing with soups, stews, or enjoying on its own. The combination of rich, melted cheese and sweet, caramelized onions adds incredible depth of flavor and a delightful texture contrast to the airy ciabatta crumb. This variation involves incorporating cooked onions and shredded cheese into the dough.
The amount of onions and cheese can be generous, typically ranging from 1/2 cup to 1 cup (about 100-150g) of caramelized onions and 1/2 cup to 1 cup (about 50-100g) of shredded cheese per 500g of flour. As with other inclusions, distributing them evenly is key to a balanced flavor and texture.
The preparation of the onions is crucial for this variation. Simply adding raw onions will result in a pungent, sharp flavor and potentially uneven cooking. Caramelizing the onions slowly over low heat brings out their natural sweetness and mellows their bite, creating a rich, savory base.
The cheese should be shredded or cubed into small pieces (e.g., 1/4 inch) to ensure it melts nicely without creating large, dense pockets in the bread. Adding the cooled caramelized onions and shredded cheese during the last set of stretch and folds helps integrate them gently into the dough. The resulting bread has pockets of gooey, melted cheese and sweet, savory onion throughout its open structure, making it a truly irresistible ciabatta bread recipe variation.
Best Cheese Varieties for Ciabatta Bread
Choosing the right cheese is vital for a successful cheese and onion ciabatta, as different cheeses melt and contribute flavor in distinct ways. Hard or semi-hard cheeses that melt well and have a pronounced flavor are generally excellent choices for ciabatta bread recipe variations. Gruyère is a superb option; it melts beautifully, offering a nutty, slightly sweet flavor that pairs exceptionally well with caramelized onions. Sharp cheddar is another popular choice, providing a tangy, robust flavor that stands up nicely to the rich onion. Other good options include:
- Parmesan: Adds a salty, umami depth. Best when finely grated and mixed with another melting cheese.
- Provolone: Offers a mild, slightly smoky flavor and good melting properties.
- Fontina: A creamy, nutty cheese that melts into wonderfully gooey pockets.
- Monterey Jack: A milder option that melts very smoothly.
Avoid very soft, high-moisture cheeses like fresh mozzarella or ricotta, as they can release too much water into the dough during baking, potentially making the crumb gummy. Crumbly cheeses like feta are also less ideal as they don't melt and can create dry spots. Aim for cheeses with moderate moisture content and good melting capabilities to ensure you get delicious pockets of melted cheese throughout your ciabatta. Shredding the cheese yourself from a block is often preferred over pre-shredded cheese, as pre-shredded varieties sometimes contain anti-caking agents that can affect melting and texture.
Caramelizing Onions for Enhanced Flavor
Caramelizing onions is a simple process that transforms their sharp pungency into a deep, sweet, and savory flavor, essential for creating truly delicious cheese and onion ciabatta bread recipe variations. The process involves cooking sliced onions slowly over low heat for an extended period, typically 30-45 minutes or even longer, allowing their natural sugars to caramelize. You'll need about 2-3 medium onions to yield roughly 1/2 to 1 cup of caramelized onions. Start by slicing the onions thinly (e.g., 1/8 inch thick).
Heat 1-2 tablespoons of olive oil or butter in a heavy-bottomed pan over medium heat. Add the sliced onions, stir to coat them with the fat, and then reduce the heat to low. This low heat is critical; it prevents the onions from burning and allows them to soften and brown gradually. Stir the onions occasionally (every 5-10 minutes) to ensure even cooking and prevent sticking.
Initially, the onions will release moisture and become translucent. As they cook down, the moisture evaporates, and the onions will start to turn golden brown, eventually developing a rich, deep brown color and a sweet, intense flavor. Once caramelized, remove the onions from the heat and let them cool completely before adding them to your ciabatta dough. Adding warm or hot onions can affect the yeast activity and dough temperature.
Garlic and Rosemary Ciabatta: An Aromatic Experience
Garlic and rosemary ciabatta is an intensely aromatic and flavorful ciabatta bread recipe variation that is incredibly popular. The pungent warmth of garlic combined with the fragrant, slightly piney notes of rosemary infuses the entire loaf, making it perfect for dipping in olive oil or serving alongside roasted meats. There are several ways to incorporate these flavors into your ciabatta dough, each yielding a slightly different result.
A common method is to add finely minced fresh garlic and chopped fresh rosemary to the dough during the later stages of mixing or during the stretch and folds. For a standard 500g flour recipe, about 2-3 cloves of minced garlic and 1-2 tablespoons of fresh chopped rosemary are a good starting point.
Alternatively, you can infuse olive oil with garlic and rosemary and use that flavored oil as part of the liquid component or drizzled into the dough. Heating sliced garlic and rosemary gently in olive oil releases their flavors into the fat, which then distributes throughout the bread. However, be cautious with raw garlic quantity; too much can inhibit yeast activity and result in a dense loaf.
Roasting garlic beforehand provides a sweeter, mellower flavor that is less likely to impact yeast performance. About 1-2 heads of roasted garlic, mashed, can be added per 500g flour for a sweeter, more subtle garlic note. The combination of garlic and rosemary is a classic for a reason, creating a rustic bread variation that is both comforting and sophisticated.
Infusing Garlic Flavor into Ciabatta Dough
Infusing garlic flavor into ciabatta dough requires attention to how garlic interacts with yeast and gluten. Raw garlic contains compounds that can inhibit yeast activity if used in large quantities, potentially leading to a slower rise or a denser loaf. One effective method to mitigate this and develop a sweeter, less pungent garlic flavor is to roast the garlic before adding it to the dough.
To roast garlic, slice off the top of a whole head of garlic, drizzle with olive oil, wrap in foil, and bake at around 400°F (200°C) for 40-60 minutes until soft and caramelized. The roasted cloves can then be mashed into a paste and added to the dough during the initial mixing or later stretch and folds. Roasting transforms the sharp allicin compounds into milder, sweeter ones.
Another approach is to infuse olive oil with raw garlic. Gently heat sliced or minced garlic in olive oil over low heat until fragrant (do not brown or burn). Let the oil cool completely, then strain out the garlic solids if desired, or leave them in for more intense flavor. This garlic-infused oil can then replace a portion of the olive oil (if your recipe uses it) or water in your recipe.
For example, if your recipe calls for 20g of olive oil, use 20g of garlic-infused oil. You can also add the minced garlic directly to the dough during the last stretch and fold, using a moderate amount (e.g., 1-2 cloves per 500g flour) to minimize potential yeast inhibition. Experimentation will help you find the method and intensity you prefer for your garlic ciabatta bread recipe variations.
Fresh vs. Dried Rosemary in Baking
Deciding between fresh and dried rosemary impacts both the flavor intensity and texture of your ciabatta bread recipe variations. Fresh rosemary has a vibrant, pungent, slightly piney aroma and flavor that is bright and herbaceous. When used in baking, the needles soften slightly but retain some texture, offering bursts of flavor throughout the bread.
To use fresh rosemary, strip the leaves from the woody stems and chop them finely. About 1-2 tablespoons of fresh chopped rosemary per 500g flour is a good starting point, but you can adjust to your preference. Fresh rosemary is best added towards the end of the mixing or during the stretch and folds to preserve its aromatic oils and prevent it from being overly crushed.
Dried rosemary, on the other hand, has a more concentrated and earthy flavor compared to fresh. Because it is dehydrated, it needs time to rehydrate in the dough to release its full flavor. Therefore, dried rosemary can be added earlier in the mixing process, often with the dry ingredients or during the initial hydration step. Use dried rosemary more sparingly than fresh; about 1-2 teaspoons per 500g flour is usually sufficient, as its flavor is more potent.
Crushing dried rosemary slightly between your fingers before adding it can help release its oils. While fresh rosemary offers a brighter, more aromatic experience, dried rosemary provides a reliable, robust flavor that holds up well during the long fermentation and high-temperature baking process. Both are excellent options for ciabatta bread recipe variations, depending on the desired outcome.
Texture and Appearance Ciabatta Bread Variations
Semolina Ciabatta: Adding a Nutty Crunch
Introducing semolina flour into your ciabatta bread recipe variations is an excellent way to alter the texture and appearance, adding a subtle nutty flavor and a delightful chew. Semolina is a coarse durum wheat flour, distinct from the fine flour used for pasta. When incorporated into bread dough, it contributes to a slightly yellower crumb color and a coarser, more rustic texture, particularly on the crust if used for dusting.
Substituting a portion of the bread flour with semolina changes the dough's hydration needs and handling characteristics. Semolina absorbs water differently than standard bread flour and can make the dough feel a bit stiffer initially.
For semolina ciabatta, you can substitute anywhere from 10% to 50% of the bread flour with semolina flour. A common ratio is substituting 20-30% semolina (e.g., 100-150g semolina for 500g total flour). Due to semolina's absorption properties, you might need to slightly increase the total hydration of the dough by a few percentage points (e.g., from 80% to 82-83%) to maintain the desired slackness.
The dough might feel a bit more cohesive and less "soupy" than 100% white flour ciabatta at the same hydration. Baking semolina ciabatta often results in a crust with a delightful, slightly gritty texture and a beautiful golden hue, while the crumb retains the characteristic open structure but with a pleasant chewiness and a hint of sweetness from the durum wheat.
Using Semolina Flour for Unique Texture
Using semolina flour in your ciabatta bread recipe variations fundamentally alters the bread's texture, moving it towards a more rustic and chewy profile. Fine semolina (sometimes labeled "rimacinata") is often preferred for dough inclusion as it integrates more smoothly than coarse semolina. The presence of semolina disrupts the continuous gluten network slightly, contributing to a firmer, more structured crumb compared to the very open, airy crumb of pure white ciabatta. The proteins in durum wheat, while high, behave differently than those in common wheat, resulting in this distinct chewiness.
Beyond incorporating it into the dough, semolina is also fantastic for dusting your work surface and proofing baskets when handling wet ciabatta dough. Its coarse texture prevents the sticky dough from adhering, making shaping and transferring much easier. Using semolina generously on the baking surface (like a pizza stone or steel) creates a beautiful, slightly crispy bottom crust with that characteristic golden color and nutty scent.
The combination of semolina in the dough and on the crust provides a multi-layered textural experience – a slightly chewier crumb and a wonderfully textured crust. This simple substitution offers a significant change in the final bread, making semolina ciabatta a popular variation among rustic bread enthusiasts.
Whole Wheat Ciabatta: A Healthier Rustic Bread Option
Creating whole wheat ciabatta is a popular ciabatta bread recipe variation for those seeking a healthier rustic bread option without sacrificing too much of the characteristic open crumb. Substituting a portion of the white bread flour with whole wheat flour increases the fiber content, vitamins, and minerals in the bread, adding a nuttier, heartier flavor. However, whole wheat flour behaves differently than white flour; the bran and germ particles interfere with gluten development, and whole wheat flour absorbs significantly more water.
To successfully bake whole wheat ciabatta, you typically substitute a percentage of the white flour, starting perhaps with 20-30% whole wheat (e.g., 100-150g whole wheat flour for 500g total flour) and potentially increasing up to 50% or more as you gain experience. A key adjustment is increasing the hydration level. Whole wheat flour can absorb 5-10% more water than white flour due to the presence of bran.
So, if your white ciabatta is 80% hydration, a 30% whole wheat version might require 85-90% hydration relative to the total flour weight to achieve a similar dough consistency. The dough will likely feel less extensible and slightly more prone to tearing due to the bran, requiring gentler handling during stretch and folds. The resulting bread will have a slightly denser but still open crumb, a darker color, and a delicious, wholesome flavor.
Adjusting Hydration Levels for Whole Wheat Ciabatta
Adjusting hydration is perhaps the most critical factor when incorporating whole wheat flour into your ciabatta bread recipe variations. Whole wheat flour includes the bran and germ of the wheat kernel, which are highly absorbent. This means that a dough made with 30% whole wheat flour will feel much stiffer than a dough made with 100% white flour at the same hydration percentage. To achieve the characteristic slackness and potential for an open crumb associated with ciabatta, you must increase the total water content.
A good rule of thumb is to add an extra 5-10g of water for every 100g of whole wheat flour you substitute into the recipe, beyond the hydration you would use for white flour. For instance, if your base recipe for 500g white flour uses 400g water (80% hydration), and you swap 150g (30%) of white flour for whole wheat, you might need to add an extra 7.5g to 15g of water, bringing the total water to 407.5g to 415g (81.5% to 83% hydration).
Start with a moderate increase and be prepared to add a little more water during the initial mixing if the dough feels too stiff. The dough might still feel less extensible than a purely white ciabatta dough due to the bran interfering with gluten, but proper hydration is key to preventing a dense, heavy loaf.
This adjustment is fundamental for successful whole wheat ciabatta bread recipe variations.
Spelt Ciabatta: A Delicious Alternative Grain
Spelt ciabatta is a delightful ciabatta bread recipe variation that utilizes an ancient grain, offering a distinct flavor and texture. Spelt flour is a type of wheat, but it has a slightly different gluten structure than modern wheat. It's often considered easier to digest for some people and imparts a lovely nutty, slightly sweet flavor to bread. Working with spelt dough requires some adjustments compared to using standard bread flour.
Spelt flour absorbs water more slowly but can become sticky and weak if overmixed. The gluten in spelt is more fragile and breaks down more easily than the strong gluten in modern bread wheat. For spelt ciabatta, you can substitute 100% of the white flour with whole spelt flour or use a mix of white spelt flour and whole spelt. Hydration levels similar to white ciabatta (75-85%) are common, but you might find the dough feels less elastic and tears more easily during stretching and folding.
Gentle handling is key. The dough may also ferment faster than white flour dough. The resulting spelt ciabatta has a slightly closer crumb structure than classic ciabatta but is still relatively open, with a tender texture and a wonderful, unique flavor that makes this one of the most rewarding ciabatta bread recipe variations to try.
Baking with Spelt Flour: Tips and Tricks
Baking ciabatta bread recipe variations with spelt flour introduces unique characteristics to the dough handling and fermentation process. Spelt gluten develops quickly but is also easily damaged by overmixing or rough handling. Therefore, aim for minimal mixing – just enough to bring the dough together – and rely heavily on gentle stretch and folds during bulk fermentation to build strength. Instead of vigorous kneading, perform 3-4 sets of stretch and folds over the first 1.5-2 hours of bulk fermentation, being careful not to tear the dough.
Spelt also tends to ferment faster than modern wheat flours. Keep a close eye on the dough during bulk fermentation; it may reach the desired airy, bubbly state sooner than you expect, potentially in 2-3 hours depending on the ambient temperature. Over-proofing spelt dough can lead to it collapsing. Similarly, the final proof might be shorter, perhaps 45-75 minutes. When shaping spelt ciabatta, be extra gentle to avoid degassing the delicate structure.
Dust your work surface and hands generously with flour or semolina. Baking temperatures and times are typically similar to white ciabatta (e.g., 450-475°F or 230-245°C for 20-25 minutes), but the crust might brown a little faster due to the sugars in spelt. Monitoring the bake closely is advisable. With gentle handling and attention to fermentation, spelt ciabatta is a delicious and rewarding rustic bread variation.
Advanced Techniques for Ciabatta Bread Recipe Variations
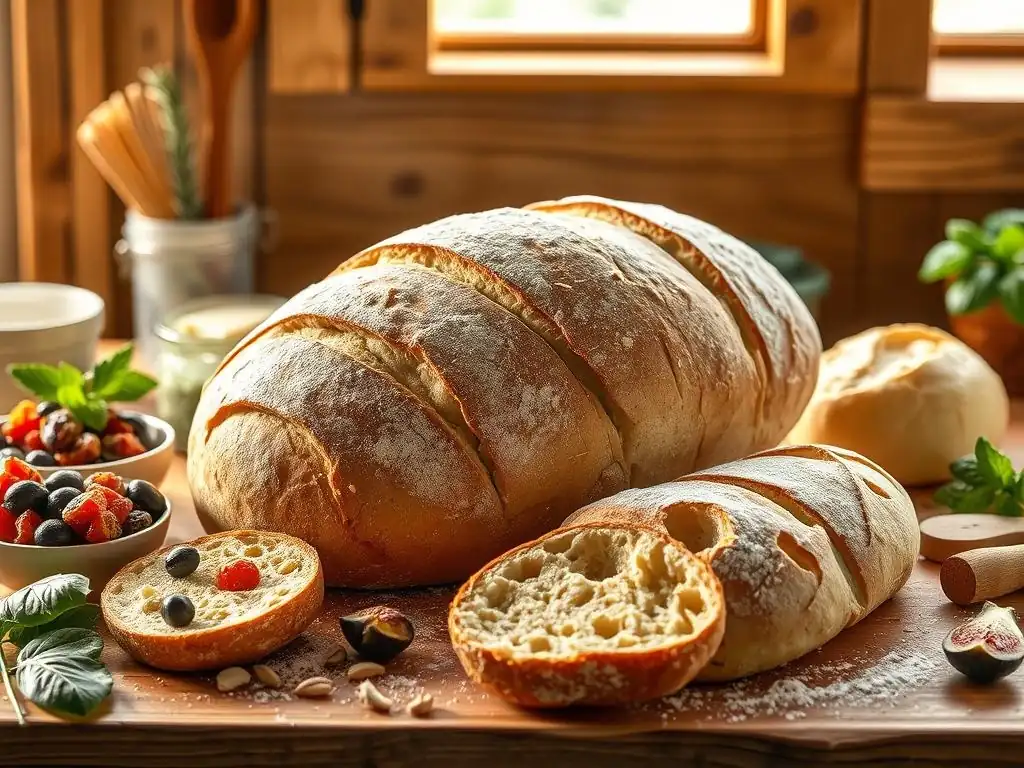
Poolish or Biga: Enhancing Flavor and Texture
Incorporating a pre-ferment like a poolish or a biga is a fantastic way to elevate your ciabatta bread recipe variations, significantly enhancing both the flavor complexity and the open, airy texture. A pre-ferment is a portion of the dough ingredients (flour, water, yeast) mixed hours or even days in advance and allowed to ferment slowly. This slow fermentation develops organic acids and flavor compounds that are not present in a straight dough mix. It also contributes to a stronger gluten structure and can aid in achieving a more open crumb.
A poolish is a high-hydration, liquid pre-ferment, typically made with equal weights of flour and water (1:1 ratio) and a tiny amount of yeast. For a 500g flour recipe, you might build a poolish using 150g flour, 150g water, and a pinch (e.g., 0.1-0.2g) of instant yeast, letting it ferment at room temperature for 12-16 hours until bubbly and slightly collapsed. A biga is a lower-hydration, stiffer pre-ferment, usually around 50-60% hydration.
A biga for a 500g flour recipe might use 200g flour, 120g water (60% hydration), and a tiny pinch of yeast, fermenting for 12-24 hours. Both pre-ferments are then incorporated into the final dough mix, adding a wonderful depth of flavor and contributing to that sought-after irregular, open crumb structure in your ciabatta bread recipe variations.
Preparing a Poolish for Ciabatta
Preparing a poolish for your ciabatta bread recipe variations is a simple yet impactful step that significantly improves the final bread's flavor and texture. A poolish is a very wet pre-ferment, typically made with a 1:1 ratio of flour to water by weight. To make a poolish for a recipe using, say, 500g of flour in total, you might allocate 20-40% of that flour to the poolish. Let's use 30% (150g flour) as an example.
You would mix 150g of bread flour with 150g of water. Add a very small amount of instant yeast – usually 0.1% to 0.2% of the flour weight in the poolish, which is just 0.15g to 0.3g for 150g flour. This is a tiny pinch, often less than 1/8 teaspoon.
Mix these three ingredients together in a bowl until no dry flour remains. The mixture will be quite liquid, like a thick batter. Cover the bowl loosely and let it ferment at room temperature (around 70-75°F or 21-24°C) for 12 to 16 hours. The poolish is ready when its surface is covered in bubbles, it has expanded significantly, and the top has started to dome and potentially just begin to recede or collapse slightly in the center.
It should smell pleasantly yeasty and slightly acidic. This fermented poolish is then added to the final dough mix along with the remaining flour, water, salt, and any other ingredients for your specific ciabatta bread recipe variations. The long, slow fermentation of the poolish contributes complex flavors and helps create a more open crumb structure.
Incorporating a Biga into Your Rustic Bread
Incorporating a biga into your rustic bread, particularly ciabatta bread recipe variations, is another excellent method for flavor development and texture enhancement. Unlike the wet poolish, a biga is a stiff pre-ferment, typically made with a hydration level between 50% and 60% of the flour weight. This lower hydration results in a longer, slower fermentation that builds different flavor compounds than a poolish and contributes significant strength to the final dough.
For a 500g total flour recipe, you might use 30-50% of the flour in the biga. Let's take 40% (200g flour) as an example. You would mix 200g of bread flour with 100g to 120g of water (50-60% hydration) and a very small amount of yeast (e.g., 0.1-0.2% of the biga flour, so 0.2g to 0.4g instant yeast).
Mix these ingredients until they form a cohesive, stiff dough – it won't be smooth like a fully kneaded dough. Cover the bowl and let the biga ferment at room temperature for 12-24 hours, or you can ferment it for a shorter time at room temperature (e.g., 2-3 hours) and then transfer it to the refrigerator for 24-72 hours for an even longer, slower fermentation.
A ripe biga will have expanded somewhat and should smell pleasantly yeasty and slightly tangy. To incorporate it into your final dough, break the biga into smaller pieces and add them to the mixing bowl with the remaining flour, water, and salt.
It will take longer to mix the biga into the final dough compared to a poolish due to its stiffness, but the resulting dough will have excellent structure and elasticity, leading to wonderful volume and an open crumb in your ciabatta bread recipe variations.
Autolyse: Improving Dough Hydration and Development
The autolyse technique is a simple yet powerful method used in bread making, including ciabatta bread recipe variations, to improve dough hydration, gluten development, and overall dough handling. Invented by Professor Raymond Calvel, it involves mixing just the flour and water from your recipe and letting the mixture rest before adding the salt and yeast. This rest period allows the flour to fully hydrate and enzymes naturally present in the flour to begin breaking down starches into sugars and proteins into components that aid gluten development.
For a ciabatta dough, which is often high hydration, the autolyse is particularly beneficial. You would typically mix all the flour and about 90-95% of the water called for in your recipe until no dry flour remains. The mixture will look shaggy and unworked. Cover the bowl and let it rest for a period ranging from 20 minutes to 60 minutes, or even longer depending on the recipe and flour type.
During this rest, the dough will become noticeably smoother and more pliable without any mechanical kneading. After the autolyse, add the salt, yeast (and any remaining water), and then proceed with your mixing and stretch and folds. The autolyse makes the dough easier to work with, reduces the amount of mixing needed to develop gluten, and can lead to a more extensible dough and a better crumb structure in your ciabatta bread recipe variations.
The Autolyse Method Explained
The autolyse method, applied to ciabatta bread recipe variations, is a period of rest given to the dough after the initial mixing of just flour and water. Its primary goals are to allow for complete hydration of the flour and to activate enzymes within the flour that facilitate gluten development and sugar production. When flour and water are mixed, proteins in the flour (glutenin and gliadin) begin to bond to form gluten.
The autolyse rest period gives these proteins time to bond and align without the interference of salt and yeast. Salt can tighten the gluten network, making it less extensible, and yeast activity can create gas bubbles that might tear the nascent gluten structure.
By delaying the addition of salt and yeast, the gluten can form more relaxed, extensible chains. This results in a dough that is easier to stretch and fold, requiring less overall manipulation to build strength. Furthermore, enzymes like protease begin to break down proteins, making the dough more extensible, while amylase breaks down starches into simple sugars, providing readily available food for the yeast once it's added.
The duration of the autolyse can vary; a typical range is 20 to 60 minutes at room temperature, but for doughs with a high percentage of whole grains or a stiff consistency, it can be extended. For high-hydration ciabatta, even a 20-30 minute autolyse can make a significant difference in handling the sticky dough and promoting an open crumb structure.
Shaping Techniques for Unique Ciabatta Loaves
While the classic ciabatta shape is flat and elongated, mastering shaping techniques allows for creating unique ciabatta bread recipe variations with different appearances and crust-to-crumb ratios. The key challenge with high-hydration ciabatta dough is shaping it without losing the precious air bubbles developed during fermentation. Unlike lower-hydration doughs that can be kneaded and formed into tight balls, ciabatta requires a much gentler touch, often relying on folds and minimal manipulation.
The most common shaping technique involves gently stretching the proofed dough (tipped onto a well-floured surface) into a rectangle or square, then dividing it into desired loaf sizes (e.g., splitting a large batch into 2-4 pieces). Each piece is then gently coaxed into a rough rectangle or square shape by stretching from underneath and folding the edges towards the center, creating tension on the surface. The shaped pieces are then carefully transferred to a well-floured couche or proofing basket for a short final proof.
For ciabatta bread recipe variations with inclusions like olives or cheese, ensuring they are well-distributed before shaping helps maintain the dough's integrity. Experimenting with dividing the dough into smaller, more rustic shapes or even baking it as a single large focaccia-like slab are fun ways to explore different presentations.
Achieving the Classic Ciabatta Shape
Achieving the classic flat, elongated ciabatta shape with its signature irregular air pockets requires a gentle touch and minimal handling of the high-hydration dough. After the bulk fermentation, the dough is very delicate and full of gas. The first step is to generously flour your work surface (a wooden board or counter works well) with bread flour or semolina. Gently tip the dough out of its container onto the floured surface, trying not to deflate it.
It will be a large, bubbly mass. Using a bench scraper and floured hands, gently coax the dough into a rough rectangle or square shape, about 1-1.5 inches thick, by gently stretching or patting it. Avoid pushing down or degassing it.
Next, divide the dough into the desired number of loaves using a bench scraper. For example, a large batch might yield 2-4 loaves. For each piece, gently stretch it into a rough rectangle. Then, working quickly but gently, fold the dough in half lengthwise, bringing the bottom edge up to meet the top edge.
This reinforces the structure and creates a seam. You can then gently stretch the folded piece to the desired length (typically 8-12 inches). Transfer the shaped loaves immediately to a well-floured couche or proofing basket, ensuring they are separated by folds in the couche or ample flour to prevent them from sticking together during the final proof. The goal is to handle the dough as little as possible to preserve the airy structure developed during fermentation.
Creative Shaping Variations for Rustic Bread
Beyond the classic slipper shape, exploring creative shaping techniques for your ciabatta bread recipe variations can add visual appeal and alter the crust-to-crumb ratio. One simple variation is to bake the entire batch of dough as a single, large, rustic loaf. Instead of dividing the stretched dough, simply leave it as one large rectangle and transfer it to your baking surface. This results in a massive, impressive loaf with a higher proportion of soft interior crumb compared to crust on the sides, though the top and bottom crusts will still be significant.
Another approach is to divide the dough into smaller, squarish or roundish rolls. This increases the crust-to-crumb ratio for individual servings, perfect for sandwiches or dinner rolls. To shape rolls, gently divide the dough into smaller portions (e.g., 8-12 pieces for rolls), then gently fold the edges underneath each piece to create a rough ball or square shape. Avoid tightening them too much.
Proof these smaller shapes on a floured surface or individual proofing bowls. For a more decorative look, you can twist or knot strips of dough, though this requires a slightly less wet dough or very skilled handling. Remember that regardless of the shape, the key to maintaining ciabatta's airy nature is gentle handling throughout the division and shaping process. These creative shaping ideas add another dimension to your repertoire of ciabatta bread recipe variations.
Serving and Enjoying Your Ciabatta Bread Variations
Pairing Suggestions for Different Ciabatta Flavors
The diverse world of ciabatta bread recipe variations offers exciting opportunities for pairing with meals and ingredients. The right pairing can enhance both the bread and the food it accompanies.
- Classic Ciabatta: Its airy crumb and mild flavor make it incredibly versatile. Perfect for dipping in olive oil and balsamic vinegar, using for paninis or sandwiches (like caprese), serving with pasta dishes to soak up sauce, or simply alongside soup or salad.
- Olive and Herb Ciabatta: Pairs beautifully with Mediterranean flavors. Serve with grilled fish or chicken, alongside a Greek salad, with feta cheese and tomatoes, or as part of an antipasto platter. Dipping in olive oil is also fantastic.
- Sun-Dried Tomato and Basil Ciabatta: A taste of Italy. Excellent with fresh mozzarella and tomatoes, as the base for bruschetta, alongside pesto-based dishes, or used for sandwiches featuring roasted vegetables or prosciutto.
- Cheese and Onion Ciabatta: Rich and savory. Ideal for accompanying hearty soups (like French onion or potato soup), stews, or chili. It's also wonderful toasted and served with butter or alongside roasted meats.
- Garlic and Rosemary Ciabatta: Highly aromatic. A natural partner for roasted lamb or chicken. Serve alongside garlic-infused dishes, with pasta aglio e olio, or simply as a flavorful bread for dipping in olive oil or melted butter.
- Semolina Ciabatta: Its nutty crunch works well with robust flavors. Try it with rustic stews, grilled steak, or strong cheeses.
- Whole Wheat or Spelt Ciabatta: Heartier options. Pair with substantial meals like pot roasts, lentil soup, or use for hearty sandwiches with cured meats and sharp cheeses.
Experimenting with pairings is part of the fun of exploring ciabatta bread recipe variations.
Storing and Freezing Homemade Ciabatta
Properly storing your homemade ciabatta bread recipe variations is key to maintaining their delicious flavor and texture. Ciabatta is best enjoyed fresh, ideally within 1-2 days of baking, when its crust is crisp and its crumb is soft and airy. To store for short periods at room temperature, allow the bread to cool completely on a wire rack after baking.
Once cool, store it in a paper bag or a linen bread bag. Avoid plastic bags or airtight containers for room temperature storage, as they trap moisture and will soften the crust and can lead to mold. A paper bag allows the crust to remain relatively crisp while protecting the interior.
If you won't be eating the ciabatta within a couple of days, freezing is the best option to preserve its quality. Again, ensure the bread is completely cool. For a whole loaf, wrap it tightly in plastic wrap, then wrap again in aluminum foil or place it in a freezer-safe bag.
For sliced ciabatta, slice the cooled loaf first, then stack the slices and wrap them well before placing in a freezer bag. This allows you to take out just the amount you need. Frozen ciabatta can be stored for up to 2-3 months.
To reheat a whole loaf, remove it from the freezer wrap, run it quickly under cool water (this creates steam for a crisp crust), and bake in a preheated oven at 350°F (175°C) for 10-15 minutes until heated through and the crust is revived. Slices can be toasted directly from frozen. Freezing is an excellent way to extend the enjoyment of your various ciabatta bread recipe variations.
Troubleshooting Common Ciabatta Baking Issues
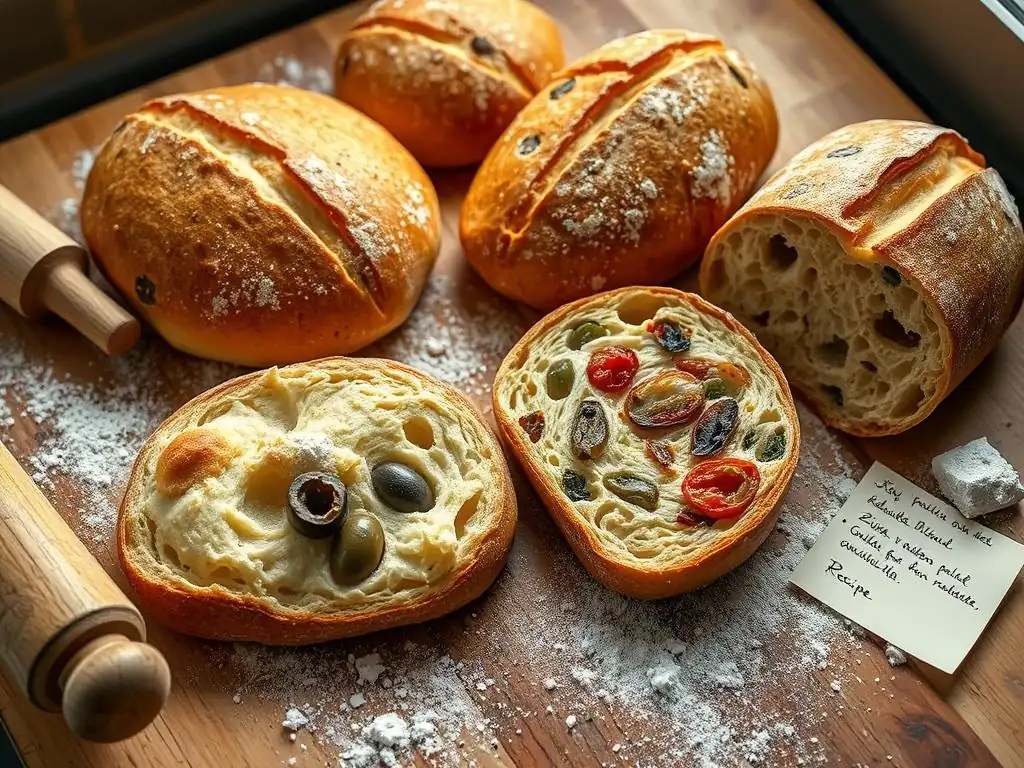
Avoiding a Flat or Dense Ciabatta
One of the most common frustrations when baking ciabatta bread recipe variations is ending up with a flat or dense loaf instead of the desired airy, open crumb. Several factors can contribute to this. Firstly, insufficient gluten development is a major culprit.
Ciabatta is a high-hydration dough, and building strength through proper mixing and gentle stretch and folds is crucial. If the dough doesn't pass the windowpane test (a small piece can be stretched thinly without tearing), it needs more development. Ensure you are performing enough sets of folds during bulk fermentation (typically 3-4 sets in the first couple of hours).
Secondly, under-proofing or over-proofing can lead to a dense crumb. Under-proofed dough hasn't developed enough gas to expand properly in the oven. Over-proofed dough has exhausted its yeast activity, and the gluten structure may have weakened and collapsed, leaving it unable to hold its shape or expand during baking. Pay attention to the dough's appearance during bulk and final proofing – it should look visibly bubbly and airy, increasing significantly in volume (e.g., doubling or more during bulk). A gentle poke test can help; if the indentation springs back immediately, it's likely under-proofed.
If it stays indented, it might be over-proofed. If it slowly springs back about halfway, it's likely ready. Lastly, rough handling during shaping can deflate the dough, expelling the gas needed for oven spring. Be as gentle as possible when turning the dough out, dividing, and shaping your ciabatta bread recipe variations.
Achieving the Perfect Ciabatta Crust
Achieving the perfect ciabatta crust – thin, crisp, and beautifully browned – is a hallmark of successful ciabatta bread recipe variations. The key factors are high baking temperature and the presence of steam in the oven during the initial phase of baking. Ciabatta is typically baked at high temperatures, often between 450°F and 500°F (230-260°C). A hot oven provides the necessary thermal shock for good oven spring and rapid crust development. Preheating your oven thoroughly, ideally with a baking stone or steel inside for at least 30-60 minutes, ensures consistent high heat transfer to the base of the loaf.
Steam is essential during the first 10-15 minutes of baking. Steam keeps the surface of the dough moist and elastic, allowing the loaf to expand fully before the crust sets. Without steam, the crust forms too quickly, restricting oven spring and potentially leading to a denser loaf and a thicker, less desirable crust. You can create steam by pouring hot water into a preheated pan on the bottom rack of your oven just as you load the bread.
Alternatively, baking the ciabatta in a preheated Dutch oven or covered baker traps the moisture released by the dough itself, creating an ideal steamy environment. After 10-15 minutes, remove the steam source (or lid) to allow the crust to dry out and become crisp and golden brown for the remainder of the bake. Proper steaming is crucial for that signature ciabatta crust on all your ciabatta bread recipe variations.
Conclusion: Unleash Your Creativity with Ciabatta Bread Recipes
The journey through ciabatta bread recipe variations is one filled with discovery, flavor, and the immense satisfaction of creating something truly special with your hands. From mastering the delicate balance of hydration and gluten development in the basic recipe to infusing your loaves with Mediterranean herbs, savory cheese and onions, or the wholesome goodness of whole grains, each variation offers a unique challenge and reward.
We've explored how simple additions can transform the character of this rustic bread and how subtle changes in technique, like using a pre-ferment or adjusting hydration for different flours, can significantly impact texture and flavor. This exploration isn't just about following instructions; it's about understanding the craft, experimenting with ingredients, and tailoring your bakes to your personal taste and culinary needs.
Ciabatta's forgiving nature, despite its high hydration, makes it an ideal canvas for creativity. Whether you prefer the tangy depth brought by a biga, the soft chew of semolina, or the aromatic punch of garlic and rosemary, there's a ciabatta variation waiting for you to discover and perfect. Remember that each bake is a learning opportunity. Pay attention to how your dough feels, how it ferments, and how it behaves in your oven.
Don't be discouraged by initial challenges; even experienced bakers learn something new with every loaf. Embrace the stickiness, celebrate the bubbles, and enjoy the incredible aroma that fills your kitchen. By delving into these ciabatta bread recipe variations, you're not just baking bread; you're expanding your skills, delighting your senses, and sharing delicious, homemade goodness with others.
Continue Exploring Rustic Bread Baking with BakeWithEase
At BakeWithEase, we are passionate about empowering you to become a confident and creative baker, and exploring ciabatta bread recipe variations is just one part of the exciting world of rustic bread baking we cover. Our website is a treasure trove of resources designed to guide you through every step, from your very first simple loaf to more advanced techniques and recipes. We provide detailed, easy-to-follow instructions, helpful tips for troubleshooting common issues, and inspiration for countless other rustic bread adventures, including sourdough, focaccia, baguettes, and more.
We encourage you to take what you've learned about ciabatta and apply it to other types of bread. Understanding hydration, fermentation, and the impact of different flours and inclusions is knowledge that translates across many baking disciplines. Our community of bakers is always growing, and we love seeing the creations our readers bake. Share your successes, ask questions, and continue to explore the endless possibilities that rustic bread baking offers. Visit BakeWithEase.com for more recipes, guides, and inspiration. Happy baking!
Frequently Asked Questions
What are some simple variations I can make to my basic ciabatta bread recipe?
You can experiment with different flours, like adding a percentage of whole wheat or rye flour. Also, try adding herbs and spices such as rosemary, thyme, or garlic powder.
I'm a beginner baker; is ciabatta bread difficult to make with variations?
While ciabatta can be a bit challenging, starting with a simple variation, like adding olive oil and sea salt, is a good way to begin. Focus on mastering the basic recipe first.
Can I add inclusions like cheese or olives to my ciabatta dough?
Yes, adding inclusions is a great way to create unique ciabatta bread variations. Just be sure to add them after the initial mixing to avoid overworking the dough, which can affect the crumb structure.
What kind of flour works best for ciabatta bread and its variations?
Strong bread flour with a high protein content is ideal for ciabatta. Experimenting with different types of flour, like semola, can add interesting flavor and texture variations.
How do variations affect the baking time and temperature of my ciabatta?
Generally, variations don't drastically change the baking time or temperature. However, if you add a lot of wet ingredients, you might need to bake it a little longer. Always check for internal doneness with a thermometer.
Final Reflection: The Enduring Allure of the Ciabatta, Reimagined
The humble ciabatta, a seemingly simple loaf, holds a world of culinary possibilities within its airy crumb. Its rustic charm and satisfying chew have captivated bakers for decades, and the enduring popularity of this Italian staple is a testament to its versatility. This exploration of creative variations proves that the ciabatta is far from a one-trick pony; it's a canvas for culinary innovation.
The journey through these recipes has been a personal reminder of the joy found in experimentation and the unexpected flavors that can arise from simple adjustments. The subtle shifts in texture and taste, from the addition of herbs to the incorporation of different flours, highlight the beauty of adapting a classic to one's own preferences. The best bread is the bread you bake with love,
a wise baker once said, and this sentiment rings truer than ever when considering the personalized touch each variation allows.
Now, it's your turn. Don't be afraid to step outside the traditional ciabatta recipe and explore the possibilities. Embrace the imperfections, celebrate the unique character of your loaf, and savor the delicious results. The next time you knead dough, remember the power of variation and the boundless creativity that awaits within the simple act of baking. Let your next ciabatta be a testament to your own culinary journey.
Unleash Your Inner Baker: Elevate Your Bread Game!
Thanks for joining us on this delicious journey into the world of ciabatta and rustic bread! We hope you've discovered new techniques and inspiration to elevate your baking skills. Now it's time to put that knowledge to the test!
- Try out one of the variations mentioned in the article: Choose your favourite recipe tweak and give it a go! Let the flour dust fly!
- Share your baking triumphs (or challenges!): Tag us on social media and let's connect with fellow bread enthusiasts!
- Experiment with different flours or grains: Explore the unique textures and flavors! What exciting combinations will you create?
Ready to knead your way to baking bliss? What unique ingredient will you add to your next loaf?