
Simple Steps to Bake a Crusty French Batard

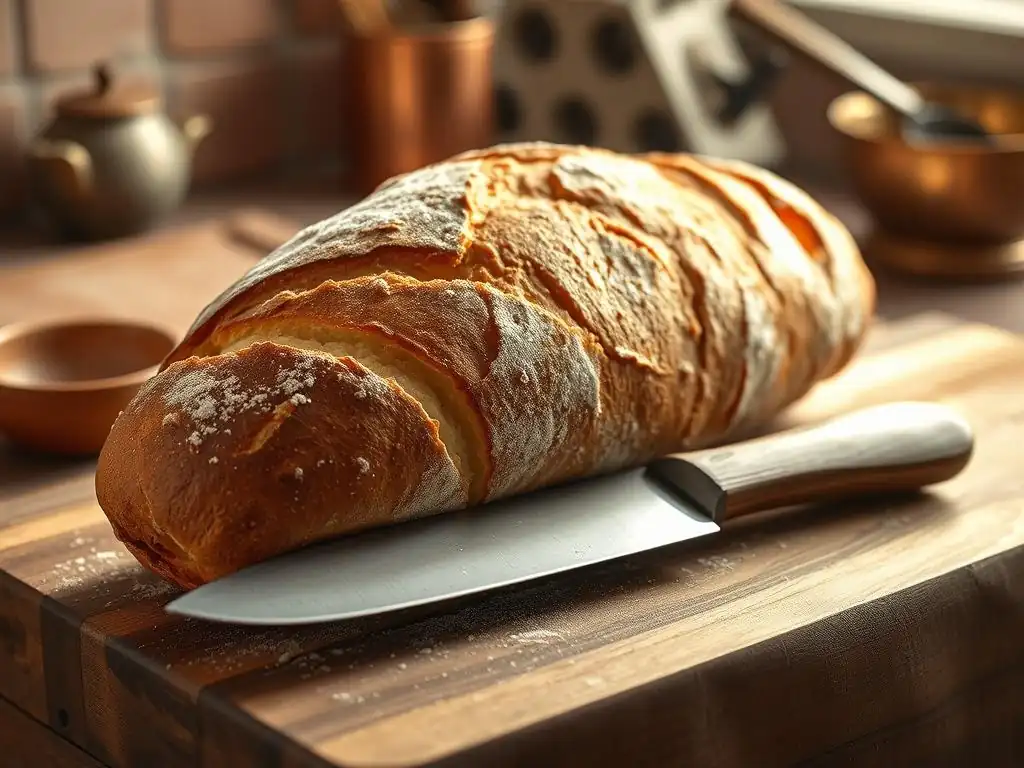
Welcome to BakeWithEase, your kitchen companion for all things baking! Ever dreamt of pulling a perfectly crusty loaf from your own oven? This week, we're demystifying the art of bread baking with our easy crusty French batard recipe. Intrigued? Discover how simple techniques and readily available ingredients can unlock bakery-quality results right at home. Let's get baking!
- Baking a Crusty Sourdough Batard at Home: A Detailed Guide
- Introduction: The Art of Sourdough Batard Baking
- Gathering Your Ingredients for a Sourdough Batard
-
Step-by-Step Guide: Baking a Crusty Sourdough Batard
- Step 1: Preparing the Levain (Sourdough Starter Build)
- Step 2: Autolysing the Flour and Water
- Step 3: Mixing the Dough: Incorporating Levain and Salt
- Step 4: Bulk Fermentation: Managing Time and Temperature
- Step 5: Shaping the Batard: Achieving Tension and Form
- Step 6: Cold Proofing: Developing Flavor
- Step 7: Baking the Batard: Mastering Oven Spring and Crust
- Step 8: Cooling and Slicing: Evaluating Your Bake
- Tips and Tricks for Perfect Sourdough Batard Baking
- Variations and Enhancements: Exploring Sourdough Batard Recipes
- Serving Suggestions: Enjoying Your Sourdough Batard
- Conclusion: The Joy of Sourdough Baking
- Frequently Asked Questions
- Final Reflection: The Humble Loaf, a Journey of Discovery
- Unleash Your Inner Baker: Craft Your Perfect Batard!
Baking a Crusty Sourdough Batard at Home: A Detailed Guide
Introduction: The Art of Sourdough Batard Baking
Embarking on the journey of baking a sourdough batard can seem daunting, but with a step-by-step approach, it becomes a rewarding and achievable goal. A batard, meaning "bastard" or "stick" in French, is an oval-shaped loaf, shorter and wider than a baguette but longer than a boule (round loaf). Its shape is ideal for slicing and offers a great ratio of crust to soft, open crumb. Mastering an easy crusty French batard recipe at home allows you to enjoy bakery-quality bread fresh from your oven, filling your kitchen with the irresistible aroma of naturally leavened bread.
Sourdough baking connects you to a timeless tradition, using only wild yeast and bacteria captured in a starter to leaven your dough. This natural leavening process imparts a complex flavor profile, ranging from mildly tangy to distinctly sour, depending on your starter and fermentation times. Beyond flavor, sourdough is often considered more digestible by some due to the fermentation process breaking down starches and gluten. Following this guide will break down the process into manageable parts, making that perfect easy crusty French batard recipe a reality for your home kitchen.
The Benefits of Baking Your Own Sourdough
Baking your own sourdough offers numerous benefits, starting with complete control over the ingredients. You can choose high-quality flours, avoid commercial yeast or additives, and tailor the salt content to your preference. This allows for a purer, often more nutritious bread. Furthermore, the slow fermentation process inherent in sourdough baking can enhance the bread's nutritional value and bioavailability of minerals, as phytic acid is broken down during the long proofing times.
Beyond the ingredients, the sourdough process itself is incredibly rewarding. It's a hands-on activity that requires patience and observation, offering a welcome break from the fast pace of modern life. There's immense satisfaction in nurturing a sourdough starter and transforming simple flour and water into a beautiful, crusty loaf.
The flavor development is another significant advantage; the unique blend of lactic and acetic acids produced by the starter creates a depth of flavor simply not possible with commercial yeast. Achieving that perfect oven spring and a deeply caramelized crust on your homemade easy crusty French batard recipe is a truly triumphant moment for any home baker.
Key Characteristics of a Great Sourdough Batard
A truly great sourdough batard boasts several distinct characteristics that set it apart. Visually, it should have a beautiful, elongated oval shape with a taut surface and well-executed scoring that allows for optimal oven spring. The crust is paramount: it should be deeply colored, ranging from golden brown to reddish-brown, and audibly crackle when pressure is applied. This crispy exterior is a hallmark of a successful bake, providing a delightful textural contrast to the interior.
Internally, the crumb structure is key. A desirable sourdough batard typically features an open, irregular crumb with varying sizes of air pockets (alveoli). This open structure is a result of careful fermentation and shaping. The crumb should be moist and tender, never gummy or dense. The flavor profile should exhibit a pleasant tanginess, balanced by the sweetness of the fermented flour. When you slice into your finished easy crusty French batard recipe, you should see that characteristic open crumb and feel the satisfying crunch of the crust.
Gathering Your Ingredients for a Sourdough Batard
Baking a sourdough batard requires just a few fundamental ingredients, but the quality and handling of each significantly impact the final result. Think of these components as the building blocks of your loaf; understanding their roles is crucial for success. Having everything measured and ready before you begin mixing ensures a smooth process and minimizes errors.
While the list is short, selecting the right types of flour, using water at the correct temperature, and understanding how salt functions in dough are vital steps. And, of course, the heart of it all is your active, bubbly sourdough starter. Taking the time to prepare your workspace and gather these essentials sets the stage for a successful bake and getting that easy crusty French batard recipe just right.
Essential Ingredients: Flour, Water, Salt, and Sourdough Starter
At its core, a sourdough batard is made from just four ingredients: flour, water, salt, and an active sourdough starter (often used in the form of a levain). The flour provides the structure (gluten) and carbohydrates for the starter to feed on. Water hydrates the flour, allowing gluten development and activating the starter's microbes. Salt controls fermentation rate, strengthens the gluten network, and significantly enhances flavor. Finally, the sourdough starter, a living culture of wild yeast and lactic acid bacteria, is the leavening agent that makes the bread rise and imparts its signature tang.
Using a kitchen scale for precise measurements of flour and water is highly recommended, as even small variations can affect dough consistency and fermentation. For instance, a recipe calling for 500g flour and 375g water has a hydration level of 75% (375/500 = 0.75). This level of hydration, common in many easy crusty French batard recipes, contributes to a more open crumb. Consistency in measuring ensures repeatable results as you refine your technique.
Understanding Flour Types: Bread Flour and Whole Wheat
For baking a sturdy, crusty sourdough batard, bread flour is often the primary choice due to its high protein content, typically ranging from 12% to 14%. This higher protein level translates to stronger gluten development, which is essential for trapping the gases produced by the sourdough starter and creating that desirable open crumb structure and good oven spring. Using a high-quality bread flour makes handling the dough easier and contributes to a better rise.
Many sourdough easy crusty French batard recipes also incorporate a percentage of whole wheat flour, usually between 10% and 30% of the total flour weight. Whole wheat flour, while containing protein, also includes the bran and germ, which can interfere slightly with gluten development but add significant flavor, nutrients, and color to the bread. A blend, such as 90% bread flour and 10% whole wheat, is a common starting point that balances strength with flavor complexity. Experimenting with different flour combinations allows you to customize the taste and texture of your batard.
Water Hydration: Achieving the Right Dough Consistency
Hydration refers to the ratio of water to flour in your dough, expressed as a percentage of the flour weight. It's a critical factor influencing dough handling, fermentation rate, and the final crumb structure. A typical hydration level for an easy crusty French batard recipe might range from 70% to 80%. Higher hydration (more water) generally leads to a more open crumb and a lighter texture, but the dough can be stickier and harder to handle. Lower hydration results in a denser crumb and easier dough to work with.
The ideal hydration also depends on the type of flour used, as different flours absorb water differently. Whole wheat flour, for example, typically absorbs more water than white bread flour. Environmental factors like humidity also play a role. It's often recommended to start with a moderately high hydration, say 75%, and adjust slightly based on how the dough feels. You want a dough that is shaggy initially but comes together and develops elasticity with mixing and folding, feeling alive and responsive.
Salt's Role in Flavor and Dough Structure
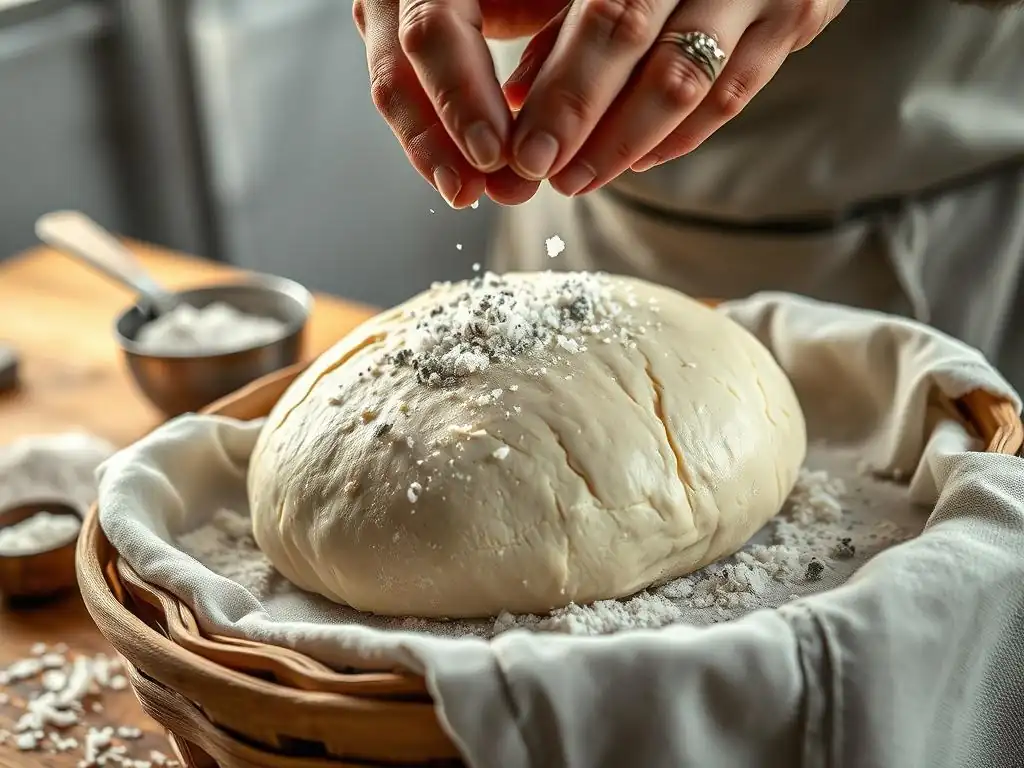
Salt is far more than just a seasoning in bread baking; it plays a crucial structural role. Typically added at about 1.8% to 2.2% of the total flour weight, salt tightens the gluten network, making the dough stronger and more manageable. Without salt, dough tends to be slack and sticky, making shaping difficult. This strengthening effect also helps the dough hold its shape during fermentation and baking, contributing to better oven spring.
In addition to its structural benefits, salt significantly impacts flavor. It enhances the natural sweetness of the fermented flour and balances the tanginess from the sourdough starter. Salt also helps control the rate of fermentation; dough with salt ferments more slowly and predictably than dough without it. Adding salt at the correct stage, usually after the autolyse, ensures it doesn't interfere with the initial water absorption by the flour.
Maintaining a Healthy Sourdough Starter
The health and activity of your sourdough starter are paramount to successful sourdough baking, including any easy crusty French batard recipe. A healthy starter, often called "levain," should be consistently fed and stored, typically at room temperature if used daily or in the refrigerator if used less frequently. Before baking, a refrigerated starter needs to be "woken up" with several feedings at room temperature until it becomes consistently active and predictable.
An active starter for baking should double or even triple in volume within 4-8 hours after feeding, depending on the temperature and feeding ratio. It should have a pleasant, tangy aroma (not overly acetic or like nail polish remover) and be full of bubbles, indicating active yeast and bacteria. A simple float test (dropping a small amount in water to see if it floats) can indicate readiness, though visual cues and smell are often more reliable indicators of a truly potent starter ready to leaven your easy crusty French batard recipe dough.
Step-by-Step Guide: Baking a Crusty Sourdough Batard
Baking a crusty sourdough batard is a process that unfolds over hours, even days, but each step is designed to build flavor, structure, and ultimately, that beautiful loaf. This guide breaks down the journey from mixing the initial ingredients to pulling a perfectly baked batard from your oven. Patience and attention to detail at each stage are key to achieving a successful bake.
Follow these steps carefully, paying attention to the feel of the dough and the signs of fermentation. While timings are provided, they are often guidelines; learning to read your dough is part of mastering the craft. This detailed process is the path to creating a fantastic easy crusty French batard recipe result.
Step 1: Preparing the Levain (Sourdough Starter Build)
The first crucial step is preparing your leavening agent, often referred to as the levain or preferment. This involves taking a small amount of your mature sourdough starter and feeding it with fresh flour and water, typically in a ratio that will make it very active within a few hours. A common ratio is 1:2:2 (1 part starter, 2 parts water, 2 parts flour), for example, 20g starter, 40g water, 40g flour.
Mix these ingredients in a clean jar and let it sit at room temperature (ideally around 75-80°F or 24-27°C) until it has roughly doubled or tripled in volume and is full of bubbles. This usually takes 4-8 hours, depending on the temperature and starter vitality. Using the levain at its peak activity ensures your dough has the best possible chance for a good rise and contributes to a flavorful, easy crusty French batard recipe outcome.
Step 2: Autolysing the Flour and Water
Autolyse is a simple, yet powerful technique that involves mixing just the flour and water for your main dough and letting it rest before adding the starter and salt. This allows the flour to fully hydrate and the gluten to begin developing naturally without the interference of salt or the starter's acidity. For a typical recipe using 500g flour and 375g water, you would mix these until no dry flour remains.
Let the mixture rest for 30 minutes up to several hours. During this time, enzymatic activity begins to break down proteins and starches, making the dough more extensible and easier to handle later. This rest period also reduces the amount of manual kneading or folding required to develop gluten, contributing to a smoother dough and potentially a more open crumb in your easy crusty French batard recipe.
Step 3: Mixing the Dough: Incorporating Levain and Salt
After the autolyse period, it's time to incorporate the active levain and salt into your dough. Add the measured levain (e.g., 90g from Step 1) and the salt (e.g., 10g) to the autolysed dough. Gently mix by hand, squeezing and folding the dough until the levain and salt are fully integrated. The dough will feel shaggy at first.
Once mixed, transfer the dough to a clean bowl or work surface for initial kneading or stretch-and-folds. Kneading for 5-10 minutes, or performing a few rounds of stretch-and-folds (pulling a section of dough up and folding it over itself), will help develop the gluten network. You'll notice the dough becoming smoother and more elastic as you work it. This stage is crucial for building the structure needed for a well-risen, easy crusty French batard recipe.
Step 4: Bulk Fermentation: Managing Time and Temperature
Bulk fermentation, or the first rise, is the period from when the levain is mixed in until the dough is shaped. This is where the majority of flavor and gas production occurs. Place the dough in a lightly oiled container, cover it, and let it ferment at room temperature. The ideal temperature is often around 75-80°F (24-27°C), which can take 4-6 hours. At cooler temperatures (e.g., 70°F or 21°C), it might take 6-8 hours or even longer.
During bulk fermentation, perform a series of stretch-and-folds every 30-60 minutes for the first 2-3 hours. This strengthens the gluten and equalizes the dough temperature. By the end of bulk fermentation, the dough should have increased significantly in volume (perhaps 50-80%), feel airy and bubbly, and show signs of fermentation like small bubbles on the surface. It should also pass the "windowpane test," where a small piece can be stretched thinly without tearing. Proper bulk fermentation is key to the texture of your easy crusty French batard recipe.
Step 5: Shaping the Batard: Achieving Tension and Form
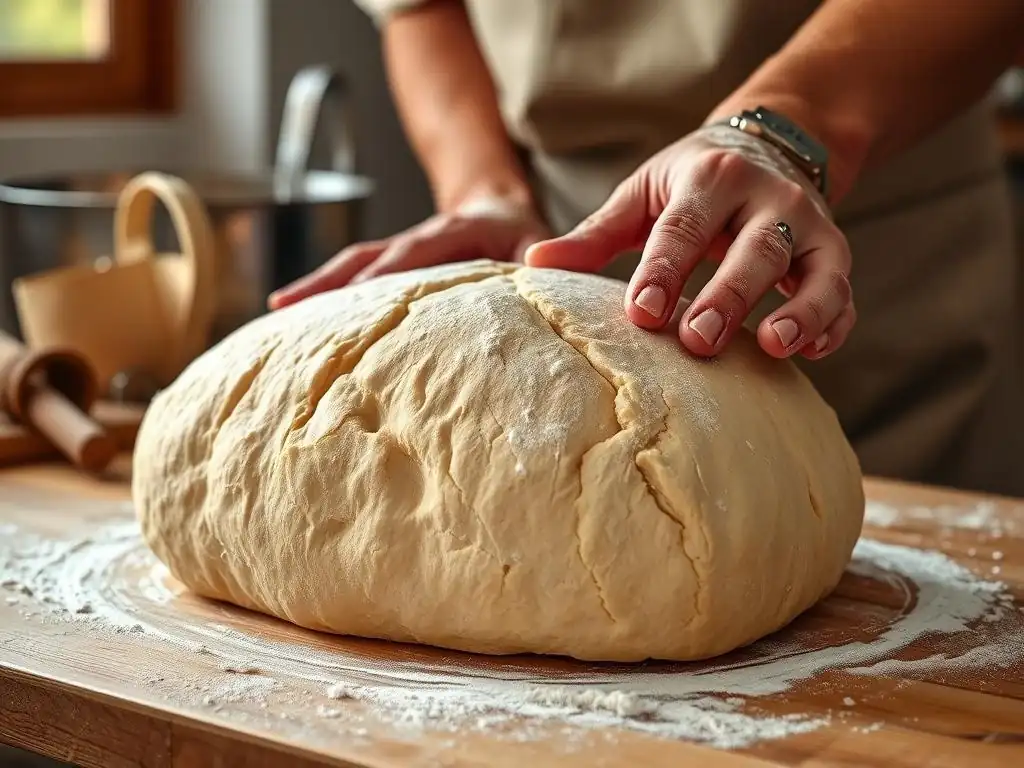
After bulk fermentation, gently turn the dough out onto a lightly floured surface. Avoid degassing it too much. For one batard, pre-shape the dough into a rough ball or oval and let it rest for 15-20 minutes. This allows the gluten to relax, making the final shaping easier.
For the final shaping of a batard, gently flatten the dough into a rectangle. Fold the top edge down about two-thirds of the way, then fold the bottom edge up and over that fold. Seal the seam with your fingertips. Then, starting from the top, roll the dough down towards you, creating tension on the surface as you go.
Seal the final seam tightly. Use your hands to gently cup the sides and roll the loaf back and forth slightly to elongate it into an oval shape about 10-12 inches long, ensuring good surface tension. This tension is vital for achieving a good shape and oven spring in your easy crusty French batard recipe.
Step 6: Cold Proofing: Developing Flavor
Cold proofing, also known as retardation, involves placing the shaped dough in the refrigerator for an extended period, typically 12-18 hours, but sometimes up to 24 hours or more. This slow, cold fermentation significantly develops the complex flavors characteristic of sourdough. The cold temperature slows down the yeast activity but allows the lactic acid bacteria to continue producing flavorful acids.
Place the shaped batard into a floured banneton (proofing basket) or a bowl lined with a floured cloth, seam-side up. Cover the banneton with a plastic bag or damp towel and place it in the refrigerator (around 38-40°F or 3-4°C). The dough will continue to rise slowly in the cold. This step is crucial for both flavor development and making the dough easier to handle and score before baking, contributing greatly to an easy crusty French batard recipe with depth of flavor.
Step 7: Baking the Batard: Mastering Oven Spring and Crust
Baking your cold-proofed batard requires a hot oven and steam to achieve that signature crust and oven spring. Preheat your oven with a Dutch oven inside to a high temperature, typically 450-500°F (230-260°C), for at least 30-60 minutes. The Dutch oven traps the steam released by the bread as it bakes initially.
Carefully remove the hot Dutch oven from the oven. Invert the cold dough from the banneton onto a piece of parchment paper. Score the top surface of the loaf with a sharp razor blade (lame). Quickly transfer the loaf (using the parchment paper as a sling) into the hot Dutch oven, place the lid on, and return it to the oven.
Bake with the lid on for 20-25 minutes. Then, remove the lid and continue baking for another 20-25 minutes, or until the crust is deep golden brown and the internal temperature reaches 205-210°F (96-99°C). This two-stage baking ensures maximum oven spring and a beautiful, easy crusty French batard recipe crust.
Step 8: Cooling and Slicing: Evaluating Your Bake
Once baked, immediately transfer the batard to a wire cooling rack. It's crucial to let the loaf cool completely, ideally for at least 1-2 hours, before slicing. As the bread cools, residual heat continues to cook the interior, and moisture redistributes throughout the crumb. Slicing too early can result in a gummy texture.
Listen to the crust as it cools – you should hear it crackle! Once cool, admire your beautiful easy crusty French batard recipe! Slice into it with a serrated knife and examine the crumb structure. Is it open and airy? How is the color of the crust? Taste the bread – does it have a pleasant tang? Evaluating these aspects helps you understand the results of your process and informs future bakes, allowing you to continually improve your sourdough skills.
Tips and Tricks for Perfect Sourdough Batard Baking
Achieving a consistently perfect sourdough batard involves more than just following the steps; it's about understanding the nuances and employing clever techniques. From creating that enviable crispy crust to troubleshooting common issues, these tips will help elevate your baking game. Incorporating these practices will make your journey to mastering an easy crusty French batard recipe even smoother and more successful.
Paying attention to details like oven environment, scoring depth, and dough behavior can make a significant difference in the final outcome. Don't be afraid to experiment slightly once you understand the basics.
Creating a Crispy Crust: Steam Injection Techniques
A hallmark of a great easy crusty French batard recipe is a deeply caramelized, crispy crust. This is achieved by baking the bread in a moist environment during the initial phase of baking. Steam prevents the crust from forming too quickly, allowing the loaf to expand fully (oven spring) before the crust sets. The most common and effective method for home bakers is using a Dutch oven, as described in the baking steps. The sealed pot traps the moisture released by the dough.
Alternatively, if you don't have a Dutch oven, you can create steam in your regular oven. One method is to place a baking stone or steel in the oven and preheat it thoroughly. Just before loading the bread, place a pan of hot water or ice cubes on the bottom rack of the oven to generate steam.
Some bakers also spray the oven walls with water. Baking on a hot surface (stone or steel) and introducing steam for the first 15-20 minutes of the bake are essential for developing that desirable crispy crust on your easy crusty French batard recipe.
Scoring Techniques: Achieving Oven Spring and Visual Appeal
Scoring, or slashing, the dough just before baking serves two main purposes: it controls where the bread expands during oven spring, preventing blowouts, and it adds a beautiful, artistic element to the loaf. For a batard, a common scoring pattern is a single, long slash along the length of the loaf, slightly off-center. This allows the loaf to open up dramatically along the cut.
Use a very sharp blade, such as a dedicated bread lame or a sharp razor blade, held at a shallow angle (about 30 degrees) to the dough surface. Make a confident, swift cut about 1/2 to 1 inch deep. The angle helps create a "ear" or lip as the bread expands. Other patterns for a batard can include multiple diagonal slashes. Experiment with different angles and depths to see how they affect the expansion of your easy crusty French batard recipe.
Troubleshooting Common Sourdough Issues [e.g., Dense crumb, sour flavor]
Encountering challenges is part of the sourdough journey. A common issue is a dense or gummy crumb. This is often caused by under-proofing (not allowing the dough enough time to ferment and develop gas during bulk fermentation or cold proofing), a weak or inactive starter, or insufficient gluten development. Ensure your starter is active, allow adequate fermentation time based on temperature, and perform sufficient stretch-and-folds or kneading.
Another common concern is an overly sour flavor. While some tang is desired in an easy crusty French batard recipe, excessive sourness can occur if the fermentation time is too long, especially at warmer temperatures, which favor acetic acid production. To reduce sourness, try using your starter when it's younger and less acidic, or shorten the bulk fermentation time and rely more on a longer cold proof for flavor development, as cold temperatures favor milder lactic acid production. Over-handling the dough can also sometimes contribute to a less desirable texture.
Storing Your Sourdough Batard for Longevity
Once your easy crusty French batard recipe is baked and cooled, proper storage is key to maintaining its quality. For enjoying within a day or two, simply storing the cut side down on a cutting board or in a paper bag is often sufficient to keep the crust crispy. Avoid airtight plastic bags at room temperature, as they will soften the crust quickly.
For longer storage, or to preserve freshness, you can wrap the cooled loaf tightly in plastic wrap and then aluminum foil, or place it in a bread box. For storing for several days or freezing, it's best to slice the cooled loaf first. Store slices in an airtight container or freezer bag. Frozen sourdough can be reheated directly in a toaster or oven, bringing back some of that wonderful crust and fresh texture, making it easy to enjoy your easy crusty French batard recipe whenever you like.
Variations and Enhancements: Exploring Sourdough Batard Recipes
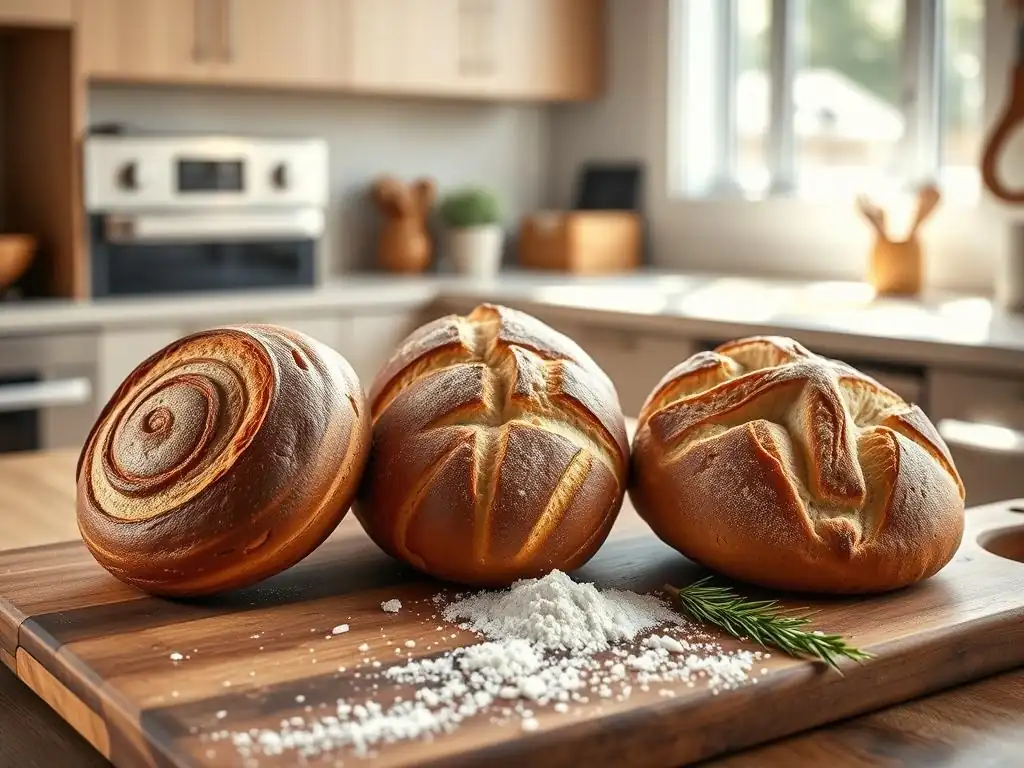
Once you've mastered the basic easy crusty French batard recipe, you can explore exciting variations to customize your bread. Adding ingredients like seeds, grains, herbs, or spices can dramatically change the flavor, texture, and nutritional profile of your loaf. These simple additions offer endless possibilities for creativity in your sourdough baking.
Experimenting with different hydration levels or flour combinations also allows you to fine-tune the crumb and crust to your preference. Don't be afraid to step outside the basic recipe and make it your own.
Adding Seeds and Grains to Your Sourdough
Incorporating seeds and grains adds texture, flavor, and nutritional value to your easy crusty French batard recipe. Common additions include sesame seeds, poppy seeds, flax seeds, sunflower seeds, or even cooked grains like oats or rye berries. Seeds can be mixed directly into the dough during the initial mixing phase or added during the first set of stretch-and-folds.
For grains or larger seeds, it's often beneficial to pre-soak them in hot water for a few hours or overnight before adding them to the dough. This ensures they soften and don't absorb too much moisture from your dough, which could otherwise result in a drier loaf. A typical addition might be 10-20% of the total flour weight in seeds or grains. For example, in a 500g flour recipe, you might add 50-100g of a seed mix. This creates a delightful crunch and nutty flavor.
Incorporating Herbs and Spices for Unique Flavors
Adding dried herbs or spices can infuse your sourdough batard with aromatic and savory notes. Popular choices include rosemary, thyme, dill, black pepper, or garlic powder. These can be mixed into the dough during the initial mixing step along with the salt. Start with a small amount, perhaps 1-2 teaspoons per 500g of flour, and adjust in future bakes based on your preference.
Consider combinations like rosemary and black pepper, or dill and garlic. Fresh herbs can also be used, though they often require slightly more quantity for the flavor to come through after baking. Adding herbs and spices is a simple way to transform your easy crusty French batard recipe into something uniquely yours, perfect for pairing with specific meals or enjoying on its own.
Experimenting with Different Hydration Levels
As discussed earlier, hydration significantly impacts your dough. Once you're comfortable with a standard hydration (like 75%), try experimenting with slightly higher or lower percentages to see how the dough handles and how the final bread turns out. Increasing hydration to 80% or even 85% can yield a more open, airy crumb and a thinner, crisper crust, but the dough will be much stickier and require more gentle handling and potentially more sets of stretch-and-folds.
Conversely, reducing hydration to 70% will result in a dough that is easier to shape and handle, producing a loaf with a denser crumb. Keep notes on your experiments, recording the hydration percentage and your observations on dough feel, handling, and the final bread characteristics. This practice helps you understand the relationship between hydration and outcome and allows you to tailor your easy crusty French batard recipe to your desired texture.
Serving Suggestions: Enjoying Your Sourdough Batard
You've put in the time and effort to bake a beautiful, easy crusty French batard recipe. Now comes the best part: enjoying it! Sourdough is incredibly versatile and pairs well with a wide variety of foods. Its tangy flavor and satisfying texture make it a perfect companion for simple meals or elaborate dishes.
Don't let any leftovers go to waste! Even stale sourdough can be transformed into delicious components for other recipes.
Pairing Your Batard with Various Dishes
A fresh slice of your homemade sourdough batard is a delight on its own, perhaps simply with a smear of butter or olive oil. Its robust flavor stands up well to strong pairings. Consider serving it alongside soups or stews, where it's perfect for soaking up every last drop. It makes an excellent base for open-faced sandwiches or bruschetta, topped with fresh tomatoes, garlic, and basil.
Sourdough also pairs wonderfully with cheese and charcuterie boards. The tanginess cuts through the richness of cured meats and complements various cheeses. Use it for dipping in balsamic vinegar and olive oil, or toast slices for croutons to add crunch to salads. The versatility of an easy crusty French batard recipe makes it a staple for many meals.
Creative Uses for Stale Sourdough
Don't despair if your beautiful batard starts to go stale; it's far from useless! Stale sourdough is ideal for making croutons. Cube the bread, toss with olive oil, herbs, and seasonings, and bake until golden and crispy. These are perfect for salads or topping soups.
Another classic use for stale bread is Panzanella, an Italian salad where stale bread is soaked and then combined with fresh tomatoes, onions, basil, and vinaigrette. Stale sourdough also makes excellent breadcrumbs; simply process dried pieces in a food processor. These can be used for coating cutlets, topping casseroles, or thickening sauces. French toast is another delicious option, as the sturdy texture of sourdough holds up well to the custard soak.
Conclusion: The Joy of Sourdough Baking
Baking an easy crusty French batard recipe at home is a journey that teaches patience, technique, and the subtle art of working with natural leaveners. From nurturing your starter to achieving that perfect oven spring and crispy crust, each step offers its own satisfaction. The result is not just a loaf of bread, but a product of your effort and connection to a time-honored craft. The aroma filling your home and the taste of truly fresh, homemade sourdough are unparalleled rewards.
Embrace the process, learn from each bake, and celebrate your successes. Every loaf is a learning opportunity, and the skills you develop will allow you to bake a wide variety of delicious sourdough breads. Enjoy the journey and the delicious destination of your easy crusty French batard recipe!
Embracing the Process and Celebrating the Results
The path to baking a perfect sourdough batard is often filled with learning moments. Some loaves might be flatter than expected, the crust might not be as crispy as desired, or the crumb could be denser. These are all part of the process. Embrace the natural variations that come with working with a living culture like sourdough. Each bake provides valuable feedback on your technique, starter health, and understanding of fermentation.
Celebrate every successful bake, no matter how small! The fact that you've transformed flour and water using only wild yeast into a risen, baked loaf is remarkable. Share your easy crusty French batard recipe creations with friends and family; the joy of baking is often amplified when shared. Keep a baking journal to track variables like temperature, timing, and hydration, helping you refine your process over time.
Further Resources for Sourdough Baking
To continue your sourdough journey and deepen your understanding, numerous resources are available. Many excellent books delve into the science and art of sourdough baking, offering detailed explanations and a wide array of recipes beyond the basic easy crusty French batard recipe. Online communities and forums are fantastic places to ask questions, share your results, and learn from experienced bakers worldwide.
Websites dedicated to baking often provide tutorials, videos, and troubleshooting guides that can be incredibly helpful. Consider following experienced sourdough bakers on social media for inspiration and tips. As you gain confidence, you might explore different types of flour, higher hydration levels, or advanced shaping techniques. The world of sourdough is vast and rewarding, with endless possibilities to explore once you have the foundation of a great easy crusty French batard recipe.
Frequently Asked Questions
What makes this French Batard recipe "easy"?
This recipe emphasizes simple ingredients and clear, step-by-step instructions making it approachable for bakers of all skill levels. It focuses on techniques that minimize complexity while still delivering a delicious result.
What are the key ingredients needed for this crusty French Batard?
You'll primarily need flour, water, salt, and yeast. The recipe focuses on basic pantry staples to ensure accessibility and ease of preparation.
How do I achieve that signature crusty exterior?
The crust is achieved through the proper hydration levels in the dough, a high baking temperature, and the use of steam during the initial baking phase.
Can I use a stand mixer for this recipe?
Yes, a stand mixer can be used, but the recipe is designed to be easily made by hand. Manual mixing allows for better control and understanding of the dough's development.
What if I don't have a Dutch oven?
While a Dutch oven helps create steam and contributes to a crusty exterior, you can simulate the effect by placing a baking sheet with water in the oven during the initial baking period.
Final Reflection: The Humble Loaf, a Journey of Discovery
The pursuit of the perfect crusty French batard is more than just a recipe; it's a journey of connection—a connection to tradition, to the simple pleasures of baking, and to the profound satisfaction of creating something beautiful from humble ingredients. This seemingly simple act of baking, as detailed in this guide, unlocks a world of sensory experiences, from the satisfying crackle of the crust to the airy chew of the crumb. In a world increasingly dominated by convenience, taking the time to craft something from scratch offers a powerful antidote.
The enduring appeal of bread, particularly a rustic loaf like the batard, lies in its ability to transcend mere sustenance. It becomes a symbol of comfort, community, and shared experience. The aroma alone can evoke powerful memories and emotions, transporting us to simpler times or connecting us to loved ones gathered around a table. Bread is the staff of life,
a simple phrase, yet it encapsulates the profound significance of this staple food. This recipe, while designed for ease of execution, allows us to participate in this rich history and tradition, even in our modern kitchens.
Now, I invite you to roll up your sleeves, gather your ingredients, and embark on your own baking adventure. Don't be intimidated by the seemingly complex process; each step, as outlined in this guide, is designed to empower you. The reward? Not just a delicious loaf of bread, but a deeper appreciation for the art of baking and the simple joys found in creating something with your own hands. Let the aroma fill your kitchen, and savor the moment – you've earned it.
Unleash Your Inner Baker: Craft Your Perfect Batard!
Thanks for joining us on this delicious journey into the world of crusty French bread! We hope you gained valuable insights and are ready to tackle your own perfect Batard. Now it's time to put your newfound knowledge into action!
- Bake your Batard today! Grab those ingredients and follow the recipe again – this time, you'll be amazed at how much easier it feels. Experiment with different flours or shaping techniques.
- Share your baking triumph! Post a picture of your masterpiece on social media and tag us @BakeWithEase – we love seeing your creations!
- Explore our other bread recipes: Dive deeper into the art of bread making by exploring our collection of easy-to-follow recipes on our website.
Ready to create your own show-stopping crusty loaf? What unique ingredient will you experiment with in your next bake?