
The Subtle Art of Degassing: When and How Much for Different Crusts


Welcome to BakeWithEase, where the joy of baking meets the simplicity of expertly crafted recipes! Ever wondered if you're degassing your dough enough? This week, we're diving deep into the subtle art of degassing – exploring exactly how much degassing is needed for different crusts to achieve that perfect texture and rise. Prepare to unlock the secrets behind a flawless bake and elevate your bread-making game!
- The Subtle Art of Degassing: When and How Much for Different Pizza Crusts
- Understanding Degassing in Pizza Dough: A Comprehensive Guide
- When to Degas Your Pizza Dough: Identifying Optimal Timing
- How Much Degassing is Necessary? Tailoring to Crust Type
- Degassing Techniques: Step-by-Step Instructions
- The Impact of Flour Type on Degassing Needs
- Troubleshooting Degassing Issues: Solutions for Common Problems
- Advanced Degassing Techniques for Pizza Excellence
- Degassing and the Final Pizza Crust: Achieving Optimal Results
-
Frequently Asked Questions
- How important is degassing dough for achieving a good crust?
- How does degassing affect the final texture of the bread's crust?
- What are some signs that I might be over-degassing my dough?
- Does the type of flour used affect the amount of degassing needed?
- Can degassing techniques vary depending on the type of crust I want to achieve (e.g., thin-crust pizza vs. rustic bread)?
- Final Reflection: Mastering the Art of Degassing: A Baker's Journey
- Unleash Your Inner Baker: Perfect Crusts Every Time!
The Subtle Art of Degassing: When and How Much for Different Pizza Crusts
Understanding Degassing in Pizza Dough: A Comprehensive Guide
What is Degassing and Why is it Important for Pizza Dough Quality?
Degassing is the process of gently or firmly removing some or all of the carbon dioxide gas that has built up in your dough during fermentation. This gas is a byproduct of yeast activity, and it's what causes the dough to rise. When dough ferments, it creates a network of gluten strands that trap these gas bubbles. Degassing essentially involves collapsing or reducing these bubbles. It's a crucial step in managing the dough's structure and texture before shaping and baking.
The importance of degassing lies in its direct impact on the final crust. Without proper degassing, especially when considering how much degassing for crust varieties is needed, you might end up with a dough that's difficult to handle, unevenly risen, or results in a crust with an undesirable texture – perhaps too airy and weak, or too dense and heavy in certain spots.
It allows you to redistribute the gas, equalize the dough's temperature (if proofing at different temperatures), and prepare the gluten structure for the final shaping and oven spring. It's not about removing all the gas, but controlling it to achieve the desired outcome.
Degassing's Role in Crust Texture: Achieving Desired Airiness and Density
The level of degassing directly dictates the size and distribution of air pockets within the baked crust. A dough that is minimally degassed will retain larger, more irregular gas bubbles, leading to a very open, airy, and potentially uneven crumb structure. This is often desirable for crusts aiming for large, rustic air pockets, like certain artisanal breads or specific pizza styles. Understanding how much degassing for crust types aiming for this texture is minimal is key.
Conversely, dough that is significantly degassed will have smaller, more uniformly distributed air pockets. This results in a denser, more even crumb structure. While you don't want a completely flat, dense crust, a certain level of controlled density provides strength and a satisfying chew. For crusts like deep dish or certain pan pizzas, where structural integrity is paramount, knowing how much degassing for crust stability is needed leans towards a more thorough approach. Mastering the balance between preserving some gas for rise and removing excess gas for structure is the heart of effective degassing.
Mastering Degassing for Different Pizza Styles: A Practical Guide
Different pizza styles demand vastly different crust textures, and consequently, require specific approaches to degassing. For a delicate Neapolitan crust, the goal is a light, airy structure with large, irregular holes in the cornicione (edge). This requires very gentle handling and minimal degassing to preserve those large bubbles formed during fermentation. It's about understanding how much degassing for crusts that are light and bubbly is truly necessary – often, just enough to allow for shaping without completely collapsing the structure.
In contrast, a sturdy Detroit-style or Sicilian-style crust benefits from more significant degassing. These thicker crusts need a strong, even structure to support toppings and achieve a uniform rise in the pan. Too much gas left haphazardly could lead to large, weak spots or an uneven bake. Therefore, knowing how much degassing for crusts requiring structural integrity is appropriate involves a more deliberate process, often involving pressing out air more thoroughly to create a tighter, more consistent crumb. The specific style dictates how much pressure and manipulation is applied during this critical stage.
When to Degas Your Pizza Dough: Identifying Optimal Timing
Visual Cues: Recognizing Over-Proofed vs. Properly Proofed Dough for Degassing
Knowing when to degas is just as important as knowing how much degassing for crust success. Visual cues are your first line of defense. Properly proofed dough, ready for shaping and potential degassing, will have roughly doubled in size, appear smooth and slightly domed, and show visible signs of fermentation (small bubbles on the surface). It should feel alive and springy. This is the ideal state before you decide how much degassing for crust texture you'll apply.
Over-proofed dough, on the other hand, will often look excessively large, potentially starting to spread out rather than hold its dome shape. The surface might appear dull, possibly with very large, fragile bubbles or even signs of collapse around the edges. The smell can become strongly alcoholic or overly sour. Degassing over-proofed dough requires a more delicate touch, as its structure is weakened. Recognizing these signs helps you adjust your degassing technique and determine if minimal or gentle handling is required to salvage the dough.
The Poke Test: Assessing Dough Readiness for Degassing
The poke test is a classic method for assessing dough's readiness, and it's particularly useful before deciding how much degassing for crust shaping is needed. To perform the test, lightly flour your finger and gently press it about half an inch into the dough. Properly proofed dough will indent but slowly spring back most of the way. This indicates that the gluten structure is developed and elastic, and there's still enough gas present to provide resistance. This is the perfect stage to proceed with degassing and shaping.
If the dough springs back immediately and completely, it likely needs more proofing time. It hasn't relaxed enough, and the gluten is still too tight. If the indentation remains completely or mostly unchanged, the dough is likely over-proofed. Its structure is weak, and degassing might cause it to collapse entirely. The poke test provides valuable tactile feedback, helping you confirm the visual cues and make an informed decision about the timing and intensity of your degassing process.
Timing and Proofing: Impact on Degassing Requirements
The total proofing time and temperature significantly influence the amount of gas produced and, consequently, how much degassing for crust development is necessary. Dough proofed quickly at warmer temperatures will produce gas rapidly. It might require earlier or more deliberate degassing to control the bubble structure before it becomes too fragile or uneven. The yeast is very active, filling the dough with gas quickly.
Dough that undergoes a long, slow fermentation, especially cold fermentation in the refrigerator, develops flavor but produces gas more gradually. While it will still expand, the gluten structure often becomes stronger and more extensible. Such doughs may require less aggressive degassing, or perhaps specific techniques like pre-shaping, to manage the gas without completely deflating the dough and sacrificing the airy structure developed over time. Understanding the proofing schedule helps predict the dough's state and determine the appropriate level of degassing.
How Much Degassing is Necessary? Tailoring to Crust Type

Thin Crust Pizza: Minimal Degassing for Crispness
For thin crust pizzas, the goal is often a cracker-like crispness with minimal rise in the center and potentially some small bubbles around the edge. Achieving this texture requires understanding how much degassing for crusts that are thin and crisp is appropriate – typically, it's very little. The focus is on stretching the dough thinly without trapping too much gas.
During shaping, gentle handling is key. Instead of punching down, you might simply lift the dough, allow it to stretch under its own weight, and gently coax it into shape. Any excess air is usually pushed towards the edges or gently pressed out during the stretching process itself, rather than a dedicated degassing step. The minimal gas remaining helps create a slight lift but prevents the dough from becoming overly puffy, which would compromise the desired crispness.
Classic Neapolitan: Gentle Degassing for an Airy Interior
The hallmark of a classic Neapolitan pizza is the light, airy, and often leopard-spotted cornicione. This texture is achieved through a combination of high hydration, high heat, and careful dough handling, including gentle degassing. The question of how much degassing for crusts aiming for this airy quality is crucial – the answer is just enough to make the dough workable, but not so much that you destroy the large, irregular air pockets within the dough.
Typically, this involves transferring the dough ball from its proofing container and gently pressing it from the center outwards, pushing the gas towards the rim. The rim itself is often left untouched or only very lightly pressed to preserve the large bubbles that will expand dramatically in the hot oven. It's a technique focused on redistribution of gas rather than forceful removal, ensuring the final crust is light, tender, and full of those characteristic large holes.
Deep Dish & Detroit Style: Moderate Degassing for Structure and Strength
Thicker crusts like deep dish or Detroit style require a different approach to degassing. These crusts need to be sturdy enough to hold a significant amount of sauce and toppings, and they bake for a longer time in a pan. A uniform crumb structure is often desired for consistency and strength. This means understanding how much degassing for crusts that are thick and require structure is necessary leans towards moderate to significant.
Before pressing the dough into the pan, you will typically press down on the dough ball more firmly than you would for a Neapolitan style. This helps to distribute the yeast and gluten evenly and remove larger, unstable air pockets. As the dough proofs in the pan, it will re-inflate, but the initial degassing helps set the stage for a more consistent rise and a denser, yet still tender, crumb structure that can support the toppings without collapsing. The level of pressure applied depends on the desired final density.
Sourdough Pizza: Degassing Considerations with Acidity
Sourdough pizza dough presents unique degassing considerations due to the presence of wild yeast and lactic acid bacteria, which ferment differently than commercial yeast. Sourdough fermentation can be more vigorous and produce larger, more irregular bubbles. The acidity can also affect the gluten structure over long fermentation periods, sometimes making it slightly more delicate. When considering how much degassing for crusts made with sourdough, you need to balance managing potentially large bubbles with preserving the unique, open crumb sourdough is known for.
Often, sourdough benefits from gentle handling, similar to Neapolitan, to retain its characteristic airy structure. However, the timing might be slightly different. If the sourdough is very active and producing gas rapidly, a gentle pre-shape and rest might be needed to manage the expansion before the final shape. For thicker sourdough crusts, a more deliberate degassing might be appropriate, but always with an awareness of the dough's potentially more extensible (or sometimes more fragile) nature due to the longer, acidic fermentation.
Degassing Techniques: Step-by-Step Instructions
Gentle Folding: Preserving Air Pockets for a Lighter Crust
Gentle folding is a technique used to degas dough minimally while strengthening the gluten structure and equalizing dough temperature. It's particularly useful for doughs where you want to preserve a lot of air, like those destined for airy ciabatta or light pizza crusts.
- Lightly flour your work surface or keep the dough in its container.
- Using wet or floured hands, gently lift one edge of the dough.
- Stretch it up slightly and fold it over towards the opposite side.
- Rotate the container or dough 90 degrees and repeat the fold.
- Perform 2-4 folds in total, just enough to gently deflate the dough slightly and build tension. Avoid pressing down hard or punching. This method helps you control how much degassing for crust structure you perform, keeping it minimal.
Punching Down: A More Aggressive Approach for Dense Crusts
Punching down is a more traditional and aggressive method of degassing, often used for doughs that require a tighter, more uniform crumb structure or after the first bulk fermentation to prepare for shaping into loaves or rolls (or certain pizza styles).
- Turn the dough out onto a lightly floured surface.
- Form a fist with your hand.
- Firmly push your fist into the center of the dough, pressing out the air.
- Fold the edges of the dough into the center.
- Turn the dough over and briefly knead or shape it to redistribute the gas and create a smooth surface. This technique is useful when you need to significantly reduce the amount of gas in the dough, directly impacting how much degassing for crust density you achieve.
Using a Dough Scraper: Precise Degassing for Consistent Results
A dough scraper can be a useful tool for controlled degassing, especially when working with wet or sticky doughs or when you want to portion and degas simultaneously.
- Turn the dough out onto a lightly floured or wet surface.
- Use the edge of the dough scraper to gently lift and fold sections of the dough over onto themselves.
- Alternatively, you can use the flat side of the scraper to gently press down on the dough, helping to push out air bubbles without tearing the gluten structure.
- For portioning, use the scraper to cut the dough, and the act of cutting and handling each portion naturally provides a level of degassing. Using a scraper allows for more precise manipulation and control over how much degassing for crust consistency is applied to each individual dough ball.
The Impact of Flour Type on Degassing Needs
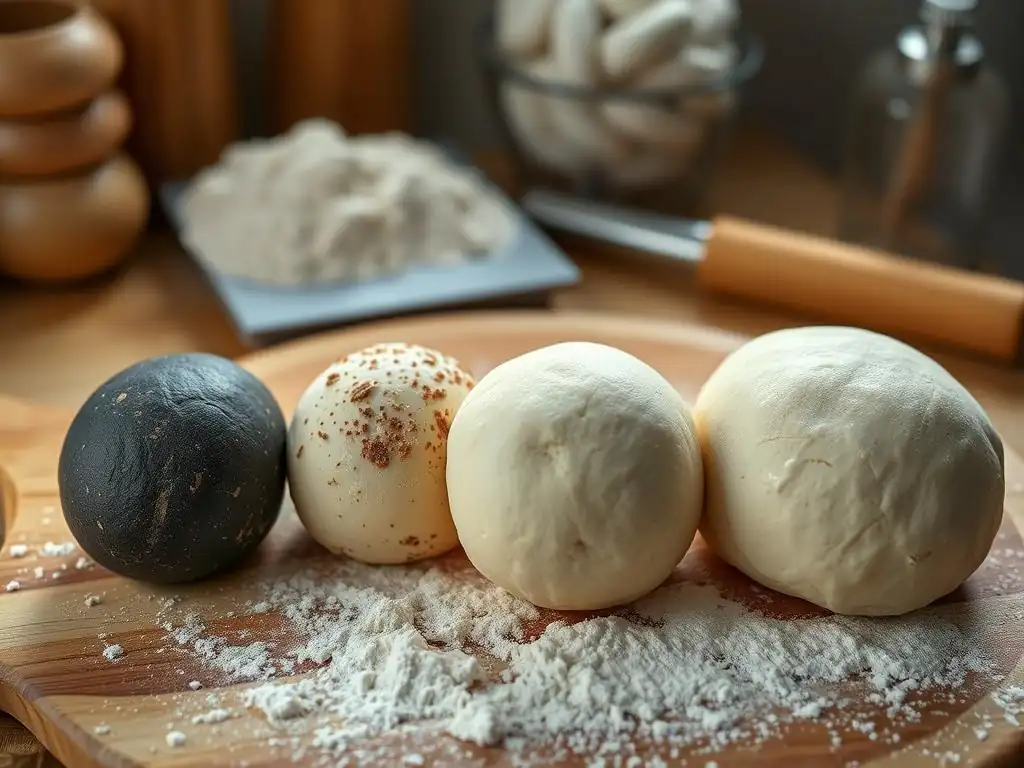
High-Protein Flour: Managing Gluten and Degassing
High-protein flours, such as strong bread flour (often 12-14% protein), develop a very strong and elastic gluten network. This strong network is excellent at trapping gas, leading to significant dough rise. However, it can also create a dough that is quite resistant to shaping and prone to developing a very tight structure if not handled correctly.
When working with high-protein flour, you might find that the dough requires slightly more deliberate degassing, especially after bulk fermentation, to relax the gluten and make it pliable for shaping. The strong network can withstand more manipulation than lower-protein flours. The key is to apply enough pressure to manage the trapped gas and relax the gluten without overworking the dough. Understanding how much degassing for crusts made with strong flour is needed involves assessing the dough's resistance and elasticity.
All-Purpose Flour: Adjusting Degassing for Protein Levels
All-purpose flour typically has a moderate protein content (around 10-12%). It develops a more moderate gluten network compared to high-protein flour, making it versatile but also requiring adjustments in handling, including degassing. Dough made with all-purpose flour might be slightly less elastic and more prone to tearing if handled too roughly after significant proofing.
When degassing dough made with all-purpose flour, a gentler approach is often preferred, especially if aiming for an airy crust. Punching down might be too aggressive and could damage the more delicate gluten structure compared to dough made with stronger flour. Folding or gentle pressing is usually sufficient to manage the gas. Adjusting how much degassing for crusts made with AP flour means being mindful of its slightly lower gluten strength and opting for less forceful methods.
Semola Flour: Degassing Considerations for Semola Doughs
Dough made with semola flour (durum wheat semolina) has unique characteristics. Semola absorbs more water and creates a dough with a slightly different texture – often described as having a pleasant chewiness and a slightly coarser feel. While it contains gluten, its structure can behave differently than doughs made solely with bread or all-purpose flour.
Degassing semola dough requires attention to its specific texture. It might feel less elastic than bread flour dough but can still trap a significant amount of gas. Gentle handling is often recommended to preserve the dough's texture and avoid making it tough. Folding or light pressing is usually adequate. When considering how much degassing for crusts incorporating semola is appropriate, focus on redistributing the gas and preparing the dough for shaping without overworking the unique semola gluten structure.
Troubleshooting Degassing Issues: Solutions for Common Problems
Over-Degassing: Recovering Overly Deflated Dough
If you've accidentally applied too much pressure or handled the dough too aggressively, resulting in a flat, lifeless mass, you've likely over-degassed it. The primary sign is dough that doesn't spring back at all and feels dense. While you can't fully restore the lost air, you can often partially recover the dough.
The best approach is often to let the dough rest for 20-30 minutes, covered, at room temperature. This allows the yeast to start producing gas again and the gluten to relax. After resting, gently reshape the dough into a tight ball to build tension.
Then, allow it to proof again for a shorter period than the initial proof, until it feels slightly airy but not overly expanded. This second, shorter proof helps replenish some gas before shaping and baking. It's about giving the yeast a chance to recover and inflate the dough again, even if you applied too much pressure initially when deciding how much degassing for crust structure you needed.
Under-Degassing: Recognizing Signs and Adjusting Technique
Under-degassed dough will typically be very bubbly and potentially difficult to handle. It might feel very airy and fragile, making it hard to stretch without tearing. If you shape and bake under-degassed dough, you might end up with a crust that has very large, irregular air pockets (potentially burning easily) and a weak structure that struggles to hold toppings.
Signs of under-degassing include excessive bubbling during shaping, dough that is overly springy and resists stretching, or a final crust with large, uneven voids. If you realize the dough is under-degassed during shaping, you can gently press out more air before the final stretch. For future batches, adjust your technique by applying slightly more pressure during the degassing step or incorporating an extra gentle fold. Learning to recognize these signs helps you refine how much degassing for crust texture is needed in subsequent attempts.
Troubleshooting Specific Scenarios: Addressing Issues by Crust Type
Different crust types present specific degassing challenges. For thin crusts, under-degassing can lead to a puffy, bread-like texture instead of crispness. Solution: Ensure you press out enough air during the initial stretching, focusing on thinning the dough evenly. For Neapolitan, over-degassing is the enemy, resulting in a dense, flat cornicione. Solution: Use only the gentlest pressure, pushing air towards the rim, not out of it entirely.
For deep dish or Detroit styles, under-degassing can cause uneven rise and a weak base. Solution: Don't be afraid to press the dough down more firmly before placing it in the pan to ensure a consistent starting point for the in-pan proof. For sourdough, managing the vigorous fermentation is key. Solution: If bubbles are massive, a gentle pre-shape might help control them before the final shape. Each style requires a specific touch when determining how much degassing for crust success is achieved.
Advanced Degassing Techniques for Pizza Excellence
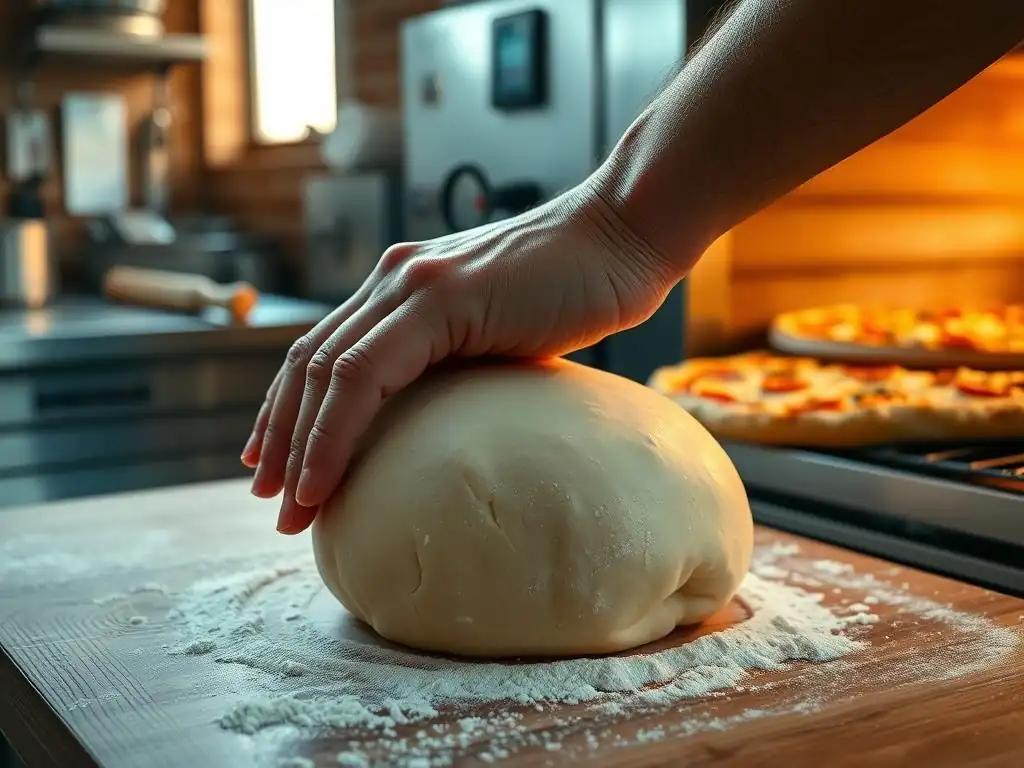
Cold Fermentation and Degassing: Enhancing Flavor and Texture
Cold fermentation, proofing dough slowly in the refrigerator for 24-72 hours or even longer, significantly enhances flavor development. It also affects the dough's structure and gas production. While yeast is less active at cold temperatures, it still produces gas slowly, and enzymes break down starches into sugars, feeding the yeast and contributing to browning. The gluten structure also strengthens over time.
When dough comes out of cold fermentation, it's typically dense and less gassy than dough proofed at room temperature. It needs time to warm up and become pliable. Degassing after cold fermentation often involves simply dividing the dough and gently shaping it into balls.
The act of shaping itself provides enough degassing for many styles. For doughs requiring more air, you might let the dough balls proof at room temperature for several hours after shaping, allowing them to re-inflate significantly before baking. This final proof is where much of the gas for the final airy structure is produced, influenced by the initial gentle handling post-cold fermentation, which dictates how much degassing for crust development occurred initially.
Degassing in Stages: Achieving Complex Dough Structures
For certain recipes, especially those aiming for complex textures like focaccia or some artisanal breads adapted for pizza, degassing can occur in multiple stages. This might involve a initial gentle fold during the bulk fermentation, followed by a more deliberate degassing when dividing and shaping.
For example, you might perform one or two sets of folds during the first hour or two of bulk fermentation to strengthen the dough and redistribute gas. Then, when it's time to portion the dough, you might gently press each piece to form a rough shape before allowing it to rest and then perform the final shaping. This multi-stage approach allows you to build structure, manage gas development over time, and refine the final texture. It's a sophisticated way to control how much degassing for crust structure is applied throughout the dough's journey.
Pre-Shaping Degassing: Optimizing Dough Handling
Pre-shaping is an intermediate step, often performed after bulk fermentation and dividing the dough, but before the final shaping. It involves gently forming the dough portions into rough rounds or logs and letting them rest for 10-20 minutes. This resting period allows the gluten to relax, making the dough easier to handle during the final shaping.
The act of pre-shaping itself provides a form of gentle degassing. As you gather the dough into a ball or log, you naturally press out some of the larger, more irregular air bubbles. This helps create a more uniform structure within each dough portion. The subsequent rest allows smaller bubbles to re-form and the dough to become pliable. Pre-shaping is a subtle way to manage gas and improve workability, contributing to the overall control of how much degassing for crust consistency is achieved in the final product.
Using a Dough Docker: Controlling Air Pockets for Uniform Crusts
A dough docker is a tool with a roller covered in spikes. It's used to create small perforations across the surface of the dough before adding toppings. While not a traditional degassing technique in the sense of collapsing the entire dough structure, it's a method for controlling air pockets, particularly useful for thin crusts or the base of thicker pizzas where you want to prevent large, uncontrolled bubbles from forming in the center.
Rolling a docker over the dough creates small holes that allow steam and gas to escape during baking. This prevents the center of the pizza from puffing up excessively, ensuring a flatter, more uniform base. It's a targeted approach to managing gas release in specific areas, complementing other degassing methods used earlier in the process. While it doesn't answer the question of how much degassing for crust texture happens overall, it's a tool for fine-tuning the final bake and preventing undesirable blistering in the center.
Degassing and the Final Pizza Crust: Achieving Optimal Results
How Degassing Affects Oven Spring and Crust Rise
Oven spring is the final, rapid rise of the dough when it hits the hot oven. It's caused by the sudden expansion of trapped gases and the rapid production of steam within the dough before the crust sets. The level of degassing directly impacts how much oven spring you get and where it occurs.
Minimally degassed dough, especially around the edges, will have more trapped gas ready to expand, resulting in significant oven spring and a very airy cornicione. This is desirable for Neapolitan style. Dough that has been more thoroughly degassed will have less potential for dramatic oven spring in the center, leading to a flatter, more stable base, which is beneficial for holding toppings on thicker crusts. Understanding how much degassing for crust rise is needed allows you to predict and control this crucial final expansion.
Evaluating Your Crust: Assessing Degassing Success
After baking, you can evaluate your pizza crust to see how successful your degassing technique was. Look at the crumb structure – the pattern of air pockets inside the crust. Are they large and irregular (indicating minimal degassing)? Are they small and uniform (indicating more significant degassing)? Is the cornicione airy and well-risen, or dense and flat?
Also, consider the overall rise and texture. Did the center puff up too much for a thin crust? Is the deep dish base sturdy? Does the sourdough have its characteristic open structure? By comparing the baked crust to your intended outcome, you can assess if you applied the right amount of pressure and the correct technique during the degassing step. This evaluation helps you refine your approach for future pizzas, continually improving how much degassing for crust perfection you apply.
Achieving Pizza Perfection Through Effective Degassing
Mastering the art of degassing is a critical step on the path to making great pizza at home. It's not a one-size-fits-all process; the ideal approach depends entirely on the type of crust you want to achieve. Whether you need minimal degassing for a light, airy Neapolitan or more significant degassing for a sturdy deep dish, controlling the gas within your dough is paramount.
By understanding why degassing is important, when to do it, and how much degassing for crust types you're aiming for is appropriate, you gain greater control over your final product. Practice with different doughs and techniques, pay attention to the feel of the dough and the visual cues, and evaluate your baked results. With practice, you'll develop an intuitive sense for how much degassing is necessary to transform simple dough into your perfect pizza crust.
Frequently Asked Questions
How important is degassing dough for achieving a good crust?
Degassing is crucial for crust development because it controls the size of air bubbles within the dough. Proper degassing leads to a more even and consistent crust texture. Improper degassing can result in large, unsightly bubbles.
How does degassing affect the final texture of the bread's crust?
Degassing influences crust texture by affecting the internal structure of the dough. Less degassing results in a more open crumb and potentially larger bubbles in the crust. More degassing leads to a tighter crumb and a finer, smoother crust.
What are some signs that I might be over-degassing my dough?
Over-degassing can be identified by a dough that feels dense and lacking elasticity. The final baked product might have a tough or rubbery crust and a very dense crumb. It will also be difficult to handle during shaping.
Does the type of flour used affect the amount of degassing needed?
Yes, different flours require varying levels of degassing. Stronger flours, like bread flour, can typically handle more degassing without becoming too dense. Weaker flours, like cake flour, need gentler handling and less degassing.
Can degassing techniques vary depending on the type of crust I want to achieve (e.g., thin-crust pizza vs. rustic bread)?
Absolutely! Thin-crust pizza often benefits from more degassing to achieve a crisp texture. Rustic bread, on the other hand, may require less degassing to maintain a desirable, airy crumb and a more irregular crust.
Final Reflection: Mastering the Art of Degassing: A Baker's Journey
The subtle art of degassing is not merely a technical detail in baking; it's the key to unlocking the full potential of your dough, directly impacting the texture, rise, and overall flavor of your final product. Understanding the nuances of when and how much to degas, as explored throughout this article, is crucial for bakers of all skill levels, from novice home bakers to seasoned professionals. The impact on the final product is undeniable, transforming a potentially dense and disappointing loaf into a masterpiece of airy perfection.
The journey of mastering degassing is a continuous one, a testament to the ever-evolving nature of baking itself. It's a process that demands patience, observation, and a willingness to experiment. Each dough, each flour, each environment presents unique challenges and opportunities. As I've explored this topic, I've been reminded of the words of Julia Child: Don't be afraid to experiment. To err is human; to forgive, divine. But learn from your mistakes, and be grateful for them.
This sentiment perfectly encapsulates the spirit of degassing – a process of trial and error, leading to a deeper understanding of the delicate balance within the dough.
Now, it's your turn. Consider the specific needs of your dough and the desired outcome. Experiment with different degassing techniques, paying close attention to the changes in texture and consistency. Don't be afraid to deviate from the guidelines presented here; allow your intuition and experience to guide you. With practice and mindful observation, you too can master the subtle art of degassing and elevate your baking to new heights. The journey of a thousand loaves begins with a single, perfectly degassed dough.
Unleash Your Inner Baker: Perfect Crusts Every Time!
Thanks for taking the time to explore the subtle art of degassing! You've now learned a crucial technique to elevate your baking game. Ready to put your newfound knowledge into practice?
- Master the art of degassing: Experiment with different doughs and observe the impact of degassing on your crusts. Try varying the techniques to see what works best for your preferred recipes.
- Share your successes (and even your flops!): Let's build a community of bakers who are mastering this skill together! Join the discussion in the comments below and tell us about your degassing journey.
- Try a new recipe this week: Challenge yourself to apply your newfound knowledge to a recipe you’ve always wanted to master. A perfectly degassed dough can make all the difference!
What's your go-to bread or pastry recipe that you’ll be degassing next?