
Simple Ways to Transport a Decorated Layer Cake


Welcome to BakeWithEase, your companion in the delightful world of baking! Ever wondered how to transport a decorated layer cake safely, ensuring your masterpiece arrives intact and ready to impress? Discover practical, foolproof techniques to keep your cakes looking their best, from oven to event. Get ready to uncover the secrets and transform your baking journey!
- Simple Ways to Transport a Decorated Layer Cake Safely | BakeWithEase
- Introduction: Ensuring Your Decorated Layer Cake Arrives in Perfect Condition
- Preparing Your Decorated Layer Cake for Transport
- Step-by-Step Guide: Safe Cake Transport Techniques
- Practical Tips for Transporting Decorated Layer Cakes
- Alternative Cake Transport Methods
- Recovering from Transport Mishaps: Cake Repair Tips
- Conclusion: Enjoy Your Perfectly Transported Decorated Layer Cake
- Frequently Asked Questions
- Final Reflection: The Sweet Success of Safe Cake Transport
- Unleash Your Inner Cake Transporter!
Simple Ways to Transport a Decorated Layer Cake Safely | BakeWithEase
Introduction: Ensuring Your Decorated Layer Cake Arrives in Perfect Condition
The Challenge of Transporting a Beautiful Layer Cake
Creating a stunning decorated layer cake is a rewarding process, but the true test often comes when it's time to move your masterpiece from your kitchen to its final destination. The journey can be fraught with potential hazards – bumps in the road, sudden stops, or even just navigating tight doorways. A cake that looked perfect just moments ago can quickly become a source of stress if not properly prepared for travel.
This challenge is amplified with multi-tiered cakes or those featuring intricate, delicate decorations like sugar flowers or sculpted figures. The goal is always to ensure your hard work arrives looking just as pristine as when it left your countertop.
Successfully transporting a decorated layer cake requires more than just careful driving; it involves strategic planning and preparation long before the cake even leaves your home. From selecting the right base to ensuring the frosting is firm and the decorations are secure, every step plays a vital role in the cake's safe passage. Consider a three-tier wedding cake, which can weigh upwards of 20-30 pounds and stand over a foot tall.
The structural integrity needed to withstand movement, even gentle swaying, is paramount. Without proper support and stabilization, gravity and motion are not your friends, making the process of how to transport decorated layer cake safely a key skill for any baker.
Why Safe Transport is Crucial for Decorated Cakes
The effort put into decorating a layer cake is significant, often involving hours spent perfecting smooth buttercream, piping intricate designs, or carefully placing delicate adornments. All of this hard work can be undone in moments if the cake isn't transported safely. Damage during transit can range from minor smudges or cracks in the frosting to catastrophic collapses, rendering the cake unsalvageable for its intended purpose. For special occasions like birthdays, anniversaries, or weddings, a damaged cake isn't just a disappointment; it can impact the entire event.
Ensuring safe cake transport isn't just about aesthetics; it's also about protecting the integrity of your bake. A cake that shifts within its box might bump against the sides, causing structural damage beyond just the decoration. Think about a gravity-defying cake design or one with multiple stacked tiers held together by dowels.
Proper transport methods ensure these internal supports remain effective and that the cake doesn't lean, tilt, or collapse under its own weight combined with the forces of motion. Mastering how to transport decorated layer cake safely is an essential skill that gives you peace of mind and guarantees your beautiful creation arrives intact and ready to impress.
Preparing Your Decorated Layer Cake for Transport
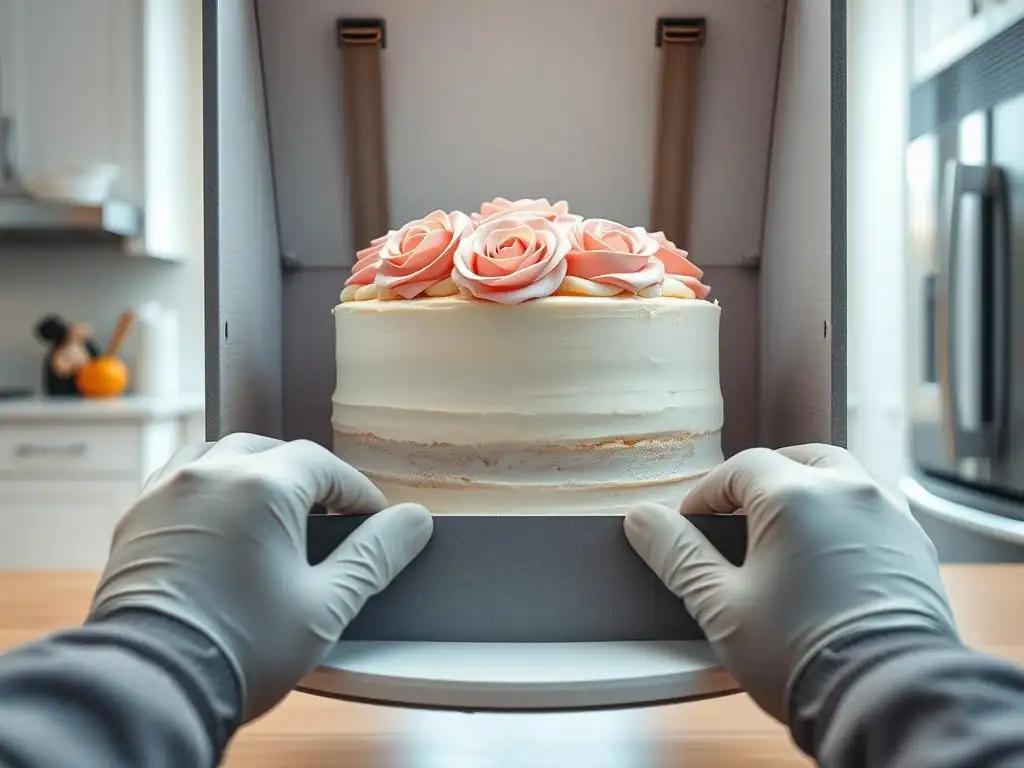
Chilling Your Layer Cake Thoroughly Before Moving It
One of the most critical steps in preparing a decorated layer cake for safe transport is thorough chilling. Buttercream, ganache, and even some types of fondant decorations firm up significantly when cold, providing a much more stable surface and structure for moving the cake. A well-chilled cake is far less susceptible to smudging, denting, or shifting during handling and transit. Aim to chill your cake for at least 4-6 hours, or preferably overnight, before attempting to move it. This allows the frosting to set completely, acting like a protective shell.
To chill effectively, place the finished cake in the refrigerator, ideally uncovered for the first hour or two to allow the exterior frosting to crust slightly if using American buttercream, or just firm up if using other types. After the initial firming, you can loosely cover it with plastic wrap or place it in its intended transport box (if the box fits in your fridge) to prevent it from absorbing odors.
Ensure your refrigerator is set to a standard temperature, typically around 35-40°F (1.7-4.4°C). This cold environment hardens the fats in the frosting and butter in the cake itself, making the entire structure more robust for the journey ahead.
Securing Decorations: Preventing Damage During Cake Transportation
Delicate decorations are often the first casualties of improper cake transportation. Sugar flowers, intricate piping, chocolate shards, or fondant figures can easily break, smudge, or detach if not secured properly. Before the cake leaves your kitchen, take a moment to assess these vulnerable elements. For items like fondant figures or heavier sugarpaste flowers, edible glue or royal icing can be used to adhere them firmly to the cake surface or cake board. Ensure these adhesives have had sufficient time to set before moving the cake.
For piping work, proper chilling helps significantly, making the buttercream or royal icing much sturdier. If you have elements like chocolate drip or delicate chocolate curls, ensure they are fully set – often requiring refrigeration. For multi-tiered cakes with intricate decorations on lower tiers, consider adding a thin layer of clear piping gel or a touch of buttercream under heavier decorations on vertical surfaces to provide extra grip. Preventing damage during cake transportation involves anticipating where stress points might occur and reinforcing those areas proactively.
Choosing the Right Cake Board and Box for Safe Travel
The foundation for safely transporting a decorated layer cake begins with the base it sits on and the container it travels in. The cake board must be sturdy enough to fully support the weight of the cake without bending or flexing. A single piece of cardboard is usually insufficient for anything more than a small single-tier cake.
For larger or multi-tiered cakes, use a thick, reinforced cake drum (at least 1/2 inch thick) or stack and glue together multiple cardboard cake circles of the same size for added rigidity. The board should be slightly larger than the widest part of your cake, typically allowing for 1-2 inches of clearance around the base.
Selecting the correct cake box is equally vital for how to transport decorated layer cake safely. The box should be tall enough to accommodate the full height of the cake, including any toppers, with at least an inch of clearance at the top to prevent contact with the lid. It should also be wide enough to easily fit the cake board inside without forcing it.
Sturdy corrugated cardboard boxes are standard and effective. Ensure the box has a secure lid that won't pop open during transit. Measuring your finished cake's dimensions carefully before buying or assembling your box is a small step that makes a huge difference.
Step-by-Step Guide: Safe Cake Transport Techniques
Step 1: Selecting a Sturdy Cake Box for Transportation
Choosing the right box is paramount for successful cake transportation. Look for boxes made from durable, corrugated cardboard, specifically designed for cakes. Avoid using flimsy pastry boxes intended for lighter items like cookies or cupcakes. The box size should provide adequate clearance around the cake – ideally 1-2 inches on all sides and at least an inch above the tallest decoration. For instance, a 10-inch round cake on a 12-inch board would need a box that is at least 12x12 inches wide and tall enough for the cake's height.
Assemble the box carefully, ensuring all tabs are securely locked. Some larger boxes may have reinforced corners or double-walled construction, which are excellent features for added security when you need to transport decorated layer cake safely. If you are transporting a multi-tiered cake, ensure the box is specifically designed for taller cakes or consider a custom-sized option if standard boxes aren't tall enough. A well-chosen, properly assembled box is the first line of defense against external forces during travel.
Step 2: How to Secure the Cake to the Cake Board
Securing the cake firmly to its board prevents it from sliding around inside the box, which is a common cause of damage. Before placing the cake on the board, apply a small dollop or swirl of buttercream or royal icing in the center of the board where the cake will sit. This acts as an edible "glue" to hold the cake in place. For single-tier cakes, this is often sufficient.
For multi-tiered cakes or those traveling a significant distance, additional security is recommended. You can use wooden dowels or plastic supports inserted through the tiers for internal stability. To secure the entire cake-on-board assembly to a larger base board (especially useful for very heavy cakes), you can use a hot glue gun on the underside of the main cake board to attach it to a larger, decorative base or directly to the bottom of the transport box (if the box is sturdy enough and you don't need to remove the cake from the box bottom).
Alternatively, for very large cakes, some professional bakers will drill pilot holes through the base board and box bottom and insert screws to anchor the cake board securely. This level of securing is particularly important when transporting decorated layer cake safely for events like weddings.
Step 3: Placing the Cake Carefully into the Box
This step requires a steady hand and often, a second person for larger cakes. Open the cake box completely or unfold the sides if it's a flat-pack style. Carefully lift the cake by its sturdy base board. Do not lift the cake itself, as this can damage the structure and frosting. With assistance if needed, gently lower the cake board with the cake centered into the bottom of the opened box. Ensure the cake board sits flat and level inside the box.
If the box has folding sides, carefully fold them up and lock the tabs into place around the cake. If it's a lift-lid box, lower the lid straight down, being mindful of the height clearance to avoid touching the top decorations. Take your time during this step; rushing is more likely to lead to accidental bumps or scrapes against the box sides. The goal is to place the cake down once, smoothly and accurately, ensuring your beautiful transport decorated layer cake arrives without incident.
Step 4: Stabilizing the Box During Transport
Once the cake is securely in its box, the next crucial step for safe cake transport is stabilizing the box itself within your vehicle or other mode of transport. The ideal spot is a flat, level surface where the box won't slide or tip. The floor of the front passenger seat is often the best option, provided it is flat. Avoid placing the cake on a car seat unless you can effectively level it (see tips below). The trunk can also work if it's clean, flat, and the temperature is controlled.
To prevent the box from moving, surround it with non-slip materials or other stable objects. Towels, blankets, or even bags of groceries can help wedge the box in place, preventing it from sliding during acceleration or braking. Ensure these stabilizing items are not pressing against the cake box walls with enough force to potentially dent them. The goal is gentle but firm support on all sides. This simple step significantly reduces the risk of your transport decorated layer cake shifting unexpectedly during the journey.
Practical Tips for Transporting Decorated Layer Cakes

Driving Safely with Your Cake: Avoiding Sudden Stops
Your driving habits are paramount when transporting a decorated layer cake. Treat the cake as if it's a precious, delicate cargo (which it is!). Accelerate slowly and smoothly, and brake well in advance to avoid sudden jolts. Cornering should be done gently and at a reduced speed. Imagine there's a full cup of coffee on your dashboard – drive in a way that wouldn't spill a drop. This mindful approach minimizes the forces acting on the cake during motion.
Avoid bumpy roads or potholes whenever possible. If you must navigate uneven surfaces, drive extremely slowly. Consider the route beforehand and choose the smoothest path, even if it adds a few minutes to your journey. A few extra minutes of careful driving are a small price to pay to ensure your transport decorated layer cake arrives in perfect condition. Maintain a consistent, moderate speed, especially on highways, and be hyper-aware of traffic conditions to anticipate stops.
Temperature Considerations: Keeping Your Cake Cool
Temperature is a major factor in safe cake transport, especially with buttercream or cream cheese frosting which can soften quickly in warmth. Ideally, transport your cake in an air-conditioned vehicle. If the weather is warm (above 70°F or 21°C), blast the air conditioning in your car before placing the cake inside to cool it down. Keep the AC running throughout the journey.
For longer journeys or very hot days, consider using insulated bags or boxes specifically designed for transporting cold items. You can place the cake box inside a larger insulated container. Avoid placing ice packs directly against the cake box walls, as condensation can damage the cardboard. Instead, place ice packs around the outside of the insulated container or wrap them in towels before placing them near the cake box. Keeping the cake cool helps maintain the firmness of the frosting and the structural integrity of the cake, crucial for how to transport decorated layer cake safely.
Using Non-Slip Mats for Added Stability
Adding a non-slip mat to the surface where you place the cake box provides an extra layer of security against sliding. These inexpensive mats, often made of rubber or silicone, create friction that helps grip the bottom of the cake box. They are particularly useful if you have to place the box on a surface that isn't perfectly flat or if you're concerned about movement on smooth car floor mats.
Simply cut a piece of the non-slip mat to fit the area where the cake box will sit – for example, the floor of the passenger seat. Place the mat down first, then place the cake box on top of it. This simple addition significantly reduces the likelihood of the box shifting during acceleration, braking, or turning. Combined with wedging the box in place, a non-slip mat offers excellent stability for safe cake transport.
Leveling the Playing Field: Elevating One Side of the Box if the Car Seat is Angled
Car seats are often angled, which is not an ideal surface for a delicate layer cake. Placing a cake box on a slanted seat can cause the cake to slowly lean or slide, potentially damaging the decorations or even the structure. If you must use a car seat for transport, you'll need to create a level surface.
Use a sturdy object like a firm cushion, a folded blanket, or even a few books to elevate the lower side of the car seat. Place the object on the seat before placing the cake box. Position it carefully so that when the cake box is placed on top, the base of the box is perfectly horizontal. Use a small level app on your phone if you want to be precise. This ensures the cake remains upright throughout the journey, preventing gravity from working against your beautiful transport decorated layer cake.
Alternative Cake Transport Methods
Using a Cake Carrier for Extra Protection
For single-tier cakes, especially those with moderate decoration, a purpose-built cake carrier can offer excellent protection. These carriers typically consist of a sturdy base (often with clips to secure the cake board) and a tall, clear lid that latches securely. They provide a rigid structure around the cake, protecting it from bumps and accidental contact.
Cake carriers come in various sizes and shapes, accommodating round or square cakes up to certain dimensions and heights. While they may not be suitable for very tall or multi-tiered creations, they are a fantastic option for standard celebration cakes. Many carriers also have handles, making them easier to carry. Using a cake carrier adds an extra layer of hard-shell protection, making the process of how to transport decorated layer cake safely much simpler for many home bakers.
Transporting Cake by Public Transport: Special Precautions
Transporting a decorated layer cake via public transport presents unique challenges due to crowds, sudden stops, and the need to carry the cake yourself. If using a bus or train, try to travel during off-peak hours to avoid congestion. Hold the cake box securely on your lap or place it on a seat next to you if possible, ensuring it's stable and won't slide. Avoid placing it on overhead racks or in luggage compartments where it could be jostled.
On subways or trams, be prepared for abrupt starts and stops; hold the box firmly and brace yourself. If standing, position yourself away from doorways and high-traffic areas. Consider using a cake carrier with a handle or placing your cake box inside a large, sturdy shopping bag to make it easier to carry and offer minimal protection from bumps from other passengers. Planning your route to minimize transfers and walking distance is also key when you need to transport decorated layer cake safely without a private vehicle.
Professional Cake Delivery Services: When to Consider Them
For very large, complex, or high-value cakes (like wedding cakes), or if you are traveling a significant distance, hiring a professional cake delivery service might be the best option. These services specialize in transporting delicate goods and have vehicles equipped with climate control and stabilization systems. While more expensive than DIY transport, the cost can be justified by the peace of mind and the guarantee that your cake will arrive safely.
Professional delivery services are experienced in handling multi-tiered cakes and navigating various transport challenges. They often have insurance to cover potential damage. If you are a baker selling cakes, offering professional delivery can be a valuable service to your clients, ensuring their investment arrives in perfect condition. For bakers transporting their own large creations to venues, hiring a professional driver or service allows you to focus on other aspects of the event setup, knowing the crucial transport decorated layer cake phase is handled expertly.
Recovering from Transport Mishaps: Cake Repair Tips
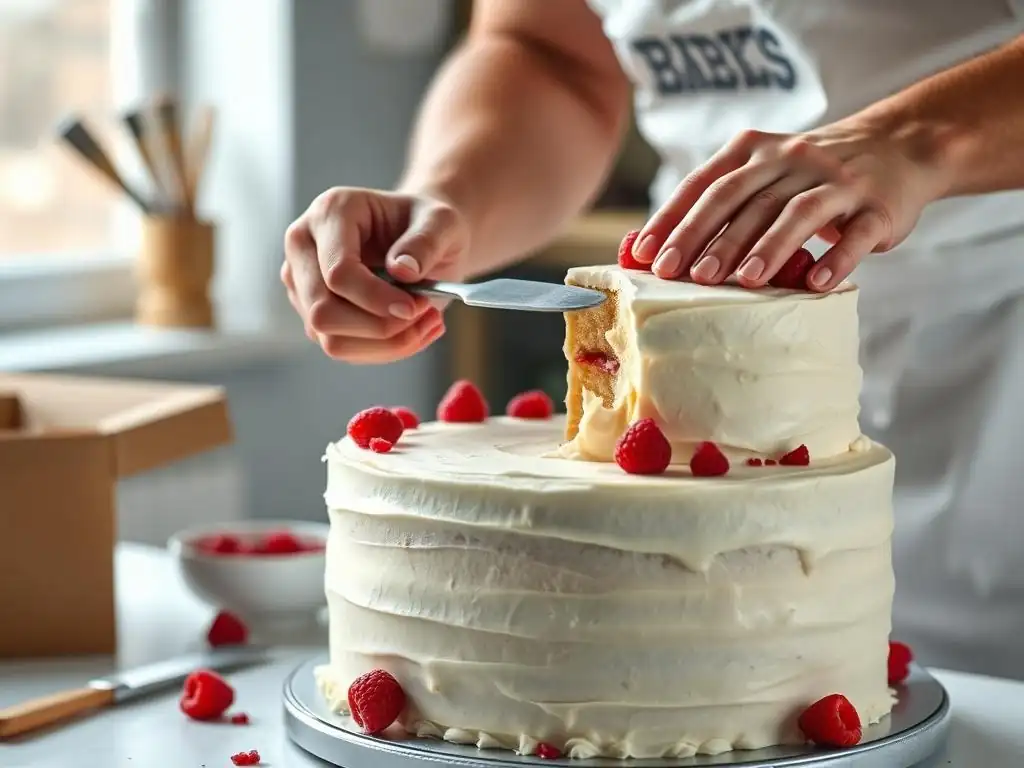
Minor Damage Repair: Fixing Small Imperfections
Despite the best precautions, minor damage can sometimes occur during cake transportation. Don't panic! Small imperfections like a slight smudge in the buttercream, a tiny crack in fondant, or a dislodged sprinkle are often fixable. For buttercream smudges, gently smooth the area with a clean offset spatula dipped in warm water and dried, or with a piece of parchment paper pressed lightly against the surface.
For small fondant cracks, you can sometimes rub them gently with a fingertip slightly moistened with water or shortening. Dislodged sprinkles or small edible decorations can be reattached with a tiny dot of buttercream or edible glue. Having a small emergency kit (see below) prepared can make these quick fixes much easier on site. Remember, most minor blemishes are far less noticeable to others than they are to you.
Major Damage Control: Rebuilding Your Cake Design
In unfortunate cases, transport decorated layer cake issues can lead to more significant damage, such as a leaning tier, a large section of frosting scraped off, or broken structural elements. Major damage requires a more involved repair effort. If a tier is leaning, you may need to carefully remove the damaged tier, assess the internal supports (dowels), add new supports if necessary, re-frost the affected area, and then carefully re-stack the tier. This is why having extra frosting on hand is crucial.
If a large section of decoration is ruined, you might need to scrape off the damaged area and re-apply frosting or fondant. For broken sugarpaste figures or delicate toppers, you might need to use edible glue or melted chocolate to piece them back together, or have backup decorations available. While challenging, many major transport mishaps can be significantly mitigated or repaired with patience and the right tools, allowing you to salvage your beautiful bake.
Emergency Cake Repair Kit: Essential Tools and Ingredients
Being prepared for potential mishaps is part of mastering how to transport decorated layer cake safely. Assemble a small emergency cake repair kit to take with you. Store it in a lidded container to keep everything clean and organized.
Your kit should include:
- [ ] Small offset spatula
- [ ] Bench scraper (for smoothing sides)
- [ ] A few piping bags and tips (basic round and star)
- [ ] Small container of matching buttercream frosting
- [ ] Small amount of royal icing or edible glue
- [ ] Spare sprinkles or small edible decorations used on the cake
- [ ] Parchment paper squares
- [ ] Clean cloths or paper towels
- [ ] Small palette knife
- [ ] Cornstarch or powdered sugar (for fondant)
- [ ] Pair of tweezers (for placing small decorations)
- [ ] Extra dowels (if transporting a multi-tier cake)
Having these items on hand means you can address minor issues immediately upon arrival, helping to ensure your transport decorated layer cake looks its best for the occasion.
Conclusion: Enjoy Your Perfectly Transported Decorated Layer Cake
Celebrate Your Baking Success!
You've done it! You've successfully navigated the potentially stressful process of transporting a decorated layer cake. Your beautiful creation has arrived safely, ready to be the centerpiece of your celebration or event. Take a moment to appreciate your skill, planning, and careful execution. From the initial chill to the final careful placement at the destination, every step contributed to this success.
The ability to bake and decorate a stunning cake is a wonderful skill, and mastering its safe transport adds another layer of confidence and accomplishment. Whether it was a simple birthday cake or an elaborate multi-tiered masterpiece, getting it there intact is a significant achievement. Now, you can relax and enjoy the moment, knowing your hard work paid off and your transport decorated layer cake is ready for admiration and enjoyment.
Final Thoughts on Cake Transport Best Practices
Transporting a decorated layer cake doesn't have to be a terrifying ordeal. By following a few key best practices, you can significantly reduce the risk of damage and ensure your cake arrives looking exactly as you intended. Always start with a sturdy base and a properly sized, strong box. Thoroughly chill your cake to firm up the frosting and structure. Secure any delicate decorations.
During transport, drive cautiously, avoid sudden movements, and maintain a cool temperature inside the vehicle. Stabilize the cake box using non-slip mats and surrounding objects. If necessary, level the surface where the box is placed. For complex cakes or long distances, consider professional help. Finally, be prepared for minor touch-ups with a simple repair kit. By integrating these tips into your process, you'll master how to transport decorated layer cake safely and confidently, making cake delivery a stress-free part of your baking journey.
Frequently Asked Questions
How do I prevent my cake layers from sliding during transport?
The key is to secure the layers properly. Use a small amount of frosting between each layer as "glue" and insert wooden dowels or straws for extra support, especially for tall cakes.
What's the best type of box for transporting a decorated layer cake?
A sturdy, appropriately sized cake box is essential. Choose a box that's slightly taller than your cake to avoid damaging the decorations and wide enough to accommodate the cake board. Reinforced cardboard is ideal.
How can I protect delicate decorations during transport?
Consider using frosting shields or parchment paper to protect delicate elements like flowers or intricate piping. You can also chill the cake thoroughly to firm up the frosting before moving it.
What's the best way to carry the cake box?
Hold the box level and from the bottom, using both hands. Avoid tilting or bumping it. Having a second person assist can be very helpful, especially for larger cakes.
What temperature should my car be when transporting a cake?
Ideally, keep your car cool and air-conditioned. Excessive heat can cause the frosting to melt and the cake to become unstable. Avoid direct sunlight and consider using a cooler with ice packs for longer journeys.
Final Reflection: The Sweet Success of Safe Cake Transport
The art of transporting a decorated layer cake remains a surprisingly relevant challenge in our visually-driven world. From celebratory birthdays to elegant weddings, the flawless arrival of a beautifully decorated cake is paramount. A single mishap can ruin hours of meticulous work and leave a lasting impression of disappointment. This isn't just about cake; it's about preserving the artistry and the emotion tied to these special moments.
The impact of successfully transporting a decorated cake extends far beyond the simple act of moving it from point A to point B. It's about the preservation of memories, the celebration of milestones, and the sharing of joy. The careful consideration of every detail, from the right carrier to the optimal driving route, speaks to a deeper appreciation for the effort and artistry involved. As the old saying goes, The best things in life are worth fighting for,
and a perfectly transported cake is a testament to that sentiment.
So, the next time you find yourself tasked with transporting a masterpiece of confectionery, remember the tips and tricks shared in this article. Don't just move a cake; safeguard a memory. Take the time to prepare adequately, choose your tools wisely, and approach the task with the care and respect it deserves. The reward – a perfectly preserved cake, ready to be admired and enjoyed – will be well worth the effort.
Unleash Your Inner Cake Transporter!
Thanks for taking the time to learn how to safely transport your beautiful creations! We hope you now feel confident in getting that delicious layer cake to its destination in perfect condition. Ready to put your new skills to the test?
- Master the Cake Carry: Practice your perfected cake-carrying technique – you'll be amazed at how much smoother the process becomes with a little practice.
- Share your Success: Show off your perfectly transported masterpiece! Share a picture on social media using #BakeWithEaseTransport.
- Explore Advanced Techniques: Dive deeper into cake transportation by exploring our other articles on BakeWithEase.com (we have some amazing tips on transporting tiered cakes! ).
So, what stunning cake are you ready to transport now?