
Troubleshooting European Bread Baking: Common Mistakes Solved

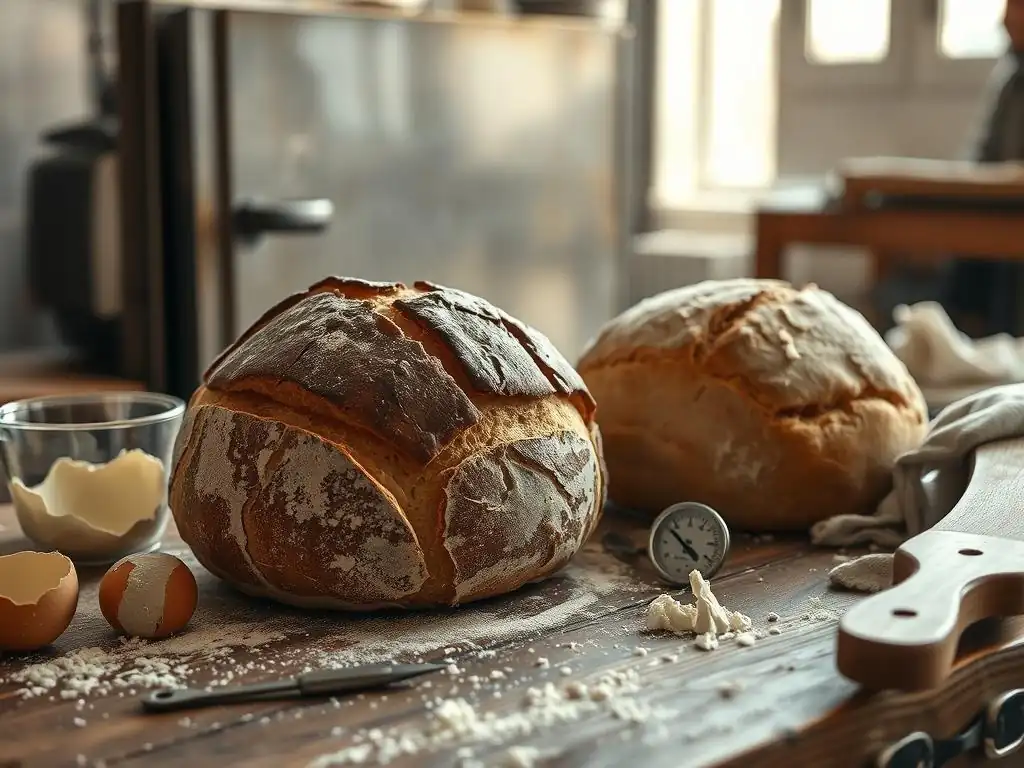
Welcome to BakeWithEase, your trusted companion on your baking journey! Ever dreamed of crafting crusty, artisan loaves like those found in European bakeries? This week, we're diving deep into Troubleshooting European Bread Baking: Common Mistakes Solved. Discover how to avoid the pitfalls that plague even experienced bakers and unlock the secrets to achieving that perfect crumb and golden crust. Curious about what's holding your bread back? Read on to find out!
- Introduction to European Bread Baking Challenges
- Common Dough Issues in European Bread Baking
- Crust Problems in European Bread Baking
- Crumb Issues in European Bread Baking
- Specific European Bread Troubleshooting
- Advanced European Bread Baking Troubleshooting Tips
- Conclusion: Bake European Breads with Confidence
-
Frequently Asked Questions
- What are some common problems encountered when baking European breads at home?
- Why is my European bread so dense and heavy?
- How can I get a crispier crust on my European bread?
- My European bread doesn't rise properly. What could be the issue?
- What's the best way to store European bread to keep it fresh for longer?
- Final Reflection: The Enduring Allure of European Bread, Perfectly Baked
- Unlock Your Inner Boulanger: Master European Bread Baking!
Introduction to European Bread Baking Challenges
Why European Breads Can Be Tricky to Bake at Home
Baking authentic European breads at home can present a unique set of challenges compared to simpler loaf styles. These breads often rely on specific flour types, precise hydration levels, long fermentation times, and techniques like steam baking or using preferments, all of which require careful attention. Mastering these elements is key to achieving the characteristic crust, crumb, and flavor profiles found in traditional European loaves, but it's easy for things to go wrong, leading to common European bread baking problems.
From the rustic, open crumb of a French boule to the dense, flavorful texture of a German rye, each regional bread has its own quirks. Factors like ambient temperature, humidity, and even the quality of your water can significantly impact the outcome. Understanding these variables and knowing how to adjust your process is crucial for successfully tackling the common European bread baking problems you might encounter in your kitchen.
BakeWithEase's Guide to Overcoming European Bread Baking Problems
At BakeWithEase, we understand the passion behind recreating those perfect European loaves. This guide is designed to walk you through the most frequent issues bakers face when attempting European bread baking at home. We'll break down the why behind common dough, crust, and crumb problems, offering practical, friendly advice and solutions to help you troubleshoot effectively.
By addressing these typical European bread baking problems head-on, you'll gain the knowledge and confidence needed to improve your technique. We'll cover everything from sticky dough and flat loaves to pale crusts and dense crumbs, providing actionable steps based on sound baking principles. Let's dive in and turn those baking frustrations into triumphs!
Common Dough Issues in European Bread Baking
Dough Too Sticky: Causes and Solutions
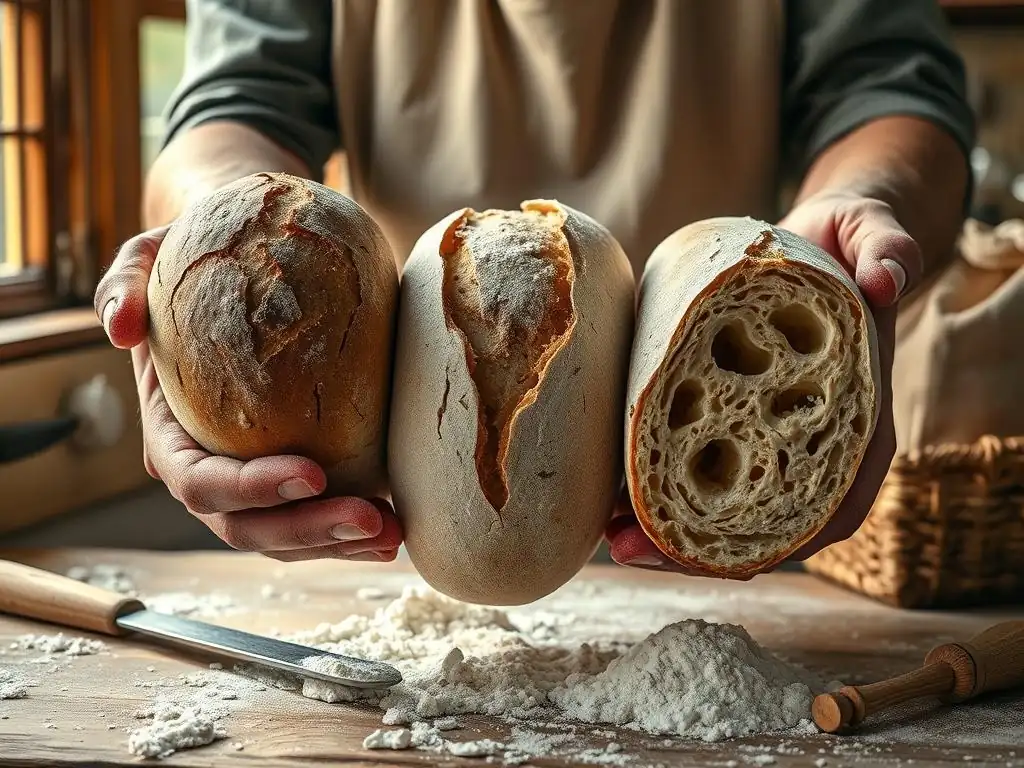
A dough that is excessively sticky is one of the most frustrating European bread baking problems. It can make handling, shaping, and kneading incredibly difficult, leading to a messy process and often a compromised final product. The primary culprits are usually related to the amount of water relative to the flour, the type of flour used, or insufficient gluten development.
One common reason is simply too much water for the flour's absorption capacity. Different flours absorb moisture differently; a high-protein bread flour typically absorbs more water than an all-purpose flour. Additionally, ambient humidity can play a role; on a very humid day, your flour might already contain more moisture, meaning you need slightly less added water. Starting with a slightly lower hydration than the recipe calls for (perhaps 5-10% less) and gradually adding more water only if needed during kneading can help prevent this issue.
Incorrect Flour Type for European Breads
Using the wrong type of flour is a major contributor to stickiness and other European bread baking problems. Many European hearth breads, like baguettes or pain de campagne, benefit from high-protein bread flour (around 12-14% protein) which can handle higher hydration levels necessary for an open crumb. Using a lower-protein all-purpose flour (typically 10-12% protein) with a high-hydration recipe will result in a very sticky, difficult-to-handle dough that struggles to develop structure.
Conversely, some European breads, like certain pastries or softer rolls, might use lower-protein flours or blends. Always check the recipe's specific flour recommendation. If a recipe calls for 'Type 00' flour (common in Italy for focaccia or ciabatta), it has a specific protein and ash content different from standard US flours. Understanding the flour's protein content and its suitability for the intended bread type is crucial to avoid sticky dough and other common European bread baking problems.
Hydration Levels: Adjusting for Humidity
Hydration, the ratio of water to flour by weight, is a critical factor in European bread baking. While high hydration (e.g., 70% or more) is desirable for an open, airy crumb in breads like ciabatta, it also makes the dough stickier. Learning to handle sticky dough is part of the process, often aided by wet hands or a dough scraper rather than adding excessive flour, which can dry out the dough.
However, if the dough is unmanageably sticky, it's likely over-hydrated for the flour or ambient conditions. As mentioned, high humidity means your flour is already moister. If your kitchen is consistently humid, you might need to slightly reduce the water in your recipes compared to someone baking in a dry climate. Keeping a baking journal to note hydration levels and results based on weather can help you make future adjustments and minimize sticky dough European bread baking problems.
Gluten Development Problems: Kneading Techniques
Insufficient gluten development can also lead to a sticky, slack dough that doesn't hold its shape. Gluten, formed when water mixes with proteins in flour and is developed through kneading or time (autolyse, bulk fermentation), provides the dough's structure and elasticity. If the gluten network is weak, the dough can feel heavy, wet, and sticky because it lacks the internal structure to manage the water.
Ensure you are kneading your dough adequately, whether by hand or mixer, until it passes the "windowpane test" (stretching a small piece thinly enough to see light through without tearing, for most non-rye breads). For very wet doughs, techniques like stretch-and-folds performed during bulk fermentation are essential for building strength without traditional kneading. Proper gluten development is fundamental to avoiding many common European bread baking problems.
Dough Too Dry: Fixing Crumbly Dough
Dough that is too dry or crumbly is another common issue, often resulting in dense, tight-crumbed loaves with a tough texture. This typically happens when there isn't enough moisture relative to the flour, preventing the gluten from fully hydrating and developing into a cohesive network. Dry dough is difficult to knead smoothly and can tear easily.
The most straightforward cause is inaccurate measurement of ingredients, particularly flour. Flour can compact in the bag or canister, so scooping directly with a measuring cup can result in significantly more flour than intended. Using a kitchen scale to weigh both flour and water is the most accurate way to ensure correct hydration and avoid dry, crumbly dough European bread baking problems. A variation of even 20-30 grams of flour can make a noticeable difference in hydration.
Measuring Ingredients Accurately
Precision in measuring ingredients is paramount, especially in baking. While volume measurements (cups, tablespoons) are common, they are notoriously inaccurate for dry ingredients like flour. A cup of flour can weigh anywhere from 120g to 150g depending on how it's scooped and leveled. This variability directly impacts the hydration percentage of your dough.
Weighing ingredients using a digital scale ensures consistency every time. If a recipe calls for 500g of flour and 350g of water, your hydration is precisely 70%. This eliminates a major variable and makes troubleshooting much easier. Adopting weight measurements is perhaps the single best step a baker can take to avoid dry dough and other common European bread baking problems.
Adding Moisture Back into the Dough
If you realize your dough is too dry during the initial mixing or kneading phase, you can often correct it. Add water a tablespoon or teaspoon at a time, kneading it in thoroughly before adding more. It might seem difficult to incorporate liquid into an already-formed dough, but with persistent kneading, the dough will absorb it.
Be patient and add water gradually to avoid swinging to the opposite problem of sticky dough. This correction is easiest early in the process. If the dough is already far into bulk fermentation, it's harder to adjust hydration significantly, though a small amount of water can sometimes be gently folded in during a stretch and fold. Learning this adjustment is a useful skill when dealing with European bread baking problems related to hydration.
Understanding Dough Hydration for Different European Breads
Different European breads require vastly different hydration levels to achieve their characteristic texture. A rustic Italian ciabatta might have 75-85% hydration, resulting in a very wet, sticky dough that yields a large, open crumb. A German Vollkornbrot, made with whole rye flour, might have a much lower hydration, perhaps 60-65%, producing a denser loaf.
Knowing the typical hydration range for the specific type of European bread you are baking is essential. If you're aiming for a light, airy baguette (often 70-75% hydration) but your dough feels like a stiff pizza dough (closer to 55-60% hydration), you know you need more water. Researching the expected dough feel and hydration for different styles helps you identify and fix dry dough European bread baking problems early on.
Dough Not Rising: Troubleshooting Proofing Problems
A dough that fails to rise, or rises very little, is a disheartening European bread baking problem. This lack of fermentation means the yeast isn't producing the gas needed to leaven the dough, resulting in a dense, heavy brick instead of a light, airy loaf. The reasons usually involve yeast viability, temperature, or time.
The most common cause is inactive or dead yeast. Yeast is a living organism and is sensitive to heat and age. Using expired yeast, or mixing active dry yeast directly into very cold or very hot water (above 130°F or 55°C can kill it instantly), will result in little to no rise. Even instant yeast, which doesn't require proofing, can be inactive if old.
Yeast Activity: Testing and Activation
If you suspect your yeast is the issue, perform a simple test. For active dry yeast, dissolve one teaspoon of yeast and a pinch of sugar in about 1/4 cup (60ml) of warm water (around 105-115°F or 40-46°C). After 5-10 minutes, it should become foamy and bubbly. If it doesn't, your yeast is likely dead and you need a fresh batch.
Even with instant yeast, which can often be added directly to dry ingredients, using warm water (not hot!) for the dough helps kickstart activity. Ensure your yeast is stored correctly – usually in an airtight container in the refrigerator or freezer to prolong its life. Using fresh, active yeast is the first step in avoiding flat loaves and other European bread baking problems related to rise.
Temperature Control During Proofing
Yeast activity is highly dependent on temperature. Too cold, and the yeast becomes sluggish or dormant; too hot, and it can over-ferment rapidly, leading to structure collapse, or even die. The ideal temperature range for most dough proofing is between 75-80°F (24-27°C). Colder temperatures require significantly longer proofing times.
If your kitchen is cold, find a warmer spot: near a sunny window, on top of a preheating oven (turned off! ), or in a proofing box or oven with just the light on (check the temperature, it shouldn't get too hot). Conversely, in a very warm kitchen, your dough will rise faster than expected, so you'll need to monitor it closely to prevent over-proofing, another source of European bread baking problems.
Proofing Time: Adjusting for Ambient Conditions
Proofing time is not a fixed number; it's a guideline that must be adjusted based on temperature, hydration, yeast amount, and the type of flour. A recipe might say "proof for 1-2 hours," but in a warm kitchen, it might be ready in 45 minutes, while in a cold kitchen, it could take 3 hours. Relying solely on the clock is a common mistake.
Instead of watching the clock, watch the dough. The dough's volume should increase significantly, often doubling or even more, depending on the recipe and stage (bulk vs. final proof). For the final proof, the "poke test" is useful: gently poke the dough with a floured finger. If the indentation springs back immediately, it needs more time. If it stays indented, it's ready. If it collapses, it's likely over-proofed. Learning to read your dough's readiness is key to solving flat bread European bread baking problems.
Crust Problems in European Bread Baking
Pale Crust: Achieving a Golden-Brown Color
A pale crust is a common disappointment when baking European breads, especially those intended to have a beautiful, caramelized exterior like a baguette or a sourdough loaf. The crust color develops through the Maillard reaction and caramelization of sugars on the surface during baking. A pale crust indicates that these reactions haven't occurred sufficiently, usually due to insufficient heat, time, or moisture on the surface.
Oven temperature plays a significant role. Many European hearth breads are baked at high temperatures, often starting around 450-500°F (230-260°C), which helps the crust set quickly and encourages browning. If your oven temperature is too low, or if the baking time isn't long enough, the crust won't develop that rich golden-brown hue. An inaccurate oven thermostat can also contribute to this problem.
Oven Temperature and Baking Time Adjustments
Verify your oven's accuracy with an oven thermometer. If it's running cool, preheat it to a higher temperature than the recipe specifies to compensate. Ensuring the oven is fully preheated, including any baking stones or Dutch ovens, is also crucial. A common issue is putting the bread in before the oven has reached and stabilized at the target temperature.
If the crust is still pale towards the end of the baking time, you can carefully increase the temperature slightly for the last 5-10 minutes, or extend the baking time. Watch carefully to prevent burning. For rich doughs like brioche, which contain sugar and fat, a slightly lower temperature (around 350-375°F or 175-190°C) is often used to prevent the crust from burning before the interior is cooked, but washes are then important for color. Adjusting temperature and time is a primary fix for pale crust European bread baking problems.
Using Egg Wash or Milk Wash
Applying a wash to the surface of the dough before baking is a simple yet effective way to promote browning and add shine, particularly for richer doughs or rolls. An egg wash (whole egg, yolk, or white mixed with a little water or milk) provides proteins and sugars that caramelize beautifully in the oven, resulting in a deep golden or even mahogany color.
A milk wash or cream wash also contributes to browning through lactose (milk sugar) and fat, yielding a softer, less shiny crust than egg wash. For lean, rustic breads like baguettes, washes are less common; their crust color relies more heavily on steam and high heat. Choosing the right wash (or no wash) depends on the desired final appearance of your specific European bread.
Steam Injection Techniques for Crust Development
Steam is arguably the most critical element for achieving the thin, crispy, and beautifully colored crust characteristic of many European hearth breads (like baguettes, boules, or pain au levain). Steam keeps the surface of the dough moist during the initial phase of baking, allowing the dough to expand fully (oven spring) before the crust sets. Once the crust sets, the moisture on the surface facilitates the Maillard reaction and caramelization at high temperatures.
Without sufficient steam, the crust sets too quickly, restricting oven spring and resulting in a thicker, duller crust that may crack randomly. Home bakers can create a steamy environment by baking in a preheated Dutch oven or lidded pot, which traps the bread's own steam. Alternatively, you can place a tray of hot water or ice cubes on the bottom rack of your oven just before loading the bread. Mastering steam is essential for solving pale crust and other European bread baking problems related to the exterior.
Crust Too Thick or Hard: Softening the Crust
While a thick, chewy crust is desirable for some breads, an overly thick or excessively hard crust can make a loaf difficult to slice and eat. This problem often arises from insufficient steam during the initial bake, baking at too low a temperature for too long, or improper cooling. Unlike the pale crust problem, which is about color, this is about the texture and thickness.
Lack of steam is a primary culprit. As discussed, steam keeps the crust pliable during oven spring. Without it, the crust sets too early and becomes thick and tough. Baking lean doughs without sufficient initial high heat can also contribute, as the crust dries out slowly rather than setting quickly with the help of steam.
Managing Steam in Your Oven
Ensuring adequate steam for the first 15-20 minutes of baking is key to preventing an overly thick crust in many European breads. Baking in a preheated Dutch oven is a highly effective method for home bakers, as the lid traps steam released by the dough. Remove the lid after 15-20 minutes to allow the crust to dry and brown.
If not using a Dutch oven, try generating steam by pouring hot water into a preheated pan on the oven floor or adding ice cubes to a hot tray. Be cautious when introducing steam; protect yourself from the hot vapor. Maintaining humidity in the oven during the crucial initial phase prevents the crust from hardening prematurely, helping to solve thick crust European bread baking problems.
Cooling the Bread Properly
How you cool your bread significantly impacts crust texture. As the bread cools, moisture from the interior migrates towards the crust. If the bread is cooled on a solid surface, this moisture can get trapped, leading to a soggy bottom crust. If it's cooled in a drafty area or too quickly, the crust can harden excessively.
Always cool bread on a wire rack, allowing air circulation around the entire loaf. This allows steam from the interior to escape evenly, resulting in a more balanced crust texture. Resist the urge to slice into hot bread; the internal structure is still setting, and cutting too early can compress the crumb and make the crust seem tougher. Patience during cooling helps mitigate crust European bread baking problems.
Flour Selection Impact on Crust Texture
The type of flour used can also influence crust thickness and hardness. Higher protein flours, like strong bread flour, tend to develop a chewier crust due to the strong gluten network. Whole grain flours, especially rye, can also contribute to a thicker crust.
For a softer crust, some recipes might incorporate a small amount of fat (like butter or oil) or sugar, which tenderize the crust. Using a lower-protein flour blend or incorporating ingredients like milk or eggs (as in brioche or challah) also results in a softer crust compared to lean doughs made only with flour, water, salt, and yeast/starter. Understanding flour properties helps predict and manage crust European bread baking problems.
Crust Cracking Excessively: Preventing Bursting
While some controlled cracking is desired for aesthetic appeal and proper expansion (e.g., the 'ear' on a baguette), excessive, uncontrolled cracking or bursting indicates that the dough's surface set too early, preventing the loaf from expanding fully during oven spring. This is a common European bread baking problem, particularly with high-hydration or strongly shaped loaves.
The primary cause is often insufficient scoring or improper scoring technique, coupled with a crust that has dried out or set prematurely before the dough's final push of expansion in the hot oven. If the surface is too tight, the expanding gases within the dough will find the weakest point and burst through unpredictably.
Scoring the Dough Correctly
Scoring (slashing) the surface of the dough just before baking is crucial for many European breads. These cuts act as vents, directing the dough's expansion during oven spring and allowing gases to escape in a controlled manner. The depth, angle, and pattern of scoring depend on the type of bread. For a baguette, long, overlapping slashes are needed to encourage a beautiful 'ear'. For a boule, a simple cross or square pattern is common.
Use a very sharp blade (a razor blade or 'lame' is ideal) and make swift, confident cuts. Hesitant or dull cuts can drag the dough and prevent proper opening. For rustic loaves aiming for an 'ear', hold the blade at about a 30-degree angle to the surface. Proper scoring is a vital skill to prevent uncontrolled bursting and manage crust European bread baking problems.
Understanding Dough Tension
The tension on the surface of the dough, created during the final shaping step, also plays a role in cracking. A well-shaped loaf has a taut surface skin that provides structure and helps the loaf hold its shape. However, if the surface is too tight, or if the underlying dough hasn't developed enough strength (gluten), the tension can be uneven.
Ensure your shaping technique creates a smooth, taut surface without tearing the dough. Allow the shaped loaf a sufficient, but not excessive, final proof. If the dough proofs too long, the surface tension can weaken, or the dough might start to collapse slightly, leading to weaker points where bursting can occur instead of controlled expansion through the scores. Balancing tension and proofing is key to avoiding uncontrolled crust European bread baking problems.
Controlling Oven Spring
Oven spring is the rapid expansion of the dough during the first 10-15 minutes in a hot oven before the crust fully sets. It's driven by the final burst of yeast activity and the expansion of gases and steam within the dough. Maximizing controlled oven spring is directly related to preventing excessive cracking.
High oven temperatures, adequate steam, and proper scoring all work together to facilitate good oven spring. The high heat provides the energy for rapid expansion, steam keeps the crust pliable to allow expansion, and scoring directs where the expansion occurs. If any of these elements are lacking, the dough struggles to expand gracefully, leading to unpredictable ruptures in the crust. Addressing these factors helps resolve crust European bread baking problems like bursting.
Crumb Issues in European Bread Baking
Dense Crumb: Achieving an Open Crumb Structure
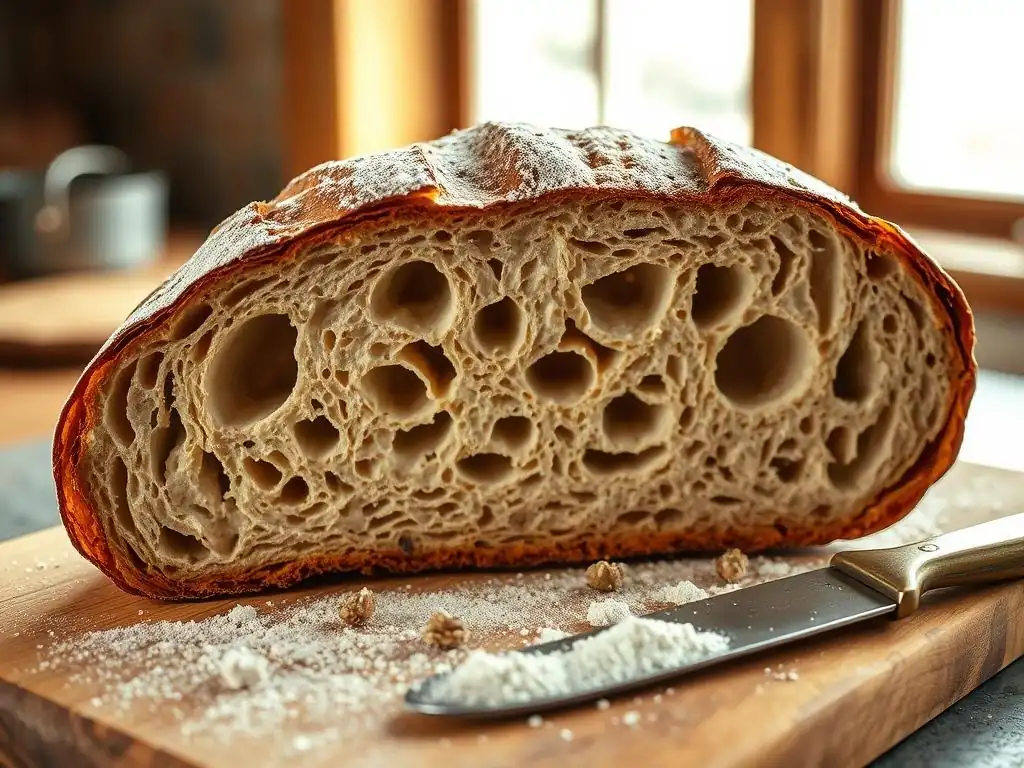
A dense, tight crumb where the air pockets are small and evenly distributed (or worse, barely there) is a common and disappointing European bread baking problem, especially when aiming for the open, airy structure typical of many artisan loaves like sourdough or ciabatta. A dense crumb usually indicates insufficient leavening or poor gluten development.
Insufficient leavening means the dough didn't produce or retain enough carbon dioxide gas to create large air pockets during fermentation and baking. This can be due to inactive yeast/starter, under-proofing, or losing too much gas during shaping. Without enough gas, the dough cannot expand properly in the oven, resulting in a tight structure.
Proper Gluten Development
A strong, elastic gluten network is essential for trapping the gases produced by fermentation. If the gluten is underdeveloped (due to insufficient kneading or using low-protein flour), it cannot hold the gas effectively, and the dough will struggle to rise, leading to a dense crumb. Kneading until the dough is smooth and elastic is vital for most non-rye European breads.
For high-hydration doughs where traditional kneading is difficult, techniques like autolyse (mixing flour and water and letting it rest before adding salt and yeast/starter) and regular stretch-and-folds during bulk fermentation are crucial for building gluten strength. A well-developed gluten network is the foundation for an open crumb and helps prevent this common European bread baking problem.
Adequate Proofing Time
Under-proofing is perhaps the most frequent cause of dense crumb. If the dough hasn't fermented long enough, the yeast hasn't produced sufficient gas to inflate the dough structure. The dough will feel heavy and may spring back immediately when poked. Baking an under-proofed loaf results in limited oven spring and a tight, dense interior.
Ensuring adequate proofing time, guided by the dough's volume increase and the poke test, is critical. While recipes provide time estimates, these must be adjusted for ambient temperature and other factors. Patience during fermentation and proofing is key to developing a light, open crumb and overcoming dense crumb European bread baking problems.
Shaping Techniques for Air Inclusion
How you shape the dough also impacts crumb structure. Gentle handling during shaping helps preserve the gases created during fermentation. Aggressive degassing (punching down too hard) can expel too much gas, leading to a tighter crumb.
For an open crumb, techniques like folding (as opposed to traditional punching down) and creating tension on the surface without deflating the interior are important. For very high-hydration doughs, minimal handling and simply folding the dough onto itself can help maintain the airy structure developed during bulk fermentation. Learning specific shaping methods for different European bread styles improves crumb texture.
Gummy Crumb: Avoiding Underbaked Bread
A gummy or sticky crumb is a clear sign of underbaking. This means the internal temperature of the bread didn't reach the point necessary to fully set the starches and evaporate excess moisture. While the exterior might look done, the interior remains moist and unpleasantly dense or sticky. This is a common issue when struggling with European bread baking problems.
Underbaking can result from pulling the bread out of the oven too soon, baking at too low a temperature, or having too much moisture in the dough (though this is less common than simply not baking long enough). The internal temperature is the most reliable indicator of doneness.
Internal Temperature Monitoring
The most accurate way to check if your bread is fully baked is to measure its internal temperature using an instant-read thermometer. For most lean European breads, a fully baked loaf should register between 200-210°F (93-99°C) in the center. Richer breads containing eggs, milk, or sugar may be done at a slightly lower temperature, around 190-200°F (88-93°C).
Insert the thermometer into the thickest part of the loaf, avoiding any large holes or the bottom crust. Relying solely on visual cues or tapping the bottom of the loaf (which should sound hollow) is less reliable than using a thermometer. Using a thermometer helps eliminate guesswork and prevents gummy crumb European bread baking problems.
Baking Time and Temperature Adjustments
If your bread consistently has a gummy crumb, you may need to adjust your baking time or temperature. If the crust is browning too quickly while the interior is still underbaked, try lowering the oven temperature slightly after the initial high-heat phase (if applicable) and extending the baking time. You can also loosely tent the loaf with foil to prevent the crust from burning.
Conversely, if the crust isn't browning but the interior is still wet, the temperature might be too low. Ensure your oven is calibrated and preheated properly. Baking time is always an estimate; use visual cues and the internal temperature to determine when your specific loaf is done. Adjusting these parameters is key to solving gummy crumb European bread baking problems.
Understanding Residual Moisture
Even when fully baked to the correct internal temperature, bread contains residual moisture. This moisture needs time to redistribute evenly throughout the loaf as it cools. Cutting into hot bread releases steam and traps moisture unevenly, which can contribute to a seemingly "gummy" texture right after baking, even if it was technically cooked through.
Allowing the bread to cool completely on a wire rack is essential. For larger loaves, this can take 2-3 hours or even longer. Patience during the cooling phase is just as important as the baking itself for achieving the correct crumb texture and avoiding perceived gummy crumb European bread baking problems.
Uneven Crumb: Troubleshooting Large Holes
An uneven crumb, characterized by some very large, irregular holes next to areas of dense, tight crumb, is another specific European bread baking problem. While an open crumb is often desired, these sporadic large tunnels or dense pockets indicate inconsistencies in the dough's structure or handling.
This issue is often caused by incorporating large air pockets during shaping that don't integrate properly with the rest of the dough's structure. It can also result from inconsistent fermentation, where some parts of the dough are more proofed than others, or from failing to adequately degas the dough at the appropriate stage.
Poor Shaping Techniques
Shaping is where you organize the dough's structure and build tension. If air bubbles are trapped unevenly during folding or rolling, they can develop into large, irregular holes during baking. For example, if you fold the dough and don't seal the seam properly, a large void can form along the seam.
Learning specific shaping techniques for different loaf types (boule, batard, baguette, etc.) is important. The goal is generally to create a smooth, taut outer surface while evenly distributing the gas within the dough or intentionally layering it for specific textures (like in a croissant, though that's laminated dough). Consistent, practiced shaping minimizes uneven crumb European bread baking problems.
Inconsistent Proofing
If the dough proofs unevenly, perhaps due to temperature variations within the proofing environment or inconsistent mixing/kneading, some areas might develop more gas than others. This can lead to pockets of over-proofed dough next to under-proofed areas, resulting in an uneven crumb structure after baking.
Ensure the dough maintains a consistent temperature during bulk fermentation and proofing. If doing a long, cold proof in the refrigerator, ensure the entire dough mass cools down evenly. Mixing and kneading should be thorough to create a homogeneous dough before fermentation begins. Consistency throughout the process helps prevent uneven crumb European bread baking problems.
Degassing the Dough Properly
While you don't want to completely deflate the dough, some level of degassing is necessary during the process, typically after bulk fermentation and before preshaping or shaping. This step breaks up large gas bubbles and helps create a finer, more even crumb structure (unless you are specifically aiming for very large, irregular holes like in some ciabatta).
Gentle folding or lightly pressing out the gas during the initial shaping steps helps redistribute the yeast and even out the dough's texture. Skipping this step or doing it inconsistently can leave large gas pockets intact, which then expand excessively in the oven, leading to tunnels and unevenness. Appropriate degassing helps manage crumb European bread baking problems.
Specific European Bread Troubleshooting
Baguette Baking Problems and Solutions
Baking the perfect baguette is often considered a benchmark for bakers, and they come with their own set of common European bread baking problems. Achieving that iconic thin, crispy crust, open irregular crumb, and elegant shape requires practice. Common issues include flat shape, thick crust, or a tight crumb.
Flat baguettes often result from insufficient gluten development for the high hydration, inadequate surface tension during shaping, or over-proofing. The high hydration dough needs a strong gluten network to hold its elongated shape. A thick crust is usually due to lack of sufficient steam during the initial bake. A tight crumb can stem from under-proofing or over-handling/degassing during shaping.
Shaping a Perfect Baguette
Shaping is critical for baguettes. The goal is to create a taut skin on the outside while elongating the dough. This is typically done by gently degassing, folding the dough onto itself multiple times, and then rolling it out to the desired length, creating tension with each pass. Too much flour on the surface during shaping prevents the layers from sealing, leading to potential issues.
Using a couche (linen cloth) dusted with flour helps support the shaped baguettes during their final proof, preventing them from spreading sideways and maintaining their shape. Transferring the delicate shaped baguettes to the baking surface without deforming them also requires practice, often using a peel or transfer board.
Scoring Techniques for Baguettes
Proper scoring is essential for the baguette's characteristic appearance and oven spring. Baguettes are typically scored with multiple diagonal slashes that overlap. Each slash should be about 4-6 inches long, about 1/2 inch deep, and angled at roughly 30 degrees to the surface.
Use a very sharp blade (a lame is ideal) and make quick, clean cuts. The angle is important as it helps create the 'ear' – the flap of crust that peels back. Inconsistent or timid scoring will result in less controlled expansion and a less attractive loaf, adding to your European bread baking problems list.
Baking Baguettes with Steam
Steam is non-negotiable for a great baguette crust. The thin, crackly crust requires a very steamy environment during the first 10-15 minutes of baking. This allows the dough to expand fully before the crust sets, resulting in a thin, crispy exterior rather than a thick, tough one.
Home bakers can achieve this by baking on a preheated baking stone and using a steam pan (like a cast iron pan with hot water) on the rack below, or by misting the oven walls (with caution). Some dedicated home bakers even install steam injection systems. Mastering steam is key to solving crust-related European bread baking problems for baguettes.
Sourdough Rye Bread Troubleshooting
Sourdough rye breads, common in countries like Germany and Poland, present unique challenges compared to wheat-based sourdoughs. Working with rye flour introduces distinct European bread baking problems. Rye contains less gluten-forming protein than wheat, and its starches behave differently, resulting in a stickier dough and a denser crumb.
Common issues include a gummy crumb, a lack of rise, or a dough that is difficult to handle. The stickiness of rye dough is normal due to pentosans, not gluten. Achieving a good rise requires a very active sourdough starter and often specific techniques like using a soaker or scald.
Working with Rye Flour
Rye flour varies significantly (light, medium, dark, pumpernickel/whole grain). The higher the percentage of rye, the more challenging the dough becomes. Rye doughs are often mixed more like a paste than kneaded like wheat dough, as extensive kneading doesn't develop a traditional gluten network.
Instead of focusing on elasticity, focus on hydration and fermentation time. Rye doughs benefit from longer, slower fermentation, sometimes including a preferment like a rye sour. Understanding that rye dough will be sticky and dense is the first step; don't try to make it behave like wheat dough by adding excessive flour.
Managing Sourdough Starter
A robust and active sourdough starter is crucial for leavening rye bread, as commercial yeast is often used sparingly or not at all. Rye starters tend to be very active, but their leavening power can still be less potent than a strong wheat starter in a wheat dough.
Ensure your rye starter is recently fed and vigorously active before using it. Using a higher percentage of starter in the dough or allowing a longer fermentation time can help achieve a better rise. The sourness level can also be controlled by adjusting fermentation temperature and time. A healthy starter is the foundation for preventing many sourdough rye European bread baking problems.
Achieving the Right Rye Bread Texture
The desired texture for rye bread varies greatly by type. A light deli rye will be less dense than a whole-grain pumpernickel. Achieving the characteristic dense but moist crumb of traditional rye breads relies on correct hydration, proper fermentation, and thorough baking.
Rye breads often benefit from lower baking temperatures and longer baking times than wheat breads to ensure the interior is fully cooked and the starches are set, preventing a gummy texture. Cooling thoroughly, often for 12-24 hours, is also essential for the crumb to stabilize and for the flavors to develop fully. Patience is key to mastering rye bread European bread baking problems.
Brioche Baking Problems and Solutions
Brioche, a rich French bread loaded with butter and eggs, presents a different set of European bread baking problems. Unlike lean hearth breads, brioche is a rich dough, and its challenges often relate to handling the soft, sticky dough, achieving the right golden color without burning, and ensuring a tender, airy crumb.
Common issues include a dough that is too soft to shape, a crust that burns before the interior is done, or a dense, heavy texture. The high fat and sugar content make the dough delicate and prone to burning. The richness also requires significant leavening power.
Rich Dough Handling
Brioche dough is notoriously soft and sticky due to the high proportion of butter and eggs, which interfere with gluten development. It's often mixed extensively (up to 15-20 minutes in a stand mixer) to develop what gluten can form. The dough is typically chilled for several hours or overnight before shaping, which solidifies the butter and makes the dough much easier to handle.
Work with cold dough and lightly floured hands or a bench scraper. Avoid adding excessive flour during shaping, as this will dry out the dough and affect the final texture. Patience and chilling are your best friends when dealing with brioche's unique handling European bread baking problems.
Achieving the Right Brioche Color
Brioche's high sugar content means its crust browns very quickly due to caramelization. Achieving a deep golden-brown color without burning requires careful temperature management and often a wash. Brioche is typically baked at moderate temperatures, around 350-375°F (175-190°C), lower than lean breads.
An egg wash (often just egg yolk and a little water or cream for a deep color and shine) applied before baking significantly enhances browning and gives brioche its signature look. If the crust starts browning too fast, loosely tent the loaf with aluminum foil for the remainder of the baking time.
Troubleshooting Brioche Texture
A perfect brioche has a tender, airy, and slightly shreddable crumb. A dense or heavy texture can result from insufficient leavening (active yeast is crucial in rich doughs), under-mixing (gluten not developed enough to support the fat), or rushing the proofing.
Ensure your yeast is active and the dough has proofed sufficiently, typically until doubled in size, which can take longer than lean doughs due to the richness. The extensive mixing time is also key to developing enough structure to hold the rise and fat. Following the recipe's mixing and proofing times closely, adjusted for temperature, helps achieve the desired texture and solve brioche European bread baking problems.
Advanced European Bread Baking Troubleshooting Tips
Understanding Flour Composition for European Breads
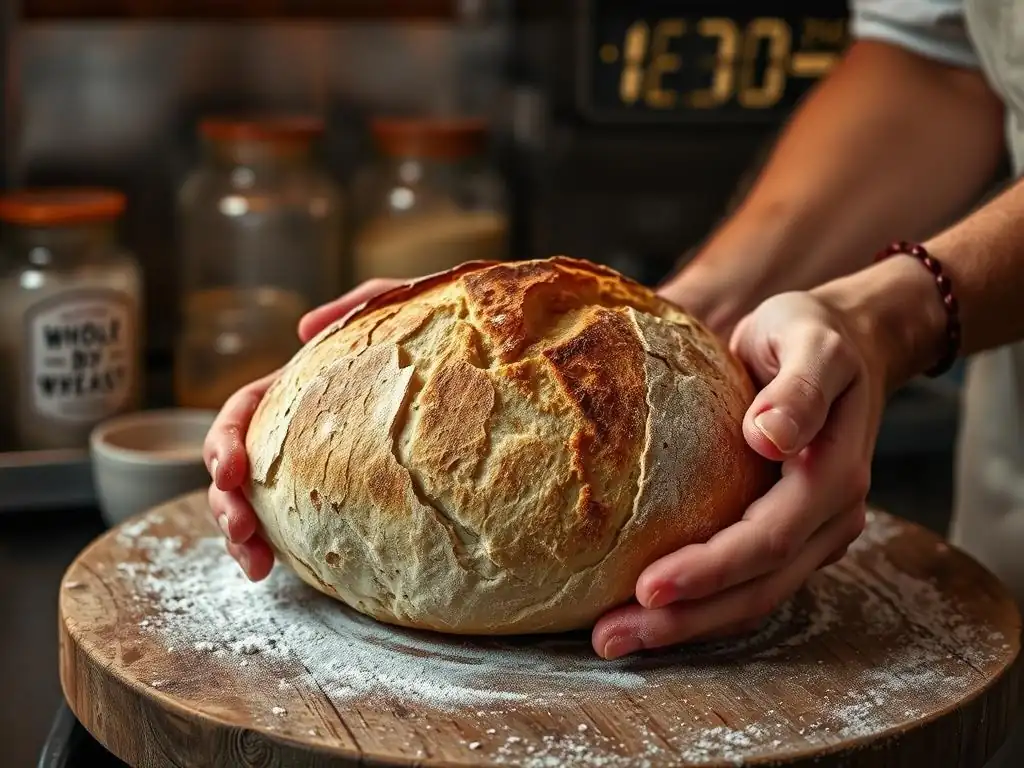
Moving beyond basic troubleshooting, a deeper understanding of flour composition is invaluable for tackling complex European bread baking problems. Different flours, even within the "wheat" category, have varying protein levels, ash content, and milling techniques that significantly impact dough behavior and the final loaf.
For instance, traditional European flours like French T55 or Italian Type 00 have specific characteristics (protein content, fine milling, low ash) that contribute to the texture of breads like baguettes or ciabatta. Substituting with a standard all-purpose flour might work, but won't yield the exact same results. Understanding these nuances helps you select the best flour or make intelligent substitutions when necessary.
Protein Content and its Impact
Protein content is a key differentiator. Higher protein flours (12-14%+) are "strong" and form robust gluten networks, ideal for chewy crusts and open crumbs in breads like sourdough or baguettes. Lower protein flours (8-11%) are "soft" and suitable for tender cakes or pastries, but won't provide enough structure for high-hydration, airy breads.
Using a flour with inappropriate protein content for the intended bread style is a common source of European bread baking problems. Too low protein for a rustic loaf leads to a flat, dense bread; too high protein for a tender roll leads to toughness.
Gluten Development in Different Flours
Not all proteins form gluten equally. Gliadin and glutenin, present in wheat, rye, and barley, combine with water to form gluten. However, rye and barley have less glutenin and more pentosans, which affect dough handling and structure differently than wheat gluten.
Even within wheat flours, the quality and quantity of gluten-forming proteins vary. Understanding how different flours develop gluten (or don't, in the case of pure rye) informs your mixing and kneading strategy and helps you anticipate dough behavior, improving your ability to troubleshoot specific European bread baking problems.
Flour Blends for Specific European Breads
Many traditional European breads use specific blends of flours to achieve their unique characteristics. For example, some rustic French breads might blend strong wheat flour with a percentage of rye or whole wheat for flavor and texture complexity. Italian pane casereccio often uses a mix of durum wheat (remilled semola) and soft wheat flour.
Experimenting with or understanding the purpose of traditional flour blends can elevate your baking. If replicating a specific regional bread, research the typical flour composition. Sometimes, the solution to a persistent European bread baking problem lies in adjusting the flour blend to better match the authentic style.
Mastering Preferments: Poolish, Biga, and Pate Fermentee
Incorporating a preferment (a portion of the dough mixed hours or days in advance) is common in European bread baking and significantly impacts flavor, texture, and fermentation strength. Poolish (equal parts flour and water, plus yeast), Biga (stiff dough, lower hydration, plus yeast), and Pate Fermentee (reserved dough from a previous batch) are common types.
Troubleshooting preferments involves ensuring they are active and mature before use. An under-fermented preferment won't provide the desired leavening or flavor benefits. An over-fermented preferment can add too much acidity, potentially hindering the main dough's rise or imparting an undesirable sourness.
Preparing and Using Preferments
Each preferment type has specific mixing and fermentation guidelines. Poolish is typically loose and bubbly, fermented at room temperature for 12-16 hours or longer in the fridge. Biga is stiffer and might ferment for 8-12 hours. Pate Fermentee is simply ripe dough.
Ensure your measurements are accurate and the fermentation temperature is controlled. When incorporating the preferment into the main dough, ensure it is fully dispersed during the initial mixing. Leftover clumps of preferment can lead to uneven fermentation and crumb European bread baking problems.
Impact on Flavor and Texture
Preferments add depth of flavor, often a pleasant tanginess, due to the longer fermentation and development of organic acids. They also contribute to a more open crumb structure and improved crust development. The type of preferment used influences the final characteristics; Poolish tends to contribute to a lighter crumb and milder flavor, while Biga often enhances chewiness and nutty notes.
If your European bread lacks depth of flavor or has a weak crumb structure despite correct mixing and proofing, incorporating a suitable preferment might be the solution. Understanding the specific benefits of each type helps you choose the right one for the bread you're baking.
Troubleshooting Preferment Issues
Common preferment problems include lack of activity or over-fermentation. If a preferment isn't bubbling as expected, check the yeast viability and temperature. It might need more time in a warmer spot. If a preferment smells strongly of alcohol or acetone and has collapsed, it's likely over-fermented and may negatively impact the final dough.
Using an over-fermented preferment can lead to a dough that rises poorly and has a gummy or unpleasant-tasting crumb. While a slightly over-fermented preferment can sometimes be salvaged, it's often best to discard a severely over-fermented one and start fresh to avoid introducing significant European bread baking problems into your final dough.
Oven Troubleshooting for European Bread Baking
Your oven is a critical piece of equipment, and its performance directly impacts your success with European bread baking. Issues like inaccurate temperatures, uneven heating, or inability to generate sufficient steam are common sources of European bread baking problems that have nothing to do with your dough handling.
Understanding your oven's quirks and how to mitigate them is essential. Many home ovens fluctuate in temperature, have hot spots, and are not designed to hold significant steam. Addressing these limitations can dramatically improve crust development and overall bake quality.
Oven Calibration and Hot Spots
Verify your oven's temperature accuracy with a reliable oven thermometer placed in the center. If it's consistently off by more than 15-20°F (approx. 8-11°C), you'll need to adjust your target temperature accordingly or consider professional calibration.
Identify hot spots by baking something simple like toast or cookies spread across a baking sheet. Areas that brown faster indicate hot spots. Knowing where these are allows you to rotate your bread during baking for a more even color and bake, helping to avoid uneven crust European bread baking problems.
Using Baking Stones and Dutch Ovens
Baking stones (like pizza stones or steel) and Dutch ovens (or other lidded heavy pots) are invaluable tools for home bakers tackling European bread baking problems. A preheated baking stone stores and radiates heat, providing a strong initial thermal shock to the dough, which boosts oven spring and helps develop a crispy bottom crust.
A preheated Dutch oven excels at trapping steam released by the dough during the crucial first phase of baking. This creates the ideal humid environment for crust development and oven spring in lean breads. Using these tools can significantly improve the quality of your crust and crumb compared to baking on a simple baking sheet.
Steam Injection Techniques for Home Ovens
As highlighted earlier, steam is crucial for many European bread crusts. While Dutch ovens are effective for single loaves, baking multiple loaves or certain shapes requires alternative steam methods. Placing a tray of hot water or ice cubes on the oven floor or bottom rack is a common technique.
Preheating the pan for steam generation is key. Pouring hot water into a hot pan creates instant steam. Be extremely careful of the steam escaping when you open the oven door. Some bakers also use lava rocks in a tray, which retain heat and generate steam effectively when water is poured over them. Consistent steam generation helps resolve many crust-related European bread baking problems.
Conclusion: Bake European Breads with Confidence
Troubleshooting European bread baking problems is a journey of learning and experimentation. While these styles can be challenging, understanding the common pitfalls related to dough handling, proofing, crust development, and crumb structure empowers you to identify issues and apply effective solutions. Every bake, successful or not, provides valuable lessons.
By paying close attention to details like ingredient measurement, temperature control, gluten development, proofing readiness, and oven environment, you can significantly improve your results. Don't be discouraged by setbacks; even experienced bakers encounter European bread baking problems. The key is to understand why something went wrong and adjust for the next bake.
Key Takeaways for Successful European Bread Baking
- Accuracy Matters: Weigh ingredients for consistent hydration.
- Understand Your Dough: Learn the expected feel and behavior for different hydration levels and flour types.
- Temperature is King: Control dough and oven temperatures for optimal fermentation and baking.
- Proofing by Feel: Rely on visual cues and the poke test, not just the clock.
- Master Steam: Use Dutch ovens or steam methods for ideal crust development in lean breads.
- Cool Completely: Patience during cooling is essential for proper crumb texture.
- Learn from Mistakes: Identify what went wrong and adjust your process for next time.
Further Resources for Mastering European Bread Baking at BakeWithEase
Continue exploring the world of European breads right here at BakeWithEase. We offer detailed recipes, technique guides, and ingredient explanations to support your baking journey. Whether you're perfecting your pain de campagne or trying your hand at challah, our resources are designed to help you overcome European bread baking problems and bake with increasing skill and confidence. Happy Baking!
Frequently Asked Questions
What are some common problems encountered when baking European breads at home?
Many home bakers struggle with achieving the right crust texture and crumb structure. Insufficient gluten development and incorrect oven temperature are often the culprits.
Why is my European bread so dense and heavy?
A dense loaf usually indicates a problem with yeast activity or gluten development. Try proofing the dough for a longer period or kneading it more thoroughly.
How can I get a crispier crust on my European bread?
Achieving a crispy crust often requires high oven temperature and steam during the initial baking. Consider using a Dutch oven or adding water to a preheated pan in the oven.
My European bread doesn't rise properly. What could be the issue?
Poor rising can be due to expired yeast, incorrect dough temperature, or insufficient kneading. Ensure your yeast is active and that your dough is in a warm environment.
What's the best way to store European bread to keep it fresh for longer?
Store your bread in a breathable bag (like linen or paper) at room temperature. Avoid plastic bags as they can trap moisture and cause the crust to soften too quickly.
Final Reflection: The Enduring Allure of European Bread, Perfectly Baked
The quest for the perfect loaf of European bread continues, a testament to the enduring power of tradition and the rewarding challenge of mastering a complex craft. From sourdough starters to oven spring, the journey is fraught with potential pitfalls, but the rewards – that satisfying crust, the airy crumb, the intoxicating aroma – make it all worthwhile. This article has explored some of the most common hurdles, offering solutions to help bakers of all levels achieve their bread-baking dreams.
The pursuit of perfect European bread transcends mere culinary skill; it's a connection to history, a celebration of simple ingredients transformed by time and technique. It's a journey of patience and precision, demanding attention to detail and a willingness to learn from mistakes. As the renowned baker, Lionel Poilâne, once said, Bread is the staff of life, but it is also a work of art.
This sentiment resonates deeply, highlighting the artistry and dedication involved in crafting truly exceptional bread. The ongoing fascination with European bread baking reflects a deeper human desire for connection to tradition, craftsmanship, and the simple pleasures of sharing a perfectly baked loaf.
Now, consider your own baking journey. What challenges have you faced? What triumphs have you celebrated? Don't be discouraged by setbacks; embrace them as opportunities for growth. Each failed loaf teaches a valuable lesson, bringing you closer to mastering the art of European bread baking. So, gather your ingredients, preheat your oven, and embark on your own baking adventure. The journey may be challenging, but the reward – that perfect loaf, shared with loved ones – is undeniably worth the effort.
Unlock Your Inner Boulanger: Master European Bread Baking!
Thanks for taking the time to explore the world of European bread baking with us! We hope you gained valuable insights into common pitfalls and discovered new techniques to elevate your baking game. Ready to put your newfound knowledge into practice?
- Bake your best loaf yet! Try out one of the recipes mentioned in the article, adapting it to your favorite flours and ingredients. Pay close attention to the proofing and baking times – that's where the magic happens!
- Share your baking journey! Post a picture of your creation on social media and tag #BakeWithEaseEuropeanBread. Let's inspire each other!
- Dive deeper into the world of sourdough! Explore our other articles on sourdough starters and advanced techniques for even more delicious results.
What unique ingredient are you most excited to experiment with in your next European bread creation?