
Create Stunning Mosaic Effects on Cookies

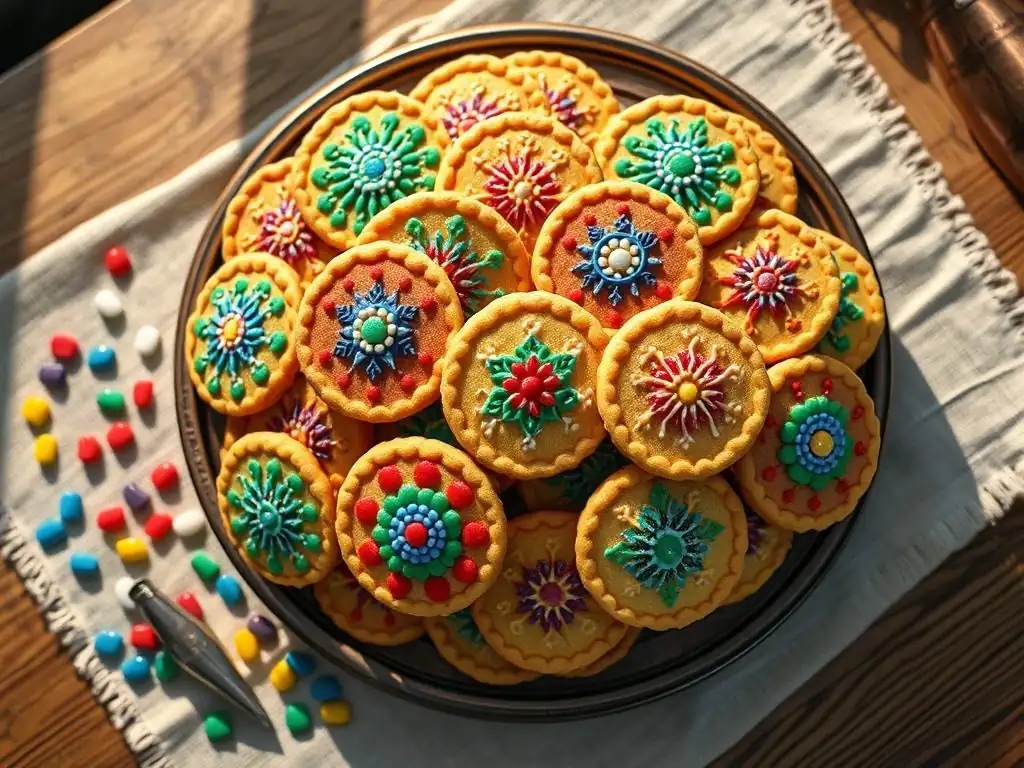
Welcome to BakeWithEase, your trusted companion on the baking journey! Ever dreamt of creating edible masterpieces that look as good as they taste? Get ready to unlock the secrets behind creating stunning patterns with our easy mosaic cookies recipe. This delicious adventure in pastry and desserts is about to begin, so grab your apron and discover how simple it is to impress your friends and family with these beautiful, eye-catching treats. Intrigued? Let's get baking!
- Create Stunning Stained Glass Effects on Cookies: An Easy Guide
- Introduction to Stained Glass Cookie Art
- Essential Tools and Ingredients for Stained Glass Cookies
-
Easy Stained Glass Cookies Recipe: Step-by-Step Guide
- Step 1: Preparing Your Sugar Cookie Dough
- Step 2: Cutting Out Your Cookie Shapes
- Step 3: Preparing and Crushing the Hard Candy
- Step 4: Filling the Cookie Cutouts with Crushed Candy
- Step 5: Baking Your Stained Glass Cookies to Perfection
- Step 6: Adding Final Touches (Optional Edible Glue and Sprinkles)
- Mastering Different Stained Glass Cookie Techniques
- Troubleshooting Common Stained Glass Cookie Problems
- Creative Stained Glass Cookie Design Ideas and Inspiration
- Storing and Presenting Your Stained Glass Cookies
- Beyond the Basics: Advanced Stained Glass Cookie Decorating
- Conclusion: Unleash Your Creativity with Easy Stained Glass Cookies
-
Frequently Asked Questions
- What exactly is an easy mosaic cookies recipe?
- What makes this mosaic cookie recipe easy compared to others?
- What are some common ingredients used in an easy mosaic cookies recipe?
- How do I prevent the colors from bleeding together when baking mosaic cookies?
- Can I use different cookie cutters to create my mosaic design?
- Final Reflection: The Enduring Art of the Mosaic Cookie
- Unleash Your Inner Mosaic Artist: Create Cookie Masterpieces!
Stained glass cookies are a beautiful fusion of classic sugar cookies and vibrant, melted hard candy. The process involves cutting shapes into cookie dough and then filling those cutouts with crushed hard candies before baking. As the cookies bake, the candy melts and solidifies into a translucent, glass-like window, creating a stunning effect that mimics traditional stained glass art.
These cookies are not just delicious, but they are also edible works of art, perfect for holidays, special occasions, or simply adding a touch of magic to your baking repertoire. Their unique appearance makes them stand out from typical decorated cookies, offering a delightful surprise in texture and visual appeal.
Baking stained glass cookies offers a creative outlet that's accessible to bakers of many skill levels. While they look intricate, the basic technique is quite straightforward, making it an achievable project for those looking to try something new beyond simple frosting or sprinkles. The contrast between the sweet, tender cookie and the smooth, slightly brittle candy "glass" is a delightful sensory experience.
Furthermore, you can customize the colors and shapes endlessly, tailoring them to any theme or season, making them a versatile addition to your baking skills. Plus, they catch the light beautifully, adding a festive sparkle to any cookie platter.
Stepping into the world of stained glass cookies allows you to move beyond basic cookie decorating techniques like piping or flooding. This method introduces a new element – working with melted candy – which opens up possibilities for creating depth, color, and transparency in your cookie designs. It challenges you to think about negative space and how light interacts with your edible art.
Mastering this technique provides a solid foundation for more complex cookie projects and expands your creative horizons in the kitchen. It's a fantastic way to impress friends and family with unique, handmade treats that showcase a higher level of baking artistry.
Developing proficiency in easy stained glass cookies also builds valuable baking intuition. You'll learn about how different candies melt, how dough behaves during baking with a filling, and temperature control – all skills transferable to other baking endeavors. Starting with simple shapes and single colors is a great way to build confidence. As you become more comfortable, you can experiment with layering colors, creating intricate patterns within the candy window, or combining stained glass with other decorating methods like royal icing borders. It's a rewarding journey that adds a sophisticated touch to your homemade goodies.
Welcome to BakeWithEase, your trusted source for simplifying delightful baking projects! We've put together this comprehensive guide to help you master the art of easy stained glass cookies. Our goal is to break down the process into simple, manageable steps, ensuring that even if this is your first time attempting this technique, you'll achieve beautiful and delicious results.
We'll cover everything from selecting the right dough and candy to troubleshooting common issues, all designed to make your baking experience smooth and enjoyable. Get ready to transform simple sugar cookies into dazzling edible windows that will captivate everyone who sees them.
At BakeWithEase, we believe that baking should be fun and accessible. This guide is filled with practical tips, clear instructions, and creative ideas to inspire you. Whether you're baking for a holiday, a special event, or just for the joy of it, these easy stained glass cookies are sure to be a hit. We encourage you to embrace the process, experiment with colors and shapes, and most importantly, have fun creating these miniature masterpieces. Let's embark on this sweet adventure together and add some sparkle to your baking repertoire!
The foundation of any great stained glass cookie is a reliable sugar cookie dough. You need a dough that holds its shape well during baking and doesn't spread excessively, which would distort the delicate candy windows. A standard cut-out sugar cookie recipe that includes a good amount of butter and is chilled thoroughly is ideal. A typical recipe might call for 1 cup (2 sticks or 226g) of unsalted butter, creamed with 1 ½ cups (300g) of granulated sugar until light and fluffy.
Then, incorporate 1 large egg and 1 teaspoon of vanilla extract. Finally, gradually add 3 cups (360g) of all-purpose flour whisked with ½ teaspoon of baking powder and ¼ teaspoon of salt. Mixing until just combined prevents tough cookies.
Once your dough is mixed, chilling is a crucial step. Wrap the dough tightly in plastic wrap and refrigerate it for at least 2-3 hours, or preferably overnight. This firms up the butter, which helps the cookies maintain their shape in the oven.
Working with cold dough is essential for clean cuts and minimal spreading. You might even find it helpful to chill the cut-out shapes again briefly before baking. Using high-quality ingredients, like good butter and fresh flour, will also contribute to the overall flavor and texture of your sugar cookie base, ensuring that your beautiful stained glass effect is paired with a delicious cookie.
Hard Candy Options for Vibrant Stained Glass Windows
The key ingredient for the "glass" effect is hard candy. The best options are individually wrapped, clear, hard candies like Jolly Ranchers, Life Savers (the original hard candy kind), or even simple clear butterscotch or fruit drops. Avoid chewy candies, gummy candies, or chocolates, as they won't melt into a clear, stable "glass." The color vibrancy depends on the candy you choose; bright, saturated colors work best for a classic stained glass look. Using a variety of colors allows you to create multi-hued windows or separate colored sections within a single cookie.
You'll need a significant amount of candy, roughly 1-2 standard bags (around 13-14 oz or 370-400g) depending on how many cookies you're making and the size of your cutouts. It's always better to have too much than too little. Ensure the candies are hard and not sticky before crushing.
If they feel a bit soft, chilling them briefly can help. Using a mix of colors adds visual interest, but you can also stick to a single color for a simpler, elegant look. Consider the flavors too; some candies might impart their flavor to the cookie, which can be a fun bonus!
Having the right tools makes the process of creating easy stained glass cookies much smoother. You'll need standard baking equipment like mixing bowls, a rolling pin, and baking sheets lined with parchment paper or silicone mats. For cutting the cookies, you'll need cookie cutters – one larger cutter for the outer shape and a smaller cutter or tool for the inner cutout where the candy will go. Basic geometric shapes like circles, squares, diamonds, or stars work well, as do holiday-themed cutters. A sharp knife or even a small paring knife can also be used for intricate inner cuts.
For crushing the hard candy, you'll need a sturdy bag (like a Ziploc freezer bag) and a heavy object, such as a rolling pin, meat mallet, or even a heavy can. A food processor can also be used but pulse carefully to avoid turning the candy into powder – you want small granules, not dust.
A small spoon or funnel is helpful for carefully filling the candy into the cookie cutouts. Finally, a metal spatula is essential for transferring the baked cookies from the baking sheet to a cooling rack once they've cooled slightly, as the melted candy can be delicate when hot.
[ ] Gather sugar cookie ingredients
[ ] Select hard candies in desired colors
[ ] Prepare baking sheets with parchment or silicone mats
[ ] Locate cookie cutters (large and small)
[ ] Find a sturdy bag and crushing tool for candy
[ ] Have a small spoon or funnel ready for filling
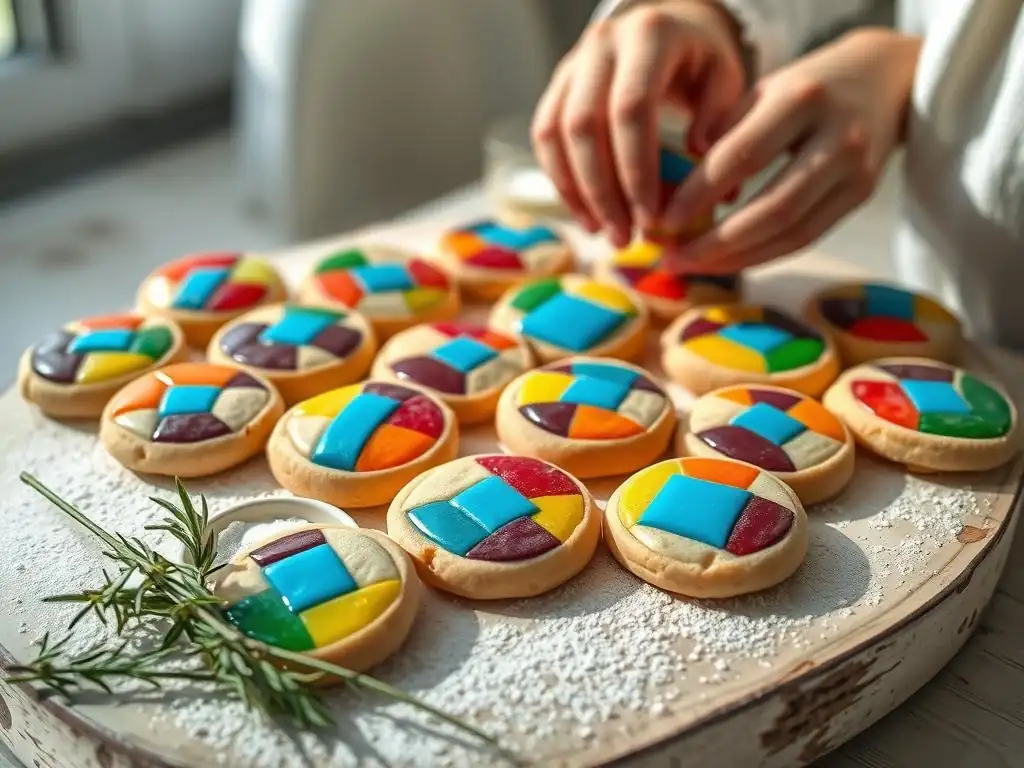
Begin by preparing your favorite cut-out sugar cookie dough recipe. As mentioned, a recipe that holds its shape well is key. Cream together the softened butter and sugar until the mixture is light and fluffy. This incorporates air, contributing to a tender cookie texture. Scrape down the sides of the bowl as needed to ensure everything is evenly mixed. Then, beat in the egg and vanilla extract until fully combined. Don't overmix at this stage; just ensure the wet ingredients are incorporated.
In a separate bowl, whisk together your dry ingredients: flour, baking powder, and salt. Gradually add the dry ingredients to the wet ingredients, mixing on low speed or by hand until the dough just comes together. Be careful not to overdevelop the gluten by overmixing. The dough should be cohesive but not sticky. Divide the dough into one or two flat discs, wrap each tightly in plastic wrap, and refrigerate for at least 2-3 hours. Chilling is non-negotiable for clean cuts and minimal spread, aiming for a dough temperature around 35-40°F (2-4°C).
Once your dough is thoroughly chilled, lightly flour a clean work surface and your rolling pin. Roll out one disc of dough to an even thickness, typically about ¼ inch (about 6mm). Uniform thickness is important for even baking of both the cookie and the candy. Thinner cookies might burn before the candy melts properly, while thicker ones might result in underbaked dough around the candy window. Use your large cookie cutters to cut out the desired outer shapes. Carefully transfer these shapes to your prepared baking sheets, leaving about 1-2 inches between them to allow for slight spread.
Now, using your smaller cookie cutters or a knife, carefully cut out the inner shape from the center of each cookie. This is where your candy "glass" will go. Remove the inner dough pieces – you can re-roll these scraps with other dough scraps, but remember that dough re-rolled multiple times can become tougher. Try to make the inner cutout large enough to hold a good amount of crushed candy, but leave enough surrounding dough to maintain the cookie's structure. For instance, if using a 3-inch star cutter, a 1-inch star or circle cutter for the inside works well.
Step 3: Preparing and Crushing the Hard Candy
While your cookie cutouts are on the baking sheets, it's time to prepare the candy. Unwrap all your hard candies and separate them by color if you plan on using multiple colors. Place each color batch into a sturdy, zip-top freezer bag. Seal the bag, pressing out as much air as possible.
Lay the bag flat on a hard surface, like a cutting board. Use a rolling pin or meat mallet to gently but firmly crush the candies into small granules. You don't want fine powder, but rather pieces ranging from sand-sized up to about ¼ of a small candy piece. Larger pieces might not melt fully or evenly.
Crushing the candy can be a bit noisy but is quite simple. Ensure all the candy pieces are broken down. If using a food processor, pulse in short bursts, checking frequently, until the desired consistency is reached. Having a mix of granule sizes is acceptable and can even add interesting texture to the finished "glass." Once crushed, keep the different colors separated in small bowls or containers, ready for filling the cookie cutouts. This preparation step is crucial for ensuring the candy melts properly in the oven.
This is where the magic starts! Carefully spoon or gently pour the crushed hard candy into the cutouts in your cookie dough shapes on the baking sheet. Fill the cavity generously, slightly mounding the candy in the center. As the candy melts, it will spread and level out. If you don't add enough candy, you might end up with thin or incomplete "glass" windows. Use a small spoon, the tip of a knife, or even a small funnel for precision, especially with smaller or intricate cutouts.
If you are creating multi-colored windows, carefully place different colored candy granules into separate sections of the cutout. For example, in a star shape, you could put red candy in one point and green in another. Try not to mix the colors too much before melting if you want distinct color blocks, as they will blend slightly in the oven anyway. Ensure the candy is contained within the dough edges and doesn't spill onto the baking sheet, as melted candy stuck to the sheet can be difficult to remove and might break the cookie when you lift it.
Preheat your oven to 350°F (175°C). This temperature is generally effective for baking the cookie dough while allowing the candy to melt fully without burning. Carefully transfer the baking sheets with the filled cookies to the preheated oven. Bake for approximately 8-12 minutes. The exact time will vary depending on your oven, the thickness of your cookies, and the size of the candy cutouts. You'll know the cookies are done when the edges are lightly golden brown and the crushed candy in the center has completely melted and appears smooth and clear.
Monitor the cookies closely as they bake, especially in the last few minutes. The candy melts relatively quickly once it reaches temperature. Overbaking can cause the candy to bubble excessively, discolor, or even burn, resulting in a cloudy or burnt-sugar appearance instead of clear "glass." The cookie dough itself should also be just done, not overbaked.
Tips for Preventing Burning and Achieving Clear "Glass"
To prevent the candy from burning, use parchment paper or a silicone baking mat on your baking sheet; this is non-negotiable as it prevents the melted candy from sticking. Ensure your oven temperature is accurate – using an oven thermometer can help. If you notice the candy melting much faster than the cookie is baking, try slightly reducing the oven temperature next time, perhaps to 325°F (160°C), or chilling the cut cookies longer before baking.
For the clearest "glass," use hard candies that are naturally transparent when melted. Avoid opaque or cloudy candies. Fill the cavities adequately but don't overfill to the point where the candy spills over the dough edge. If bubbles form in the melting candy, sometimes a gentle swirl of the baking sheet can help them disperse, but avoid touching the hot candy directly. Letting the cookies cool undisturbed on the baking sheet is also key for the candy to re-harden into a smooth, clear state.
Step 6: Adding Final Touches (Optional Edible Glue and Sprinkles)
Once your stained glass cookies are baked and the candy has melted and cooled completely on the baking sheet until hard, you can carefully transfer them to a wire rack using a thin spatula. The candy will be brittle when fully cool, so handle with care. At this point, the cookies are technically complete and beautiful on their own! However, you can add optional final touches to enhance their appearance.
For extra sparkle or detail, you can use edible glue (a simple mixture of powdered sugar and a tiny bit of milk or water) or a thin line of royal icing along the dough edges. While the glue is wet, you can adhere edible glitter, sanding sugar, or small sprinkles around the candy window or along the cookie edges. This adds another layer of decoration and can help frame the stained glass effect.
Ensure any added decoration doesn't obscure the beautiful transparency of the candy window itself. Allow any icing or glue to dry completely before storing or packaging the cookies.
The Simple Cut-Out and Fill Stained Glass Method
The most straightforward technique for creating easy stained glass cookies involves using two concentric cookie cutters: one larger for the outer shape and a smaller one for the inner cutout. As described in the steps above, you simply cut the outer shape from your chilled dough, place it on the baking sheet, and then cut and remove the inner shape. Fill the resulting cavity with crushed hard candy before baking. This method is perfect for beginners and works well with standard shapes like circles, squares, stars, hearts, or even simple animal silhouettes.
This technique is forgiving and allows for a wide range of design possibilities using just basic cookie cutters. You can vary the size and shape of the inner cutout relative to the outer shape to change the look of the "frame" around your stained glass. For example, using a small circle cutter inside a large circle cutter creates a classic ring shape, while using a star inside a circle offers an interesting contrast. It's a great way to get comfortable with the process before moving on to more complex designs, ensuring reliable results with minimal effort.
Creating Multi-Colored Stained Glass Effects
Adding multiple colors to a single stained glass window elevates the visual appeal of your cookies. This can be achieved in a few ways. The simplest is to use different colors of crushed candy side-by-side within a single cutout. For instance, in a large heart cutout, you could fill the left side with crushed red candy and the right side with crushed pink candy. During baking, the colors will melt and likely blend slightly where they meet, creating a beautiful gradient or marbled effect.
For more defined multi-colored sections, you might use cookie cutters with internal divisions, or carefully section off areas within a larger cutout using thin strips of cookie dough (though this requires careful handling to ensure the dough doesn't break). Another approach is to bake a base cookie with a large cutout, then after it cools, use melted isomalt (a sugar substitute that hardens clear) colored with food coloring to create specific colored sections, pouring one color, letting it set, then adding another.
However, for easy stained glass cookies using hard candy, the side-by-side crushed candy method is the most accessible and effective way to get vibrant, multi-colored windows.
Adding Edible Wafer Paper Details
For an extra layer of detail and sophistication on your easy stained glass cookies, consider incorporating edible wafer paper. Wafer paper is a starch-based edible paper that can be printed with edible ink or cut into shapes. While you can't bake wafer paper directly into the candy window (it would likely dissolve or burn), you can apply it after the cookie is baked and cooled.
Once your stained glass cookie has completely cooled and the candy window is solid, you can adhere cut-out wafer paper shapes or printed designs onto the candy surface using a tiny amount of edible glue or clear piping gel. For example, you could cut out a small cross or a floral design from wafer paper and attach it to the center of a clear candy window to mimic traditional stained glass patterns. This technique allows for intricate designs that might be difficult to achieve with just melted candy, adding fine detail and a professional touch to your beautiful cookies.
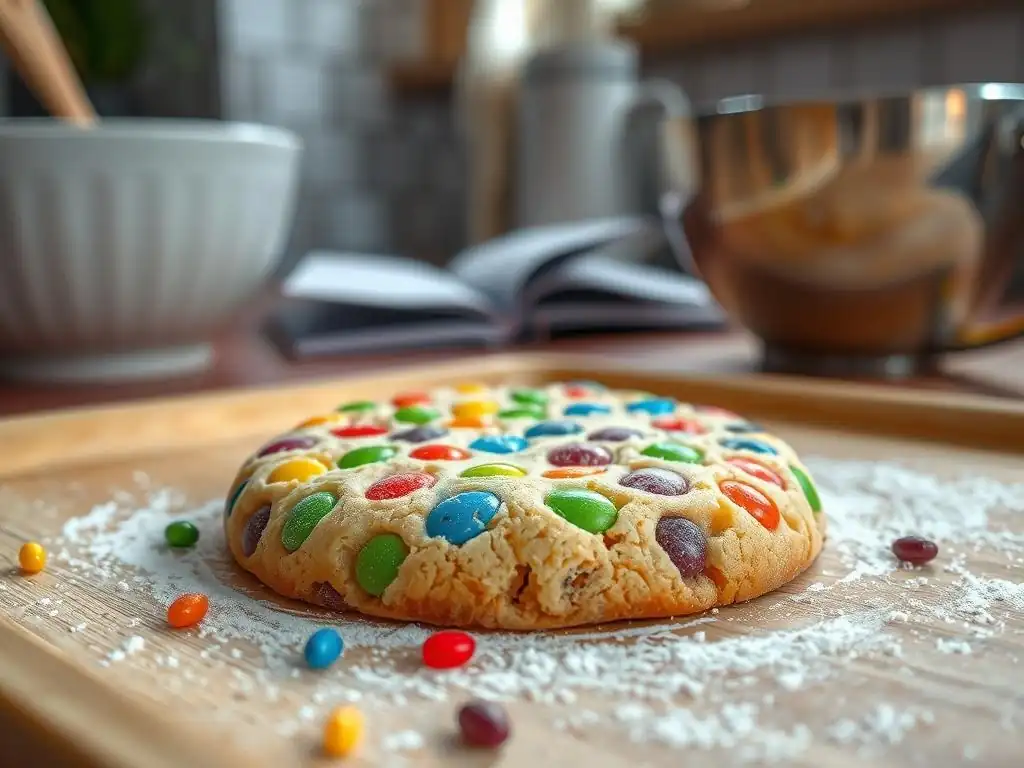
Preventing Candy from Leaking or Burning
One of the most common frustrations when making stained glass cookies is the candy leaking out of the cutout or burning in the oven. Leaking usually happens if the dough is too soft, the cutout is too close to the edge, or the baking sheet isn't properly lined. Ensure your dough is well-chilled before cutting and transferring to the baking sheet.
Use parchment paper or a silicone mat, making sure it covers the entire surface under the cookies. Also, double-check that the inner cutout is not too close to the outer edge of the cookie shape; leave a substantial dough border (at least ½ inch or 1 cm).
Burning occurs when the candy is exposed to high heat for too long. The optimal temperature is usually 350°F (175°C), but ovens vary. If your candy is burning before the cookie is done, try reducing the oven temperature slightly to 325°F (160°C) and extending the baking time by a minute or two.
Ensure the candy is crushed into relatively uniform, small granules – large pieces take longer to melt and can lead to uneven results or burning of the surrounding smaller pieces. Monitoring the cookies closely during the last few minutes of baking is crucial; pull them out as soon as the candy is fully melted and smooth.
Avoiding Bubbles in the Melted Candy
Sometimes, the melted candy window can develop unsightly bubbles, which can obscure the clear "glass" effect. This is often caused by the heat of the oven releasing trapped air or moisture within the crushed candy pieces or uneven melting. Using very dry, hard candies is a good starting point. Ensure the candy is completely unwrapped and free of any paper residue before crushing.
While some bubbles are almost inevitable, minimizing them is possible. Ensure the candy is crushed into small, relatively uniform pieces rather than a mix of dust and large chunks. Don't overfill the cavity excessively, as this can trap air.
Once the cookies are in the oven and the candy starts to melt, you can sometimes gently tap the baking sheet on the oven rack (carefully!) to help larger bubbles rise and pop, but this must be done cautiously to avoid spilling the hot candy. Ultimately, a few small bubbles are often part of the charm of homemade stained glass cookies.
Ensuring Even Melting of the Hard Candy
Achieving a perfectly smooth, evenly melted candy window requires consistent heat and uniform candy size. Uneven melting can result in some parts of the window being liquid while others are still granular, or some areas being clear while others are cloudy. The primary factor for even melting is the consistency of your crushed candy; aim for granules that are roughly the same size. Avoid having a mix of very fine powder and large chunks in the same cutout.
Another factor is oven temperature consistency. If your oven has hot spots, rotate the baking sheet halfway through the baking time. Also, ensure the cookies are placed on a level surface in the oven rack. Filling the cavity evenly with the crushed candy helps too; spread it out gently with a spoon so there aren't thick piles in one area and sparse coverage in another. Patience is also key; allow the cookies to bake until all the candy is melted and smooth, even if the cookie edges look done.
Stained glass cookies are absolutely perfect for holidays, adding a festive glow to any celebration. For Christmas, think about using star, tree, bell, or gingerbread person cutters. Fill them with red, green, and clear crushed candies. You can even use a small circle cutter to make "ornament" cookies with a single candy window. For Easter, egg or bunny shapes with pastel-colored candy windows are delightful. Halloween calls for spooky shapes like ghosts, pumpkins, or bats filled with orange, purple, or black (licorice or dark fruit flavors) candy.
Valentine's Day is ideal for heart-shaped cookies with red or pink stained glass centers. For fall holidays like Thanksgiving, consider leaf shapes with warm-toned candies like orange, yellow, and brown. You can easily match the candy colors to the traditional colors of any holiday. The translucent effect of the candy makes them look particularly magical when displayed near a light source, like on a windowsill or hanging on a Christmas tree (ensure they are fully cooled and sturdy if hanging).
Geometric shapes are excellent for beginners making easy stained glass cookies because the cutouts are simple and the lines are clean. Start with basic shapes like circles, squares, rectangles, or triangles. You can use a smaller version of the same shape for the inner cutout (e.g., a small square inside a large square) or mix shapes (e.g., a circle inside a square). Using multiple small circle cutouts within a large rectangle cookie can create a fun, polka-dot window effect.
Experiment with patterns using geometric shapes. A large rectangle cookie with several smaller rectangular cutouts arranged in a grid creates a window pane effect. A diamond cookie with a smaller diamond cutout offers a modern look. These simple shapes are easy to cut and fill, providing a great way to practice the technique and achieve beautiful results without intricate cutters. The clean lines of geometric stained glass cookies offer a contemporary aesthetic that is both striking and easy to execute.
Once you're comfortable with the basic techniques, you can explore more advanced designs like floral patterns or abstract art. For floral designs, you might use flower-shaped cutters and cut out the center, or use a knife to carefully cut petal shapes within a larger circle cookie. Filling these intricate shapes requires more precision with the crushed candy, possibly using a small tool to push the granules into tight corners.
Abstract designs offer immense creative freedom. You could use freeform cutouts within a cookie or even break a baked cookie with a large candy window into pieces after it cools to create "shards" of stained glass (be careful of sharp edges!). Another advanced technique involves using cookie cutters that create internal patterns, like a snowflake cutter with internal lines. You can carefully fill different sections of these internal patterns with different colored candies to create complex, multi-colored designs. These advanced techniques require patience and practice but result in truly stunning, unique edible art pieces.
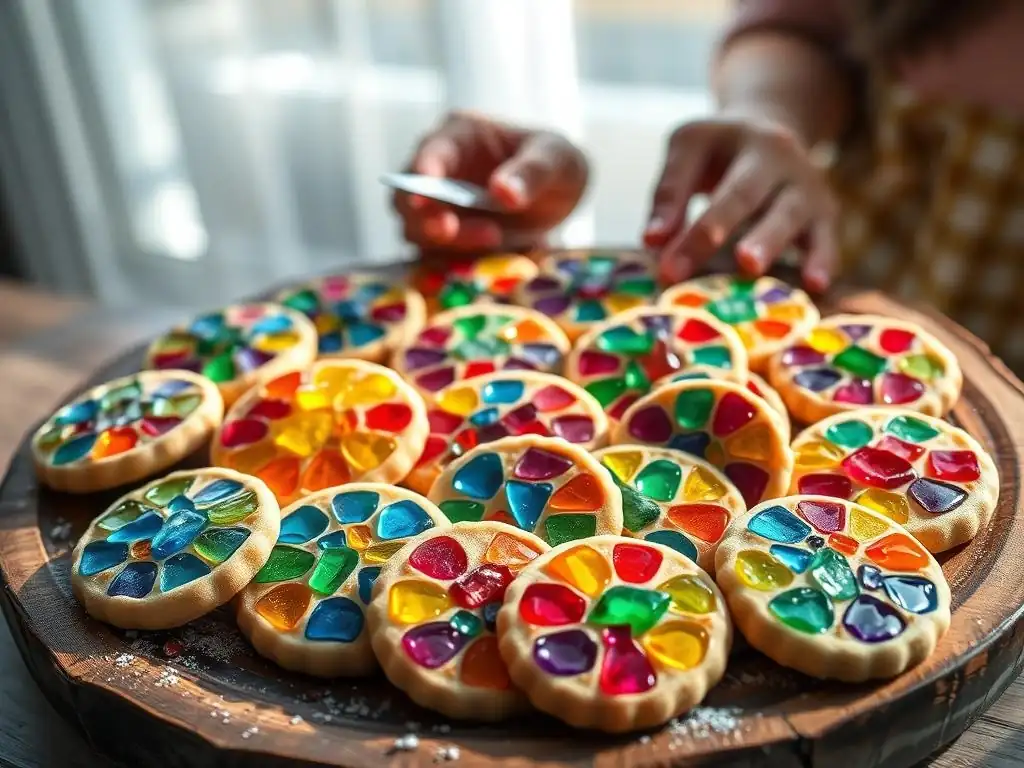
Proper storage is key to maintaining the quality and appearance of your easy stained glass cookies. The main concern is moisture, which can make the cookies soft and the candy windows sticky or cloudy. Once the cookies are completely cooled and the candy is fully hardened, store them in an airtight container at room temperature. Avoid stacking the cookies directly on top of each other, as the candy windows can stick together or scratch.
To prevent sticking, you can layer the cookies between sheets of parchment paper or wax paper within the container. Ensure the container is sealed tightly to keep out humidity. Stained glass cookies are best consumed within 1-2 weeks for optimal freshness. Avoid refrigerating or freezing these cookies, as the condensation can damage the candy windows, turning them sticky or opaque. Storing them correctly ensures that your beautiful stained glass effect remains clear and the cookie stays crisp.
Creative Packaging and Presentation Ideas for Gifting
Stained glass cookies make wonderful homemade gifts, and creative packaging enhances their appeal. Since the candy windows catch the light, consider packaging that allows them to be seen. Clear cellophane bags tied with ribbon are a simple and effective option for individual cookies or small stacks. For multiple cookies, a decorative tin or box lined with tissue paper is classic. Again, use parchment or wax paper between layers if stacking.
For a truly impressive presentation, consider using small clear gift boxes or even hanging the cookies (if sturdy enough, using a small hole punched before baking and thread added after cooling) on a decorative stand or mini Christmas tree. Pairing them with a simple card explaining they are homemade stained glass cookies adds a personal touch. Their unique beauty means they often don't need much extra embellishment beyond simple packaging that highlights the vibrant candy windows.
Incorporating Edible Paint for Detailed Designs
Taking your easy stained glass cookies to the next level can involve adding intricate details using edible paints. Once the cookie is baked and completely cooled, and the candy window is solid, you can use fine brushes and edible food coloring mixed with a clear extract (like lemon extract or vodka, which evaporates quickly) to paint designs directly onto the candy surface. This is similar to painting on royal icing.
You can paint fine lines to mimic leading in traditional stained glass or add small illustrative details like flowers, stars, or abstract patterns. Metallic edible paints can add a beautiful shimmer. Practice your design on paper first. Ensure your paint isn't too watery, which could damage the candy surface. This technique requires a steady hand and adds a level of artistry that transforms the cookie into an even more detailed edible masterpiece, allowing for complex patterns not possible with just crushed candy.
Using Isomalt for Crystal-Clear Stained Glass
While hard candy is fantastic for easy stained glass cookies, isomalt offers an even clearer, more glass-like finish. Isomalt is a sugar substitute often used in confectionery for pulled sugar and sugar sculptures because it resists crystallization and remains very clear when melted. It comes in granular or stick form and needs to be melted carefully in a saucepan or microwave, often requiring higher temperatures than hard candy.
To use isomalt for stained glass cookies, bake your sugar cookies with the cutouts first, without any filling. Let the cookies cool slightly on the baking sheet. Melt the isomalt according to package directions. You can add a tiny amount of gel food coloring to the melted isomalt if desired.
Carefully pour the melted isomalt into the baked cookie cutouts. Let the cookies cool completely and undisturbed on the baking sheet until the isomalt hardens into a perfectly smooth, crystal-clear window. Isomalt is less prone to bubbles than hard candy but requires more caution due to its high melting temperature.
The type of hard candy you use not only affects the color but also the flavor of your stained glass window. While the cookie provides the base flavor, the melted candy adds a burst of sweetness and often a fruity or minty note. Experimenting with different candy flavor combinations can add an extra dimension to your easy stained glass cookies.
Consider pairing complementary flavors: a lemon-flavored candy in a lemon-zest sugar cookie, or raspberry candy in a vanilla cookie. For holidays, peppermint candy creates a festive window. You can also use flavor combinations within a single cookie, perhaps using alternating sections of cherry and lime Jolly Ranchers in a window. Be mindful of strong flavors; some candies might overpower the subtle taste of the sugar cookie. Testing different candies will help you discover your favorite flavor pairings that make your stained glass cookies not just visually stunning but also a delightful treat for the taste buds.
Making stained glass cookies is a wonderfully rewarding baking project. It combines the simple pleasure of baking classic sugar cookies with the exciting artistic process of creating vibrant, translucent windows. There's a unique satisfaction in seeing the crushed candy transform in the oven into smooth, jewel-like centers. It's a craft that allows for endless creativity, whether you stick to simple shapes or venture into more complex designs and techniques. The process is engaging, and the result is always impressive – cookies that are as fun to look at as they are to eat.
Sharing your easy stained glass cookies is part of the joy. They spark conversation and bring smiles, often eliciting wonder about how they were made. It's a perfect activity to do with family, especially kids (with adult supervision for the hot candy steps), introducing them to a unique baking technique. The versatility in design and color means you can create stained glass cookies for any occasion, making them a cherished addition to your baking repertoire. Embrace the process, have fun experimenting, and delight in the beautiful edible art you create.
We hope this guide from BakeWithEase has inspired you to try making your own stunning stained glass cookies. We love seeing what our community creates! Once you've baked your easy stained glass cookies, we encourage you to share photos of your creations. Show us your vibrant colors, your unique shapes, and how you've made this technique your own. Your beautiful cookies can inspire other bakers on their journey!
Whether you followed the steps exactly or added your own creative twist, your homemade stained glass cookies are something to be proud of. Baking is a journey of learning and sharing, and seeing your success is the greatest reward for us at BakeWithEase. Happy baking, and we can't wait to see the dazzling stained glass windows you bring to life in your kitchen!
Frequently Asked Questions
It's a cookie recipe designed to create visually appealing cookies with a mosaic-like pattern, using simple techniques and readily available ingredients. The emphasis is on ease of execution and a stunning final result.
This recipe prioritizes simple instructions and avoids complicated techniques. It often relies on pre-made dough or easily prepared doughs and focuses on the creative arrangement of shapes, rather than intricate baking skills.
Common ingredients include basic cookie dough ingredients like flour, sugar, butter, and eggs. Food coloring or naturally colored ingredients like cocoa powder or fruit purees are used to create the contrasting mosaic colors.
Ensuring the dough is chilled properly before baking helps prevent the colors from bleeding. Also, avoid overbaking the cookies, as this can cause the colors to melt and spread.
Absolutely! Using a variety of cookie cutters is a great way to create unique and personalized mosaic designs. Experiment with different shapes and sizes to achieve the desired aesthetic effect.
The intricate beauty of mosaic cookies, achievable even by novice bakers, offers a delightful blend of artistic expression and delicious indulgence. This seemingly simple technique unlocks a world of creative possibilities, proving that stunning results don't require years of culinary expertise. In a world often dominated by fast-paced trends, the meticulous process of creating these cookies provides a welcome opportunity for mindful creation and quiet satisfaction.
The enduring appeal of mosaic cookies lies not just in their visual impact, but in the shared experience they create. Whether enjoyed as a family project, a unique gift, or a personal artistic endeavor, these cookies transcend the simple act of baking. They become a tangible representation of creativity and connection. The best things in life are the people we love, the places we've been, and the memories we've made along the way.
This quote perfectly encapsulates the lasting impression these cookies can leave, transforming a simple treat into a cherished memory.
Now, it's your turn. Don't just read about the magic of mosaic cookies – create it. Gather your ingredients, unleash your inner artist, and experience the joy of transforming simple ingredients into miniature works of edible art. The satisfaction of crafting these beautiful cookies, and the smiles they bring to those who share them, are rewards far beyond the delicious taste. Let your creativity flow, and discover the surprisingly simple path to stunning, unforgettable mosaic cookies.
Thanks for joining us on this delicious journey into the world of mosaic cookies! We hope you've gained some inspiration and new techniques to elevate your baking game. Ready to put your newfound skills to the test?
- Dive into your kitchen and create your own mosaic cookie masterpiece! Use the techniques we shared to experiment with different colors, shapes, and designs. Don't be afraid to get creative and personalize your cookies!
- Share your creations with us! We'd love to see the beautiful cookies you bake. Tag us on social media (using #BakeWithEaseMosaics) and show off your artistic flair.
- Challenge a friend to a mosaic cookie bake-off! Turn this into a fun activity and see who can create the most stunning design.
What unique mosaic design will you create to amaze your friends and family?