
Secret Ingredients: How to Enhance Your Bread Machine Recipes

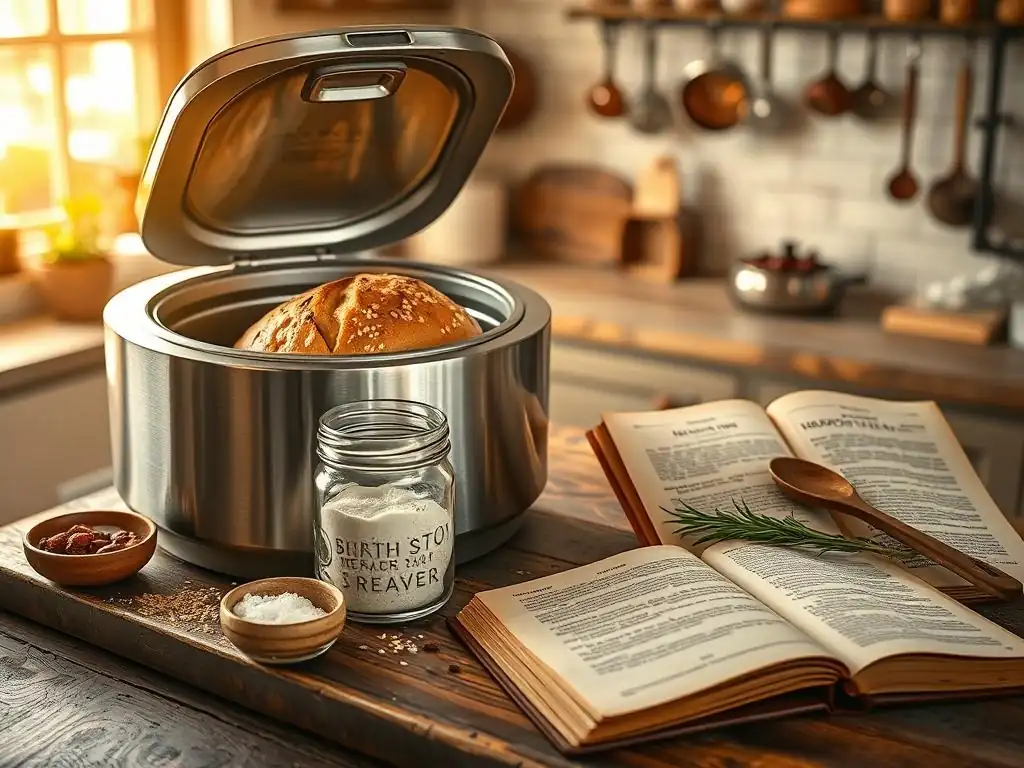
Welcome to BakeWithEase, where we unravel the secrets of effortless baking! Ever wondered how to elevate your bread machine creations to artisanal levels? This guide delves into the power of secret ingredients, specifically focusing on a game-changing technique: a bread machine sourdough starter recipe. Discover how this simple addition can transform your loaves into tangy, flavorful masterpieces. Intrigued? Let's unlock the secrets together and bake with ease!
- BakeWithEase: Unleashing the Potential of Your Bread Machine
- Elevate Your Bread Machine Baking: Beyond the Basics
- Understanding the Fundamentals for Better Bread Machine Bread
-
The Secret Ingredients for Exceptional Bread Machine Bread
- Secret Ingredient #1: The Power of Bread Flour
- Why Bread Flour Matters in Bread Machine Recipes
- Secret Ingredient #2: Sugar's Subtle Impact
- Sugar Varieties for Enhanced Flavor and Texture in Bread Machines
- Secret Ingredient #3: Fat is Your Friend: Oils and Shortenings
- Choosing the Right Fat for Your Bread Machine Loaf
- Secret Ingredient #4: The Magic of Milk Powder
- Enhancing Bread Machine Bread with Nonfat Dry Milk Powder
- Secret Ingredient #5: Tangy Goodness: Bread Machine Sourdough Starter Recipe
- Create Your Own Bread Machine Sourdough Starter: A Step-by-Step Guide
- Bread Machine Sourdough Starter Recipe: Ingredients and Instructions
- Troubleshooting Your Bread Machine Sourdough Starter
- Mastering Bread Machine Sourdough: A Deep Dive
- Flavor Boosters for Bread Machine Recipes
- Troubleshooting Common Bread Machine Baking Problems
- Expert Tips for Perfect Bread Machine Bread
- Beyond the Basic Loaf: Creative Bread Machine Baking Ideas
- Final Thoughts: Unlock Your Bread Machine's Full Potential
- BakeWithEase: Your Journey to Bread Machine Mastery
-
Frequently Asked Questions
- What makes sourdough bread different from regular bread baked in a bread machine?
- Can I use a bread machine to make sourdough bread from scratch?
- What secret ingredients can I add to my bread machine sourdough starter recipe to improve the flavor and texture?
- How does using a bread machine affect the sourdough starter?
- What are some common mistakes people make when using a bread machine for sourdough, and how can I avoid them?
- Final Reflection: The Unexpected Joy of Sourdough in Your Bread Machine
- Unlock Your Bread Machine's Full Potential!
BakeWithEase: Unleashing the Potential of Your Bread Machine
Your bread machine is a powerful tool in the kitchen, capable of producing delicious loaves with minimal effort. Many bakers start by following simple recipes provided in the machine's manual or found online, achieving satisfactory results. However, the true magic of bread machine baking lies in understanding how to elevate these basic recipes, transforming them from good to absolutely exceptional. This involves looking beyond the standard ingredient list and exploring nuances that significantly impact the final texture, flavor, and appearance of your bread.
At BakeWithEase, we believe that mastering your bread machine is about more than just pressing buttons; it's about understanding the ingredients and processes. By incorporating a few "secret ingredients" and refining your techniques, you can unlock a whole new level of baking success. Whether you're aiming for a perfectly soft sandwich loaf, a crusty artisan-style bread, or even tackling a bread machine sourdough starter recipe, paying attention to the details and experimenting with key components will dramatically improve your results and make your bread machine baking experience even more rewarding.
Elevate Your Bread Machine Baking: Beyond the Basics
Moving beyond the standard, predictable outcomes of basic bread machine recipes requires a deeper understanding of how different ingredients interact within the controlled environment of the machine. While convenience is the primary appeal of a bread machine, it doesn't mean you have to sacrifice quality or flavor. Think of your bread machine not just as a set-it-and-forget-it appliance, but as a consistent and reliable partner in your baking journey, ready to handle the heavy lifting of kneading and proofing.
To truly elevate your bread machine baking, you need to consider the quality and type of each ingredient, as well as how minor adjustments can lead to significant improvements. This includes everything from the flour you choose to the subtle additions that enhance flavor and texture. Embracing this mindset allows you to move from simply producing edible bread to crafting loaves that you're truly proud of, loaves with better structure, richer flavor profiles, and more satisfying crusts, perhaps even leading you to perfect a tangy bread machine sourdough starter recipe.
Understanding the Fundamentals for Better Bread Machine Bread
Achieving consistently excellent bread machine results starts with a solid grasp of the basic principles of bread making, even when using automated equipment. The bread machine handles the mixing, kneading, and often the proofing and baking, but the quality of the final loaf is fundamentally determined by the ingredients used and their proportions. Understanding the role each component plays is crucial for troubleshooting and improving any recipe.
The hydration level (the ratio of water to flour), the activity of the yeast, the amount of salt, and the presence of fats or sugars all interact to create the dough's structure and influence the final texture and flavor. Knowing the typical behavior of these elements helps you anticipate outcomes and make informed decisions when adjusting recipes or experimenting. This foundational knowledge is particularly important when attempting more complex breads, like those incorporating a bread machine sourdough starter recipe, where balancing leavening and acidity is key.
Key Ingredients for Bread Machine Success
Every bread recipe, including those designed for a bread machine, relies on a core set of ingredients: flour, water, yeast, and salt. Flour provides the structure through its protein content (gluten). Water hydrates the flour, activating the gluten and yeast. Yeast is the leavening agent, producing carbon dioxide gas that makes the bread rise. Salt controls the yeast activity, strengthens the gluten structure, and enhances flavor.
Beyond these basics, many bread machine recipes include sugar and fat. Sugar provides food for the yeast, aiding in leavening and contributing to crust browning and flavor. Fat (like oil or butter) tenderizes the crumb, adds richness, and helps the bread stay fresh longer. Understanding the specific role and optimal amount of each of these key ingredients is the first step toward consistently successful bread machine baking, whether you're making a simple white loaf or working on a complex bread machine sourdough starter recipe.
Mastering the Art of Bread Machine Baking
Mastering bread machine baking involves more than just adding ingredients in the correct order and selecting the right cycle. It requires attention to detail, understanding ingredient quality, and recognizing how environmental factors can influence the process. For instance, the temperature of your kitchen and the water you use can significantly impact yeast activity and proofing times, even within the controlled environment of the machine.
Successful bread machine bakers learn to observe their dough during the kneading cycle, checking its consistency and making minor adjustments if necessary. Is it too sticky? A tablespoon of flour might help.
Is it too dry and shaggy? A teaspoon of water could be the solution. This hands-on approach, combined with careful ingredient measurement and selecting the appropriate cycle for the type of bread (e.g., basic, whole wheat, dough, or even a dedicated sourdough setting if available), transforms bread machine use from a simple process into a refined skill, essential for tackling things like a bread machine sourdough starter recipe.
The Secret Ingredients for Exceptional Bread Machine Bread
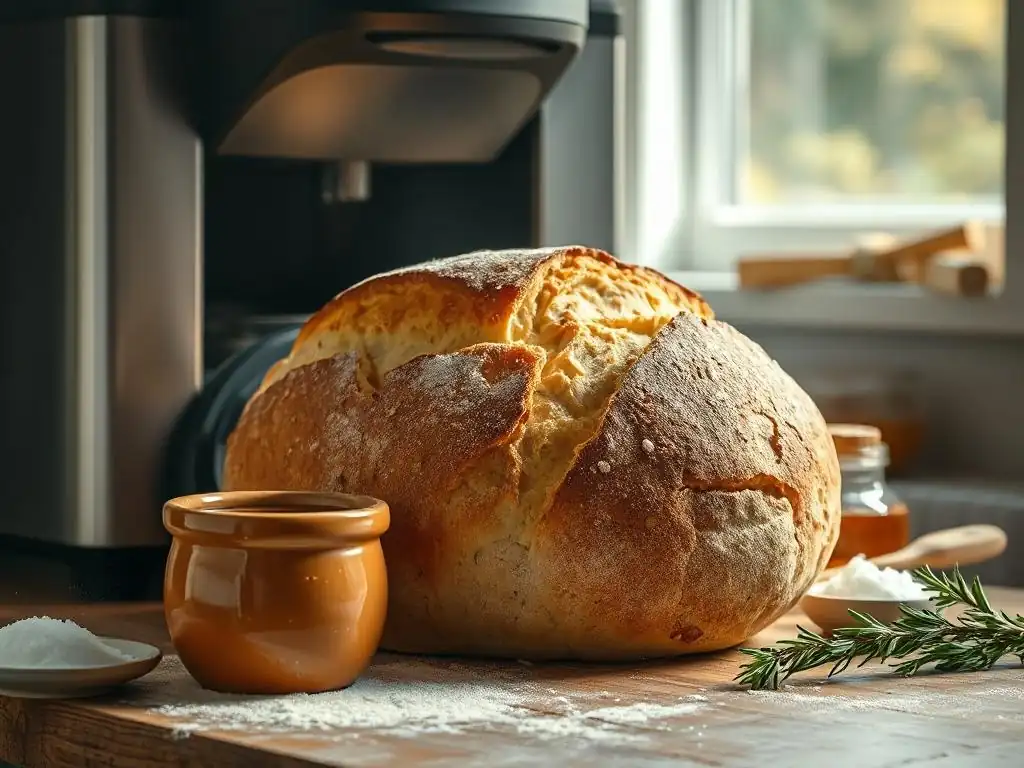
While the fundamental ingredients are essential, incorporating certain "secret" ingredients can dramatically improve the quality of your bread machine loaves. These aren't necessarily exotic items, but rather common pantry staples used strategically to enhance texture, flavor, and overall performance. They work by interacting with the basic ingredients, modifying gluten development, yeast activity, and moisture retention in ways that standard recipes might not account for.
Think of these secret ingredients as enhancers, each offering a unique benefit that elevates the final product. From choosing the right flour to adding specific types of sugar or fat, these choices can turn a good loaf into a truly memorable one. Even adding something as simple as milk powder or tackling a bread machine sourdough starter recipe introduces new dimensions of flavor and texture that are difficult to achieve with just the basic four ingredients.
Secret Ingredient #1: The Power of Bread Flour
Using the right flour is arguably the single most impactful secret ingredient for better bread machine bread. While all-purpose flour works in a pinch, bread flour is specifically milled to have a higher protein content, typically ranging from 12% to 14%. This higher protein level is crucial because it translates to more gluten development during kneading.
Gluten is the elastic network that traps the carbon dioxide gas produced by the yeast, allowing the bread to rise and creating its internal structure. With more gluten, your dough will be stronger, more elastic, and capable of producing a loaf with better volume and a chewier, more satisfying texture. This is particularly important in the vigorous kneading cycle of a bread machine, which benefits significantly from a flour with robust gluten potential.
Why Bread Flour Matters in Bread Machine Recipes
Bread flour's higher protein content directly impacts the structure and texture of bread machine loaves. When water is added to bread flour, the gluten-forming proteins (glutenin and gliadin) link together to create a strong, elastic network. The mechanical action of the bread machine's paddle efficiently develops this network, resulting in a dough that can hold its shape and rise effectively.
Using all-purpose flour, which typically has 10-12% protein, can result in a weaker gluten structure. This might lead to loaves that don't rise as high, have a denser crumb, or even collapse during baking because the structure isn't strong enough to support the dough's weight. For recipes requiring a strong structure, like a hearty whole wheat loaf or a bread machine sourdough starter recipe where the tang can sometimes weaken gluten, bread flour provides the necessary foundation for success.
Secret Ingredient #2: Sugar's Subtle Impact
Sugar is often included in bread machine recipes, and while it serves as food for the yeast to kickstart fermentation, its role goes beyond just leavening. Sugar also contributes significantly to the browning of the crust through the Maillard reaction and caramelization during baking. A small amount of sugar can give your loaf a beautiful golden-brown exterior and a subtle sweetness that enhances the overall flavor profile.
Furthermore, sugar is hygroscopic, meaning it attracts and retains moisture. This quality can help keep your bread softer and extend its shelf life. While too much sugar can inhibit yeast activity and result in a dense loaf, the right amount, typically around 1-3% of the flour weight in savory breads, provides these benefits without overwhelming the flavor or structure. Even in a bread machine sourdough starter recipe, a touch of sugar can help balance the acidity.
Sugar Varieties for Enhanced Flavor and Texture in Bread Machines
Different types of sugar can bring slightly different qualities to your bread machine creations. Granulated sugar is the most common choice, providing a clean sweetness and aiding in browning. However, experimenting with other sugars can add complexity. Brown sugar, for example, contains molasses, which adds moisture, a slightly richer flavor, and contributes to a softer crumb and darker crust.
Honey or maple syrup can also be used, offering unique flavor notes and contributing to a moist crumb. When substituting liquid sweeteners for granulated sugar, you may need to slightly reduce the amount of other liquids in the recipe to maintain the correct hydration balance. Consider the overall flavor profile you're aiming for; a rustic loaf might benefit from the depth of brown sugar, while a simple white bread works well with granulated sugar. These choices are even relevant when considering the subtle sweetness that might complement the tang in a bread machine sourdough starter recipe.
Secret Ingredient #3: Fat is Your Friend: Oils and Shortenings
Incorporating fat into your bread machine recipe might seem counterintuitive for a lean loaf, but it plays a vital role in improving texture and keeping quality. Fats, whether liquid oils or solid shortenings/butter, interfere with gluten development. While this might sound negative, a small amount of fat prevents the gluten strands from becoming too tightly bound, resulting in a more tender and softer crumb.
Fat also coats the flour particles, preventing them from absorbing liquid too quickly. This can help distribute moisture more evenly throughout the dough and the final loaf, contributing to a moister texture. Additionally, fat adds richness to the flavor and helps preserve the bread by slowing down the staling process, keeping your bread machine creations fresh and enjoyable for longer.
Choosing the Right Fat for Your Bread Machine Loaf
The type of fat you choose can influence the flavor and texture of your bread machine bread. Liquid vegetable oils, like canola or sunflower oil, are neutral in flavor and contribute to a very soft crumb. They are easy to incorporate into the dough. Solid fats, such as butter or shortening, can add richness and flavor (especially butter) and tend to produce a slightly firmer, yet still tender, crumb.
Butter is a popular choice for its flavor, but it contains water, which needs to be accounted for in the recipe's hydration. Shortening, being 100% fat, offers excellent tenderizing properties and contributes to a very fine, soft crumb. The choice depends on the desired outcome: use oil for maximum softness and a neutral taste, or butter for enhanced flavor and richness. Even a lean bread machine sourdough starter recipe can benefit from a small amount of fat for improved texture.
Secret Ingredient #4: The Magic of Milk Powder
Adding nonfat dry milk powder to your bread machine recipes is a simple yet effective way to enhance both the texture and appearance of your loaf. Milk powder contains proteins and lactose (milk sugar) that react during baking to create a beautifully browned crust. The proteins also contribute to a softer crumb structure and add richness to the flavor profile without adding significant fat or liquid that could alter the dough's hydration.
Beyond crust color and flavor, milk powder helps the bread retain moisture, resulting in a softer loaf that stays fresh longer. It also provides a boost of nutrients. Typically, adding 1-3 tablespoons of nonfat dry milk powder per loaf is sufficient to see noticeable improvements. This is an easy 'secret' ingredient to incorporate into almost any standard bread machine recipe, offering consistent benefits for tenderness and keeping quality.
Enhancing Bread Machine Bread with Nonfat Dry Milk Powder
Nonfat dry milk powder works its magic in bread machines by interacting with other ingredients during the heating cycles. The lactose in the milk powder doesn't get consumed by the yeast during fermentation, meaning it's still present during baking. This lactose contributes significantly to the Maillard reaction, leading to a deeper, more appealing golden-brown crust than you might achieve with just flour and water.
Furthermore, the milk proteins strengthen the dough structure slightly, helping the loaf rise evenly and maintain its shape. This can be particularly helpful in recipes with a lot of whole grains or additions that might otherwise weigh the dough down. The result is often a loaf with a finer, more even crumb structure and a delightful softness that lasts. It's a simple addition that yields significant results in the texture and visual appeal of your bread machine baked goods.
Secret Ingredient #5: Tangy Goodness: Bread Machine Sourdough Starter Recipe
Introducing a bread machine sourdough starter recipe into your routine is perhaps the most transformative secret ingredient for achieving complex flavors and unique textures. A sourdough starter is a living culture of wild yeast and lactic acid bacteria, typically nurtured with just flour and water. When added to bread dough, it acts as a leavening agent and imparts a characteristic tangy flavor and a chewy texture that is distinct from commercial yeast breads.
While traditional sourdough baking can be time-consuming, adapting a bread machine sourdough starter recipe allows you to leverage your machine's capabilities for mixing, kneading, and sometimes even proofing. The starter replaces or supplements commercial yeast, requiring adjustments to fermentation times and hydration levels. Learning to work with a bread machine sourdough starter recipe opens up a new world of flavor possibilities, adding depth and complexity to your homemade bread.
Create Your Own Bread Machine Sourdough Starter: A Step-by-Step Guide
Making a bread machine sourdough starter recipe from scratch is a rewarding process, though it requires patience. You'll need flour (rye or whole wheat often work best initially, but all-purpose or bread flour is fine) and non-chlorinated water.
Here’s a basic outline:
- Day 1: Mix equal parts flour and water (e.g., 50g flour, 50g water) in a jar. Cover loosely and leave at room temperature (around 70-75°F is ideal).
- Days 2-4: You might see bubbles forming. Discard half the starter and feed with fresh flour and water (e.g., discard 50g, add 50g flour, 50g water).
- Days 5+: By now, your starter should be consistently bubbly and doubling in size between feedings. It should also have a pleasant, tangy aroma. Continue daily feeding (discarding half before feeding) until it's reliably active.
Once your bread machine sourdough starter recipe is vigorous, it's ready to use in baking, bringing its unique leavening power and flavor to your bread machine creations.
Bread Machine Sourdough Starter Recipe: Ingredients and Instructions
To maintain an active bread machine sourdough starter recipe, you need a simple feeding routine. The standard ratio is 1:1:1 by weight (starter:flour:water).
Ingredients:
- Active sourdough starter
- Bread flour (or all-purpose)
- Non-chlorinated water (lukewarm, around 75-80°F)
Instructions:
- In a clean jar, keep a small amount of your active starter (e.g., 50g). Discard any excess.
- Add an equal weight of fresh flour (50g) and water (50g) to the jar.
- Mix thoroughly until no dry flour remains.
- Scrape down the sides of the jar.
- Cover loosely (a lid resting on top, or plastic wrap with a rubber band and a few holes poked in it) to allow gases to escape.
- Leave at room temperature. Your starter should become bubbly and active within 4-12 hours, depending on the temperature and starter maturity.
- Once active, it's ready to use in your bread machine sourdough starter recipe adaptation or can be refrigerated and fed less often (weekly).
Troubleshooting Your Bread Machine Sourdough Starter
Developing a reliable bread machine sourdough starter recipe sometimes involves troubleshooting. A common issue is lack of activity. This could be due to cold temperatures; try moving your starter to a warmer spot. Inconsistent feeding or using chlorinated water can also inhibit yeast and bacterial growth. Ensure you're feeding regularly and using filtered or bottled water.
If you see mold, discard the starter and begin again, ensuring your equipment is clean. A layer of dark liquid on top, called "hooch," indicates your starter is hungry; simply stir it in or pour it off before feeding. A strong, unpleasant smell (like acetone) also means it's very hungry; feed it more frequently or with a higher ratio of flour to water. Patience is key; most starters take 1-2 weeks to become consistently strong enough for baking a successful bread machine sourdough starter recipe loaf.
Mastering Bread Machine Sourdough: A Deep Dive
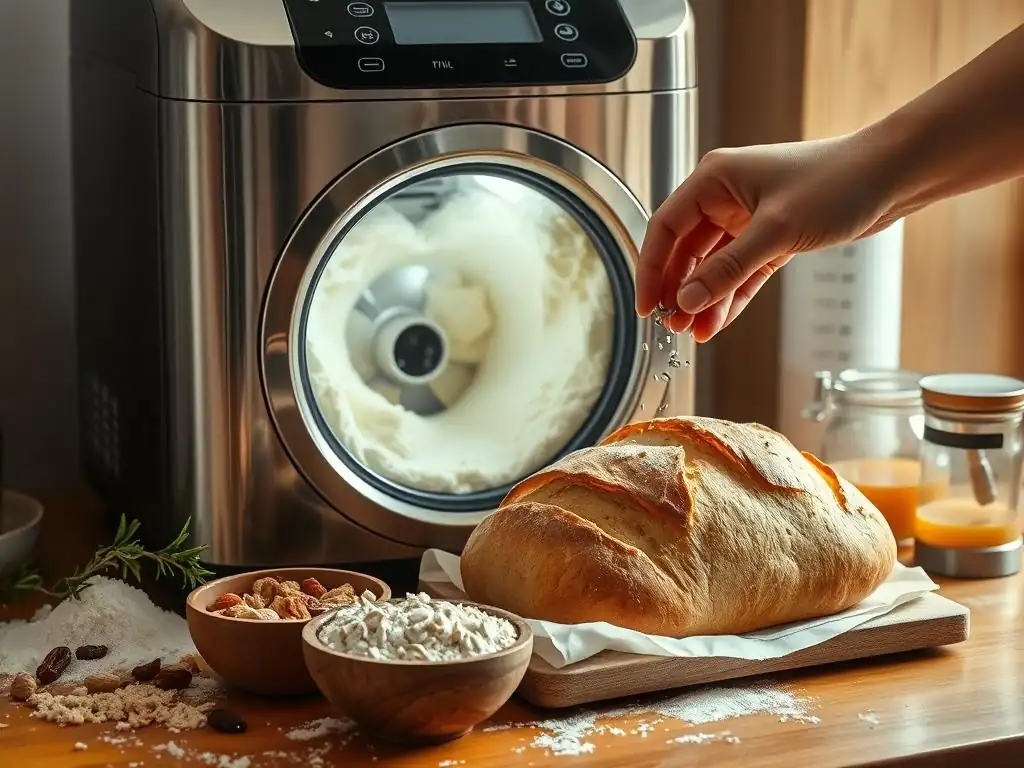
Integrating a bread machine sourdough starter recipe into your baking routine requires understanding how sourdough behaves differently from commercial yeast. Sourdough fermentation is slower and produces both carbon dioxide for leavening and organic acids (lactic and acetic) that contribute the characteristic tang. This slower process means longer proofing times, even in a bread machine.
Mastering bread machine sourdough involves learning to read your dough and your starter. Is the starter vigorous and bubbly? Has the dough risen sufficiently during the proofing cycle? You might need to use the "Dough" cycle on your machine and then allow for a much longer rise outside the machine before baking, or use a specific "Sourdough" cycle if your machine has one. The hydration level is also crucial; sourdough doughs are often higher in hydration than commercial yeast doughs, which can affect handling.
Baking Sourdough Bread in a Bread Machine: Tips and Tricks
Baking sourdough bread successfully in a bread machine involves adapting standard techniques. Since sourdough fermentation is slower, you may need to let the dough proof for several hours longer than a typical yeast recipe, possibly using the machine's "Dough" cycle and then finishing the proofing outside the machine. Some advanced machines have a dedicated "Sourdough" cycle that includes a longer fermentation period.
Using an active bread machine sourdough starter recipe is paramount. Feed your starter 4-12 hours before you plan to mix the dough to ensure it's at its peak activity. Consider using a small amount of commercial yeast alongside the starter initially if you need a stronger rise while your starter matures. Pay attention to the dough consistency during the knead cycle; sourdough dough can be wetter, but it should still form a cohesive ball.
Adjusting Bread Machine Recipes for Sourdough Starter
Converting a standard commercial yeast bread machine recipe to use a bread machine sourdough starter recipe requires careful adjustment. A common approach is to replace some or all of the water and flour in the recipe with an equal weight of active starter.
For example, if a recipe calls for 300g water and 500g flour and 1 tsp yeast, you might replace 100g of the water and 100g of the flour with 200g of 100% hydration active sourdough starter. You may also need to slightly reduce the salt, as the acids in the starter can sometimes make the bread taste saltier.
The amount of starter used relative to the flour weight (the inoculation percentage) affects fermentation speed. Using 20-30% starter (relative to total flour weight) is a common starting point for an overnight or long proof. You'll also likely need to omit or significantly reduce the commercial yeast. Experimentation is key to finding the right balance for your specific bread machine sourdough starter recipe and desired baking schedule.
Achieving the Perfect Sourdough Crust in Your Bread Machine
Achieving a truly crusty sourdough loaf in a bread machine can be challenging, as the machine's baking chamber typically creates a moist environment that favors a softer crust. However, you can take steps to improve crust development. If your machine has a "Dark Crust" setting, use it. This setting usually extends the baking time and/or increases the final baking temperature.
For a crispier crust, consider using the bread machine's "Dough" cycle to prepare the dough using your bread machine sourdough starter recipe. After the cycle finishes and the dough has proofed sufficiently outside the machine, shape it and bake it in a preheated oven on a baking stone or in a Dutch oven, where you can control the environment to create steam for a better crust. If baking in the machine, removing the loaf immediately after baking and cooling it on a wire rack helps prevent the crust from becoming soggy from trapped steam.
Flavor Boosters for Bread Machine Recipes
Beyond the core ingredients and secret enhancers like milk powder or a bread machine sourdough starter recipe, you can infuse your bread machine creations with a wide array of flavors. Adding herbs, spices, cheese, nuts, or dried fruits transforms a simple loaf into something special, tailored to your taste. These additions are typically mixed in during the machine's "add-in" signal, if available, or simply added along with the dry ingredients at the start.
When incorporating flavor boosters, consider their impact on the dough's consistency and the loaf's structure. Large or heavy additions like nuts and fruits can sometimes weigh down the dough, potentially affecting the rise. Spices and herbs can add wonderful aromas and tastes. Cheese adds richness and a savory depth. Start with small amounts and adjust in future batches based on your preference.
Adding Herbs and Spices to Your Bread Machine Dough
Herbs and spices are fantastic for adding complexity and aroma to bread machine bread. Dried herbs like rosemary, thyme, or oregano are easy to incorporate; start with 1-2 teaspoons per loaf. Spices such as garlic powder, onion powder, black pepper, or chili flakes can add a savory kick. For a sweeter bread, cinnamon, cardamom, or nutmeg work well.
You can add dried herbs and spices along with the flour and other dry ingredients at the beginning of the cycle. For fresh herbs, add them during the "add-in" beep to prevent them from being overly bruised during the initial kneading. The heat of baking will release their aromatic oils, infusing the entire loaf with flavor. Consider combinations like rosemary and garlic for a savory loaf or cinnamon and cardamom for a sweet swirl bread.
Incorporating Fruits and Nuts for Added Texture and Taste
Adding dried fruits and nuts introduces wonderful texture and bursts of flavor to bread machine bread. Raisins, cranberries, dried apricots, walnuts, pecans, or sunflower seeds are popular choices. They add sweetness, chewiness, and crunch, transforming a basic loaf into a fruit-and-nut bread, perfect for breakfast or snacking.
Add fruits and nuts when your bread machine signals the "add-in" time. This usually happens after the initial kneading phase, preventing the additions from being completely broken down by the paddle. If your machine doesn't have an add-in signal, you can wait until the dough has formed a cohesive ball during the first knead cycle and gently lift the lid to add them. Use moderation; too many additions can inhibit the dough's rise. A ratio of about 1/2 to 1 cup of total additions per standard loaf is a good starting point.
Experimenting with Cheese in Your Bread Machine Bread
Cheese adds a delicious savory element and a rich aroma to bread machine bread. Shredded hard or semi-hard cheeses like cheddar, Gruyère, or Parmesan work well. They melt into the dough during baking, creating pockets of flavor and a tender crumb. Soft cheeses like mozzarella can also be used, but be mindful that they release more moisture.
Like fruits and nuts, cheese should ideally be added during the bread machine's "add-in" signal. This ensures the cheese pieces remain somewhat intact rather than being completely incorporated into the dough during the main kneading phase. The amount of cheese can vary, but starting with 1/2 to 1 cup of shredded cheese per loaf is a good range. Cheese bread is fantastic served warm, perhaps with soup or as a side dish.
Troubleshooting Common Bread Machine Baking Problems
Even with the best ingredients and techniques, occasional issues can arise in bread machine baking. Understanding common problems like dense bread, collapsed loaves, or uneven baking helps you diagnose the cause and adjust your approach for future batches. Most problems stem from incorrect ingredient measurements, improper water temperature, or issues with yeast activity.
Keeping a baking journal can be incredibly helpful. Note the recipe used, ingredient brands, measurements (ideally by weight), water temperature, room temperature, and the outcome. This allows you to identify patterns and pinpoint what might have gone wrong. Troubleshooting is a natural part of the baking process, and overcoming challenges helps you become a more skilled bread machine baker, even when perfecting a bread machine sourdough starter recipe.
Dense Bread: Causes and Solutions
Dense bread is a common frustration in bread machine baking. It often means the dough didn't rise sufficiently. Several factors can contribute to this:
- Inactive yeast: Ensure your yeast is fresh and stored properly. Test active dry yeast by dissolving it in warm water (105-115°F) with a pinch of sugar; it should become foamy within 5-10 minutes.
- Incorrect water temperature: Water that is too hot can kill the yeast; too cold can slow it down significantly. Aim for lukewarm water, typically 80-90°F for most bread machine cycles, unless the recipe specifies otherwise (some rapid cycles use warmer water).
- Too much flour or not enough liquid: This results in a stiff dough that is difficult for the yeast to leaven. Measure accurately, ideally by weight (1 cup all-purpose flour is typically 120-125g, bread flour 125-130g). The dough should be slightly sticky after kneading.
- Too much salt or sugar: Both can inhibit yeast activity if used in excess.
- Using old or weak sourdough starter: If using a bread machine sourdough starter recipe, ensure your starter is active and bubbly before use.
Collapsed Loaves: Preventing Bread Machine Failures
A loaf that rises beautifully but then collapses during or after baking is usually a sign of over-proofing. This means the dough rose too much, and the gluten structure weakened and couldn't support the rise, causing it to deflate. This can happen if:
- Too much yeast or starter: Using more leavening than necessary speeds up proofing excessively.
- Overly warm conditions: A warm kitchen or warm water can accelerate yeast activity.
- Too much sugar: Sugar can initially boost yeast activity rapidly.
- Weak gluten structure: This can result from using low-protein flour (like cake flour), not enough kneading (though the machine usually handles this), or too much liquid making the dough too weak. Ensure you're using bread flour for best results, especially when working with a bread machine sourdough starter recipe which can sometimes produce a more extensible, less structured dough.
Adjusting the amount of leavening, controlling water temperature, and ensuring proper flour-to-liquid ratios are key to preventing collapse.
Uneven Baking: Tips for a Perfectly Baked Loaf
Uneven baking in a bread machine can manifest as a loaf that is darker on the bottom or sides than the top, or doughy spots inside. This is often related to the machine's heating element and the loaf pan.
- Machine hot spots: Some machines heat more intensely from the bottom. If your crust is consistently too dark on the bottom, try reducing the "Dark Crust" setting or placing a piece of foil loosely over the top of the pan partway through the baking cycle (check your machine's manual for allowed interventions).
- Incorrect cycle choice: Ensure you are using the recommended cycle for the recipe type. A basic white bread cycle is different from a whole wheat or sweet bread cycle, with different timings and temperatures.
- Dough consistency: A dough that is too wet or too dry can bake unevenly. Ensure your dough is the correct consistency after kneading.
- Paddle issues: Sometimes dough can get stuck around the paddle, leading to a dense or underbaked area at the bottom. Some bakers remove the paddle after the final knead cycle (before the last rise), though this can cause the dough to deflate slightly.
Experimenting with your specific machine and making small adjustments can help you achieve more even baking results over time.
Expert Tips for Perfect Bread Machine Bread
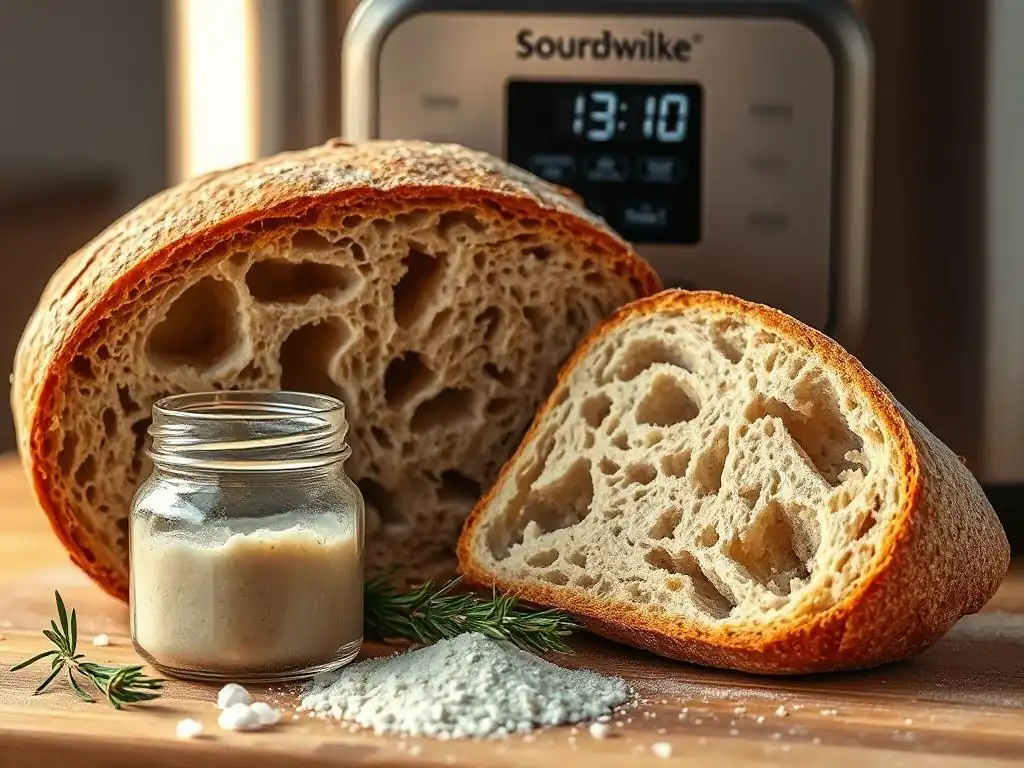
Beyond ingredient tweaks and troubleshooting, several fundamental practices contribute significantly to consistently perfect bread machine bread. These tips focus on precision, ingredient handling, and understanding your machine's capabilities. They are simple steps that can make a big difference in the final outcome of any bread machine recipe, including those involving a bread machine sourdough starter recipe.
Adopting these expert tips means approaching your bread machine baking with attention to detail. It's about treating the process with the care that traditional baking demands, even though the machine automates much of the work. From how you measure your flour to the temperature of your water, these seemingly small factors play a crucial role in the complex chemistry of bread making.
Measuring Ingredients Accurately for Bread Machine Success
Accurate measurement is paramount in bread machine baking. Unlike traditional baking where you might adjust flour during kneading, the bread machine requires precise ratios from the start. The most accurate way to measure flour and other dry ingredients is by weight using a kitchen scale. Volume measurements (cups) can vary significantly depending on how the flour is scooped and leveled.
For example, a cup of flour can weigh anywhere from 100g to 150g depending on compaction. Using a scale ensures you have the correct amount of flour relative to your liquid, leading to predictable dough consistency. Liquids should also be measured accurately, ideally in a liquid measuring cup at eye level. Yeast, salt, sugar, and other additions should be measured with standard measuring spoons, leveling off dry ingredients. Precision minimizes variables and improves consistency.
The Importance of Water Temperature in Bread Machine Recipes
The temperature of the water (or other liquid) used in your bread machine recipe is critical because it directly impacts yeast activity. Yeast is a living organism that is sensitive to temperature.
- Too cold water (below 70°F): Yeast will be sluggish, resulting in a slow or insufficient rise.
- Lukewarm water (80-90°F): Ideal for activating most commercial yeasts and promoting a steady rise in standard cycles. This is often recommended for adding liquids first in the bread machine.
- Warm water (95-115°F): Can be used to quickly activate active dry yeast before adding it to the machine (proofing). Some rapid bread machine cycles specifically call for warmer water to speed up fermentation.
- Hot water (above 120°F): Will kill the yeast, resulting in a loaf that doesn't rise at all.
Using a thermometer to check your water temperature before adding it to the bread machine pan is a simple step that can prevent many common issues, especially when balancing the needs of commercial yeast and a bread machine sourdough starter recipe if using both.
Choosing the Right Bread Machine Setting for Your Recipe
Modern bread machines come with a variety of settings, and selecting the correct one is essential for a successful loaf.
- Basic/White: Standard cycle for white or enriched white bread.
- Whole Wheat: Longer knead and rise times to accommodate whole wheat flour, which develops gluten more slowly.
- French/Italian: Often involves a longer rise time for a chewier texture and sometimes a darker crust.
- Sweet: Shorter rise times and often a gentler knead, designed for doughs with higher sugar and fat content.
- Rapid/Express: Uses more yeast and warmer temperatures to significantly shorten the cycle time. Results may be less flavorful and have a coarser texture.
- Dough: Completes the mixing, kneading, and first rise. The dough is then removed for shaping and baking outside the machine. Ideal for rolls, pizza dough, or when using a bread machine sourdough starter recipe and wanting to bake in a conventional oven.
- Bake Only: Used for baking pre-made dough or finishing a loaf that needed more baking time.
- Sourdough: Some advanced machines have a specific cycle designed to mimic the longer fermentation needed for sourdough, often with specific temperature phases.
Always check your recipe and your machine's manual to select the setting that best matches the dough type and desired outcome.
Beyond the Basic Loaf: Creative Bread Machine Baking Ideas
Your bread machine is capable of producing far more than just simple sandwich loaves. The "Dough" cycle, in particular, unlocks a world of creative possibilities, allowing you to use the machine for the labor-intensive mixing and kneading before shaping and baking items like rolls, pizza dough, or even sweet buns outside the machine.
Even using the full bake cycle, you can experiment with different flour combinations, add-ins, and flavor profiles to create unique breads. Think savory herb and cheese loaves, sweet cinnamon swirl bread, or rustic whole grain loaves incorporating seeds. Exploring these creative ideas keeps bread machine baking exciting and allows you to expand your baking repertoire without needing to hand-knead. This creativity can even extend to adapting a bread machine sourdough starter recipe for different shapes and uses.
Making Rolls and Buns in Your Bread Machine
Using your bread machine's "Dough" cycle is perfect for making rolls and buns. Simply prepare your favorite dough recipe (or a specific roll/bun recipe) in the machine. The machine will mix, knead, and complete the first rise. Once the cycle is finished, remove the dough, which should be soft and elastic.
Divide the dough into equal portions, shape them into rolls or buns, and place them on a baking sheet. Let them rise for a second time (proof) in a warm place until they are about double in size, which might take 30-60 minutes depending on the recipe and room temperature. Bake them in a preheated oven according to your recipe's instructions, typically at 375-400°F (190-200°C) for 15-25 minutes, until golden brown. This method provides perfectly kneaded dough ready for any shape you desire.
Bread Machine Pizza Dough: A Quick and Easy Recipe
Making pizza dough in a bread machine is incredibly convenient. The "Dough" cycle handles all the mixing and kneading, producing a smooth, elastic dough ready to be shaped into your pizza crust. A basic bread machine pizza dough recipe typically includes flour, water, yeast, salt, and sometimes a little olive oil for tenderness and flavor.
Simply add the ingredients to your bread machine pan in the order recommended by your machine's manual (usually liquids first, then dry ingredients, with yeast added last on top of the flour). Select the "Dough" cycle. Once the cycle finishes (typically 1.5 to 2.5 hours), remove the dough.
It should be soft and easy to work with. Punch it down gently, let it rest for 10 minutes, then shape it into your desired pizza crust size and thickness. Add your favorite toppings and bake in a hot oven (450-500°F or 230-260°C is ideal) for 8-15 minutes, depending on thickness and temperature.
Sweet Breads and Desserts in Your Bread Machine
Your bread machine isn't just for savory loaves; it can also handle sweet breads and even some simple dessert-style items. Recipes for brioche, challah, cinnamon swirl bread, or even simple cake-like loafs can often be adapted for the bread machine. These recipes typically have higher amounts of sugar, fat, and sometimes eggs compared to standard bread.
Use the "Sweet" or "Basic" cycle, depending on the specific recipe and your machine's recommendations. Be mindful of the order of ingredients, especially with enriched doughs which can be stickier. Adding fruits, nuts, or chocolate chips during the "add-in" signal works well for sweet breads. For items like cinnamon swirl bread, you'll likely use the "Dough" cycle to create the dough, then remove, shape with a filling, proof, and bake in a conventional oven. Exploring sweet recipes adds a delightful dimension to your bread machine baking capabilities.
Final Thoughts: Unlock Your Bread Machine's Full Potential
Your bread machine is more than just a basic appliance; it's a gateway to exploring the rewarding world of baking with convenience. By understanding the fundamental ingredients, incorporating "secret" enhancers like bread flour, milk powder, or even tackling a bread machine sourdough starter recipe, and paying attention to technique, you can consistently produce loaves that are superior in texture, flavor, and appearance.
Don't be afraid to experiment! Try different flours, vary the amounts of sugar or fat slightly, or add your favorite herbs, spices, fruits, or nuts. Learn to troubleshoot common issues by observing your dough and understanding the role of each ingredient. With practice and attention to detail, you'll unlock your bread machine's full potential, moving beyond simple loaves to bake a diverse range of delicious, homemade breads that will impress your friends and family.
BakeWithEase: Your Journey to Bread Machine Mastery
At BakeWithEase, we are passionate about helping you succeed in your baking endeavors, whether you're a complete beginner or looking to refine your skills. Our resources, including guides like this, are designed to demystify the baking process and provide you with the knowledge and confidence to create delicious things in your own kitchen.
Mastering your bread machine is a journey, and we're here to guide you every step of the way. From understanding the science behind the ingredients to perfecting techniques and exploring new recipes, including perhaps your very first bread machine sourdough starter recipe, BakeWithEase offers the tips, tools, and inspiration you need. Keep experimenting, keep learning, and most importantly, keep baking with ease!
Frequently Asked Questions
What makes sourdough bread different from regular bread baked in a bread machine?
Sourdough bread relies on a natural starter containing wild yeast and bacteria, giving it a tangy flavor and unique texture compared to bread made with commercial yeast. The starter ferments for a longer time.
Can I use a bread machine to make sourdough bread from scratch?
Yes, you can! While bread machines aren't traditional, they offer a convenient way to knead and proof sourdough dough. You'll still need to prepare your sourdough starter separately.
What secret ingredients can I add to my bread machine sourdough starter recipe to improve the flavor and texture?
Adding a touch of whole wheat flour can enhance the flavor. A small amount of honey or molasses can also balance the tanginess and add a subtle sweetness.
How does using a bread machine affect the sourdough starter?
The bread machine's consistent temperature can be beneficial for controlled fermentation of the sourdough starter. However, be mindful of the dough temperature as excessive heat can kill the yeast.
What are some common mistakes people make when using a bread machine for sourdough, and how can I avoid them?
Over-proofing is a common issue. Monitor the dough closely and adjust proofing time as needed. Also, ensure your starter is active and bubbly before using it.
Final Reflection: The Unexpected Joy of Sourdough in Your Bread Machine
The perfect sourdough loaf, once a symbol of painstaking dedication, is now surprisingly accessible thanks to the humble bread machine. This article explored how to harness the power of your bread machine to create delicious sourdough loaves, demystifying the process and unlocking a world of flavor for even the busiest baker. The ease and consistency achievable through this method make sourdough baking a realistic pursuit for everyone.
The journey of mastering sourdough, whether in a traditional oven or a bread machine, is a testament to the enduring connection between food, process, and personal growth. It's a journey of experimentation, patience, and ultimately, immense satisfaction. The best bread is the bread you bake yourself.
This simple truth resonates deeply, as the act of creating something from scratch, even with the help of technology, fosters a sense of accomplishment and connection to the food we consume. The accessibility of bread machine sourdough opens this rewarding experience to a far wider audience.
Now, it's your turn. Don't be intimidated by the seemingly complex world of sourdough. Experiment with the techniques outlined in this article, adjust the recipes to your preferences, and most importantly, enjoy the process. The aroma of freshly baked sourdough, warm from your bread machine, is a reward in itself. Embrace the unexpected joy of sourdough, and discover the baker within you.
Unlock Your Bread Machine's Full Potential!
Thanks for taking the time to explore the secrets to elevating your bread machine baking! You've now gained the knowledge to create truly amazing loaves. Are you ready to put your newfound skills into practice?
- Experiment with your favorite add-ins: Try adding different nuts, seeds, or dried fruits to your next batch—there are countless options! This is your opportunity to personalize your bread.
- Share your baking successes and challenges! Join our BakeWithEase community on social media and showcase your bread creations. Let’s motivate and learn from each other!
- Challenge yourself with a new recipe: Use your enhanced knowledge to try a more complex recipe than usual. What delicious bread will you create next?
What unexpected ingredient will you incorporate into your bread this week to surprise your family and friends?