
How to Frost a Cake Without Any Special Tools

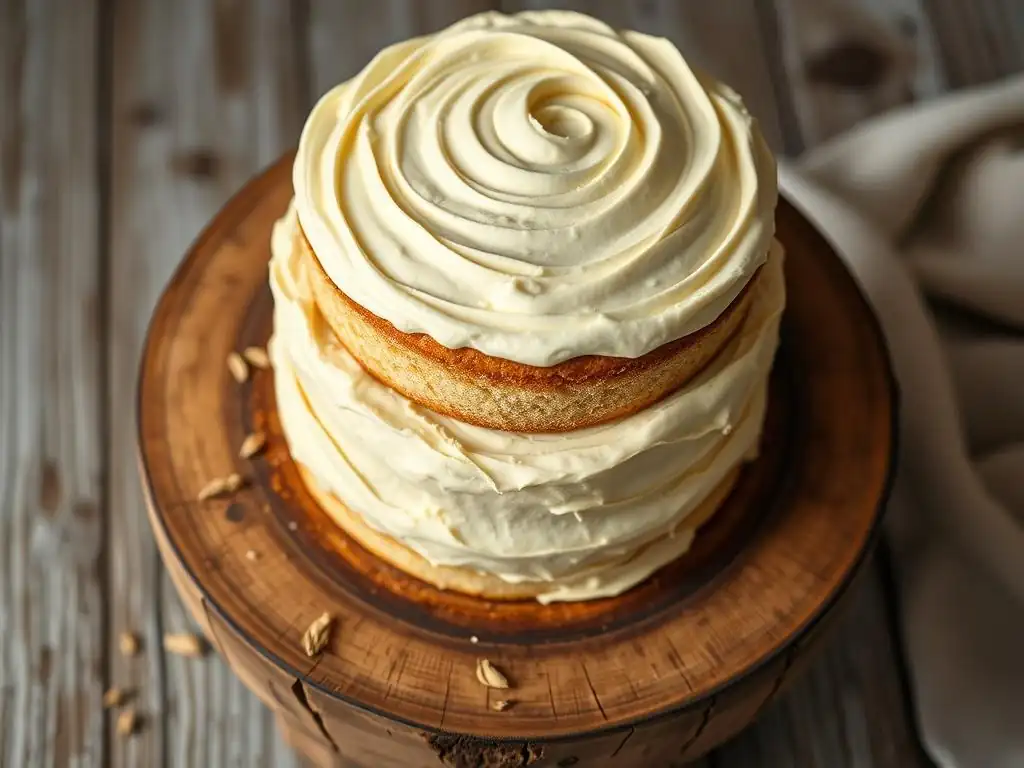
Welcome to BakeWithEase, your haven for effortless baking! Ever dreamt of achieving bakery-worthy results without all the fancy equipment? You're in the right place. Today, we're diving into a game-changer: perfecting your cake with an easy cake frosting, no tools required. Curious to discover how to transform a simple cake into a stunning masterpiece using just a spoon and a little creativity? Let's get started!
- How to Frost a Cake Without Special Tools: A BakeWithEase Guide
- Introduction: Beautifully Frosted Cakes Made Easy
- Understanding the Basics of Easy Cake Frosting
- Step-by-Step: Frosting Your Cake with Basic Kitchen Tools
- Tips and Tricks for Easy Cake Frosting Success
- Troubleshooting Common Frosting Problems
- Beyond the Basics: Mastering Simple Cake Decoration
- Conclusion: Cake Frosting Confidence Achieved!
-
Frequently Asked Questions
- How can I frost a cake smoothly without professional tools?
- What are some alternatives to a piping bag for decorating a cake?
- What kind of frosting is best for frosting a cake without special tools?
- What are some tips for preventing crumbs from getting into my frosting?
- Can I achieve professional-looking results frosting a cake without special tools?
- Final Reflection: The Unexpected Joy of Simple Cake Frosting
- Unleash Your Inner Cake Artist!
How to Frost a Cake Without Special Tools: A BakeWithEase Guide
Introduction: Beautifully Frosted Cakes Made Easy
Welcome to BakeWithEase: Your Guide to Simple Cake Decorating
Welcome to BakeWithEase, where we believe that creating delicious and beautiful desserts should be accessible to everyone, regardless of your skill level or the fancy tools you own. We know that the final touch on a cake – the frosting – can sometimes feel intimidating, especially when you see intricate designs online. But frosting a cake beautifully doesn't require a kitchen stocked with specialized equipment.
In fact, some of the most elegant finishes can be achieved with items you likely already have on hand. Our goal is to empower you to transform simple ingredients into stunning creations, making the baking process enjoyable from start to finish.
This guide is specifically designed to show you how to achieve easy cake frosting no tools needed beyond the absolute basics. We'll walk you through selecting the right frosting, preparing your cake, and applying the frosting using common kitchen implements. Forget the pastry bags and offset spatulas for now; we're focusing on simple, effective techniques that yield impressive results. Whether you're frosting a birthday cake, a simple loaf cake, or cupcakes, these methods will help you achieve a smooth, professional-looking finish without the fuss.
Achieving Professional-Looking Frosting Without the Fuss
Many home bakers believe that a perfectly smooth or artfully textured frosting finish is only possible with specialized tools like large offset spatulas, cake turntables, and piping bags with various tips. While these tools certainly have their place and can speed up the process, they are by no means essential for achieving a gorgeous cake. The truth is, achieving easy cake frosting no tools relies more on technique, patience, and understanding the properties of your frosting and cake.
This article will demystify the process, proving that you can get stunning results using everyday items like butter knives, spoons, and even just the back of a spoon or a simple piece of parchment paper. We'll demonstrate techniques for smoothing, creating textures, and even adding simple decorations that require minimal or no specialized gear. By focusing on fundamentals like proper cake preparation and frosting consistency, you'll gain the confidence to tackle any frosting project and achieve a beautiful, finished cake that looks like it came from a bakery, all through easy cake frosting no tools methods.
Understanding the Basics of Easy Cake Frosting
Choosing the Right Frosting for a Tool-Free Application
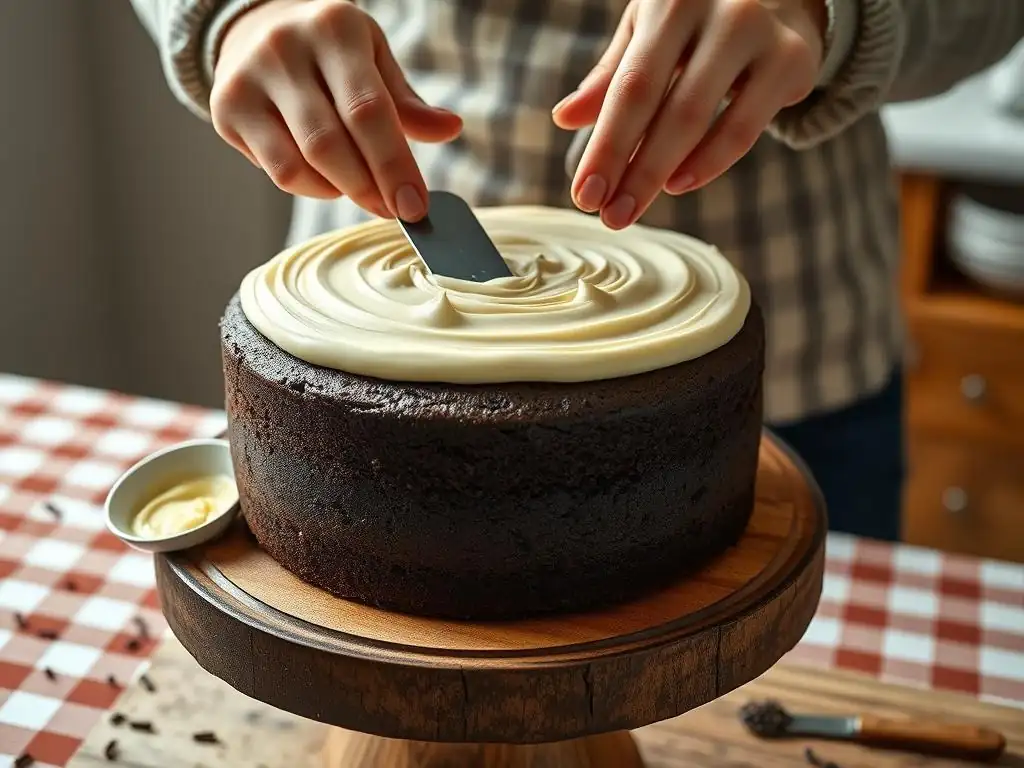
The type of frosting you choose significantly impacts how easy it is to apply without special tools. For tool-free application, you want a frosting that is relatively stable, spreadable, and not prone to melting too quickly at room temperature. Avoid overly thin glazes or very delicate meringues for your first few attempts at easy cake frosting no tools. The ideal consistency is one that holds its shape but spreads smoothly with a little pressure. Below are a few excellent choices that are forgiving and easy to work with using basic tools.
Consider frostings with a balance of fat and sugar, as this combination provides structure and creaminess. A classic American buttercream or a simple cream cheese frosting are fantastic starting points. These frostings are opaque, which helps hide imperfections, and their texture allows for easy manipulation with basic spreading tools. A well-made chocolate ganache, when cooled to the right consistency, also provides a smooth, luxurious finish that can be poured or spread easily.
Simple Buttercream: A Beginner-Friendly Option
Simple buttercream is arguably the most popular choice for home bakers and is perfect for easy cake frosting no tools. Typically made from butter, powdered sugar, milk or cream, and vanilla extract, it's incredibly versatile and easy to adjust in consistency. For tool-free application, ensure your buttercream isn't too stiff; adding a touch more liquid (milk or cream) can make it wonderfully spreadable. A standard ratio might be 1 cup of softened butter to 3-4 cups of powdered sugar, with 2-3 tablespoons of liquid. This yields a firm yet pliable frosting.
The key to working with buttercream without special tools is to have it at the right temperature – cool but not hard. If it's too warm, it will be messy and hard to smooth; if too cold, it will be stiff and tear the cake. Buttercream is forgiving; you can scrape it off and re-apply if needed. Its opacity also means minor cake imperfections are easily hidden. For an 8-inch two-layer cake, you'll likely need about 3-4 cups of buttercream to cover it generously using basic spreading techniques.
Cream Cheese Frosting: Tangy and Easy to Spread
Cream cheese frosting offers a delightful tangy flavor and a smooth, creamy texture that is excellent for easy cake frosting no tools. Made from cream cheese, butter, powdered sugar, and vanilla, it tends to be slightly softer than traditional buttercream due to the cream cheese. This softer consistency can actually be an advantage when spreading with basic tools, as it glides more easily over the cake surface. A common ratio uses equal parts softened cream cheese and butter (e.g., 8 ounces of each) combined with 3-4 cups of powdered sugar.
Because cream cheese frosting is softer, chilling is often your best friend when working with it. After applying a layer, a quick chill in the refrigerator helps it firm up, making subsequent layers or smoothing techniques much simpler. Its slight softness also makes it easy to create simple textures using the back of a spoon or a butter knife. While it might be slightly less stable than a very stiff buttercream in hot weather, it's incredibly simple to spread and perfect for cakes like carrot cake or red velvet.
Chocolate Ganache: A Smooth and Luxurious Finish
Chocolate ganache, a simple mixture of chocolate and hot cream, provides a rich, decadent frosting option that can be applied without special tools. The consistency of ganache depends on the ratio of chocolate to cream. A ratio of 1:1 (equal parts chocolate and cream by weight) results in a pourable ganache when warm, which can be used for a smooth drip effect or simply poured over the top of the cake. A ratio of 2:1 or 3:1 chocolate to cream creates a thicker ganache that firms up as it cools, becoming spreadable like a thick frosting.
For easy cake frosting no tools, the thicker, spreadable ganache is ideal. Once cooled to a peanut butter-like consistency, it can be easily spread with a butter knife or the back of a spoon. Its smooth nature means it naturally creates a sleek finish with minimal effort.
While it requires melting chocolate and heating cream, the process is straightforward, and the result is a luxurious frosting that needs little manipulation to look impressive. A batch made with 8 ounces of chocolate and 4 ounces of cream will provide enough spreadable ganache for a small cake or the top and sides of a single layer.
Preparing Your Cake for Frosting: The Foundation for Success
Proper cake preparation is the absolute cornerstone of achieving beautiful easy cake frosting no tools. No matter how good your frosting is or how skilled you are with your tools (or lack thereof), a poorly prepared cake will make frosting a frustrating task. Ensuring your cake layers are cool, level, and free of loose crumbs is crucial. Think of it as building a house; a solid foundation is necessary for a stable and attractive structure. Taking these preparatory steps will save you time and effort in the long run and lead to a much smoother frosting experience.
Allowing your cake layers to cool completely is perhaps the most critical step. Attempting to frost a warm cake will result in melted, sliding frosting and torn cake crumbs mixing into your beautiful finish. Once cooled, leveling the layers and applying a crumb coat are the next essential steps. These steps create a clean, flat surface for your final frosting layer, making the application of easy cake frosting no tools significantly simpler and more effective.
Leveling Your Cake Layers: Ensuring a Flat Surface
Cake layers often dome in the center as they bake. For a professional-looking layered cake, it's important to level these domes so that when stacked, the cake is straight and stable. While professional bakers use cake levelers or long serrated knives, you can achieve this with a regular large serrated bread knife. Ensure your cake is completely cool, then place it on a flat surface. Hold the knife parallel to the counter and gently saw through the domed top, removing just enough to create a flat surface.
This removed cake can be saved for cake pops or trifle layers! Leveling provides a stable, even surface for stacking and frosting, preventing your finished cake from leaning. For instance, if you're frosting a two-layer 8-inch cake, leveling both layers means you'll have two perfectly flat surfaces meeting in the middle, ensuring the frosting between the layers is even and the outside surface is straight, which is key for achieving smooth easy cake frosting no tools.
Applying a Crumb Coat: Sealing in Loose Crumbs
A crumb coat is a thin layer of frosting applied all over the cake before the main frosting layer. Its purpose is to trap any loose crumbs that might detach from the cake surface, preventing them from getting into your final, smooth frosting layer. This step is non-negotiable for achieving a clean finish, especially when aiming for easy cake frosting no tools where you might be using less precise spreading tools. It acts like a primer for your cake.
To apply a crumb coat, use a small amount of your chosen frosting (about 1/2 cup for an 8-inch cake). Using a butter knife or the back of a spoon, spread a very thin layer over the top and sides of the cake. Don't worry about making it perfect; its job is just to catch crumbs.
Once covered, chill the cake in the refrigerator for at least 20-30 minutes. This allows the crumb coat to firm up, effectively sealing all those pesky crumbs underneath and providing a smooth, stable surface for your final, thicker layer of easy cake frosting no tools.
Step-by-Step: Frosting Your Cake with Basic Kitchen Tools
Gathering Your "Tools": What You'll Need
Achieving easy cake frosting no tools requires a slight shift in perspective – instead of specialized equipment, we look to common kitchen items for their functionality. You don't need a cake decorating store's inventory to get the job done. The items listed below are likely already in your drawers or pantry and can serve as excellent substitutes for traditional cake decorating tools. Think creatively about how everyday objects can be used for spreading, smoothing, and even simple decorating.
Having these items ready before you start makes the process flow much more smoothly. Consider setting up a dedicated workspace that's easy to clean. A damp cloth nearby is also helpful for wiping your tools (or substitutes) clean as you work, which is essential for a smooth finish when doing easy cake frosting no tools.
Offset Spatula Substitute: Using a Butter Knife
An offset spatula is the go-to tool for spreading frosting due to its angled blade, which keeps your knuckles from dragging in the frosting. However, a simple butter knife works remarkably well as a substitute for easy cake frosting no tools. The flat, rounded tip is perfect for scooping and spreading frosting, and the edge can be used for smoothing. For larger cakes, a longer table knife might be even more effective than a small butter knife.
Using a butter knife requires a slightly different technique; you'll work in smaller sections compared to a large offset spatula. Use the flat side to apply and spread the bulk of the frosting, and then hold the knife at a slight angle (around 45 degrees) against the cake to smooth it out. The key is to use gentle, even pressure and wipe the knife clean frequently, perhaps every few strokes, to remove excess frosting and crumbs. This simple substitute is proof that achieving easy cake frosting no tools is entirely possible with everyday items.
Turntable Alternative: A Lazy Susan
A cake turntable allows you to easily rotate the cake as you frost, making it much simpler to apply and smooth frosting evenly. Without one, you'd have to constantly move around the cake. A fantastic, common alternative is a lazy Susan. If you have one for your dining table or pantry, it can be repurposed as a makeshift cake turntable. Place a non-slip mat or a damp paper towel on top of the lazy Susan before placing your cake board or cake stand on it to prevent sliding.
Using a lazy Susan allows you to slowly rotate the cake with one hand while you spread or smooth the frosting with the other. This is particularly helpful when trying to achieve a smooth finish on the sides of the cake. While it might not spin as freely or smoothly as a professional cake turntable, it provides enough rotation to significantly ease the process of applying easy cake frosting no tools evenly around the entire cake.
Piping Bag Hack: Using a Ziploc Bag
Piping bags are used for precise application of frosting, whether for borders, writing, or filling gaps. When attempting easy cake frosting no tools, you might think you're limited to just spreading. However, a simple Ziploc bag can be transformed into a makeshift piping bag. Simply spoon frosting into one corner of a sturdy Ziploc bag, push the frosting into the corner, and then snip off a tiny bit of the corner with scissors. The size of the snip determines the size of your "piping tip."
This hack is incredibly useful for filling in gaps between cake layers after stacking, applying frosting to the top of the cake before spreading, or creating simple dollops or lines for decoration. For example, you can use this to pipe a dam of frosting around the edge of a layer before adding filling, preventing the filling from squeezing out. It's a practical way to add a touch more control to your easy cake frosting no tools application.
Applying the First Layer of Frosting: The Crumb Coat
As discussed earlier, the crumb coat is a thin layer applied to trap crumbs. This step is crucial for achieving a clean final layer when you're focused on easy cake frosting no tools. It provides a stable base and ensures that no stray crumbs disrupt the smooth finish you're aiming for. Don't rush this step; its simplicity belies its importance in the overall success of your frosted cake.
Applying the crumb coat with basic tools is straightforward. You don't need precision here, just coverage. Use your butter knife or the back of a spoon to spread a thin, even layer over the entire cake. Focus on getting a thin, consistent coverage rather than perfect smoothness.
Achieving a Thin and Even Crumb Coat
For the crumb coat, you need only a small amount of frosting – typically about 1/2 cup to 1 cup for a standard 8- or 9-inch two-layer cake. Use your butter knife or spoon to scoop a small amount of frosting and dab it onto the top and sides of the cake. Then, using the flat side of the knife or spoon, gently spread the frosting outwards from the center of the top, and around the sides. The goal is a translucent layer where you can still somewhat see the cake through the frosting.
Work quickly and lightly to avoid pulling up too many crumbs. If you encounter a particularly crumbly spot, dab frosting onto it rather than trying to spread. Once the cake is thinly covered, use the edge of your tool to scrape away any significant excess, leaving just a thin, even layer. This thinness is important because you don't want a thick crumb coat interfering with your final, smooth layer of easy cake frosting no tools.
Chilling the Crumb Coat: Setting the Stage for the Final Layer
Once the crumb coat is applied, the cake must be chilled. This step is absolutely essential for firming up the crumb coat and locking those crumbs in place. Place the cake in the refrigerator uncovered for at least 20-30 minutes, or until the frosting is firm to the touch. You can even chill it longer if needed, up to a few hours.
This chilling process creates a smooth, stable, and crumb-free surface that is perfect for applying the final layer of frosting. When you apply your final layer of easy cake frosting no tools over a firm crumb coat, the frosting glides on smoothly without picking up stray crumbs. It also provides a firm base if you plan to create any simple textures or patterns on the surface.
The Final Frosting Layer: Achieving a Smooth Finish
With the crumb coat chilled and firm, you are ready for the final layer of frosting. This is where you'll apply a thicker layer and focus on achieving the desired smooth or textured finish using your basic tools. Remember, patience is key, and don't be afraid to scrape off frosting and re-apply if needed. The beauty of easy cake frosting no tools is its forgiving nature.
You'll need a more generous amount of frosting for this layer – typically 2-3 cups for an 8-inch two-layer cake, depending on how thick you like your frosting. Have your butter knife or spoon ready, and maybe a glass of hot water nearby for smoothing techniques.
Applying the Frosting: Working in Sections
Take your chilled cake out of the refrigerator. Start by placing a generous dollop of frosting on top of the cake. Using the flat side of your butter knife or the back of your spoon, spread the frosting evenly over the top, pushing it slightly over the edge. Don't worry about the sides yet; focus on getting a nice, even layer on the top.
Once the top is covered, apply frosting to the sides. It's often easiest to dab chunks of frosting onto the sides and then spread them. Work in small sections, spreading the frosting horizontally or vertically around the cake. Apply enough frosting so that the crumb coat is completely covered and you have a relatively thick layer to work with for smoothing. Don't strive for perfection at this stage; just get the cake covered.
Smoothing the Frosting: Techniques for a Flawless Look
Now for the smoothing! This is where your basic tools really shine in achieving easy cake frosting no tools. There are a couple of effective techniques you can use with a butter knife or spoon to get a clean, smooth finish. The goal is to apply gentle, even pressure and remove excess frosting.
Remember to wipe your knife or spoon clean frequently. Excess frosting built up on your tool will create drag marks and prevent a smooth finish. Work systematically around the cake, smoothing the sides first, then the top.
The Butter Knife Method: Gentle Smoothing
To smooth the sides using a butter knife, hold the knife at a slight angle (around 45 degrees) against the side of the cake. Apply gentle, consistent pressure and move the knife horizontally around the cake, either rotating the lazy Susan or moving yourself around the cake. Overlap your strokes slightly to avoid lines. For the top, hold the knife flat against the surface and gently draw it across the cake, scraping off excess frosting.
You might need to go over sections multiple times. Don't press too hard, as this can scrape off too much frosting and expose the cake or crumb coat. The goal is to skim the surface, removing just enough frosting to create a smooth plane. For easy cake frosting no tools, this method is straightforward and effective with a little practice.
The Hot Water Trick: Dipping for a Clean Finish
A fantastic technique for achieving a super smooth finish with metal tools like a butter knife or spoon is the hot water trick. Fill a tall glass with hot water. Dip your butter knife or spoon into the hot water for a few seconds, then wipe it completely dry with a clean cloth or paper towel. The warm, dry surface of the tool will glide through the frosting much more smoothly, melting the surface slightly as it passes.
Immediately use the warm, dry tool to smooth the frosting on the cake. For sides, hold the warm knife at an angle and smooth horizontally. For the top, hold it flat and draw it across. As the tool cools, repeat the process: dip in hot water, wipe dry, and smooth. This technique is particularly effective for getting a polished, sleek look when doing easy cake frosting no tools and is a favorite simple hack among bakers.
Easy Cake Decorating Ideas for No-Tool Frosting
Achieving easy cake frosting no tools doesn't mean your cake has to be plain! You can add simple, beautiful decorations using just your frosted surface and a few common kitchen items or pantry staples. These techniques add visual interest and personality to your cake without requiring any specialized piping tips or tools.
These ideas focus on manipulating the frosting surface itself or adding simple edible elements. They are perfect for beginners and demonstrate how creative you can be even with minimal equipment.
Simple Swirls and Textures: Adding Visual Interest
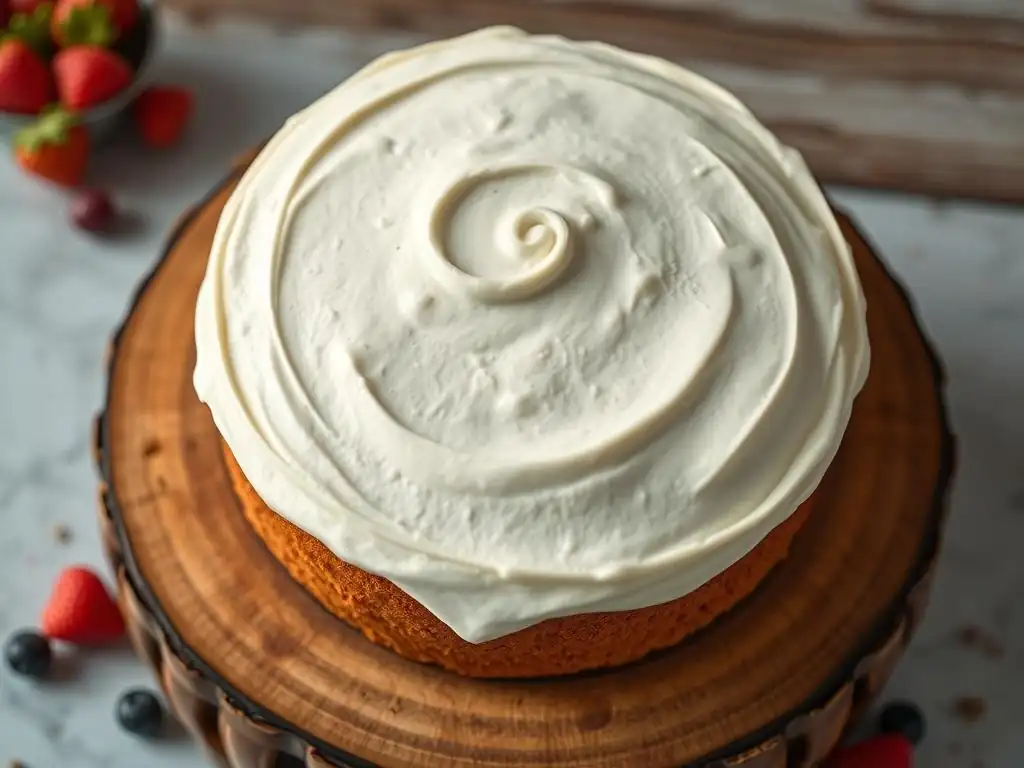
Once your final frosting layer is applied, you can easily create attractive textures using the back of a spoon, a butter knife, or even a fork. For simple swirls, press the back of a spoon gently into the frosting on top of the cake and twist slightly as you lift it away. Repeat this pattern across the top. For the sides, you can make vertical or horizontal lines by dragging the tines of a fork or the edge of a butter knife through the frosting.
Another easy texture is the rustic look. Simply use your butter knife or spoon to make random swooshes and peaks all over the cake surface. This is very forgiving and hides any imperfections in the smoothing process. These simple techniques instantly elevate the look of your easy cake frosting no tools.
Sprinkles and Edible Decorations: A Touch of Fun
One of the easiest ways to decorate a cake frosted with no special tools is to add sprinkles! Sprinkles adhere easily to freshly applied frosting. You can press them gently into the sides or scatter them over the top. For more controlled application on the sides, you can hold the cake over a tray or large plate to catch falling sprinkles and then pour them back into the container.
Other easy edible decorations include chocolate shavings (made with a vegetable peeler), chopped nuts, or crushed cookies. These can be pressed into the sides or sprinkled over the top for added texture and flavor. For example, pressing chopped toasted pecans into the sides of a carrot cake with cream cheese frosting adds a lovely finish. These elements require no special tools beyond maybe a peeler or knife for prep.
Fresh Berry Arrangements: A Natural and Elegant Touch
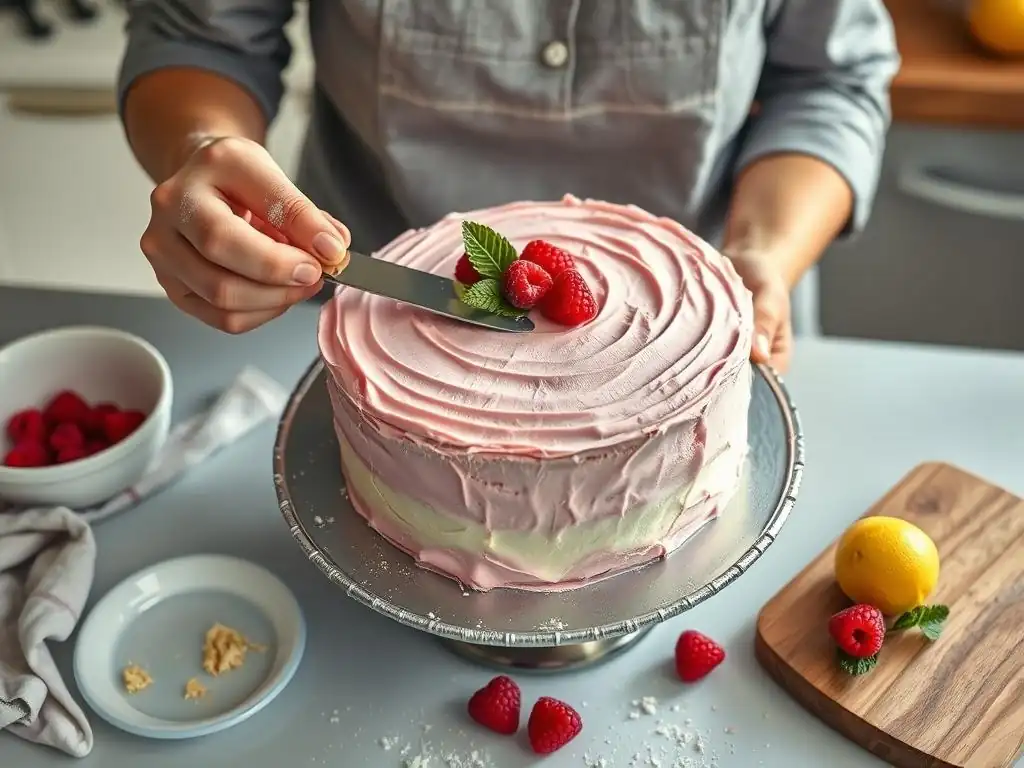
Fresh berries offer a beautiful, natural, and effortless way to decorate a cake frosted using easy cake frosting no tools. Arrange fresh strawberries, raspberries, blueberries, or a mix on top of the cake. You can create patterns, clusters, or simply scatter them artfully. The vibrant colors of the berries contrast beautifully with the frosting and add a fresh element.
This method requires no special tools beyond washing and arranging the fruit. For example, arranging sliced strawberries in concentric circles on top of a vanilla cake with buttercream creates a stunning effect. You can also add a few sprigs of mint for a touch of green. It's a simple yet elegant way to finish your cake.
Tips and Tricks for Easy Cake Frosting Success
Achieving beautiful easy cake frosting no tools is not just about the techniques; it's also about mastering a few key principles and knowing how to handle common challenges. These tips and tricks will help ensure your frosting process goes smoothly and results in a cake you're proud of. From managing frosting consistency to dealing with crumbs, these insights are invaluable for tool-free frosting.
Paying attention to the details below can make a significant difference in the final appearance of your cake. They address common issues faced by bakers and offer simple solutions applicable when using basic kitchen tools.
Preventing Air Bubbles: Tapping and Patience
Air bubbles in frosting can create unsightly pockmarks on a smooth surface. They often get incorporated during the mixing process. To minimize air bubbles before you even start frosting, gently stir your prepared frosting with a spoon or spatula for a few minutes after mixing. This helps release trapped air. For easy cake frosting no tools, you can also tap the bowl gently on the counter.
When applying the frosting, try not to overwork it. Once the frosting is on the cake, if you spot a large air bubble, you can gently pop it with the tip of your butter knife and then smooth the area. Patience is key; sometimes leaving the frosted cake to sit for a few minutes allows small bubbles to surface and disappear before your final smoothing pass.
Dealing with Crumbs: Keeping Your Frosting Clean
Despite applying a crumb coat, you might still encounter a few rogue crumbs, especially if using a butter knife which can be sharper than an offset spatula. The most important tip here is to keep your frosting clean. If you pick up crumbs on your knife while smoothing, stop immediately. Wipe the knife clean on the edge of your frosting bowl or a separate cloth before continuing.
If you get crumbs in your main bowl of frosting, try to scoop them out carefully. If there are too many, you might need to transfer the frosting to a new bowl, leaving the crumb-filled bottom layer behind. Working in small sections and frequently cleaning your tool is the best defense against crumbs when aiming for easy cake frosting no tools.
Achieving Sharp Edges: Techniques for a Polished Look
Achieving perfectly sharp edges on a cake without specialized tools can be challenging, but you can get a clean, defined edge using a butter knife or spoon. Once the sides and top are smoothed, hold your butter knife or the back of a spoon flat against the top edge of the cake, with half of the tool extending over the edge. Gently pull the tool inwards towards the center of the cake, removing the slight ridge of frosting that forms at the top edge.
Wipe your tool clean and repeat this process all around the top edge of the cake. This bevels the edge slightly and gives it a cleaner, more defined look. While it might not be a razor-sharp edge achievable with a bench scraper, it provides a neat, polished finish suitable for easy cake frosting no tools.
Frosting Consistency: Getting It Just Right
The consistency of your frosting is paramount for easy application without special tools. If it's too stiff, it will tear the cake and be hard to spread smoothly. If it's too soft, it will slide off the cake and won't hold any shape or texture. The ideal consistency is spreadable like peanut butter but firm enough to hold a soft peak.
If your frosting is too stiff, beat in milk, cream, or water, one teaspoon at a time, until it reaches the desired consistency. If it's too soft, add more powdered sugar (a tablespoon at a time) or chill the frosting in the refrigerator for 10-15 minutes to firm it up. Adjusting consistency is a simple yet vital step for successful easy cake frosting no tools.
Troubleshooting Common Frosting Problems
Even with the best preparation and techniques, you might encounter issues. Knowing how to quickly troubleshoot common frosting problems can save your cake and your sanity. These simple fixes apply whether you're using special tools or focusing on easy cake frosting no tools.
Don't get discouraged if your first attempt isn't perfect. Frosting is a skill that improves with practice. These solutions address the most frequent challenges home bakers face.
Frosting Too Soft: Quick Fixes
If your frosting is too soft and won't hold its shape, especially cream cheese frosting or buttercream in a warm kitchen, the quickest fix is chilling. Place the bowl of frosting in the refrigerator for 15-30 minutes, stirring it occasionally. The fat in the frosting will firm up, making it more spreadable and stable.
If chilling isn't enough, you can try adding a bit more powdered sugar, a tablespoon at a time, and mixing it in thoroughly. For buttercream, you could also add a very small amount of softened butter (a teaspoon or two). Remember to add gradually and check the consistency often.
Frosting Too Stiff: Easy Solutions
Frosting that is too stiff is difficult to spread and can pull crumbs from the cake. This is easily fixed by adding a liquid. For buttercream, add milk, cream, or water, starting with just a teaspoon. Mix thoroughly and add more, a teaspoon at a time, until the frosting is smooth and easily spreadable.
For cream cheese frosting, you can add a little milk or cream. For ganache, gently warm it slightly over a double boiler or in the microwave (in short bursts, stirring frequently) until it reaches the desired consistency. Always add liquid or heat gradually to avoid making it too soft.
Uneven Frosting: Smoothing Techniques
If your final frosting layer is uneven, don't panic! This is where your smoothing techniques come back into play. Ensure your tool (butter knife or spoon) is clean. Use the hot water trick if you have access to it, as a warm, dry tool is excellent for resmoothing.
Apply gentle, even pressure and go over the uneven areas again. You can scrape off excess frosting from the high spots and use it to fill in the low spots. Work methodically around the cake. Remember that simple textures (like swirls or rustic swooshes) are also a great way to camouflage minor unevenness when doing easy cake frosting no tools.
Beyond the Basics: Mastering Simple Cake Decoration
Once you're comfortable with the easy cake frosting no tools techniques, you might want to explore simple ways to add a bit more flair to your cakes. These ideas build upon your basic frosting skills and introduce ways to elevate your cake decoration without needing a full set of professional tools.
These next steps show how mastering simple techniques opens the door to more creative finishes, still focusing on accessibility and ease for the home baker.
Exploring Different Frosting Flavors: Expanding Your Repertoire
Mastering easy cake frosting no tools with vanilla buttercream or cream cheese frosting is just the beginning. You can easily adapt these recipes to create a variety of flavors without changing your application technique. Add cocoa powder for chocolate buttercream, melted and cooled chocolate for chocolate ganache buttercream, citrus zest and juice for a tangy cream cheese frosting, or fruit purées (used sparingly) for fruit-flavored frostings.
Experimenting with flavors keeps baking exciting and allows you to pair frostings perfectly with different cake types. A simple lemon buttercream on a vanilla cake, or a coffee-flavored cream cheese frosting on chocolate cake, can elevate your dessert significantly, all applied with the same basic tools.
Creating Simple Piping Designs: Elevating Your Cake
Even with just a Ziploc bag hack, you can create simple piping designs to enhance your easy cake frosting no tools. Snip a small corner off the bag for fine lines or writing. Snip a larger corner for thicker lines or dollops. You can pipe simple borders around the top or bottom edge of the cake, write a message (practice on parchment paper first! ), or pipe small stars or dots by simply squeezing the bag and pulling straight up.
While you won't achieve complex designs without piping tips, these simple piped elements add a touch of elegance and finish to your cake. For instance, piping a simple line of frosting around the base of the cake helps give it a clean edge against the plate or stand.
Conclusion: Cake Frosting Confidence Achieved!
You Can Frost a Beautiful Cake Without Special Tools!
Congratulations! You've learned that achieving a beautiful, well-frosted cake is absolutely possible without owning a single specialized cake decorating tool. By focusing on proper cake preparation, choosing the right frosting consistency, and utilizing common kitchen items like butter knives, spoons, and Ziploc bags, you can create stunning results. The techniques for easy cake frosting no tools are accessible, effective, and prove that creativity and skill are more important than expensive equipment.
Whether you're aiming for a perfectly smooth finish, a rustic textured look, or simple decorations, the methods outlined in this guide provide a solid foundation. Don't be afraid to practice; each cake you frost will build your confidence and improve your technique.
BakeWithEase: Empowering You to Create Delicious and Beautiful Desserts.
At BakeWithEase, our mission is to make baking fun, accessible, and rewarding for everyone. We hope this guide on easy cake frosting no tools has empowered you to tackle your next cake project with confidence. You now have the knowledge and techniques to create delicious cakes that look as good as they taste, using only what you have in your kitchen.
Continue exploring BakeWithEase.com for more simple recipes, helpful tips, and easy-to-follow guides. We're here to support your baking journey, helping you create beautiful desserts that bring joy to you and those you share them with, proving that easy cake frosting no tools is just one step towards mastering the art of baking with ease.
Frequently Asked Questions
How can I frost a cake smoothly without professional tools?
You can achieve a smooth frosting by using a simple offset spatula or even a butter knife. Focus on small, overlapping strokes and chilling the cake between layers for a neater finish.
What are some alternatives to a piping bag for decorating a cake?
Alternatives include using a zipper bag with a corner snipped off, or creating designs with a fork or spoon. Get creative with everyday kitchen utensils!
What kind of frosting is best for frosting a cake without special tools?
A buttercream frosting is generally easy to work with and spread smoothly. Try a simple vanilla buttercream for beginners, as it is quite forgiving.
What are some tips for preventing crumbs from getting into my frosting?
Apply a crumb coat – a thin layer of frosting to trap crumbs – and chill the cake before the final frosting layer. This creates a protective barrier against crumbs.
Can I achieve professional-looking results frosting a cake without special tools?
While specialized tools offer more precision, you can still achieve beautiful results with practice and patience. Focus on smooth application and creative decorating techniques.
Final Reflection: The Unexpected Joy of Simple Cake Frosting
Mastering the art of frosting a cake doesn't require a professional's arsenal of tools; it simply requires a little ingenuity and a whole lot of heart. This article demonstrated that achieving a beautifully frosted cake is entirely within reach, even without specialized equipment. The techniques shared, from using a butter knife to achieving smooth swirls with a spoon, prove that delicious results are possible with readily available resources.
The accessibility of this skill is what truly resonates. It's a small act of creation, a moment of joy that can be shared with loved ones, regardless of skill level or budget. The best things in life are simple,
a sentiment perfectly encapsulates the spirit of this endeavor. It's not about the perfection of the frosting, but the love and care infused into the process, a sentiment that transcends the kitchen and touches on the heart of connection and shared experiences.
Now, I invite you to take this newfound knowledge and apply it. Don't be intimidated by the seemingly complex world of cake decorating. Embrace the simplicity, experiment with different techniques, and most importantly, have fun! The next time you bake a cake, remember the power of resourcefulness and the joy of creating something beautiful with your own two hands. Let your cake be a testament to the sweet rewards of simple ingenuity.
Unleash Your Inner Cake Artist!
Thanks for taking the time to learn how to frost a cake like a pro, even without fancy tools! You've now got the skills to create stunning cakes at home. Ready to put your new knowledge into practice?
- Frost your first masterpiece! Grab your ingredients and give it a try. Don't worry about perfection—the key is to have fun!
- Share your creation! Show off your frosted cake on social media and inspire others. Use #BakeWithEase to connect with our community.
- Try experimenting with different frosting techniques and flavors! What delicious combination will you create next?
What unique frosting design will you dream up for your next baking adventure?