
Troubleshooting Gluten: Fixing Common Dough Development Issues

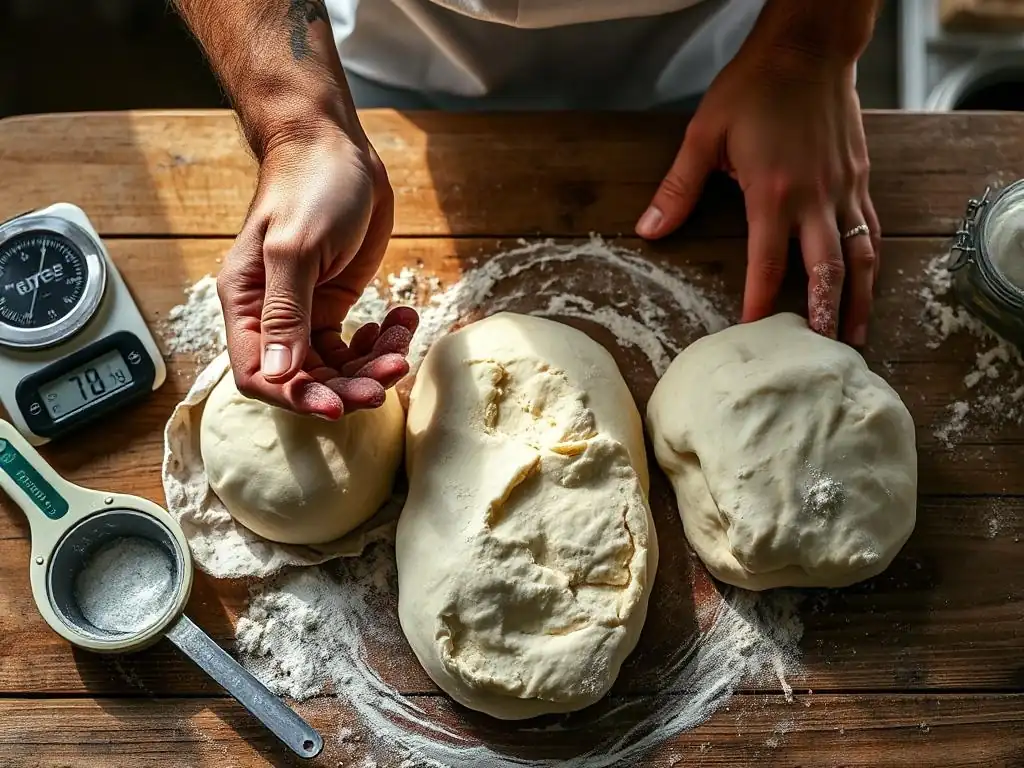
Welcome to BakeWithEase, your guide to unlocking baking perfection! Ever wondered why your dough just isn't behaving? Dive into our latest article, "Troubleshooting Gluten: Fixing Common Dough Development Issues," where we unravel the mysteries of gluten development dough problems. Discover practical solutions and techniques to transform frustrating baking experiences into triumphant creations. Are you ready to conquer your dough dilemmas? Let's get baking!
- Troubleshooting Bread Dough: Fixing Common Issues - BakeWithEase
- Introduction to Dough Development and Common Problems
- Identifying Dough Issues
- Factors Affecting Dough Development
- Troubleshooting Underdeveloped Dough
- Advanced Techniques for Dough Development Control
- Preventing Future Dough Development Problems
- Conclusion: Mastering Dough Development for Baking Success
-
Frequently Asked Questions
- What exactly is gluten development, and why is it so important in baking?
- My dough is too sticky and slack. What's likely causing this, and how can I fix it?
- My dough is tough and won't stretch. What could be the problem?
- How does different types of flour affect the final gluten development in my dough?
- I'm using a stand mixer. How can I tell if I've kneaded my dough enough, or if I'm over-kneading it?
- Final Reflection: The Ever-Evolving Dance of Gluten
- Unleash Your Inner Baker: Master Gluten's Secrets!
Troubleshooting Bread Dough: Fixing Common Issues - BakeWithEase
Introduction to Dough Development and Common Problems
Why Understanding Dough Structure is Crucial for Baking Success
Understanding the intricate structure of dough is fundamental to achieving successful baking results. At its core, dough is a complex matrix, primarily formed by gluten, starch, and water, with other ingredients like yeast, salt, and fat playing vital roles. Gluten, a protein network formed when glutenin and gliadin proteins in flour are hydrated and worked, provides the elasticity and extensibility necessary for dough to trap gases produced by yeast, allowing it to rise. Without proper gluten development, dough remains slack, unable to hold its shape or achieve a light, airy texture, leading to dense, heavy baked goods.
Mastering the science behind dough structure allows bakers to anticipate and prevent issues before they arise. Knowing how different factors like flour type, hydration, mixing, and fermentation affect the gluten network empowers you to adjust your process proactively. This knowledge is particularly critical when tackling common gluten development dough problems, ensuring that your bread, pastries, and other baked goods have the ideal structure for optimal rise, texture, and flavor. It transforms baking from following a recipe blindly to an informed, controlled craft.
Common Dough Problems Faced by Bakers
Bakers, whether novice or experienced, frequently encounter challenges related to dough development. One of the most prevalent gluten development dough problems is dealing with dough that is either underdeveloped or overdeveloped. Underdeveloped dough often feels sticky, lacks strength, and doesn't hold its shape well, resulting in poor oven spring and a dense crumb structure. Conversely, overdeveloped dough can become tough, rubbery, or even tear easily, leading to a heavy texture and difficulty in shaping.
Beyond under- or over-development, other common gluten development dough problems include inconsistent texture, excessive stickiness that makes handling difficult, or a lack of extensibility needed for shaping techniques like stretching or rolling. Environmental factors like temperature and humidity, as well as ingredient quality and measurement inaccuracies, can exacerbate these issues. Addressing these problems requires a systematic approach, starting with accurate identification of the specific issue before implementing targeted solutions.
BakeWithEase: Your Guide to Perfect Dough
At BakeWithEase, we understand the frustrations that can arise from gluten development dough problems. Our mission is to demystify the baking process, providing clear, actionable guidance to help you achieve perfect dough every time. We break down the science behind gluten development into easy-to-understand concepts and offer practical troubleshooting tips for common issues.
From selecting the right flour and understanding hydration ratios to mastering mixing techniques and fermentation timing, BakeWithEase provides the knowledge and tools you need. We aim to empower you to confidently approach any recipe, equipped to identify potential gluten development dough problems and apply the right solutions. Consider us your trusted partner on your journey to becoming a skilled baker, helping you transform challenging doughs into delicious, perfectly structured baked goods.
Identifying Dough Issues
Signs of Underdeveloped Dough
Underdeveloped dough is a common hurdle in baking, often resulting from insufficient mixing or hydration. Recognizing the signs early is key to correcting gluten development dough problems before baking. The dough may look shaggy and uneven, failing to form a smooth, cohesive ball. It might also feel heavy and dense rather than light and airy.
Dough Lacks Elasticity and Strength
A primary indicator of underdeveloped dough is a noticeable lack of elasticity and strength. When you try to stretch a piece of the dough, it will likely tear quickly and easily, rather than stretching thinly without breaking. This is because the gluten network has not been sufficiently formed or aligned through mixing. The dough won't spring back readily when poked, instead leaving a deep indentation. This weakness means the dough won't be able to support its structure during fermentation and baking.
Consider testing your dough with a simple poke test. Gently press your finger into the dough about half an inch deep. If the indentation remains completely without springing back even slightly, it's a strong sign of underdevelopment. Properly developed dough will slowly spring back, showing that the gluten network has enough strength and elasticity to resist the deformation.
Sticky and Difficult to Handle Dough
Underdeveloped dough often presents as excessively sticky, making it challenging to work with. While some stickiness is normal, especially in high-hydration doughs, underdeveloped dough feels more like a wet mass that clings stubbornly to hands and surfaces. This stickiness isn't necessarily due to too much water, but rather the gluten network not being strong enough to effectively bind the water and other ingredients. The lack of structure means the dough doesn't consolidate properly.
For instance, if you're making a standard white bread dough with a hydration around 60-65% and it feels like you're wrestling with a gooey mess after initial mixing, it's likely underdeveloped. Attempting to knead this dough by hand will often result in it sticking everywhere rather than developing tension and smoothness. A properly developed dough, even at higher hydration, will eventually release from your hands and the work surface as the gluten network tightens.
Poor Rise and Dense Texture
Ultimately, underdeveloped dough leads to poor fermentation and a dense final product. Because the weak gluten structure cannot effectively trap the carbon dioxide gas produced by the yeast, the dough won't rise to its full potential during bulk fermentation or proofing. This results in a loaf that is smaller and flatter than expected.
After baking, bread made from underdeveloped dough typically has a tight, compact crumb structure with small, uneven holes, or sometimes no significant holes at all. The texture will be heavy and possibly gummy, lacking the desirable lightness and open crumb associated with well-developed dough. For example, a baguette made with underdeveloped dough would likely be dense and chew like a brick, instead of having the characteristic airy interior and crisp crust.
While underdevelopment is a common issue, it's also possible for dough to be overdeveloped, particularly when using a stand mixer or prolonged kneading. Overdevelopment can be just as detrimental to the final product as underdevelopment, leading to a different set of gluten development dough problems. The signs often indicate that the gluten strands have been overworked to the point of breaking down.
Tough and Rubbery Dough
Overdeveloped dough often feels excessively tight, tough, and rubbery. Instead of being elastic and extensible, it becomes very resistant to stretching. It might feel hard or stiff, lacking the pleasant pliability of properly developed dough. This toughness is a sign that the gluten network has become too tight and potentially started to break down.
Imagine trying to shape an overdeveloped dough into a smooth boule. It will constantly resist your efforts, snapping back fiercely like a rubber band. This excessive tension makes handling difficult and can lead to uneven shaping and structure in the final bake. This contrasts sharply with properly developed dough, which feels elastic but yielding, allowing for smooth shaping.
Difficult to Shape Dough
As mentioned, the rubbery, tight nature of overdeveloped dough makes it incredibly difficult to shape effectively. The dough resists stretching and can become frustratingly uncooperative. Techniques that rely on the dough's extensibility, such as rolling out pizza dough or forming baguettes, become arduous tasks.
For example, trying to stretch an overdeveloped pizza dough might result in it shrinking back instantly when you release it, or tearing in the middle before you can achieve the desired diameter. The dough lacks the necessary balance of elasticity and extensibility. This difficulty in shaping is a clear indicator that the gluten network has been pushed too far, leading to serious gluten development dough problems.
Dough Tears Easily
Paradoxically, while overdeveloped dough is tough and resistant to stretching initially, it can also become prone to tearing, especially when pushed too far during shaping or handling. The gluten network, though tight, may have become weakened by excessive stress, leading to brittle points.
If you attempt the windowpane test on significantly overdeveloped dough, you might find that instead of stretching into a thin, translucent membrane, it tears abruptly. This tearing indicates that the gluten strands have been overworked to the point of fracturing. This fragility is a sign that the dough's structural integrity is compromised, a key issue among gluten development dough problems.
Factors Affecting Dough Development
Flour Type and Protein Content: Choosing the Right Flour
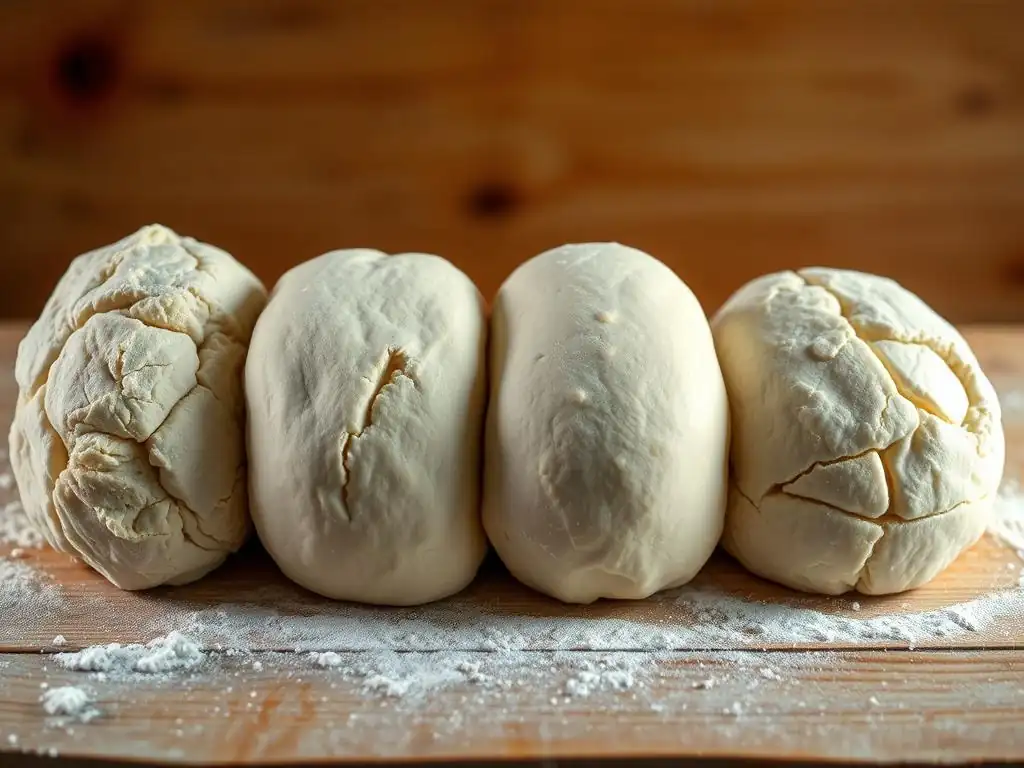
The type of flour you use is perhaps the single most important factor influencing gluten development. Different flours contain varying amounts of the proteins glutenin and gliadin, which form gluten. The protein content directly impacts the potential strength and structure of your dough. Choosing the correct flour for your intended bake is essential for managing gluten development dough problems from the start.
For instance, bread flour typically has a higher protein content, ranging from approximately 12% to 14%. This higher protein level means it has the potential to form a strong, robust gluten network, ideal for chewy breads like sourdough, baguettes, or rustic loaves that require significant structure to hold their shape and achieve an open crumb. Using bread flour for delicate cakes, however, would lead to a tough texture.
Understanding Different Flour Varieties (Bread Flour, All-Purpose Flour, Pastry Flour)
Different flour varieties are milled from different types of wheat and have distinct protein levels and characteristics. Bread flour, as discussed, is high in protein and designed for strong doughs. All-purpose flour is a versatile middle ground, usually containing around 10% to 12% protein, suitable for a wide range of baking from cookies and cakes to some breads. It offers a balance of strength and tenderness.
Pastry flour, on the other hand, is milled from soft wheat and has a low protein content, typically 8% to 10%. This results in minimal gluten formation, which is desirable for tender baked goods like pies, pastries, biscuits, and some cakes. Using pastry flour for bread would result in a very weak dough with poor rise and a dense, crumbly texture, highlighting how flour choice directly impacts potential gluten development dough problems.
Impact of Protein Content on Dough Strength
The percentage of protein in your flour directly correlates to the potential strength and elasticity of your dough's gluten network. Higher protein flours can absorb more water and develop more tenacious gluten strands through mixing. This results in a stronger dough capable of trapping more gas, leading to better oven spring and a more open crumb structure in breads.
Conversely, lower protein flours develop weaker gluten networks. While this is perfect for creating tender cakes or flaky pastries, it means they are unsuitable for recipes requiring significant structure and rise, such as artisan bread. Understanding this fundamental relationship is crucial for selecting the right flour and managing potential gluten development dough problems based on your baking goals.
Hydration Levels: The Role of Water in Dough Formation
Water is not just a binder in dough; it's a critical component in activating gluten formation. Glutenin and gliadin proteins require hydration to begin linking together and forming the gluten network. The amount of water, or the hydration level relative to the flour weight, significantly impacts the dough's consistency, how it handles, and ultimately, its texture and structure.
Hydration is typically expressed as a baker's percentage, calculated by dividing the weight of water by the weight of flour (Water Weight / Flour Weight * 100%). A higher hydration level (e.g., 75% or more) results in a wetter, stickier dough that can be challenging to handle but often leads to a more open, airy crumb structure. Lower hydration levels (e.g., 55-60%) produce stiffer, easier-to-handle doughs suitable for items like bagels or some enriched breads, resulting in a denser crumb.
Ideal Hydration Ratios for Different Doughs (e.g., Sourdough, Baguettes)
The "ideal" hydration ratio is highly dependent on the specific type of bread or baked good you are making, as well as the flour type used. For example, sourdough doughs, particularly those aiming for a very open crumb, often have hydration levels ranging from 75% to over 85%. This high water content contributes to a more extensible dough that can expand significantly during baking.
In contrast, a classic New York-style bagel dough typically has a much lower hydration, often around 55-60%. This low hydration results in a stiff dough that produces the dense, chewy texture characteristic of bagels. Baguette doughs usually fall somewhere in between, perhaps 65-75%, balancing structure with a relatively open crumb. Knowing the typical hydration ranges for different types of dough helps in predicting and managing gluten development dough problems specific to that bake.
Adjusting Hydration to Optimize Dough Development
While recipes provide a starting point, factors like flour absorption rates (which can vary by brand, type, and even batch) and ambient humidity can necessitate hydration adjustments. If your dough feels too dry and isn't coming together during mixing, adding a tablespoon or two of water at a time can help achieve the right consistency for gluten development.
Conversely, if your dough is excessively sticky and slack after the initial mixing and resting period (assuming proper mixing time has been given), it might be over-hydrated for the flour used or the intended outcome. While adding more flour isn't always the best solution as it changes the overall ratio, understanding that hydration is a key lever allows you to anticipate potential gluten development dough problems and make informed adjustments during the mixing process or subsequent folds.
Mixing Techniques: How to Develop Dough Effectively
Mixing is the primary mechanical action that facilitates gluten development. The process of kneading, whether by hand or machine, aligns the hydrated glutenin and gliadin proteins into a strong, elastic network. The technique and duration of mixing are critical; insufficient mixing leads to underdeveloped dough, while excessive mixing can lead to overdevelopment.
The goal of mixing is to achieve a dough that is smooth, elastic, and passes the windowpane test (stretching a small piece thinly enough to see light through it without tearing). The specific technique used can vary, from gentle folding methods for high-hydration doughs (like no-knead breads) to vigorous kneading for lower-hydration doughs (like pizza or sandwich bread). Mastering the right technique for your dough is key to avoiding gluten development dough problems.
The Importance of Proper Mixing Time
Mixing time is not a one-size-fits-all measurement; it depends heavily on the hydration level, flour type, and the mixing method used (hand vs. stand mixer). However, ensuring sufficient time for the gluten network to form is paramount. Under-mixing is a frequent cause of gluten development dough problems, resulting in weak, sticky doughs.
Using a stand mixer with a dough hook is typically faster and more efficient for gluten development than hand kneading. A medium-hydration dough might take 8-12 minutes in a stand mixer on a medium speed (e.g., speed 2 or 3), whereas hand kneading the same dough could take 15-20 minutes or even longer, requiring significant physical effort. It's crucial to mix until the dough looks smooth, feels elastic, and begins to pull away from the sides of the bowl, rather than strictly adhering to a time written in a recipe, as conditions vary.
Different Mixing Methods: Hand Mixing vs. Stand Mixer
The choice between hand mixing and using a stand mixer impacts both the process and the potential outcome of gluten development. Hand mixing is a traditional method that allows for a tactile connection with the dough, letting you feel its development. It typically involves folding, stretching, and pushing the dough. While effective, it requires more time and effort to achieve full gluten development compared to a machine.
A stand mixer offers consistency and speed. Using a dough hook on a low to medium speed provides continuous mechanical action that efficiently develops gluten. However, it's easier to over-mix dough in a stand mixer, potentially leading to tough or torn dough. For very wet or sticky doughs, methods like the 'stretch and fold' technique (folding the dough onto itself at intervals during bulk fermentation) are often preferred over continuous kneading, whether by hand or machine, to gently build strength and avoid excessive stickiness, mitigating common gluten development dough problems.
Resting and Fermentation: Allowing Dough to Relax and Strengthen
Resting and fermentation are critical stages where dough undergoes significant transformation beyond just rising. During these periods, enzymatic activity breaks down starches into sugars, improving flavor, and the gluten network continues to strengthen and relax. This balance of strengthening and relaxing is vital for managing gluten development dough problems and achieving a dough that is both strong enough to hold gas and extensible enough to shape.
Resting periods, such as the initial autolyse (mixing flour and water before adding other ingredients) or a short bench rest after dividing, allow the gluten to relax, making the dough easier to handle and shape. Fermentation, driven by yeast or sourdough starter, produces gas and acids. The acids help strengthen the gluten network, while the gas stretches it, creating the structure of the final crumb.
Bulk Fermentation and its Impact on Dough
Bulk fermentation (the first rise) is a crucial stage where the dough develops flavor, volume, and strength. As yeast produces carbon dioxide, the dough expands, stretching the nascent gluten network. Periodic "folds" or "punch-downs" during bulk fermentation are often used to redistribute yeast and temperature, equalize gas pressure, and, importantly, strengthen the gluten structure further by aligning the protein strands.
The duration and temperature of bulk fermentation significantly impact gluten development and dough properties. A longer, cooler fermentation (like in the refrigerator) slows yeast activity but allows enzymes more time to work, deepening flavor and improving gluten structure. Conversely, a shorter, warmer fermentation speeds up rising but can lead to a less complex flavor and potentially weaker gluten if not managed carefully. Monitoring the dough's activity and feel, rather than just the clock, is key to successful bulk fermentation and preventing gluten development dough problems.
Proofing: The Final Stage of Dough Development
Proofing (the second rise, after shaping) is the final expansion of the dough before baking. During this stage, the dough continues to produce gas and expand, filling out its shape. The gluten network, developed during mixing and bulk fermentation, holds this gas, giving the loaf its final volume. Proper proofing is essential for achieving a light texture and good oven spring.
Over-proofing occurs when the dough ferments for too long or at too warm a temperature during this final rise. The gluten network becomes overstretched and weakened, and the dough may collapse or fail to rise in the oven. Under-proofing means the dough hasn't expanded enough, resulting in a dense loaf. Recognizing the signs of properly proofed dough (often passing the poke test where an indentation slowly springs back only halfway) is vital to avoid gluten development dough problems at this late stage.
Troubleshooting Underdeveloped Dough
Problem: Dough Lacks Strength and Elasticity
If your dough feels slack, tears easily when stretched, and doesn't spring back when poked, it's likely underdeveloped. This is a classic symptom of insufficient gluten development dough problems. The gluten network hasn't been adequately formed or strengthened.
Solution 1: Increase Mixing Time
The most direct way to address underdeveloped dough is to continue mixing. If you were mixing by hand, knead for an additional 5-10 minutes, focusing on stretching and folding the dough. If using a stand mixer, return the dough to the bowl and mix on a low to medium speed (e.g., speed 2) for another 3-5 minutes. Check the dough periodically using the windowpane test; stop when it becomes smooth, elastic, and passes the test. Be cautious not to over-mix once the desired development is achieved.
Solution 2: Add Vital Wheat Gluten
For doughs made with lower protein flours (like all-purpose) or if you consistently face underdeveloped dough issues with your flour, adding vital wheat gluten can significantly boost strength. Vital wheat gluten is a concentrated form of wheat protein. Add 1-2 tablespoons per 500g of flour during the initial mixing phase. This supplement increases the overall protein content, allowing for a stronger gluten network to form and helping to mitigate gluten development dough problems.
Solution 3: Adjust Hydration Levels (Add More Water Gradually)
Sometimes, dough appears underdeveloped because it's too dry, preventing the gluten proteins from fully hydrating and connecting. If the dough feels stiff and crumbly rather than just slack, try adding a small amount of water, perhaps a teaspoon at a time, while mixing. Incorporate each addition fully before adding more. This can help the dough become more cohesive and allow the gluten to develop more effectively. This is particularly helpful with whole wheat flours, which absorb more water than white flours.
Problem: Dough is Sticky and Difficult to Handle
Excessive stickiness, especially when combined with a lack of strength, often points to underdeveloped dough or an imbalance of hydration and gluten structure. This is a common manifestation of gluten development dough problems.
Solution 1: Mix for a Longer Duration
As with lacking strength, continued mixing is often the solution for overly sticky dough that lacks structure. The stickiness is often due to the gluten not yet being strong enough to manage the hydration level. Kneading or mixing longer allows the gluten network to tighten and organize, eventually causing the dough to become less sticky and more manageable. Use a stand mixer on medium speed or vigorous hand kneading. It might seem counterintuitive to keep mixing a sticky dough, but as the gluten develops, it will transform.
Solution 2: Add Flour Gradually to Reduce Stickiness
If you suspect the hydration level is slightly too high for the flour or your handling comfort, you can add a small amount of flour. Add just a tablespoon at a time during the later stages of mixing or kneading. Incorporate it fully before adding more. Avoid adding large amounts, as this can significantly change the recipe's ratios and potentially lead to a dense result. This approach is best for minor adjustments to manage stickiness linked to gluten development dough problems.
Solution 3: Check Hydration Levels and Adjust Accordingly
Review the recipe's hydration relative to the flour type. Is it a high-hydration dough (e.g., 75%+)? High-hydration doughs are inherently sticky and require different handling techniques (like wet hands, bench scrapers, and stretch-and-folds instead of traditional kneading). If it's supposed to be a lower hydration dough (e.g., 60-65%) and is excessively sticky, it might be over-hydrated for the flour used. Note this for future bakes and consider slightly reducing the water next time, or using a flour with higher protein content.
Problem: Poor Rise and Dense Texture
A lack of significant rise during fermentation and proofing, resulting in a dense final loaf, can be a consequence of underdeveloped dough, but can also stem from other factors related to fermentation activity. This is one of the most disappointing gluten development dough problems.
Solution 1: Ensure Proper Yeast Activity (Check Expiration Date)
If your dough didn't rise, the primary culprit might be inactive yeast, not just underdeveloped gluten. Check the expiration date of your yeast. If using active dry yeast, ensure you bloomed it in warm water (around 105-115°F or 40-46°C) with a pinch of sugar to confirm it's alive and frothy before adding it to the flour. Instant yeast can be mixed directly with dry ingredients but still needs proper hydration and temperature to be active. If your yeast is dead, no amount of gluten development will make the dough rise.
Solution 2: Increase Mixing to Develop Dough
Assuming your yeast is active, a poor rise is often due to a weak gluten network unable to hold the gas produced. If the dough exhibited signs of underdevelopment (slackness, tearing), the solution is to increase mixing time in the initial stages of dough preparation. A stronger gluten structure is essential for trapping gas and achieving good volume and a lighter texture.
Solution 3: Adjust Fermentation Time and Temperature
Even with active yeast and developed gluten, fermentation conditions are key. Dough rises best within a specific temperature range, typically 70-80°F (21-27°C). If your kitchen is too cold, fermentation will be very slow. Try placing the dough in a warmer spot, like a slightly warm oven (turned off) or near a window on a sunny day. Conversely, if it's too warm, fermentation can happen too quickly, potentially leading to over-proofing later. Ensure you give the dough adequate time for both bulk fermentation and proofing, watching the dough's volume increase rather than strictly adhering to time.
Problem: Dough is Tough and Rubbery
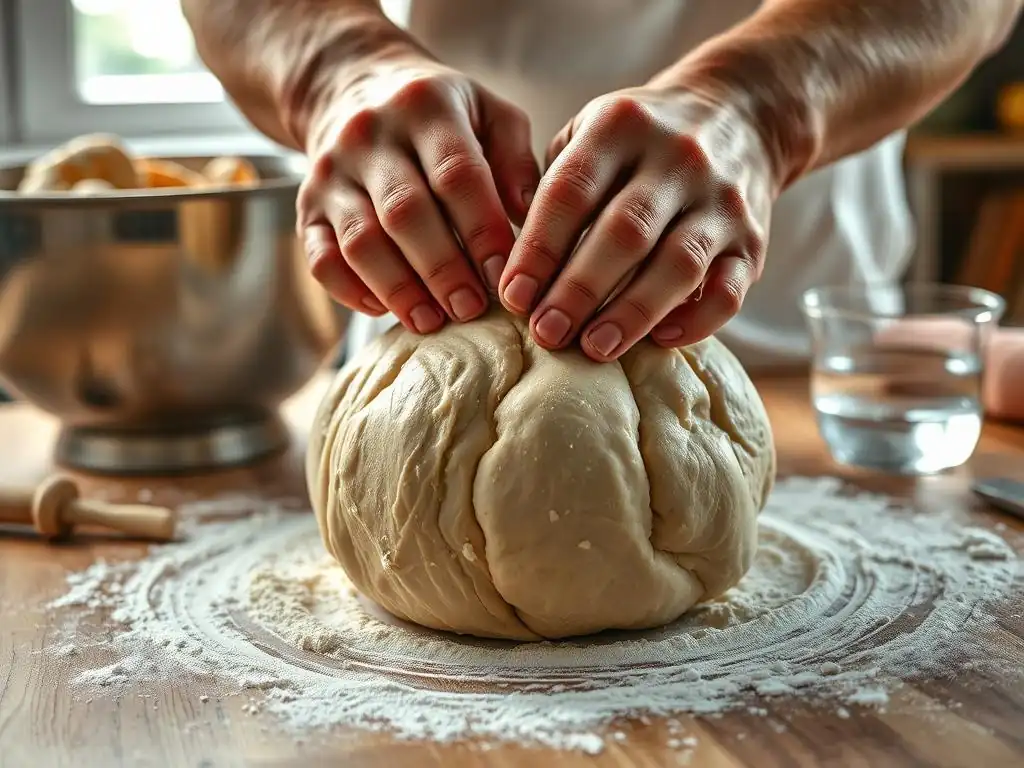
Overdeveloped dough feels tight, stiff, and resistant to stretching – the opposite of the slackness seen in underdeveloped dough. This is another form of gluten development dough problems, caused by over-working the gluten.
Solution 1: Reduce Mixing Time
The most common cause of tough, rubbery dough is simply mixing or kneading for too long, especially with a stand mixer. For your next batch, significantly reduce the mixing time. Focus on mixing just until the dough becomes smooth and passes a gentle windowpane test, rather than continuing for a set time from a recipe, as mixer speeds and flour can vary. Aim for the point where the dough is developed but still feels yielding and extensible, not tight.
Solution 2: Add Fat to Shorten Dough Strands (Butter or Olive Oil)
If you realize your dough is becoming tough during mixing (and it's a recipe where fat is appropriate, like enriched breads or brioche), adding a small amount of fat can help. Fat coats the gluten strands, preventing them from linking too tightly and effectively "shortening" the gluten network. This makes the dough more tender and less rubbery. For example, adding a tablespoon of softened butter or olive oil during the later stages of mixing can help salvage an overdeveloped dough and reduce gluten development dough problems.
Solution 3: Rest the Dough (Autolyse) to Relax Dough
While autolyse (mixing flour and water only) is typically done before adding other ingredients and mixing, allowing an overdeveloped dough to rest can help relax the tight gluten network. Cover the dough and let it rest at room temperature for 20-30 minutes. This rest period allows the gluten to unwind slightly, making the dough easier to handle and shape. This technique is particularly useful when troubleshooting dough that feels tight and resistant after initial mixing.
Problem: Difficult to Shape Dough
If your dough is constantly snapping back and resisting your shaping efforts, it's likely overdeveloped. The excessive tension in the gluten network makes it uncooperative, a clear sign of gluten development dough problems from overworking.
Solution 1: Gently Handle the Dough
When working with dough that feels tight and resistant, use a lighter touch. Avoid aggressive stretching or pulling, which will only cause the gluten to tighten further or tear. Use gentle folding and coaxing motions instead. Minimize the use of excess flour, which can also make the dough stiffer.
Solution 2: Allow Dough to Relax Before Shaping
The best way to deal with dough that is resisting shaping is to give it a rest. After dividing the dough into portions, let them rest on the counter, covered, for 15-20 minutes (this is often called a "bench rest"). This allows the gluten network, which tightened during dividing and initial handling, to relax. After the rest, the dough should be much more pliable and easier to shape without fighting back. This resting period is crucial for managing gluten development dough problems during the shaping phase.
Solution 3: Use a Bench Scraper for Easier Handling
For sticky or slightly resistant doughs, a bench scraper is an invaluable tool. It allows you to lift and manipulate the dough without it sticking to your hands or the work surface, minimizing frustration and the need for excessive flour. Use it to help fold, divide, and move the dough gently, reducing the stress on the gluten network and facilitating shaping.
Problem: Dough Tears Easily
While underdeveloped dough tears due to weakness, overdeveloped dough can tear because the gluten network has been stressed to the point of breaking down. This is a sign of severe gluten development dough problems from over-processing.
Solution 1: Avoid Over-Mixing
Prevention is key here. The primary cause of tearing in overdeveloped dough is simply mixing for too long. For future batches, pay close attention to the dough's consistency and the windowpane test. Stop mixing as soon as the dough is smooth, elastic, and passes the test, even if the recipe suggests a longer time. Different flours and mixers require different mixing durations.
Solution 2: Ensure Adequate Hydration
Sometimes, dough that tears easily is not necessarily over-mixed but slightly under-hydrated for the protein content of the flour. A dough that is too dry can feel stiff and brittle, leading to tearing during handling. Ensure your hydration levels are appropriate for the flour type and intended outcome. If your flour is very high protein, it might require slightly more water than a standard recipe calls for.
Solution 3: Use a Gentler Mixing Technique
For doughs prone to tearing or when using a stand mixer, consider incorporating rests during the mixing process. Mix for a few minutes, then let the dough rest for 5-10 minutes, then resume mixing. This intermittent mixing allows the gluten to hydrate and relax between mixing periods, potentially reducing the risk of over-stressing the network and preventing gluten development dough problems related to tearing. For very delicate doughs or high-hydration doughs, relying more on stretch-and-folds during bulk fermentation rather than intensive initial kneading can also be beneficial.
Advanced Techniques for Dough Development Control
Autolyse: Pre-Hydrating Flour for Enhanced Dough Development
Autolyse is a simple yet powerful technique used to improve dough development, particularly beneficial for lean doughs (flour, water, yeast, salt). It involves mixing just the flour and water from the recipe and letting the mixture rest for 20 minutes to several hours before adding other ingredients like salt and yeast and commencing the main mixing.
During the autolyse period, the flour fully hydrates, and enzymatic activity begins to break down starches into sugars, which benefits yeast later. More importantly, the gluten proteins start to link and align on their own, without mechanical mixing. This pre-development allows for shorter, gentler mixing later, resulting in a dough that is more extensible, easier to handle, and often yields a loaf with better volume and structure. Incorporating autolyse can be a proactive strategy to minimize gluten development dough problems.
Using a Dough Docker to Prevent Over-Proofing
While a dough docker (a roller with spikes) is typically used for flatbreads like pizza or crackers to prevent large bubbles, it can also serve a purpose in managing gluten development dough problems related to over-proofing in certain contexts, particularly for shaped loaves where specific surface characteristics are desired or when proofing conditions are unpredictable.
By gently piercing the surface of the dough before its final proof or even during proofing, a docker allows some of the trapped gases to escape in a controlled manner. This can help prevent the formation of very large, uneven bubbles just beneath the surface and can slightly slow down the final explosive expansion, potentially offering a small buffer against the dough tearing or collapsing if it's slightly over-proofed or has surface tension issues due to gluten development dough problems. However, this technique is not standard for most artisan breads and should be used judiciously.
The Windowpane Test: Checking Dough Development
The windowpane test is a classic method for assessing whether dough has been adequately developed. It provides a visual confirmation of the strength and elasticity of the gluten network. To perform the test, take a small piece of dough (about the size of a golf ball). Gently stretch and pull it outwards with your fingers, rotating it as you go, trying to create a thin membrane.
If the dough is properly developed, you should be able to stretch it into a thin, translucent sheet, like a windowpane, without it tearing. You should be able to see light through it. If it tears before you can stretch it thinly, the dough is underdeveloped and needs more mixing. If it tears abruptly or feels very tight and resistant to stretching, it might be overdeveloped. Mastering this simple test is one of the most effective ways to gauge gluten development and avoid common gluten development dough problems.
Preventing Future Dough Development Problems
Accurate Measurements and Ingredient Ratios
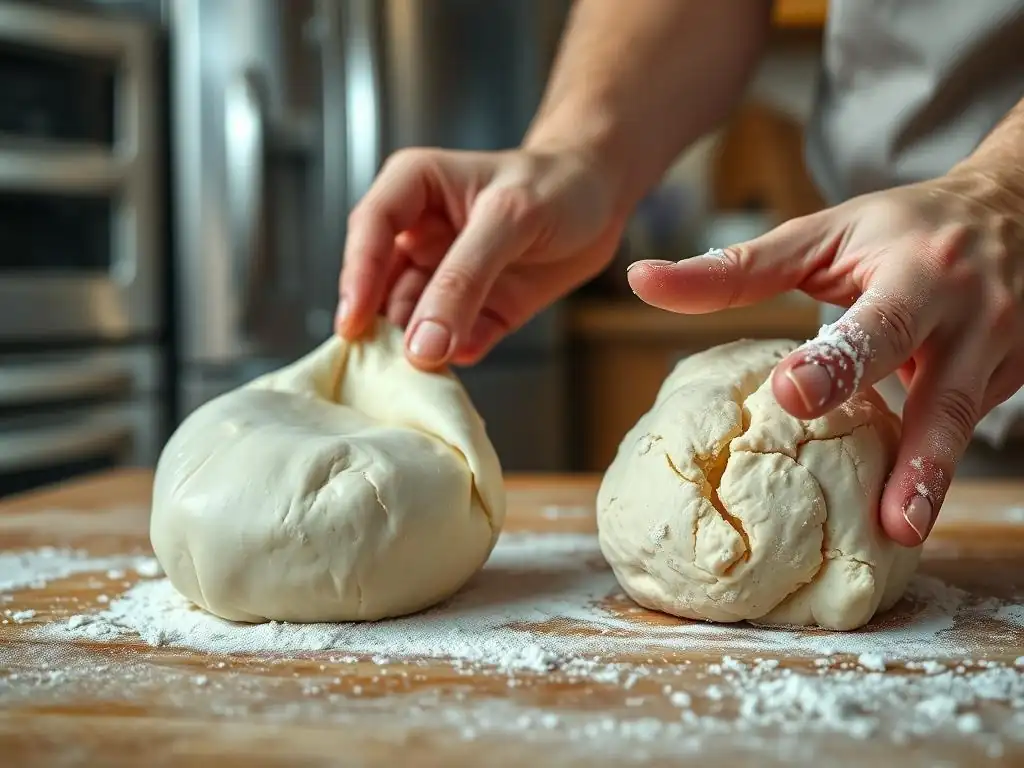
Precision in measuring ingredients is fundamental to preventing gluten development dough problems. Using a digital kitchen scale to weigh flour and water is far more accurate than using volume measurements (cups), as the density of flour can vary significantly depending on how it's scooped. Even a slight variation in the flour-to-water ratio can drastically impact dough consistency and gluten development.
Understanding and adhering to the baker's percentages provided in recipes helps maintain consistent results. For example, if a recipe calls for 500g of flour and 325g of water, that's 65% hydration (325/500 * 100%). Maintaining this ratio is crucial. Consistently accurate measurements ensure you start with the correct foundation, significantly reducing the likelihood of facing common gluten development dough problems related to ingredient imbalance.
Understanding Your Oven and Baking Environment
The baking environment, including ambient temperature and humidity, can affect dough development and fermentation rates. A warm, humid kitchen will accelerate rising, while a cold, dry environment will slow it down. Be prepared to adjust fermentation times based on your environment, watching the dough's activity rather than sticking rigidly to time cues.
Your oven also plays a role in the final stage – oven spring. A properly preheated oven with good heat retention is essential for achieving maximum expansion. If your oven temperature is inaccurate or fluctuates, it can negatively impact how the dough rises in the initial crucial minutes of baking, potentially masking or exacerbating issues related to gluten development dough problems. Using an oven thermometer can help ensure your oven is at the correct temperature.
Consistent Mixing and Fermentation Techniques
Developing a consistent approach to mixing and fermentation is key to reliable baking results. Pay attention to how the dough feels and looks throughout the mixing process, using tests like the windowpane test to guide you rather than solely relying on a timer. Note the dough's consistency and temperature at the end of mixing.
Similarly, during fermentation, observe how the dough is rising. Is it doubling in volume? Does it feel airy and bubbly? Are you performing folds, if required, consistently? Keeping a baking journal can help you track variables like mixing times, fermentation duration and temperature, and the dough's behavior, allowing you to identify what works best with your ingredients and environment and proactively address potential gluten development dough problems.
Conclusion: Mastering Dough Development for Baking Success
Achieving perfectly developed dough is a cornerstone of successful baking. While gluten development dough problems are common, they are also highly solvable with the right knowledge and techniques. By understanding the fundamental role of gluten, the impact of ingredients like flour and water, and the importance of processes like mixing and fermentation, you gain the power to troubleshoot and prevent issues.
Whether your dough is underdeveloped and slack or overdeveloped and tough, recognizing the signs and knowing the appropriate adjustments—from extending mixing time to allowing the dough to rest—will elevate your baking. Embracing techniques like autolyse and using tools like the windowpane test empowers you to take control of the dough development process, transforming potential frustrations into consistent successes.
Key Takeaways for Perfect Dough
- Gluten provides the essential structure for dough; its proper development is crucial.
- Underdeveloped dough is weak, sticky, and leads to poor rise and dense texture.
- Overdeveloped dough is tough, rubbery, difficult to shape, and can tear easily.
- Flour type, hydration, mixing, and fermentation are key factors influencing gluten development.
- Accurate measurements and consistent techniques are essential for preventing problems.
- Learning to read the dough's feel and appearance is more important than sticking rigidly to times.
BakeWithEase: Your Partner in Dough Mastery.
Frequently Asked Questions
What exactly is gluten development, and why is it so important in baking?
Gluten development is the process of forming a strong and elastic network from glutenin and gliadin proteins in flour when mixed with water. It's crucial for the structure and texture of many baked goods.
My dough is too sticky and slack. What's likely causing this, and how can I fix it?
Excessive stickiness often indicates over-hydration or insufficient gluten development. Try adding a little more flour, a teaspoon at a time, and knead the dough for a longer duration to strengthen the gluten.
My dough is tough and won't stretch. What could be the problem?
Tough dough typically signifies over-kneading, resulting in overdeveloped gluten. Unfortunately, there's no perfect fix; try gently handling the dough and allowing it to rest to relax the gluten strands.
How does different types of flour affect the final gluten development in my dough?
Different flours have varying protein content, which directly impacts gluten formation. Bread flour, with higher protein, develops stronger gluten compared to cake flour, which has low protein.
I'm using a stand mixer. How can I tell if I've kneaded my dough enough, or if I'm over-kneading it?
Look for the "windowpane test": gently stretch a small piece of dough. If it forms a thin, translucent membrane without tearing, the gluten is well-developed. If it tears easily, continue kneading; if it's already tough, you've likely over-kneaded the dough.
Final Reflection: The Ever-Evolving Dance of Gluten
Mastering gluten development is not just about perfect loaves; it's about understanding the fundamental chemistry that transforms flour and water into edible art. The seemingly simple act of mixing dough hides a complex interplay of proteins, hydration, and time, and troubleshooting the common pitfalls reveals a deeper appreciation for the baking process. This understanding is crucial, not just for professional bakers, but for anyone who seeks to consistently create delicious and satisfying bread.
The journey of understanding gluten development is a continuous one, mirroring the ever-shifting landscape of culinary innovation. Each failed loaf, each slightly gummy or overly tough texture, offers a valuable lesson. It's a testament to the patience and persistence required to truly master this craft. As the renowned baker, Jim Lahey, once said, Bread baking is a journey, not a destination. Enjoy the process.
This sentiment perfectly encapsulates the ongoing learning and refinement involved in perfecting gluten development.
Now, it's your turn. Consider the challenges you've faced in your own baking endeavors. What lessons have you learned from your successes and failures? Don't be afraid to experiment, to adjust hydration levels, to play with kneading techniques. Each attempt, regardless of the outcome, brings you closer to understanding the intricate dance of gluten and the magic of transforming simple ingredients into something truly extraordinary. Embrace the process, learn from your mistakes, and savor the rewarding journey of becoming a more confident and skilled baker.
Unleash Your Inner Baker: Master Gluten's Secrets!
Thanks for taking the time to explore the world of gluten and dough development! We hope you now feel more confident tackling those tricky baking challenges. Ready to put your newfound knowledge into practice?
- Bake your best loaf yet: Try the recipe mentioned in the article, focusing on the techniques discussed to achieve optimal gluten development. Notice the difference!
- Share your baking triumphs (or challenges!): Join our BakeWithEase community and let us know how your latest loaf turned out. We'd love to see your results!
- Experiment with different flours: Explore how varying gluten content affects your dough. What unexpected textures or flavors do you discover?
So, what new baking adventure will you embark on next?