
Mastering Ganache Drips for a Professional Cake Finish

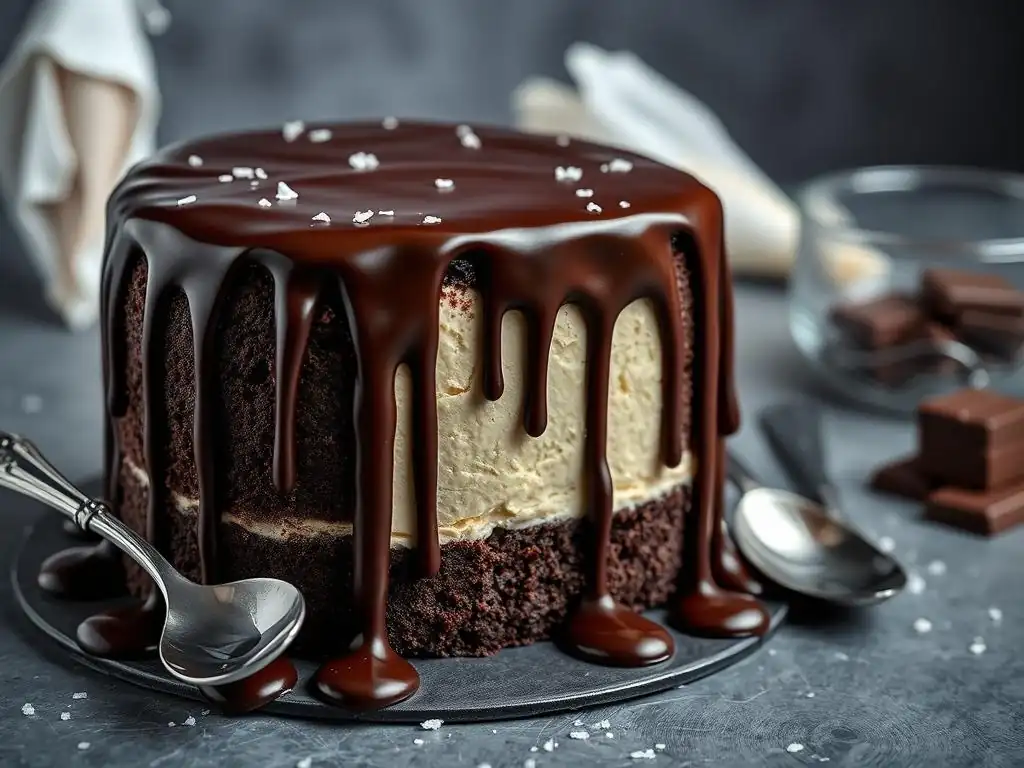
Welcome to BakeWithEase, your haven for stress-free baking! Ever wondered how to achieve that flawless, professional cake finish you see in bakeries? This week, we're diving deep into the secrets of perfect ganache drips. Forget complicated techniques and frustrating results – our easy ganache drip recipe will transform your cakes from homemade to showstopper in minutes. Intrigued? Keep reading to unlock the secrets to achieving bakery-worthy results, and say goodbye to uneven, messy drips forever.
- Mastering Chocolate Ganache Drips for Cake Decorating: A Professional Finish
- Introduction to Chocolate Ganache Drips: Elevate Your Cake Decorating
- Understanding Chocolate Ganache: The Foundation for Drips
- Chocolate Ganache Drip Recipe: Ingredients and Preparation
- Mastering the Chocolate Ganache Drip Technique: A Visual Guide
- Adding Your Personal Touch: Creative Chocolate Ganache Drip Variations
- Storing Your Chocolate Ganache Drip Cake: Maintaining Freshness
- Conclusion: Achieving Professional Cakes with Chocolate Ganache Drips
-
Frequently Asked Questions
- What exactly is ganache, and why is it used for cake drips?
- What kind of chocolate is best for an easy ganache drip recipe?
- How do I achieve the perfect consistency for my ganache drip? What should I look for?
- What are some tips for preventing my ganache drip from being too thick or too thin?
- How long does it take for a ganache drip to set, and how should I store a cake with ganache?
- Final Reflection: The Enduring Allure of the Perfect Ganache Drip
- Unleash Your Inner Cake Artist: Master the Ganache Drip!
Mastering Chocolate Ganache Drips for Cake Decorating: A Professional Finish
Introduction to Chocolate Ganache Drips: Elevate Your Cake Decorating
Why Chocolate Ganache Drips Enhance Cake Decorating
Adding chocolate ganache drips to a cake instantly elevates its visual appeal from homemade to professional. This simple technique creates a stunning cascade effect down the sides, adding a touch of elegance, drama, or fun depending on the color and style of the drip. It provides a beautiful contrast in texture and sheen against buttercream or fondant, drawing the eye and making the cake feel more sophisticated and complete.
A well-executed drip can transform even a basic layer cake into a showstopper, making it perfect for birthdays, anniversaries, or any special occasion. It's a technique that looks impressive but is surprisingly accessible, making it a favorite among home bakers looking to enhance their decorating skills.
Beyond aesthetics, the ganache drip adds a delightful layer of flavor and richness. Chocolate ganache, made from just chocolate and cream, is inherently decadent and pairs wonderfully with a wide range of cake and frosting flavors, from classic vanilla and chocolate to more adventurous combinations like coffee or fruit.
The smooth, luxurious texture of the ganache provides a pleasant counterpoint to the lighter texture of cake layers and frosting. Mastering an easy ganache drip recipe means you're not just decorating, you're also adding a delicious component that enhances the overall eating experience of the cake, providing that extra touch that makes your baked goods truly memorable.
Achieving Professional Cake Finishes with Chocolate Ganache: A Guide
Achieving a professional cake finish with chocolate ganache is more attainable than many intricate decorating techniques. The key lies in understanding the simple science behind ganache and practicing the application method. Unlike piping complex designs or sculpting fondant, applying a drip requires controlling temperature and consistency, skills that develop quickly with a little practice. This guide breaks down the process into manageable steps, from selecting the right ingredients to troubleshooting common issues, empowering bakers of all levels to achieve that polished, bakery-quality look right in their own kitchen.
The journey to mastering the chocolate ganache drip begins with a reliable, easy ganache drip recipe and precise measurements. Using high-quality chocolate and cream ensures the ganache emulsifies correctly and sets beautifully. Once the ganache is prepared, the technique involves applying it carefully to a chilled cake. The cold surface is crucial; it helps the warm ganache set quickly on contact, creating those distinct, controlled drips rather than a messy slide. With a little patience and attention to detail, anyone can learn to apply drips that look clean, uniform, and undeniably professional, significantly enhancing their cake decorating repertoire.
Understanding Chocolate Ganache: The Foundation for Drips
What is Chocolate Ganache? A Baker's Definition
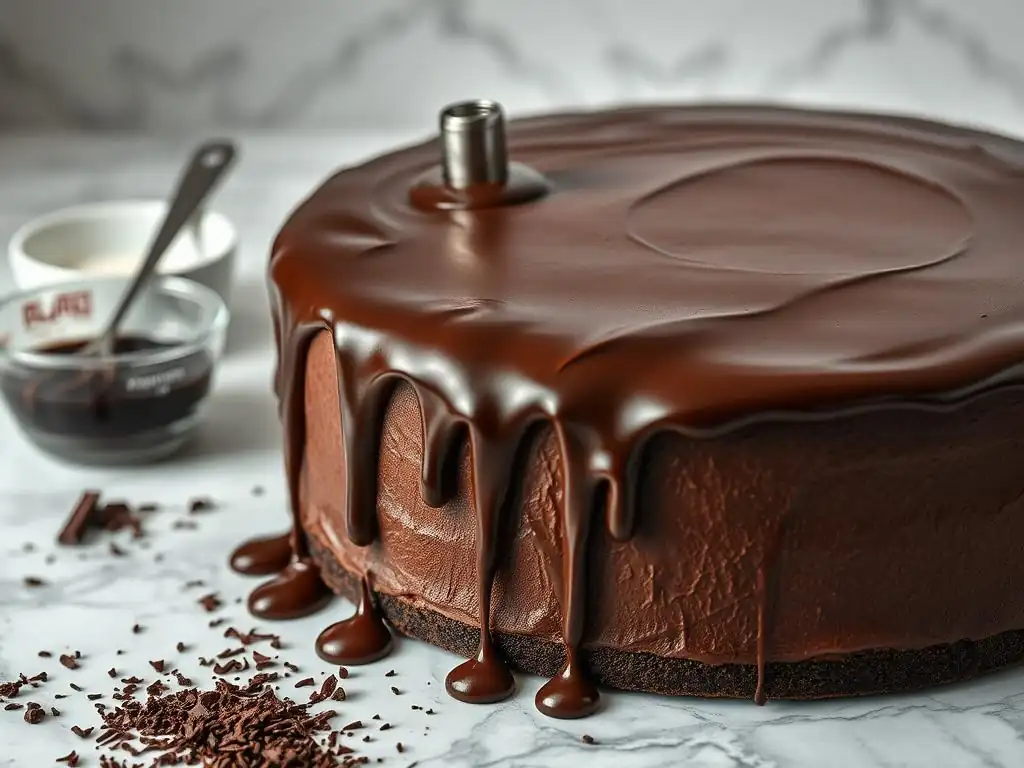
Chocolate ganache is a simple yet versatile confectionary mixture traditionally made by combining heated cream with chopped chocolate. The heat from the cream melts the chocolate, and whisking them together creates a smooth, stable emulsion. This emulsion is the magic behind ganache, resulting in a rich, glossy mixture that can be used in numerous ways depending on the ratio of chocolate to cream and its temperature. At room temperature, a thicker ganache might be used as a filling or truffle base, while a thinner, warmer ganache is perfect for glazes or, as we're focusing on here, beautiful cake drips.
Essentially, ganache is a suspension of tiny chocolate particles in a liquid fat (from the chocolate and cream) and water (from the cream), stabilized by emulsifiers naturally present in chocolate, like lecithin. The quality of the ingredients significantly impacts the final result. Using real chocolate with a good percentage of cocoa butter, rather than compound chocolate or chips with added stabilizers, leads to a smoother, more stable, and better-tasting ganache. Understanding this basic definition is the first step in confidently preparing the foundation for an effective, easy ganache drip recipe.
The Science of Chocolate Ganache: Ratios Explained
The ratio of chocolate to cream by weight is the single most critical factor determining the final consistency of ganache. A higher proportion of chocolate results in a firmer ganache when cooled, while a higher proportion of cream yields a softer, more fluid mixture. For a chocolate ganache drip recipe, you typically need a consistency that is pourable when warm but sets up relatively firmly when cooled on the cake. Common ratios for drips range from 1:1 (equal parts chocolate and cream) for dark chocolate, to 1:1.5 or even 1:2 (more cream than chocolate) for white chocolate.
This variation in ratios is necessary because different types of chocolate contain different amounts of cocoa solids, cocoa butter, and sugar. Dark chocolate has the most cocoa solids and butter, making it the most stable and requiring an equal or slightly lower amount of cream (e.g., 1:1 or 1.25:1 chocolate to cream) for a drip that sets firmly. Milk chocolate has less cocoa solids and more sugar and milk fats, often requiring a 1.5:1 or 2:1 chocolate to cream ratio for a drip.
White chocolate, containing only cocoa butter (no cocoa solids) plus sugar and milk solids, is the least stable and needs the highest proportion of chocolate to cream, typically 2:1 or even 2.5:1, to achieve a drip consistency that will set adequately without running off the cake entirely. Precision in weighing ingredients according to the chocolate type is paramount for a successful ganache drip.
The Impact of Chocolate Type on Ganache Consistency
As highlighted by the science of ratios, the type of chocolate used fundamentally dictates the correct cream proportion for a ganache drip. Dark chocolate, with its high percentage of cocoa solids (often 50-70% or more), provides structural integrity. A 1:1 ratio of dark chocolate to heavy cream by weight is a common starting point for a drip, offering a good balance between fluidity for application and firmness upon setting. For instance, using 100 grams of 60% dark chocolate with 100 grams of heavy cream will yield a relatively quick-setting, sturdy drip suitable for most cakes.
Milk chocolate contains more sugar and milk fat than dark, which makes it softer at room temperature. To achieve a similar drip consistency that sets firmly enough, you need a higher proportion of milk chocolate relative to the cream. A ratio closer to 1.5:1 or 2:1 (milk chocolate to cream) is often necessary.
For example, using 150-200 grams of milk chocolate with 100 grams of heavy cream would be appropriate. White chocolate, composed mainly of cocoa butter, sugar, and milk solids, is the softest and requires the most significant adjustment; ratios of 2:1 or 2.5:1 (white chocolate to cream) are typical to ensure the drip sets properly on a cold cake. Using 200-250 grams of white chocolate with 100 grams of heavy cream would be a standard approach for a white chocolate easy ganache drip recipe.
Cream Selection: Choosing the Right Cream for Ganache
The fat content of the cream is crucial for creating a stable ganache emulsion. For a reliable chocolate ganache drip recipe, heavy cream or whipping cream with a minimum fat content of 30%, and ideally around 36%, is recommended. The higher fat content helps create a stable bond with the cocoa butter in the chocolate, resulting in a smooth, glossy, and properly setting ganache. Using lower-fat creams, such as half-and-half or light cream (typically 10-18% fat), will likely result in a broken, greasy, or runny ganache that will not set correctly for a drip effect.
In many regions, "heavy cream" or "heavy whipping cream" refers to cream with approximately 36% fat. In the UK, "double cream" has an even higher fat content, often around 48%, which can result in a very rich and quick-setting ganache, potentially requiring a slight adjustment to the chocolate ratio (maybe slightly less chocolate) depending on desired flow.
Brands like Land O'Lakes Heavy Whipping Cream or Organic Valley Heavy Cream in the US are reliable choices. The specific brand is less important than ensuring the cream states "heavy" or "whipping" and ideally lists a fat percentage near 36% for best results when following a standard chocolate ganache drip recipe.
Chocolate Ganache Drip Recipe: Ingredients and Preparation
Gather Your Ingredients: Ganache Drip Checklist
Preparing an easy ganache drip recipe starts with having the right ingredients measured and ready. The two core components are high-quality chocolate and heavy cream. The type and amount of chocolate will depend on the desired color and flavor of your drip (dark, milk, or white) and the size of your cake.
For an 8-inch cake, approximately 100-200 grams of chocolate and 100 grams of heavy cream is a good starting point, adjusting the chocolate amount based on whether it's dark, milk, or white. Ensure your chocolate is finely chopped from a bar or use good quality chips that melt smoothly.
Beyond the main ingredients, optional additions can enhance flavor or appearance. A small pinch of salt can surprisingly deepen the chocolate flavor. A teaspoon of vanilla extract or another complementary extract (like coffee or orange) can be stirred in after the ganache is emulsified and cooled slightly. For colored drips, especially vibrant ones, you'll need white chocolate ganache as a base and appropriate food coloring, preferably gel-based. Having everything measured and laid out makes the process smoother and helps ensure success with your chocolate ganache drip recipe.
Precise Measurements for a Chocolate Ganache Drip Recipe
Accuracy in measurement, specifically by weight, is paramount for consistent results with any ganache, especially for a drip where consistency is key. Volume measurements (cups, tablespoons) can be inaccurate due to how ingredients pack. Using a digital kitchen scale is highly recommended. For a basic dark chocolate ganache drip suitable for an 8 or 9-inch cake, a common starting point is 100 grams of chopped dark chocolate (around 50-60% cocoa content) and 100 grams of heavy cream (36% fat). This 1:1 ratio provides a ganache that flows well when warm but sets up nicely.
If using milk chocolate, you'll need more chocolate relative to the cream to achieve a similar set. A ratio of 150-180 grams of milk chocolate to 100 grams of heavy cream is often effective.
For white chocolate, which is the least stable, you'll need even more chocolate; typically 200-250 grams of white chocolate to 100 grams of heavy cream is needed for a drip that sets properly on a chilled cake. These precise weight ratios are the foundation of a reliable, easy ganache drip recipe, ensuring that the ganache will have the correct flow and setting properties needed for beautiful drips.
Chocolate Type: [Callebaut, Valrhona, Guittard]
The quality and type of chocolate you use significantly impact the smoothness, flavor, and setting properties of your ganache drip. Chocolatier-grade chocolate or couverture, like brands such as Callebaut, Valrhona, or Guittard, contains a higher percentage of cocoa butter and undergoes a tempering process that results in a very smooth melt and a glossy finish when set. Using finely chopped chocolate from a bar of these types is often preferred by professionals for the best results.
While chocolate chips are convenient and can be used in an easy ganache drip recipe, they often contain stabilizers to help them hold their shape when baked. These stabilizers can sometimes make the ganache slightly less smooth or glossy compared to using chopped bar chocolate. If using chips, opt for high-quality brands and ensure they melt completely and smoothly into the cream. Whichever type you choose, ensure it's real chocolate containing cocoa butter, not compound chocolate made with vegetable oils, as compound chocolate will not create a proper ganache emulsion.
Heavy Cream: [36% Fat Content and Brand Recommendations]
As discussed earlier, the fat content of your cream is crucial for a stable ganache. Aim for heavy cream with a fat content of approximately 36%. This percentage provides enough fat to emulsify properly with the chocolate's cocoa butter, resulting in a smooth, stable, and glossy ganache that sets well for drips. Creams with lower fat content will not emulsify correctly and can lead to a broken or runny ganache that won't perform as a drip.
Reliable brands widely available in grocery stores include Land O'Lakes Heavy Whipping Cream, Organic Valley Heavy Cream, or store-brand heavy cream, provided they list a fat content around 36%. In the UK, double cream (around 48% fat) is a common choice and works very well, though you might use a touch less chocolate in your ratio compared to using 36% cream. The key is to check the label for fat content and use a product specifically labeled as "heavy cream" or "whipping cream" to ensure you have the necessary fat for a successful chocolate ganache drip recipe.
Step-by-Step Chocolate Ganache Preparation: A Simple Recipe
Preparing the ganache for your easy ganache drip recipe is a straightforward process involving just a few steps. First, finely chop your chocolate and place it in a heatproof bowl. Fine chopping ensures the chocolate melts quickly and evenly when the hot cream is added. Having the chocolate ready in the bowl before heating the cream is important so you can immediately combine them at the right temperature.
Next, heat the heavy cream in a small saucepan over medium heat until it just reaches a simmer. You'll see small bubbles forming around the edges, but do not let it boil vigorously. Boiling can cause the cream to reduce too much and potentially break the emulsion.
Once the cream is hot, immediately pour it over the chopped chocolate in the bowl. Let the mixture stand undisturbed for 5-10 minutes; this allows the hot cream to melt the chocolate effectively without scorching it. After resting, gently whisk or stir the mixture starting from the center of the bowl, gradually working outwards until a smooth, glossy emulsion forms.
Avoid vigorous whisking, which can incorporate too much air and make the ganache dull. Once smooth, allow the ganache to cool to the correct temperature for dripping, stirring occasionally as it cools to prevent a skin from forming. This simple method ensures a smooth, stable ganache ready for application.
Melting the Chocolate: Gentle Techniques for Smooth Ganache
Melting the chocolate gently is a critical step in creating a smooth, lump-free ganache. Overheated or scorched chocolate can become grainy and lose its ability to emulsify properly, ruining your easy ganache drip recipe. The preferred method is often pouring hot cream over finely chopped chocolate, as described above, allowing residual heat to do the work.
Alternatively, you can use a double boiler setup (a heatproof bowl set over a pot of simmering water, ensuring the bottom of the bowl doesn't touch the water) or a microwave. If using a microwave, heat the chopped chocolate in short bursts (15-30 seconds at a time) on medium power (around 50%), stirring thoroughly after each interval. This prevents hot spots and ensures the chocolate melts evenly.
Stop heating when there are still a few small unmelted pieces; residual heat will finish the job as you stir. Whichever method you choose, the goal is a smooth, fully melted chocolate base before combining it with the cream.
Combining Chocolate and Cream: Creating the Perfect Emulsion
The moment the hot cream meets the melted (or finely chopped) chocolate is when the magic of emulsion happens. After pouring the hot cream over the chocolate and letting it sit, the stirring technique is key. Start stirring gently in the very center of the bowl with a whisk or spoon. As you stir, the mixture will initially look separated or even curdled – this is normal. Continue stirring the center, and gradually, the chocolate and cream will begin to come together into a smooth, glossy mass.
Once the center is emulsified, slowly expand your stirring circle outwards until all the chocolate is incorporated and the mixture is completely smooth and homogenous. Avoid vigorous whisking which can introduce air bubbles. The resulting ganache should be beautifully shiny and uniform in color and texture.
This smooth emulsion is the foundation for a perfect chocolate ganache drip recipe; any graininess or separation at this stage will affect the final drip appearance. If it looks slightly separated, a gentle whisking over a very low heat or a quick pulse with an immersion blender can sometimes bring it back together, but starting with properly melted chocolate and hot cream is the best prevention.
Achieving the Right Consistency: Adjusting for Drip
The consistency of the ganache is paramount for successful drips, and this is primarily controlled by its temperature. After achieving a smooth emulsion, the ganache will be quite fluid and too hot for dripping immediately. It needs to cool and thicken. The ideal temperature for dripping is typically between 85°F and 95°F (29°C to 35°C), though this can vary slightly depending on your specific ganache ratio and desired drip style.
As the ganache cools at room temperature, it will thicken. Stir it occasionally to help it cool evenly and prevent a skin from forming. To test for drip consistency, let a spoonful run off the back of the spoon or practice on a piece of parchment paper. It should flow relatively easily but hold its shape as it drips, not run off like water.
If it's too thick, gently warm it slightly (a few seconds in the microwave or over a warm water bath), stirring well. If it's too thin, let it cool longer at room temperature, or pop it in the refrigerator for 5-10 minutes, stirring every couple of minutes to check consistency and prevent it from becoming too hard. Getting the temperature just right is key to mastering this easy ganache drip recipe technique.
Mastering the Chocolate Ganache Drip Technique: A Visual Guide
Preparing Your Cake for the Chocolate Ganache Drip
Proper cake preparation is as important as the ganache itself for achieving clean, professional-looking drips. Before you even think about applying the ganache, your cake needs to be frosted and, crucially, well-chilled. The frosting should be smooth and set; buttercream works wonderfully as it provides a good surface for the ganache to adhere to and set against. Ensure the top edge where the drips will start is neat and defined.
Any decorative elements that sit directly on the top surface but near the edge should be applied after the drip, or carefully masked if they are permanent fixtures. The surface should be as level as possible. A crumb coat and final layer of frosting applied smoothly create the ideal canvas. Taking the time to properly prepare your cake ensures that when you apply your easy ganache drip recipe, the results will be sharp and clean, making your final decoration efforts much more impactful.
Chilling the Cake: Ensuring a Stable Surface
Chilling your cake is a non-negotiable step for beautiful ganache drips. Once frosted, place the cake in the refrigerator for at least 30 minutes, and ideally 1-2 hours, until the frosting is firm and cold to the touch. The cold surface of the cake is what causes the warm ganache to cool and set quickly upon contact, controlling the length and shape of the drips.
If the cake is at room temperature, the warm ganache will simply melt the frosting slightly and run down the sides without setting, resulting in uncontrolled, often messy drips that pool at the bottom. A properly chilled cake creates a thermal shock for the ganache, causing it to thicken rapidly as it flows over the edge. This allows you to control the amount of ganache per drip and predict how far it will run, which is essential for achieving uniform and intentional drip styles with your easy ganache drip recipe.
Leveling the Cake: Creating a Smooth Canvas
While the chilling step is crucial for setting the drips, having a level cake top is important for starting them evenly. If your cake layers aren't perfectly flat or your frosting isn't applied evenly across the top, the edge where the drips begin might be uneven. This can lead to some drips starting higher or lower than others, affecting the overall symmetry and professional look of the finished cake.
Before frosting, ensure your cake layers are level using a cake leveler or a serrated knife. After frosting, use an offset spatula or bench scraper to smooth the top surface and create a relatively sharp, level edge where the top meets the sides. A smooth, level surface provides a consistent starting point for each drip, allowing the ganache to flow over the edge uniformly. This attention to detail in preparing your cake contributes significantly to the success of your easy ganache drip recipe application.
Applying the Chocolate Ganache Drip: Step-by-Step Instructions
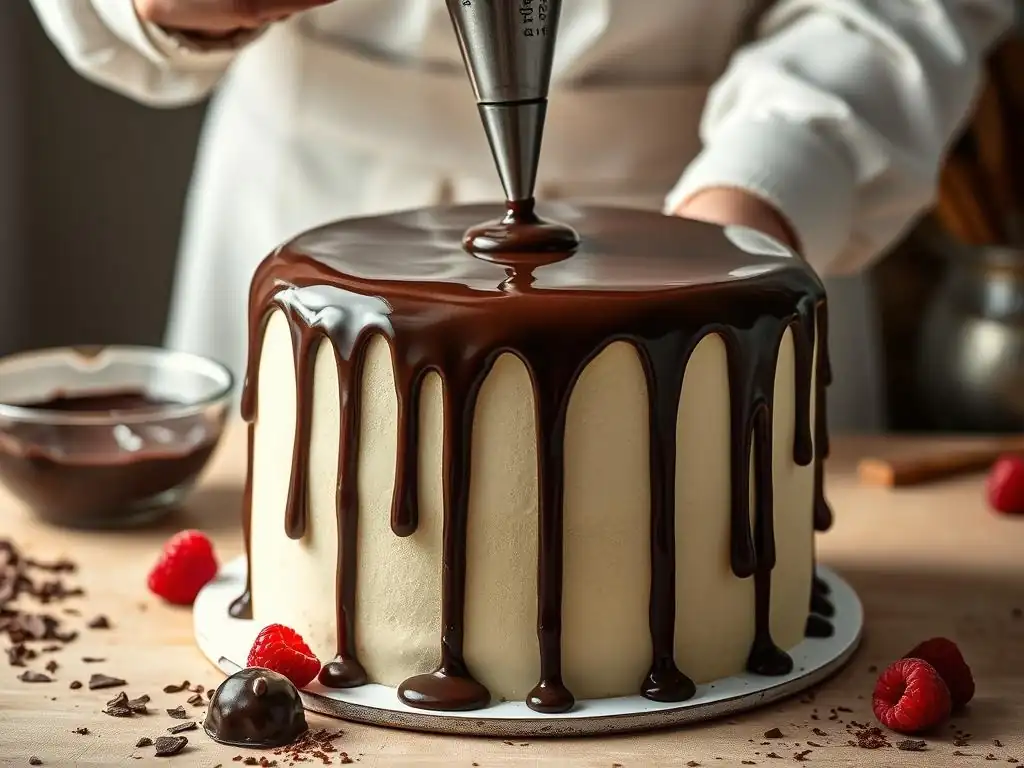
Once your ganache is at the correct temperature and consistency, and your cake is well-chilled, you're ready to apply the drips. There are several tools you can use, each offering slightly different results. A squeeze bottle provides the most control for creating precise, uniform drips. A spoon allows for more rustic, varied drips, while a piping bag with a small round tip or a snipped end offers a balance of control and ease. Choose the tool that best suits your desired aesthetic and comfort level.
To apply, start by testing the drip consistency on the inside of the ganache bowl or on a piece of parchment paper to ensure it flows correctly. Then, working around the top edge of your chilled cake, gently apply the ganache, letting it flow over the edge. With a squeeze bottle, lightly squeeze a small amount of ganache at the edge, letting it run down naturally. With a spoon, carefully pour a small amount over the edge, guiding it slightly.
For full coverage on top, pour ganache onto the center of the cake and spread it gently towards the edges with an offset spatula, letting the excess flow over to form drips. Work relatively quickly but carefully around the entire cake. Once the sides are done, you can add a layer of ganache to the top if desired, smoothing it with an offset spatula.
Tools and Equipment: [Squeeze Bottles, Spoons, Piping Bags]
Selecting the right tool can make a big difference in the ease and appearance of your chocolate ganache drip. Squeeze bottles, particularly those with a narrow tip, offer excellent control for creating defined, evenly spaced drips of a consistent length. You can apply just the right amount of pressure to control the flow and stop it precisely at the cake's edge.
Using a spoon provides a more freehand approach, allowing for thicker, more rustic drips that vary slightly in size and length. This can be charming for certain cake styles. A small spoon works well for individual drips.
A piping bag fitted with a small round tip (like Wilton tip #3 or #4) or simply with the end snipped off offers good control, similar to a squeeze bottle, but some bakers find it easier to handle, especially for larger cakes or when applying a lot of drips. An offset spatula is also useful for spreading ganache evenly across the top of the cake before pushing it gently over the edge for a top-to-bottom drip effect.
Testing the Drip: Achieving the Desired Effect
Before committing to dripping ganache onto your beautifully frosted cake, it's crucial to test its consistency and temperature. The easiest way to do this is to let a small amount of ganache drip off the back of your spoon or, even better, onto a piece of parchment paper placed on a flat surface. Observe how quickly it flows and how far it runs.
If the ganache drips too quickly and runs excessively, it's too warm or too thin (ratio issue). Let it cool longer, stirring occasionally. If it drips too slowly, is thick and gloopy, or doesn't want to drip at all, it's too cool or too thick. Gently warm it slightly (as described in the troubleshooting section). This simple test allows you to adjust the temperature or consistency of your easy ganache drip recipe before you start applying it to the cake, preventing potential frustration and ensuring you achieve the desired drip length and style.
Creating Uniform Drips: Tips and Tricks
Achieving uniform drips requires a steady hand and consistent application. If using a squeeze bottle, practice applying consistent pressure for each drip. Aim to apply the same small amount of ganache at each point around the cake's edge. Starting with a few test drips on the back of the cake (or a less visible spot) can help you get a feel for the flow before moving to the front.
Work quickly but deliberately around the cake. The cold surface will set the ganache relatively fast. For even spacing, you can even lightly mark points around the top edge of the cake with a toothpick before you start, although this isn't usually necessary with practice. Consistency in the amount of ganache applied at each point and maintaining a consistent ganache temperature are the most important factors for creating uniform drips using your easy ganache drip recipe.
Achieving Different Drip Styles: Long, Short, or Textured
The temperature and amount of ganache you apply are the primary factors in achieving different drip styles. For longer drips, use ganache that is slightly warmer (but still within the drip temperature range) and apply a slightly larger amount at each point, letting gravity pull it further down the cold cake side.
For shorter, more controlled drips, use ganache that has cooled slightly more (closer to the lower end of the drip temperature range) and apply a smaller amount. The cooler, thicker ganache won't run as far before setting on the cold cake.
To create textured drips, you can sometimes achieve this by using a spoon and gently pushing the ganache just over the edge, allowing it to gather slightly before dripping, or by swirling the ganache gently on the top edge with an offset spatula before it runs down. Experimenting on a practice surface helps you get a feel for how temperature and application method affect the final look of your easy ganache drip recipe.
Troubleshooting Common Chocolate Ganache Drip Problems
Ganache Too Thick: How to Thin It Out
If your ganache has cooled too much and become too thick to drip properly, don't despair! It's usually an easy fix. The simplest way to thin it out is to gently warm it slightly. You can do this by placing the bowl of ganache over a pan of warm (not boiling) water for a few minutes, stirring constantly. Alternatively, you can microwave it in very short bursts (5-10 seconds) on low power, stirring thoroughly after each interval until it reaches the desired consistency.
Another method is to stir in a very small amount of additional warm heavy cream – literally a teaspoon at a time – whisking until fully incorporated before adding more if needed. Be cautious not to add too much cream at once, as it can alter the ratio and potentially make the ganache too thin or affect its setting properties. Gentle warming is usually the easiest and most effective way to restore a pourable consistency to your easy ganache drip recipe.
Ganache Too Thin: How to Thicken It Up
If your ganache is too thin and running off the cake too quickly, it needs to cool down. The easiest way to thicken it is simply to let it sit at room temperature, stirring occasionally, until it cools and thickens to the desired consistency. This might take anywhere from 15 minutes to an hour or more, depending on the room temperature and the amount of ganache.
For a faster fix, you can place the bowl of ganache in the refrigerator for 5-10 minute intervals, stirring it thoroughly every couple of minutes to ensure it cools evenly and doesn't set up solid around the edges while remaining liquid in the center. Keep testing the consistency frequently during this process to avoid over-thickening. Patience is key here; a little cooling time is often all that's needed to get your easy ganache drip recipe to the perfect consistency for application.
Uneven Drips: Correcting Imperfections
Even with careful application, you might end up with a few drips that are shorter or less uniform than others. If the ganache hasn't fully set, you can sometimes gently nudge a shorter drip with a little more ganache applied directly above it, letting the new ganache merge and extend the drip. If a drip is too long or looks messy, you can carefully scrape it off before it sets completely using a small offset spatula or knife, and then reapply the ganache in that spot once the surrounding area has firmed up a bit.
Once the ganache has set, correcting uneven drips becomes more difficult without damaging the surrounding frosting. At this stage, it's often better to embrace the slight imperfections or strategically place decorations (like sprinkles, fruit, or candies) to camouflage any drips you're unhappy with. Remember that slight variations are part of the charm of a homemade cake, and with practice, your drips will become more consistent. Each attempt using your easy ganache drip recipe is a learning opportunity!
Adding Your Personal Touch: Creative Chocolate Ganache Drip Variations
Colored Chocolate Ganache Drips: Achieving Vibrant Hues
While classic chocolate brown drips are beautiful, using colored ganache can add a fun and vibrant touch to your cake. To create colored drips, you'll need to start with white chocolate ganache as your base. White chocolate has a neutral color that can be easily tinted with food coloring. However, white chocolate ganache requires a different ratio than dark or milk chocolate to set properly, typically 2 parts white chocolate to 1 part heavy cream by weight (e.g., 200g white chocolate to 100g cream).
Once you've made the white chocolate ganache and it has cooled slightly but is still warm and fluid, you can add food coloring. It's best to use gel food coloring, as it is highly concentrated and won't add excess liquid to your ganache, which could affect its consistency. Add the coloring a tiny drop at a time, stirring thoroughly until the desired hue is achieved.
Remember that the color might deepen slightly as the ganache cools and sets. You can create any color imaginable, from bright pinks and blues to elegant golds or silvers using edible luster dust mixed with a clear extract.
Using Gel Food Coloring: Best Practices
Gel food coloring is the superior choice for coloring ganache compared to liquid or oil-based colors. Gel colors are concentrated pigments suspended in a gel base, meaning you need only a small amount to achieve vibrant colors without significantly altering the ganache consistency. Oil-based colors are designed for fat-based mediums like chocolate itself (before adding cream) and will not mix effectively into the ganache emulsion. Water-based liquid colors are too diluted and can cause the ganache to seize or break.
To use gel coloring, dip a toothpick into the color and then swirl the toothpick into your warm white chocolate ganache. Stir well to distribute the color evenly. Add more color using a clean toothpick (to avoid cross-contamination) until you reach your desired shade. For very deep colors like red or black, you may need to use a considerable amount of gel coloring, which can slightly soften the ganache consistency. In such cases, you might need to let the colored ganache cool slightly longer before applying it as a drip from your easy ganache drip recipe.
Natural Food Coloring Options: A Healthier Alternative
For those seeking alternatives to artificial dyes, several natural options can be used to color white chocolate ganache, although the resulting shades may be more muted and some can impart subtle flavors. For pinks and reds, beetroot powder or freeze-dried raspberry powder can be effective, though they may add an earthy or fruity note. Turmeric powder yields a lovely yellow, while matcha powder provides a natural green (and a distinct tea flavor).
To use natural powders, it's best to mix a small amount of the powder with a tiny bit of the warm heavy cream before adding it to the chocolate, ensuring there are no dry clumps. Alternatively, you can whisk the powder directly into the finished warm ganache, making sure to whisk vigorously to dissolve any particles. Be aware that the intensity of natural colors can vary, and achieving very bright or specific shades might be challenging compared to using gel colors. Experimenting with small batches of your easy ganache drip recipe is recommended when using natural colorings.
Flavored Chocolate Ganache Drips: Enhancing the Taste
Adding flavorings to your ganache drip can elevate the cake's overall taste profile, creating a multi-sensory experience. Extracts and essences are an easy way to infuse flavor into your chocolate ganache drip recipe. Classic choices like vanilla extract enhance the inherent chocolate flavor. For a richer, deeper chocolate taste, a touch of coffee extract or espresso powder can be added.
Citrus extracts, such as orange or lemon, pair beautifully with chocolate, particularly dark chocolate. Add extracts after the ganache has emulsified and cooled slightly, stirring them in thoroughly. Start with a small amount, like 1/4 to 1/2 teaspoon per 100 grams of chocolate used, and taste before adding more, as extracts can be potent. Ensure the extract is alcohol-based or an oil-based flavoring specifically designed for chocolate/candy making if adding directly to melted chocolate before the cream; however, adding to the finished ganache is generally safer for emulsion stability.
Adding Extracts and Essences: [Vanilla Extract, Coffee Extract, Orange Extract]
Incorporating extracts and essences is a simple yet effective way to customize the flavor of your chocolate ganache drip. Vanilla extract is a staple, enhancing the sweetness and depth of the chocolate. For a mocha-flavored drip, stir in a small amount of coffee extract or a teaspoon of instant espresso powder dissolved in a tiny amount of hot water after the ganache is made and cooled.
Citrus extracts like orange or even a bit of orange zest (infused in the cream) add a bright, zesty counterpoint that works particularly well with dark chocolate. Experiment with other complementary flavors like almond extract, peppermint extract (for a mint-chocolate drip), or even a touch of liqueur (added after cooling). Remember to start with a small amount and taste as you go, as extracts vary in strength. Adding them once the ganache is a smooth emulsion ensures they mix in evenly without affecting the texture.
Infusing with Spices: [Cinnamon, Nutmeg]
Infusing the cream with spices before making the ganache is a wonderful way to add warmth and complexity to your chocolate drip without altering its texture. Simply add whole spices, such as cinnamon sticks, star anise, or cardamom pods, or ground spices like a pinch of nutmeg or cayenne pepper, to the heavy cream in the saucepan before heating it.
Heat the cream with the spices until it just reaches a simmer, then remove it from the heat, cover the pan, and let the spices steep in the hot cream for about 10-15 minutes. This allows the flavors to infuse into the cream. Before pouring the cream over the chocolate, strain out any whole spices or large particles of ground spice using a fine-mesh sieve.
The resulting spiced cream is then used to make the ganache as usual. This method creates a subtly flavored ganache drip that adds an extra layer of taste to your easy ganache drip recipe cake.
Decorative Elements: Enhancing Your Ganache Drip Cake
Once your chocolate ganache drip has been applied and has begun to set slightly, you have a fantastic base for adding further decorations. The partially set ganache on the top surface is perfect for adhering sprinkles, edible glitter, or small candies, while the drips themselves can frame larger elements placed on top of the cake. Think of the drip as the first layer of decoration that sets the stage for everything else.
Common decorative elements include sprinkles, edible glitter, chocolate shavings, fresh fruit, macarons, or even small candies and cookies. These additions can complement the color and theme of the cake and add extra texture and visual interest. Applying these elements while the ganache is still slightly tacky on top ensures they stick securely. Combining a well-executed easy ganache drip recipe with thoughtful decorations results in a truly stunning finished cake.
Sprinkles and Edible Glitter: Adding Sparkle
Sprinkles and edible glitter are quick and easy ways to add sparkle and color to your ganache drip cake. Apply them immediately after you have finished applying the ganache to the top surface (if you are covering the top) and around the edge where the drips begin, while the ganache is still wet and sticky.
You can gently pour sprinkles directly from a container, use a spoon to scatter them, or even apply them precisely with tweezers for intricate patterns. Edible glitter can be sprinkled on or, for a more intense sparkle, applied with a small brush. A popular technique is to apply sprinkles just around the very edge of the cake top, allowing them to catch on the tops of the drips. This adds a festive touch that complements the smooth ganache finish from your easy ganache drip recipe.
Fresh Fruit and Chocolate Shavings: A Luxurious Finish
For an elegant and delicious finish, decorating your ganache drip cake with fresh fruit or chocolate shavings is a classic choice. Fresh berries like strawberries, raspberries, blueberries, or cherries add vibrant color, natural sweetness, and a lovely textural contrast to the rich ganache. Arrange them artfully around the top edge of the cake or pile them in the center.
Chocolate shavings or curls can be made by running a vegetable peeler or sharp knife along the edge of a block of chocolate. These add more chocolate flavor and a sophisticated look. Scatter them over the top of the cake, around the base, or let them catch on the drips. Combining fresh fruit and chocolate shavings creates a luxurious and appealing presentation that perfectly complements the professional look achieved with your easy ganache drip recipe.
Storing Your Chocolate Ganache Drip Cake: Maintaining Freshness
Proper Storage Techniques: Keeping Your Cake Looking Its Best
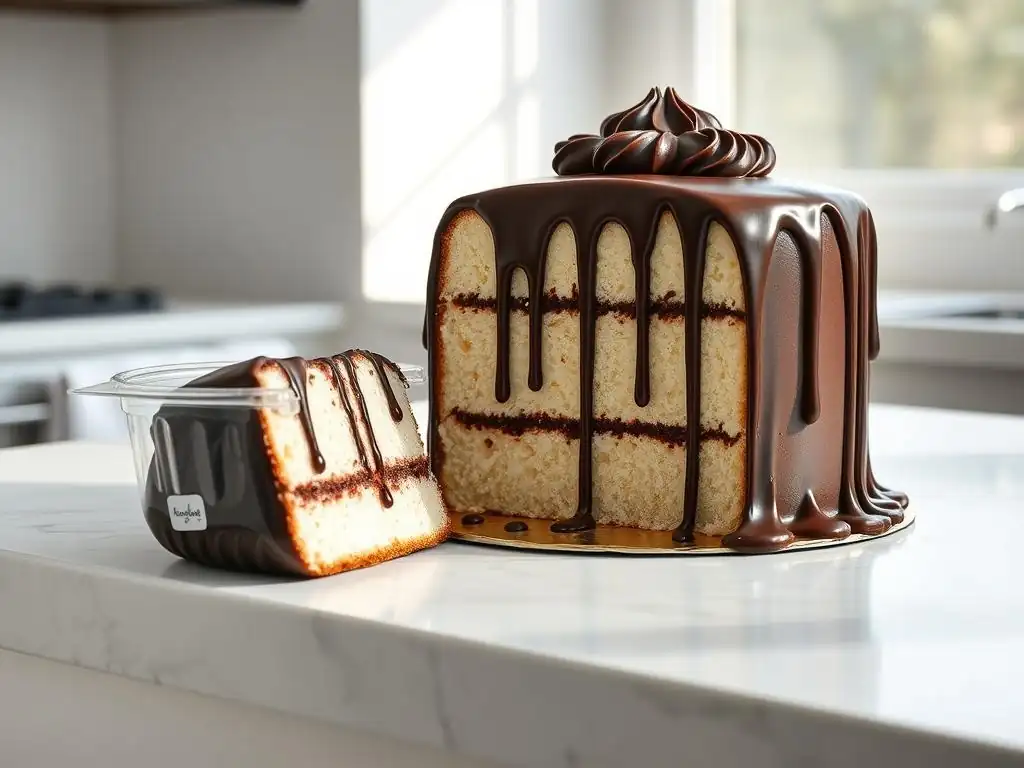
Proper storage is essential to keep your beautiful chocolate ganache drip cake fresh and looking its best. The primary concerns are preventing the cake from drying out and protecting the ganache drip from being smudged or damaged. The best method is often to store the cake in an airtight container. If you don't have a container large enough, a cake dome works well.
If neither of these is available, you can loosely cover the cake with plastic wrap. Be very careful when applying the plastic wrap, ensuring it doesn't touch the delicate ganache drips on the sides, as they can easily stick to the wrap and be pulled off. Refrigeration is usually recommended for cakes decorated with ganache, especially in warmer environments, as the ganache contains dairy and will firm up nicely when chilled, helping the drips maintain their shape. Ensure the refrigerator is free of strong odors that the cake might absorb.
How Long Does Chocolate Ganache Drip Cake Last?
A cake decorated with chocolate ganache drips, when stored properly in the refrigerator, typically lasts for 3 to 4 days. The high fat and sugar content in the ganache itself make it relatively stable. However, the shelf life is ultimately determined by the most perishable component of the cake, which is usually the cake layers themselves and the frosting.
If the cake contains fillings like fresh fruit, pastry cream, or whipped cream, its shelf life will be shorter, often only 1-2 days. For a standard cake with buttercream and a ganache drip made from an easy ganache drip recipe, 3-4 days refrigerated is a reasonable expectation. Always store it in an airtight container to maintain freshness and prevent the cake from drying out. While it might be safe to eat for a bit longer, the quality, texture, and flavor are best within the first few days.
Conclusion: Achieving Professional Cakes with Chocolate Ganache Drips
Recap: Mastering the Chocolate Ganache Drip Technique
Mastering the chocolate ganache drip technique is an incredibly rewarding skill that allows home bakers to create cakes with a polished, professional appearance. The process, while requiring attention to detail, is built upon a simple foundation: a correct ganache ratio, careful preparation, and controlled application onto a chilled cake. Understanding how the type of chocolate and the temperature of the ganache affect its flow and set is key.
From precisely weighing your ingredients for the easy ganache drip recipe to gently melting the chocolate and achieving a smooth emulsion, each step contributes to a successful outcome. Preparing your cake by chilling it thoroughly provides the essential cold surface for the drips to set beautifully. Whether using a squeeze bottle for precision or a spoon for a rustic look, practicing the application helps build confidence and control, leading to consistently stunning results that will impress anyone who sees and tastes your cake.
Having mastered the art of the chocolate ganache drip, you've unlocked a powerful tool for cake decoration. This technique is just one of many ways to add flair and professionalism to your baked creations. Exploring other decorating methods can further expand your skills and allow you to create even more elaborate and personalized cakes for any occasion.
Consider delving into techniques like perfecting buttercream swirls and textures, using piping tips to create various borders and decorative elements, working with fondant for smooth finishes and sculpted details, or exploring mirror glazes for a different type of glossy coating. Each technique offers unique possibilities for expressing your creativity and taking your cake decorating to the next level, complementing the skills you've gained from mastering the easy ganache drip recipe.
Frequently Asked Questions
What exactly is ganache, and why is it used for cake drips?
Ganache is a simple mixture of chocolate and cream. It's used for cake drips because it provides a smooth, glossy finish that's easy to manipulate and control.
What kind of chocolate is best for an easy ganache drip recipe?
Semi-sweet or dark chocolate are typically recommended for ganache drips because they offer a good balance of sweetness and richness. However, milk chocolate can also be used, but adjust the cream ratio to prevent it from being too thin.
How do I achieve the perfect consistency for my ganache drip? What should I look for?
The ideal consistency is similar to a thick syrup. It should coat the back of a spoon and slowly drip off. If it's too thick, add a small amount of warm cream. If too thin, add a bit more melted chocolate.
What are some tips for preventing my ganache drip from being too thick or too thin?
Use a kitchen scale for accurate measurements of chocolate and cream. Also, allow the ganache to cool slightly after mixing before applying it to the cake, as this allows it to thicken.
How long does it take for a ganache drip to set, and how should I store a cake with ganache?
Ganache typically sets within 15-30 minutes at room temperature. Cakes with ganache should be stored in the refrigerator, especially if filled with cream or other perishable ingredients, and brought to room temperature before serving.
Final Reflection: The Enduring Allure of the Perfect Ganache Drip
The art of the perfect ganache drip transcends mere cake decoration; it's a testament to precision, patience, and the undeniable power of a visually stunning dessert. In a world saturated with online tutorials and baking trends, mastering this seemingly simple technique remains a highly sought-after skill, evidenced by the enduring popularity of searches for "easy ganache drip recipe." This article aimed to demystify the process, providing accessible steps and troubleshooting tips for bakers of all levels.
The impact of a flawlessly executed ganache drip is undeniable. It elevates a simple cake into a showstopper, transforming a homemade treat into a piece of art. It's a visual cue that speaks to quality and attention to detail, a silent promise of deliciousness within. This resonates deeply with me, as I've witnessed firsthand the joy and pride bakers experience when they achieve that perfect cascade of chocolate. The best things in life are simple, but not easy.
This quote perfectly encapsulates the ganache drip – simple in concept, yet requiring practice and understanding to master.
Now, I invite you to take what you've learned and apply it to your next baking project. Don't be afraid to experiment, to embrace the occasional imperfection, and to find joy in the process. The journey to mastering the ganache drip is as rewarding as the final result. Remember the techniques, the tips, and the confidence you've gained. The next time you see a beautifully dripped cake, you'll not only appreciate the artistry but also understand the dedication and skill behind it. Go forth and create your own masterpiece!
Unleash Your Inner Cake Artist: Master the Ganache Drip!
Thanks for taking the time to elevate your baking skills with us! You've now unlocked the secrets to creating stunning ganache drips – prepare for cake-decorating magic! Ready to put your new knowledge into practice?
- Create your masterpiece: Try experimenting with different chocolate types and pouring techniques to achieve your dream ganache drip. Don't be afraid to get creative!
- Share your creations: Show off your beautifully dripped cakes on social media using #BakeWithEaseGanache. We'd love to see your results!
- Join our baking community forum to discuss ganache techniques and share your tips and tricks with other enthusiastic bakers.
What unique flavor combination will you try for your next ganache drip masterpiece?